How to Fix 503 Service Unavailable Error in WordPress

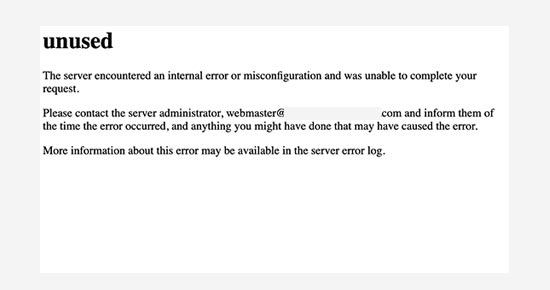
Are you seeing a 503 service unavailable error on your WordPress website?

The problem with the 503 error is that it gives you no clues about what’s causing it, which makes it extremely frustrating for beginners.

In this article, we will show you how to fix the 503 service unavailable error in WordPress.

How to fix 503 service unavailable error in WordPress

What Is the 503 Service Unavailable Error?

A 503 service unavailable error indicates that your website server is unable to handle any requests due to overload or maintenance.

The 503 error occurs when your web server is unable to get a proper response from a PHP script. This PHP script could be a WordPress plugin, a theme, or a misbehaving custom code snippet.

All WordPress hosting companies offer a fixed amount of resources for each hosting account. For websites on shared hosting, this limit cannot handle heavy usage of server resources.

If the error is caused by heavy usage, a server glitch, or a DDoS attack, then it could automatically disappear in a few minutes. However, if it is caused by bad code on your website, then it will keep occurring unless you find and disable the code that’s causing it.

That being said, let’s take a look at how to easily fix 503 service unavailable errors in WordPress.

Fixing 503 Service Unavailable Error in WordPress

As we mentioned above, this error is caused when your web server is unable to get a proper response from a PHP script running in the background.

To fix it, we will disable all unnecessary PHP scripts one by one until the error is resolved.

Let’s get started.

1. Deactivate All WordPress Plugins

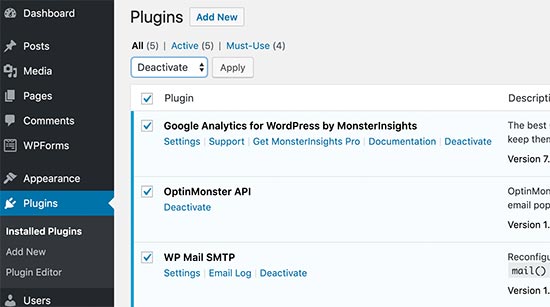
All your WordPress plugins are PHP scripts, so the first thing you need to do is deactivate all your WordPress plugins.

Since you cannot log in to your WordPress dashboard due to the 503 error, you will need to connect to your website using an FTP client or File Manager in cPanel.

If you’re using an FTP client, then simply connect it to your website. For more details, please see our guide on how to use FTP to upload files to WordPress.

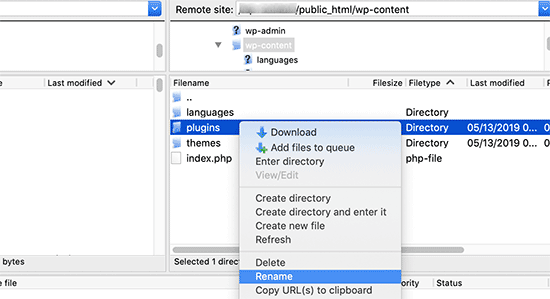
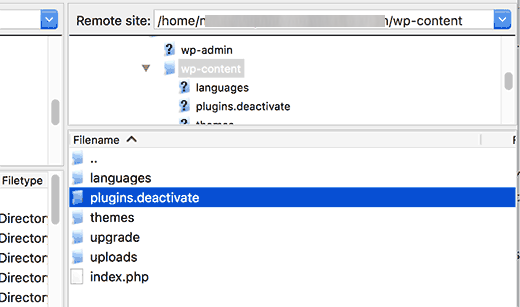
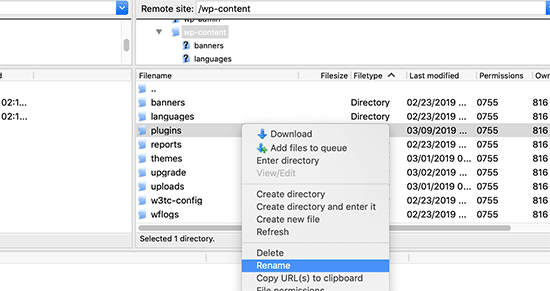
Once connected, simply go to the /wp-content/ folder. Then right-click on the ‘plugins’ folder and rename it to ‘plugins-old’.

Rename plugin folder

Next, you need to create a new folder and name it plugins.

Now, you need to visit your WordPress site to see if this resolved the error.

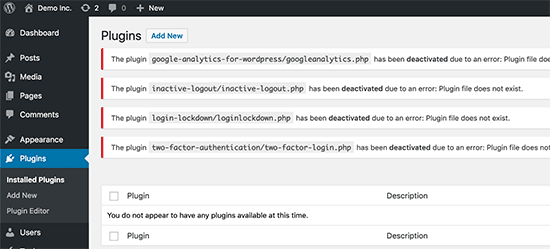
If it did, then this means a plugin installed on your website was causing the error. The above steps have deactivated all WordPress plugins.

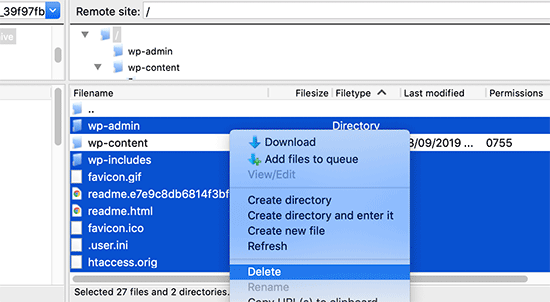
To figure out which plugin was causing the issue, you can go to the /wp-content/ folder. From here, right-click on the empty plugins folder and select the ‘Delete’ option.

Delete empty plugins folder

After that you need to rename the plugins-old folder to plugins. This will make all your previously installed plugins available to WordPress. However, these plugins will remain deactivated.

You need to visit the WordPress admin area and then go to the plugins page. You can activate your plugins one by one and visit different pages on your website after activating each plugin. Keep doing that until you find the plugin causing the 503 error.

If this step resolves your issue, then you don’t need to follow the rest of the instructions on this page. Otherwise, you can move on to the next step.

For more details, please see our guide on how to deactivate all plugins when not able to access wp-admin.

2. Switch to a Default WordPress Theme

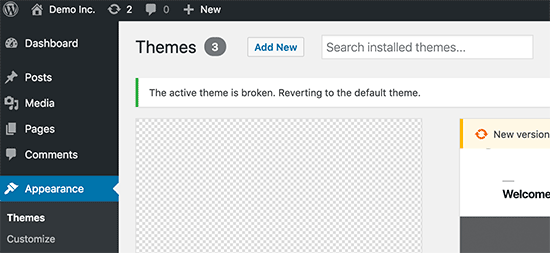
If deactivating plugins didn’t resolve the issue, then the next step would be to switch to a default WordPress theme. This will deactivate your current WordPress theme.

First, you need to connect to your WordPress site using an FTP client or File Manager in cPanel. Once connected, go to the /wp-content/themes/ folder.

Go to the themes folder

Next, you can locate your currently active WordPress theme and download it to your computer as a backup.

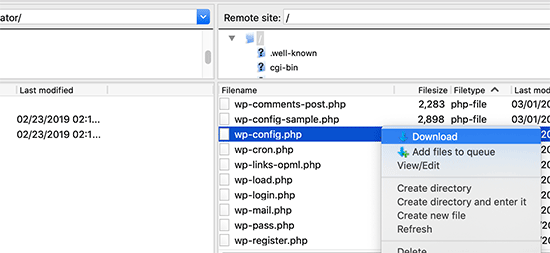
To do that, simply right-click on the folder named after your website theme and click the ‘Download’ option.

Download active theme

After downloading your theme files, you can go ahead and delete it from your server.

Now, if you already have a default theme like Twenty Twenty-Four installed, then it will be automatically activated. If you don’t, then you can go ahead and install a default theme on your website.

Thoroughly check your website to make sure that the 503 service unavailable error is resolved.

3. Reinstall WordPress with a Fresh Copy

If you are still facing 503 errors on your WordPress website after deactivating plugins and changing the website theme, then you may need to reinstall WordPress.

This method is usually required if one of your WordPress core files gets corrupted or modified. As a result, it might interfere with your site’s functionality and cause a 503 service unavailable error.

Before reinstalling WordPress, it’s better to create a backup of your website. This way, you can revert back to the previous state and recover your data in case something goes wrong.

You can follow our step-by-step guide on how to uninstall and reinstall WordPress for more details.

4. Upgrade Your Server Resources

It is also possible that your website server resources are not able to handle all the requests. In that case, it’s worth upgrading your website hosting plan and checking if it resolves the 503 error.

However, before proceeding with the upgrade process, it would be best to contact your hosting provider and find out what’s causing the 503 error.

If it is because of a lack of server resources, then you can choose the fastest hosting provider or move to a higher-pricing package with your existing hosting company.

Remember to choose a website server with more storage and speed. It should be able to handle high-traffic loads without delay.

If you’re using shared WordPress hosting, consider moving to a managed hosting solution. Besides that, you should look for built-in caching, which will help boost your server’s performance.

Additional Resources for Fixing Other WordPress Errors

Here are some additional resources for other WordPress errors you may come across while running your website:

We hope this article helped you learn how to fix the 503 service unavailable error in WordPress. You may also want to see our ultimate list of the most common WordPress errors and the ultimate guide to boosting WordPress speed and performance.

If you liked this article, then please subscribe to our YouTube Channel for WordPress video tutorials. You can also find us on Twitter and Facebook.

The post How to Fix 503 Service Unavailable Error in WordPress first appeared on WPBeginner.

How to Fix Blank Site Editor Issue in WordPress (Step by Step)

Are you seeing a blank screen when you try to use the full site editor in WordPress?

The WordPress full site editor allows you to customize your website’s theme, including its header, footer, and page templates. However, some users are just seeing a blank screen when trying to open the site editor.

In this article, we will show you how to fix the blank site editor issue in WordPress.

How to Fix Blank Site Editor Issue in WordPress

What Is the Blank Site Editor Issue in WordPress?

The full site editor in WordPress is an editing interface that works with block themes and gives you more control over your website design. It allows you to use blocks for styling your website’s header, footer, sidebar, and other sections.

You can access it by selecting Appearance » Editor from the WordPress admin sidebar whenever you wish to customize your WordPress theme.

The WordPress Full Site Editor

However, some users report seeing a blank screen whenever they try to access the site editor.

Some users just see a completely blank screen. That screen may be dark or light in color.

Completely Blank Site Editor

This issue is caused by incorrect WordPress settings. We will show you how to fix it in Method 1.

Other users can see part of the site editor’s interface, but the preview of their website is blank. They might also see a spinning circle indicating that the editor is trying to load the preview, but it never appears.

Blank Site Editor Preview

This happens when someone has disabled the REST API in WordPress. We show you how to fix this issue in Method 2.

With that being said, let’s take a look at how to fix the blank site editor in WordPress. You can use the links below to jump to the method you need to use:

Fixing the Blank Site Editor Issue in WordPress Settings

If you are seeing a completely blank screen when you try to use the site editor, then you have a problem with the URL settings on your WordPress website.

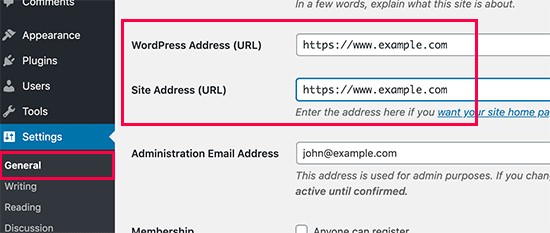
First, you need to navigate to Settings » General in your dashboard. Now, you need to find the ‘WordPress Address (URL)’ and ‘Site Address (URL)’ settings.

The General Settings Page in WordPress

You need to make sure that the site address matches the WordPress address.

In particular, you need to make sure that if the WordPress address has a www or non-www URL, then the site address matches that exactly. In our screenshot above, these do not match, so ‘www.’ needs to be removed from the site address URL.

Once the two settings are identical, you need to scroll to the bottom of the General Settings page and click the ‘Save Changes’ button to store your settings.

You can now open up the site editor again, and it should work.

Fixing the Blank Site Editor Issue by Enabling the REST API

If the site editor is not loading a preview of your website, then the REST API might be disabled on your WordPress website.

What Is the REST API in WordPress?

The REST API was introduced in WordPress 4.4. It is useful for plugin developers because it provides an interface where they can access WordPress functionality and data to build their plugins.

The REST API is enabled by default, and the site editor uses it to render a preview of your website. So, if you have disabled the REST API on your website, then the site editor won’t be able to show a preview of your site.

Some website owners choose to disable the REST API in the hope of improving their site’s security and performance. They may have followed our guide on how to disable the JSON REST API in WordPress.

Our guide shows you how to disable the REST API using two methods: adding a code snippet in WPCode or installing the Disable REST API plugin.

To enable the REST API again, you will need to disable that code snippet or plugin, depending on which method you originally chose.

Disabling the REST API Code Snippet in WPCode

If you used WPCode to disable the REST API, then you need to navigate to Code Snippets in WordPress admin.

Once there, you need to find the ‘Disable WordPress REST API’ snippet and switch the ‘Status’ toggle off.

Deactivating a Code Snippet in WPCode

Alternatively, if you disabled the REST API by adding code directly to your functions.php file instead of using WPCode, then you will need to open that file using an FTP client or the file manager app in your hosting dashboard.

Then, you must edit the file and remove the custom code.

Edit functions.php file

You should now be able to access the site editor and see the preview of your website.

Disabling the Disable REST API Plugin

If you used a plugin to disable the REST API, then you need to navigate to Plugins » Installed Plugins.

Once there, you need to scroll down to the plugin and click the ‘Deactivate’ link. In our example, we are working with the Disable REST API plugin, but you will use the same method if you have a different plugin installed.

Deactivating a WordPress Plugin

You can now open up the site editor, and it should be working properly again.

Alternative: Using a Page Builder Plugin to Design Your Website

While the full site editor is a helpful tool for designing your website, it has some limitations. It is only available with block themes, and you will lose your customizations if you change your theme.

By contrast, WordPress page builders like SeedProd provide a drag-and-drop interface where you can design all your individual pages using blocks. They are compatible with any WordPress theme, and you can change your theme without losing your customizations.

You can get started by choosing a template/site kit or building completely from scratch.

Choose SeedProd website kit template

You can even use SeedProd to design an entire theme for your website. For more details, you can see our guide on how to create a custom WordPress theme without writing any code.

We hope this tutorial helped you learn how to fix the blank site editor issue in WordPress. You may also want to see our guide to the most common WordPress errors and how to fix them or our expert pick of the best drag-and-drop page builder plugins to design your website more easily.

If you liked this article, then please subscribe to our YouTube Channel for WordPress video tutorials. You can also find us on Twitter and Facebook.

The post How to Fix Blank Site Editor Issue in WordPress (Step by Step) first appeared on WPBeginner.

What is 414 Request URI Too Long Error and How to Fix It

Have you ever encountered a 414 request URI too long error on your WordPress website?

The error is usually caused when there is a critical error between your web browser and a server. You’ll see this error when clicking on a link or any action performed by a WordPress plugin.

In this article, we will show you what is the ‘414 request URI too long’ error and how to fix it.

What is 414 request URI too long error and how to fix it

What is 414 Request URI Too Long Error?

A 414 request URI too long error occurs when a URL or an action you’re requesting is too long for the server to handle.

Do note that there is a difference between URI and URL. A URI or Uniform Resource Identifier can be a resource’s name, location, or both. On the other hand, a URL or Uniform Resource Locator can only be the location of a resource.

Both terms are usually used interchangeably because URL is part of URI. However, the 414 error can be triggered by both components, so let’s look at the causes.

What Causes 414 Request URI Too Long Error?

You might see the 414 error when you click on the link, and the server is unable to process it because it’s too long.

One situation where a link might to very long is using UTM (Urchin Tracking Module) parameters. If you’re using UTM codes to track conversions on your WordPress website and there are a lot of parameters in the URL, then it can cause this error.

Another situation that can cause a 414 error is a redirect loop. This is when a misconfiguration or a setting in a WordPress plugin causes a lot of redirect requests.

As a result, you get incredibly long URLs and 414 requests URI too long error.

Similarly, some plugins can also generate lengthy URIs as part of their functionality. You’re most likely to encounter this error if you have all-in-one WordPress security plugins installed on your site.

In a rare event, a developer-side issue can also trigger a 414 error when a POST request converts into a GET request with query information being too long. Lastly, cyber attacks on your website server can also result in 414 URI too long issues.

That said, let’s see how you can fix the 414 error on your WordPress website.

Fixing 414 Request URI Too Long Error

A quick way to fix this issue is by increasing the size of the URI your website server can process.

Before we move forward, we recommend creating a WordPress backup. That’s because fixing the 414 error involves editing the website configuration files. In case anything goes wrong, you’ll have a backup copy of your site ready to restore.

For more details, please see our guide on how to backup a WordPress site.

Determine if Your Website is Using Apache or Nginx

First, you’ll need to find out the type of server your WordPress website is using. There are 2 main types of servers, which includes Apache and Nginx.

A simple way to do that is by opening your site in a browser. After that, you can right-click on the homepage and select the ‘Inspect’ option.

Open inspect element

Next, you’ll need to switch to the ‘Network’ tab at the top.

From here, you can select any element under the Name column. After that, you will need to scroll down to the ‘Response Headers’ section and see the ‘Server’ details.

View server type of your site

This will show you whether your site is using Nginx or Apache.

If you’re still unsure which server type to use, then you can reach out to your WordPress hosting provider to get more details.

Once you’ve determined the server type, let’s look at how to fix the 414 request URI too long error for Apache and Nginx.

Fixing 414 Request URI Too Long Error in Nginx

First, you’ll need an FTP or file transfer protocol client to access website configuration files.

There are many FTP clients you can use. For this tutorial, we will use Filezilla. If you need help setting up FTP and accessing website files, then please see our guide on how to use FTP to upload files to WordPress.

Once you’re logged in, you’ll need to download the ‘nginx.conf’ file. You can access this by following this path: /etc/nginx/nginx.conf

Access Nginx file

After locating the file, go ahead and download it on your computer and then open it in a notepad software.

From here, you can search for large_client_header_buffers 4 8K settings. If it’s not there, then simply add it to the end of the file.

You will see 2 sets of values, which relate to a number and size. Simply edit the size from 8K to 128K. This will increase the URI size and allow the site server to process long URLs.

Increase URI size in Nginx

Once you’re done, simply save the text file and reupload it to your website using the FTP client.

For more details, please see our guide on how to use FTP to upload files to WordPress.

Fixing 414 Request URI Too Long Error in Apache

If you’re using the Apache server type, then the process is similar to that of Nginx. First, you’ll need an FTP client to access website files.

Once you’re logged in, you’ll need to locate the ‘apache2.conf’ file. Simply head to the following path using the FTP client: /etc/apache2/apache2.conf

Access apache config files

Next, you’ll need to download the file and open it in notepad software.

After that, you can look for LimitRequestLine 128000 settings. If you don’t see one, then simply add it to the end of the file.

Usually, LimitRequestLine is set to 128000. However, you can increase this to 256000 or higher to remove the 414 error. Just make sure that the value you set is a multiple of 2.

Increase URI size in apache

Once you’re done, simply upload the file back to the website using the FTP client. This should help resolve the 414 error on your WordPress website.

We hope this article helped you learn about what is 414 request URI too long error and how to fix it. You may also want to see our guide on WordPress security and the most common WordPress errors.

If you liked this article, then please subscribe to our YouTube Channel for WordPress video tutorials. You can also find us on Twitter and Facebook.

The post What is 414 Request URI Too Long Error and How to Fix It first appeared on WPBeginner.

How to Fix the ERR_CONNECTION_REFUSED Error in Chrome

Are you seeing the ERR_CONNECTION_REFUSED error when trying to access a website or when viewing a website resource using your browser’s inspect tool?

This error message appears when your browser is unable to connect to the website you’ve requested. You might also see it in your browser’s inspect tool when you are exploring why a certain resource on the website won’t load.

In this article, we’ll show you how to fix the ERR_CONNECTION_REFUSED error in Chrome.

How to Fix the ERR_CONNECTION_REFUSED Error in Chrome

What Is the ‘ERR_CONNECTION_REFUSED’ Error in Chrome?

The ERR_CONNECTION_REFUSED message is displayed in Google Chrome when it is trying to open a web page or website resource but is unable to do so. This error code is usually included inside an error message such as:

  • ‘This site can’t be reached’
  • ‘Failed to load resource’

There are lots of common WordPress errors, but this error may stop you from visiting your own website and logging in to the WordPress admin area. You’ll typically want to solve this problem as quickly as possible.

Often when you see this error message, your WordPress website is still working, but something is stopping the browser from accessing it. In many cases, you will only need to fix a problem with your own browser or internet connection.

With that being said, let’s take a look at how to fix the ERR_CONNECTION_REFUSED error in Chrome. First, we’ll look at how to fix the error when you can’t access an entire website, then we’ll show the solution for when you can’t access a specific file or resource on a website.

How to Fix the ‘This Site Can’t Be Reached’ Error

Usually, this message is displayed when you can’t access an entire website.

You will see the Chrome error message ‘This site can’t be reached’ along with the ERR_CONNECTION_REFUSED error code. The message may even suggest a few things to try to fix the error, such as checking the connection, proxy, firewall, and DNS configuration.

This Site Can't Be Reached Error

Other browsers will display similar messages, such as:

  • ‘Unable to connect’
  • ‘Hmmm…can’t reach this page’

There are many things that can interfere with your connection to the website, and you will need to follow some troubleshooting steps to identify and fix the problem.

We’ll briefly cover the steps you should take below. For detailed instructions, see our guide on how to easily fix the ‘This site can’t be reached’ error in WordPress.

Check Your Internet Connection

The simplest fix is to check that you’re connected to the internet and restart your modem and router. Resetting your internet connection may be all it takes to reconnect to your website.

If not, you should check to see whether your website is working. Simply visit the Website Uptime Status Checker website, then enter the URL of your own site.

IsItWP Uptime Checker Tool

If your site is down, then you should contact your WordPress hosting provider to let them know your website is down.

Clear Your Browser Cache

Your web browser stores files and data from the websites you visit, so it doesn’t have to download them again. However, this can cause problems if the cached files become outdated or corrupt.

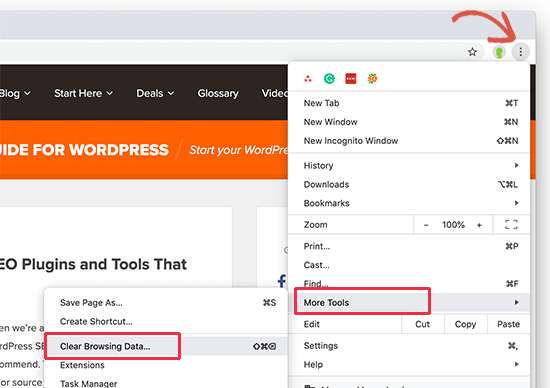
You can easily clear the browser cache in Google Chrome by clicking on the three-dotted icon in the upper-right corner and then selecting ‘More Tools,’ followed by ‘Clear Browsing Data…’

How to clear the browser cache in Google Chrome

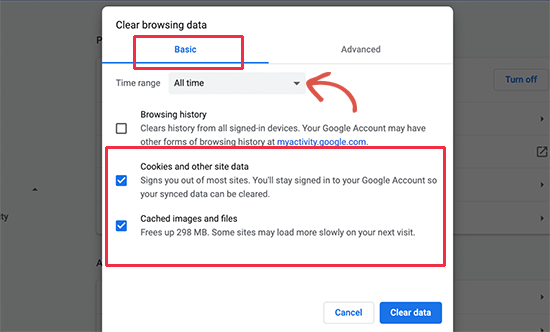
In the popup that appears, check the box next to ‘Cached images and files’ and then click the ‘Clear data’ button.

Now try revisiting the website to check whether you can access it.

Troubleshoot the Software on Your Computer

Some of the security and networking software you run on your computer may be interfering with your connection to the website. This can include your firewall, antivirus software, VPN, and proxy server.

We offer detailed instructions on how to troubleshoot each of these in our guide on how to fix the ‘This site can’t be reached’ error.

Troubleshoot Your DNS Settings

Similar to the browser cache, your computer stores the IP addresses of all the websites you visit. This means the browser doesn’t have to look up the same IP address multiple times.

By flushing your DNS cache, you’ll get the very latest information about a website, including its new domain name or address.

To help you out, we’ve created a complete guide on how to clear your DNS cache for Mac, Windows, and Google Chrome.

If you still can’t access the website after doing this, then you can try changing your DNS server as well. You can follow the detailed instructions in the change the DNS server step of our guide on how to fix the ‘This site can’t be reached’ error.

Add the Addresses for Google's DNS Servers

Reset the TCP/IP Settings

Finally, if there’s a problem with how your internet connection is configured, then renewing your TCP and IP protocol will return the connection to its default settings, which may solve the problem.

You can learn how to do this step-by-step in the reset the TCP/IP settings section of our guide on how to fix the ‘This site can’t be reached’ error.

Click the 'Renew DHCP Lease' Button

How To Fix the ‘Failed To Load Resource’ Error

You might notice that, while your website loads, a certain resource or file doesn’t. This file could be an image or other media file, JavaScript, or a CSS stylesheet. A missing resource can cause your website to misbehave or not function properly.

When that happens, the browser will add a notice in the error console for debugging purposes.

In most cases, you would see this error in your browser’s error console when using the Inspect tool. You might see the error message Failed to load resource: net::ERR_CONNECTION_REFUSED.

Refused to Load Resource Error

This error message happens when your website’s code mentions the file, but your browser is unable to download it. This can happen when there is a problem with the file itself, or the URL that points to it.

To fix the problem, you will need to either replace the resource in question or fix the URL. We offer detailed instructions for both of these in our guide on how to fix the ‘Failed to load resource’ error in WordPress.

We hope this tutorial helped you learn how to fix the ERR_CONNECTION_REFUSED error in Chrome. You may also want to see our ultimate WordPress security guide, or check out our list of easy ways to increase your blog traffic.

If you liked this article, then please subscribe to our YouTube Channel for WordPress video tutorials. You can also find us on Twitter and Facebook.

The post How to Fix the ERR_CONNECTION_REFUSED Error in Chrome first appeared on WPBeginner.

How to Easily Fix This Site Can’t Be Reached Error in WordPress (8 Ways)

Are you looking for the easiest way to fix the ‘this site can’t be reached’ error in WordPress?

You can get this error on any website, including third-party sites and your own WordPress blog. If this error shows up on your own site, then it’s a big problem as it can stop you from accessing the admin area.

In this article, we will show you how to easily fix the ‘this site can’t be reached’ error.

How to easily fix this site can't be reached error in WordPress

What Is the ‘This Site Can’t Be Reached’ Error in WordPress?

There are lots of common WordPress errors, but ‘this site can’t be reached’ is especially frustrating because the message is vague, and it doesn’t tell you what to do next.

The Chrome 'site can't be reached' error

In the worst-case scenario, this error can stop you from visiting your own website. That will make it difficult to test your WordPress site, add new content, install security updates, and make other important changes.

Usually, the error means that something is stopping the browser from accessing the destination website. This could be anything from an internet outage, to a misconfigured network, or even an issue with your DNS settings.

In this guide, we’ll take a closer look at why you may be seeing this error, including exploring the different error codes. When you encounter a problem, you’ll typically want to solve that problem as quickly as possible.

With that being said, we have 8 ways to troubleshoot this WordPress error, so you can fix the ‘site can’t be reached’ problem quickly.

If you’re unsure what’s causing the issue, then we recommend starting with step one since it’s the easiest. However, if you prefer to jump straight to a particular step, then you can use the quick links below.

1. Check Your Internet Connection

When troubleshooting an error, it’s smart to try the simplest fix first. To start, check that you’re currently connected to the internet.

If there is no obvious problem with the connection, then the next step is restarting your internet connection. Similar to switching your computer off and on, resetting your entire connection can fix all kinds of small problems and get you back on track.

We recommend disconnecting your router from its power supply and then waiting at least 1 minute before reconnecting it. You can then try visiting the website again to see whether this has removed the error message.

2. Clear the Browser Cache

Downloading files from a WordPress hosting server located far away can take a lot of time.

To solve this problem, most modern web browsers store files, data, and other content from the websites you visit. The browser can then simply load this cached content from the local computer, rather than re-downloading it from a remote server.

This helps websites to load faster, but it can sometimes cause problems. For example, cached content can become outdated or get corrupted over time.

Thankfully, it’s easy to clear the browser cache. If you’re using Google Chrome, then simply click on the three-dotted icon in the upper-right corner.

Then, select ‘More Tools,’ followed by ‘Clear Browsing Data….’

How to clear the browser cache in Google Chrome

In the popup that appears, check the box next to ‘Cached images and files.’

Google Chrome will clear the entire cache by default. Another option is to open the ‘Time Range’ dropdown and tell Chrome to only clear content that was cached during a particular time period.

Fixing the site can't be reached error in WordPress

Once you’ve done that, you can check or uncheck any of the other options. For example, the ‘Browsing History’ checkbox is selected by default, but you can uncheck this box if you want to keep your browsing history.

When you’re ready, click on ‘Clear data.’

Emptying the Chrome cache

Google Chrome will now empty the browser cache. Once it’s finished, try revisiting the website to check whether you’re still getting the ‘this site can’t be reached’ error.

For all other browsers, see our beginners guide on how to clear the browser cache in any browser.

3. Disable Your Firewall or Antivirus Software

Antivirus and firewall plugins can keep you safe, but they can also block websites that are perfectly trustworthy.

This might be a problem with how your security plugins and software are configured. For example, your settings may be too strict.

Other times, the website may be set up in a way that triggers your security software even if that website doesn’t pose a real threat.

For instance, if you’re still building your WordPress website, then you might not have an SSL certificate yet. Many firewalls will stop you from visiting a site that doesn’t have a valid certificate, so this may trigger the error.

To test whether a firewall or antivirus program is blocking the connection, simply disable that software. Then, visit the website that was showing the ‘this site can’t be reached’ error.

If the site loads without a problem, then you’ll know that the antivirus program or firewall was to blame.

If this is the case, then we don’t recommend disabling it completely.

Instead, it’s smart to check the software’s settings to see whether you can whitelist a particular website. In this way, you can access the site while still protecting yourself against hackers, viruses, and other digital threats.

If you’re not sure where to find these settings, then try checking the software’s official documentation, forums, or social media pages for more information. Depending on your software license, you may also be able to contact customer support or the developer for help.

For more tips on protecting yourself against hackers without triggering the ‘this site can’t be reached’ error, please see our ultimate WordPress security guide.

4. Reset Your Virtual Private Network

A Virtual Private Network (VPN) can protect your privacy, keep your information secure, and allow you to visit sites that are blocked or censored in your location.

However, if you’re using a VPN then your connection may drop, or the VPN may not recognize the IP address that you’re using. Some VPNs will reconnect automatically if they encounter a problem, but you may have to reconnect manually.

If you get the ‘site can’t be reached’ error when using a VPN, then we recommend checking your provider’s website or documentation for instructions on how to reset your VPN.

5. Disable Your Proxy Server

A proxy server sits between you and the websites you’re trying to visit. Many people use these ‘middle-man’ servers as an extra layer of security, or to cache data.

If your proxy server can’t connect to a website, then you’ll see the ‘site can’t be reached’ error. You may also get this error if you can’t connect to the proxy server in the first place.

In this case, the easiest fix is to simply disable the proxy server. If you’re on a Mac, then go ahead and click the ‘Apple’ icon in the toolbar.

The System Preferences settings on macOS

Then, select ‘System Preferences…’

In the popup that appears, click on ‘Network.’

Fixing the 'site can't be reached' error in WordPress

In the left-hand menu, select the network where you want to disable the proxy settings.

Once you’ve done that, click on the ‘Advanced…’ button.

The Advanced network settings on Mac

In the popup, simply select the ‘Proxies’ tab.

You can now uncheck all of the protocols listed under ‘Select a protocol to configure.’

The proxy server settings

Finally, click on the ‘OK’ button to save your changes. You can now try visiting the website to see whether you can access it without any problems.

6. Flush Your DNS cache

Similar to the browser cache, your computer stores the IP addresses of all the websites you visit. This means the browser doesn’t have to look up the same IP address multiple times.

This helps websites to load faster, but the cached DNS information can get outdated. This may trigger a ‘site can’t be reached’ error, particularly if the site has moved to a new domain name or you’ve moved WordPress to a new host.

By flushing your DNS cache, you’ll get the very latest information about a website, including its new domain name or address.

To help you out, we’ve created a complete guide on how to clear your DNS cache for Mac, Windows, and Google Chrome.

7. Change Your DNS Server

DNS is like the internet’s phone book. Instead of listing people’s names and phone numbers, the DNS lists domain names and their corresponding IP addresses.

Your internet service provider assigns you a DNS server automatically. However, sometimes this server may be unavailable, or it might have the wrong information.

If your browser doesn’t have a site’s correct address, then you’ll get a ‘this site can’t be reached’ error.

You can solve this problem by switching to a different public DNS server, such as Google Public DNS. You can use any public server you want, but just be aware that the DNS provider will be able to see all the websites you visit.

Many providers also collect personal information, such as your business email address, name, and phone number.

With that being said, it’s smart to research your DNS provider carefully.

Once you’ve found a DNS server that you want to use, it’s time to switch to that server. On Mac, this means selecting the ‘Apple’ icon in the toolbar and then clicking on the ‘System preferences…’ option.

The macOS System preferences...

In the popup that appears, select ‘Network’ and then click on the ‘Advanced…’ button.

Once you’ve done that, open the ‘DNS’ tab.

Fixing the site can't be reached error by changing the DNS server

In the bottom-left corner, click on the ‘+’ button.

This adds a new DNS server with the address 0.0.0.0.

Switching the DNS server settings

You can now go ahead and type in the numbers for the public server that you want to use.

After that, simply click on the ‘OK’ button to save your changes.

Switching to a public DNS server to fix the site can't be reached error

This takes you back to the previous popup.

To start using your new DNS server, click on the ‘Apply’ button.

How to switch to a different DNS server

Finally, you’re ready to visit the website to see whether this has removed the error message.

8. Reset the TCP/IP Settings

Transmission Control Protocol/Internet Protocol (TCP/IP) is a set of protocols that control how data is sent and received over the internet.

If there’s a problem with how your internet connection is configured, then renewing your TCP and IP protocol will return the connection to its default settings, which may solve the problem.

To reset the TCP/IP settings on Mac, select the ‘Apple’ icon in the toolbar and then click on ‘System Preferences…’

In the popup that appears, select ‘Network’ and then click on the ‘Advanced…’ button. Once you’ve done that, open the ‘TCP/IP’ tab.

Changing the TCP/IP settings

On this screen, go ahead and click on the ‘Renew DHCP Lease’ button.

That’s it. You can now try visiting the website or blog, to check whether you still get the same ‘site can’t be reached’ error.

What Causes ‘This Site Can’t Be Reached’ Error in WordPress?

There are a few different reasons why you may get this error message, but the code that appears next to the message can help you pinpoint the cause.

Let’s take a closer look at these codes and what they mean for your WordPress blog.

  1. ERR_CONNECTION_RESET

Sometimes, you’ll see an ERR_CONNECTION_RESET code next to the ‘site can’t be reached’ error. Most of the time, this means there’s a problem with your internet connection.

The most obvious problem is an internet outage, but there’s also software and settings that can interfere with the connection and trigger an ERR_CONNECTION_RESET. For example, VPNs and proxy servers can sometimes cause this error code.

  1. DNS_PROBE_FINISHED_NXDOMAIN

Domain Name System (DNS) lets you connect to websites by matching a user-friendly domain name such as www.wpbeginner.com, with the ID of the server where this website is stored.

You’ll get this error code if Google Chrome can’t resolve the domain name or address for the website that you’re trying to access.

Since it can’t connect, the browser assumes that the domain name doesn’t exist. It then shows a DNS_PROBE_FINISHED_NXDOMAIN error code, where the NXDOMAIN part of the error stands for ‘non-existent domain. ‘

If you see this error code next to the ‘site can’t be reached’ message, then it usually means there’s a problem with how your DNS settings are configured.

To learn more about this error code, please see our guide on how to easily fix the DNS_PROBE_FINISHED_NXDOMAIN error.

We hope this article helped you learn how to easily fix ‘this site can’t be reached’ error in WordPress. You can also go through our guide on the difference between domain name and web hosting and the best email marketing for small businesses.

If you liked this article, then please subscribe to our YouTube Channel for WordPress video tutorials. You can also find us on Twitter and Facebook.

The post How to Easily Fix This Site Can’t Be Reached Error in WordPress (8 Ways) first appeared on WPBeginner.

How to Fix Post-Processing of Image Failed Error in WordPress

Are you seeing the ‘Post-Processing of Image Failed’ error in WordPress?

This error usually occurs when you are uploading an image file to WordPress using the built-in media uploader.

In this article, we will show you how to easily fix the ‘Post-Processing of Image Failed’ upload error in WordPress.

How to Fix Post-Processing of Image Failed Error in WordPress

What Causes the ‘Post-Processing of Image Failed’ Error?

When you add an image to a post or the media library on your WordPress website, several things happen. The image file is uploaded to your WordPress hosting server, an attachment page is created for the image, and a PHP image editing module performs some post-processing.

Unfortunately, sometimes during the image upload process you may see a WordPress error message like this:

‘Post-processing of the image likely failed because the server is busy or does not have enough resources. Uploading a smaller image may help. Suggested maximum size is 2500 pixels.’
The Post-Processing of Image Failed Error Message

Luckily, this WordPress error message provides quite a lot of detail. It tells you that the problem occurred when post-processing the image in WordPress and suggests there may be a problem with your web server.

The error message also suggests a possible solution. It recommends you upload a smaller image that is no larger than 2500 pixels in its longest dimension.

With that being said, let’s take a look at how to fix the ‘Post-Processing of Image Failed’ error in WordPress.

1. Make Sure The HTTP Error is Not Temporary

First, you should check to make sure that there are no special characters in the file name, such as an apostrophe. If it does, then you should rename the image file.

Next, you should wait a few minutes and then try uploading your image file again. If your server was simply busy as the message suggests, then it may have been caused by unusual traffic or low server resources.

Problems like these are automatically fixed on most WordPress hosting servers.

If you’re still having image upload issues after waiting a while, then you can try uploading a different file. You could also try clearing your browser cache or using a different web browser.

If you still see the ‘Post-Processing of Image Failed’ error after trying these steps, then the problem is not a temporary glitch, and you should read on to continue troubleshooting.

2. Increase WordPress Memory Limit

The error message suggests that your server may not have enough resources. Let’s increase the amount of memory that is available to WordPress.

You will need to increase the amount of memory PHP can use on your server. You can do this by adding the following code to your wp-config.php file.

define( 'WP_MEMORY_LIMIT', '256M' );

This code increases the WordPress memory limit to 256MB, which should be enough to fix any memory limit issues.

You might also like to check whether the file is larger than your website’s upload limit. To do this, see our guide on how to increase the maximum file upload size in WordPress.

Check current file upload size limit

If your WordPress hosting company does not allow you to increase memory limit, then you may need to switch to a managed WordPress hosting provider like SiteGround or WP Engine.

3. Optimize the Image to Make It Smaller

The error message says that uploading a smaller image may help. It recommends that the longest edge of your image should have no more than 2500 pixels.

When starting a new blog, many beginners simply upload images without optimizing them for the web. Not only can that cause an error message like this one, but these large image files will also make your website slower.

Having a slow website will hurt your overall SEO rankings.

To optimize the image, you will need to use an image editing software to save in the optimal file format (such as JPEG, PNG, or GIF), resize the image dimensions to a smaller size, and compress the image to make the file size smaller again.

For step by step instructions, see our guide on how to optimize images for web performance without losing quality. This covers how to optimize your images, as well as the best tools and practices to use for image optimization.

It’s important to note that sometimes this error message can be seen even when uploading smaller images. If you see the error even when uploading optimized images, then you’ll need to move to the next step of troubleshooting.

4. Change Image Editor Library Used by WordPress

WordPress post-processes images using two PHP modules, ImageMagick and GD Library. WordPress may use either one of them depending on which is available.

However, ImageMagick can run into memory issues that can cause errors during image uploads. To fix this, you can make the GD Library your default image editor.

You can do this by simply adding this code to your theme’s functions.php file or a site-specific plugin.

function wpb_image_editor_default_to_gd( $editors ) {
    $gd_editor = 'WP_Image_Editor_GD';
    $editors = array_diff( $editors, array( $gd_editor ) );
    array_unshift( $editors, $gd_editor );
    return $editors;
}
add_filter( 'wp_image_editors', 'wpb_image_editor_default_to_gd' );

After adding this code, you should try uploading the image again.

We hope this tutorial helped you learn how to fix the ‘Post-Processing of Image Failed’ error in WordPress. You may also want to see our guide on how to start a podcast in WordPress, and our detailed tutorial on how to easily create a staging site in WordPress.

If you liked this article, then please subscribe to our YouTube Channel for WordPress video tutorials. You can also find us on Twitter and Facebook.

The post How to Fix Post-Processing of Image Failed Error in WordPress first appeared on WPBeginner.

How to Fix ‘Another Update is Currently in Progress’ Error in WordPress

Do you want to fix the ‘another update is currently in progress’ error?

This error stops you from updating WordPress. Normally, it should automatically go away. But if it doesn’t, then you’ll need to fix it manually. 

In this article, we’ll show you how to fix the ‘another update is currently in progress’ error in WordPress, step by step.

How to fix 'another update is currently in progress' error

Why Does the ‘Another Update is Currently in Progress’ Error Occur?

This message usually appears when a core WordPress update is running in the background, and a user tries to start another update process.

During the core update process, WordPress automatically sets an update lock on your WordPress database. This database lock prevents you from running simultaneous updates on your website, which could cause WordPress errors or destroy important data.

Another update in progress error

This message is set to automatically disappear in 15 minutes or when the update process has finished. However, if you are stuck on this message, then you’ll need to remove it manually. 

With that said, let’s take a look at how you can fix the ‘another update is currently in progress’ error in WordPress.

Fixing the ‘Another Update in Progress’ Error in WordPress

When you’re experiencing the another update in process error, you need to delete the ‘core_updater.lock’ file from your WordPress database. The easiest way to do this is by using phpMyAdmin.

Note: Before you make changes to your database or WordPress theme files, it’s a good idea to create a full website backup. To learn more, see our guide on how to backup your WordPress site.

First, you need to log in to the cPanel dashboard of your WordPress hosting account. We’re using Bluehost, so your screen may look a bit different if you’re using another hosting company.

From your Bluehost dashboard, you’ll need to click on the Advanced tab on the left. Next, navigate to the ‘Databases’ section and click on the ‘phpMyAdmin’ icon. If you don’t see a phpMyAdmin option in your hosting dashboard, you should contact your hosting company’s support for help.

Open phpMyAdmin from CPanel

This will launch the phpMyAdmin app, where you need to select your WordPress database. Once you click your database, it will display all of the tables inside the database.

Then, you need to click the ‘Browse’ button next to the WordPress options tables (wp_options).

Select database and wp-options

This brings up all of the rows inside the options table. 

You need to find the row with the option name ‘core_updater.lock’ and click on the delete button next to it.

Click wp-options in phpMyAdmin

Now, phpMyAdmin will automatically delete the row from your database. 

When you go back to your WordPress website, the another update in process error will be gone, and you can continue updating your site. 

If you’re still seeing other errors, then you can see our beginner’s guide on troubleshooting WordPress errors to get more help.

We hope this article helped you learn how to fix the ‘another update is currently in progress’ error in WordPress. You may also want to see our guide on how to choose the best web design software and our expert picks of the best live chat software for small businesses.

If you liked this article, then please subscribe to our YouTube Channel for WordPress video tutorials. You can also find us on Twitter and Facebook.

The post How to Fix ‘Another Update is Currently in Progress’ Error in WordPress first appeared on WPBeginner.

How to Fix The Invalid JSON Error in WordPress (Beginner’s Guide)

Are you trying to fix the invalid JSON error in WordPress?

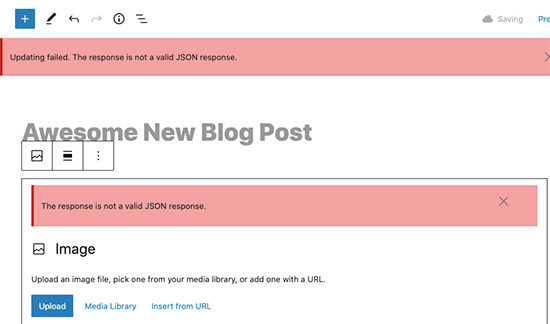
This error appears when editing WordPress posts or pages on your website. You’ll see a message saying ‘The response is not a valid JSON response’ and updating that page would fail.

In this article, we’ll show you how to easily fix the invalid JSON error in WordPress. We’ll also talk about why this error occurs and how to avoid it in the future.

JSON response is not valid error in WordPress

What causes ‘Not a Valid JSON Response’ Error in WordPress?

Failure to receive an expected response from the server causes the ‘Not a valid JSON response’ error in WordPress.

Basically, WordPress needs to communicate with the server while you are editing a blog post. It relies on getting responses from the web hosting server in the background. This response is usually in JSON format which is used to quickly transport data using JavaScript.

If for some reason, WordPress fails to get the response, or the response is not in JSON format, then you’ll see the ‘Not a valid JSON response’ error.

Not valid JSON response error displayed in WordPress

This error could appear for a number of reasons. However, the most likely cause of it to occur is incorrect URL settings in WordPress or broken permalinks.

That being said, let’s take a look at how to easily fix the invalid JSON error in WordPress.

Important: Please make a complete WordPress backup before making any big changes to your website. This allows you to easily restore your website to the previous state.

1. Check WordPress URLs in Settings

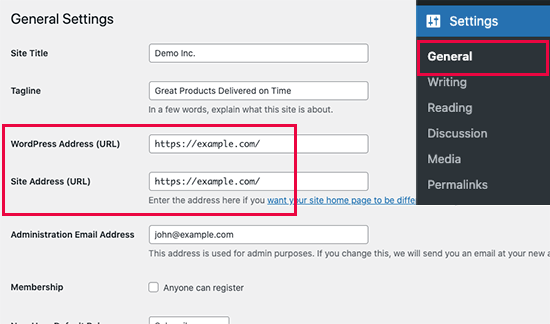
First, you need to make sure that your WordPress Address and Site Address settings are correct.

Simply, go to Settings » General page. From here, you need to review the WordPress Address (URL) and Site Address (URL) fields.

WordPress URL settings

For most websites, this setting needs to have the same URL in both fields.

However, rarely, some users may have given WordPress its own directory and serve the website on a different address. In that case, they can have different URLs here.

However, if your Site Address is incorrect then that would trigger the invalid JSON error in WordPress.

If you made any changes to the settings, then don’t forget to click on the Save Changes button to store your settings. You can now edit a blog post and see if adding any new blocks or saving that post triggers the ‘Not valid JSON response’ error.

If you are still seeing the error, then continue reading.

2. Fix WordPress Permalink Structure

WordPress comes with SEO friendly URL structure that allows you to use human-readable URLs for your posts and pages.

However, sometimes a user may mess up the permalinks settings. This would make it impossible for the WordPress editor to get a valid JSON response and cause the error to show up.

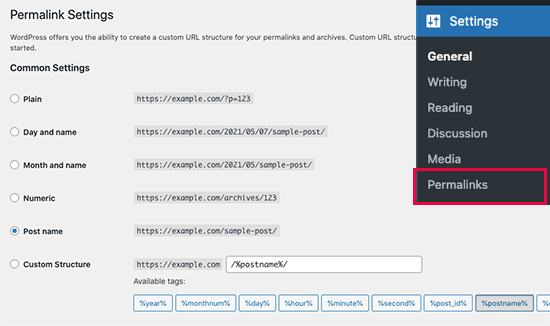
To fix this, you need to simply visit Settings » Permalinks page. From here, you need to carefully review the permalink options.

Fix permalinks in WordPress

If you are unsure whether you are using the right settings, then simply select one of the default formats available.

After that, go ahead and click on the Save Changes button to store your settings.

You can now try editing a blog post or page to see if the error has disappeared. If it hasn’t, then you can try this next step.

3. Regenerate WordPress .htaccess File

The .htaccess file in WordPress is used as a configuration file to manage SEO-friendly URLs (permalinks).

Normally, WordPress can automatically regenerate and update it. You can also trigger that update by simply clicking on the Save Changes button at the bottom of Settings » Permalinks page.

However, sometimes it may not get updated or has incorrect settings. This would affect your WordPress permalinks and may also cause an invalid JSON response error.

To fix this, you need to connect to your website using an FTP client or the file manager app in your WordPress hosting account dashboard.

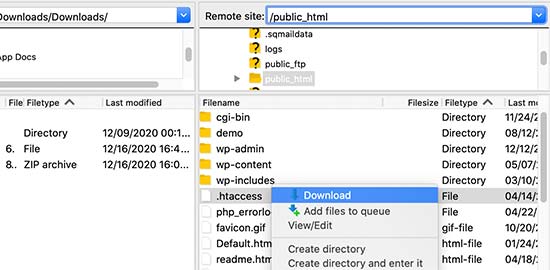
Once connected, you need to locate the .htaccess file in the root folder of your website and download it as a backup to your computer.

Download .htaccess file as a backup

Tip: Can’t locate .htaccess file? See this quick article on how to find .htaccess file.

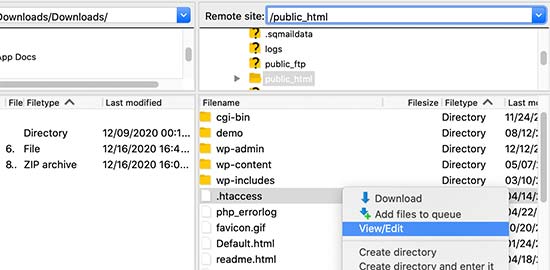
After that, you need to edit the .htaccess file using FTP client or the file manager app.

Edit .htaccess file

Once the file opens, you need to delete all the code inside it and replace it with the following code:

# BEGIN WordPress

RewriteEngine On
RewriteRule .* - [E=HTTP_AUTHORIZATION:%{HTTP:Authorization}]
RewriteBase /
RewriteRule ^index\.php$ - [L]
RewriteCond %{REQUEST_FILENAME} !-f
RewriteCond %{REQUEST_FILENAME} !-d
RewriteRule . /index.php [L]

# END WordPress

Don’t forget to save your changes and upload the file back to your website.

You can now visit your website and edit and post or page to see if you can reproduce the invalid JSON response error.

If you are still seeing the error, then there are a few more steps you can take.

4. View The Rest API Debug Log

The invalid JSON response error would also mean that WordPress REST API on your website encountered an error.

The REST API is the set of techniques WordPress uses to communicate with the server as you work on your website.

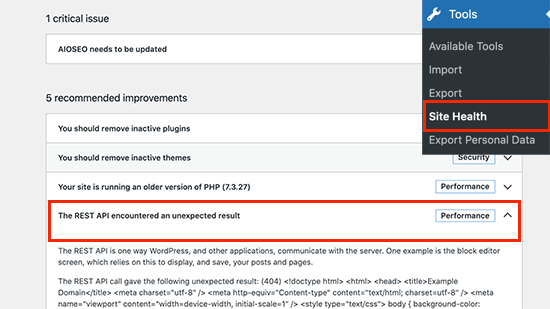
You can see details of this error in the WordPress Site Health tool. Visit the Tools » Site Health page.

REST API issue in WordPress

From here, you may see an issue labeled ‘The REST API encountered an unexpected result’.

Clicking on it will show you more details which may give you some clues about which plugin or third-party service may be causing the issue.

If this doesn’t provide any clue, then you can move on to the next step.

5. Deactivate All WordPress Plugins

Occasionally, WordPress plugins may conflict with each other or the WordPress core. This could result in unexpected behavior and could be a potential reason for the invalid JSON error.

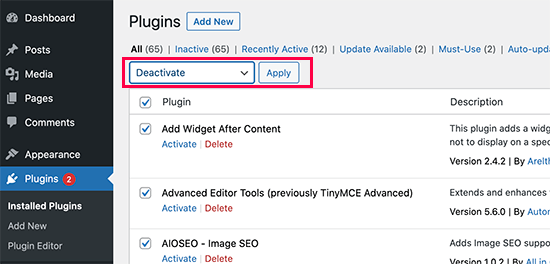
Simply go to the Plugins » Installed Plugins page. From here, select all your WordPress plugins and then choose ‘Deactivate’ under the Bulk Actions drop down menu. Now, click the Apply button to continue.

Deactivate all plugins

WordPress will now deactivate all your installed plugins.

You can now try again to reproduce the error. If the error disappears, then this means one of the plugins installed on your website was causing it.

To figure out which plugin, you need to activate them one by one and then try to reproduce the error. Repeat this until you find the culprit.

After that, you can reach out to the plugin author for support or find an alternative plugin.

6. Temporarily Switch to the Classic Editor

If all the above steps fail, then you can temporarily switch to the Classic Editor for WordPress.

This older version of WordPress editor uses a simpler text editor and doesn’t rely heavily on REST API to get JSON response.

To use it, you need to install and activate the Classic Editor plugin. For more details, see our step by step guide on how to install a WordPress plugin.

The plugin works out of the box, and it will disable the Gutenberg editor upon activation.

You can now continue working on your website and get back to the troubleshooting later.

7. Further Troubleshooting

A number of things can block WordPress REST API or make it return an invalid JSON response. We have addressed the most likely culprits above, but if that didn’t fix it for you then here are some more steps that you can try.

Switching to a Default WordPress Theme

Sometimes a conflict between your WordPress theme and a plugin or the WordPress core may result in unexpected behavior.

You can test this, by simply switching to a default WordPress theme like TwentyTwentyOne or Twenty-Twenty.

Temporarily Turn off Website Application Firewall

If you are using a WordPress firewall like Sucuri, Cloudflare, or a plugin, then it is possible that they may sometimes block legitimate requests too.

The easiest way to figure this out is by temporarily disabling your WordPress firewall plugin or service.

Some application-level WordPress firewalls can be disabled by simply deactivating the plugin. For DNS level firewalls like Sucuri and Cloudflare, you can disable them from your account dashboard.

Turn on Debugging in WordPress

WordPress comes with a built-in feature that allows you to keep a log of errors. However, it is not enabled by default.

To turn it on, you need to add the following code to your wp-config.php file:

define( 'WP_DEBUG', true );
define( 'WP_DEBUG_LOG', true );

After that, WordPress will keep a log of all errors in a debug.log file located inside /wp-content/ folder. You can access this file by using an FTP client.

The error log may provide you a clue about what may be causing the invalid JSON error on your website. For more details, see our guide on setting up WordPress error logs and using them for debugging errors.

Seek Expert Help

Finally, if all else fails, then this could be due to a misconfiguration on your WordPress hosting server. Most reliable WordPress hosting companies are able to help users with common WordPress issues like that.

Simply reach out to them via live chat or support ticket and they may be able to help you fix it.

We hope this article helped you learn how to fix the invalid JSON error in WordPress. Let us know which solution worked for you in the comments below.

You may also want to see our complete handbook of the most common WordPress errors and how to fix them.

If you liked this article, then please subscribe to our YouTube Channel for WordPress video tutorials. You can also find us on Twitter and Facebook.

The post How to Fix The Invalid JSON Error in WordPress (Beginner’s Guide) appeared first on WPBeginner.

How to fix cURL error 28: Connection timed out after X milliseconds

Are you seeing the cURL error 28: Connection timed out error on your WordPress site?

The cURL error 28 is a common WordPress REST API issue that can affect your website’s performance and may cause it to behave unpredictably.

In this article, we will show you how to easily fix the ‘cURL error 28: Connection timed out’ issue on your WordPress website.

Fixing the cURL error 28: Connection timed out issue in WordPress

What is cURL in WordPress?

The cURL is a software utility used by WordPress and many other web applications to send and receive data requests using URLs.

WordPress uses cURL to handle several API requests. It is available as an extension of the PHP programming language, and your WordPress hosting company takes care of that.

The cURL library plays a crucial role in how WordPress works behind the scenes. If it is not configured properly, then your WordPress website will not function properly.

What Causes cURL error 28 in WordPress?

Failure to respond back to the server’s data requests in a timely manner causes cURL error 28 in WordPress.

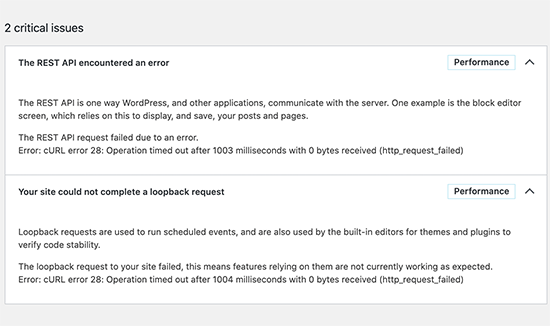
WordPress uses REST API (a programming technique) to send and receive data requests. If these requests time out, then you’ll see it as a critical issue in the Site Health report with the title ‘The REST API encountered in error’.

cURL error 28 shown in WordPress site health report

Expanding the error will show you further details including the error message:

Error: cURL error 28: Operation timed out after x milliseconds with x bytes received (http_request_failed)

You may also see another related issue with the title ‘Your site could not complete a loopback request’. It will have a similar error message with the following description.

‘The loopback request to your site failed, this means features relying on them are not currently working as expected.’

What may cause cURL to timeout?

A number of scenarios may cause the cURL to time out in WordPress.

For instance, a WordPress firewall plugin may block a REST API request considering it to be a suspicious activity.

If your DNS server is not working correctly, then this may also fail HTTP requests and cause the cURL timeout error in WordPress.

A poorly configured WordPress hosting server may simply have a very low timeout threshold which may stop certain WordPress processes to run properly.

That being said, let’s take a look at how to troubleshoot and fix the ‘curl error 28: Connection timed out’ issue in WordPress.

1. Temporarily Disable WordPress Firewall

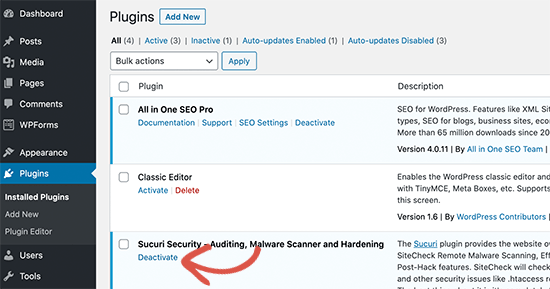
If you are using a WordPress firewall or a security plugin, then go ahead and temporarily deactivate it.

Deactivate WordPress firewall plugin

After that, you need to visit the WordPress site health report page to see if your issue has resolved.

If it has, then you need to check your WordPress firewall logs to see which API requests have been blocked.

This would either identify the source of the issue or you can adjust firewall settings to not block legitimate API requests.

2. Deactivate All WordPress Plugins

WordPress plugins make their own API requests to send and receive data. If these calls are too frequent or take too long to complete, then this may cause the cURL error in your site health report.

The easiest way to figure this out is by deactivating all WordPress plugins. Simply go to the Plugins » Installed Plugins page and select all plugins.

Deactivate all WordPress plugins

After that, click on the Bulk Actions drop down to select ‘Deactivate’ and then click on the ‘Apply’ button.

You can now visit the Site Health report to see if the issue has disappeared. If this resolved the issue, then you can start activating your plugins one by one until the issue reappears.

This will help you find the plugin that may be causing the issue and you can then ask the plugin author for support.

3. Ensure Your Hosting Server is Using the Latest Software

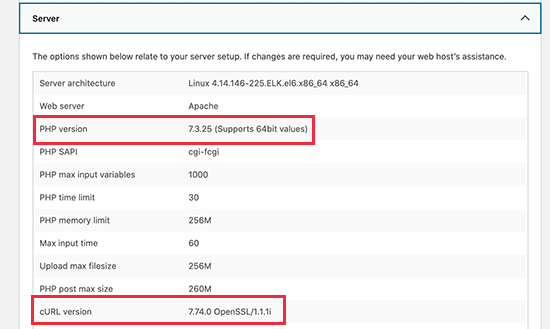
The next, step is to make sure that your WordPress hosting server is using the latest versions of PHP, cURL library, and OpenSSL.

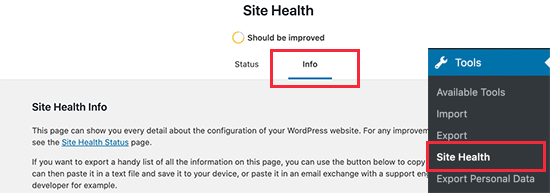
You can check that by looking at the system information tab under Tools » Site Health page.

System information report under site health

Simply switch to the ‘Info’ tab and expand the ‘Server’ section. From here you can get the information about software installed on your WordPress hosting server.

Check PHP, cURL, and OpenSSL versions

Ideally, your server should be using PHP 7.4.13 or higher, curl 7.74.0 or higher, and OpenSSL 1.1.1 or higher.

If it doesn’t, then you need to contact your WordPress hosting company and request them to update the software for your hosting account.

4. Fix SSL Insecure Content Issues

If your WordPress site is using HTTPS / SSL, but it is not configured properly, then this could also lead your web server to block insecure cURL requests.

Similarly, if your WordPress site doesn’t use HTTPS / SSL, but it made an API call using an HTTPs URL, then those requests will fail too, and you may see the following cURL error instead:

‘Error: cURL error 7: Failed to connect to localhost port 443: Connection refused (http_request_failed)

cURL error 7 in WordPress

To fix this, you can ask your hosting provider to re-install SSL certificate for your website. If the issue persists, then follow our guide on how to fix common SSL issues to properly set up SSL on your WordPress website.

5. Seek Help from Hosting Provider

If the above steps fail to resolve the cURL error 28 on your WordPress site, then the problem is most likely a hosting environment issue.

There are many factors that can only be controlled and fixed by your hosting company. For instance, if their DNS servers are unable to resolve requests in a timely manner, then this will cause cURL requests to timeout.

Another scenario could be slower connectivity or networking issues with your hosting server.

Simply drop them a support request with the error details and their technical staff can troubleshoot and apply a fix to solve it.

We hope this article helped you learn how to fix the cURL error 28 in WordPress. You may also want to bookmark our WordPress troubleshooting tips and our ultimate handbook on fixing common WordPress errors.

If you liked this article, then please subscribe to our YouTube Channel for WordPress video tutorials. You can also find us on Twitter and Facebook.

The post How to fix cURL error 28: Connection timed out after X milliseconds appeared first on WPBeginner.

How to Fix WordPress Updating Failed / Publishing Failed Error

Are you trying to fix the WordPress updating failed or publishing failed error on your website?

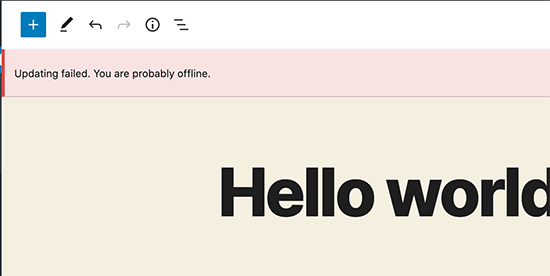
Sometimes when editing a post or page, you may see the updating failed or publishing failed error. This error does not give any clues, which makes it particularly difficult for beginners.

In this article, we’ll show you how to easily fix the WordPress updating failed error. We’ll also explain what causes this issue, and how to avoid this in the future.

Fixing the updating failed or publishing failed error in WordPress post editor

What Causes Updating Failed or Publishing Failed Error in WordPress?

Failure to communicate with the WordPress REST API causes the ‘Updating Failed’ or ‘Publishing Failed’ error in WordPress.

Updating failr or Publishing failed error in WordPress post editor

Basically, WordPress sometimes uses a set of APIs (programming methods) called ‘REST API’ to send and receive requests to the WordPress database.

If it fails to send and receive those requests, then some parts of your WordPress website may not be able to function. This includes the WordPress block editor, which uses the API to send update and publish requests to WordPress.

Why WordPress is Unable to use REST API?

Now you might be wondering, that if I didn’t make any changes to my website, then why did the REST API stop working on its own?

There are a number of scenarios that may prevent WordPress from using the REST API. For example, you may not be connected to the internet or have lost connectivity.

Other reasons may be a little more complicated. For instance, you may have accidentally changed the site URL, a WordPress plugin may be causing the issue, or a third-party service may be blocking the API calls.

That being said, let’s take a look at how to troubleshoot and fix the WordPress updating failed error.

Step 1. Check Your Internet Connection and Site URL

The most common cause for updating failed error in WordPress is losing the WiFi connection. If your computer loses the internet connection as you are writing a blog post, then WordPress will fail to save your changes.

Make sure you are connected to the internet by visiting other websites in a new browser tab.

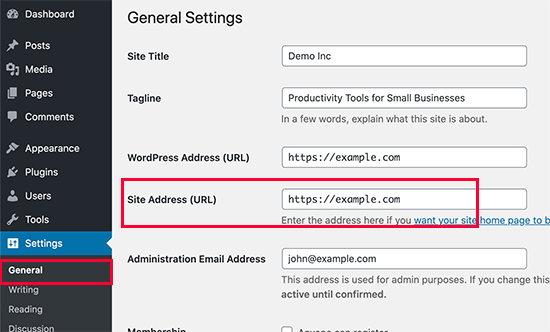
If your internet is working fine, then the next thing you would want to check is your WordPress site URL setting.

Simply go to Settings » General page and make sure that the Site Address and WordPress Address options are correct. For most websites, you should have the same URLs in both fields.

WordPress site URL setting

If your site URL settings look ok, and you are connected to the internet, then you can move on to further troubleshooting.

Step 2. Check REST API Status Using WordPress Site Health

WordPress comes with a built-in site health tool, which shows important information about your site’s security and performance.

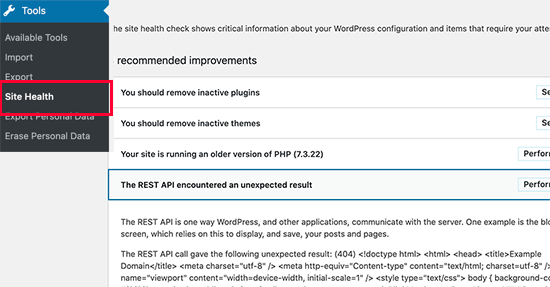
Simply go to the Tools » Site Health page to view the report. If REST API is not working, then you will see it under recommended improvements as ‘The REST API encountered an unexpected result’.

REST API error in WordPress Site Health

It may also show you some debugging information which may explain what happened when WordPress made the REST API call. Studying this may give you some clue on which plugin or third party service may be causing the issue.

However, if it doesn’t give you any clue, then you can move on to the next step.

Step 3. Disable All Your WordPress Plugins

If a WordPress plugin is causing the REST API to misbehave, then the easiest way to find it out is by deactivating all your WordPress plugins.

You can go to the Plugins » Installed Plugins page and check the box to select all plugins. After that, use the Bulk Actions drop down to deactivate all plugins.

Deactivate all WordPress plugins

After that, you can go to the post edit screen and try to update. If the Updating Failed error disappears, then this means that one of your plugins was causing the issue.

You can now start activating your WordPress plugins one at a time and try to reproduce the error. Once you find the plugin causing the issue, you can seek support from plugin author or find an alternative plugin.

On the other hand, if disabling all WordPress plugins didn’t make the error go away, then continue to the next step.

Step 4. Check Website Firewall Service

If you are using a website firewall service like Sucuri or Cloudflare, then there is a chance that these services may block REST API requests.

This could happen if their firewall filters consider your IP address to be suspicious. They may also block REST API requests if your website is under an on going DDOS attack.

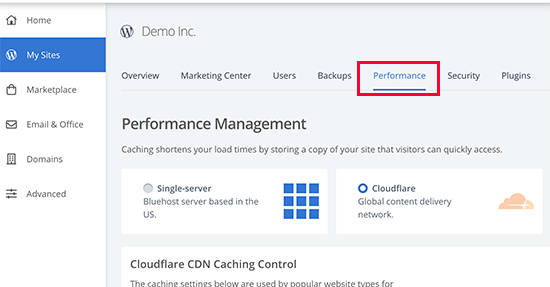
If you are using Cloudflare, then you can temporarily disable Cloudflare to see if this resolves your issue.

Normally, you’ll find Cloudflare settings under Domains section of your hosting dashboard. Bluehost users can find under My Sites » Manage » Performance tab.

Temporarily disable Cloudflare in Bluehost

If you are using Sucuri, then you can reach out to their support team, and they can whitelist your IP address or let you know what’s causing the issue.

Plugins and Firewall services are the most common cause of the updating failed error. However, if you are still seeing the error, then there are a few more things you can do.

Step 5. Enable and Review WordPress Debug Log

WordPress comes with built-in feature to keep a log of all WordPress errors. It does not log the REST API errors, but it will help you see if there are some other issues that may be causing the error.

Simply add the following lines to your wp-config.php file.

// Change WP_DEBUG to true

define( 'WP_DEBUG', true );

// Keep a log of WordPress errors

define( 'WP_DEBUG_LOG', true );

Don’t forget to save your changes and upload the file back to your server. You can now try to publish or update a post in WordPress to reproduce the error.

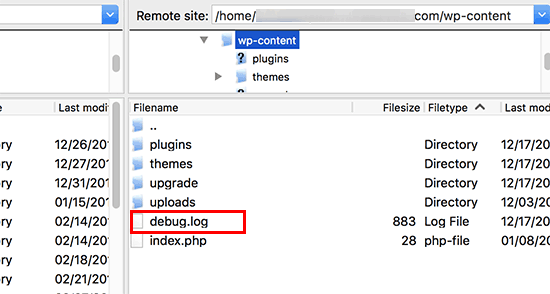
After that, you can connect to your WordPress hosting account using an FTP client and go to /wp-content/ folder. From here, you can download the debug.log file to your computer.

Debug log file in WordPress

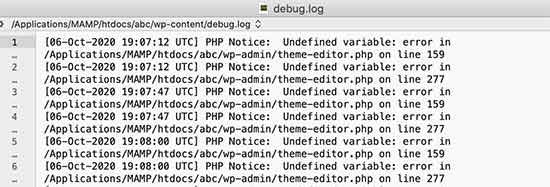
You can open the debug file in a plain text editor like Notepad. It may contain a few errors, warnings, or notices caught by WordPress as you worked on your site or a user visited it.

Debug log file showing PHP errors in WordPress

If you see something that points you to a plugin or theme file, then this can be a useful hint. You can then mention this error when asking for support on WordPress.org forums or from your hosting provider.

Step 6. Temporarily Switch to the Classic WordPress Editor

A temporary solution to this error is to enable the classic editor. It is the old WordPress editor that does not rely on REST API to update and publish content.

You can enable it by simply installing and activating the Classic Editor plugin. For more details, see our step by step guide on how to enable the classic editor in WordPress.

Upon activation, you can simply edit the post you were working on. You would be able to save and publish it without seeing the updating failed or publishing failed error in WordPress.

Classic editor

Final Step: Ask for Support

If all else fails, then you may need to ask for support. You can start by directly contacting your hosting provider. They do have access to server logs and additional tools. It could also be caused by a misconfigured server or glitch at their end.

You can also seek help on WordPress.org forums or WPBeginner Facebook Group where other experts and users can help you fix the error.

For more details, see our article on how to properly ask for WordPress support and get it.

We hope this article helped you fix the WordPress updating failed or publishing failed error. You may also want to bookmark our complete guide on the most common WordPress errors and how to fix them.

If you liked this article, then please subscribe to our YouTube Channel for WordPress video tutorials. You can also find us on Twitter and Facebook.

The post How to Fix WordPress Updating Failed / Publishing Failed Error appeared first on WPBeginner.

How to Fix WordPress Website Not Updating Right Away

Are you trying to fix your WordPress website not updating right away?

Often users ask us why some changes they make to their site like a new blog post, widget settings, don’t appear right away. It is a common issue and very easy to fix.

In this article, we’ll show you how to easily fix a WordPress website not updating right away.

Fixing a WordPress website not updating right away

Why My WordPress Site Not Updating Right Away?

The most common cause of a WordPress site not updating right away is caching.

By default, many WordPress hosting companies enable their own caching systems which store a temporary copy of your pages to improve website speed and reduce server load.

Apart from that, you may also be using a WordPress caching plugin on your own which may not be configured properly.

Last but not the least, your browser may also store a cached version of your pages in temporary storage.

Normally, when you make any change to your WordPress website those cached versions expire, and you get to see your changes right away.

However, sometimes due to some configuration error this may not happen right away. In that case you will see the old version of that page for a while.

The most common symptom of this problem is new posts not appearing on the homepage of your WordPress website.

While you can still view the single post by clicking on the view post link from the WordPress admin area, you are unable to see it on the main page.

That being said, let’s take a look at how to easily fix this issue.

Fixing WordPress Website Not Updating Issue

You’ll start by first clearing the browser cache. For most users, this should fix the issue, and you wouldn’t need to proceed to step 2.

Step 1. Force Browser to Reload or Clear Cache

Sometimes your browser (specially Google Chrome) will show you a cached copy of your website instead of showing the new one.

To resolve this issue, you need to simply hit CTRL + F5 (or Cmd + R in Mac) buttons on your keyboard to reload the page.

This will ask the browser to reload the page by fetching a fresh version. In most cases, this would fix the issue for many users.

However, if that doesn’t work, then the next step is to clear your browser cache. In Google Chrome, click on the three-dot menu in the top right corner. From the menu, you need to go to More Tools » Clear Browsing Data.

Clear browser cache

For more details, see our guide on how to clear cache in all major browsers.

Step 2. Clear WordPress Cache for Your Website

The second and most likely cause of this issue is poorly configured WordPress caching plugin. Most caching plugins make it super easy to clear your cache with the click of a button.

1. WP Rocket

If you are using WP Rocket on your website, then simply go to the Settings » WP Rocket page and click on the ‘Clear Cache’ button under the dashboard tab.

WP Rocket clear cache

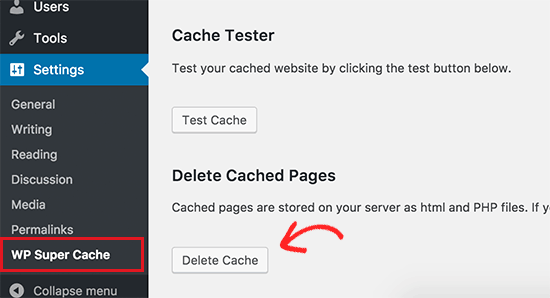
2. WP Super Cache

If you are using the WP Super Cache plugin, then go to the Settings » WP Super Cache page and click on ‘Delete Cache’ button.

WP Super Cache delete cache

3. Bluehost

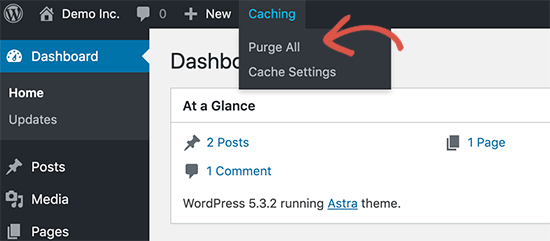
Even if you don’t have a WordPress caching plugin installed on your website, many WordPress hosting companies deploy their own caching system by default.

For instance, if you are on the Bluehost hosting platform, then you’ll notice a ‘Caching’ button in the admin toolbar.

Clear cache in Bluehost

Take your mouse over and you’ll see the option to ‘Purge All’ cache. This will delete all cached files from your website.

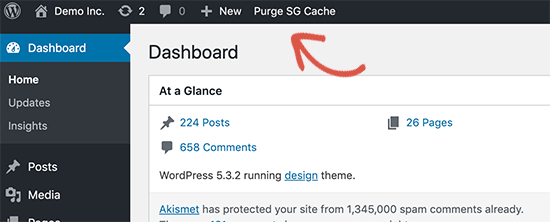
4. SiteGround

SiteGround is another top WordPress hosting company that offers its own built-in caching system.

You can manage SiteGround cache by installing and activating the SG Optimizer plugin. For more details, see our step by step guide on how to install a WordPress plugin.

Upon activation, you need to click on the Purge SG Cache button in the WordPress admin toolbar.

Purge SiteGround cache

This will clear up SiteGround cache for your website.

For more hosting companies and caching plugins, see our complete guide on how to clear WordPress cache.

We hope this article helped you fix WordPress website not updating right away issue. You may also want check out our guide on the most common WordPress errors and how to fix them.

If you liked this article, then please subscribe to our YouTube Channel for WordPress video tutorials. You can also find us on Twitter and Facebook.

The post How to Fix WordPress Website Not Updating Right Away appeared first on WPBeginner.

50 Most Common WordPress Errors and How to Fix Them

While WordPress is really easy to use, there are some common WordPress errors that can make you panic. The good thing is that the WordPress error you are seeing on your site is most likely been reported and resolved by someone before you. At WPBeginner, we have written tutorials on how to fix several popular WordPress errors. In this article, we will cover the 40 most common WordPress errors along with showing you how to fix all of these common WordPress errors.
Fixing common WordPress errors

Important: Before trying to fix any WordPress error, make sure that you have a complete WordPress backup. You can use UpdraftPlus or use this tutorial to manually create a WordPress backup.

In case you are unable to resolve your issue from the steps mentioned in this article, then please contact your WordPress hosting company.

Since this is a lengthy article, we have created a table of contents below for easy navigation.

Table of Contents

  1. How to fix internal server error
  2. This site is experiencing technical difficulties
  3. How to fix syntax error in WordPress
  4. How to fix the error establishing database connection in WordPress
  5. How to fix WordPress white screen of death
  6. How to fix WordPress posts returning 404 error
  7. How to fix sidebar below content error in WordPress
  8. How to fix white text and missing buttons in WordPress visual editor
  9. How to fix WordPress memory exhausted error by increasing PHP memory limit
  10. What to do when you are locked out of WordPress admin area
  11. How to fix WordPress login page refreshing/redirecting issue
  12. How to fix image upload issue in WordPress
  13. How to fix common image issues in WordPress
  14. How to fix “Are you sure you want to do this” error in WordPress
  15. How to fix briefly unavailable for scheduled maintenance error in WordPress
  16. How to fix WordPress not sending email issue
  17. How to fix WordPress RSS feed errors
  18. How to fix 403 forbidden error in WordPress
  19. How to fix error too many redirects issue in WordPress
  20. How to fix “Upload: failed to write file to disk” error in WordPress
  21. How to fix “This site ahead contains harmful programs” error in WordPress
  22. How to fix missed scheduled post error in WordPress
  23. How to fix fatal error: Maximum execution time exceeded in WordPress
  24. How to fix Facebook incorrect thumbnail issue in WordPress
  25. How to fix WordPress keeps logging out problem
  26. How to Fix the Mixed Content Error in WordPress
  27. How to Fix Add Media Button Not Working in WordPress
  28. How to Fix the 502 Bad Gateway Error in WordPress
  29. How to Fix 503 Service Unavailable Error in WordPress
  30. How to Fix the 504 Gateway Timeout Error in WordPress
  31. How to Fix the WordPress Failed to Open Stream Error
  32. How to Fix the WordPress 429 Too Many Requests Error
  33. How to Fix the 413 Request Entity Too large Error in WordPress
  34. How to Turn Off PHP Errors in WordPress
  35. How to Fix Secure Connection Error in WordPress
  36. How to Fix Destination Folder Already Exists Error in WordPress
  37. How to Fix ‘Another Update in Process’ Error in WordPress
  38. How to Fix Password Reset Key Error in WordPress
  39. How to Fix “Missing a Temporary Folder” Error in WordPress
  40. How to Fix Pluggable.php File Errors in WordPress
  41. How to fix common SSL issues in WordPress
  42. How to fix file and folder permissions error in WordPress
  43. How fix HTTP error when uploading images in WordPress
  44. How to fix your connection is not private error in WordPress
  45. How to fix “The link you followed has expired” error in WordPress
  46. How to fix WordPress website not updating right away issue
  47. How To fix “Failed to load resource” error In WordPress
  48. How to fix “Missing a temporary folder” error in WordPress
  49. How to fix “Googlebot cannot access CSS and JS files” error in WordPress
  50. Troubleshooting WordPress errors on your own

Let’s take a look at how to solve the most common WordPress errors (one by one).

1. How to Fix Internal Server Error
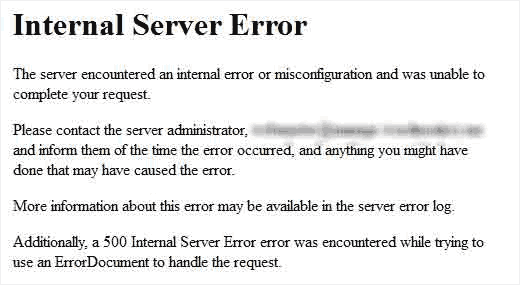
Internal server error

Perhaps the most confusing WordPress error that a beginner may come across is “Internal Server Error”, or sometimes “500 Internal Server Error”.

This error usually appears when there is something wrong, but the server is unable to identify where the problem is. Since the error message does not indicate where you should look for the error, it is pretty much up to you to figure this out.

We have compiled a list of solutions that you can try and one of them will help you resolve it. See how to fix internal server error in WordPress.

[Back to top ↑]

2. This Site is Experiencing Technical Difficulties
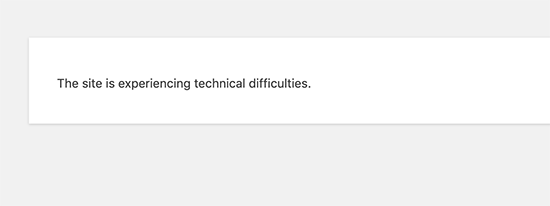
Site experiencing technical difficulties

WordPress introduced a fatal error protection feature in WordPress 5.2. This feature displays a simple error message stating that “This site is experiencing technical difficulties”.

For full details, WordPress then sends an email notification on your WordPress admin email address. This email message contains a link to access the backend and attempt to fix the error.
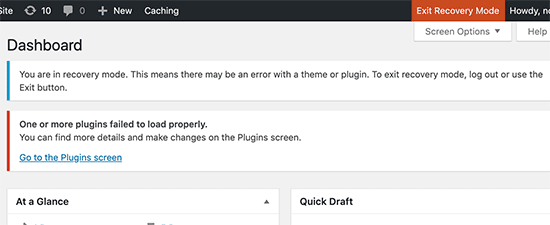
WordPress recovery mode

This error message can be triggered by any of the fatal errors mentioned in this article. If you don’t have access to the admin email or can’t get WordPress emails then it becomes harder to find out what error is occurring.

The easiest way to fix this is to make sure that your WordPress admin email address is correct and that you can receive WordPress notification emails. If you can’t get WordPress emails then see our guide on fixing the WordPress not sending email issue.

[Back to top ↑]

3. How to Fix Syntax Error in WordPress
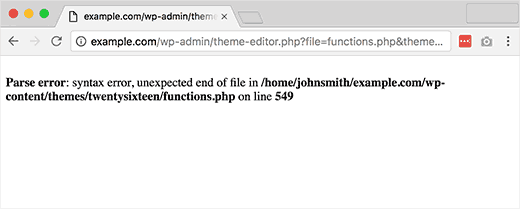
Syntax error in WordPress

This error usually occurs when you are trying to add code snippets into WordPress and have accidentally missed something or the code has incorrect syntax. This will result into a PHP parse error and you will see a notice like:

Parse error- syntax error, unexpected $end in /public_html/site1/wp-content/themes/my-theme/functions.php on line 278

The error message would indicate the unexpected thing found in the code and the location of the script where the error occurred with line number. To fix this issue you will have to correct the syntax. Most of the time it is a missing bracket, or some unexpected character in the code. [Fix syntax error in WordPress]

[Back to top ↑]

4. How to Fix the Error Establishing a Database Connection in WordPress
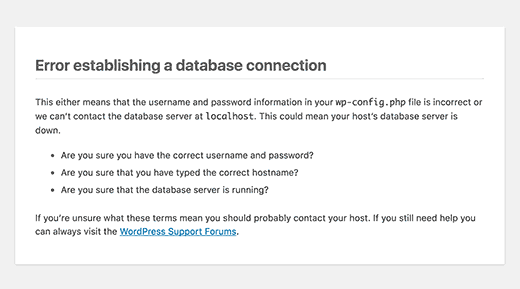
Error establishing database connection

This error message is clear that your website is unable to connect to the database. However solving this error can be tricky for beginners.

Usually this occurs when a user has entered or modified their database credentials (database host, database username, and database password) incorrectly. Sometimes your database server could be unresponsive, or your database may have corrupted.

However, mostly it is incorrect database login credentials. Take a look at common solutions for this problem. [Fix error establishing database connection in WordPress]

[Back to top ↑]

5. How to Fix the WordPress White Screen of Death
White screen of death error in WordPress

This error usually results into a plain white screen with no error message. This makes it the most puzzling because you have no clue where to look and what to fix.

Most of the time it is caused when a script exhausts PHP memory limit. It can also happen due to a configuration on the server. It is also possible that a user would only see white screen of death on certain sections of their site. [See how to fix WordPress white screen of death]

[Back to top ↑]

6. How to Fix WordPress Posts Returning 404 Error
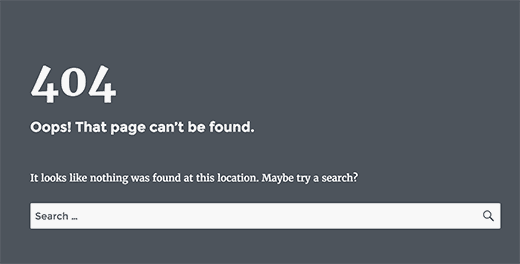
WordPress posts returning 404 error

The symptoms of this error is that when a user visits a single post on their site they get a 404 page – not found error.

The user can browse all other sections of their site including the admin area. The most common cause of this issue is permalink settings in WordPress. To solve this issue a user would need to reconfigure their permalinks settings or manually update their rewrite rules. [Fix WordPress posts returning 404 error]

[Back to top ↑]
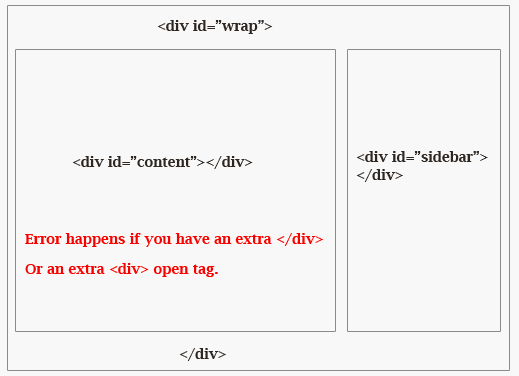
7. How to Fix the Sidebar Below Content Error in WordPress

Sidebar appearing below content

Another common issue beginners face is when the sidebar appears below the content when it is supposed to appear next to the content. This issue is mostly caused by WordPress themes.

Sometimes when users are adding code snippets to their site, they may accidentally forget to close an html div tag or add an extra closing div which may result into breaking the theme layout. Another common cause is using disproportionate width in CSS or not clearing float properly. [Fix sidebar appearing below content error in WordPress]

[Back to top ↑]
8. How to Fix White Text and Missing Buttons in WordPress Visual Editor

Missing buttons in WordPress TinyMCE visual editor

If you’re using the classic WordPress editor, then sometimes buttons from the visual editor may disappear or start showing blank white spaces instead of buttons.

This problem may occur when concatenated JavaScript is not working. It may also caused by missing or corrupt TinyMCE files, or conflict with some other plugin that modifies or extends the TinyMCE shipped with WordPress. [Fix white text and missing buttons in WordPress visual editor]

[Back to top ↑]

9. Fix: WordPress Memory Exhausted Error – Increase PHP Memory

Memory size error

Indications of this error could be a white screen of death, or an error message like this one:

Fatal error: Allowed memory size of 33554432 bytes exhausted (tried to allocate 2348617 bytes) in /home/username/public_html/site1/wp-includes/plugin.php on line xxx

This error occurs when a WordPress script or a plugin exhausts the default allocated memory size limit. [Fix WordPress memory exhausted error]

[Back to top ↑]

10. What To Do When You Are Locked Out of WordPress Admin (wp-admin)
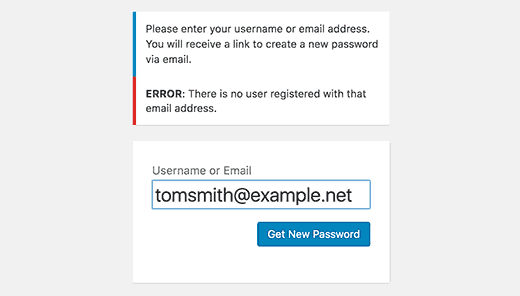
Locked out of WordPress admin area

Sometimes you may find yourself locked out of the WordPress admin area. This could happen if you forgot your password and don’t have to access to password recovery email.

A plugin or code that incorrectly tries to make some changes into admin section can also lock you out. You may also lose access to admin area due to a hacked WordPress site. [Fix locked out of WordPress admin issue]

[Back to top ↑]
11. How to Fix WordPress Login Page Refreshing and Redirecting Issue

WordPress login redirect error

Symptoms of this issue are that when a user attempts to login to the WordPress dashboard, they are redirected by WordPress back to the login page.

Most of the time it happens due to incorrect values for site url and home url fields in WordPress options table. It can also be caused by poorly configured permalink settings or redirects setup in the .htaccess file. [Fix WordPress login page refreshing and redirecting issue]

[Back to top ↑]

12. How to Fix Image Upload Issue in WordPress
WordPress image upload issues

Sometimes a user would suddenly notice that all the images from their site are gone and are showing broken image placeholders. When the user tries to upload an image to a post using the media uploader, it results into an error.

All these files in the media library will appear as broken. This error occurs due to incorrect file and directory permissions in a WordPress installation. A number of factors may cause this issue. [Fix image upload issues in WordPress]

[Back to top ↑]

13. How to Fix Common Image Issues in WordPress
Common image issues in WordPress

Uploading images to a WordPress site can be confusing for someone new to WordPress. A user may be unable to find out how to align images, resize or crop them, or display them in a gallery format.

This is not an error or issue in WordPress. You just need to familiarize yourself with how WordPress handles media. [Fix common image issues in WordPress]

[Back to top ↑]

14. How to Fix “Are You Sure You Want to Do This” Error in WordPress
Are you sure you want to do this error in WordPress

Users may come across this error in WordPress admin area. The most common cause of this error is a plugin or theme failing to use Nonce properly.

Nonce are special security keys which may be appended to URLs when performing an admin action in WordPress. Sometimes a plugin or theme may use it incorrectly which may result into users seeing this error. [Fix are you sure you want to do this error in WordPress]

[Back to top ↑]

15. How to Fix Briefly Unavailable for Scheduled Maintenance Error in WordPress
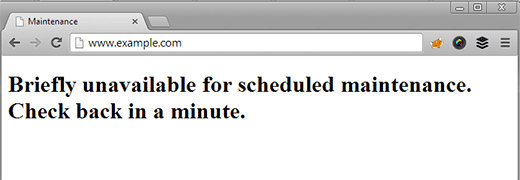
WordPress unavailable for maintenance error

Sometimes due to an unfinished or interrupted WordPress update, you might see “Briefly Unavailable for Scheduled Maintenance” error in WordPress.

What happens there is that WordPress puts your site in maintenance mode during an update. If for some reason the update is interrupted, then WordPress does not get the chance to put your site out of the maintenance mode. This error would lock down your entire site and make it unavailable for admins as well as visitors. [Fix briefly unavailable for scheduled maintenance error]

[Back to top ↑]

16. How to Fix WordPress Not Sending Email Issue
Fixing WordPress not sending email issue

The most common symptom of this problem is not receiving any contact form or WordPress notification emails from your site.

This issue is usually caused because most shared hosting providers disable or limit the module used for sending emails to prevent their servers from abuse. [Fix WordPress not sending email issue]

[Back to top ↑]
17. How to Fix WordPress RSS Feed Errors

Fixing RSS feed errors in WordPress

Most WordPress RSS feed errors are caused by poor formatting. You may see errors like these:

XML Parsing Error: XML or text declaration not at start of entity
Location: http://example.com/feed
Line Number 2, Column 1:

Depending on what browser you are using, your RSS feed error message may vary. You can also see this error message when visiting your feed in a browser.

Warning: Cannot modify header information – headers already sent by (output started at /home/username/example.com/wp-content/themes/twentysixteen/functions.php:433) in /home/username/example.com/wp-includes/pluggable.php on line 1228

WordPress outputs RSS feeds in XML which is a strict markup language. A missing line break or an extra tab can break your RSS feed. [Fix WordPress RSS feed errors]

[Back to top ↑]

18. How to Fix 403 Forbidden Error in WordPress
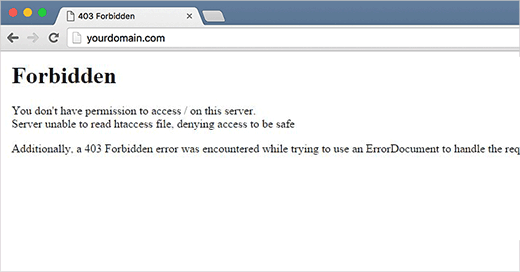
403 Forbidden error

403 Forbidden error code is shown when your server permissions don’t allow access to a specific page. This is why the error is usually accompanied by the text:

403 Forbidden – You don’t have permission to access ‘/’ on this server.
Additionally, a 403 Forbidden error was encountered while trying to use an ErrorDocument to handle the request.

There are different scenarios when you can see this error. Incorrect file permissions, poorly coded security plugins, or server configuration are the most common culprits. [Fix 403 Forbidden error in WordPress]

[Back to top ↑]

19. How to Fix Error Too Many Redirects Issue in WordPress
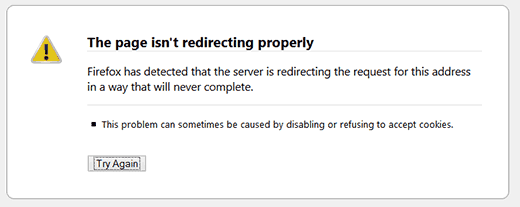
Too many redirects error in WordPress

This error usually occurs due to a misconfigured redirection issue. As you know that WordPress has SEO friendly URL Structure which uses the redirect function. Several other popular WordPress plugins also use the redirect functionality as well.

Due to a misconfiguration in any of these redirection tools, your site may end up redirecting users to a URL that is actually redirecting them back to the referring URL. In that case the user’s browser is trapped between two pages causing a redirect loop. [Fix too many redirects issue in WordPress]

[Back to top ↑]

20. How to Fix “Upload: Failed to Write File to Disk” Error in WordPress

Upload failed error in WordPress

This error can occur due to a number of reasons. However, the most common one is incorrect folder permissions.

Each file and folder on your website has a set of permissions. Your web server controls access to the files based on these permissions. Incorrect permissions to a folder can take away your ability to write files on server. This means your web server cannot create or add new files to that particular folder. [Fix Upload: Failed to write file to disk error]

[Back to top ↑]

21. How to Fix “This site ahead contains harmful programs” Error in WordPress
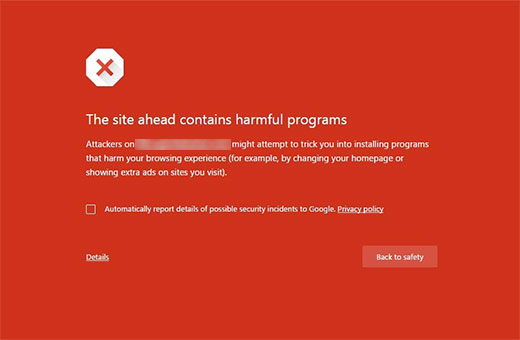
Harmful programs error in Google Chrome

Google marks a website with this warning if they find any suspicious code that could be a malware or trojan. Sometimes the reason for this is that your website is hacked and is now used to distribute malicious code.

Another common reason for this error is showing ads from low quality advertising networks. These networks may sometime display ads linking to websites distributing malicious code. [Fix site ahead contains harmful programs error in WordPress]

[Back to top ↑]

22. How to Fix the Missed Schedule Post Error in WordPress

Missed post schedule

WordPress has this wonderful feature that allows you to schedule posts to be automatically published at a specified time. Most bloggers rely on the future to manage their publishing schedule.

However, sometimes WordPress can miss scheduled posts due to a number of reasons. If this has happened to you more than a few times then you need to address this issue. [Fix missed schedule post error in WordPress]

[Back to top ↑]

23. How to Fix Fatal Error: Maximum Execution Time Exceeded in WordPress

Maximum execution time error in WordPress

WordPress is coded mainly in PHP programming language. To protect web servers from abuse, there is a time limit set for how long a PHP script can run.

Some WordPress hosting providers have set this value to a higher level while others may have set it to a lower level. When a script reaches the maximum execution time limit, it results into maximum execution time exceeded error. [Fix maximum execution time exceeded error in WordPress]

[Back to top ↑]

24. How to Fix Facebook Incorrect Thumbnail Issue in WordPress
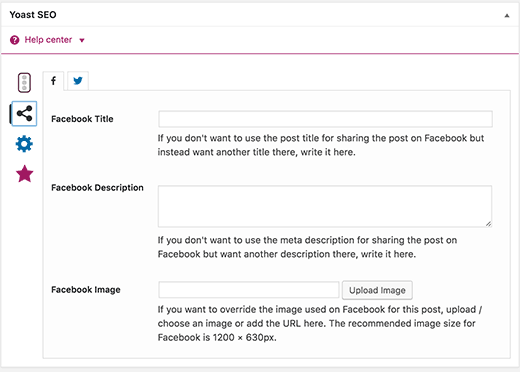
Setting Facebook thumbnail in WordPress using Yoast SEO

There are many reasons that can prevent Facebook from correctly guessing the right thumbnail image. One of the most common reason is having multiple images set in the og:image tag where your featured image is smaller than rest of the images.

Facebook uses Open Graph (og) tags, and plugins like Yoast SEO automatically adds them to your site to prevent missing thumbnail issue. [Fix Facebook incorrect thumbnail issue in WordPress]

[Back to top ↑]

25. How to Fix WordPress Keeps Logging Out Problem
WordPress keeps logging out

WordPress sets a cookie in your browser to authenticate a login session. This cookie is set for the WordPress URL stored in your settings section. If you are accessing from a URL that does not match the one in your WordPress settings, then WordPress will not be able to authenticate your session. [Fix WordPress keeps logging out problem]

[Back to top ↑]

26. How to Fix the Mixed Content Error in WordPress
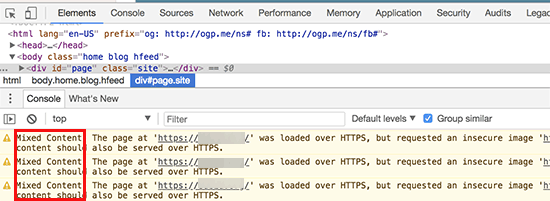
Mixed content errors

Mixed content errors are caused by incorrect HTTPs / SSL settings on your WordPress site. They may or may not affect your website’s functionality, but they can affect your website’s SEO and user experience.

Basically, on an SSL enabled website all resources should be loaded using an HTTPs URL. Your site may have content with HTTP URLs, or a plugin or theme may be loading a file with HTTP. This causes the mixed content error as those resources are not loaded using a secure protocol.

To fix this, you need to find out which resources are loaded insecurely, and then fix their URLs. You can do this with a plugin or you can do this manually as well. [Fix mixed content errors in WordPress]

[Back to top ↑]
27. How to Fix Add Media Button Not Working in WordPress

Add media button not working

Add Media button in WordPress post edit screens uses JavaScript to launch the media library and uploader. However, sometimes a plugin or theme’s code conflict with WordPress core can prevent JavaScript from working.

What happens is that WordPress combines all scripts inside the WordPress admin area to improve performance. A plugin or theme’s script can disrupt this which will make other code in the script stop working. [Fix add media button not working in WordPress]

[Back to top ↑]

28. How to Fix the 502 Bad Gateway Error in WordPress

502 Bad Gateway error

502 Bad gateway error is another puzzling error that may appear on your WordPress website. It is usually caused when a user’s request to a server takes too long to process without giving any other error.

This delay can be a temporary glitch caused by high traffic. It could also be caused by a poorly coded WordPress theme or plugin. Last but not least, a server misconfiguration can also produce this error. [Fix 502 bad gateway error in WordPress]

[Back to top ↑]

29. How to Fix 503 Service Unavailable Error in WordPress

The 503 ‘service unavailable’ error is often caused by an unresponsive PHP script. This could be a WordPress plugin, a theme, or a misbehaving custom code snippet.

It can also be triggered by heavy server load, a server glitch, or a brute force attack. In that case, it could automatically disappear in a few minutes. If it doesn’t disappear, then you would need to troubleshoot and fix it. [Fix 503 service unavailable error in WordPress]

[Back to top ↑]

30. How to Fix the 504 Gateway Timeout Error in WordPress

The 504 gateway timeout error is often caused when a request to your server is processed through a proxy or firewall but fails to connect with the upstream server.

You are more likely to see this error, if you are using a WordPress firewall like Sucuri or Cloudflare. [Fix 504 gateway timeout error in WordPress]

[Back to top ↑]

31. How to Fix the WordPress Failed to Open Stream Error
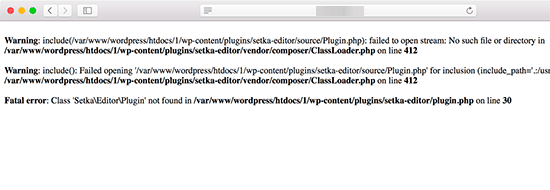
Failed to open stream error

The ‘Failed to open stream’ error occurs when WordPress is unable to load a file mentioned in website code. Sometimes WordPress will continue loading the site and only show a warning message, while other times it would result in a fatal error.

The error message can be different, depending on where the error is triggered in the code and what caused it. In each instance, failed to open stream phrase would be followed by a reason. For example, permission denied, no such file or directory, operation failed, and more. [Fix the WordPress failed to open stream error]

[Back to top ↑]

32. How to Fix the WordPress 429 Too Many Requests Error
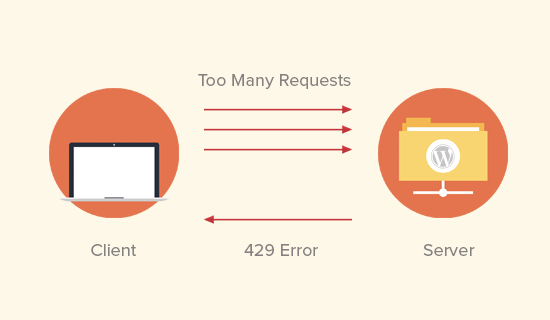
429 too many requests error

The 429 error is a preventive measure to protect servers from abuse. This error is triggered when a bot, script, or a user is making too many requests to the server.

However, if it is not properly configured, then it can block search engines and other APIs from accessing your website. To fix this you will need to find the misbehaving code, plugin, or service that’s causing the error. [Fix WordPress 429 too many requests error]

[Back to top ↑]

33. How to Fix the 413 Request Entity Too large Error in WordPress
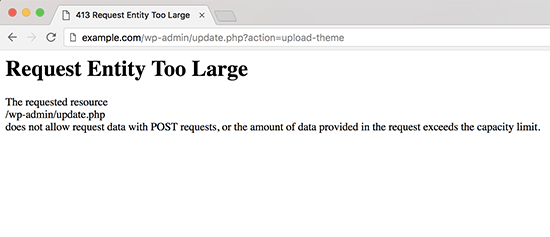
413 Request entity too large

Normally, most WordPress hosting companies have their servers configured, so that WordPress users can easily upload large images and other media. However, sometimes this setting is not high enough to upload large theme or plugin files.

It would also stop you from uploading large files in the media library. In that case, you will see a different message, clearly stating that the file size exceeds maximum allowed limit. [Fix 414 request entity too large error in WordPress]

[Back to top ↑]

34. How to Turn Off PHP Errors in WordPress
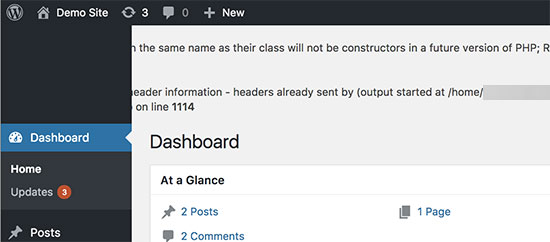
PHP errors and warnings in WordPress

Your WordPress site may sometimes show errors and warnings inside WordPress admin area or your website. These errors do not stop WordPress from displaying your website. They are helpful in debugging issues but your website will look really unprofessional if it is showing these errors on the front-end.

WordPress comes with easy configuration tricks to control PHP errors and how they are displayed or logged on your website. You just need to turm them off and PHP errors will disappear from your site. [Fix PHP Errors in WordPress]

[Back to top ↑]

35. How to Fix Secure Connection Error in WordPress

Secure connection error in WordPress

WordPress comes with an updates management system which regularly checks for available updates on WordPress.org website. Your website may fail to connect with WordPress.org website, due to a misconfiguration on your hosting server, which will cause the secure connection error.

Updates play an important role in WordPress security and performance. This is why you need to fix this error to resume WordPress updates. [Fix secure connection error in WordPress]

[Back to top ↑]

36. How to Fix Destination Folder Already Exists Error in WordPress
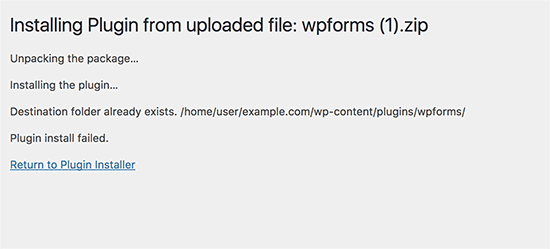
Folder already exists error

This error occurs during the installation of a WordPress theme or plugin. WordPress extracts your plugin or theme’s zip file into a folder named after the file itself.

If a folder with the same name already exists, then WordPress aborts the installation with the following error message.

Destination folder already exists. /home/user/example.com/wp-content/plugins/wpforms/

Plugin install failed.

To fix this, you simply need to delete the existing folder and then continue installation. [Fix folder already exists error in WordPress]

[Back to top ↑]

37. How to Fix ‘Another Update in Process’ Error in WordPress
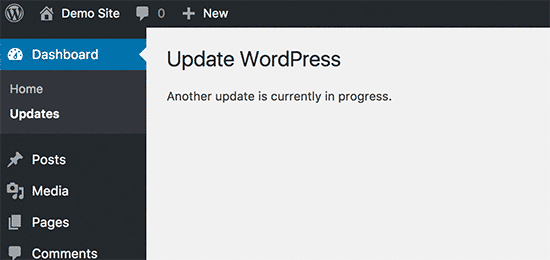
Another update in process error

This error usually appears during the WordPress core update process. If a user initiates another update process while an update is already underway, then you’ll see this error message.

What happens is that WordPress automatically sets an update lock option in the database. This database option prevents you from running simultaneous updates on your website. This option automatically disappears after a while. However, if it doesn’t or you don’t want to wait, then you can also manually fix it. [Fix another update in process error in WordPress]

[Back to top ↑]

38. How to Fix Password Reset Key Error in WordPress
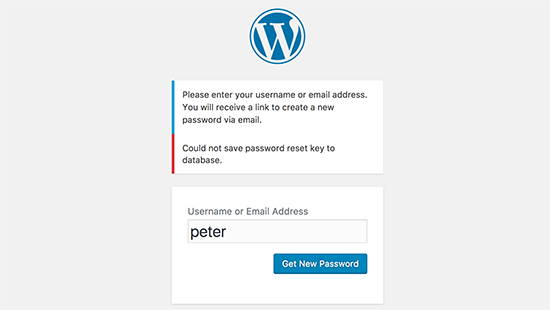
Password reset key error in WordPress

This error forces the login page to keep refreshing and wouldn’t allow you to save the password reset key. While the front-end of your website works normally, you wouldn’t be able to login and work on your website.

It is caused by the lack of disk space on your WordPress hosting account. Since there is no more disk space, WordPress fails to save new data into the database. The easy way to fix this is to simply delete a few unnecessary files from your website. [Fix password reset key error in WordPress]

[Back to top ↑]

39. How to Fix “Missing a Temporary Folder” Error in WordPress
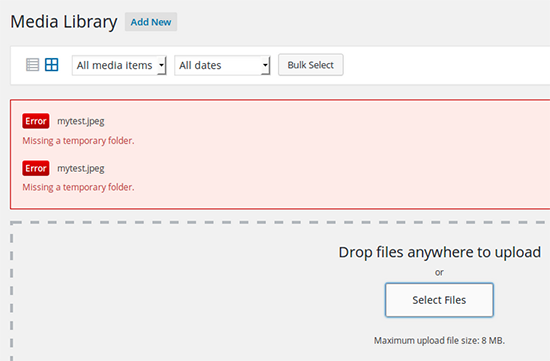
Missing temporary folder

This error is caused when WordPress does not have access to the folder PHP uses to store temporary files. The error disrupts your WordPress media uploads, plugins, and theme installations.

To fix this error, you will need to define a temporary folder for WordPress to use or ask your WordPress hosting provider to fix it for you. [Fix missing a temporary folder error in WordPress]

[Back to top ↑]

40. How to Fix Pluggable.php File Errors in WordPress
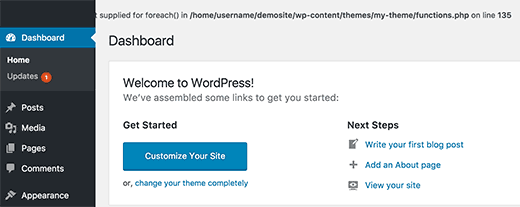
Pluggable.php file error in WordPress

Pluggable.php file contains some core WordPress functions that users and developers can override in their own code. However, if a WordPress plugin or a custom code snippet fails to correctly handle one of these functions, then you will see an error like this one:

Warning: Cannot modify header information – headers already sent by (output started at /home/username/demosite/wp-content/themes/mytheme/functions.php:1035) in /home/username/demosite/wp-includes/pluggable.php on line 1179

Sometimes you would be able to continue working on your site despite the error, sometimes the error would be fatal and make your site completely inaccessible. [Fix pluggable.php file errors in WordPress]

41. How to Fix Common SSL Issues in WordPress
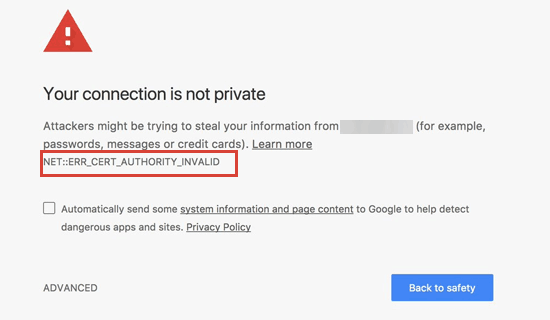
Fixing common SSL issues in WordPress

SSL / HTTPS enabled sites use a unique SSL certificate for identification purposes. If a server is pretending to be on HTTPS, and its certificate doesn’t match, then most modern browsers will warn the user from connecting to the website.

The easiest way to fix this is to ask your WordPress hosting provider to properly install your SSL certificate. For more details and other errors caused by SSL misconfiguration, see our guide on how to fix common SSL issues in WordPress.

[Back to top ↑]

42. How to Fix File and Folder Permissions Error in WordPress
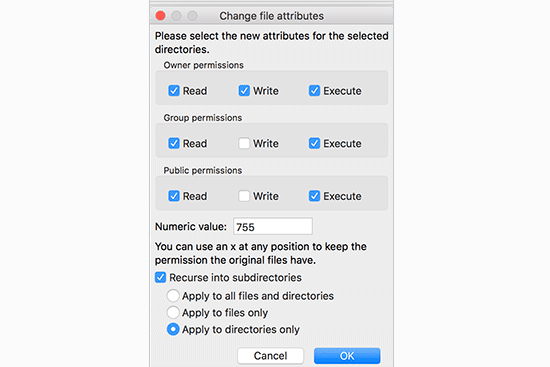
File and folder permissions in WordPress

WordPress needs specific file and folder permissions to work properly. Most WordPress hosting companies already set them up but these permissions could change accidentally or due to a misconfiguration.

You can set these permissions manually by using an FTP client. Simply select all WordPress files and folders and then apply permissions to folders and files recursively.

You will need to set all folder permissions to 755 and all file permissions to 655. For more details, see our article on how to fix file and folder permissions in WordPress.

[Back to top ↑]

43. How to Fix the HTTP Image Upload Error in WordPress
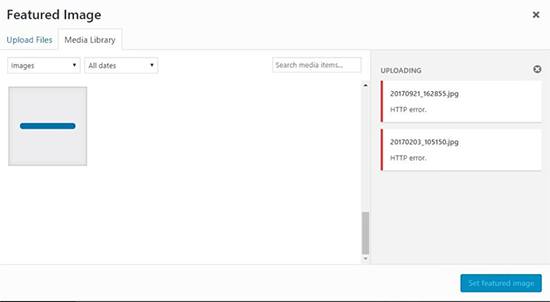
HTTP error when uploading an image

Are you seeing HTTP error when trying to upload images or media to your WordPress website? There are a number of things that could lead to an HTTP error when uploading files using the WordPress media uploader.

Most of the time, this error is a temporary issue and resolves in a few minutes. However, other times it becomes persistent and needs further investigation.

For step by step instructions, see our complete guide on fixing the HTTP image upload error in WordPress.

[Back to top ↑]

44. How to Fix Your Connection is Not Private Error
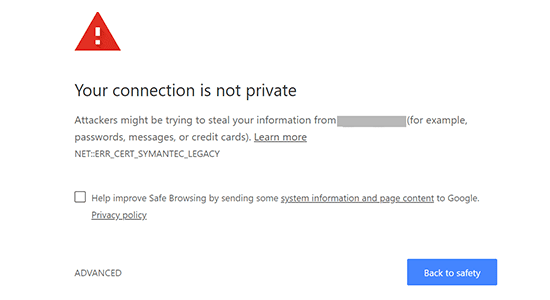
Your connection is not private

‘Your connection is not private’ error appears on websites using the SSL / HTTPs protocol when your browser is unable to validate the SSL certificate issued by the website.

Most popular browsers will display the error message instead of your website, this results in sudden drop in website traffic and damage to your brand image.

The problem is figuring out the cause of this error. We have prepared a step by step guide to easily fix connection is not private error on your website.

[Back to top ↑]

45. How To Fix “The Link You Followed Has Expired” Error in WordPress
The link you followed has expired

This error usually occurs when you are trying to upload a WordPress theme or a plugin to your website from the WordPress admin area.

WordPress hosting companies put a limit on file sizes you can upload and how long a script can run on a website. If the file you are uploading is large or taking longer to upload, then you’ll see the ‘Link you followed has expired’ error.

Depending on what’s causing the error you need to increase memory limit and file upload size in WordPress. For detailed instructions, see our article on how to fix the link you followed has expired error in WordPress.

[Back to top ↑]

46. WordPress Website Not Updating Right Away Issue
Website not updating

Is your WordPress website not showing the recent changes you made? The most common reason for this issue is caching.

Basically, your browser or WordPress caching plugin temporarily stores a version of each page viewed on your website. This allows them to quickly serve pages instead of requesting a fresh copy from your server.

If your website is not updating right away, then the most likely cause is that you are viewing a cached version. We have compiled a detailed guide that shows how to clear WordPress cache on all popular browsers and caching plugins.

[Back to top ↑]

47. How To Fix “Failed To Load Resource” Error In WordPress
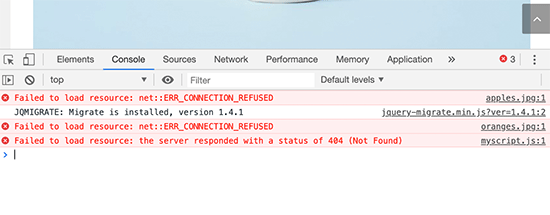
Failed to load resource error

WordPress includes several files when loading any page on your website. Behind the scenes, each page load contains several images, scripts, stylesheets, and more. These files are then loaded by user’s browser.

However, if these files are not found, then you’ll see the “Failed to resource” error in the browser’s Inspect tool.

The easiest solution is to make sure that the file actually exists on your website. However, if that doesn’t work then you need to check your WordPress URLs to make sure they are correct.

For detailed instructions, see our guide on how to fix “Failed to load resource” error in WordPress.

[Back to top ↑]

48. How to Fix “Missing a Temporary Folder” Error in WordPress

Missing a temporary folder

WordPress temporarily stores files in a temporary folder when you are uploading media, upgrading plugins, and themes. If it is unable to create or write in the temporary folder then your uploads fail with the error message ‘Missing a temporary folder’.

To fix this, you need to add the following code in your wp-config.php file.

define('WP_TEMP_DIR', dirname(__FILE__) . '/wp-content/temp/');

After that, you need to connect to your website using an FTP client and create a new folder named ‘temp’ inside the wp-content folder.

For more details, see our guide on how to fix missing a temporary folder error in WordPress.

[Back to top ↑]

49. How to Fix “Googlebot cannot access CSS and JS files” Error in WordPress

Blocked resource error in Google Search Console

Are you seeing crawl errors in Google search console with the message ‘Googlebot cannot access resources”? In order to understand a page, Googlebot needs to view it with the accompanying CSS and JavaScript files.

However, if Google cannot load these files then it would cause errors in your Google Search Console’s coverage report.

The most common cause of this error is users accidentally blocking these resources using .htaccess file or robots.txt. See both files in your website’s root folder to make sure you are not blocking static resources.

For detailed instructions, follow our article on how to fix Googlebot cannot access CSS and JS files error in WordPress.

[Back to top ↑]

50. Troubleshooting WordPress Errors on Your Own

We have covered some of the most common WordPress errors in this article. However, the real power of WordPress comes from thousands of plugins and themes that you can use on your site. Any plugin or theme installed on your site can cause errors.

It could become really hard for beginners to find out what is causing the problem on their site and how they can fix it.

We have compiled complete step by step guide on troubleshooting WordPress errors for beginners. It will help you learn how to diagnose WordPress issues and how to fix them like a pro.

[Back to top ↑]

That’s all, we hope that this guide helped you find and fix the WordPress error that you were encountering.

If you liked this article, then please subscribe to our YouTube Channel for WordPress video tutorials. You can also find us on Twitter and Facebook.

The post 50 Most Common WordPress Errors and How to Fix Them appeared first on WPBeginner.

How to Fix the 401 Error in WordPress (6 Solutions)

Are you seeing a 401 error on your WordPress site?

It is one of the most confusing WordPress errors that could lock you out of your WordPress website.

The 401 error has multiple names including Error 401 and 401 unauthorized error. These errors are sometimes accompanied by a message ‘Access is denied due to invalid credentials’ or ‘Authorization required’.

In this article, we will show you different solutions to easily fix the 401 error in WordPress. We will also discuss what causes it, and how to avoid it in the future.

Fixing the 401 error in WordPress

What Causes the 401 Error in WordPress?

The 401 error in WordPress is caused by improper authentication while communicating with the WordPress hosting server.

For example, if you have password-protected your WordPress admin folder, then not entering a password will show a 401 error page on WordPress login and admin pages.

401 Authorization failed error

However, in some cases you may see this error even without adding any special password protection to your website.

For example, WordPress security plugins can lock down your admin area during a brute force attack.

Another common cause of this error is security measures taken by hosting companies to protect your WordPress website. These security measures start showing this error when your WordPress login pages are accessed excessively.

Mostly, 401 error appears on WordPress admin and login pages. However, in some cases, it could appear on all pages of your website.

You’ll need to troubleshoot exactly what’s causing the error and then fix it.

That being said, let’s take a look at different solutions to quickly fix the 401 error in WordPress.

1. Temporarily Remove Password Protection on WordPress Admin

If you have password-protected your WordPress admin directory, then this could be the solution you need.

You may have forgotten your admin directory password, or your server configuration may have changed.

Head over to your WordPress hosting control panel and locate the Directory Privacy or Password Protected Directories icon.

Our screenshot is showing our Bluehost hosting account, but most hosting panels will have this option.

Directory privacy

Once you open it, you will see all the files and folders on your hosting account. Browse to your wp-admin directory and select it by clicking on the name.

The control panel will now display its password protection settings. Simply uncheck the box next to ‘Password protect this directory’ option and click on the Save button.

Disable password protection

After that, click on the Go Back button and scroll down to the bottom of the page. From here you need to delete the username you used to login to your password-protected directory.

You have successfully disabled password protection for your WordPress admin directory. You can now try to log into your WordPress site.

If everything works normally, then you can go ahead and enable password protection for your WordPress admin area by creating a new user and password.

2. Clear Firewall Cache to Solve 401 Error in WordPress

If you are using a cloud-based WordPress firewall service like Sucuri or Cloudflare, then 401 error may be triggered when the firewall fails to communicate with your website.

Purge Cache in Sucuri Firewall

If you are using Sucuri, then login to your Sucuri dashboard and visit the ‘Performance’ page. From here you need to switch to the ‘Clear Cache’ tab and then click on the ‘Clear cache’ button.

Sucuri clear cache

Purge Cache in Cloudflare

If you are using Cloudflare, then you need to login to Cloudflare dashboard and go to the ‘Caching’ section. From here you need to click on the ‘Purge everything’ button to clear all cache.

Cloudflare clear cache

After clearing your firewall cache, go ahead and clear your browser cache or WordPress cache as well. See our complete guide on how to clear cache in WordPress for more details.

3. Deactivate All WordPress Plugins

A misbehaving or poorly configured WordPress plugin can also trigger the 401 error. You will need to temporarily deactivate all WordPress plugins to find out if the error is caused by one of them.

You can simply deactivate WordPress plugins from inside the admin area by visiting the plugins page.

Deactivate all plugins

However, if you cannot access the WordPress admin area, then you’ll need to use FTP to deactivate all WordPress plugins.

Simply connect to your WordPress site using an FTP client. Once connected go to /wp-content/ folder and rename the plugins folder to plugins.deactivated.

Deactivate all WordPress plugins via FTP

Renaming the plugins folder will deactivate all WordPress plugins.

You can now visit your WordPress website’s admin area and try to log in. If everything works fine, then this means that one of the plugins was causing the issue.

Now you need to switch back to FTP client and once again rename the plugin’s folder to just plugins.

Next, return to the WordPress admin area and go to the plugins page. You can now activate each plugin one at a time until you start seeing the 401 error again.

This will help you find the plugin causing the issue. Once you found the plugin, you can contact plugin’s support or find an alternative plugin.

4. Switch to a Default WordPress Theme

Sometimes a function inside your WordPress theme may trigger the 401 error on your website. To find out, you need to temporarily switch to a default WordPress theme.

Default themes are made by the WordPress team and are shipped with the default WordPress install. These themes include Twenty Nineteen, Twenty Seventeen, Twenty Sixteen, and more.

First, go to Appearance » Themes page. Now if you have a default WordPress theme installed, then you can go ahead and activate it.

Activate default WordPress theme

If you don’t have a default theme installed on your site, then you need to install and activate it. See our guide on how to install a WordPress theme for instructions.

After switching the theme, you can go and test your website. If everything works OK now, then this means your theme was causing the 401 error.

You can report the issue to the theme developer, they may be able to help you fix it. If that doesn’t work, then you can permanently change your WordPress theme.

5. Reset WordPress Password

WordPress hosting companies can sometimes block access to wp-admin and login pages if someone is repeatedly trying to enter a password.

In that case, your access will be temporarily blocked, and you can try after a few minutes.

However, instead of guessing your password it would be best to recover forgotten WordPress password.

Lost password

WordPress will send you an email with a link to change your password. The problem with this method is that sometimes WordPress may fail to send emails.

If you don’t get the email, then don’t worry. You can also reset the WordPress password using phpMyAdmin.

6. Contact WordPress Hosting Provider

Many WordPress hosting companies automatically detect suspicious activity on a WordPress website and block access to prevent attacks.

These security precautions sometimes only affect the WordPress admin area, and your login page may become inaccessible for a while.

Too many login attempts

However, if it does not return back to a normal state, or you are seeing 401 error on all your site pages, then you need to contact your WordPress hosting provider immediately.

Their staff will be able to check the access and error logs to fix the issue for you.

For future prevention, you can follow our complete WordPress security guide to protect your WordPress admin area from unauthorized access.

We hope one of these solutions helped you fix the 401 error in WordPress. You may also want to see our complete WordPress troubleshooting guide with step by step instructions to fix common WordPress issues by yourself.

If you liked this article, then please subscribe to our YouTube Channel for WordPress video tutorials. You can also find us on Twitter and Facebook.

The post How to Fix the 401 Error in WordPress (6 Solutions) appeared first on WPBeginner.

How To Fix “The Link You Followed Has Expired” Error in WordPress

Are you seeing ‘The link you followed has expired’ error in WordPress?

This error does not give much clues about what’s actually wrong, which is why beginners find it a bit difficult to resolve.

In this article, we will show you how to easily fix ‘the link you have followed has expired’ error in WordPress. We will also talk about what causes this error and how to avoid it in the future.

Fixing 'The link you have followed has expired' error

What Causes The Link You Have Followed Has Expired Error?

This error usually occurs when you are trying to upload a WordPress theme or a plugin to your website from the WordPress admin area.

The link you followed has expired error displayed on a WordPress website

WordPress hosting companies have a setting which controls the size of files you can upload from inside the WordPress admin area. They also have a setting which stops scripts from running too long.

You can see the file size upload limit by visiting Media » Add New page.

WordPress file upload limit

These restrictions make your website safer and improves the overall performance of your WordPress hosting server.

If these settings are too low, or you are trying to upload a larger file, then you would see errors like memory exhausted error or maximum execution time exceeded error.

However, if you are trying to upload a WordPress theme or plugin, then you would see ‘The link you followed has expired’ error.

That being said, let’s take a look at how to easily fix this problem.

Fixing ‘The Link You Have Followed Has Expired’ Error

The quickest way to fix ‘The link you followed has expired’ error is by increasing the file upload size, PHP memory, and execution time limits for your website.

There are multiple ways to do that. We will show you all of them, and you can choose the one that looks easier or the one that works on your hosting environment.

Method 1. Increasing limits in functions.php file

This method is easier, but it has a downside. Your site will return back to the old limits if you change WordPress theme. If you are planning on changing your theme, then try one of the other two methods described below.

Simply add the following code to your WordPress theme’s functions.php file.

@ini_set( 'upload_max_size' , '120M' );
@ini_set( 'post_max_size', '120M');
@ini_set( 'max_execution_time', '300' );

You can increase the values in upload_max_size and post_max_size to be more than the file you are trying to upload.

You will also need to increase the max_execution_time to the time you think it would take for the file to upload. If you are unsure, then you can try doubling this value.

Method 2. Fix by increasing limits in .htaccess file

If you don’t want to add code to your theme’s functions file, then you can try the .htaccess method.

For this method, you will need to edit the .htaccess file by using an FTP client or the File Manager app in cPanel.

Simply connect to your website using FTP and edit the .htaccess file.

Editing the .htaccess file using FTP

Now, you need to add the following code at the bottom of your .htaccess file.

php_value upload_max_filesize 128M
php_value post_max_size 128M
php_value max_execution_time 300
php_value max_input_time 300

Don’t forget to save your changes and upload the file back to your website.

Method 3. Fix by increasing limits in php.ini file

The php.ini file is a configuration file used by PHP and WordPress. You’ need to connect to your WordPress site using an FTP client and look for php.ini file in your site’s root folder.

Most users are on a shared hosting account, so they may not find it in their site’s root folder. In that case, you need to create a blank php.ini file using a plain text editor like Notepad and upload it to your website.

Now edit the php.ini file and add the following code inside it.

upload_max_filesize = 128M
post_max_size = 128M
max_execution_time = 300

Don’t forget to save your changes and upload the file back to your website.

You can now visit your website and try to upload the theme or plugin file. The error would disappear, and you should be able to upload the file.

If it doesn’t, then try to increase file limits to match the file size you are trying to upload.

We hope this article helped you easily fix ‘The link you followed has expired’ error in WordPress. You may also want to bookmark our guide on how to fix the most common WordPress errors. It will help you save a lot of time by quickly finding a fix for WordPress issues.

If you liked this article, then please subscribe to our YouTube Channel for WordPress video tutorials. You can also find us on Twitter and Facebook.

The post How To Fix “The Link You Followed Has Expired” Error in WordPress appeared first on WPBeginner.

How to Fix Fatal Error: Maximum Execution Time Exceeded in WordPress

Are you seeing ‘Fatal error: Maximum execution time of 30 seconds exceeded’ on your screen when trying to update a WordPress plugin or theme?

Typically this problem occurs when a PHP code in WordPress takes a long time to run and reaches the maximum time limit set by your WordPress hosting server. The time limit is important because it helps prevent the abuse of server resources.

In this article, we will show you how to fix the fatal error: maximum execution time exceeded in WordPress.

Fix Fatal Error: Maximum Execution Time Exceeded in WordPress Easily

Why Maximum Execution Time Exceeded Error Occurs?

WordPress is coded mainly in the PHP programming language. To protect web servers from abuse, there is a time limit set for how long a PHP script can run.

The actual time limit varies across hosting companies, however most of the times the maximum execution time is set between 30 – 60 seconds because that’s usually enough for a good PHP script to run.

When a script reaches the maximum execution time limit, it results in maximum execution time exceeded error.

Maximum Execution Time of 30 Seconds Exceeded Error in WordPress

Fixing Maximum Execution Time Exceeded Error

Although Maximum Execution Time Exceeded error is named a ‘fatal error,’ it is one of the most common WordPress errors, and you can easily resolve this.

Depending on when and where the error is triggered, WordPress may show the following error message to your website visitors.

Technical difficulties

This is part of the fatal error protection feature added in WordPress 5.2. You may also receive an email that will tell you which plugin (if a plugin triggered the error) caused the issue.

Technical issue email sent to admin

The email will also include a special link, which will allow you to log in to WordPress with ‘Recovery mode’.

Recovery mode

Once there, you can simply deactivate or delete the plugin causing the error.

However, if you don’t want to deactivate a plugin, then you can fix the underlying cause that triggered the error.

To fix the error, you will need to manually edit your .htaccess file and add a simple line of code.

Simply connect to your website using an FTP client.

Your .htaccess file is located in the same folder as your /wp-content/ and /wp-admin/ folders. If you can’t find it, then look at our article on why you can’t find the .htaccess file and how to find it.

For example, if you are using FileZilla as your FTP client, then you can find it in the ‘Remote Site’ section on the right-hand column.

WordPress .htaccess File in Filezilla

Once you locate the .htaccess file, right-click and open ‘View/Edit’ option. This will open the file with in a text editor.

View/Edit .htaccess File in WordPress

Next, you need to add this line at the bottom of your .htaccess file:

php_value max_execution_time 300

If you are using Notepad as your text editor, here is how it may look.

Adding Code to .htaccess File WordPress

Once done, save your file.

This code simply sets the value for maximum execution time to 300 seconds (5 minutes). You can now visit your website to see if the error is resolved.

If you still get the error, then try increasing the value to 600.

If you found this method easier, then check out these most useful .htaccess tricks for WordPress.

Another method to fix the maximum execution time exceeded error in WordPress is by modifying your php.ini file.

The php.ini file is a configuration file that defines settings for PHP on your server. On many WordPress hosting platforms, you may not see it inside your WordPress folder.

In that case, you can create a new php.ini file inside your WordPress root folder. After that, edit the php.ini file and add the following line.

max_execution_time = 60

Don’t forget to save and upload your changes back to the server. You can now visit your website and to see if the error has gone.

In most cases, increasing maximum execution time using either of these two methods will resolve the error. However if it doesn’t, then you need to contact your WordPress hosting provider for assistance.

We hope this article helped you fix the fatal error: maximum execution time exceeded in WordPress. You may also want to see our guide on how to fix the error establishing a database connection in WordPress.

If you liked this article, then please subscribe to our YouTube Channel for WordPress video tutorials. You can also find us on Twitter and Facebook.

The post How to Fix Fatal Error: Maximum Execution Time Exceeded in WordPress appeared first on WPBeginner.

How to Fix “Are You Sure You Want to Do This” Error in WordPress

Every once in a while, you might encounter a WordPress error like error establishing database connection or memory exhausted error. These errors are somewhat helpful because they tell you exactly what the problem is.

On the other hand, there are unhelpful errors like “Are you sure you want to do this”.

There are too many factors that can lead to this error. This is why WordPress is unable to provide any information to point you in the right direction to fix it.

In this article, we will show you how to investigate and fix “Are you sure you want to do this” error in WordPress.

Error - Are you sure you want to do this

What causes the: “Are you sure you want to do this?” error?

‘Are you sure you want to do this?’ error usually appears when nonce verification fails and the most likely candidates to cause this error are plugins and themes not using this feature properly.

Nonces are unique keys which add a security layer to protect WordPress URLs, forms, and ajax calls from abuse. They ensure that a script is originating from your website and not an external source like a hacker trying to gain access to your website.

How to Fix “Are Your Sure You Want to Do This?” Error

Most commonly, this error is caused by a plugin or theme that is installed on your site. To investigate which plugin or theme is causing the issue, you will need to deactivate all your plugins.

Investigating Plugins

First, you need to deactivate all WordPress plugins and make sure that WordPress is unable to locate any installed plugin.

Simply connect to your WordPress hosting account using an FTP client.

Once connected, go to the wp-content folder and rename plugins folder to plugins.deactivated.

Rename plugins folder to deactivate all plugins

After that, you need to go back to the plugins page in your WordPress admin area. You will see a notification for all your plugins which are now deactivated.

Plugins deactivated in WordPress
Now that all your plugins are properly uninstalled and deactivated, you can try to reproduce the error.

If the error does not appear again, then this means that one of the plugins on your website was causing the issue. To figure out which plugin was causing the issue, go back to your FTP client and rename plugins.deactivated folder back to plugins.

After that, visit the plugins page in your WordPress admin area and activate each plugin one by one. You need to try to reproduce the error after activating each plugin until you find the plugin that is causing the issue.

Yes, this sounds like a time consuming task, but it is the easiest way for beginners to find a misbehaving WordPress plugin.

Investigating Themes

If the plugins were not causing this issue, then it might be your theme that is causing the ‘Are you sure you want to do this’ error.

You can investigate the theme causing this issue by repeating the same procedure you did for plugins. First, you need to connect to your website using an FTP client and download your currently active theme to your computer as a backup.

Once you have backed up your theme, you can safely delete it from your web server.

Now visit Appearance » Themes page in your WordPress admin area, and you will see a notification: ‘The active theme is broken. Reverting to the default theme’.

Theme deactivated

WordPress will now start using the default theme like Twenty Seventeen for your website.

If you are unable to reproduce the error after the default theme was activated, then this means that your theme was causing ‘Are you sure you want to do this?’ error.

Unable to Find The Source of The Error

Make sure that you have tested thoroughly to reproduce this error after deactivating and reactivating your plugins and themes.

If you find out that no plugin or theme on your site is causing the error, then there are a few extra steps you can take.

These steps will basically replace all core WordPress files with fresh copies downloaded from the source.

First, you need to make a complete WordPress backup for your site. This step is important as it will help you easily restore your website in case something goes wrong.

Next, connect to your website using an FTP client and download the ‘wp-config.php’ file to your computer. This file contains your WordPress database settings which you will need later.

Download wp-config.php file to your computer

After that you need to carefully delete all WordPress files from your server except wp-content folder and all its contents.

Delete all WordPress files except wp-content folder

After that, you need to download a fresh copy of WordPress to your computer. You can download it from WordPress.org website as a zip file.

Go ahead and extract the zip file on your computer and upload the files inside the ‘wordpress’ folder to your web server using FTP.

Once you have uploaded all the files, rename the wp-config-sample.php file to wp-config.php.

Now, you need to edit the new wp-config file to enter your WordPress database and table information. You can look at the old wp-config.php file that you downloaded earlier to enter all the information.

See our article on how to edit the wp-config.php file in WordPress for detailed instructions.

You need to add all sections except ‘Authentication Unique Keys and Salts’. Delete all the lines starting with define in this section.

/**#@+
 * Authentication Unique Keys and Salts.
 *
 * Change these to different unique phrases!
 * You can generate these using the {@link https://api.wordpress.org/secret-key/1.1/salt/ WordPress.org secret-key service}
 * You can change these at any point in time to invalidate all existing cookies. This will force all users to have to log in again.
 *
 * @since 2.6.0
 */
define('AUTH_KEY',         '`+7nTNb<AwtbLA$L-Q7amn;~|wH)ljXv2~TpbP?mLA+M`8H|n1`/Lz-GmAQL{4fB');
define('SECURE_AUTH_KEY',  '/gkAjhhJe`iwO)V-p=J<cN_ +6D{YhrM|=E#C7gD}]c2w~OJ} y}eY^,HWn&-j:a');
define('LOGGED_IN_KEY',    'PtDl2V|01oIXDpq^K,IH-8|rhT +T(ZMpuLq>UD?|W)b3gMfG~g[zr8N6}m%MZ|L');
define('NONCE_KEY',        ']Zj5i*hHlsUWKg2|>YF,X+xpd-_`I[nFmA6ZLw~;EW7g0.s5EaZCAJ=j]./5z^X~');
define('AUTH_SALT',        'e*l:hUsddFIxm1E7y-n#<a0|u- #+SsS@-#$vNz}EY4rY~-x|0_6=Q!TR=MMxUL?');
define('SECURE_AUTH_SALT', 'n]^c9nY>_}3,4)J]S sM6-MI3aB#Qk<Re^j#Lu_|x^*BhO.54aZQTtzJeCo5DWAg');
define('LOGGED_IN_SALT',   'Ba3kd1&J$~~`(|uJ0:v;w+DJ3xW}.B#R9J*r|.+V}*sTuK &8db-Mn+[boHW3{[/');
define('NONCE_SALT',       'nBv-U1qfkCZxS|13%hYdHz*s1^){.KSZWm1A^${`r!d5;EqrH:>1Xx`pwt6?**i}');

Now, save and upload your wp-config.php file back to your website.

That’s all, you have successfully refreshed your WordPress installation. You can now go ahead and try to reproduce the error on your website.

Basic Tips for Fixing WordPress Issues

We understand that fixing such issues can be frustrating at times. That’s why we have prepared a handy WordPress troubleshooting guide which shows you how to investigate and fix WordPress problems like a pro.

WordPress is used by millions of people. No matter what problem you come across, it is likely that thousands of other other people have faced it before you and have fixed it.

You can find a solution by simply entering the error in the Google search. For more helpful results, add wpbeginner.com at the end of your search term to find an easy step by step guide to fix it.

You can also bookmark our complete guide to common WordPress errors and how to fix them.

We hope this article helped you fix “Are You Sure You Want to Do This” Error in WordPress. You may also want to see our complete WordPress security guide to protect your website against hacking and malware.

If you liked this article, then please subscribe to our YouTube Channel for WordPress video tutorials. You can also find us on Twitter and Facebook.

The post How to Fix “Are You Sure You Want to Do This” Error in WordPress appeared first on WPBeginner.