7 Best WordPress CDN Services in 2024 (Compared)

We get thousands of global visitors every day on WPBeginner, so we know how important content delivery networks are for website performance.

A CDN is a service that can significantly speed up your website. It works by caching and serving your website content from the servers nearest to your user’s location, reducing your page load time.

While we use Cloudflare on our own site, we know there are lots of other great options for WordPress users. That’s why we have tested the top options on the market, paying attention to the location and number of data centers, pricing, and user-friendliness.

In this article, we will show you the best WordPress CDN providers to speed up your website.

Best WordPress CDN Services

Expert Tip: Are you looking for more ways to speed up your WordPress website? It might be time to call in the experts.

Our experts will do a full performance audit on your website and then optimize it for lightning-fast loading times. Check out our WPBeginner Site Speed Optimization Service today!

How Does a CDN Help WordPress Sites?

A CDN is a global network of servers that saves your website’s static content, such as HTML, CSS, and JavaScript files, in a cache. When a user visits your site, the CDN will serve the content from the server closest to the user, making it load faster.

With a CDN, your website will be much faster and less likely to crash when the traffic is high. This is because your site will rely on multiple CDN servers (called edge servers) instead of just a single origin server to deliver your content.

Here are some benefits of using a CDN:

  • You get a faster page load speed. CDNs can decrease latency, or the time it takes for a server to deliver content to a browser.
  • Your site will also be more SEO-friendly. This is because Google prioritizes web pages with good user experience, such as how fast your pages load.
  • You get better uptime. CDNs use load balancing, so when one of the edge servers fails, the others can cover for it and keep the site running.
  • You can make your WordPress website more secure against distributed denial of service (DDoS) attacks. The CDN will absorb and route the attack’s traffic to the network of servers to avoid overwhelming the origin server.
  • You can reduce your WordPress hosting’s bandwidth usage, meaning you won’t need to upgrade to a more expensive hosting plan.

For these reasons, many WordPress website owners use CDNs to make their sites faster and more secure. So, let’s take a look at some of the top WordPress CDN services and how they stack up against each other.

Why Trust WPBeginner?

At WPBeginner, we have 16+ years of experience in running WordPress websites, optimizing them for speed, and reaching readers all over the world. We have also thoroughly tested each of the CDN services mentioned in this article.

For more details, just see our editorial process.

1. Bunny.net

Bunny.net CDN service

Out of all the CDN services we have reviewed, Bunny.net is the best WordPress CDN on the market. Their WordPress plugin is easy and fast to set up, so you can start using the CDN right away.

Our team has been using Bunny CDN on OptinMonster because their pricing is very affordable for small businesses. If you are based in North America, then the pricing is just $0.01 per GB.

Not sure how much the total will be? Bunny.net has a handy calculator you can use.

Bunny.net's monthly bill calculator

They also have data centers worldwide, so you can reach users anywhere they are based. Simply select one of its 123 PoP (point of presence) locations across North America, South America, Asia, Africa, the Middle East, and Oceania.

Bunny.net knows that beginner WordPress users may be new to CDN services. That’s why they provide 24/7 customer support through live chat to help their customers, and they typically respond within an average of 5 minutes.

Pros of Bunny.net:

  • User-friendly control panel to manage your CDN features, like activating your free SSL certificate in one click or clearing your cache to keep your content updated.
  • Wide network coverage with its 123 and growing PoP locations.
  • Video CDN to load videos faster.
  • Up to 80% image optimization to reduce the size of your image files.
  • 99.99% global Service Level Agreement, which means if your website is down, you will be eligible for credits to offset any loss caused by the outage.
  • Real-time analytics to help you pinpoint performance issues on your website.

Cons of Bunny.net:

  • There is no free tier, though there is a 14-day free trial.

Why we recommend Bunny.net: This high-performance CDN service is one of the best options for beginner WordPress users. Despite their affordability, Bunny.net has everything you need to make your website faster and offer a better user experience.

2. Cloudflare

Cloudflare CDN's landing page

Cloudflare is known as the best free CDN for small business WordPress websites. With a global network of 310 cities and 120 countries, you can rest assured that your site will always be online.

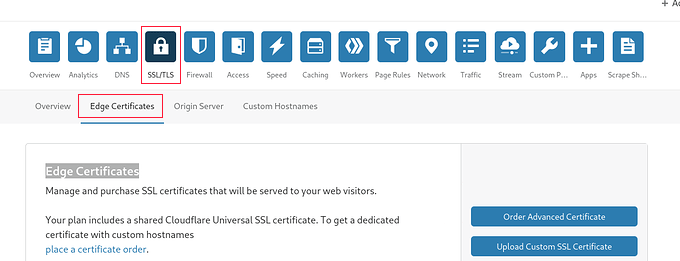
Setting up Cloudflare CDN in WordPress is easy. All you need to do is sign up for a plan, add your website to Cloudflare, and replace your domain’s nameservers with Cloudflare’s.

Cloudflare’s free plan also includes unmetered DDoS protection. This means Cloudflare will detect and mitigate DDoS attacks without limiting the traffic volume that can be protected.

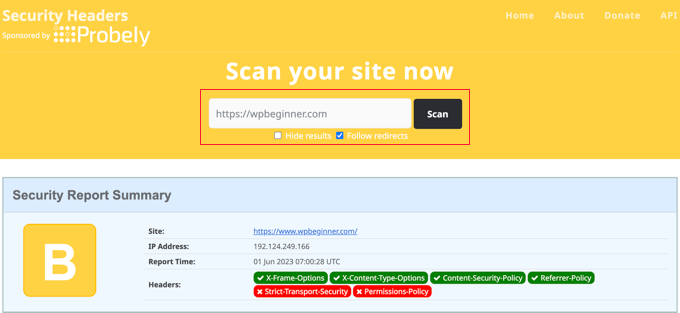
We actually use Cloudflare for their paid security and CDN services on WPBeginner, and we have been very happy with their fast performance, huge CDN network, and excellent uptime.

For more details, you can see why we switched from Sucuri to Cloudflare.

Pros of Cloudflare:

  • Cloudflare’s global network coverage is vast.
  • The CDN has a built-in web application firewall to protect users against not just DDoS attacks but also other threats, like email spammers.
  • Simple bot mitigation to differentiate legitimate bots, like search engine crawlers, from malicious bots like DDoS attackers or phishing campaigns.
  • Special tools to handle dynamic content caching and delivery to make your site faster.

Cons of Cloudflare:

  • There is no uptime guarantee for Free and Pro plan users.
  • Direct support is only available for paid plan users.

Why we recommend Cloudflare: We use a paid Cloudflare plan on WPBeginner for our security and CDN needs. Overall, we appreciate how fast the Cloudflare CDN is, along with its advanced firewall rules to keep our website safe.

3. Sucuri

Sucuri's CDN landing page

Sucuri is one of the most popular website security companies out there. Besides offering powerful website security features, they provide an easy-to-use CDN that’s optimized for WordPress.

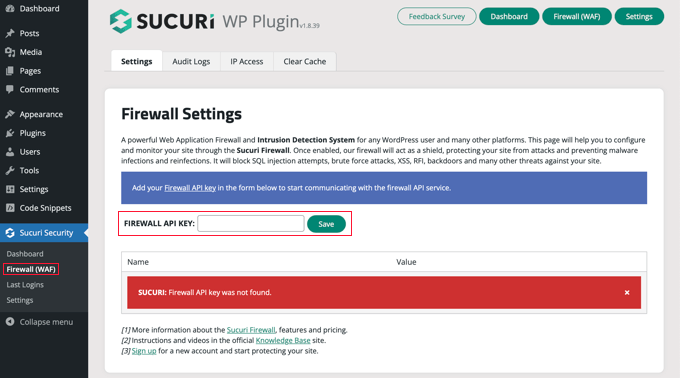
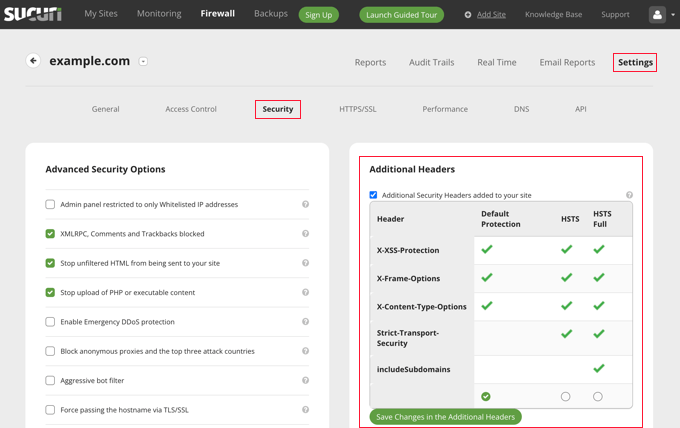
To use Sucuri’s CDN, you need to sign up for one of their website security platform plans, which includes a web application firewall (WAF).

You can then add your site to the WAF, activate the firewall by changing your site’s DNS settings, and choose a CDN caching option. Besides speeding up your site and preventing DDoS attacks, the WAF also blocks spam and malware.

Sucuri’s data centers are vast, with locations in North America, Europe, and Asia. They also have CDN edge servers operating on Amazon Web Services in Australia and Brazil.

Pros of Sucuri:

  • According to Sucuri, they can improve website performance by 60%.
  • Multiple caching options, so you can choose the one that suits your site’s needs best. These include minimal caching, which is great if your site has lots of dynamic content (e.g., personalized text).
  • Automatic SSL certificate installation for your firewall server to protect your data as it is being transmitted.
  • Automatic malware removal, meaning Sucuri will delete any malware that it detects right away.
  • For small business owners, Sucuri offers a basic firewall with CDN plans that start at $9.99 per month.

Cons of Sucuri:

  • You cannot use the CDN alone as you have to purchase it with Sucuri’s main security features.

Why we recommend Sucuri: Sucuri is a great option if you are looking for a combination of WordPress security features and a CDN. It’s also pretty affordable, making it an excellent choice for small businesses.

4. KeyCDN

KeyCDN's homepage

KeyCDN is another good option for a WordPress CDN service. It has a user-friendly CDN Enabler plugin that can automatically rewrite your website URLs to serve them through the CDN.

With the CDN Enabler plugin, you get more control over how your CDN works. For example, you can select what type of files need to be served using the CDN to focus on only the essential elements of your website.

KeyCDN's CDN Enabler plugin

You can also instantly purge your CDN cache right from your admin area. As a result, you can keep your website content up-to-date.

KeyCDN’s network of servers is spread across the Americas, Africa, Europe, Asia Pacific, and Oceanic regions. This way, your site always performs fast no matter where your audience is.

Pros of KeyCDN:

  • High-performance CDN with support for HTTP/2, GZIP compression, IPv6 support, and image processing, all of which are important features that contribute to faster load times.
  • Instant CDN purge right from the CDN Enabler plugin to easily update your website content.
  • Pay-as-you-go pricing with a low minimum charge of $4 per month.
  • Free 14-day trial with no credit card required.

Cons of KeyCDN:

  • Despite the low minimum charge, you must purchase a minimum of $49 worth of credit to use KeyCDN.

Why we recommend KeyCDN: This CDN service’s wide network coverage, easy-to-use plugin, and affordable pricing make it worth recommending for small business owners who are just starting out. Just remember to have at least $49 worth of credit in your account to use it.

5. RocketCDN

Rocket CDN's homepage

RocketCDN is a WordPress CDN service offered by the same team as WP Rocket, one of the most popular WordPress caching plugins. That plugin has powered over 3 million websites, so you know you are in good hands with RocketCDN.

RocketCDN is powered by Bunny.net, which means they also have a global network of over 120 edge locations. However, what makes them different is their respective pricing models.

Instead of a pay-as-you-go scheme, RocketCDN comes in a single plan costing $8.99 per month. This already includes unlimited bandwidth for all regions, so you won’t have to worry about hitting any data caps or slow speeds due to limited resources.

When you activate RocketCDN, they will automatically adjust the settings of your website to ensure that it runs smoothly and quickly. These settings include Gzip compression and serving assets over HTTP/2.

Pros of RocketCDN:

  • Monthly pricing with unlimited bandwidth, which can be a good option if you don’t want the hassle of calculating your own resource usage.
  • Easy WordPress setup, as you only need to install their plugin and activate their API key.
  • Everything is enabled for you once the CDN is active, from Gzip compression, and HTTP/2 support, to serving all images using CDN.
  • Automatic canonical header setup so that search engines know which version of your website to show even though some of your assets are served using a CDN address.

Cons of RocketCDN:

  • Compared to other CDN solutions on the list, RocketCDN’s features may seem too basic.
  • No free trial.

Why we chose RocketCDN: Many WPBeginner users use WP Rocket for their websites, and RocketCDN is one of the best solutions to complement this caching plugin.

6. Imperva

Imperva CDN

Imperva is a cyber security company that offers many website and application protection solutions, including a CDN. They have 62+ data centers with 10 TB per second capacity, which is very high.

If your site receives 1 million visitors per day, and each visitor downloads 1 MB of data, Imperva could handle all that traffic without breaking a sweat.

Additionally, Imperva has self-service customization. This means you can decide how content is cached or traffic is routed based on factors like device type and user location. This feature can help optimize your website’s performance and reduce costs.

Pros of Imperva:

  • Large bandwidth capacity to handle high traffic volume, making it perfect for online businesses.
  • Self-service customization feature to configure how the CDN behaves to optimize performance.
  • 99.999% uptime guarantee with a 3-second mitigation SLA, which means downtime is extremely low, and Imperva promises to fix any issue within 3 seconds.

Cons of Imperva:

  • The self-service customization feature may be too advanced for the average WordPress user.
  • There is no fixed pricing, and you have to contact their team for custom pricing.

Why we chose Imperva: When reviewing Imperva, we were thoroughly impressed by their high-performance CDN and advanced features that not all CDNs provide. We recommend Imperva if you have a growing, multinational business.

7. Amazon CloudFront

Amazon CloudFront's homepage

Last but not least, we have Amazon CloudFront. It’s a powerful WordPress CDN service for people who use Amazon services like Amazon SES and Amazon Web Services (AWS).

That said, despite its name, this WordPress CDN solution works with many other hosting providers, not just AWS.

When you use CloudFront, you will also get the AWS Shield Standard automatically enabled. This technology is like a more comprehensive version of DDoS protection, securing your website against attacks at all network layers.

Amazon CloudFront has 600+ points of presence in 90 cities across 47 countries, so its CDN service has vast coverage. It also offers a free tier that allows you to send 1 TB of data from CloudFront each month at no extra cost.

Pros of Amazon CloudFront:

  • Seamless integration with AWS services, so it’s a great option if you already use them.
  • A global network of servers, with hundreds of points of presence worldwide.
  • Robust security features at the edge servers to protect your content from DDoS attacks, malware, phishing, and other threats at all levels.
  • Generous free tier plan, as 1 TB of data transfer can serve approximately 1 billion web pages.

Cons of Amazon CloudFront:

  • Not the most beginner-friendly setup.

Why we chose Amazon CloudFront: If you run WordPress on AWS, then you already have a great WordPress CDN service at your disposal. The vast network and generous free-tier plan also make CloudFront worth recommending.

Bonus: Use a Hosting Provider With Free CDN

These days, many WordPress hosting providers come with their own custom CDN solutions. This way, you won’t have to pay extra to make your website fast and secure.

Hostinger, for instance, has a built-in CDN available for Business plan users or above. It includes features like WebP image compression, CSS and JavaScript minification, and a handy under-attack mode to fight rapid DDoS attacks.

Hostinger's built-in CDN

SiteGround also has an excellent CDN feature designed specifically for users who receive traffic from multiple countries. The team behind it has reported that loading speeds have increased by 20% on average.

While a free plan is available, they also have a premium plan with unlimited monthly bandwidth.

On the other hand, some hosting providers like Bluehost and WP Engine have integrated third-party CDN services like Cloudflare.

Which Is the Best WordPress CDN Provider for Your Site?

After carefully evaluating all these top WordPress CDN services, we believe that Bunny.net is the best WordPress CDN on the market. It has a wide global network coverage and offers a great set of features at a reasonable price.

For people on a tight budget, Cloudflare’s free CDN plan can do the job. It comes integrated with popular web hosting providers like Bluehost and WP Engine. Plus, you get unmetered DDoS protection.

If you want a CDN focusing on security, then Sucuri is the one for you. Besides multiple caching options, you can get a powerful WAF with automatic malware removal and SSL installation.

WordPress CDN Services: Frequently Asked Questions

Now that we’ve covered the best WordPress CDN services, let’s cover some frequently asked questions about using a CDN.

Which CDN does WordPress use?

The WordPress software does not use any CDN as it is only a content management system that requires a hosting service to run. Instead, the user has the freedom to choose any CDN service they prefer.

How do I choose a CDN for my WordPress website?

To choose a CDN for your WordPress website, you can consider your website needs, your own budget, and the platform’s ease of use.

If you need a beginner-friendly CDN with affordable pricing, then look no further than Bunny.net. On the other hand, if your website handles a lot of sensitive data, then you may want a CDN with a good set of security features, like Sucuri.

Can I use Cloudflare CDN with WordPress, and how does it compare to other CDN services?

Yes, you can use Cloudflare CDN with WordPress. In fact, many hosting providers like Bluehost and WP Engine have Cloudflare integrated into their dashboards, so you can immediately use it.

While Cloudflare CDN is free, it has great unmetered DDoS protection. However, there is no direct support.

Does CDN increase website speed?

Yes, a CDN can increase your website speed and make it faster. It will cache your website content into multiple servers spread worldwide. When users visit your site, the server closest to them will deliver the content.

That said, many factors affect website speed, so we recommend implementing other best speed optimization practices as well. For more information, check out our ultimate guide to boost WordPress speed and performance.

Ultimate Guides to Boost Your WordPress Site Performance

We hope this article helped you find the best WordPress CDN solution for your website. You may also want to see our ultimate WordPress performance guide or our expert pick of the best website speed test tools.

If you liked this article, then please subscribe to our YouTube Channel for WordPress video tutorials. You can also find us on Twitter and Facebook.

The post 7 Best WordPress CDN Services in 2024 (Compared) first appeared on WPBeginner.

How to Add Cloudflare Turnstile CAPTCHA in WordPress

Do you want to add Cloudflare Turnstile CAPTCHA in WordPress?

CAPTCHA and reCAPTCHA can stop spambots, but they’re also unpopular with visitors. By using a non-intrusive technology like Turnstile, you can protect your website from spambots and automated scripts without annoying your visitors.

In this article, we will show you how to add Cloudflare Turnstile to your WordPress website.

How to add Cloudflare Turnstile CAPTCHA in WordPress

Why Add Cloudflare Turnstile CAPTCHA in WordPress?

Spam is a big problem for all websites including WordPress. Spambots can use non-secure forms to send you spammy links, which will make it more difficult for you to do lead generation.

They can also try to break into your site’s login form by using brute force attacks or flooding your site with spam comments that’ll damage the visitor experience and your WordPress SEO.

If you run an online store, then automated scripts may even place fraudulent orders.

Many website owners use CAPTCHA and reCAPTCHA to block scripts and bots. However, a lot of people complain that these technologies deliver a poor user experience, and some even worry about CAPTCHAs stealing their data.

With that being said, Cloudflare has introduced Turnstile CAPTCHA. This alternative technology uses a selection of non-intrusive challenges that often run invisibly in the browser. This allows you to protect your website without asking visitors to complete complex puzzles.

To help keep visitor information private, Cloudflare uses Apple’s Private Access Tokens to test whether the visitor is a real person without collecting extra data.

If you’re using form builders or WooCommerce, then Turnstile also integrates with these third-party plugins. This allows you to add invisible CAPTCHAs across many different areas of your WordPress website.

With that in mind, let’s see how you can add Cloudflare Turnstile CAPTCHA in WordPress. Simply use the quick links below to jump between the different steps.

Install a WordPress Cloudflare CAPTCHA Plugin

The easiest way to add Cloudflare’s CAPTCHA to WordPress is by using Simple Cloudflare Turnstile. This free plugin allows you to connect your website to the Turnstile service, and then check that it’s responding to your requests correctly.

First, you’ll need to install and activate the plugin. If you need help, then please see our guide on how to install a WordPress plugin.

Upon activation, go to Settings » Cloudflare Turnstile.

Adding a site key and secret key to a WordPress website

The plugin will now ask you to provide a site key and site secret.

You can get these for free by clicking on the link next to ‘You can get your site key and secret from here.’

Get a Cloudflare Turnstile Site Secret and Site Key

The link will take you to the Cloudflare login page where you can register your domain and create a site key and site secret. This is free, but you will need to create a Cloudflare account using your email address, if you haven’t already.

Once you’re logged into the Cloudflare dashboard, find ‘Turnstile’ in the left-hand menu and give it a click.

The Cloudflare dashboard

This will take you to a screen with some basic information about Cloudflare Turnstile.

If you’re happy to go ahead, then click on the ‘Add site’ button.

Adding a site to the Cloudflare dashboard

On this screen, start by typing in a ‘Site Name.’

This is just for your reference so you can use anything you want.

Adding a WordPress website to the Cloudflare dashboard

Next, type your website’s domain name into the ‘Domain’ field.

The next step is choosing which CAPTCHA widget you want to create. The first choice is ‘Managed,’ which is the method recommended by Cloudflare. This is where Cloudflare analyzes the browser’s request and then decides what kind of challenge it should run.

While this is happening, the visitor will see a loading animation.

Adding a Cloudflare Turnstile CAPTCHA to WordPress

Wherever possible, Cloudflare will try to run a non-interactive challenge in the background, so the visitor doesn’t have to do anything.

In this case, the user will simply see a ‘Success’ message when their browser passes the test.

Creating a managed Cloudflare Turnstile CAPTCHA

Sometimes, Cloudflare may decide that it’s safer to show an interactive challenge instead. However, the visitor will simply need to check a box rather than complete a puzzle, so it’s still easier than the traditional puzzle-based CAPTCHAs.

Unless you have a specific reason not to, it’s smart to use managed CAPTCHAs as this gives you a good level of security with minimum impact on the visitor experience.

How to create a managed CAPTCHA for WordPress

Don’t want to use interactive challenges on your WordPress website? Then you can choose ‘Non-interactive’ or ‘Invisible’ instead.

Non-interactive challenges run in the browser so the visitor doesn’t have to take any action. Just like the managed CAPTCHA, visitors will see the loading animation and a ‘Success’ message when the challenge is complete.

If you choose ‘Invisible’ instead, then the visitor won’t see the animation or success message. This setting allows you to completely hide the CAPTCHA from your visitors, which can avoid confusion and won’t add any clutter to your WordPress theme.

After making your decision, click on the ‘Create’ button.

As soon as you’ve done that, Cloudflare will show your site key and secret key.

Creating a site key and secret key for your WordPress website

You can now add this information to the plugin’s settings on your website.

Add Cloudflare Turnstile CAPTCHA to Your WordPress Website

In your WordPress dashboard, head back to Settings » Cloudflare Turnstile. You can now go ahead and add the ‘Site Key’ and ‘Site Secret’ to your WordPress dashboard.

Adding the Cloudflare secret key and site secret to WordPress

After that, you may want to customize how the CAPTCHA looks on your website, and how it acts. To start, you can open the ‘Theme’ dropdown and choose from light, dark, or auto.

The following image shows an example of how the ‘Dark’ theme looks in the WordPress comment section.

A Cloudflare Turnstile CAPTCHA with a dark theme

By default, Cloudflare Turnstile shows a ‘Please verify that you are human’ message to visitors. You may want to change this. For example, you might briefly explain why the CAPTCHA is so important, or that it will only take a few seconds to complete.

To add your own wording, simply type into the ‘Custom Error Message’ field.

Creating a custom error message for a WordPress CAPTCHA

After that, you can select the forms where you’ll use the Cloudflare Turnstile CAPTCHA.

The options you see may vary depending on the plugins you’ve installed, but by default, you can use Turnstile with all the built-in WordPress forms. This includes the login page, user registration form, and password reset page.

Enabling Cloudflare Turnstile CAPTCHA for the WordPress forms

When you’re happy with the information you’ve entered, scroll to the bottom of the screen and click on ‘Save Changes.’

Now, if you visit your website you’ll see the Turnstile CAPTCHA in action.

Bonus: Add Turnstile CAPTCHA to Your WordPress Forms

WordPress comes with different built-in forms, but you’ll often want to create custom forms. For example, you might replace the default forms with professionally-designed alternatives that better suit your website.

You can also add forms that are missing from the core WordPress software, such as contact forms and online order forms.

Simple Cloudflare Turnstile integrates with the best contact form plugins for WordPress including WPForms and Formidable Forms. This allows you to add the same advanced CAPTCHAs to all your forms, no matter how you created them.

How to add a CAPTCHA to a WordPress contact form

To add a CAPTCHA to any WPForms or Formidable Forms page, simply go to Settings » Cloudflare Turnstile in your WordPress dashboard.

At the bottom of the page, you should see a section for either WPForms or Formidable Forms, depending on which plugin you’re using.

Integrating Cloudflare with WPForms and Formidable Forms

Simply click on either of these sections to expand.

To add the CAPTCHA to all your forms, just check the ‘Enable on all…’ box.

Enabling CAPTCHA for WPForms

If you’re using a ‘Managed’ or ‘Non-interactive’ CAPTCHA, then you can change whether the loading and success animation appears before or after the form’s ‘Submit’ button.

In the following image, we’re using the ‘After button’ option.

Changing where the CAPTCHA appears in WPForms

To make this change, simply open the ‘Widget Location’ dropdown.

Then, choose either ‘Before Button’ or ‘After Button.’

Changing the location of the CAPTCHA widget

Some forms may not need a CAPTCHA. For example, you might disable the CAPTCHA for forms that aren’t getting many conversions, to see whether this improves your conversion rates. For more information, see our guide on WordPress conversion tracking made simple.

To remove the CAPTCHA, you’ll need to type the form’s ID into the ‘Disable Form IDs’ field.

Removing the CAPTCHA from WPForms

If you’re using WPForms, then you can get this ID by going to WPForms » All Forms.

The ‘Shortcode’ column shows each form’s ID. For example, in the following image the form ID is 62.

How to disable CAPTCHAs on your WordPress website

If you’re a Formidable Forms user, then head over to Formidable » Forms instead.

On this screen, find the form that you want to exclude and make a note of the number in the ‘ID’ column.

Forms, created using the Formidable Forms WordPress plugin

You can now add these IDs to the ‘Disable Form IDs’ field.

To remove the CAPTCHA from multiple forms, simply separate each ID with a comma.

Disabling the Cloudflare CAPTCHA for multiple forms

When you’re happy with how you’ve set up the integration, don’t forget to click on ‘Save Changes’ to store your settings.

Now if you visit any form created using Formidable Forms or WPForms, you’ll see the Cloudflare Turnstile CAPTCHA in action.

Bonus: Add Cloudflare Turnstile CAPTCHA to WooCommerce

Scripts and bots aren’t just bad news for WordPress blogs and websites. If you run an online store, then spambots and automated scripts might try to register with your store and place fake orders.

Every transaction comes with processing feeds, so fake orders can cost you a lot of money and make it difficult to grow your business.

The good news is that Cloudflare Turnstile also integrates with WooCommerce. This allows you to protect all your eCommerce pages including the WooCommerce login, signup, and checkout pages.

The Cloudflare Turnstile CAPTCHA on the WooCommerce checkout page

To add Cloudflare Turnstile to your WooCommerce pages, simply go to Settings » Cloudflare Turnstile.

Then, scroll to the ‘WooCommerce Forms’ section.

Adding CAPTCHAs to your WooCommerce forms

If it isn’t already expanded, then click on this section.

You’ll now see all the WooCommerce pages where you can add a Cloudflare CAPTCHA. Simply check the box next to each page that you want to protect.

Protecting your WooCommerce store with a CAPTCHA

After that, don’t forget to click on ‘Save Changes’ to store your settings. Now, if you visit any of your WooCommerce pages, you’ll see the Cloudflare Turnstile CAPTCHA.

We hope this article helped you learn how to add Cloudflare Turnstile CAPTCHA in WordPress. You can also go through our ultimate WordPress security guide and the best WordPress membership plugins.

If you liked this article, then please subscribe to our YouTube Channel for WordPress video tutorials. You can also find us on Twitter and Facebook.

The post How to Add Cloudflare Turnstile CAPTCHA in WordPress first appeared on WPBeginner.

How to Fix Error 521 with WordPress and Cloudflare

Are you looking for a way to fix ‘Error 521’ with WordPress and Cloudflare? 

If you’re seeing this error message, then so is everyone who tries to visit your website. This is bad news for the visitor experience and your conversion rates. It may even cost you your search engine rankings.

In this article, we will show you how to fix the 521 error with WordPress and Cloudflare.

How to fix error 521 with WordPress and Cloudflare

What Causes Error 521 with WordPress and Cloudflare?

If you see a 521 error when trying to visit your WordPress website, this means your browser is connecting to Cloudflare successfully, but Cloudflare isn’t connecting to the server that hosts your website.

Often this is because your server is offline.

There’s also a chance your WordPress hosting server may be online, but it’s blocking Cloudflare. Typically this WordPress error happens when a server mistakes Cloudflare for a security threat. This is usually due to a problem with how your server or Cloudflare is set up.

But don’t worry, we have five troubleshooting steps that you can follow to fix this error quickly.

If you’re unsure what’s causing your 521 error, then we recommend starting with step 1 and working your way through the each step. If you prefer to jump straight to a particular step, then you can use the links below.

  1. Contact Your Hosting Provider
  2. Check Whether Your Server Is Offline
  3. Whitelist All of Cloudflare’s IP Addresses 
  4. Ask Your Hosting Provider to Enable Port 443 
  5. Create and Upload a Cloudflare Origin Certificate 

1. Contact Your Hosting Provider

When you get a 521 error, there are steps you can take to fix the problem yourself. However some of them can be time-consuming and technical.

With that in mind, the easiest way to fix a 521 error is by contacting your WordPress hosting provider. A good web host should be able to tell you why you’re getting this error. They may even be able to fix the problem for you.

If you’re unsure how to contact support, then head over to your hosting provider’s website. You can then look for any Contact Us or Support pages. 

The Bluehost support settings

To help you fix this problem as quickly as possible, we recommend choosing live support options where available. For example, live chat or business phone support is almost always faster than ticketing portals or email. 

If you’re unable to get support from your hosting provider right away, then you can try the following steps.

2. Check Whether Your Server Is Offline

When you get a 521 error, it’s always worth checking whether your server is online. 

If it’s still online, then you can try other troubleshooting steps.

To do this, you’ll need to know your server’s IP address. This is a string of numbers that identifies a piece of hardware on a network.

You can use this IP address to ‘ping’ the physical server that hosts your WordPress website. If the server responds, you’ll know that it’s online. 

If it doesn’t respond, then your server is offline and this is what’s causing your 521 error. 

To get your IP address, you’ll need to log into your website’s control panel. This is usually supplied by your hosting provider, and is typically either cPanel or a custom panel.

Once you’re logged in you can look for any settings labeled ‘IP address.’ 

If you’re a Bluehost customer, then you just need to log into your cPanel dashboard. You can then click on Advanced in the left sidebar.

The Bluehost cPanel dashboard

On this screen, find the General Information section.

Bluehost will show your server’s IP address under ‘Shared IP address.’

Getting your IP address in cPanel

If you’re struggling to find this IP address, it’s always worth checking your hosting provider’s website or online documentation. Many web hosts have detailed tutorials showing you how to find your IP address.

Once you have this information, head over to the HTTP Header Checker tool. You can use this tool to ‘ping’ your website’s server and see whether it responds. 

To do this test, simply paste your IP address into the ‘URL’ field. 

Then add ‘http://’ in front of your IP address. This turns this string of numbers into a web address. For example:

56.18.270.000

Becomes:

http://56.18.270.000

The HTTP Header Checker tool

Next, click on the Check button. HTTP Header Checker will now try to talk to your server.

If your server is offline, then you’ll see a message such as ‘Failed to connect’ or ‘Host Not Found.’ 

This explains why you’re getting the 521 error. In this case, you’d need to contact your hosting provider to fix it.

If your server is online, HTTP Header Checker will show a ‘2XX’ status code. You may also see a ‘3XX’ status code if your server is online but is temporarily redirecting to a new location.

If your server is online, then an outage or server downtime isn’t causing your 521 error. In that case, you can continue following this guide to fix the error.

3. Whitelist All of Cloudflare’s IP Addresses 

Your server may be online, but blocking Cloudflare’s IP addresses. This can cause the 521 error when you try to visit your WordPress website.

The solution is to whitelist all the IP addresses that Cloudflare uses. By whitelisting an IP address, you’re telling your server to allow all requests coming from that address.

You can add whitelisted IPs to your website’s .htaccess file. This is an important configuration file that tells the server how it should act.

To edit your .htaccess file, you’ll need an FTP client such as FileZilla.

If you haven’t used an FTP client before, you may want to see our guide on how to use FTP. This post shows you how to connect to your server using an FTP client. 

Once you’re connected to your server, you’ll need to open your website’s root folder. To reach it, simply open the folder that shows your website’s address. 

Next, open the ‘public_html’ folder. 

The FileZilla FTP client

You should now see your website’s .htaccess file.

Some FTP clients hide sensitive files by default. If you don’t see an .htaccess file, then you’ll need to enable the ‘show hidden files’ option in your FTP client. 

If you’re using FileZilla, just select Server from the toolbar. Then click on ‘Force showing hidden files.’

Showing hidden files in FileZilla

If you’re still struggling to find .htaccess, then please see our guide on how to find the .htaccess file in WordPress.

When you’re ready to edit this file, simply Control-click on the .htaccess file.

Then, select View/Edit. 

Editing the .htaccess file

This will open .htaccess in your computer’s default text editing program. 

Inside this file, find the ‘​​# BEGIN’ line. You’ll need to add all the Cloudflare IP addresses above this line.

Fixing error 521 with WordPress and Cloudflare

To start, type the following on a new line:

order deny,allow

How to fix error 521 using .htaccess

In a new tab, open the list of Cloudflare IP ranges

To whitelist an IP address, you’ll need to type ‘allow from’ and then either copy/paste or type the IP address. This means that:

103.21.244.0/22

Becomes:

allow from 103.21.244.0/22

You’ll also need to add each IP address on a new line.

Whitelisting the Cloudflare IP address

After adding all the Cloudflare IP addresses, save your changes. You can now close the .htaccess file.

Now you can go ahead and visit your site, to see whether this has fixed ‘Error 521.’ 

4. Ask Your Hosting Provider to Enable Port 443 

Cloudflare has a few different encryption modes.

Did you switch to Full or Full (Strict) mode, right before getting the 521 error? This may have caused the problem. 

When Cloudflare is in Full or Full (Strict) mode, it needs access to port 443. However, some servers prevent Cloudflare from accessing this port, which will trigger the ‘Error 521′ error.

The solution is to enable port 443 on your server. 

This process will vary depending on your hosting provider and your server’s settings. With that in mind, we recommend contacting your hosting provider and asking them to enable port 443 for you. 

5. Create and Upload a Cloudflare Origin Certificate 

Even with port 443 enabled, you may still get the 521 error when using Cloudflare’s Full or Full (Strict) mode. 

This is because some servers only allow connections on port 443 if you have a valid Cloudflare Origin Certificate. This certificate encrypts the traffic between Cloudflare and your web server.

If you don’t provide an Origin Certificate, you may get an ‘Error 521.’ 

The good news is that Cloudflare can walk you through the process of creating this certificate, step by step.

To get started, log into your Cloudflare account. Then go to SSL/TLS » Origin Server.

How to create a Cloudflare Origin Certificate

Next click on the Create Certificate button. 

Cloudflare will now ask for a private key and a Certificate Signing Request (CSR). 

Do you already have a private key and CSR? Then simply select the ‘Use my private key and CSR’ checkbox.

Creating a private key

You can now type your CSR into the ‘Certificate Signing Request (CSR)’ box. 

If you don’t have a CSR and key, don’t panic! Cloudflare can create these two things for you. 

To get started, select ‘Generate private key and CSR with Cloudflare.’

Fixing error 521 with WordPress and Cloudflare

You can now choose whether to create an RSA key or an ECC key. 

Most security experts agree that ECC and RSA are equally secure. However, ECC has a shorter key length. This means that ECC keys are faster. 

For this reason, we recommend you create an ECC key.

Once you’ve made your decision, open the ‘Private key type’ dropdown. You can then select either RSA or ECC.

Creating a private key for Cloudflare

Next, scroll to the Hostnames field. Here you can add all the hostnames that you want to protect. This may sound complicated, but Cloudflare does a lot of the work for you. 

You’ll see that Cloudflare has already added your root domain name

Cloudflare also automatically adds a wildcard, which is your website’s domain plus a * symbol. This is a ‘catch-all’ that makes sure your subdomains are properly protected. For example, if your root domain is ‘www.example.com’ then this wildcard will ensure your ‘store.youurwebsite.com’ subdomain is also protected. For more details, see our complete guide to subdomains

These default values should be enough to protect most websites. However, if you need to add more hostnames then you can just type them into the ‘Hostnames’ field.

Adding hostnames to Cloudflare

Next scroll to the ‘Certificate validity’ section.

Your certificate will be valid for 15 years by default. 

Need more time? Then just open the ‘Certificate validity’ dropdown and choose a new value. 

Changing your certificate validity

When you’re happy with all the information you’ve entered, click on the Create button.

Cloudflare will now create your certificate. 

Fixing error 521 with a Cloudflare certificate

Cloudflare will then show an Origin Certificate and Private Key. You’ll need to copy this information into separate files.

NOTE: You won’t be able to see the Private Key again after leaving this screen. With that in mind, make sure you store this key somewhere safe.

You can now upload your Origin Certificate to your web server. The steps may vary depending on your hosting provider and server.

To help you out, Cloudflare has published instructions for the different types of web servers.

Once you’ve installed the Origin Certificate on your server, the final step is updating your SSL/TLS encryption mode. 

In your Cloudflare dashboard, go to SSL/TLS.

The Cloudflare dashboard

Now find the ‘SSL/TLS encryption mode’ section. 

In this section select ‘Full (strict).’ 

Changing your Cloudflare mode

Cloudflare is now using your Origin Certificate. You can now check your site to see whether this has fixed the ‘Error 521’

We hope this article helped you learn how to fix ‘Error 521’ with WordPress and Cloudflare. You may also want to see our guide on best managed WordPress hosting if you’d like your hosting company to deal with the technical details, or see our roundup of the best business VoIP providers for small businesses.

If you liked this article, then please subscribe to our YouTube Channel for WordPress video tutorials. You can also find us on Twitter and Facebook.

The post How to Fix Error 521 with WordPress and Cloudflare first appeared on WPBeginner.

7 Fresh Links on Performance For March 2022

I have a handful of good links to articles about performance that are burning a hole in my bookmarks folder, and wanna drop them here to share.

Screenshot of the new WebPageTest homepage, a tool for testing performance metrics.
The new WebPageTest website design

7 Fresh Links on Performance For March 2022 originally published on CSS-Tricks. You should get the newsletter.

Implementing Google OAuth to Use Google API in Cloudflare Workers

Recently I had the opportunity to build a small application that needed to authenticate and authorize a user using Google’s sign-in mechanism, and requests on their behalf data from a Google API.

I choose to implement this as a Cloudflare Worker as a serverless compute service leveraging Cloudflare key-value storage (KV) for session storage. The tooling from Cloudflare (wrangler) has evolved nicely since my first attempt at Cloudflare Workers, so I thought it was high time that I gave it another try.

How to Speed Up Your eCommerce Website (14 Proven Tips)

Do you want to speed up your eCommerce website?

Speed is crucial for the success of an eCommerce site. It not only improves customer experience, but it directly impacts conversions and sales.

In this guide, we’ll show you how to easily speed up your eCommerce store to improve performance and conversions.

Improving eCommerce website speed

Why Speed Matters for Your eCommerce Store

Speed is extremely important when it comes to user experience. No one likes a slow website, a slow computer, or a slow app.

But for online stores, a slow website can actually costs you business.

For instance, a study found that a single-second delay in page load time results in 7% loss in conversions, 11% fewer page views, and 16% decrease in customer satisfaction.

StrangeLoop study

In simpler words, slow websites can lead to lower sales.

Now apart from user experience and sales, eCommerce site speed also affects your SEO rankings. Search engines like Google consider speed as an important user experience indicator and ranking factor.

In fact, Google’s page experience search update is solely focused on user experience metrics like bounce rate and website speed. A faster eCommerce website will help you bring more free traffic from search engines.

That being said, let’s take a look at how to easily bump up your eCommerce store speed and performance.

Here is a quick overview of the topics we’ll cover in this guide.

1. Choose a Better Ecommerce Hosting Provider

All eCommerce performance optimization you make to your website will have little impact if you don’t have a good eCommerce hosting provider.

Not all WordPress hosting companies are the same. For better performance, you need to choose an eCommerce hosting provider that does the following:

  • Provides a stable and up-to-date platform to host your eCommerce store.
  • It is optimized for WordPress, WooCommerce, or any other eCommerce plugin that you may want to use
  • Their servers are optimized for speed and performance. This means built-in caching, security, and other features to improve performance

We recommend using SiteGround. They are one of the officially recommended WordPress hosting providers.

SiteGround servers run on Google Cloud Platform which is known for high performance. They have built-in caching and even have their own optimization plugin that automatically implements many of the performance tips that we’ll recommend later in this article.

If you are looking for alternatives, then check out our list of best WooCommerce hosting providers.

After setting up your eCommerce store on a good hosting service, you can implement the following optimization tips to boost performance.

2. Install a WordPress Caching Plugin

WooCommerce is a dynamic eCommerce platform. This means all your product data is stored in a database and product pages are generated when a user visits your website.

To do this, WordPress needs to run the same process each time. If more people visit your eCommerce store at the same time, then it will slow down and may even crash.

A caching plugin, helps you fix that issue.

Instead of generating pages each time, a caching plugin shows user a cached version of the HTML page. This frees up your server resources and allows it to run more efficiently thus improving website loading time.

How caching works in WordPress

There are some great WordPress caching plugins available, and popular WordPress hosting companies like SiteGround and Bluehost offer their own caching systems.

We recommend using WP Rocket. It is the best WordPress caching plugin on the market with the most beginner-friendly settings.

Unlike other WordPress caching solutions, WP Rocket doesn’t wait for users to visit a page to generate a cached version. Instead, it automatically prepares a cache of your website and keeps it up to date.

With the right WP Rocket settings, you can easily get near perfect scores in speed test tools like Pingdom, GTMetrix, Google Pagespeed Insights, and more.

For details and instructions, see our article on how to install and set up WP Rocket in WordPress.

Top WordPress hosting companies, like SiteGround and Bluehost offer their own caching solutions too.

SiteGround SG Optimizer

SiteGround allows you to easily turn on caching on your eCommerce store by using their SG Optimizer plugin.

This all-in-one performance tool includes caching, performance tweaks, WebP image conversion in WordPress, database optimization, CSS minification, GZIP compression, and more.

Simply install and activate the SG Optimizer plugin in WordPress. For more details, see our step by step guide on how to install a WordPress plugin.

Upon activation, click on the SG Optimizer menu in your WordPress admin sidebar to access plugin settings. From here, you need to turn on the Dynamic Caching option.

Turn on caching in SiteGround

Turn on Caching on Bluehost

Similarly, Bluehost also allows you to use its built-in caching system for optimizing WooCommerce. Simply login to your Bluehost dashboard and go to My Sites page. If you have multiple sites, then select your site and then switch to the Performance tab.

Bluehost caching levels

From here you can select a caching level for your website. For instance, you can choose eCommerce but if your website still remains slow then you can come back here and increase the caching level.

3. Use Latest PHP Version

WordPress and WooCommerce are both mainly written in the PHP programming language.

With each new version, PHP improves in performance and becomes faster. It also fixes bugs and patches security issues that may compromise your website’s stability and speed.

This is why you should always use the latest PHP version.

You can find out your eCommerce store’s PHP version by visiting Tools » Site Health in your WordPress dashboard and switching to the ‘Info’ tab.

Site Health in WordPress

From here, you need to click on the ‘Server’ section to expand it, and you’ll be able to see the PHP version used by your server.

PHP version in WordPress site health

If your website is running on a PHP version lower than 8.0, then you should reach out to your hosting provider and ask them to update it for you.

For more details, see our article on how PHP updates impact your website.

Note: Some managed WordPress hosting companies like SiteGround have built their own Ultrafast PHP to improve overall server response time. Others are using PHP FastCGI to help customers improve eCommerce speed.

4. Latest Version of WordPress & WooCommerce

WordPress and WooCommerce developers spend a significant amount of time on improving performance during each development cycle. This makes both apps run more efficiently and use fewer server-side resources.

Each new version also fixes bugs and strengthens security which is crucial for an eCommerce business.

As the store owner, it is your responsibility to make sure that you are using the latest version of WordPress, WooCommerce, other plugins, and your WordPress theme.

Simply go to Dashboard » Updates page to install all available updates.

Installing updates

5. Optimize Product Images for Performance

Product images are one of the most visually important things for an online store. Better product images keep customers engaged and can help boost sales conversion.

This is why it’s important to add high-quality product images. However, you need to make sure that large image file sizes are properly optimized.

There are two ways to optimize product images for the web without losing quality.

First, you can optimize each product image on your computer before uploading it to your website. This requires image editing software like Adobe Photoshop, Affinity, Gimp, etc.

Most of them have an option to export an image for the web. You can also adjust the quality of the image before saving it for upload.

Export for web in Adobe Photoshop

Alternately, you can use an image compression plugin for WordPress. These plugins automatically optimize your product image size for better site performance.

Aside from image compression, the image file type you choose can also help. For example, JPEG images are better for images that have a lot of color, whereas png images are better for transparent images.

6. Use a DNS Level Website Firewall

Brute force and DDoS attacks are common internet nuisances. Basically, hackers try to overload your server to break in, steal data or install malware.

Most hosting companies have basic safeguards that protect your websites from such attacks. However, one downside of these attacks is that they make your website loads extremely slow.

This is where you need a Website Application Firewall (WAF).

Now, common WordPress firewall plugins run on your own webserver. This makes them a little less efficient as they cannot block suspicious attacks until they reach your server.

On the other hand, a DNS-level firewall is able to filter your traffic on the cloud and block suspicious attacks even before they reach your website.

Website firewall

We recommend using Sucuri. It is the best WordPress firewall plugin with a comprehensive security suite.

Sucuri also comes with a powerful CDN (content delivery network). A CDN serves your website’s static content (images, stylesheets, JavaScript) from a global network of servers. This further reduces your server load and improves overall site load time.

If you are looking for a free option, then Cloudflare free CDN gives you basic level DNS firewall protection.

7. Choose a Better WordPress Theme

Choose better eCommerce theme

WordPress themes control the appearance of your eCommerce store. However, not all of them are optimized for performance and often add too much clutter which makes your website slower.

When choosing a WordPress theme for an eCommerce store, you need to find the balance between functionality and speed. Theme features like sliders, carousels, web fonts and icon fonts can slow down your website.

We recommend going for a simple theme and then use plugins to add the features you need. This gives you better control over both the performance and appearance of your online store.

WordPress themes by StudioPress, Elegant Themes, and Astra are all optimized for performance. For more individual theme recommendations, see our expert pick of the best WooCommerce themes for WordPress.

8. Use Better WordPress Plugins

One of the most often asked questions by WordPress beginners is that how many plugins they can use on their store without affecting performance?

The answer is as many as you like.

The total number of plugins does not affect the performance of your online store. It’s the quality of code that does.

A single poorly coded WordPress plugin may load too many scripts or stylesheets that could affect page load speed.

On the other hand, a well coded plugin would use standard best practices to minimize the performance impact. We recommend testing your plugins for performance impact before and after installing them.

We also maintain a list of must have WooCommerce plugins where we hand-picked essential WooCommerce plugins used by most online stores.

For example, the SeedProd drag & drop landing page builder helps you build blazing fast eCommerce landing pages without writing any code.

SeedProd Page Builder

For more on this topic, see our guide on how to choose the best WordPress plugins. It has a step by step process on how to evaluate WordPress plugins and picking the right one for your online store.

9. Reduce External HTTP Requests

A typical eCommerce page contains several components. For instance images, CSS and JavaScript files, video embeds, and more.

Each such component is separately loaded by users’ browsers by making an HTTP request to your server. More HTTP requests mean longer page load times.

Your server may also be fetching things from third-party tools and services like Google Analytics, social media retargeting, and other services. These are called external HTTP requests. These can take even longer to finish on a typical web page load.

It is ok to have these scripts on your WordPress website, but if they are affecting your website’s performance, then you need to consider reducing them.

You can view external HTTP requests by visiting your website and opening the Inspect tool in your browser. From here, switch to the Sources » Page tab to view all external HTTP requests.

External HTTP requests

10. Reduce Database Requests

WordPress and WooCommerce use database to store a lot of content and settings. Your WordPress theme and plugins also make database queries to fetch and display that information on screen.

Database queries are extremely fast, and your website can run hundreds of those in mere milliseconds. However, if your website is handling a traffic spike, then these queries can slow down your page load time.

You can check the database calls by using a plugin like Query Monitor in WordPress. Upon activation, the plugin will add the query monitor menu into your WordPress admin bar.

Query monitor menu

However, minimizing these requests may not be possible for beginner-level users. For instance, you may need to modify your WordPress theme to reduce database calls.

If you are comfortable editing your WordPress theme files or debug code, then you can look for database calls that can be avoided.

Other users, can try finding a better WordPress theme and alternate plugins to reduce database calls if needed.

11. Optimize WordPress Database

Over a period of time, your WordPress database may get bloated with information that you may not need anymore.

This clutter can potentially slow down database queries, backup processes, and overall WordPress performance. From time to time, it’s important to optimize your WordPress database to declutter unnecessary information.

Simply install and activate the WP Sweep plugin. Upon activation, simply go to Tools » Sweep to clean up your WordPress database.

WordPress database optimization

For more on this topic, see our article on how to optimize WordPress database for speed and performance.

12. Use Staging Sites to Track Performance Issues

Making changes to a live eCommerce store can cause issues. For instance, a customer may loose their order, or your site may go down during a sale event.

A staging site helps you easily try out performance optimization tips, new plugins, or a theme without affecting your live store.

Basically, a staging site is a clone of your live website that is used for testing changes before making them live.

Many popular WordPress hosting companies offer 1-click staging site set up. Once set up, you can try your changes and track your page load speed and performance.

Once you are ready to implement those changes, you can simply deploy staging site to the live version.

For step by step instructions, see our tutorial on how to create a staging site for WordPress.

13. Offload Ecommerce Emails

Offload eCommerce emails

Emails play a very important role on an eCommerce store. They are used to deliver order confirmations, invoices, password reset emails, sales and marketing messages, and more.

However, many beginners don’t realize this and use their hosting provider’s limited email functionality for eCommerce emails.

Most hosting companies don’t support the default WordPress mail function. Some even disable it to prevent spam and abuse.

This is why you need to use a dedicated SMTP email service provider along with the WP Mail SMTP plugin. These companies specialize in sending mass emails and ensure higher deliverability, which means your emails don’t end up in the spam folder.

We recommend using SMTP.com as one of the best SMTP service provider for transactional emails.

It is easy to set up and works with WooCommerce and all top WordPress contact form plugins. Plus, they offer a 30-day free trial with up to 50,000 emails.

If you want to look at others, then do check out Sendinblue or Mailgun.

14. Use Better Conversion Rate Optimization Tools

When it comes to eCommerce website, conversion rate optimization (CRO) is important for increasing sales.

A typical online store has many dynamic elements to increase conversions such as free shipping bar on homepage, black friday sale countdown timer in website header, exit-intent popup on checkout pages, or even spin a wheel gamification on mobile site to reduce abandonment.

Free shipping bar example

Often store owners and retailers use a combination of tools and plugins to add these dynamic elements. The challenge is that not all of them are properly optimized for speed.

This is why it’s important to choose conversion optimization tools that offer a suite of features in one platform, so you’re not loading multiple external scripts.

Below is a list of popular conversion optimization tools that we use on our eCommerce websites:

  • OptinMonster – it’s the most powerful conversion optimization toolkit that lets you create personalized popups, gamification campaigns, floating bars, and more.
  • LiveChat.com – it’s the best live chat software. They also offer ChatBot automation software as well that works for both WooCommerce and Shopify.
  • TrustPulse – it’s the best social proof software in the market that’s optimized for speed. You can use it to show real-time user activity without slowing down your site.

When it comes to analytics and A/B testing tools, we recommend only using what’s absolutely needed.

For example, if you’re launching a new landing page or website design, it’s important to run heatmap analytics. However after a short period of analysis, we recommend disabling heatmaps so it doesn’t slow down your website speed.

Similarly for A/B testing tools, you don’t need to run those scripts on every page of your website. You can selectively load A/B testing scripts on specific pages, and when you’re done with the test, don’t forget to remove the script.

We hope this article helped you speed up your eCommerce website. You may also want to see our WordPress security handbook or check out our WooCommerce SEO guide to get free traffic from search engines to your online store.

If you liked this article, then please subscribe to our YouTube Channel for WordPress video tutorials. You can also find us on Twitter and Facebook.

The post How to Speed Up Your eCommerce Website (14 Proven Tips) appeared first on WPBeginner.

How to Add HTTP Security Headers in WordPress (Beginner’s Guide)

Do you want to add HTTP security headers in WordPress?

HTTP security headers allow you to add an extra layer of security to your WordPress website. They can help block common malicious activity from affecting your site’s performance.

In this beginner’s guide, we will show you how to add HTTP security headers in WordPress.

How to Add HTTP Security Headers in WordPress (Beginner's Guide)

What Are HTTP Security Headers?

HTTP security headers are a security measure that allows your website’s server to prevent some common security threats before they can affect your website.

When a user visits your WordPress website, your web server sends an HTTP header response to their browser. This response tells browsers about error codes, cache control, and other statuses.

The normal header response issues a status called HTTP 200. After this, your website loads in the user’s browser. However, if your website is having difficulty, then your web server may send a different HTTP header.

For example, it may send a 500 internal server error or a not found 404 error code.

HTTP security headers are a subset of these headers. They are used to protect websites from common threats like click-jacking, cross-site scripting, brute force attacks, and more.

Let’s have a quick look at some HTTP security headers and how they protect your website:

  • HTTP Strict Transport Security (HSTS) tells web browsers that your website uses HTTPS and should not be loaded using an insecure protocol like HTTP.
  • X-XSS Protection allows you to block cross-site scripting from loading.
  • X-Frame-Options prevents cross-domain iframes or click-jacking.
  • X-Content-Type-Options X-Content-Type-Options blocks content mime-type sniffing.

HTTP security headers work best when they are set at the web server level, which means your WordPress hosting account. This allows them to be triggered early on during a typical HTTP request and provide maximum benefit.

They work even better if you are using a DNS-level website application firewall like Sucuri or Cloudflare.

That being said, let’s take a look at how to easily add HTTP security headers in WordPress. Here are quick links to different methods so that you can jump to the one that suits you:

1. Adding HTTP Security Headers in WordPress Using Sucuri

Sucuri is one of the best WordPress security plugins on the market. If you are using their website firewall service, then you can set HTTP security headers without writing any code.

First, you will need to sign up for a Sucuri account. It is a paid service that comes with a server-level website firewall, security plugin, CDN, and malware removal guarantee.

During sign-up, you will need to answer simple questions, and Sucuri documentation will help you set up the website application firewall on your website.

After signing up, you must install and activate the free Sucuri plugin. For more details, see our step-by-step guide on how to install a WordPress plugin.

Upon activation, you need to go to Sucuri Security » Firewall (WAF) and enter your Firewall API key. You can find this information under your account on the Sucuri website.

Sucuri WAF API key

After that, you will need to click the green ‘Save’ button to store your changes.

Next, you must switch to your Sucuri account dashboard. From here, click on the ‘Settings’ menu on top and then switch to the ‘Security’ tab.

Setting HTTP security headers in Sucuri

From here, you can choose three sets of rules. The default protection will work well for most websites.

If you have a Professional or Business plan, then you also have options for HSTS and HSTS Full. You can see which HTTP security headers will be applied for each set of rules.

You need to click the ‘Save Changes in the Additional Headers’ button to apply your changes.

Sucuri will now add your selected HTTP security headers in WordPress. Since it is a DNS-level WAF, your website traffic is protected from hackers even before they reach your website.

2. Adding HTTP Security Headers in WordPress Using Cloudflare

Cloudflare offers a basic free website firewall and CDN service. It lacks advanced security features in its free plan, so you will need to upgrade to its Pro plan, which is more expensive.

You can learn how to add Cloudflare to your website by following our tutorial on how to set up the Cloudflare free CDN in WordPress.

Once Cloudflare is active on your website, you must go to the SSL/TLS page in your Cloudflare account dashboard and then switch to the ‘Edge Certificates’ tab.

Setting up HTTPS security headers in Cloudflare

Now, scroll down to the ‘HTTP Strict Transport Security (HSTS)’ section.

Once you find it, you need to click on the ‘Enable HSTS’ button.

Click the Enable HSTS Button

This will bring up a popup with instructions telling you that you must have HTTPS enabled on your website before using this feature.

If your WordPress blog already has a secure HTTPS connection, then you can click on the ‘Next’ button to continue. You will see the options to add HTTP security headers.

Enable HTTPS security headers in Cloudflare

From here, you can enable HSTS, apply HSTS to subdomains (if the subdomains are using HTTPS), preload HSTS, and enable no-sniff header.

This method provides basic protection using HTTP security headers. However, it does not let you add X-Frame-Options, and Cloudflare doesn’t have a user interface to do that.

You can still do that by creating a script using the Cloudflare Workers feature. However, we don’t recommend this because creating an HTTPS security header script may cause unexpected issues for beginners.

3. Adding HTTP Security Headers in WordPress Using .htaccess

This method allows you to set the HTTP security headers in WordPress at the server level.

It requires editing the .htaccess file on your website. This server configuration file is used by the most commonly used Apache webserver software.

Note: Before making any changes to files on your website, we recommend making a backup.

Next, simply connect to your website using an FTP client or the file manager in your hosting control panel. In the root folder of your website, you need to find the .htaccess file and edit it.

View of Edit the .htaccess File Using an FTP Client

This will open the file in a plain text editor. At the bottom of the file, you can add some code to add HTTPS security headers to your WordPress website.

You can use the following sample code as a starting point. It sets the most commonly used HTTP security headers with optimal settings:

<ifModule mod_headers.c>
Header set Strict-Transport-Security "max-age=31536000" env=HTTPS
Header set X-XSS-Protection "1; mode=block"
Header set X-Content-Type-Options nosniff
Header set X-Frame-Options DENY
Header set Referrer-Policy: no-referrer-when-downgrade
</ifModule>

Don’t forget to save your changes and visit your website to make sure that everything is working as expected.

Note: Take care when editing code on your website. Incorrect headers or conflicts in the .htaccess file may trigger the 500 Internal Server Error.

4. Adding HTTP Security Headers in WordPress Using AIOSEO

All in One SEO (AIOSEO) is the best SEO tool for WordPress and is trusted by over 3 million businesses. The premium plugin lets you easily add HTTP security headers to your website.

The first thing you will need to do is install and activate the AIOSEO plugin on your website. You can learn more in our step-by-step guide on how to set up All in One SEO for WordPress.

You then need to head over to the All in One SEO » Redirects page to add the HTTP security headers. First, you will need to click the ‘Activate Redirects’ button to enable the feature.

Activating Redirects in All in One SEO

Once redirects are enabled, you need to click on the ‘Full Site Redirect’ tab and then scroll down to the ‘Canonical Settings’ section.

Simply enable the ‘Canonical Settings’ toggle and then click the ‘Add Security Presets’ button.

Add Security Presets in AIOSEO

You will see a preset list of HTTP security headers appear in the table.

These headers are optimized for security. You can review and change them if needed.

Security Headers are Added in AIOSEO

Make sure to click the ‘Save Changes’ button at the top or bottom of the screen to store the security headers.

You can now visit your website to make sure that everything is working fine.

How to Check HTTP Security Headers for a Website

Now that you have added HTTP Security headers to your website, you can test your configuration using the free Security Headers tool.

Simply enter your website URL and click on the ‘Scan’ button.

Checking a Website's HTTP Security Headers

It will then check HTTP security headers for your website and show you a report. The tool will also generate a so-called grade label, which you can ignore as most websites will get a B or C score without affecting user experience.

It will show you which HTTP security headers are sent by your website and which ones are not included. If the security headers that you wanted to set up are listed there, then you are done.

We hope this article helped you learn how to add HTTP security headers in WordPress. You may also want to see our complete WordPress security guide and our expert picks for the best WordPress plugins for business websites.

If you liked this article, then please subscribe to our YouTube Channel for WordPress video tutorials. You can also find us on Twitter and Facebook.

The post How to Add HTTP Security Headers in WordPress (Beginner’s Guide) first appeared on WPBeginner.

Cloudflare Launches Automatic Platform Optimization for WordPress

Just a day after launching its new privacy-first web analytics product last week, Cloudflare announced Automatic Platform Optimization (APO) for WordPress. The new service boasts staggering performance improvements for sites that might otherwise be slowed down by shared hosting, slow database lookups, or sluggish plugins:

Our testing… showed a 72% reduction in Time to First Byte (TTFB), 23% reduction to First Contentful Paint, and 13% reduction in Speed Index for desktop users at the 90th percentile, by serving nearly all of your website’s content from Cloudflare’s network. 

APO uses Cloudflare Workers to cache dynamic content and serve the website from its edge network. In most cases this eliminates origin requests and origin processing time. That means visitors requesting your website will get near instant load times. Cloudflare reports that its testing shows APO delivers consistent load times of under 400ms for HTML Time to First Byte (TTFB).

The effects of using APO are similar to hosting static files on a CDN, but without the need to manage a complicated tech stack. Content creators retain their ability to create dynamic websites without any changes to their workflow for the sake of performance.

Version 3.8 of Cloudflare’s official WordPress plugin was recently updated to include support for APO. It detects when users make changes to their content and purges the content stored on Cloudflare’s edge.

The new service is available to Cloudflare users with a single click of a button. APO is included at no cost for existing Cloudflare customers on the Professional, Business, and Enterprise plans. Users on the Free plan can add it to their sites for $5/month. The service is a flat fee and is not metered.

Cloudflare’s announcement has so far been well-received by WordPress professionals and hosting companies and many have already begun testing it.

WordPress lead developer Mark Jaquith called APO “incredible news for the WordPress world.”

“On sites I manage this is going to lower hosting complexity and easily save hundreds of dollars a month in hosting costs,” Jaquith said.

After running several speed tests from six different locations around the world, early testers at Kinsta got remarkable results using APO:

“By caching static HTML on Cloudflare’s edge network, we saw a 70-300% performance increase. As expected, the testing locations furthest away from Tokyo saw the biggest reduction in load time.

“If your WordPress site uses a traditional CDN that only caches CSS, JS, and images, upgrading to Cloudflare’s WordPress APO is a no-brainer and will help you stay competitive with modern Jamstack and static sites that live on the edge by default.”

George Liu, a “self-confessed page speed addict” and Cloudflare Community MVP, performed a series of detailed tests on the new APO product with his blog. After many comparisons, he found that Cloudoflare’s WordPress plugin with APO turned on delivers results similar to his heavily optimized WordPress blog that uses a custom Cloudflare Worker caching configuration.

“You’ll find that Cloudflare WordPress plugin’s one click Automatic Platform Optimization button does wonders for page speed for the average WordPress user not well versed in page speed optimizations,” Liu said.

“Cloudflare’s WordPress plugin Automatic Platform Optimization will in theory beat all other WordPress caching solutions other than you rolling out your own Cloudflare Worker based caching like I did. So you get a good bang for your buck at US$5/month for Cloudflare’s WordPress plugin APO.”

Liu also warned of some speed bumps with the initial rollout, as Cloudflare’s APO supports a limited set of WordPress cookies for bypassing the Cloudflare CDN cache, leaving certain use cases unsupported. APO does not seem to work on subdomains and users are also reporting that it’s not compatible with other caching plugins. It also disables real visitor IP address detection.

Cloudflare is aware of many of these issues, which have been raised in the comments of the announcement, and is in the process of adding more cookies to the list to bypass caching. Due to some plugin conflicts, APO may not be as plug-and-play as it sounds for some users right now, but the product is very promising and should improve over time with more feedback.

Cloudflare Launches New Web Analytics Product Focusing on Privacy

In pursuit of “democratizing web analytics,” Cloudflare announced it is launching privacy-first analytics as a new standalone product. The company is entering a market that has been dominated by Google Analytics for years but with a major differentiating feature – it will not track individual users by a cookie or IP address to show unique visits.

Cloudflare Web Analytics defines a visit as “a successful page view that has an HTTP referer that doesn’t match the hostname of the request.” It’s not the same as Google’s “unique” metric, and Cloudflare says it may differ from other reporting tools. Weeding out bots from the total traffic numbers is a nascent feature that Cloudflare is improving as part of its Bot Management product.

Cloudflare Web Analytics is launching with features that are largely similar to Google Analytics but with some unique ways of zooming into different traffic segments and time ranges to see where traffic is originating from.

“The most popular analytics services available were built to help ad-supported sites sell more ads,” Cloudflare product manager Jon Levine said. “But, a lot of websites don’t have ads. So if you use those services, you’re giving up the privacy of your users in order to understand how what you’ve put online is performing.

“Cloudflare’s business has never been built around tracking users or selling advertising. We don’t want to know what you do on the Internet — it’s not our business.”

Paying customers on the Pro, Biz, and Enterprise plans can access their analytics from their dashboards immediately. Cloudflare is also offering the product for free as JavaScript-based analytics for users who are not currently customers. Those who want access to the free plan can sign up for the waitlist.

Configuring TLS and Resolving Errors

Today, we are going to discuss and see how to configure the TLS and resolve errors related to this. There are different versions of TLS.

Protocol

How to Setup Cloudflare Free CDN in WordPress (Step by Step)

Do you want to use the free Cloudflare CDN on your WordPress site?

Cloudflare is one of the best WordPress CDN services available in the market. They offer a free CDN that speeds up your website along with a suite of powerful security features for small business websites.

The challenge is that many entry-level users are not able to use Cloudflare because they think it is hard to set up.

In this guide, we will walk you through a complete Cloudflare setup in WordPress to help you improve your website speed.

How to Setup Cloudflare Free CDN in WordPress (Step by Step)

What Is a CDN?

A CDN or content delivery network is a system of distributed servers that helps deliver your website files faster to users based on their location.

Typically, a web hosting service serves your website visitors from a single location. All the users access the same server, no matter where they are located.

This can cause a delay in content delivery for users living further away from your website’s central hosting server.

That’s why CDNs set up multiple edge servers in different locations around the globe.

These CDN servers cache static content from your website’s origin server and present it to users when they visit your WordPress website.

Content Delivery Network (CDN)

When there is a user request, the CDN server closest to the user’s location will handle it.

For example, if someone in the USA wants to access a UK-hosted website, then a CDN server in the USA will serve that request, not the main server in the UK.

With a CDN, all the user requests are handled by the nearest CDN servers. This reduces the physical distance between the visitors and your website’s server.

As a result, a CDN improves your website performance and speed for all users regardless of their geographic location.

A faster website also improves the user experience and can give your website a slight boost in SEO rankings. Using a CDN also reduces the load on your primary server and protects it from crashing during traffic spikes.

If you want to learn more, then see our guide on why you need a CDN for your WordPress blog.

What Is Cloudflare CDN?

Cloudflare CDN

Cloudflare is one of the most popular free CDN providers available on the internet. It is a large network of globally-distributed servers that automatically cache static content and deliver dynamic content quickly.

On top of a CDN service, Cloudflare is also a cloud-based website firewall and a distributed proxy server. It monitors all incoming traffic to your website and blocks suspicious traffic even before it reaches your server.

They offer a free basic plan that’s suitable for small business websites and blogs. They also offer paid plans starting at $20 per month.

Cloudflare is an excellent choice for small businesses looking for a free CDN. However, if you want to fully utilize all of Cloudflare’s features, then you will need the Business plan, which costs $200 per month.

Note: We do not use Cloudflare on WPBeginner. Instead, we use Sucuri as a website firewall and CDN. This firewall has the double benefit of improving speed and security. You can learn more in our comparison of Sucuri vs. Cloudflare.

With that being said, let’s take a look at how to set up Cloudflare Free CDN in WordPress. You can use the quick links below to jump to the different parts of the tutorial:

Setting Up Cloudflare CDN in WordPress

To begin, you need to visit the Cloudflare website and click on the ‘Sign Up’ button.

Visit Cloudflare website

On the next page, you need to enter your email address and password to create a Cloudflare account.

Simply enter the information required, and then click on the ‘Sign up’ button.

Create Cloudflare account

When you finish signing up, you will see a thank you page confirming that your Cloudflare account has been set up.

The next step is to add your website to Cloudflare. You should click the ‘Add a website or application’ button to get started.

The Cloudflare Thank You Page

You can now enter your website into the ‘Enter your site’ field.

Make sure you only type your site’s domain name, such as example.com. You don’t need to type the full URL or any extra characters.

Enter Your Website's Domain Name

On the next screen, you will be asked to choose the type of Cloudflare plan you want.

For this tutorial, we will choose the free Cloudflare plan. Then, click the ‘Continue’ button.

Select Cloudflare free plan

After that, Cloudflare will show you a list of all DNS records their systems found. These will include your subdomains as well.

The DNS records you want to be passed through Cloudflare should have an orange cloud icon. The DNS records that will bypass Cloudflare will have a gray cloud icon.

You need to review the list to make sure that your primary domain is active on Cloudflare with an orange cloud icon. Simply click the ‘Proxy status’ toggle to change the status.

Verify DNS Records to Set up Cloudflare

Once you have verified your DNS records, just click on the ‘Continue’ button at the bottom.

During the next step of your setup, Cloudflare will ask you to update your nameservers. You will be asked to change your nameservers and point them to Cloudflare nameservers.

Change to Cloudflare nameservers

Note: Changing nameservers can take some time to propagate throughout the internet. During this time, your website may become inaccessible to some users.

You can change nameservers from your domain registrar account, like Domain.com.

Or, if you got a free domain from your web hosting provider like Bluehost, then you will have to change the name server by logging in to your hosting account.

For the sake of this tutorial, we will be showing you how to change the nameservers from the Bluehost control panel.

While the process is similar across hosting companies, you can always ask your hosting provider for detailed instructions for their control panel.

Once you are logged in to your Bluehost cPanel dashboard, go to the ‘Domains’ section, and select your domain name. After that, click on the ‘Name Servers’ tab and the ‘Edit’ button.

Edit nameservers in hosting cPanel

Next, you need to select ‘Custom’ and enter the nameservers provided by Cloudflare.

Then, click the ‘Save’ button.

Save new Cloudflare nameservers

After that, you need to go back to the Cloudflare setup page, and click the ‘Done, check nameservers’ button to finish the setup.

It will now check your new nameservers automatically.

Check Cloudflare nameservers

That’s it! It will take a few minutes to update your domain nameservers and activate Cloudflare.

Once activated, you will see the success message in your Cloudflare dashboard.

Cloudflare success message

In the meantime, the Cloudflare Quick Start Guide will open automatically, and you can use it to customize your Cloudflare settings. We will show you how in the next section.

Note: The above screenshots show the Bluehost control panel. Your nameserver settings may look different if you are using a different hosting provider.

Configuring Cloudflare With the Quick Start Guide

The Cloudflare Quick Start Guide should have opened automatically after you clicked on the ‘Done, check nameservers’ button above. This setup wizard will help you improve the security and performance of your website.

The first setting is ‘Automatic HTTPS Rewrites’.

Cloudflare Automatic HTTPS Rewrites

This will help you avoid the mixed content error in WordPress. It does this by automatically changing ‘http’ to ‘https’ in the URLs of all resources and links on your site that can be served with a secure ‘https’ URL.

This setting is on by default. We recommend you leave it on and click the ‘Save’ button.

The next setting is ‘Always Use HTTPS’.

Always Use HTTPS

Some users have reported issues when using this setting with Cloudflare. This setting is disabled by default, and we recommend you leave it that way. We will show you how to redirect from HTTP to HTTPS using the All in One SEO plugin later in this article.

Now you can click the ‘Save’ button to move on to the next option.

The next setting is Brotli compression.

Brotli Compression

Cloudflare can use Brotli compression to unlock 15-20% speed improvements. This setting is on by default, and we recommend you leave it on.

Make sure you click the ‘Save’ button to store this setting.

Now you will see a summary of what you have configured with the Quick Start Guide.

Cloudflare Quick Start Summary

You should see:

  • Automatic HTTPS Rewrites: ON
  • Always Use HTTPS: OFF
  • Brotli: ON

You have now completed the Quick Start Guide and can click the ‘Finish’ button. However, there are still some additional important settings that need to be configured.

Configuring Additional Important Cloudflare Settings

Your basic Cloudflare setup is complete, but there are a few essential settings you need to configure to keep your WordPress site secure.

1. Secure Your WordPress Login Page

You can set up page rules to customize how Cloudflare works on specific pages on your site. This is especially useful for securing critical pages such as the login page and wp-admin area.

The Cloudflare free account allows you to set up 3 page rules. If you want to add more page rules, then you need to pay $5 per month for 5 extra rules.

First, you need to click the ‘Rules’ option in the menu on the left of the page. After that, you can click the ‘Create Page Rule’ button.

Cloudflare Page Rules

Now you can set up 3 different page rules. You can start by creating a rule that secures your WordPress login page.

Simply add the following settings below to secure your website:

  • Page URL: example.com/wp-login.php*
  • Settings: Security Level – High
Secure WordPress login page

When you are done, just click ‘Save and Deploy’ to store and activate the rule.

2. Exclude the WordPress Dashboard from Cloudflare

You will be returned to the Page Rules page, where you can see your first rule listed.

Now you can create a second rule to exclude the WordPress dashboard from Cloudflare caching and enable high security.

Click the Create Page Rule Button

You’ll need to click on the ‘Create New Rule’ button to create your second rule.

After that, you need to type the following settings into the rule. You can click the ‘+ Add a Setting’ button to add new rows for additional settings:

  • Page URL: example.com/wp-admin*
  • Settings: Security Level – High
  • Cache Level – Bypass
  • Disable Performance
  • Disable Apps
Exclude WordPress dashboard

When you are done, make sure you click ‘Save and Deploy’ to add the new rule.

3. Configure SSL Certificate Settings

Another important setting is the SSL certificate available in the ‘SSL/TLS’ menu on the left.

Set SSL certificate settings

Make sure to click the ‘Full’ radio button if you are already using SSL.

If you don’t have an SSL certificate, then see our guide on how to get a free SSL certificate for your website.

Once you are done, Cloudflare will provide the essential green padlock in your visitors’ address bar to signify that your website is secure.

4. Redirect from HTTP to HTTPS Using All in One SEO

We mentioned earlier that we don’t recommend using Cloudflare’s ‘Always Use HTTPS’ feature. A great alternative is to use the All in One SEO plugin. It’s the best SEO plugin for WordPress, used by over 3 million sites.

The first thing you need to do is activate and install the All in One SEO plugin. For more details, see our guide on how to install a WordPress plugin.

After that, navigate to All in One SEO » General Settings and then enter your license key into the ‘License Key’ box and click ‘Connect’.

Enter AIOSEO license key

You can find your license key in your account profile on the All in One SEO website.

Next, navigate to All in One SEO » Redirects and then click the ‘Full Site Redirects’ menu navigation option.

AIOSEO Full Site Redirect

You will need to scroll down the page until you find the ‘Canonical Settings’ toggle. You should click this toggle so that it turns blue.

Next, turn on the ‘Redirect from HTTP to HTTPS’ toggle. This will create a redirect from HTTP to HTTPS, making sure that your visitors always have a secure connection to your website.

Using AIOSEO to Force HTTPS

When you are done, make sure to click the ‘Save Changes’ button at the bottom or top of the screen to store this setting.

Optimizing Cloudflare for WordPress Using a Plugin

Cloudflare offers a dedicated WordPress plugin for one-click WordPress-optimized settings.

The plugin lets you quickly set up Cloudflare on your WordPress site, add web application firewall (WAF) rulesets, automatically purge the cache, and more.

To get started, install and activate the Cloudflare plugin on your website. For more details, see our step-by-step guide on how to install a WordPress plugin.

Once done, you need to visit Settings » Cloudflare in your admin panel to configure the Cloudflare settings.

On the settings page, you will see a ‘Create Your Free Account’ button and a sign-in option for existing accounts. Simply click the ‘Sign in here’ link.

Cloudflare plugin settings

On the next screen, you will need to enter your Cloudflare email and API key.

Click the ‘Get your API key from here’ link.

Entering API Credentials Into the Cloudflare Plugin

This will bring up a popup for your account area on the Cloudflare website.

Make sure you are on your ‘My Profile’ page, and then click on the ‘API Tokens’ tab in the left sidebar.

After that, go to the ‘Global API Key’ section and click on the ‘View’ button.

Get global API key

This will open a popup and display your API key.

Simply click on the key to copy it.

Click to Copy the Global API Key

Next, you need to come back to your WordPress dashboard and enter your email address and API key.

Then, click the ‘Save API Credentials’ button.

Save Cloudflare API Credentials in WordPress

After that, the Cloudflare settings will appear on your dashboard.

From here, you can apply a single-click WordPress optimization, purge the cache, enable automatic cache, and more.

To optimize your WordPress site, just click the ‘Apply’ button next to ‘Apply Default Settings’.

Apply to optimize WordPress

Next, click on the ‘Settings’ menu option.

Here you will find more site optimization settings.

Cloudflare for WordPress Settings

You can scroll down on this screen to find the ‘Security’ section.

By default, the security level is medium. To improve your website’s security, you can select ‘High’ from the dropdown list.

Change WordPress security level

We hope this article helped you to learn how to set up Cloudflare free CDN in WordPress. You may also want to see our ultimate WordPress security guide and our expert picks for the best WordPress security plugins to further protect your website.

If you liked this article, then please subscribe to our YouTube Channel for WordPress video tutorials. You can also find us on Twitter and Facebook.

The post How to Setup Cloudflare Free CDN in WordPress (Step by Step) first appeared on WPBeginner.

Building a Full-Stack Serverless Application with Cloudflare Workers

One of my favorite developments in software development has been the advent of serverless. As a developer who has a tendency to get bogged down in the details of deployment and DevOps, it's refreshing to be given a mode of building web applications that simply abstracts scaling and infrastructure away from me. Serverless has made me better at actually shipping projects!

That being said, if you're new to serverless, it may be unclear how to translate the things that you already know into a new paradigm. If you're a front-end developer, you may have no experience with what serverless purports to abstract away from you – so how do you even get started?

Today, I'll try to help demystify the practical part of working with serverless by taking a project from idea to production, using Cloudflare Workers. Our project will be a daily leaderboard, called "Repo Hunt" inspired by sites like Product Hunt and Reddit, where users can submit and upvote cool open-source projects from GitHub and GitLab. You can see the final version of the site, published here.

Workers is a serverless application platform built on top of Cloudflare's network. When you publish a project to Cloudflare Workers, it's immediately distributed across 180 (and growing) cities around the world, meaning that regardless of where your users are located, your Workers application will be served from a nearby Cloudflare server with extremely low latency. On top of that, the Workers team has gone all-in on developer experience: our newest release, at the beginning of this month, introduced a fully-featured command line tool called Wrangler, which manages building, uploading, and publishing your serverless applications with a few easy-to-learn and powerful commands.

The end result is a platform that allows you to simply write JavaScript and deploy it to a URL – no more worrying about what "Docker" means, or if your application will fall over when it makes it to the front page of Hacker News!

If you're the type that wants to see the project ahead of time, before hopping into a long tutorial, you're in luck! The source for this project is available on GitHub. With that, let's jump in to the command-line and build something rad.

Installing Wrangler and preparing our workspace

Wrangler is the command-line tool for generating, building, and publishing Cloudflare Workers projects. We've made it super easy to install, especially if you've worked with npm before:

npm install -g @cloudflare/wrangler

Once you've installed Wrangler, you can use the generate command to make a new project. Wrangler projects use "templates" which are code repositories built for re-use by developers building with Workers. We maintain a growing list of templates to help you build all kind of projects in Workers: check out our Template Gallery to get started!

In this tutorial, we'll use the "Router" template, which allows you to build URL-based projects on top of Workers. The generate command takes two arguments: first, the name of your project (I'll use repo-hunt), and a Git URL. This is my favorite part of the generate command: you can use all kinds of templates by pointing Wrangler at a GitHub URL, so sharing, forking, and collaborating on templates is super easy. Let's run the generate command now:

wrangler generate repo-hunt https://github.com/cloudflare/worker-template-router
cd repo-hunt

The Router template includes support for building projects with webpack, so you can add npm modules to your project, and use all the JavaScript tooling you know and love. In addition, as you might expect, the template includes a Router class, which allows you to handle routes in your Worker, and tie them to a function. Let's look at a simple example: setting up an instance of Router, handling a GET request to /, and returning a response to the client:

// index.js
const Router = require('./router')

addEventListener('fetch', event => {
  event.respondWith(handleRequest(event.request))
})

async function handleRequest(request) {
  try {
    const r = new Router()
    r.get('/', () => new Response("Hello, world!"))
    const resp = await r.route(request)
    return resp
  } catch (err) {
    return new Response(err)
  }
}

All Workers applications begin by listening to the fetch event, which is an incoming request from a client to your application. Inside of that event listener, it's common practice to call a handleRequest function, which looks at the incoming request and determines how to respond. When handling an incoming fetch event, which indicates an incoming request, a Workers script should always return a Response back to the user: it's a similar request/response pattern to many web frameworks, like Express, so if you've worked with web frameworks before, it should feel quite familiar!

In our example, we'll make use of a few routes: a "root" route (/), which will render the homepage of our site; a form for submitting new repos, at /post, and a special route for accepting POST requests, when a user submits a repo from the form, at /repo.

Building a route and rendering a template

The first route that we'll set up is the "root" route, at the path /. This will be where repos submitted by the community will be rendered. For now, let's get some practice defining a route, and returning plain HTML. This pattern is common enough in Workers applications that it makes sense to understand it first, before we move on to some more interesting bits!

To begin, we'll update index.js to set up an instance of a Router, handle any GET requests to /, and call the function index, from handlers/index.js (more on that shortly):

// index.js
const Router = require('./router')
const index = require('./handlers/index')

addEventListener('fetch', event => {
  event.respondWith(handleRequest(event.request))
})

function handleRequest(request) {
  try {
    const r = new Router()
    r.get('/', index)
    return r.route(request)
  } catch (err) {
    return new Response(err)
  }
}

As with the example index.js in the previous section, our code listens for a fetch event, and responds by calling the handleRequest function. The handleRequest function sets up an instance of Router, which will call the index function on any GET requests to /. With the router setup, we route the incoming request, using r.route, and return it as the response to the client. If anything goes wrong, we simply wrap the content of the function in a try/catch block, and return the err to the client (a note here: in production applications, you may want something more robust here, like logging to an exception monitoring tool).

To continue setting up our route handler, we'll create a new file, handlers/index.js, which will take the incoming request and return a HTML response to the client:

// handlers/index.js
const headers = { 'Content-Type': 'text/html' }
const handler = () => {
  return new Response("Hello, world!", { headers })
}
module.exports = handler

Our handler function is simple: it returns a new instance of Response with the text "Hello, world!" as well as a headers object that sets the Content-Type header to text/html – this tells the browser to render the incoming response as an HTML document. This means that when a client makes a GET request to the route /, a new HTML response will be constructed with the text "Hello, world!" and returned to the user.

Wrangler has a preview function, perfect for testing the HTML output of our new function. Let's run it now to ensure that our application works as expected:

wrangler preview

The preview command should open up a new tab in your browser, after building your Workers application and uploading it to our testing playground. In the Preview tab, you should see your rendered HTML response:

With our HTML response appearing in browser, let's make our handler function a bit more exciting, by returning some nice looking HTML. To do this, we'll set up a corresponding index "template" for our route handler: when a request comes into the index handler, it will call the template and return an HTML string, to give the client a proper user interface as the response. To start, let's update handlers/index.js to return a response using our template (and, in addition, set up a try/catch block to catch any errors, and return them as the response):

// handlers/index.js
const headers = { 'Content-Type': 'text/html' }
const template = require('../templates/index')

const handler = async () => {
  try {
    return new Response(template(), { headers })
  } catch (err) {
    return new Response(err)
  }
}

module.exports = handler

As you might imagine, we need to set up a corresponding template! We'll create a new file, templates/index.js, and return an HTML string, using ES6 template strings:

// templates/index.js
const template = () => {
  return <code><h1>Hello, world!</h1>`
}

module.exports = template

Our template function returns a simple HTML string, which is set to the body of our Response, in handlers/index.js. For our final snippet of templating for our first route, let's do something slightly more interesting: creating a templates/layout.js file, which will be the base "layout" that all of our templates will render into. This will allow us to set some consistent styling and formatting for all the templates. In templates/layout.js:

// templates/layout.js
const layout = body => `
<!doctype html>
<html>
  <head>
    <meta charset="UTF-8">
    <title>Repo Hunt</title>
    <meta name="viewport" content="width=device-width, initial-scale=1">
    <link rel="stylesheet" href="https://cdnjs.cloudflare.com/ajax/libs/bulma/0.7.5/css/bulma.min.css">
  </head>
  <body>
    <div class="container">
      <div class="navbar">
        <div class="navbar-brand">
          Repo Hunt
          Find cool open-source projects daily
        </div>
        <div class="navbar-menu">
          <div class="navbar-end">
            <div class="navbar-item">
              Post a repository
            </div>
          </div>
        </div>
      </div>
      <div class="section">
        ${body}
      </div>
    </div>
  </body>
</html>
`
module.exports = layout

This is a big chunk of HTML code, but breaking it down, there's only a few important things to note: first, this layout variable is a function! A body variable is passed in, intended to be included inside of a div right in the middle of the HTML snippet. In addition, we include the Bulmahttps://bulma.io) CSS frameworkhttps://bulma.io), for a bit of easy styling in our project, and a navigation bar, to tell users *what* this site is, with a link to submit new repositories.

To use our layout template, we'll import it in templates/index.js, and wrap our HTML string with it:

// templates/index.js
const layout = require('./layout')

const template = () => {
  return layout(`<h1>Hello, world!</h1>`)
}

module.exports = template

With that, we can run wrangler preview again, to see our nicely rendered HTML page, with a bit of styling help from Bulma:

Storing and retrieving data with Workers KV

Most web applications aren't very useful without some sort of data persistence. Workers KV is a key-value store built for use with Workers – think of it as a super-fast and globally distributed Redis. In our application, we'll use KV to store all of the data for our application: each time a user submits a new repository, it will be stored in KV, and we'll also generate a daily array of repositories to render on the home page.

A quick note: at the time of writing, usage of Workers KV requires a paid Workers plan. Read more in the "Pricing" section of the Workers docs here.

Inside of a Workers application, you can refer to a pre-defined KV namespace, which we'll create inside of the Cloudflare UI, and bind to our application once it's been deployed to the Workers application. In this tutorial, we'll use a KV namespace called REPO_HUNT, and as part of the deployment process, we'll make sure to attach it to our application, so that any references in the code to REPO_HUNT will correctly resolve to the KV namespace.

Before we hop into creating data inside of our namespace, let's look at the basics of working with KV inside of your Workers application. Given a namespace (e.g. REPO_HUNT), we can set a key with a given value, using put:

const string = "Hello, world!"
REPO_HUNT.put("myString", string)

We can also retrieve the value for that key, by using async/await and waiting for the promise to resolve:

const getString = async () => {
  const string = await REPO_HUNT.get("myString")
  console.log(string) // "Hello, world!"
}

The API is super simple, which is great for web developers who want to start building applications with the Workers platform, without having to dive into relational databases or any kind of external data service. In our case, we'll store the data for our application by saving:

  1. A repo object, stored at the key repos:$id, where $id is a generated UUID for a newly submitted repo.
  2. A day array, stored at the key $date (e.g. "6/24/2019"), containing a list of repo IDs, which indicate the submitted repos for that day.

We'll begin by implementing support for submitting repositories, and making our first writes to our KV namespace by saving the repository data in the object we specified above. Along the way, we'll create a simple JavaScript class for interfacing with our store – we'll make use of that class again, when we move on to rendering the homepage, where we'll retrieve the repository data, build a UI, and finish our example application.

Allowing user-submitted data

No matter what the application is, it seems that web developers always end up having to write forms. In our case, we'll build a simple form for users to submit repositories.

At the beginning of this tutorial, we set up index.js to handle incoming GET requests to the root route (`/). To support users adding new repositories, we'll add another route, GET /post, which will render a form template to users. In index.js:

// index.js

// ...

const post = require('./handlers/post')

// ...

function handleRequest(request) {
  try {
    const r = new Router()
    r.get('/', index)
    r.get('/post', post)
    return r.route(request)
  } catch (err) {
    return new Response(err)
  }
}

In addition to a new route handler in index.js, we'll also add handlers/post.js, a new function handler that will render an associated template as an HTML response to the user:

// handlers/post.js
const headers = { 'Content-Type': 'text/html' }
const template = require('../templates/post')

const handler = request => {
  try {
    return new Response(template(), { headers })
  } catch (err) {
    return new Response(err)
  }
}

module.exports = handler

The final piece of the puzzle is the HTML template itself – like our previous template example, we'll re-use the layout template we've built, and wrap a simple three-field form with it, exporting the HTML string from templates/post.js:

// templates/post.js
const layout = require('./layout')

const template = () =>
  layout(`
  <div>
    <h1>Post a new repo</h1>
    <form action="/repo" method="post">
      <div class="field">
        <label class="label" for="name">Name</label>
        <input class="input" id="name" name="name" type="text" placeholder="Name" required></input>
      </div>
      <div class="field">
        <label class="label" for="description">Description</label>
        <input class="input" id="description" name="description" type="text" placeholder="Description"></input>
      </div>
      <div class="field">
        <label class="label" for="url">URL</label>
        <input class="input" id="url" name="url" type="text" placeholder="URL" required></input>
      </div>
      <div class="field">
        <div class="control">
          <button class="button is-link" type="submit">Submit</button>
        </div>
      </div>
    </form>
  </div>
<code>)

module.exports = template

Using wrangler preview, we can navigate to the path /post and see our rendered form:

If you look at the definition of the actual form tag in our template, you'll notice that we're making a POST request to the path /repo. To receive the form data, and persist it into our KV store, we'll go through the process of adding another handler. In index.js:

// index.js

// ...

const create = require('./handlers/create')

// ...

function handleRequest(request) {
  try {
    const r = new Router()
    r.get('/', index)
    r.get('/post', post)
    r.post('/repo', create)
    return r.route(request)
  } catch (err) {
    return new Response(err)
  }
}

When a form is sent to an endpoint, it's sent as a query string. To make our lives easier, we'll include the qs library in our project, which will allow us to simply parse the incoming query string as a JS object. In the command line, we'll add qs simply by using npm. While we're here, let's also install the node-uuid package, which we'll use later to generate IDs for new incoming data. To install them both, use npm's install --save subcommand:

npm install --save qs uuid

With that, we can implement the corresponding handler function for POST /repo. In handlers/create.js:

// handlers/create.js
const qs = require('qs')

const handler = async request => {
  try {
    const body = await request.text()

    if (!body) {
      throw new Error('Incorrect data')
    }

    const data = qs.parse(body)
    
    // TODOs:
    // - Create repo
    // - Save repo
    // - Add to today's repos on the homepage

    return new Response('ok', { headers: { Location: '/' }, status: 301 })
  } catch (err) {
    return new Response(err, { status: 400 })
  }
}

module.exports = handler

Our handler function is pretty straightforward — it calls text on the request, waiting for the promise to resolve to get back our query string body. If no body element is provided with the request, the handler throws an error (which returns with a status code of 400, thanks to our try/catch block). Given a valid body, we call parse on the imported qs package, and get some data back. For now, we've stubbed out our intentions for the remainder of this code: first, we'll create a repo, based on the data. We'll save that repo, and then add it to the array of today's repos, to be rendered on the home page.

To write our repo data into KV, we'll build two simple ES6 classes, to do a bit of light validation and define some persistence methods for our data types. While you could just call REPO_HUNT.put directly, if you're working with large amounts of similar data, it can be nice to do something like new Repo(data).save() - in fact, we'll implement something almost exactly like this, so that working with a Repo is incredibly easy and consistent.

Let's define store/repo.js, which will contain a Repo class. With this class, we can instantiate new Repo objects, and using the constructor method, we can pass in data, and validate it, before continuing to use it in our code.

// store/repo.js
const uuid = require('uuid/v4')

class Repo {
  constructor({ id, description, name, submitted_at, url }) {
    this.id = id || uuid()
    this.description = description
    
    if (!name) {
      throw new Error(`Missing name in data`)
    } else {
      this.name = name 
    }
    
    this.submitted_at = submitted_at || Number(new Date())
    
    try {
      const urlObj = new URL(url)
      const whitelist = ['github.com', 'gitlab.com']

      if (!whitelist.some(valid => valid === urlObj.host)) {
        throw new Error('The URL provided is not a repository')
      }
    } catch (err) {
      throw new Error('The URL provided is not valid')
    }

    this.url = url
  }

  save() {
    return REPO_HUNT.put(`repos:${this.id}`, JSON.stringify(this))
  }
}

module.exports = Repo

Even if you aren't super familiar with the constructor function in an ES6 class, this example should still be fairly easy to understand. When we want to create a new instance of a Repo, we pass the relevant data to constructor as an object, using ES6's destructuring assignment to pull each value out into its own key. With those variables, we walk through each of them, assigning this.$key (e.g. this.name, this.description, etc) to the passed-in value.

Many of these values have a "default" value: for instance, if no ID is passed to the constructor, we'll generate a new one, using our previously-saved uuid package's v4 variant to generate a new UUID, using uuid(). For submitted_at, we'll generate a new instance of Date and convert it to a Unix timestamp, and for url, we'll insure that the URL is both valid *and* is from github.com or gitlab.com to ensure that users are submitting genuine repos.

With that, the save function, which can be called on an instance of Repo, inserts a JSON-stringified version of the Repo instance into KV, setting the key as repos:$id. Back in handlers/create.js, we'll import the Repo class, and save a new Repo using our previously parsed data:

// handlers/create.js

// ...

const Repo = require('../store/repo')

const handler = async request => {
  try {
    // ...
    
    const data = qs.parse(body)
    const repo = new Repo(data)
    await repo.save()

    // ...
  } catch (err) {
    return new Response(err, { status: 400 })
  }
}

// ...

With that, a new Repo based on incoming form data should actually be persisted into Workers KV! While the repo is being saved, we also want to set up another data model, Day, which contains a simple list of the repositories that were submitted by users for a specific day. Let's create another file, store/day.js, and flesh it out:

// store/day.js
const today = () => new Date().toLocaleDateString()
const todayData = async () => {
  const date = today()
  const persisted = await REPO_HUNT.get(date)
  return persisted ? JSON.parse(persisted) : []
}

module.exports = {
  add: async function(id) {
    const date = today()
    let ids = await todayData()
    ids = ids.concat(id)
    return REPO_HUNT.put(date, JSON.stringify(ids))
  }
}

Note that the code for this isn't even a class — it's an object with key-value pairs, where the values are functions! We'll add more to this soon, but the single function we've defined, add, loads any existing repos from today's date (using the function today to generate a date string, used as the key in KV), and adds a new Repo, based on the id argument passed into the function. Back inside of handlers/create.js, we'll make sure to import and call this new function, so that any new repos are added immediately to today's list of repos:

// handlers/create.js

// ...

const Day = require('../store/day')

// ...

const handler = async request => {
  try {

    // ...
    
    await repo.save()
    await Day.add(repo.id)

    return new Response('ok', { headers: { Location: '/' }, status: 301 })
  } catch (err) {
    return new Response(err, { status: 400 })
  }
}

// ...

Our repo data now persists into KV and it's added to a listing of the repos submitted by users for today's date. Let's move on to the final piece of our tutorial, to take that data, and render it on the homepage.

Rendering data

At this point, we've implemented rendering HTML pages in a Workers application, as well as taking incoming data, and persisting it to Workers KV. It shouldn't surprise you to learn that taking that data from KV, and rendering an HTML page with it, our homepage, is quite similar to everything we've done up until now. Recall that the path / is tied to our index handler: in that file, we'll want to load the repos for today's date, and pass them into the template, in order to be rendered. There's a few pieces we need to implement to get that working – to start, let's look at handlers/index.js:

// handlers/index.js

// ...
const Day = require('../store/day')

const handler = async () => {
  try {
    let repos = await Day.getRepos()
    return new Response(template(repos), { headers })
  } catch (err) {
    return new Response(`Error! ${err} for ${JSON.stringify(repos)}`)
  }
}

// ...

While the general structure of the function handler should stay the same, we're now ready to put some genuine data into our application. We should import the Day module, and inside of the handler, call await Day.getRepos to get a list of repos back (don't worry, we'll implement the corresponding functions soon). With that set of repos, we pass them into our template function, meaning that we'll be able to actually render them inside of the HTML.

Inside of Day.getRepos, we need to load the list of repo IDs from inside KV, and for each of them, load the corresponding repo data from KV. In store/day.js:

// store/day.js

const Repo = require('./repo')

// ...

module.exports = {
  getRepos: async function() {
    const ids = await todayData()
    return ids.length ? Repo.findMany(ids) : []
  },
  
  // ...
}

The getRepos function reuses our previously defined todayData function, which returns a list of ids. If that list has *any* IDs, we want to actually retrieve those repositories. Again, we'll call a function that we haven't quite defined yet, importing the Repo class and calling Repo.findMany, passing in our list of IDs. As you might imagine, we should hop over to store/repo.js, and implement the accompanying function:

// store/repo.js

class Repo {
  static findMany(ids) {
    return Promise.all(ids.map(Repo.find))
  }

  static async find(id) {
    const persisted = await REPO_HUNT.get(`repos:${id}`)
    const repo = JSON.parse(persisted)
    return persisted ? new Repo({ ...repo }) : null
  }

  // ...
}

To support finding all the repos for a set of IDs, we define two class-level or static functions, find and findMany which uses Promise.all to call find for each ID in the set, and waits for them all to finish before resolving the promise. The bulk of the logic, inside of find, looks up the repo by its ID (using the previously-defined key, repos:$id), parses the JSON string, and returns a newly instantiated instance of Repo.

Now that we can look up repositories from KV, we should take that data and actually render it in our template. In handlers/index.js, we passed in the repos array to the template function defined in templates/index.js. In that file, we'll take that repos array, and render chunks of HTML for each repo inside of it:

// templates/index.js

const layout = require('./layout')
const dateFormat = submitted_at =>
  new Date(submitted_at).toLocaleDateString('en-us')

const repoTemplate = ({ description, name, submitted_at, url }) =>
  `<div class="media">
      <div class="media-content">
        <p>
          ${name}
        </p>
        <p>
          ${description}
        </p>
        <p>
          
            Submitted ${dateFormat(submitted_at)}
        </p>
      </div>
    </div>
  `

const template = repos => {
  const renderedRepos = repos.map(repoTemplate)

  return layout(`
  <div>
    ${
      repos.length
        ? renderedRepos.join('')
        : `<p>No repos have been submitted yet!</p>`
    }
  </div>
`)
}

module.exports = template

Breaking this file down, we have two primary functions: template (an updated version of our original exported function), which takes an array of repos, maps through them, calling repoTemplate, to generate an array of HTML strings. If repos is an empty array, the function simply returns a p tag with an empty state. The repoTemplate function uses destructuring assignment to set the variables description, name, submitted_at, and url from inside of the repo object being passed to the function, and renders each of them into fairly simple HTML, leaning on Bulma's CSS classes to quickly define a media object layout.

And with that, we're done writing code for our project! After coding a pretty comprehensive full-stack application on top of Workers, we're on the final step: deploying the application to the Workers platform.

Deploying your site to workers.dev

Every Workers user can claim a free Workers.dev subdomain, after signing up for a Cloudflare account. In Wrangler, we've made it super easy to claim and configure your subdomain, using the subdomain subcommand. Each account gets one Workers.dev subdomain, so choose wisely!

wrangler subdomain my-cool-subdomain

With a configured subdomain, we can now deploy our code! The name property in wrangler.toml will indicate the final URL that our application will be deployed to: in my codebase, the name is set to repo-hunt, and my subdomain is signalnerve.workers.dev, so my final URL for my project will be repo-hunt.signalnerve.workers.dev. Let's deploy the project, using the publish command:

wrangler publish

Before we can view the project in browser, we have one more step to complete: going into the Cloudflare UI, creating a KV namespace, and binding it to our project. To start this process, log into your Cloudflare dashboard, and select the "Workers" tab on the right side of the page.

Inside of the Workers section of your dashboard, find the "KV" menu item, and create a new namespace, matching the namespace you used in your codebase (if you followed the code samples, this will be REPO_HUNT).

In the listing of KV namespaces, copy your namespace ID. Back in our project, we'll add a `kv-namespaces` key to our `wrangler.toml`, to use our new namespace in the codebase:

# wrangler.toml
[[kv-namespaces]]
binding = "REPO_HUNT"
id = "$yourNamespaceId"

To make sure your project is using the new KV namespace, publish your project one last time:

wrangler publish

With that, your application should be able to successfully read and write from your KV namespace. Opening my project's URL should show the final version of our project — a full, data-driven application without needing to manage any servers, built entirely on the Workers platform!

What's next?

In this tutorial, we built a full-stack serverless application on top of the Workers platform, using Wrangler, Cloudflare's command-line tool for building and deploying Workers applications. There's a ton of things that you could do to continue to add to this application: for instance, the ability to upvote submissions, or even to allow comments and other kinds of data. If you'd like to see the finished codebase for this project, check out the GitHub repo!

The Workers team maintains a constantly growing list of new templates to begin building projects with – if you want to see what you can build, make sure to check out our Template Gallery. In addition, make sure to check out some of the tutorials in the Workers documentation, such as building a Slack bot, or a QR code generator.

If you went through the whole tutorial (or if you're building cool things you want to share), I'd love to hear about how it went on Twitter. If you’re interested in serverless and want to keep up with any new tutorials I’m publishing, make sure to join my newsletter and subscribe to my YouTube channel!

The post Building a Full-Stack Serverless Application with Cloudflare Workers appeared first on CSS-Tricks.