Implementing JDBC Persistent Object Store With Anypoint Clustering | MySQL Database

In this blog, we will be discussing about implementing persistent object store using MYSQL with Anypoint Clustering. We will going to see that how we can use MYSQL database to persist the object store data. One of the advantages of using persistent object store is that we will be not loosing data in case Mule Runtime or Mule Application get restarted or shutdown or crashes. In such cases, your object store data will persisted in Database. 

Enabling Persistent Object Store Using MySQL With Anypoint Clustering

To enable, Persistent object store using MySQL required few steps and there are few prerequisites.

7 Easy Steps to Generate Both XML and HTML Reports in Cypress

The common requirement when we are working with automation tests in we need to generate both XML and HMTL reports. When it comes to Cypress it relies on Mochawesome reporter. In this article, I will explain to you a simple way to generate HTML and Junit XML reporter in your Cypress end-to-end Automation framework. 

If you look over the internet there are many articles but for beginners, it's very complicated Since there is some complexity involved. 

Mistakes Probably Every Programmer Makes in the Beginning

You started your coding journey, multiple roads ahead, wondering which road to take, which map to follow, wondering how I am gonna walk the next step and many more questions would have arrived. Feeling nostalgic, seniors? I bet you do. But as a human we are bound to do mistakes, aren't we? So, let us talk about the mistakes a rookie or a newbie programmer makes, as I did, and later learns the lesson the hard way. If you are just starting your journey, I think the place and the timing couldn't have been more perfect. I hope this will show you the hurdles or the potholes you need to avoid to march ahead in your journey.

Overwhelming Yourself With Too Many Things

Someone said, start with C language, now you are learning C, next minute you heard about C++, now you are on to it. Very next day you read somewhere Java is popular then again you jumped to it. Someone whispered python, and here you go. It happened to me while I was in college. I was jumping to one another every semester (not like I was learning a language the whole sem). And seriously, I didn't even know what I have tried my hands on. In the last sem struggling to prepare for the job I came to my senses somehow and stuck to Java.

How I Used Brotli to Get Even Smaller CSS and JavaScript Files at CDN Scale

The HBO sitcom Silicon Valley hilariously followed Pied Piper, a team of developers with startup dreams to create a compression algorithm so powerful that high-quality streaming and file storage concerns would become a thing of the past.

In the show, Google is portrayed by the fictional company Hooli, which is after Pied Piper’s intellectual property. The funny thing is that, while being far from a startup, Google does indeed have a powerful compression engine in real life called Brotli

This article is about my experience using Brotli at production scale. Despite being really expensive and a truly unfeasible method for on-the-fly compression, Brotli is actually very economical and saves cost on many fronts, especially when compared with gzip or lower compression levels of Brotli (which we’ll get into).

Brotli’s beginning…

In 2015, Google published a blog post announcing Brotli and released its source code on GitHub. The pair of developers who created Brotli also created Google’s Zopfli compression two years earlier. But where Zopfli leveraged existing compression techniques, Brotli was written from the ground-up and squarely focused on text compression to benefit static web assets, like HTML, CSS, JavaScript and even web fonts.

At that time, I was working as a freelance website performance consultant. I was really excited for the 20-26% improvement Brotli promised over Zopfli. Zopfli in itself is a dense implementation of the deflate compressor compared with zlib’s standard implementation, so the claim of up to 26% was quite impressive. And what’s zlib? It’s essentially the same as gzip.

So what we’re looking at is the next generation of Zopfli, which is an offshoot of zlib, which is essentially gzip.

A story of disappointment

It took a few months for major CDN players to support Brotli, but meanwhile it was seeing widespread adoption in tools, services, browsers and servers. However, the 26% dense compression that Brotli promised was never reflected in production. Some CDNs set a lower compression level internally while others supported Brotli at origin so that they only support it if it was enabled manually at the origin.

Server support for Brotli was pretty good, but to achieve high compression levels, it required rolling your own pre-compression code or using a server module to do it for you — which is not always an option, especially in the case of shared hosting services.

This was really disappointing for me. I wanted to compress every last possible byte for my clients’ websites in a drive to make them faster, but using pre-compression and allowing clients to update files on demand simultaneously was not always easy.

Taking matters into my own hands

I started building my own performance optimization service for my clients.

I had several tricks that could significantly speed up websites. The service categorized all the optimizations in three groups consisting of several “Content,” “Delivery,” and “Cache” optimizations. I had Brotli in mind for the content optimization part of the service for compressible resources.

Like other compression formats, Brotli comes in different levels of power. Brotli’s max level is exactly like the max volume of the guitar amps in This is Spinal Tap: it goes to 11.

Brotli:11, or Brotli compression level 11, can offer significant reduction in the size of compressible files, but has a substantial trade-off: it is painfully slow and not feasible for on demand compression the same way gzip is capable of doing it. It costs significantly more in terms of CPU time.

In my benchmarks, Brotli:11 takes several hundred milliseconds to compress a single minified jQuery file. So, the only way to offer Brotli:11 to my clients was to use it for pre-compression, leaving me to figure out a way to cache files at the server level. Luckily we already had that in place. The only problem was the fear that Brotli could kill all our processing resources.

Maybe that’s why Pied Piper had to continue rigging its servers for more power.

I put my fears aside and built Brotli:11 as a configurable server option. This way, clients could decide whether enabling it was worth the computing cost.

It’s slow, but gradually pays off

Among several other optimizations, the service for my clients also offers geographic content delivery; in other words, it has a built-in CDN.

Of the several tricks I tried when taking matters into my own hands, one was to combine public CDN (or open-source CDN) and private CDN on a single host so that websites can enjoy the benefits of shared browser cache of public resources without incurring separate DNS lookup and connection cost for that public host. I wanted to avoid this extra connection cost because it has significant impact for mobile users. Also, combining more and more resources on a single host can help get the most of HTTP/2 features, like multiplexing.

I enabled the public CDN and turned on Brotli:11 pre-compression for all compressible resources, including CSS, JavaScript, SVG, and TTF, among other types of files. The overhead of compression did indeed increase on first request of each resource — but after that, everything seemed to run smoothly. Brotli has over 90% browser support and pretty much all the requests hitting my service now use Brotli.

I was happy. Clients were happy. But I didn’t have numbers. I started analyzing the impact of enabling this high density compression on public resources. For this, I recorded file transfer sizes of several popular libraries — including jQuery, Bootstrap, React, and other frameworks — that used common compression methods implemented by other CDNs and found that Brotli:11 compression was saving around 21% compared to other compression formats.

It’s important to note that some of the other public CDNs I compared were already using Brotli, but at lower compression levels. So, the 21% extra compression was really satisfying for me. This number is based on a very small subset of libraries but is not incorrect by a big margin as I was seeing this much gain on all of the websites that I tested.

Here is a graphical representation of the savings.

Vertical bar chart. Compares jQuery, Bootstrap, D3.js, Ant Design, Senamtic UI, Font Awesome, React, Three.js, Bulma and Vue before and after Brotli compression. Brotli compression is always smaller.

You can see the raw data below..Note that the savings for CSS is much more prominent than what JavaScript gets.

LibraryOriginalAvg. of Common Compression (A)Brotli:11 (B)(A) / (B) – 1
Ant Design1,938.99 KB438.24 KB362.82 KB20.79%
Bootstrap152.11 KB24.20 KB17.30 KB39.88%
Bulma186.13 KB23.40 KB19.30 KB21.24%
D3.js236.82 KB74.51 KB65.75 KB13.32%
Font Awesome1,104.04 KB422.56 KB331.12 KB27.62%
jQuery86.08 KB30.31 KB27.65 KB9.62%
React105.47 KB33.33 KB30.28 KB10.07%
Semantic UI613.78 KB91.93 KB78.25 KB17.48%
three.js562.75 KB134.01 KB114.44 KB17.10%
Vue.js91.48 KB33.17 KB30.58 KB8.47%

The results are great, which is what I expected. But what about the overall impact of using Brotli:11 at scale? Turns out that using Brotli:11 for all public resources reduces cost all around:

  • The smaller file sizes are expected to result in lower TLS overhead. That said, it is not easily measurable, nor is it significant for my service because modern CPUs are very fast at encryption. Still, I believe there is some tiny and repeated saving on account of encryption for every request as smaller files encrypt faster.
  • It reduces the bandwidth cost. The 21% savings I got across the board is the case in point. And, remember, savings are not a one-time thing. Each request counts as cost, so the 21% savings is repeated time and again, creating a snowball savings for the cost of bandwidth. 
  • We only cache hot files in memory at edge servers. Due to the widespread browser support for Brotli, these hot files are mostly encoded by Brotli and their small size lets us fit more of them in available memory.
  • Visitors, especially those on mobile devices, enjoy reduced data transfer. This results in less battery use and savings on data charges. That’s a huge win that gets passed on to the users of our clients!

This is all so good. The cost we save per request is not significant, but considering we have a near zero cache miss rate for public resources, we can easily amortize the initial high cost of compression in next several hundred requests. After that,  we’re looking at a lifetime benefit of reduced overhead.

It doesn’t end there

With the mix of public and private CDNs that we introduced as part of our performance optimization service, we wanted to make sure that clients could set lower compression levels for resources that frequently change over time (like custom CSS and JavaScript) on the private CDN and automatically switch to the public CDN for open-source resources that change less often and have pre-configured Brotli:11. This way, our clients can still get a high compression ratio on resources that change less often while still enjoying good compression ratios with instant purge and updates for compressible resources.

This all is done smoothly and seamlessly using our integration tools. The added benefit of this approach for clients is that the bandwidth on the public CDN is totally free with unprecedented performance levels.

Try it yourself!

Testing on a common website, using aggressive compression can easily shave around 50 KB off the page load. If you want to play with the free public CDN and enjoy smaller CSS and JavaScript, you are welcome to use our PageCDN service. Here are some of the most used libraries for your use:

<!-- jQuery 3.5.0 -->
<script src="https://pagecdn.io/lib/jquery/3.5.0/jquery.min.js" crossorigin="anonymous" integrity="sha256-xNzN2a4ltkB44Mc/Jz3pT4iU1cmeR0FkXs4pru/JxaQ=" ></script>


<!-- FontAwesome 5.13.0 -->
<link href="https://pagecdn.io/lib/font-awesome/5.13.0/css/all.min.css" rel="stylesheet" crossorigin="anonymous" integrity="sha256-h20CPZ0QyXlBuAw7A+KluUYx/3pK+c7lYEpqLTlxjYQ=" >


<!-- Ionicons 4.6.3 -->
<link href="https://pagecdn.io/lib/ionicons/4.6.3/css/ionicons.min.css" rel="stylesheet" crossorigin="anonymous" integrity="sha256-UUDuVsOnvDZHzqNIznkKeDGtWZ/Bw9ZlW+26xqKLV7c=" >


<!-- Bootstrap 4.4.1 -->
<link href="https://pagecdn.io/lib/bootstrap/4.4.1/css/bootstrap.min.css" rel="stylesheet" crossorigin="anonymous" integrity="sha256-L/W5Wfqfa0sdBNIKN9cG6QA5F2qx4qICmU2VgLruv9Y=" >


<!-- React 16.13.1 -->
<script src="https://pagecdn.io/lib/react/16.13.1/umd/react.production.min.js" crossorigin="anonymous" integrity="sha256-yUhvEmYVhZ/GGshIQKArLvySDSh6cdmdcIx0spR3UP4=" ></script>


<!-- Vue 2.6.11 -->
<script src="https://pagecdn.io/lib/vue/2.6.11/vue.min.js" crossorigin="anonymous" integrity="sha256-ngFW3UnAN0Tnm76mDuu7uUtYEcG3G5H1+zioJw3t+68=" ></script>

Our PHP library automatic switches between private and public CDN if you need it to. The same feature is implemented seamlessly in our WordPress plugin that automatically loads public resources over Public CDN. Both of these tools allow full access to the free public CDN. Libraries for JavaScript, Python. and Ruby are not yet available. If you contribute any such library to our Public CDN, I will be happy to list it in our docs.

Additionally, you can use our search tool to immediately find a corresponding resource on the public CDN by supplying a URL of a resource on your website. If none of these tools work for you, then you can check the relevant library page and pick the URLs you want.

Looking toward the future

We started by hosting only the most popular libraries in order to prevent malware spread. However, things are changing rapidly and we add new libraries as our users suggest them to us. You are welcome to suggest your favorite ones, too. If you still want to link to a public or private Github repo that is not yet available on our public CDN, you can use our private CDN to connect to a repo and import all new releases as they appear on GitHub and then apply your own aggressive optimizations before delivery.

What do you think?

Everything we covered here is solely based on my personal experience working with Brotli compression at CDN scale. It just happens to be an introduction to my public CDN as well. We are still a small service and our client websites are only in the hundreds. Still, at this scale the aggressive compression seems to pay off.

I achieved high quality results for my clients and now you can use this free service for your websites as well. And, if you like it, please leave feedback at my email and recommend it to others.

The post How I Used Brotli to Get Even Smaller CSS and JavaScript Files at CDN Scale appeared first on CSS-Tricks.

Mastering API Analytics for API Programs: The Developer Funnel

You have an API program that developers are adopting, but unsure how much. How long does it take for a new integration to move to revenue generation? If you came from a web or mobile product management background, you may already be familiar with mobile product analytics to measure app engagement and retention. Growing APIs have similar KPIs to measure the success of your API program. This article will talk more what you should be measuring and how to leverage that information.

The Developer Funnel

While traditional customer funnels will consist of just a marketing and sales funnel component. However, APIs as a product where customers and partners include developers have what is called the developer funnel or integration funnel. The developer funnel is after the marketing funnel and before the sales funnel and has three core stages:

How to Build a CRUD Application Using React and Django

In this tutorial, we are going to build a CRUD application for storing books with React and Django. CRUD stands for Create, Read, Update and Delete, so basically this app would work like a library shelf where we can take a look at each book data being able to modify as we want or need.

Technologies Used

For this application, we will be using two very popular solutions for building user interfaces and APIs. The user interface of the application will be built using React – prior knowledge of React is not required for this tutorial.

How to Animate on the Web With Greensock

There are truly thousands of ways to animate on the web. We’ve covered a comparison of different animation technologies here before. Today, we’re going to dive into a step-by-step guide of one of my favorite ways to get it done: using GreenSock.

(They don’t pay me or anything, I just really enjoy using them.)

Why do I prefer Greensock to other methods? Technically speaking, it's often the best tool for the job. Its usage is extremely straightforward, even for complex movement. Here are a few more reasons why I prefer using it:

  • You can use them on DOM elements as well as within WebGL/Canvas/Three.js contexts.
  • The easing is very sophisticated. CSS animations are limited to two bezier handles for ease, meaning if you want, say, a bounce effect, you would have to make keyframes up and down and up and down for each pass. GreenSock allows multiple bezier handles to create advanced effects. A bounce is a single line of code. You can see what I mean by checking out their ease visualizer.
  • You can sequence movement on a timeline. CSS animations can get a little spaghetti when you have to coordinate several things at once. GreenSock remains very legible and allows you to control the timeline itself. You can even animate your animations! 🤯
  • It will perform some calculations under the hood to prevent strange cross-browser behavior as well as things that the spec dictates should be true aren't — like the way that stacking transforms work.
  • It offers a lot of advanced functionality, in the form of plugins, that you can use if you’d like to take your work a step further — things like Morphing SVG shapes, drawing SVG paths, dragging and dropping, inertia, and more.

People sometimes ask me why I'd use this particular library over all of the other choices. It’s further along than most others — they’ve been around since the Flash was still a thing. This demo reel is pretty inspiring, and also gets the point across that serious web animators do tend to reach for this tool:

What follows is a breakdown of how to create movement on the web, distilled down to the smallest units I could make them. Let’s get started!

Animating a DOM element

Consider a ball that we make with a

that's styled with a border-radius value of 50%. Here’s how we would scale and move it with Greensock:


gsap.to('.ball', {
  duration: 1,
  x: 200,
  scale: 2
})

See the Pen
Greensock Tutorial 1
by Sarah Drasner (@sdras)
on CodePen.

In this case, we’re telling GreenSock (gsap) to take the element with the class of .ball move it .to() a few different properties. We’ve shortened the CSS properties of transform: translateX(200px) to a streamlined x: 200 (note there's no need for the units, but you can pass them as a string). We’re also not writing transform: scale(2). Here's a reference of the transforms you might want to use with animations, and their corresponding CSS syntax:

x: 100 // transform: translateX(100px)
y: 100 // transform: translateY(100px)
z: 100 // transform: translateZ(100px)
// you do not need the null transform hack or hardware acceleration, it comes baked in with
// force3d:true. If you want to unset this, force3d:false
scale: 2 // transform: scale(2)
scaleX: 2 // transform: scaleX(2)
scaleY: 2 // transform: scaleY(2)
scaleZ: 2 // transform: scaleZ(2)
skew: 15 // transform: skew(15deg)
skewX: 15 // transform: skewX(15deg)
skewY: 15 // transform: skewY(15deg)
rotation: 180 // transform: rotate(180deg)
rotationX: 180 // transform: rotateX(180deg)
rotationY: 180 // transform: rotateY(180deg)
rotationZ: 180 // transform: rotateZ(180deg)
perspective: 1000 // transform: perspective(1000px)
transformOrigin: '50% 50%' // transform-origin: 50% 50%

Duration is what you might think it is: it’s a one-second stretch of time.

So, OK, how would we animate, say, an SVG? Let’s consider the same code above as an SVG:

  
gsap.to('.ball', {
  duration: 1,
  x: 200,
  scale: 2
})

See the Pen
Greensock Tutorial 2
by Sarah Drasner (@sdras)
on CodePen.

From an animation perspective, it’s actually exactly the same. It’s grabbing the element with the class .ball on it, and translating those properties. Since SVGs are literally DOM elements, we can slap a class on any one of them and animate them just the same way!

Great! We’re cooking with gas.

Eases

I mentioned before that eases are one of my favorite features, let’s take a look at how we’d use them.

Let’s take the original ball. Maybe we want to try one of those more unique bounce eases. It would go like this:

gsap.to('.ball', {
  duration: 1.5,
  x: 200,
  scale: 2,
  ease: 'bounce'
})

See the Pen
Greensock Tutorial 3
by Sarah Drasner (@sdras)
on CodePen.

That’s it! This version of GreenSock assumes that you want to use ease-out timing (which is better for entrances), so it applies that as a default. All you have to do is specify "bounce" as a string and you’re off to the races.

You might have noticed we also lengthened the duration a bit as well. That’s because the ball has to do more "work" in between the initial and end states. A one-second duration, though lovely for linear or sine easing, is a little too quick for a bounce or an elastic ease.

Delays and Timelines

I mentioned that the default ease-out timing function is good for entrances. What about an ease-in or ease-in-out exit? Let’s do that as well.

gsap.to('.ball', {
  duration: 1.5,
  x: 200,
  scale: 2,
  ease: 'bounce'
})

gsap.to('.ball', {
  duration: 1.5,
  delay: 1.5,
  x: 0,
  scale: 1,
  ease: 'back.inOut(3)'
})

You might have noticed a few things happening. For example, we didn't use bounce.in on the second-to-last line (ease: 'back.inOut(3)'). Instead, we used another ease called back for ease-in-out. We also passed in a configuration option because, as you can see with Greensock's ease visualizer tool, we’re not limited to just the default configuration for that ease. We can adjust it to our needs. Neat!

You may have also noticed that we chained the animations using a delay. We took the length of the duration of the first animation and made sure the next one has a delay that matches. Now, that works here, but that’s pretty brittle. What if we want to change the length of the first one? Well, now we’ve got to go back through and change the delay that follows. And what if we have another animation after that? And another one after that? Well, we’d have to go back through and calculate all the other delays down the line. That's a lot of manual work.

We can offload that work to the computer. Some of my more complex animations are hundreds of chained animations! If I finish my work and want to adjust something in the beginning, I don’t want to have to go back through everything. Enter timelines:

gsap
  .timeline()
  .to(‘.ball’, {
    duration: 1.5,
    x: 200,
    scale: 2,
    ease: "bounce"
  })
  .to(‘.ball’, {
    duration: 1.5,
    x: 0,
    scale: 1,
    ease: "back.inOut(3)"
  });

See the Pen
Greensock Tutorial 4
by Sarah Drasner (@sdras)
on CodePen.

This instantiates a timeline and then chains the two animations off of it.

But we still have a bit of repetition where we keep using the same duration in each animation. Let’s create a default for that as an option passed to the timeline.

gsap
  .timeline({
    defaults: {
      duration: 1.5
    }
  })
  .to('.ball', {
    x: 200,
    scale: 2,
    ease: "bounce"
  })
  .to('.ball', {
    x: 0,
    scale: 1,
    ease: "back.inOut(3)"
  });

See the Pen
Greensock Tutorial 4
by Sarah Drasner (@sdras)
on CodePen.

That’s pretty cool! Alright, you are probably starting to see how things are built this way. While it might not be a big deal in an animation this simple, defaults and timelines in really complex animations can truly keep code maintainable.

Now, what if we want to mirror this motion in the other direction with the ball, and just... keep it going? In other words, what if we want a loop? That’s when we add repeat: -1, which can be applied either to a single animation or to the entire timeline.

gsap
  .timeline({
    repeat: -1,
    defaults: {
      duration: 1.5
    }
  })
  .to('.ball', {
    x: 200,
    scale: 2,
    ease: "bounce"
  })
  .to('.ball', {
    x: 0,
    scale: 1,
    ease: "back.inOut(3)"
  })
  .to('.ball', {
    x: -200,
    scale: 2,
    ease: "bounce"
  })
  .to('.ball', {
    x: 0,
    scale: 1,
    ease: "back.inOut(3)"
  });

See the Pen
Greensock Tutorial 5
by Sarah Drasner (@sdras)
on CodePen.

We could also not only make it repeat but repeat and playback and forth, like a yoyo. That’s why we call this yoyo: true. To make the point clear, we’ll show this with just the first animation. You can see it plays forward, and then it plays in reverse.

gsap
  .timeline({
    repeat: -1,
    yoyo: true,
    defaults: {
      duration: 1.5
    }
  })
  .to('.ball', {
    x: 200,
    scale: 2,
    ease: "bounce"
  })

See the Pen
Greensock Tutorial 6
by Sarah Drasner (@sdras)
on CodePen.

Overlaps and Labels

It’s great that we can chain animations with ease, but real-life motion doesn’t exactly work this way. If you walk across the room to get a cup of water, you don’t walk. Then stop. Then pick up the water. Then drink it. You’re more likely to do things in one continuous movement. So let’s talk briefly about how to overlap movement and make things fire at once.

If we want to be sure things fire a little before and after each other on a timeline, we can use an incrementer or decrementer. If we take the following example that shows three balls animating one after another, it feels a little stiff.

gsap
  .timeline({
    defaults: {
      duration: 1.5
    }
  })
  .to('.ball', {
    x: 300,
    scale: 2,
    ease: "bounce"
  })
  .to('.ball2', {
    x: 300,
    scale: 2,
    ease: "bounce"
  })
  .to('.ball3', {
    x: 300,
    scale: 2,
    ease: "bounce"
  })

See the Pen
Greensock Tutorial 8
by Sarah Drasner (@sdras)
on CodePen.

Things get smoother if we overlap the movement just slightly using those decrementers passed as strings:

gsap
  .timeline({
    defaults: {
      duration: 1.5
    }
  })
  .to('.ball', {
    x: 300,
    scale: 2,
    ease: "bounce"
  })
  .to('.ball2', {
    x: 300,
    scale: 2,
    ease: "bounce"
  }, '-=1')
  .to('.ball3', {
    x: 300,
    scale: 2,
    ease: "bounce"
  }, '-=1')

See the Pen
Greensock Tutorial 9
by Sarah Drasner (@sdras)
on CodePen.

Another way we can do this is to use something called a label. Labels make sure things fire off at a particular point in time in the playhead of the animation. It looks like this:.add('labelName')

gsap
  .timeline({
    defaults: {
      duration: 1.5
    }
  })
  .add('start')
  .to('.ball', {
    x: 300,
    scale: 2,
    ease: "bounce"
  }, 'start')
  .to('.ball2', {
    x: 300,
    scale: 2,
    ease: "bounce"
  }, 'start')
  .to('.ball3', {
    x: 300,
    scale: 2,
    ease: "bounce"
  }, 'start')

See the Pen
Greensock Tutorial 10
by Sarah Drasner (@sdras)
on CodePen.

We can even increment and decrement from the label. I actually do this a lot in my animations. It looks like this: 'start+=0.25'

gsap
  .timeline({
    defaults: {
      duration: 1.5
    }
  })
  .add('start')
  .to('.ball', {
    x: 300,
    scale: 2,
    ease: "bounce"
  }, 'start')
  .to('.ball2', {
    x: 300,
    scale: 2,
    ease: "bounce"
  }, 'start+=0.25')
  .to('.ball3', {
    x: 300,
    scale: 2,
    ease: "bounce"
  }, 'start+=0.5')

Whew! We’re able to do so much with this! Here’s an example of an animation that puts a lot of these premises together, with a bit of interaction using vanilla JavaScript. Be sure to click on the bell.

See the Pen
phone interaction upgrade
by Sarah Drasner (@sdras)
on CodePen.

If you're looking more for framework-based animation with GreenSock, here's an article I wrote that covers this in Vue, and a talk I gave that addresses React — it's a couple of years old but the base premises still apply.

But there’s still so much we haven’t cover, including staggers, morphing SVG, drawing SVG, throwing things around the screen, moving things along a path, animating text... you name it! I'd suggest heading over to GreenSock’s documentation for those details. I also have a course on Frontend Masters that covers all of these in much more depth and the materials are open source on my GitHub. I also have a lot of Pens that are open source for you to fork and play with.

I hope this gets you started working with animation on the web! I can’t wait to see what you make!

The post How to Animate on the Web With Greensock appeared first on CSS-Tricks.

8 Basic Git Commands Every Newbie Developer Must Know

Learn more about these essential Git commands.

Git is one of the most important parts of the developer’s day-to-day work. So learning Git is a must for a newbie developer. In this article, you are going to learn the eight most important basic Git commands.

Below, I have listed down all the eight commands. Then, we will have a look at them one by one.

Emcee Tips for a Conference or Meetup

There are some great resources out there to help conference speakers give better talks, but fewer for people who are preparing to take on the role of emcee at meetup or conference.

I've been fortunate enough to emcee conferences more than 20 times now, most recently JAMstack_conf which I help organize. I also enjoy hosting smaller, less formal meetups which benefit just as much from having somebody to keep things rolling nicely along.

Since emcee-ing is a rather visible role, I often get asked, "Got any tips for emcee-ing?" I do. At the same time, note that there is no substitute for finding the approach that fits you and lets you be yourself. But I've found what works for me, and what I enjoy in an emcee when I'm attending or speaking at a conference.

Here's my advice:

Biggest tip: Enjoy yourself.

I find that trying to relax (yeah, easy to say) and remembering that the audience want you to succeed really helps. When you remember that you're not hosting the Oscars (if you are reading this in preparation for hosting the Oscars, please contact me directly. DMs are open), and that people are very happy with you being human and personable, it gives you license to relax and talk to the room as if everyone is your friend. That’s liberating and helps you to be more natural.

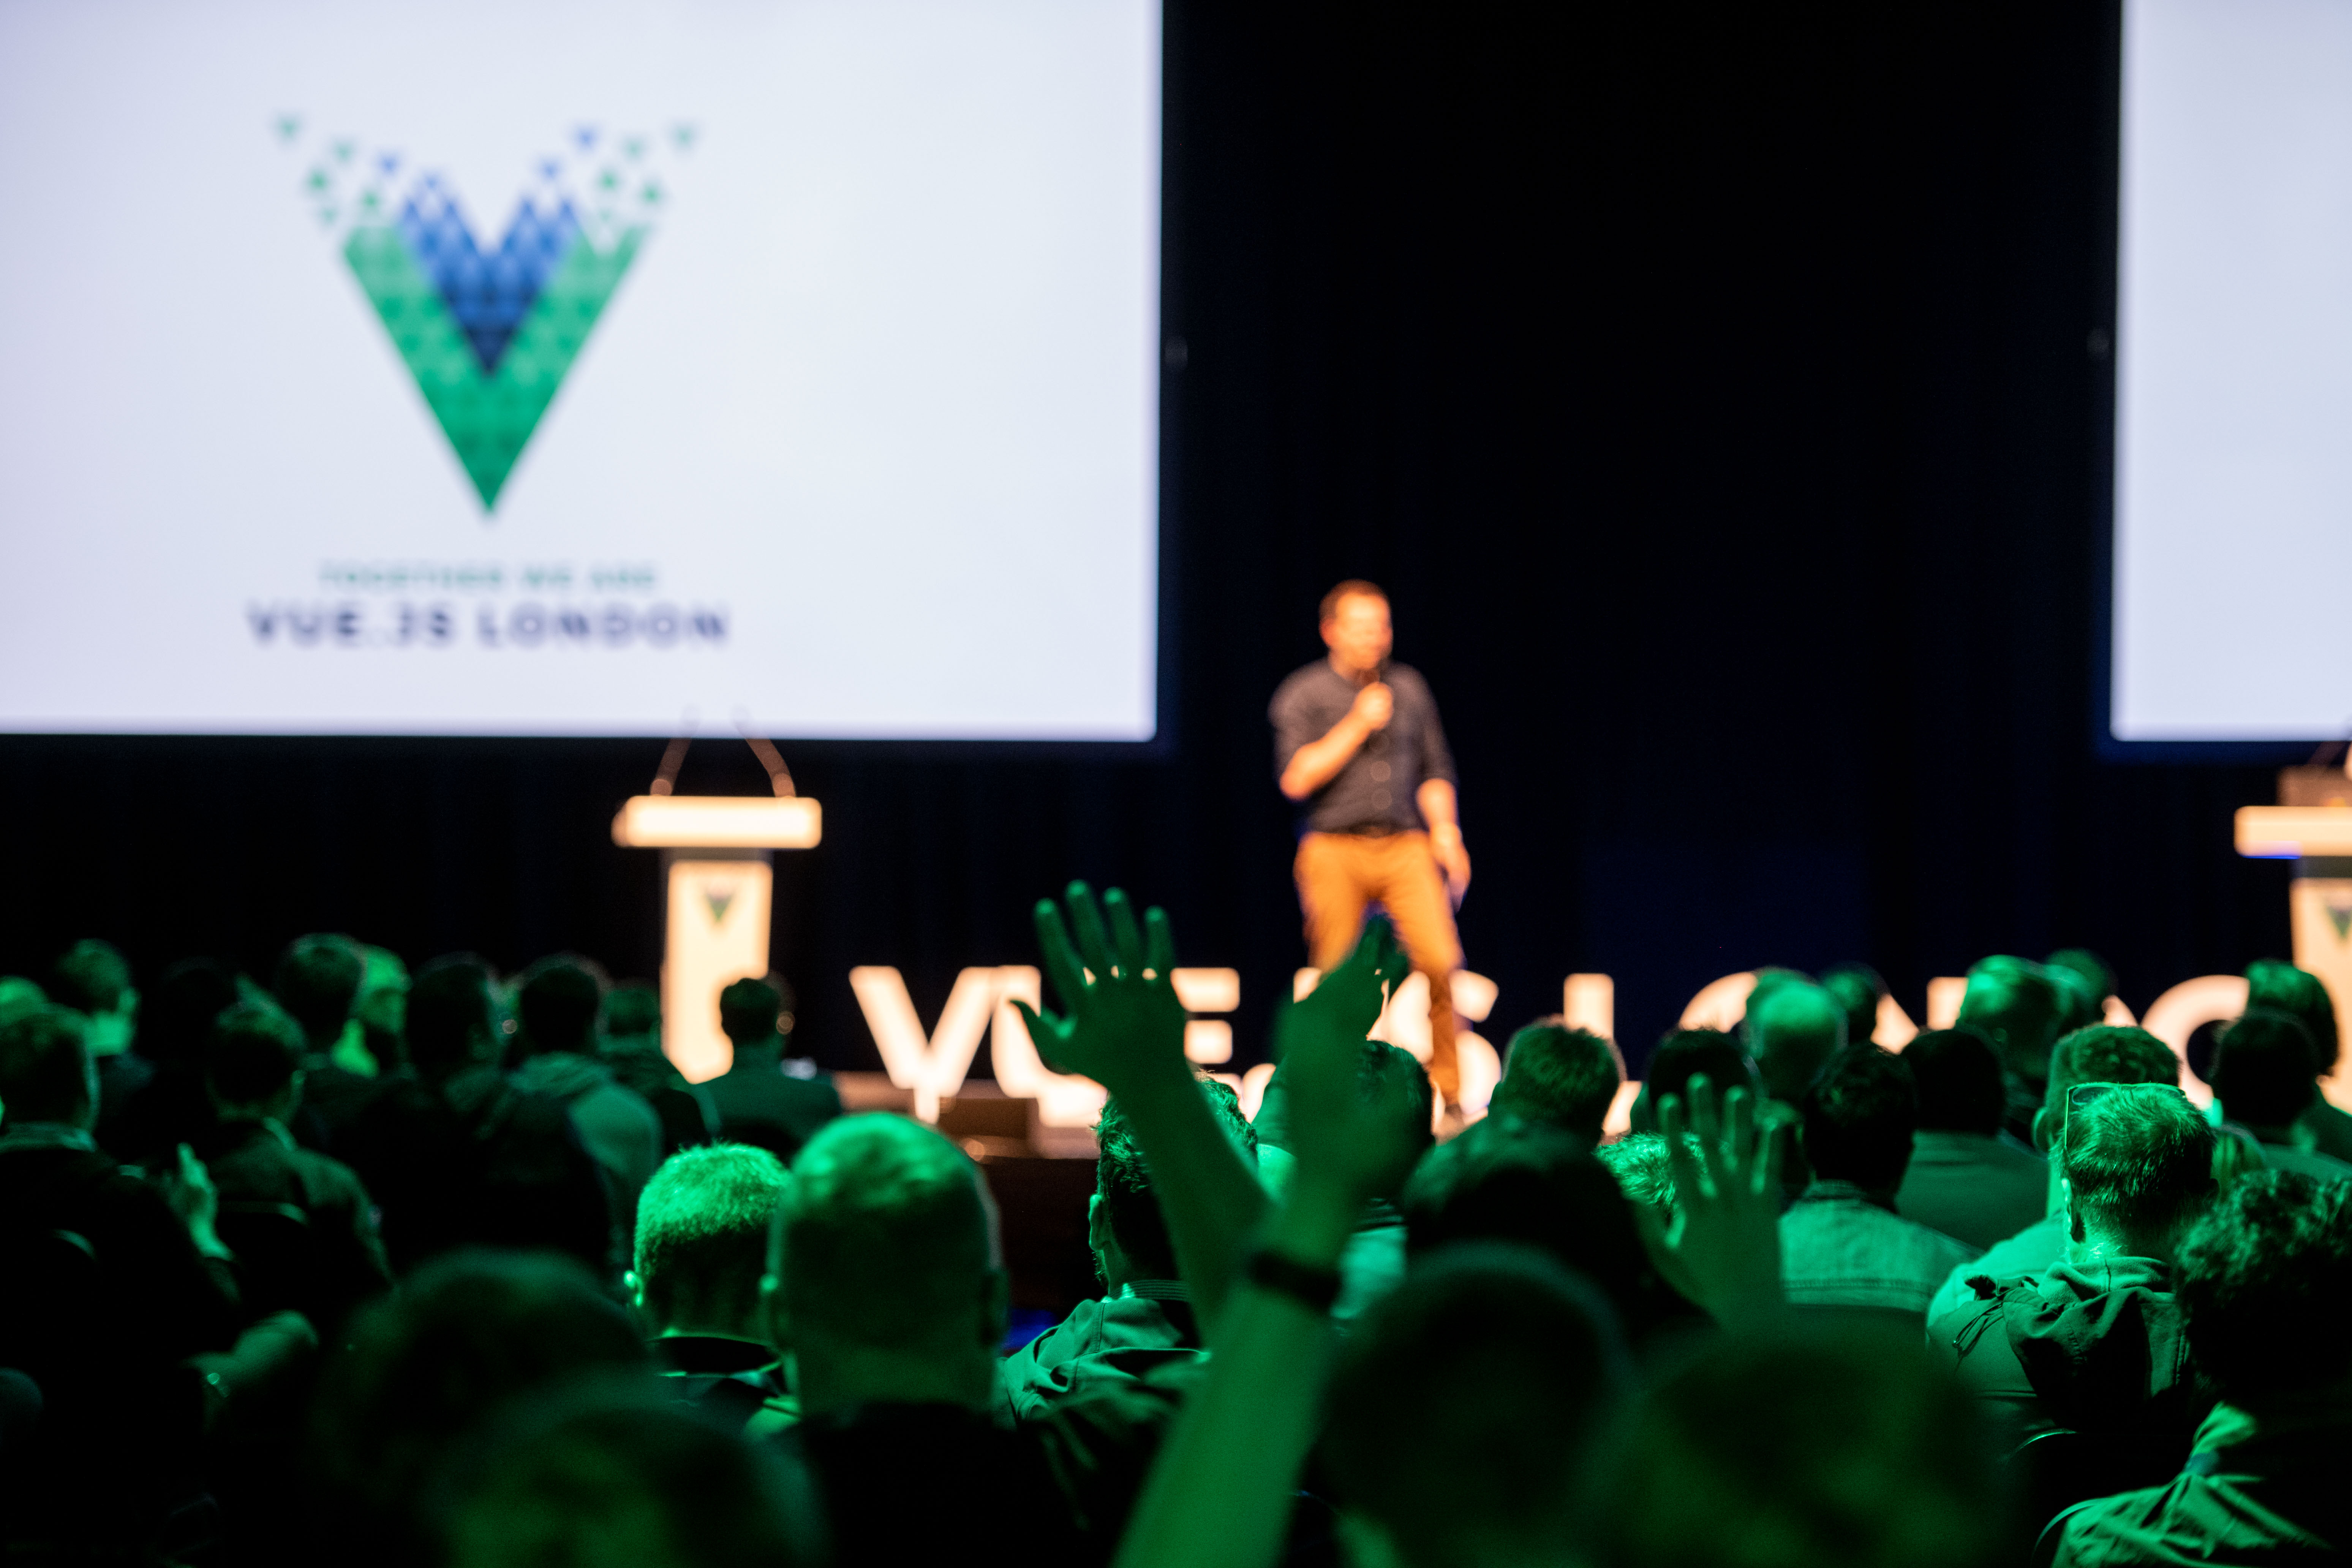
The crowd's view of the stage at Vue.js London. Image copyright www.edtelling.com.

To err is human

While we all want things to run as smoothly as possible, mistakes happen. Don’t panic or let them throw you off too much. I find that owning mistakes and communicating them honestly to the audience can be a feature rather than a bug. It also helps them trust you and be on your side. (I believe that there is only one “side” at a conference anyway. And this can help to establish that.)

Many of the moments I consider highlights have come from some silly mistake I’ve made on stage, like giving the wrong information and being corrected by the audience. It’s fine. We’re in it together. Have a little fun with it.

Technical difficulties

It’s really common for there to be technical difficulties during a conference. They often only take a few moments to resolve, but they can occasionally drag on and become a little uncomfortable.

As a speaker it is horrible to think that you are on your own to fix things while a room full of people impatiently watches on. As an emcee, you can help enormously by being ready to jump in if it looks like things might need some time and concentration from the speaker, or if a helpful member of the audio-visual team is sprinting to the stage.

I like to step back on the stage to provide a little buffer. No need to panic. Often just a little company on stage and some headspace is all that is required. My trick is to keep a little pocket-sized notebook on me all day. I keep a few notes ready, things like news and announcements for the audience. Where will the refreshments be later? Who are the sponsors and where can you find them? What are the details for the social later on? Those kinds of things. You may need them at the start of the next break anyway, but you can buy a little time for the speakers and save time for later by being ready to share that at this "handy opportunity."

“Me again! We’ll get this fixed in a second. While we have a mo...”

Even when there isn’t a problem, the speaker might still take a little time to plug in their laptop, be certain that they can see their speaker notes, and so on. If the conference does need each speaker to plug in as they come to the stage, I like to invite them up while I introduce them, and then check that they are ready when it looks like they have stopped tinkering with their setup. This doesn’t need to be a secret from the audience. “It looks like Jina is ready to go. Are you all set? Excellent! OK, a big round of applause please, for...”

Longer pauses. Oh this is getting awwwwwkward!

Every once in a while, there is a larger technical issue. The audio-visual team is on it, but you’ve used up all your padding material, pulled a couple of jokes from your back pocket, and now you and the speaker are stranded on stage with nothing to say and that horrible feeling of not knowing where to put your hands so that you look natural. Not to worry. Be honest.

Eventually the audience will start to feel awkward too, so cut this off at the pass. If things look like they really do need a few minutes, tell the audience. A bright and breezy update buys you some time and some good will.

"It looks like we still need a couple more minutes to figure this out, so we’ll step off stage for a moment and then come on again to enjoy a second, bonus round of applause. Don’t go anywhere, we’ll be right back!"

This sort of thing can take the pressure off everyone. Including the audience. And you can milk that second round of applause for the speaker as they return.

Just be honest. Everyone is on your side, remember.

Practice all the names

A mistake that makes me uncomfortable is botching somebody's name when I introduce them. That is a bit of a fear I still have and I've done it many times despite my best efforts. I like to watch YouTube videos of all the speakers that I don't already know to get a sense of what they've spoken about in the past, and also as a chance to listen to how they introduce themselves. I practice them out loud and write them down phonetically if they are tricky.

If you find a name particularly difficult, you can even use the voice recorder on your phone to capture how they pronounce it on YouTube, or your own best try, and then have it ready as a last-minute primer just before you need it.

Know more than the speaker's bio

Speakers often get introduced by someone reading out their bio. I don't think this gives the impression that you have enthusiasm for, or awareness of them. Both of which are, I think, valuable for creating trust with the audience and comfort for the speaker. I like to look them up and make some notes based on previous talks, the links on their own sites, or whatever else I can scrounge. I like to have an intro that goes beyond the bio that the attendees all have and will recognize as being read verbatim when they hear it.

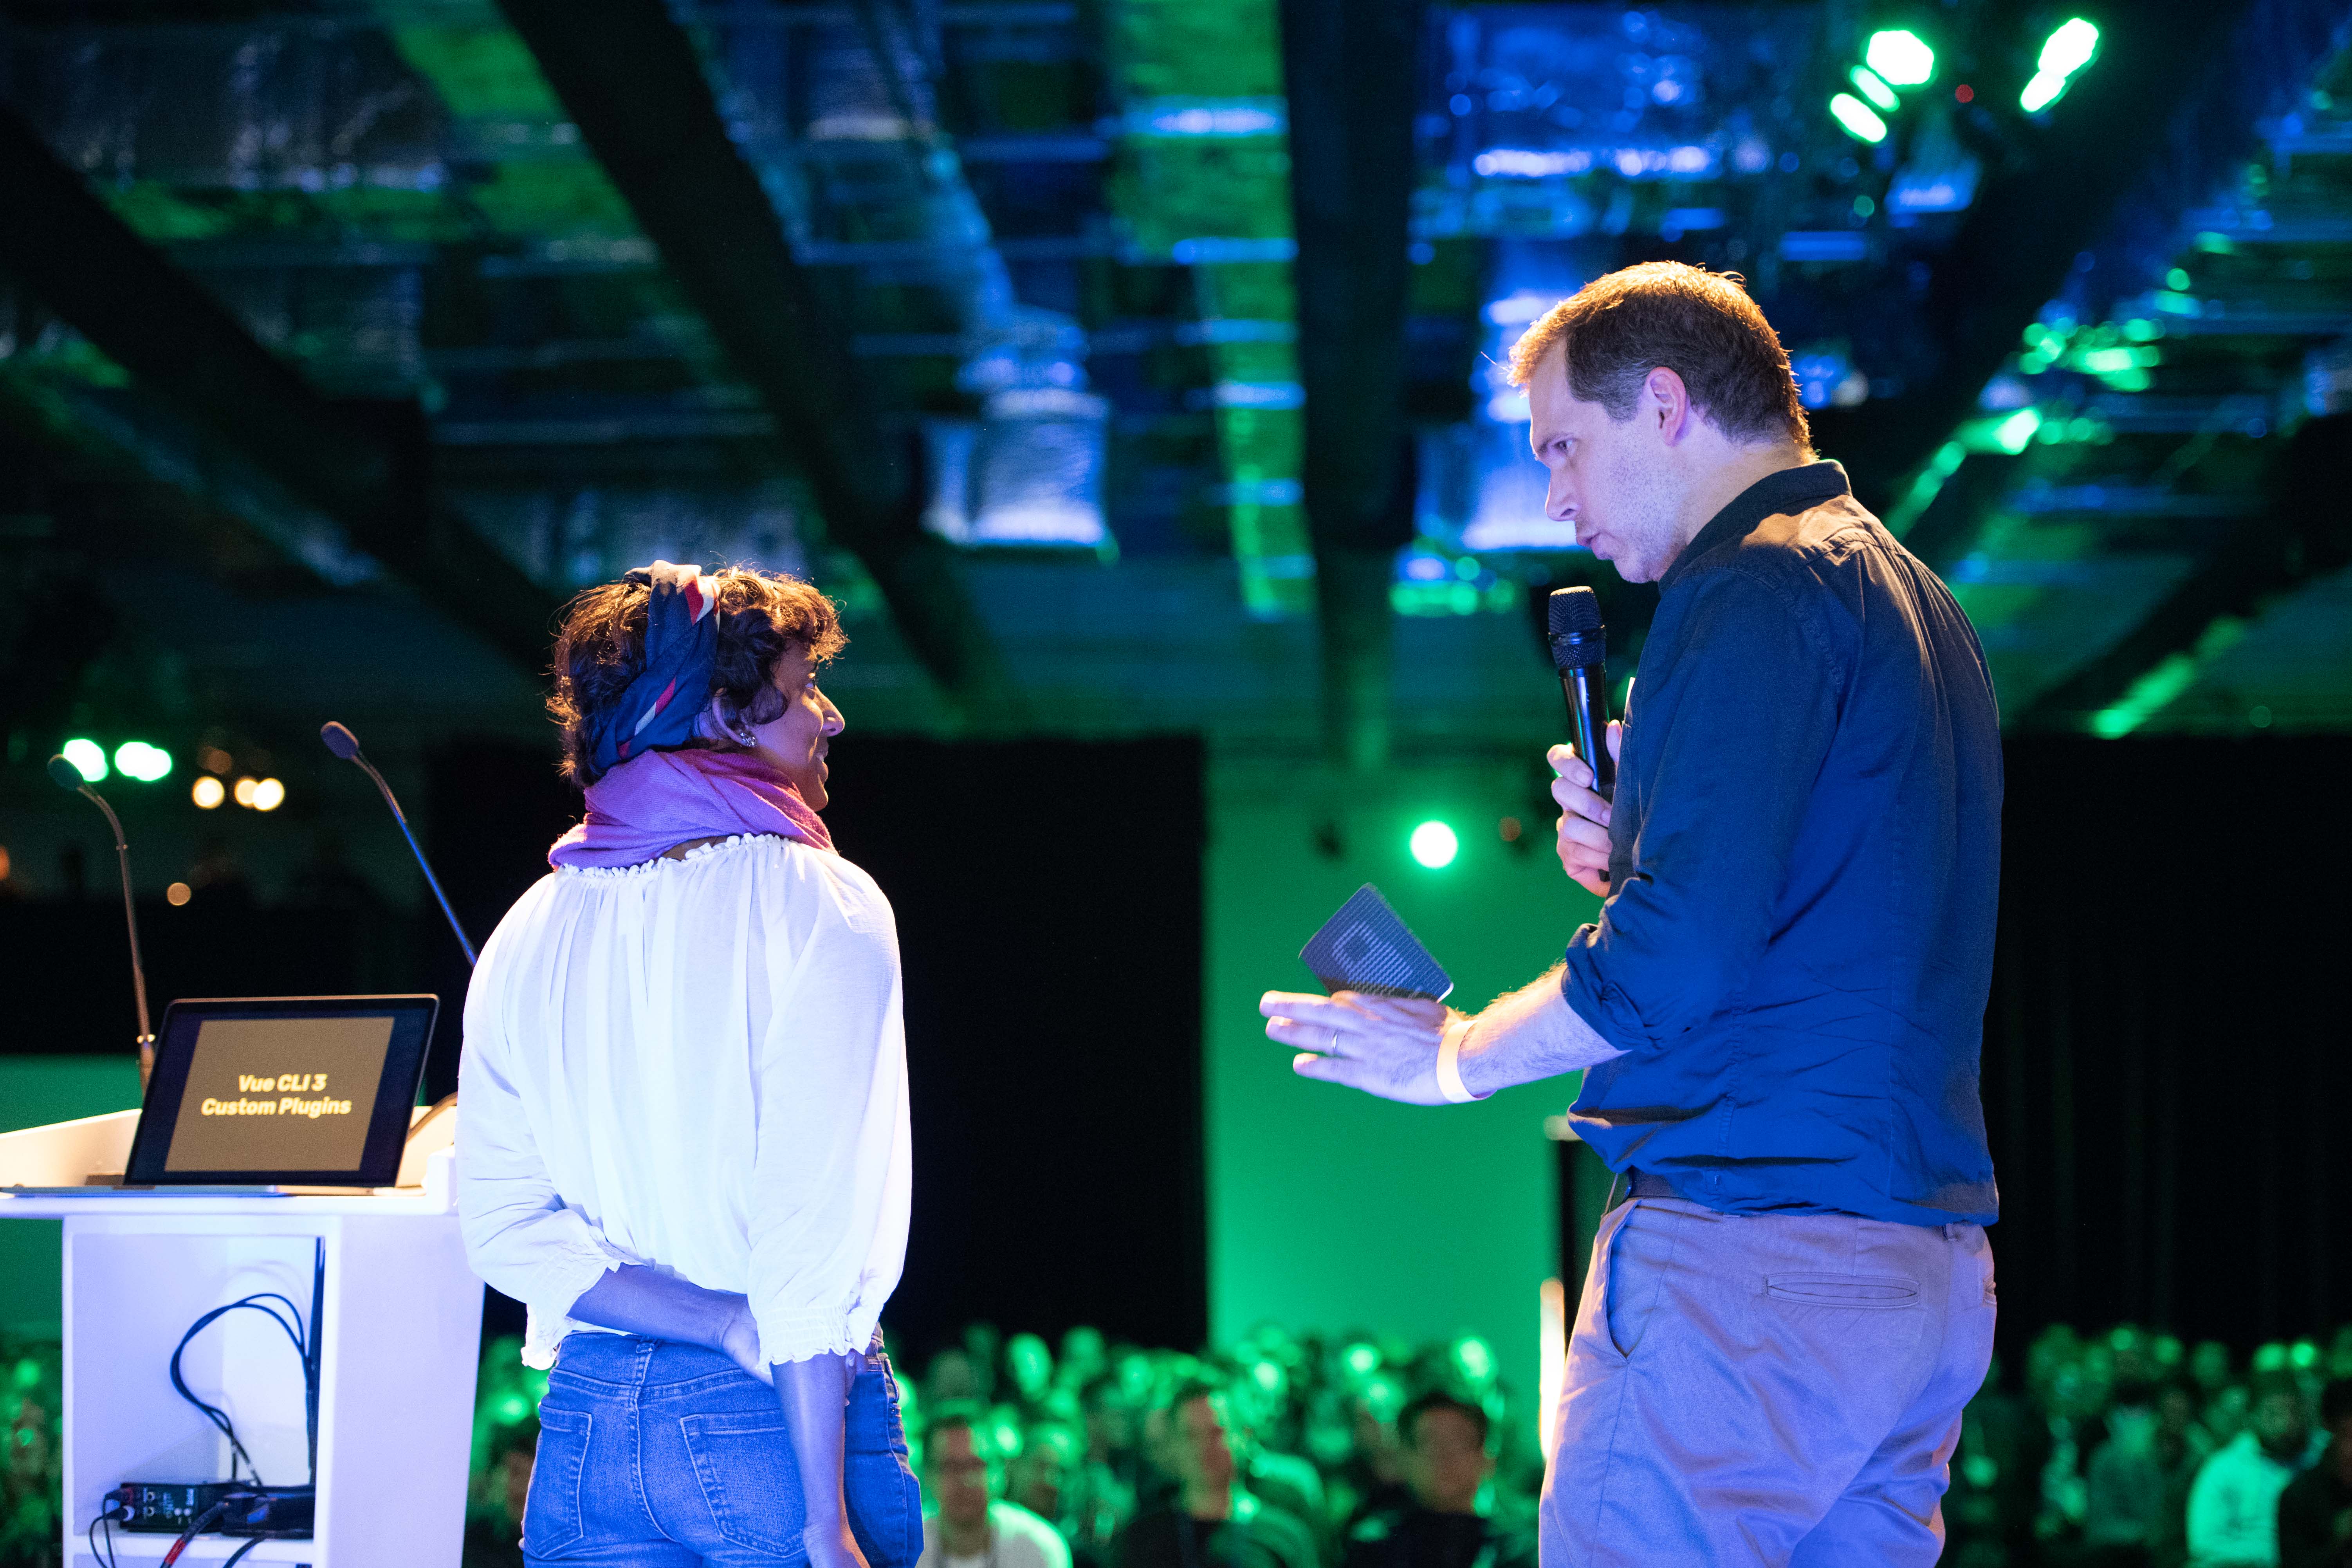
Introducing Divya Sasidharan onstage at Vue.js London. Image copyright www.edtelling.com.

Jake has a good thought related to this:

... it shouldn't matter if the speaker has published 18 books, or if they're just an intern starting out their career, their talk content is what matters.

Yes! Listing their full resume isn't the point at all. I personally just like to convey that I know who this is, and that I'm not encountering them for the first time as I read the schedule — and that I’m looking forward to hearing what they have to say, irrespective of how extensive their previous experience or fame may be.

It's also worth double-checking that the job title and company details you have for somebody are still correct. It's nice to make sure that you didn't miss a recent role change.

Another good nugget from Jake is to avoid surprising the speaker. I've wandered into this territory before where I've enthused about a speaker in their introduction and mentioned a bunch of things that they were planning to say for themselves in their intro. As he says:

Make the speaker aware of the kind of intro they'll get, so they can adjust their own intro accordingly.

That's good. Communicating with the speaker ahead of time so that you can tune your own intro is likely to be easier than them adjusting their own content, what with slides and timings, etc.

"No surprises" is probably a good motto for this.

Avoid "in jokes"

When you emcee, you might sometimes be introducing somebody you know. Perhaps it's a friend, a colleague, or somebody you shared a nice chat and giggle with at the reception or dinner the night before. While I think it's fine to reference a history or relationship in an intro for context, It's safer to focus on things that everyone can relate to and not just those who already know you or the speaker.

Private jokes don't mean anything to the vast majority of the audience, and can even alienate you a little by creating a bit of a clique as Jan thoughtfully mentioned on Twitter.

Don't assume or rely on "fame"

"This next speaker needs no introduction" is rarely true. Even if it's likely that a lot of people in the room might already know who a given speaker is, there will be some who don't.

As Luke observed:

Don't assume the audience knows who the speaker is.

Each speaker deserves a nice introduction. And there will always be some in the audience thinking "who dis?" Even a little background can be a helpful foundation and give the speaker a nice springboard to get started.

Announce and thank people with vigor

I've been introduced quite a few times in ways where I've been unsure whether the intro is over or not! I like to be sure that the final thing I say is the name of the speaker. (Not their talk title, although I'll likely mention that and possibly the themes in my introduction.)

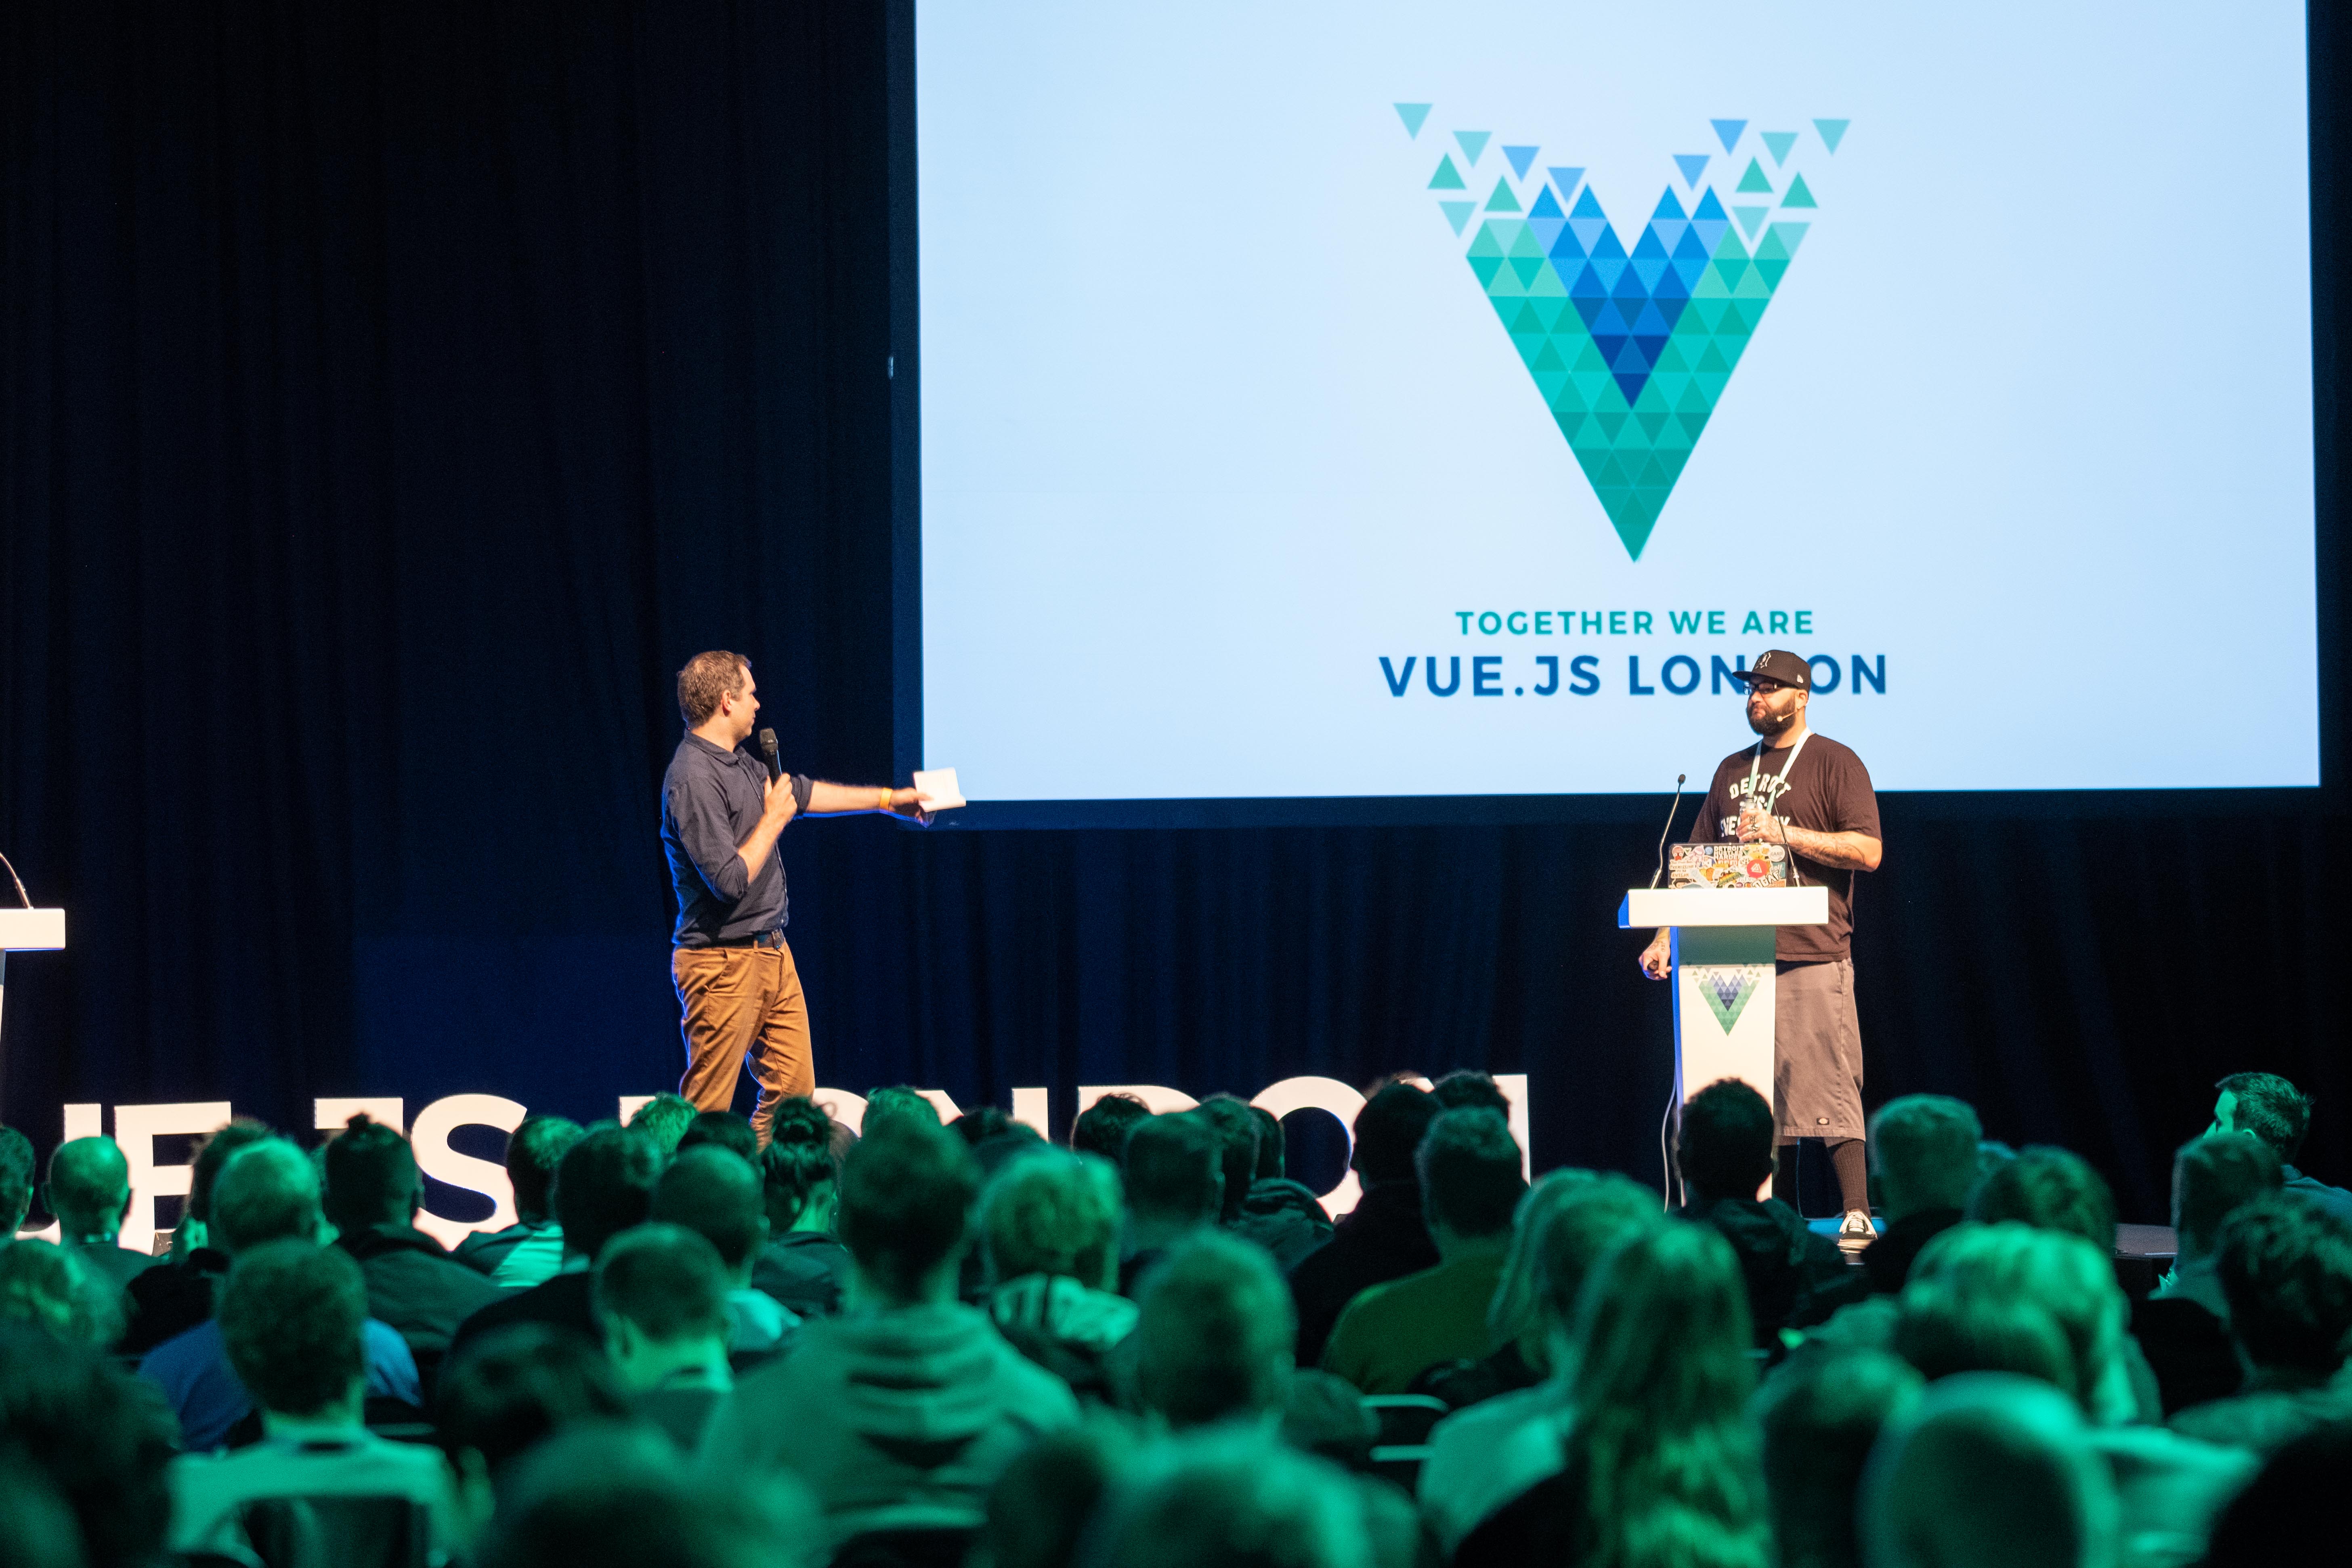
An onstage introduction at Vue.js London. Image copyright www.edtelling.com.

Ending the intro with the speaker's name seems painfully obvious, but I do this even if I've used their name earlier in the intro. It makes the handoff emphatic and acts as an obvious cue for audience applause. Using an intonation which suggests "it's time to clap right now!" is also helpful. Again, it seems obvious but giving the audience clear cues is important.

Let the speakers give the talks

You might sometimes be opinionated about the topic of the next talk. Maybe you’ve given talks on the same subject yourself. Great, that will come in handy if you need to ask informed questions after the talk. But don’t fall into the temptation to show this off during your intro. The speakers are “the show” — not the emcee. And the person you are introducing is the one invited to share their expertise.

I sometimes show I value the upcoming topic, but I advise against flexing your knowledge muscles during an intro. You might cannibalize the content, or even contradict it. And you’ll never communicate it in an intro as well as the speaker can during the actual talk. You might come off as being cocky.

Don’t step on the speaker's toes. Let them present the content. This is why everyone is here.

Prep speakers for questions and answers

If there is Q&A that you’ll need to lead or curate, it’s important to know that in advance. It is one of the first things I’ll ask the organizer in the run up to a conference. I like to ask the speakers at the speaker dinner the night before the event or when they are getting mic'd up (but earlier really is better, especially when they have time to think while being relaxed) if there is anything they'd like me to ask or avoid saying altogether. There are often things people can't include due to time and this can be a chance to squeeze that in and also serve as a nice soft ball question to get things started and let them settle in.

Some speakers might not want to take questions. I like to make sure about that first, and steer the event organizers away from it if somebody prefers not to have it.

Housekeeping is a good boilerplate

At the opening of the day, I usually jump quickly into the various housekeeping stuff of toilets, exits, code of conduct, etc. soon after saying my initial hello and maintain an enthusiastic posture about the day. It doesn't require much imagination and can help you settle in.

Don't forget to introduce yourself too!

Ask the organizers what they need

Along the way, there might be a need to mention sponsors, inform people of food, or even other things. I like to check in with the organizers at every break to see if there is anything they need me to announce. Maybe there can be a private Slack channel or Whatsapp group so you can stay in contact with them. That way you can find out if they need to adjust timings or any other odds and ends as you go.

Most of all though, and to repeat my first point a little, allow yourself to enjoy the experience. It's so much fun when the speakers and audience are enjoying themselves.

Make sure you ride that wave and have fun too!

My checklist

I have this little checklist as a starting point for the events I'll be emcee-ing. It changes a bit depending on what the conference needs.

Prep speaker intro notes
Prep speaker name pronunciation notes
Confirm format for Q&A with organizers
Prep seed questions for each talk
Share event notes Google Doc with organizers
Access/create emcee slack channel or WhatsApp group
Confirm or create event intro/outro slides if appropriate
Get housekeeping notes from organizers
Get familiar with code of conduct and contact info to share
Confirm event hashtags to share
Get sponsor call-out requirements from organizers
Meet AV team and discuss transition format
Brief speakers on transition format and get ok for questions
Get water / pen / notepad / mic
Breath. Smile. Have fun.


What have I missed? Got any good tips? I'd love to hear them. Feel free to leave thoughts and suggestions in the comments.

The post Emcee Tips for a Conference or Meetup appeared first on CSS-Tricks.

Promises in Javascript: A Complete Guide for 2019

Don't let your program down!

Promises are an important concept that is essential for a JavaScript developer to understand. If this concept is clear, the developer can utilize promises in a variety of ways in their day-to-day lives.

There are a lot of articles and tutorials available on the web about promises. However, very few of them act as a comprehensive guide to make use of promises. In this article, I will try to elaborate on promises in-depth, so you won't need to go through other resources.

Three Ways to Create Objects in JavaScript

Almost everything in Javascript is an object, whether it’s an array or a function. In this post, we’ll learn three different ways to create objects in JavaScript:

  1. Object Literals.
  2. New Keyword.
  3. Classes.
You may also like: Object-Oriented JavaScript: Objects, Encapsulation, and Abstraction (With Examples).

Object Literals

A JavaScript object literal is a comma-separated list of name-value pairs wrapped in curly braces. Object literals encapsulate data, enclosing it in a tidy package.

Let’s Make a Fancy, but Uncomplicated Page Loader

It’s pretty common to see a loading state on sites these days, particularly as progressive web apps and reactive sites are on the rise. It’s one way to improve "perceived" performance — that is, making it feel as though the site is loading faster than it actually is.

There’s no shortage of ways to make a loader — all it takes is a quick search on CodePen to see oodles of examples, from animated GIFs to complex animations. While it’s tempting to build the fanciest of the fancy loaders, we can actually do a pretty darn good job with only a minimal amount of CSS and JavaScript.

Here’s an example we can make together.

See the Pen
Preloader with JavaScript FadeOut
by Maks Akymenko (@maximakymenko)
on CodePen.

SVG and CSS is all we need for the spinner

I’m going to assume that you’ve already created a project, so we’ll jump right in and start with the spinner — or "pre-loader" as it is also called.

SVG is a great option for a spinner. It’s scalable and implementing it is as easy as an image tag. We could make one from scratch, say in an image editor like Illustrator, Sketch or Figma. For this example, I’m just going to grab this one from loading.io, which is a nice resource to make and customize different loaders.

Now that we have an SVG for the visual, we can drop it into HTML:

<div class="preloader">
  <img src="spinner.svg" alt="spinner">
</div>

We’re using .preloader as a wrapper, mostly because it helps us position the image on the page, but also because it will help us hide and reveal the page content while the loader works.

Let’s style it up:

.preloader {
  align-items: center;
  background: rgb(23, 22, 22);
  display: flex;
  height: 100vh;
  justify-content: center;
  left: 0;
  position: fixed;
  top: 0;
  transition: opacity 0.3s linear;
  width: 100%;
  z-index: 9999;
}

This is doing a few things that are more than cosmetic:

  • We’re displaying the loader directly in the center of the screen, using flexbox properties and values.
  • We’ve made the element take up the entire width and height of the screen and given it a black (well, actually a really, really dark gray) background. That means anything behind it (like the page content) is completely hidden. If our page was a different background color (e.g. white), then we would adjust the loader’s background color accordingly.
  • The position is fixed so scrolling won’t affect it’s location on the page. Plus, the z-index is high enough that not other element should stack on top of it and block it from view.

This is what we should see so far when opening it up in the browser:

A circle loader that fades out into a black background.

Some light JavaScript handles the hiding

We’ve got a fancy spinner that covers the entire page, whether we’re viewing this on small or large screens. No we can write some logic to make it fade out after a certain amount of time. That’ll take a small dose of JavaScript.

First, let’s select the .preloader element we just styled up:

const preloader = document.querySelector('.preloader');

It would actually be a lot easier to add a class to the loader that sets its opacity to zero. However, it wouldn’t be as smooth as what we’re doing here, which is using a tiny helping of JavaScript to create a fadeOut function.

const fadeEffect = setInterval(() => {
  // if we don't set opacity 1 in CSS, then
  // it will be equaled to "" -- that's why
  // we check it, and if so, set opacity to 1
  if (!preloader.style.opacity) {
    preloader.style.opacity = 1;
  }
  if (preloader.style.opacity > 0) {
    preloader.style.opacity -= 0.1;
  } else {
    clearInterval(fadeEffect);
  }
}, 100);

💡 jQuery has a function that does this right out of the box. Leverage that if you’re already using jQuery in your project. Otherwise, rolling it with vanilla JavaScript is the way to go.

Let me explain the JavaScript a little bit. As the comment says, if our .preloader element doesn’t have the opacity property set, then it will be equal to empty ("") and we can set it to a value of 1 manually to make sure it displays when the document loads.

Once we know the opacity is set, then we set manipulate it. The whole function is wrapped in setInterval and we check if the opacity property every 100 milliseconds to see if it is greater than zero. As long as it is above zero, we decrease its value in 0.1 increment, which creates a smooth effect that fades the element out over time.

Once we hit zero opacity, we clearInterval to stop the script from running infinitely. Feel free to play around with timing and decreasing points to fit your needs.

The last thing that left to do is to call the function. We’ll call it when the window loads:

window.addEventListener('load', fadeEffect);

We are intentionally using the load event instead of DOMContentLoaded because the DOMContentLoaded event is fired when the document has been completely loaded and parsed. That means it doesn’t *wait for stylesheets, images, and subframes to finish loading* *before it executes*. The load event can be used to detect a fully-loaded page, and that is exactly what we are looking for. Otherwise, the function would start before our CSS and SVG are ready.

Drop some content into the HTML and try things out. Here’s the demo again:

See the Pen
Preloader with JavaScript FadeOut
by Maks Akymenko (@maximakymenko)
on CodePen.


Congratulations! You now know how to build a pretty nice loading effect using nothing but an image and a pinch of CSS and JavaScript. Enjoy!

The post Let’s Make a Fancy, but Uncomplicated Page Loader appeared first on CSS-Tricks.

Running Alluxio-Presto Sandbox in Docker

The Alluxio-Presto sandbox is a Docker application featuring installations of MySQL, Hadoop, Hive, Presto, and Alluxio. The sandbox lets you easily dive into an interactive environment where you can explore Alluxio, run queries with Presto, and see the performance benefits of using Alluxio in a big data software stack.

In this guide, we’ll be using Presto and Alluxio to showcase how Alluxio can improve Presto’s query performance by caching our data locally so that it can be accessed at memory speed!

The Importance of One-on-Ones

What do we mean by 1:1 (pronounced one-on-one)? This is typically a private conversation between an Engineering Manager/Lead and their Employee. I personally have been a Lead, a Manager, and also an Independent Contributor/Software Engineer, so I’ve sat at each side of the table. I’ve both had great experiences on each side and have made mistakes on each side. That said, I'm going to cover some meditations on the subject because 1:1s open opportunities for personal and professional growth when they're effective.

What I’ve noticed about Software Engineering as a discipline, in particular, is that it has many people sharing posts about technical implementations and very few about engineering management. Management can influence and impact our ability to code efficiently and hone our craft, so it’s worth exploring publicly.

My thoughts on this change a lot and, like all humans, I’m always learning, so please don’t take any of these opinions as gospel. Think of them more like a dialogue where we can bounce ideas off one another.

Establishing baseline rules

I believe that 1:1s are crucial and should not be the kind of meeting anyone takes lightly, whether on the management or employee side. The meetings should have a regular cadence, scheduled either once a week or biweekly and only cancelled for pressing circumstances — and if they have to be cancelled, it's a good practice to let the other person know why rather than simply removing it from the calendar.

It might be tempting to think remote working means fewer 1:1s, but it's quite the opposite. Since each person is in a different space on a day-to-day basis, 1:1s help make up for sporadic contact by meeting regularly.

1:1s should be conducted in a space with the smallest amount of distractions possible. If you are in a room with one other person, shut off your computer and use a notepad so you won’t get notifications. If doing a 1:1 remotely, make sure you’re in a quiet place and that it has stable internet bandwidth. And, please, avoid taking 1:1s in a car or while running errands. It's also worth trying to limit the time you spend in noisy environments, like cafes. Another tip: if you have to be outside, wear headphones. Again, this is all for the benefit of limiting distractions so that everyone's focus is on the meeting itself.

Honestly, I would rather someone cancel on me or push the meeting off until they’re in a quiet place than take a call swarming with distractions. Nothing says, “I don’t value your time,” like multitasking during a 1:1 meeting. The whole purpose of the 1:1 should be to make the other person feel valuable and connected.

meeting between two people
📷 Credit: @rawpixel on Unsplash

So, why should we devote time to 1:1s anyway?

1:1s are crucial. If we constantly work on tasks without taking the time to step back and check in with our work, we risk being tactical rather than strategic. We risk working in a silo, which can lead to burnout and anxiety. We risk opportunities to spot errors early and reduce technical debt. At their root, 1:1s should reduce uncertainty by making us feel more connected to the rest of the team while clarifying intent.

For example, on the employee side, you might not be sure whether to invest your time in Task A or Task B and the progress of your commits slows down as a result. Which one is higher priority? On the manager side, you might not be sure what's happening — the employee could be stuck on a problem. They could be burnt out, but it's tough to be sure. It's totally normal for someone to get stuck once in a while, but it's common to not want to announce it in front of others, perhaps out of fear of embarrassment, among other things. A 1:1 is a good, safe, private place to explore concerns before they become tangible problems because they offer privacy that some open floor plans simply do not.

This privacy part is important. Candid exploration of high level topics, like career goals, or even low level topics, like code reviews, are best done and that is easier to do with one person in a private space rather than a full audience out in the open. At their best, 1:1s should create a good environment to resolve some of these issues.

Employees and managers alike should be fully invested in the meeting. This means using active body language that shows attention. This means emphasizing listening and speaking in turn without interrupting the other person.

Connection

Belonging is a core tenant of Maslow's hierarchy of needs because, as humans, we're designed for connectedness and kinship. I know this article is about engineering management, but engineers are no less in need of empathy and human connection than any other person in any other profession.

The reason I include this at all is because connecting with others on a personal level is something I really need to work on myself. I’m awkward. I’m an introvert. I don’t always know how to talk to people. But I do know that there have been plenty of 1:1s where I either felt heard or that I was hearing someone else. In other words, I felt in connected to the other person, be it through shared goals, personal similarities, or even common gripes about something.

A friend of mine mentioned that "people leave managers, not jobs." This is, for the most part, so true! Simply taking the time to develop a connection where a manager and employee both know each other better creates a higher level of comfort that can go a long way towards many benefits, including employee retention.

It might be worth asking the other person what modality works best if you're remote. Some people prefer video chats; some people prefer phone calls. That's all part of fostering a better connection.

1:1s are more for employees than managers

Don't let that headline give you pause. Yes, these meetings are for both parties. They really are. But here’s the thing: in the balance of power, the manager can always speak directly to the employee. The inverse isn’t always true. There are also dynamics between teammates. That means the manager’s job in a 1:1 is to provide a space for the employee to speak clearly and freely about concerns, particularly ones that might impact their performance.

Ideally, a manager will listen more than an employee, but a back and forth dialogue can be healthy, too. A 1:1 where a manager is speaking the most is probably the least productive. This isn't team time; it's time to give an employee the floor because it otherwise might not happen in other venues.

In my experience, it’s best if a manager first learns the an employee's Ultimate Goals™. Where do they see themselves in five years? What kind of work they like to do most? What environments do they work in best and which ones are the most difficult? A manager can’t always facilitate the ideal situation, but having this information is still extremely valuable for cultivating a person’s career trajectory, for the work that needs to be done, and for a general understanding of what will keep people working well together.

Let's say you have two employees: one wants to be a Principal Architect someday and another who tells you that they love refactoring. That actually gives you pretty good insight for a project that requires one person to drive direction and another to clean up the legacy code in preparation for the refactor!

Or, say you have an employee that wants to be Director someday but rarely helps others. You also concurrently get an intern. This is your chance to develop one's mentoring skills and scale the other's engineering skills.

When these meetings are focused on the employee instead of the manager, they help the employee feel heard and motivated, which can bolster their career and also give the manager the ability to make bigger decisions about how everyone works together to accomplish their individual and collective goals.

meeting between two people
📷 Credit: @rawpixel on Unsplash

Yes, agendas are required

Yes, even though 1:1s have a tendency to be informal because everyone already knows each other well, they’re way more successful when there's an agenda, at least in my opinion. And no, it’s not important for the agendas to be super formal either. They could be a couple bullet points on a sheet of paper. Or even items added to a private Slack channel. What's most important is that both parties come prepared to talk.

If both the manager and the employee have agendas, my preference is to either defer priority to the employee, or compare lists up front to prioritize items. It might be that the manager has to discuss something pressing and sensitive, like a team reorg that affects the employee's agenda. Regardless, communication is key. In a best-case scenario, you’re both in lock step and that all agenda items actually overlap.

Employees: Sometimes weeks are tough and it's easy to get frustrated. Taking time to write an agenda keeps the meeting from being all, “I hate everything and how could you have done me so wrong,” and more focused on actionable items. Why not just vent? Sure, there's a time and place for venting, but the problem with it is that your manager is a person, and might not know exactly how to help you on an emotional level. Having specific topics and items make it facilitate more actionable feedback for your manager, and therefore, make them better able to support you.

Managers: Let’s face it, you’re probably juggling a million plates. (That metaphor might be wrong, but you catch my drift.) There’s a lot on your mind and most of it is confidential. Agenda give you the context you need to prevent wandering into topics you might not be at liberty to discuss. It also keeps things on track. Are there four more things you need to cover and you’re already 15 minutes into a 30-minute meeting? You’re less likely to pontificate about your early career or foray into irrelevant paths and stay focused on the task and human right in front of you.

Direction and Guidance

One thing that a 1:1 can be useful for is guidance. On a few occasions, I’ve checked in with an employee who's communicated feeling like they’re in over their heads — whether they've overcommitted or have such a tall task in front of them, they’re not sure how to proceed and feel anxious to the point of paralysis.

As mentioned before, this is a great opportunity for a manager to reduce uncertainty. Some ways to do that:

  • Prioritize. If there’s too much work, spend time talking through the most important pieces, and even perhaps offer yourself as a shield from some of the work.
  • Make action items. Sometimes a task is too large and the employee needs help breaking it down into organized pieces making it easier to know where to start and how to move forward.
  • Clarify vision. People might feel overwhelmed because they don’t know why they’re doing something. If you can communicate the necessity of the work at hand, then it can align them with the goal of the project and make the work more rewarding and valuable.

One risk here is passive listening. For example, there's a fine line between knowing when to let an employee vent and when that venting needs actionable solutions. Or both! I have no hard rules about when one is needed over the other, and I sometimes get this wrong myself. This is why eye contact and active listening is important. You’ll receive subtle cues from the person that help reveal what is needed in the situation.

If you’re an employee and your manager isn’t providing the listening mode you need from them, I think it’s OK to gently mention that. Your manager isn’t a mind reader, and in many cases, they haven’t even received management training to develop proper listening skills. It’s perfectly fine to say something along the lines of, "It would be really great if you could sit with me and help me prioritize all these tasks on my to do list,” or “I really need to vent right now, but some of the venting is stuff I think is valuable for you to know about." Personally, I love it when someone tells me what they need. I’m usually trying to figure that out, so it takes out the guesswork.

Meeting adjourned...

You spend many waking hours at work. It’s important that your working relationships — particularly between manager and employee — are healthy and that you're intentionally checking in with purpose, both in the short-term and the long-term.

1:1s may appear to be time hogs on the calendar, but over the long haul, you’ll find they save valuable time. As a manager, having a team of employees who feel valued, aligned and connected is about the best thing you can ask for. So, value them because you'll get solid value in return.

More Resources