Common Affiliate Marketing Scams and How to Avoid Them

At WPBeginner, we have been on both sides of affiliate marketing as affiliate marketers and as businesses running affiliate programs.

With over a decade of expertise, we have encountered all types of affiliate marketing scams and frauds.

While most folks in the affiliate business are honest, hardworking people, there are always people trying to make a quick buck at the expense of others.

Here, we’ll discuss some of the top affiliate marketing scams and how to avoid them. We’ll talk about it from both perspectives as a business owner and as an affiliate marketer.

Common affiliate marketing scams explained for beginners

How Do Affiliate Marketing Scams Affect Businesses?

Affiliate marketing scams try to steal from businesses by pretending to be affiliate marketers. Similarly, they may also defraud unsuspecting affiliate marketers by pretending to be a legitimate business.

Thousands of people make money online with affiliate marketing. It is a lucrative industry worth over $17 billion (Source).

Due to the low barrier of entry, good payouts, and higher returns on invested time and resources, it attracts many businesses and marketers.

Affiliate marketing industry

However, this success also attracts many bad actors who want to profit by scamming and defrauding affiliate marketers and businesses running affiliate programs.

For these reasons, affiliate marketers and businesses may struggle to distinguish between legitimate opportunities and scams:

  • Financial loss – Affiliate marketing scams may use deceptive practices to hijack ads, change payment terms, or block payments, causing financial loss to marketers.
  • Reputational Damage – Some scammers create fake websites, advertisements, and landing pages pretending to be from a legitimate business. This causes harm to the business’s reputation.
  • Legal Damages – Some affiliate marketing scams may promote illegal products or fraudulent activities. This can lead to legal consequences and damage the affiliate’s personal and professional standing.
  • Increased Skepticism – Due to encountering scams, affiliate marketers may become more skeptical and hesitant to join new programs or promote certain products. This can limit their opportunities for legitimate partnerships and revenue generation. Similarly, businesses may find it difficult to trust affiliate marketers if they have been deceived by fraudulent actors in the industry.

However, this can be mitigated by carefully researching an affiliate program’s terms and conditions. Before signing up, you can also look for the common shady tactics scammers use.

Here are some of the most common affiliate marketing scams you should avoid.

Common Affiliate Marketing Scams Targeting Affiliate Marketers

Scammers often target affiliate marketers to promote illegal or dubious products with little to no payout in return.

Here are some of the most common scams targeted at affiliate marketers.

1. Get Rich Quick Schemes

Get rich quick scams

Get-rich-quick schemes are perhaps the industry’s most common and longest-running affiliate marketing scam.

They promise affiliate marketers a much higher commission for promoting their products with dubious promises and big claims about earning potential.

These scams can be harder to identify. Many niches in the affiliate industry offer higher incentives, and it is not uncommon to make big claims even by legitimate businesses.

These scams differ because they often sell questionable products with little to no value. These programs have their terms and conditions set up so that they end up paying nothing to the affiliate marketers.

How to Identify This Scam:

These businesses often make big promises of incredibly high earning potential. They are often selling dubious products with little to no value. Their affiliate program is not transparent, and terms and conditions are often vague or have hidden clauses to avoid any payment.

2. Fake Products

Another common scam targeting affiliate marketers is fake products. These scammers would sell a cheap (and often illegally obtained) copy of a legitimate product by a recognized brand.

However, often, they don’t even deliver the cheap copy and just steal money from the customers.

Another variation of this scam involves digital products. After customers have paid up, there is no product to download or access, and the company’s customer support is non-existent.

On the other end of things, these scammers will also simply refuse to issue any payment to the affiliate marketers, meaning they get money for nothing.

How to Identify This Scam:

Fake products are often shown by copying an existing brand or business. Their pricing would be lower than the actual products to lure customers into believing they are getting a cheaper deal. Do your research about the product, search for real reviews, or dig into background information of the business.

3. Pyramid Schemes and Multi-level Marketing Programs

Pyramid schemes or they’re modern name, multi-level marketing (MLM) are scams dating back to pre-internet days. It is still effectively used to target innocent people.

They target affiliate marketers by asking them to recruit investors into often imaginary, fake, or shoddy products. Marketers are promised a commission on each new sign-up that their recruits or people they bring in make.

Eventually, it becomes impossible to find new recruits, and the whole scheme fails. These scammers then go ahead and launch the scheme with different names.

Even if there is a real product being sold, a MLM company floods the market with affiliates, meaning no one makes any meaningful money and saturates the market.

How to Identify This Scam:

These scams often ask you to promote a fake business or product like a get-rich-quick scheme, dietary supplements, or cheaply made fake products. You will be promised higher payouts when people you bring in recruit more people. You may also be asked to deposit a joining fee, which they may label as an investment.

4. Pay to Join Affiliate Programs

Another common scam is to ask for you to pay a fee to join an affiliate program. These pay-to-join programs will claim that they run an exclusive affiliate partnership program, and in order to ensure that only serious marketers join their program, they need you to make a small payment.

Such programs will pretend to sell high-value items and promise to offer unrealistically high commissions.

All genuine affiliate programs are free to join. It is possible that some affiliate programs may require you to demonstrate product knowledge or industry expertise, but they would never ask you to pay them in order to promote their products.

How to Identify This Scam:

The most obvious sign of this scam is that they will ask you to make a payment. Some may even want you to pay with Bitcoin so the transaction can’t be reversed or traced back. If you are asked to make any payment just to join an affiliate program, then it is most likely a scam.

5. Fake Gurus and Influencers

Social media influencer

Another popular scam is when you are asked to promote a fake guru or social media influencer. These fake influencers or self-claimed gurus often pretend to be experts in something and typically sell courses and 1-on-1 training sessions.

You may be asked to bring in unsuspecting customers and will be promised a lucrative commission when they sign up for the course, follow the influencer on social media, or join an email list.

These scammers would then sell customers useless courses with little to no value. They would refuse to pay affiliate marketers by not recognizing any leads or conversions they bring.

On the other hand, there are legitimate experts in various industries selling online courses and mentorship programs. This makes it harder for affiliate marketers to distinguish between legitimate businesses and scammers.

How to Identify This Scam:

These scammers usually have no track record of their supposed expertise. Their testimonials would sound phony and unverifiable. They would use pushy tactics to make sales, and most of their followers on social media profiles would be bot accounts.

6. Phishing Scams

Phishing scams

Another way scammers target affiliate marketers is by using phishing tactics to steal sensitive information.

They create fake websites or emails that appear to be from legitimate affiliate programs, tricking affiliates into providing login credentials or personal information.

Besides fake websites and emails, scammers may also target affiliate marketers on social media websites and messaging apps. They may use brand images of popular affiliate platforms to deceive victims into believing that they are talking to an official account.

How to Identify This Scam:

Ensure that you are visiting a legitimate website. If you are unsure, then close your browser window and try to reach the actual website manually. Any email account asking you to visit a website should be sifted through. Don’t provide any login information to any fake website.

Common Affiliate Marketing Scams Targeting Businesses

If you are a business running an affiliate program to generate more sales, then you may be targeted by scammers in a number of ways.

Here are some of those common scams to look out for:

1. Fraudulent Transactions

Transaction fraud

Scammers may target a business by generating fake sales using stolen credit cards, dummy payment accounts, and other fraudulent techniques.

Once a sale is generated, they are qualified for commission. However, your business may pay a refund or chargeback on the fake transaction.

More sophisticated scammers may even attempt to manipulate your conversion tracking data to credit them for more sales.

How to Identify This Scam:

The easiest way to detect this scam is by monitoring your refund and chargeback requests. However, this could be due to customers being genuinely unsatisfied with their purchase.

You can look for patterns to detect fraudulent activities causing higher refunds. Compare the refund rates of suspected affiliates with other affiliates to detect suspicious activity.

2. Cookie Stuffing

This is a sophisticated affiliate marketing scam targeting businesses that run an affiliate program.

Here is how it works, the scammers use phishing tactics, malware, and popups to install cookies with their affiliate tracking IDs on unsuspecting users. After that, when users visit the website and make a purchase, these marketers earn a commission.

These cookies are often set never to expire unless a user deletes all cookies in their browser. The user would have never interacted with the affiliates’ content and wouldn’t even be referred by their URL.

How to Identify This Scam:

This sort of scam is harder to identify. However, depending on your affiliate management program, it may automatically detect fraudulent activities. You also need to monitor your conversions in Google Analytics to find suspicious URLs and activities.

Many affiliate programs only allow marketers to send traffic from a pre-approved list of websites, and any conversions not originating from their approved websites are discredited.

3. Google Ad Keyword Hijacking

Google Ad Hijacking

Another problematic affiliate scam that affects businesses is Google Ad Keyword Hijacking.

Basically, the scammers sign up for an affiliate program and run Google ads on brand keywords or keywords where your business may already be advertising.

This increases your cost to bid on those keywords, and you end up paying additional commission to a source of traffic that you could have acquired yourself by running the ads.

An even more problematic situation arises when these scammers first redirect the users to their websites before sending them to yours. This makes it harder for you to detect fraudulent activity for a longer period of time.

How to Identify This Scam:

Monitor your top keywords for PPC ads on Google. The easiest way to do this is by using a search marketing tool like Semrush.

Another way to identify this scam is to monitor your website traffic and look for unusually high-traffic sources. You can also carefully monitor affiliate activity to look out for unusually high conversions, sudden jumps in referral traffic, and other signs of suspicious activity.

4. Fake Leads

Fake leads can be a problematic affiliate scam for businesses paying affiliate marketers to bring in leads.

Scammers can generate fake leads using sophisticated techniques like stolen user data, unverified leads bought from third-party sources, or simply paying someone to create fake user accounts.

More sophisticated scammers may even send bot traffic from their legitimate-looking websites. These bots then fill in forms with fake user data to submit a lead.

How to Identify This Scam:

One way to thwart fake leads is by requiring customers to double opt-in. Another way to detect quality leads is by reaching out to customers.

If more leads appear to be non-existent, you can dig deeper and find the affiliate accounts sending those leads.

Look for your affiliate reports to find patterns like a website sending a specific number of leads per day could be a sign of fake leads.

5. Click Frauds

Businesses running pay-per-click affiliate programs are vulnerable to click fraud. Scammers can use a wide variety of techniques to generate fake clicks and traffic.

Some of these techniques use automated bots to click on links. These bots may use IP spoofing and appear as legitimate traffic in your analytics or affiliate marketing reports.

Other scammers may use click farms, where scammers pay pennies to click farms where actual humans click on links as part of their job. These click farms may use hacked computers worldwide to generate those clicks.

How to Identify This Scam:

Monitoring your Google Analytics reports can help you look for signs of click fraud. You can look for suspicious traffic sources, traffic coming from random places, low conversion rates than the industry average.

Keep track of IP addresses to look for signs of click fraud. Your affiliate management software may also provide tools to detect and prevent click fraud.

6. URL Hijacking

Another common scam targeting businesses is when an affiliate partner registers similar domain names or misspelled URLs.

For instance, if a business’s website is a stargardeningtools.com, the scammers may register stargardiningtools.com or similar domains.

This scam is also called domain squatting. It can be easily tracked by looking at referral domains in Google Analytics. However, some of these affiliates may set up dubious redirects to ensure that the squatted domain doesn’t appear as a referral domain.

How to Identify This Scam:

You can track most such tactics by regularly monitoring the referral domains in Google Analytics. Also looking for traffic sources that look suspicious can be helpful. Sometimes, these traffic sources may not have any content promoting your products and services.

Avoiding Affiliate Marketing Scams Tips and Tricks

Following are some handy tips that will help you avoid common affiliate marketing scams both as a marketer and as a business.

1. Join Reputable Affiliate Platforms

Join the top affiliate networks and platforms to work with top businesses, best products, and legitimate affiliate marketers.

Platforms like ShareASale, Impact, and Amazon offer a large number of products and businesses to promote. They also help businesses partner up with the best marketers, handle payouts, and prevent fraud.

However, these programs cost money and may reduce the profitability of your business.

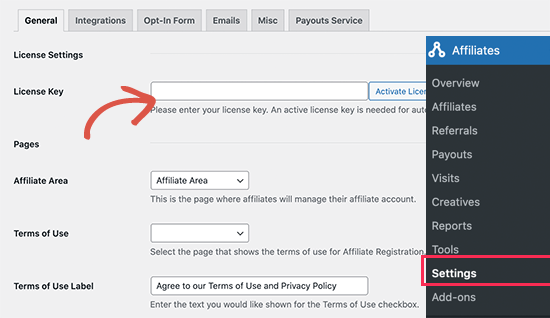
Luckily, there are platforms like AffiliateWP. It is the best affiliate tracking and management software that runs on top of WordPress.

AffiliateWP comes with easy affiliate management, advanced fraud detection, easy payouts, and no middleman fees.

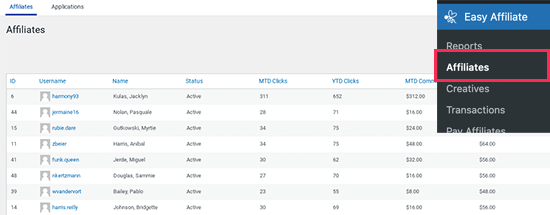
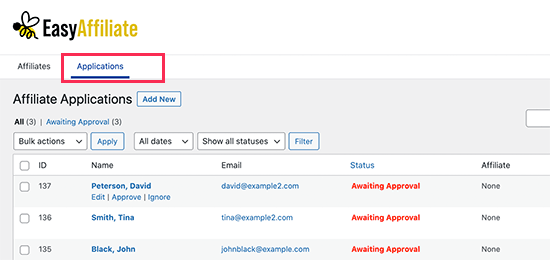
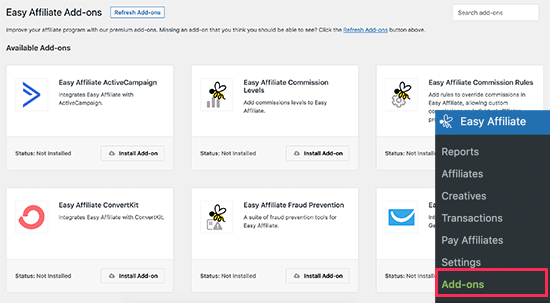
Another excellent alternative is EasyAffiliate. Similar to AffiliateWP, it runs on top of WordPress and allows you to manage and run your own affiliate program.

2. Monitor Your Website Traffic

Whether you are an affiliate marketer or an affiliate manager, monitoring your website traffic regularly helps you detect and prevent fraud and scams.

The easiest way to do this is by installing MonsterInsights. It is the best Google Analytics plugin for WordPress and helps you easily track your website traffic.

MonsterInsights

MonsterInsights has features like eCommerce tracking, conversion tracking, outbound link tracking, and more. Plus, it helps you easily see where your traffic is coming from and what those users do while visiting your site.

3. Use Better Link Management Tools

As an affiliate marketer, you will need tools to manage all your affiliate links easily. This helps you insert links easily and increase your earnings, but it will also help you track link performance and detect your clicks.

This is where ThirstyAffiliates comes in. It is the best affiliate link management tool for WordPress and allows you to easily manage and track all your affiliate links.

ThirstyAffiliates

ThristyAffiliates helps you detect broken affiliate links, track link clicks, set up redirects, and cloak affiliate links.

Another excellent alternative is PrettyLinks. It is a link management tool for WordPress. It allows you to shorten affiliate links, cloak links, manage all your links, and easily insert them in your website.

Pretty Links Pro Website

For more on this topic, see our complete affiliate marketing guide for beginners.

Frequently Asked Questions Regarding Affiliate Marketing Scams

The following are some of the most commonly asked questions about affiliate marketing scams by our users.

1. Is affiliate marketing risky?

Affiliate marketing is just as risky as other type of marketing strategies. Due to the increasing number of fraudulent activities and scams, it may give an impression of being risky. However, most of these affiliate marketing scams can be easily avoided. Affiliate marketing still provides excellent opportunities for publishers to make money online and businesses to promote their products and services.

2. Is affiliate marketing similar to pyramid schemes?

No, affiliate marketing is not similar to pyramid schemes. Unlike pyramid schemes, affiliate programs are free to join, and affiliate marketers are paid to bring in customers. However, some pyramid schemes may present themselves as an affiliate program in order to appear legitimate.

3. Is it possible to avoid affiliate marketing scams altogether?

Yes, it is possible to avoid affiliate marketing scams by joining reputable affiliate platforms and carefully selecting affiliate marketers, products, and businesses that you work with.

We hope this article helps you avoid common affiliate marketing scams. You may also want to explore these low online business ideas or take a look at these additional ways to make money online.

If you liked this article, then please subscribe to our YouTube Channel for WordPress video tutorials. You can also find us on Twitter and Facebook.

The post Common Affiliate Marketing Scams and How to Avoid Them first appeared on WPBeginner.

7 Proven Affiliate Marketing Tips to Grow Revenue From the Founder of Pretty Links

Are you looking for new ways to grow your affiliate marketing revenue?

There’s a lot of money to be made! In 2023, affiliate marketing made over $17 billion globally.

But while the average salary for an affiliate marketer is over $60,000, many people earn much less while a few earn much more. What makes the difference?

Here are 7 tips that will help you grow your affiliate marketing revenue.

Note: This is a guest post by Blair Williams, the founder of Pretty Links, a popular all-in-one affiliate link management plugin. We publish an expert column on WPBeginner every other Thursday. This is an invite-only column, meaning we don’t accept unsolicited guest post offers.

Proven Affiliate Marketing Tips to Grow Revenue

I will cover quite a few topics in this post. Here’s a handy list so you can jump to the section you are most interested in:

1. Drive the RIGHT Traffic That Earns Commissions

The first step in generating revenue from affiliate sales is to make sure you attract an audience that actually wants to try out the product or service you recommend.

Since over 70% of affiliate marketers get most of their traffic from search engines like Google, that makes SEO really important.

But SEO takes time, especially if you’re competing against other affiliate marketing sites for keywords with high search volume and high competition.

To earn the most commissions, I highly recommend targeting investigational keywords. Let me explain why.

Generally speaking, Google searches are performed with 4 different types of intent, and the best match for affiliate websites is investigational intent. Here’s a quick breakdown of the different kinds of search intent:

  • Users with navigational intent are trying to get to a particular website. Example: search on Google with the phrase www.wpbeginner.com
  • Users with informational intent are simply trying to find an answer to a question. Example: search on Google with the phrase who is the current US President.
  • Users with transactional intent have already made a decision and are ready to purchase or download the product they chose. Example: buy Apple iPhone 15 Pro
  • Finally, users with investigational intent are looking for information that may eventually lead to a purchase or transaction. Example: best student laptops, compare hp vs dell laptops, etc.

Users with investigational intent will want to read product reviews, showcases, and comparisons like yours before making a final purchasing decision. This means as an affiliate marketer, it’s your job to help your users find the right product and get them purchase it through your affiliate link.

They use investigational keywords in their search queries that include words like ‘best’, ‘review’, ‘compare’, and ‘alternative’.

Investigational Intent Keywords Example

Here are some examples of investigational intent keywords:

  • best laptops for students
  • honest review of Tesla Model S
  • Bose QuietComfort 45 vs. Sony WH-1000XM4
  • Lenovo ThinkPad X1 common problems
  • best alternatives to the Hoover MAXLife Pro

You can see the keywords people use to find your WordPress site using online tools like Google Search Console or All in One SEO for WordPress.

Keyword performance table

By targeting investigational keywords, you will drive the right audience to your site. I’ve found that means you won’t have to get as much traffic to make a decent affiliate income.

2. Publish High-Quality Content

Now that you know the investigational keywords that will bring potential customers to your site, your next job is to create high-quality content that ranks for those keywords.

That means writing in-depth product reviews, comparisons with pros and cons, video reviews, and more. Only 28% of affiliate marketers use blogs to promote their affiliate links, and I think that number should be much higher.

Create Quality Content

Not only will high-quality content bring in traffic to your WordPress website, but you will also benefit from long-term traffic that comes from your blog’s rankings.

Some of the most successful affiliates have become experts at using the product or service they are reviewing. In fact, demonstrating real-life experience in your reviews is more important now than ever.

In December 2022, Google added ‘experience’ to their E-E-A-T ranking criteria. Now, unless you show first-hand experience with the products you write about, Google may penalize you in the long run by giving your site a lower search ranking.

Darren Rowse’s Digital Photography School blog is a great example of what you should be doing. He shows excellent photos taken on Canon and Nikon SLR cameras and then mentions those cameras in posts and tutorials.

Demonstrate Experience DPS

Not only does this improve his ‘experience’ score with Google, but when his visitors are inspired by the spectacular photos taken by the cameras he reviews, they will be more likely to purchase them using his affiliate links.

You can do the same by producing more content, such as detailed blog posts or YouTube videos, displaying your skills using the actual product or service. Just make sure you don’t just talk about a product’s features. You also need to show your audience how they can use those features to get great results.

The best way to add affiliate links to your website or blog is by using a plugin like Pretty Links or ThirstyAffiliates. Creating a centralized affiliate link management system in your WordPress dashboard can save you a lot of time.

For example, when one of your affiliate partners changes your link, you would normally need to find every post where the link appears and update the link manually.

But with an affiliate link plugin, you simply need to update it once, and it will update across your entire website.

Managing affiliate links with ThirstyAffiliates

These plugins will also let you cloak the affiliate links you promote on your website. Typically, affiliate links are long and ugly like this:

http://example.com/products/?product_id=123&affiliate_id

A cloaked affiliate link looks better and is easier to understand:

http://www.yoursite.com/refer/productname
Pretty Links Cloaking an Affiliate Link

Besides these benefits, an affiliate link manager lets you categorize your links, add notes, check for links that have stopped working, and much more. This means you can spend less time managing your affiliate links and more time creating high-quality content.

Now that you’ve added affiliate links to your website, it’s essential to track how many times each one is being clicked.

This will help you see which affiliate products are performing well, and which of your blog posts are generating the most clicks.

This information will let you make improvements to your website that result in more revenue, and you can also use the metrics to negotiate with your partner companies for higher payouts. I’ll talk about this more later on.

Google Analytics can show how much traffic your links are sending to each affiliate product, but beginners can find it tricky to use.

Instead, I recommend using an analytics plugin like MonsterInsights because it makes your analytics easy to understand and supports affiliate link tracking out of the box.

Top Affiliate Links Shown in MonsterInsights

Now that you know how much traffic you are sending to each affiliate link, you should compare it with the revenue you made. This will help you discover your highest-performing products, and focusing on them will boost your affiliate income.

5. Convert Up to 60% of Abandoning Visitors With an Affiliate Popup

We spoke earlier about how to increase your affiliate income by bringing more visitors to your website. It’s also important to think about the visitors leaving your site, or you will miss out on sales.

You need to grab the attention of abandoning visitors before they leave your site because 70% of them will never come back.

Nadi Lopez, a marketing specialist at Top 6 Digital, combats this using an exit-intent popup. It detects the user’s mouse movement and shows them an affiliate promotion when they’re about to leave.

He uses OptinMonster to display a popup that is customized for the content the reader is viewing at the time, like this:

Affiliate Popup Example

The plan worked, and 17.31% of visitors who saw the popup above clicked the link.

As a result, Top 6 Digital’s affiliate revenue increased by 30%, and on some web pages, as many as 62% of abandoning visitors were converted.

For more details on how to do this, you can see this article on how to create popups that convert.

6. Optimize Your Content to Boost Conversions

Your visitors won’t click a link they don’t notice. You’ll get more clicks and revenue by highlighting the affiliate mentions in your articles.

You can try doing this in lots of different ways. Just make sure you track affiliate clicks to measure which methods are most effective on your blog and individual posts.

For example, you can highlight a link by simply bolding it or using colored text.

Or you can make a link more obvious by placing it in an affiliate product box or button. Some websites also use discreet icons like arrows or shopping carts next to the links to show they are affiliate links.

Affiliate product box

You could also create a call to action (CTA) where you mention the affiliate product or service. For best results, use persuasive language that encourages readers to learn more or click through.

7. Negotiate With Brands for a Higher Commission Tier

Finally, you can make more affiliate income by simply asking your partners for a higher commission percentage. This can potentially help you make the biggest gains in revenue.

Because you’ve already enabled link tracking, you will be able to gather the information you need to demonstrate the value you bring your affiliate partner.

Make sure you do your research first. Some affiliate plans may already offer a tiered structure that pays higher commission rates for higher sales volumes. Otherwise, you can speak to the affiliate manager about increasing the rates for your website.

Don’t become aggressive or demanding or you may damage your relationship with the company. Make sure you remain courteous and flexible and aim for a win-win outcome.

I hope my practical tips will help you grow your affiliate marketing revenue. You may also want to see the ultimate affiliate marketing guide or the best affiliate marketing tools and plugins for WordPress.

If you liked this article, then please subscribe to our YouTube Channel for WordPress video tutorials. You can also find us on Twitter and Facebook.

The post 7 Proven Affiliate Marketing Tips to Grow Revenue From the Founder of Pretty Links first appeared on WPBeginner.

How to Add Affiliate Links in WordPress with ThirstyAffiliates

Are you wondering how to add affiliate links to your WordPress site?

Adding affiliate links for third-party products/services on your website is a great way to generate passive income. Every time someone buys something through one of your links, you will make a small commission.

In this article, we will show you how to easily add affiliate links in WordPress with ThirstyAffiliates. We will also share some tips to improve your affiliate marketing strategy.

Adding affiliate link in WordPress with ThirstyAffiliates

Why Use ThirstyAffiliates for Affiliate Links in WordPress?

An affiliate link is a special type of link that you add to your online content. You can earn a commission if a visitor clicks on the link and then makes a purchase on the affiliated website.

If you have a WordPress blog, then affiliate marketing can add a steady income stream and improve your monetization strategy.

To add affiliate links in WordPress, you will need to use an affiliate link management plugin. This makes it easy to design custom affiliate links, track their performance, and more.

ThirstyAffiliates is one of the best affiliate link management plugins for WordPress that allows you to store your affiliate links, organize them in categories, and manage them more efficiently.

It even helps you create branded URLs, comes with a search form, and allows you to automatically replace keywords with affiliate links, making it a complete solution.

For more details, you may want to see our comparison of Pretty Links vs. ThirstyAffiliates: which is right for your site?

Note: We use ThirstyAffiliates on WPBeginner for affiliate link management.

Having said that, let’s see how to easily add affiliate links in WordPress with ThirstyAffiliates. You can use the quick links below to jump to different parts of our tutorial:

How to Install and Set Up the ThirstyAffiliates Plugin

First, you will need to visit the ThirstyAffiliates website and click on the ‘Pricing’ tab in the top right corner of the screen.

This will take you to the ‘Pricing’ page, where you have to select a subscription plan that suits your needs.

ThirstyAffiliates pricing

Once you have done that, you need to visit your WordPress website to install and activate the ThirstyAffiliates plugin. For detailed instructions, you may want to see our beginner’s guide on how to install a WordPress plugin.

Note: ThirstyAffiliates also has a free version that you can use. However, we will be using the premium plugin to unlock more features.

Upon activation, visit the ThirstyAffiliates » Settings page from the WordPress admin sidebar and switch to the ‘License’ tab in the left column.

Here, simply paste your license key for the plugin and click the ‘Activate License Key’ button.

You can find this information in your account on the ThirstyAffiliates website.

Add the ThirstyAffiliates license key

Next, switch to the ‘Link Appearance’ tab from the sidebar on the left to configure some settings.

Once you are there, you can start by choosing a link prefix from the dropdown menu. This prefix will be used in your cloaked link before the link slug.

For example, if you choose the ‘Recommends’ option as the link prefix, then your affiliate links will look like this:

http://www.your-site.com/recommends/link-name

Choose a link prefix from the dropdown menu

You can also create a custom link prefix by selecting the ‘Custom’ option from the ‘Link Prefix’ dropdown menu.

Once you’ve done that, simply type the link prefix of your choice into the ‘Custom Link Prefix’ field. In our example, we are using ‘refer’.

Type custom link prefix

After that, you can also check the box next to the ‘Link Category in URL?’ option if you want to show the selected affiliate link category in the URL.

This will add a link category to the URL after the link prefix and before the link slug like this:

http://www.your-site.com/refer/category/link-name

Add link categories to the affiliate URL

Next, scroll down to the ‘Use nofollow on links?’ section and select the ‘Yes’ option from the dropdown menu.

This means that the nofollow attribute will now be added to all your affiliate links, which will tell the search engines not to pass a small portion of your authority to the other website.

We recommend using this option because it’s a general SEO best practice. For more details, you may want to see our step-by-step guide on how to add nofollow links in WordPress.

Add the nofollow attribute to affiliate links

Once you’ve done that, you can also open all your affiliate links in new tabs by choosing ‘Yes’ next to the ‘Open links in a new window?’ option.

After that, you can leave the other settings as default or configure them as you like.

Finally, don’t forget to click the ‘Save Changes’ button at the bottom to store your settings.

Open affiliate links in new tab

Now that you have set up the plugin, you need to head over to the ThirstyAffiliates » New Affiliate Link page from the WordPress dashboard.

Once you are there, you can start by typing a name for your affiliate link in the ‘Add Title’ field.

As this name will be used in the cloaked URL created by ThirstyAffiliates, we recommend using the product or service name as the link title.

Add affiliate link name

Next, you have to add the full affiliate link with your affiliate ID in the ‘Destination URL’ field.

You can also attach an image to your affiliate link by clicking on the ‘Upload/Insert’ button under the ‘Attach Images’ section.

This will launch the media library on the screen, where you can upload an image of your choice.

We recommend using this setting if you want to display affiliate links in sidebars or have templates where links can be shown with images.

Add a destination URL and attach an image to the affiliate link if you like

Now, scroll down to the ‘Autolink Keywords’ section and type the keywords that you want to automatically link to this particular affiliate link.

This will save you a lot of time when writing a blog post on your website, as the affiliate links will be automatically added once you type in a specific keyword.

Next, you can also set a limit for auto-linking in the ‘Limit (per keyword):’ option.

For example, if you type the number 3 in this field, then ThirstyAffiliates will automatically stop auto-linking the affiliate link with the specific keyword after the first three times.

Add keywords for auto linking

After that, you can also sort your links into categories. To do this, simply click the ‘+ Add New Category’ link in the ‘Link Categories’ section on the right.

From here, type the category name that suits your affiliate link and click the ‘Add New Category’ button.

Add category for the affiliate links

After that, scroll down to the ‘Link Options’ section in the right column and select if you want to add the nofollow attribute, open the link in a new tab, pass the query string to the destination URL, and even change the redirect type of your link.

You can also leave these settings as they are because they will already be configured according to the options that you picked when setting up the plugin.

Configure link options

Finally, click the ‘Save Link’ button at the top to store your settings and create your first affiliate link.

Aside from using the auto-linker, sometimes you may want to manually add affiliate links to your WordPress posts and pages.

To do this, open a post/page in the block editor from the WordPress admin sidebar.

Once you are there, you will notice that ThirstyAffiliates has added an ‘Affiliate Link’ button in the toolbar at the top of your blocks.

Now, to manually add an affiliate link to your WordPress post or page, simply select the anchor text for the link (the words you want to put the link on) and click the ‘TA’ icon in the block toolbar at the top.

Click the TA icon in the block toolbar after selecting anchor text for the affiliate link

This will open a search form on the screen where you have to type the name of the affiliate link that you created.

Once the link appears in the search results, simply click on it to add it to the anchor text.

Type affiliate link names in the search form

After that, don’t forget to click the ‘Publish’ or ‘Update’ button at the top to store your settings.

You have now successfully added an affiliate link to your WordPress page/post.

ThirstyAffiliates uses built-in WordPress functionality to manage links. Links added via the ThirstyAffiliates plugin are added into a custom post type, which makes it really simple to add, edit, or delete them.

To manage your affiliate links, simply visit the ThirstyAffiliates » Affiliate Links page from the admin area.

Here, you can click on the ‘Edit’ link under the affiliate link of your choice to make some changes or click on the ‘Trash’ link to delete it.

You can also use the ‘Filters’ option at the top to filter all your affiliate links according to categories.

If you have the statistics add-on activated, then it will also show you the number of clicks for each link broken down into daily, weekly, and monthly clicks.

Manage affiliate links

To view the full statistics report, just visit the ThirstyAffiliates » Reports page from the WordPress admin sidebar.

From here, you can easily get a statistics report for your affiliate link performance over the last year, month, or week. You can even set a custom date for your report.

ThirstyAffiliates stats

This can help you show which link categories are performing better, which links are getting more clicks and fewer sign-ups, and which ones are getting fewer clicks and more signups.

You can then improve your content strategy to maximize your earning potential.

Bonus Tips for Affiliate Marketing

Affiliate marketing is a super easy way to earn money online. If you are new to affiliate marketing, then the first step is to find a product or company that you are passionate about and would like to promote.

Once you’ve done that, you can partner with that company by asking to join their affiliate program and then using the affiliate ID provided by them to sell their products on your website.

You can typically find an affiliate program by searching for an ‘Affiliates’ page on a company’s website.

Finding affiliate programs to join

When choosing an affiliate program, it is important to pick a reputable company and recommend a product that you personally use and trust.

In addition, try to find affiliate programs that are relevant to your audience and sell products/services that your visitors may need.

For example, if you run a food blog, then you might want to endorse kitchen appliances, cookbooks, or food-related merchandise that your users may already be interested in.

Moreover, don’t try to overstuff your content with irrelevant affiliate links, as the key to driving traffic to your website and affiliate products is to create quality content.

For more tips, you may want to see our ultimate affiliate marketing guide for beginners.

Apart from affiliate links, you can also use affiliate product boxes on your website to further highlight the products that you want to promote.

SeedProd preview of the affiliate product box

This strategy can boost sales, increase brand exposure, and save time and resources.

For more details, please see our tutorial on how to create an affiliate product box in WordPress.

We hope that this article helped you learn how to add and manage affiliate links in WordPress with ThirstyAffiliates. You may also want to see our tutorial on how to build an Amazon affiliate store in WordPress and our expert picks for the best WordPress themes for affiliate marketing.

If you liked this article, then please subscribe to our YouTube Channel for WordPress video tutorials. You can also find us on Twitter and Facebook.

The post How to Add Affiliate Links in WordPress with ThirstyAffiliates first appeared on WPBeginner.

How to Add Affiliate Disclosure for Each Blog Post Automatically

Do you want to add an affiliate disclosure for each blog post automatically?

Affiliate marketing is one of the easiest ways to make money online. However, if you don’t disclose your affiliate links then you could end up in legal trouble.

In this article, we will show you how you can add an affiliate disclosure to all your WordPress blog posts.

How to add affiliate disclosure for each blog post automatically

Why Add an Affiliate Disclosure to Each WordPress Blog Post?

With affiliate marketing, you earn a commission every time someone clicks a referral link and makes a purchase. It’s a great way to make money online blogging with WordPress.

However, you must make it clear that your links are paid advertisements by adding an affiliate disclaimer. That just means posting a short notice explaining what affiliate marketing is, and that you get money from talking about the product or service.

Many countries have laws about failing to disclose paid endorsements. For example in the United States, you might get a fine from the Federal Trade Commission. You may even end up banned from reputable networks such as Amazon affiliates.

Even if you don’t get into legal trouble, customers who click on undisclosed affiliate links may feel tricked and stop visiting your WordPress website.

How to Add an Affiliate Disclosure to Each WordPress Blog Post

One option is to publish the affiliate disclaimer on its own page, as we do on WPBeginner.

The WPBeginner affiliate disclaimer page

You can then add a link to every page that features an affiliate URL. This may be a good choice if you have a longer disclosure and don’t want to distract from the post’s content.

If yours is short, then you can often add the full text of the disclaimer to every post.

An example affiliate disclaimer on a blog

No matter which option you choose, you can save time and effort by adding the affiliate disclosure automatically. Simply use the quick links below to jump straight to the method you want to use.

Pretty Links is one of the best affiliate marketing plugins that can automate all your affiliate activities, including adding a disclosure.

Pretty Links comes with an advanced auto-linking feature that allows you to enter the keywords or phrases that you want to turn into affiliate URLs.

Every time you type this word or phrase, Pretty Links will turn it into an affiliate URL automatically. Even better, if you have created a disclosure notice page, Pretty Links can also add a link to it in the post.

For example, if you add “MacBook Pro” as a keyword and then use that phrase in a new post, then Pretty Links will automatically turn “MacBook Pro” into an affiliate URL and add a link to your disclosure notice page.

An affiliate disclaimer, created using Pretty Links

Note: Pretty Links won’t insert the disclosure link if you only add affiliate URLs manually. It only works when a post uses automatic keyword linking.

To get started, you’ll need to install and activate Pretty Links. If you need help, then please see our guide on how to install a WordPress plugin.

Upon activation, go to Pretty Links » Activate. You can then add your license key to the following field: ‘Enter Your Pretty Links Pro License Key.’

Activating the Pretty Links WordPress plugin

You can find this information under your account on the Pretty Links website. After typing in this information, click on the ‘Activate’ button.

With that done, you’ll need to go to Pretty Links » Add New and then add the first link you want to manage using the Pretty Links plugin.

For detailed step-by-step instructions, please see our guide on how to cloak affiliate links on your WordPress site.

How to cloak an affiliate link in WordPress with Pretty Links

After that, click on the ‘Pro’ tab. In the ‘Keywords’ field, type in each word or phrase where you want to automatically insert this affiliate URL.

Simply repeat this process for all your affiliate links.

Adding keywords to the Pretty Links affiliate linking plugin

Every time it adds this affiliate URL, Pretty Links will also add a link to your disclosure notice.

The next step is creating the disclosure notice page that Pretty Links will link to. Simply go to Pages » Add New. You can then type in your affiliate disclaimer and add any categories or tags that you want to use.

An example affiliate disclaimer

When you’re happy with your disclaimer, publish the page to make it live. It’s a good idea to make a note of the page’s URL, as you’ll need it in the next step.

Once you’ve done that, simply go to Pretty Links » Options. Then, click on the ‘Replacements’ tab.

Pretty Links' auto-linking and replacement settings

Here, check the ‘Enable Replacements’ box if it isn’t already selected.

After that, check the ‘Link to Disclosures’ box. In the ‘URL’ box, go ahead and enter your affiliate disclosure URL.

Pretty Links Disclosure Notice

By default, Pretty Links will use ‘Affiliate Link Disclosures’ as your link’s text. However, you can change this to anything you want by typing into the ‘Text’ field.

You can also change where Pretty Links adds the affiliate disclaimer link. By default, it shows the URL at the bottom of the post, so it doesn’t distract visitors from the post’s content.

Another option is to add the disclaimer to the top of the post. This is where we include it on WPBeginner.

WPBeginner Disclosure Notice

This lets visitors know the post contains an affiliate link before they start reading, which is a good way to build trust with your audience. However, some people may see the disclaimer and decide not to stay on the page, which can increase your bounce rate.

You can also add the disclaimer to both the top and bottom of each post. This may be a good idea if you write very long posts, but most sites don’t need multiple disclosures per page.

To place the affiliate URL, simply open the ‘Position’ dropdown and choose Bottom, Top, or Top and Bottom.

Changing where an affiliate disclaimer appears on your WordPress website

Once you’ve done that, just scroll to the bottom of the page.

Then, click on the ‘Update’ button.

Saving your Pretty Links settings

Now, Pretty Links will add an affiliate disclosure link every time it auto-inserts an affiliate URL to your posts, pages, or custom post types.

Method 2. Add Affiliate Disclosure Using WPCode (More Customizable)

Sometimes you may want to add the affiliate disclosure to different areas of every blog post. For example, you might show the disclosure after you mention each affiliate product for the first time.

In this case, you can create a shortcode that adds your affiliate disclaimer. This gives you complete control over where the disclosure appears, without you having to type the entire text every single time.

A custom shortcode created with WPCode

The easiest way to create a custom shortcode is using WPCode. This plugin lets you add code snippets to WordPress without editing your theme’s functions.php file.

WPCode also helps you avoid common errors by performing smart code snippet validation.

There are lots of ways to add an affiliate disclosure using WPCode. Besides the shortcode method, we’ll also share an easy way to automatically add the disclaimer to every post, page, or custom post type.

The first thing you need to do is install and activate the free WPCode plugin on your website. For more details, see our step-by-step guide on how to install a WordPress plugin.

Upon activation, go to Code Snippets » Add Snippet.

Adding a custom code snippet to WordPress

This will bring you to the ‘Add Snippet’ page where you can see all the ready-made snippets that you can use on your site.

Since we want to add custom code in WordPress, hover your mouse over ‘Add Your Custom Code (New Snippet).’ Then, click on ‘Use snippet’ when it appears.

Adding custom snippets to WordPress

To start, enter a title for the custom code snippet.

This could be anything that helps you identify the snippet in the WordPress admin area.

Adding a title to a WPCode custom code snippet

We’re going to add a PHP snippet, so open the ‘Code Type’ dropdown and choose the ‘PHP Snippet’ option.

You can then go ahead and paste the following code into the code box:

function disclosure() {
    return "<p class='disclosure'>This site may contain links to affiliate websites, and we receive an affiliate commission for any purchases made by you on the affiliate website using such links.</p>";
}

add_shortcode( 'disclosure', 'disclosure' );

You can use any text as your affiliate disclaimer, simply by editing the code above. For example, you might want to add a link in HTML to your affiliate disclosure page.

Once you’ve done that, scroll to the ‘Insertion’ section and make sure ‘Auto Insert’ is selected.

Auto-inserting custom code snippets in WordPress

Then, open the ‘Location’ dropdown and choose ‘Frontend Only’ since we only want to use this code on our site’s frontend, which is what visitors see when they visit your site.

You can also organize your snippets by adding tags.

When you’re happy with how the snippet is set up, scroll to the top of the screen and click on ‘Save Snippet.’

Saving your WPCode snippet

After that, you can make the code snippet live by clicking the ‘Active’ toggle.

Finally, don’t forget to save the change by clicking on ‘Update.’

Updating a custom code snippet in WordPress

Now you can add the affiliate disclosure to any page, post, or custom post type using the [disclosure] shortcode. For more details on how to place the shortcode, you can see our guide on how to add a shortcode in WordPress.

How to Automatically Display the Affiliate Disclosure with WPCode

With WPCode, there are lots of different ways to add an affiliate disclosure to your WordPress website, including automatically adding it to every post.

This can save you a lot of time and effort, since you don’t need to add the shortcode manually. However, the disclosure will appear in the same location on every page.

To automatically add the disclaimer, simply create a new custom code snippet by following the same process described above. However, this time open the ‘Code Type’ dropdown and select ‘HTML Snippet.’

Adding an HTML snippet to WordPress

You can now add your disclaimer in the code editor, complete with the formatting that you want to use. For example, here we’re adding a simple disclaimer as a new paragraph:

<p>This site may contain links to affiliate websites, and we receive an affiliate commission for any purchases made by you on the affiliate website using such links.</p>

Next, scroll to the ‘Insertion’ section and open the ‘Location’ dropdown.

You can now choose where this disclaimer should appear, such as ‘Insert After Post’ or ‘Insert Before Content.’

Automatically inserting an affiliate disclaimer

You can then go ahead and enable the snippet by following the same process described above. WPCode will now automatically show the disclaimer on every page, post, and custom post type, without you having to add the shortcode manually.

Method 3. Add Affiliate Disclosure Using Full-Site Editor (Block-Enabled Themes Only)

If you’re using a block-based theme like Hestia Pro, then you can add an affiliate disclosure to your theme’s blog post template.

This is a good choice if you want to show the exact same disclosure on every blog post. However, you won’t have the option to change the style or text on individual posts, so it’s not a good choice if you want to show different information on different pages.

To use this method, go to Themes » Editor in the WordPress dashboard.

Opening the WordPress full-site editor (FSE)

By default, the full-site editor will show your theme’s home template, so you’ll typically want to select a new template.

If you want to show the affiliate disclosure across your entire website, then we recommend adding it to the footer template part. 

However, if you just want to show the disclaimer on your blog posts, then click on Templates on the left-hand side of the screen in the Design section.

Adding an affiliate disclosure using the full-site editor (FSE)

The editor will now show all the layouts that make up your WordPress theme.

Simply click go ahead and click on ‘Single.’

Adding an affiliate disclaimer to a WordPress blog post template

WordPress will now show a preview of the template.

To edit this template, go ahead and click on the small pencil icon.

Editing a blog post template in a block-enabled WordPress theme

With that done, click on the blue ‘+’ icon in the top left corner.

In the search bar that appears, type in ‘Paragraph’ to find the right block. 

Adding a Paragraph block to a full-site template

You can now drag and drop the block onto the area where you want to show the disclaimer. 

Now, click on the block and type in your affiliate disclaimer. 

Adding text to a WordPress blog template

You may also want to change how the disclaimer looks. 

To change the font size, background color, and more, simply click to select the paragraph block. Then, select the ‘Block’ tab in the right-hand menu.

Styling affiliate disclaimers using the WordPress FSE block-based editor

You can now change the background color and text color, or make the disclaimer bigger or smaller using the settings in the right-hand menu.

When you’re happy with how the disclaimer looks, click on the ‘Save’ button.

An example of an affiliate disclaimer, created using the FSE

Now, if you visit any blog post on your affiliate website, you’ll see the disclaimer in action. 

We hope this article helped you learn how to add affiliate disclosures for each blog post automatically. You can also go through our guide on the best giveaway and contest plugins and how to create an email newsletter the RIGHT way.

If you liked this article, then please subscribe to our YouTube Channel for WordPress video tutorials. You can also find us on Twitter and Facebook.

The post How to Add Affiliate Disclosure for Each Blog Post Automatically first appeared on WPBeginner.

Pretty Links vs ThirstyAffiliates: Which is Right for Your Site?

Are you looking for the best affiliate link management plugin for your website?

The right affiliate URL management plugin will help you add relevant links to your site, so you never miss a chance to make money. They’ll also make it easier to monitor, update, and fine-tune your links to get as many sales as possible.

In this article, we will compare Pretty Links vs ThirstyAffiliates, to help you decide which affiliate plugin is right for your website.

Pretty Links vs ThirstyAffiliates: Which is right for your site?

Why Use an Affiliate Link Management Plugin?

Affiliate marketing is where you earn a commission every time someone buys a product using your unique referral link. It’s a great way to make money online without having to create and sell your own digital downloads or physical products.

However, it’s not enough to simply add affiliate links to your site. To get sales, you need to place those links in the right place and show them to the right people.

It’s also important to monitor the number of click-throughs and conversions, identify any broken links, update outdated URLs, and much more.

This can take a lot of time and effort, which is why so many marketers use an affiliate link management plugin. The right plugin can help you better manage your affiliate links, and even help automate certain processes like contextual linking.

In this Pretty Links vs ThirstyAffiliates guide, we’re comparing two of the most popular affiliate plugins to see which is right for your website. Simply use the quick links below to jump straight to the feature you want to compare.

An effective link management plugin is a must-have for any affiliate marketer. With that being said, let’s start with an overview of these two popular link management plugins.

ThirstyAffiliates – Overview

ThirstyAffiliates is an affiliate management plugin that allows you to replace ugly affiliate URLs with branded links.

The ThirstyAffiliates affiliate WordPress plugin

It has everything you need to make money online blogging with WordPress including link scheduling, Google Analytics integration, automatic keyword linking, geolocation specific links, and an automatic 404 checker.

You can also organize your links into categories, so it’s easier to work with lots of different affiliate partners.

Note: We have been using ThirstyAffiliates on our own websites including WPBeginner for over 5 years.

Pretty Links – Overview

Pretty Links is also a popular affiliate link management plugin for WordPress that’s trusted by over 200,000 websites.

The Pretty Links affiliate plugin for WordPress

You can use Pretty Links to replace long and complicated affiliate URLs with cleaner, more memorable alternatives. These links are easier to post on social media, podcasts, forums, and many other platforms.

You can even create links that originate from your domain name, so they seem more trustworthy to security-conscious shoppers.

In addition to link cloaking, Pretty Links is a complete affiliate link management tool that has tons of advanced features including automatically adding links to your site and detailed conversion reports.

Affiliate links are a great way to monetize your WordPress blog or website. However, maintaining those links can take a lot of time and effort, especially if you’re a small team. If you don’t manage your links effectively, then you may miss opportunities to make money.

Here’s a look at how these plugins can help you manage your affiliate URLs.

ThirstyAffiliates – Affiliate Link Management

ThirstyAffiliates allows you to manage your links from a single location in your WordPress dashboard. This can save you a ton of time if you ever need to update those URLs.

For example, if an affiliate partner changes a link, then you can simply edit the URL once in the WordPress dashboard, and ThirstyAffiliates will automatically redirect to the new URL across your entire WordPress website.

Adding affiliate URLs to the ThirstyAffiliates dashboard

ThirstyAffiliates’ also support categories, which work in a similar way to post and page categories in WordPress.

This helps to keep your links organized, no matter how many affiliate partners you work with.

Adding categories to a ThirstyAffiliates affiliate link

However, there’s no way to add tags to your links.

Pretty Links – Affiliate Link Management

Just like ThirstyAffiliates, Pretty Links provides a single location where you can manage all your affiliate links.

Managing affiliate links using Pretty Links

Again, this means you can edit an affiliate link once, and Pretty Links will apply the change across your entire WordPress website.

Although Pretty Links and ThirstyAffiliates handle link management in a very similar way, Pretty Links does have some extra features. To start, you can add both categories and tags to your affiliate links.

How to add tags to an affiliate URL using Pretty Links

It even has a separate section where you can manage all your affiliate tags.

This can be particularly useful if you have lots of different affiliate partners or a ton of links that you need to keep organized.

How to organize your affiliate links into tags and categories in WordPress

Pretty Links also has a ‘Notes’ section for each link where you can leave reminders for yourself, or even notes for other people.

In this way, you can communicate with clients, guest bloggers, partners, and anyone else who shares the WordPress dashboard with you.

Adding notes to an affiliate URL

Winner – Pretty Links

If you’re looking for a tool to help you perform essential link management, then both plugins are a great choice.

Both Pretty Links and ThirstyAffiliates will save you a ton of time with link management, no matter how many URLs you add to your online store, blog, or website. However, Pretty Links has a few extra features that can help you organize your links, so it has a slight edge over ThirstyAffiliates in this area.

Broken links are bad news for any website, but 404 errors cost affiliate marketers money.

When a visitor clicks on an affiliate link, it typically means they’re thinking about buying the product. If they get a 404 error, then you’ve missed out on a potential sale.

As an affiliate marketer, you need a link management plugin that helps you fix broken links before they start costing you money. Here’s what both plugins have to offer.

ThirstyAffiliates – Link Checker

ThirstyAffiliates has an Automatic 404 Checker that scans your site and then reports any problems. It will show information about each link in the ‘404 checker’ area of the WordPress dashboard.

ThirstyAffiliates' 404 checker

You can check for broken links by visiting this tab, but ThirstyAffiliates will also notify your site admin about any broken URLs it discovers. However, there’s no option to send these email notifications to a different email address, which may be a problem if you share the WordPress dashboard with other people.

The Automatic 404 Checker also isn’t enabled by default, so you’ll need to go into the plugin’s settings to activate it.

Enabling the auto-link feature

ThirstyAffiliates also allows you to check the health of specific links as you’re adding them to your online marketplace or website.

This allows you to verify that a link works before publishing it.

Checking for 404 errors using the Health Check tool

Pretty Links – Link Checker

Pretty Links has a Link Health feature that scans your site and creates weekly reports about any broken links it discovers.

However, just like ThirstyAffiliates, you will need to go into the plugins’s settings to enable this feature, as it doesn’t run by default.

Enabling the Pretty Links URL health check feature

Unlike ThirstyAffiliates, Pretty Links prioritizes the links that get you the most conversions, by scanning your best-performing links first. This feature is particularly useful for large sites that have hundreds or even thousands of affiliate URLs.

You can see the Link Health report in the WordPress dashboard, but Pretty Links can also notify you about broken links via email. By default, Pretty Links will email your site admin but you can change this to any other address in the plugin’s settings.

Sending affiliate marketing notifications to a site admin

Winner – ThirstyAffiliates

Both of these plugins allow you to identify and fix broken links without having to manually track 404 pages in WordPress.

However, ThirstyAffiliates lets you check that a link is working before publishing it, simply by clicking a button. This is a quick way to avoid 404 errors happening in the first place, which gives this plugin a slight advantage over Pretty Links.

Scheduling helps you create automated workflows for your affiliate website. This is important for busy website owners who don’t have time to enable and disable affiliate URLs manually.

It’s also useful if your affiliate partners run sales and other time-sensitive promotions, as you can organize your campaigns in advance.

Let’s see how these plugins compare when it comes to link scheduling.

ThirstyAffiliates – Link Scheduling

With ThirstyAffiliates, you can set the date and time when your affiliate URLs will go live.

Scheduling affiliate links to go live

You can also create redirects for any visitors who click your affiliate URLs before they’re active, or after they’ve expired.

For example, you might show a custom landing page explaining the promotion has ended, and suggesting some alternatives affiliate products visitors may want to buy instead.

How to schedule affiliate links to go live in WordPress

In this way, you can improve the user experience and possibly even turn 404 errors into sales.

Pretty Links – Link Scheduling

Unlike ThirstyAffiliates, Pretty Links doesn’t allow you to schedule when your links will go live. However, you can set links to expire automatically on a specific date or after a certain number of clicks. This is perfect if you want to use FOMO to increase conversions.

Setting an affiliate link to expire using Pretty Links

Similar to ThirstyAffiliates, you can automatically redirect visitors after a link has expired. For example, you might use a page builder plugin to design a custom Sorry page, or you can forward them to an alternative affiliate product.

Winner – Tie

If you like to plan your affiliate campaigns in advance, then this is a good reason to choose ThirstyAffiliates over Pretty Links. However, if you want your links to expire automatically after a certain number of clicks, then this is very easy to set up using Pretty Links.

Link cloaking is where you replace complicated affiliate URLs with user-friendly links that have your own branding. This makes the links look more trustworthy, which encourages shoppers to click on them.

Cloaked links are often shorter, so they’re also easier to share on social media. In addition, link cloaking hides your affiliate ID, so it’s more difficult for malicious third parties to hijack your links and steal your commissions.

Since it’s such an important feature, let’s compare how ThirstyAffiliates and Pretty Links handle affiliate URL cloaking.

Pretty Links – URL Cloaking

Every time you add a link to Pretty Links, you have the option to set up link cloaking. Simply type in the original link and the cloaked URL that you want to use instead.

You can then choose between various redirection types, including 301 redirects, 307, and JavaScript redirection.

Redirecting affiliate links using Pretty Links

You can then mark the links as no-follow or sponsored, so you’re in complete control of your WordPress SEO.

‘Sponsored’ tells search engines that the URL is a paid placement or advertisement. Although no-follow and sponsored links are similar, ‘sponsored’ helps search engines understand this is an affiliate URL, so it’s a great example of Pretty Links paying attention to the finer details.

Sometimes you may need to pass a parameter to the target URL, such as a coupon code or customer ID. With Pretty Links, this is as simple as checking a box.

How to set up parameter forwarding using Pretty Links

ThirstyAffiliates – URL Cloaking

Similar to Pretty Links, ThirstyAffiliates makes it easy to cloak your affiliate URLs. In fact, the process is practically identical as you simply type in the original link and the URL you want to use instead.

Cloaking URLs in WordPress

You can also easily change whether the cloaked link opens in a new tab, mark URLs as nofollow, and pass query strings to the destination URL.

However, ThirstyAffiliates only allows you to set up 301, 302, and 307 redirects, so you have fewer options compared to Pretty Links.

If you want to mark affiliate links as sponsored, then you’ll need to add this as an additional rel attribute tag in the plugin’s settings.

Adding rel attributes to a ThirstyAffiliates link

This is much more difficult than how Pretty Links handles sponsored links.

On the plus side, ThirstyAffiliates has a unique smart uncloaking feature that helps you follow Amazon’s terms and conditions. The Amazon Associates Program forbids using any kind of redirection including link cloaking. If you ignore this rule, then you may get banned from their affiliate program.

If you’re creating an Amazon Affiliate Store using WordPress, then it’s easy to uncloak a specific Amazon link.

ThirstyAffiliates' smart uncloaking feature

Even better, if you add all your Amazon links to the same category, then you can enable automatic clink uncloaking for that entire category.

Now, any Amazon links you add to your website will be uncloaked by default. This is something that Pretty Links doesn’t offer, and it’s a very attractive feature for anyone who uses Amazon affiliate links.

How to uncloak Amazon affiliate links

Winner – ThirstyAffiliates

No matter whether you choose Pretty Links or ThirstyAffiliates, you’ll get advanced link cloaking features.

For the typical affiliate marketer, ThirstyAffiliates and Pretty Links have everything you need to create more shareable, user-friendly, and safe links. However, if you plan to use lots of Amazon links, then ThirstyAffiliates’ automatic link uncloaking is a must-have feature.

It’s easy to overlook an opportunity to add affiliate links to your blog posts. This becomes a bigger problem if you run a multi-author WordPress blog or have guest bloggers.

Both Pretty Links and ThirstyAffiliates can scan your site for specific keywords and phrases and then convert them into affiliate links automatically. Let’s take a closer look at how both plugins handle automatic keyword linking.

Pretty Links – Automatic Keyword Linking

When you add a new URL, you can type in an unlimited number of keywords and phrases. Every time you use these words in your posts and pages, Pretty Links will insert the affiliate link automatically.

Auto-inserting affiliate URLs using Pretty Links

Even better, Pretty Links will scan your older content for these keywords and phrases. If you’ve already published some content, then you can start earning money from your back catalog without having to manually update any posts.

Pretty Links also has a settings tab where you can control exactly how this auto-linking works on your site.

This includes setting a limit for the number of affiliate URLs that Pretty Links can add to a single page, so the links don’t distract from your content or annoy your visitors.

The auto-link feature in Pretty Links

Pretty Links can also add a disclosure to every page where it auto-inserts an affiliate URL.

Undisclosed links can create a legal nightmare, so Pretty Links can earn you extra income without risking any fines or damaging your reputation.

Automatically inserting affiliates disclosures in WordPress

ThirstyAffiliates – Automatic Keyword Linking

ThirstyAffiliates works in a very similar way, as you can add keywords every time you create a link. ThirstyAffiliates will then automatically add the link to every page or post that features that word.

Autolinking keywords using ThirstyAffiliates

Just like Pretty Links, ThirstyAffiliates lets you limit how many affiliate links it will add to a single page or post.

However, unlike Pretty Links it allows you to set a global limit in the plugin’s settings and a limit for a specific affiliate link.

Adding a global limit to your auto-link affiliate URLs

In the plugin’s general settings, you can also disable auto-linking on your homepage and archive pages. You can also disable auto-linking for your pages or posts.

Often, sales pages and landing pages have their own clear call to action. Affiliate URLs can distract from that CTA, so this is an easy way to disable them across all your pages.

ThirstyAffiliates vs Pretty Links: Which is right for your site?

These extra settings give you much more control over how auto-linking is used on your WordPress website.

Once you’ve set up auto-linking, it can be difficult to keep track of all the affiliate URLs across your website. With that in mind, you may want to look at the Link Inserted Scanner, as it lists every page and post that uses a particular affiliate link.

This is a simple but effective way to keep track of your URLs, even when using the auto-linking feature.

The Link Inserted Scanner feature

Winner – Tie

Auto-linking can help you earn extra commission so it’s a must-have feature for all affiliate marketers. Although ThirstyAffiliates has some extra settings, both Pretty Links and ThirstyAffiliates have everything you need to automatically add affiliate URLs to your content, while still keeping control over your links.

It’s important to monitor how your affiliate links are performing. In this way, you can see what’s working and not working, and then adjust your affiliate marketing activities to get the best results.

Let’s see how ThirstyAffiliates vs Pretty Links stack up in terms of affiliate marketing reports.

ThirstyAffiliates – Affiliate Marketing Reports

ThirstyAffiliates has a reporting dashboard that spans multiple tabs. Here, you can see the total clicks on your different affiliate links and identify your top-performing URLs.

ThirstyAffiliate's affiliate reporting feature

Some links may get more engagement from certain geographical locations. To help you spot these trends, ThirstyAffiliates has a Geolocation Report that tracks link clicks based on the visitor’s location.

Depending on the data, you might decide to show different content to users, based on their geographical location.

For more detailed information, we recommend pairing ThirstyAffiliates and Google Analytics. After making this connection, ThirstyAffiliates will send all its data to your Google Analytics profile.

You can even cross-match the information against your Google Analytics data. In this way, you can get a detailed insight into the people who convert, including the devices and operating systems they’re using, and how they arrived at your site.

This is how we use ThirstyAffiliates on WPBeginner to get maximum insights.

Google Analytics is a powerful tool, but it can be difficult to set up. For that reason, we recommend using MonsterInsights. It is the best analytics solution for WordPress users and can show all your ThirstyAffiliates and Google Analytics data inside the WordPress dashboard.

Pretty Links – Affiliate Marketing Reports

Unlike ThirstyAffiliates, Pretty Links doesn’t show you data automatically in a reporting dashboard. Instead, you’ll need to generate custom reports by selecting the links you want to analyze. You can start by generating standard reports, which show the total clicks and unique clicks on each affiliate link.

This is useful to know, but clicks don’t necessarily mean sales and affiliate revenue. With that in mind, you can also create conversion reports, which show the total conversions and the conversion rate for each link.

Creating an affiliate report using Pretty Links

Unlike ThirstyAffiliates, there’s no way to explore your data based on geographical location by default. However, Pretty Links does integrate with MonsterInsights and Google Analytics.

This allows you to take the built-in Pretty Links reports to the next level and access more detailed information, including where visitors are located.

MonsterInsights will even send real-time data to Google Analytics, so you can track clicks as they’re happening.

Pretty Links also has a unique auto-trim clicks feature that automatically filters known robots and unidentifiable browser clients from your click data, stats, and reports. This can greatly improve the accuracy and quality of your reports.

Winner – Pretty Links

Both of these plugins provide easy access to all the information you need to make decisions based on real data, especially if you’re using a plugin such as MonsterInsights. However, Pretty Links’ auto-trimming feature can significantly improve the accuracy of this information, so it’s our top pick when it comes to affiliate reports.

Both Pretty Links and ThirstyAffiliates are easy to use. However, even experienced affiliate marketers need help from time to time, so let’s compare their support options.

Pretty Links – Professional and Community Support

If you prefer to find answers yourself, then Pretty Links has detailed online documentation and a blog where you’ll find step-by-step guides covering everything from how to use specific Pretty Links features, to general advice on running a successful affiliate site.

The Pretty Links affiliate marketing blog

If you want one-on-one support, then you can submit a ticket to their Premium Support Request page.

According to Pretty Links, you can typically expect a response within 1-2 business days.

An affiliate marketing support ticket

If you don’t have a support license, then Pretty Links encourages you to reach out using their contact form or post to their support forum on the official WordPress repository.

The Pretty Links team members are very active on the free forum and respond quickly to user questions. If you plan to join the conversion, then we recommend reading our guide on how to properly ask for WordPress support and get it.

A free support forum on the official WordPress repository

ThirstyAffiliates – Community and Professional Support

If you choose ThirstyAffiliates, then you’ll have access to a huge knowledge base covering both the free and premium versions of the plugin. There’s also a blog where they regularly post affiliate marketing tips, along with step-by-step guides on how to use ThirstyAffiliates.

Similar to Pretty Links, this may be all the information and resources you need to answer your questions and solve any problems you have.

When it comes to one-to-one support, premium customers can submit a ticket and get a response within 24-48 hours. Again, this is very similar to the level of support we see from Pretty Links.

An affiliate marketing support portal

If you have the free plugin then you can use the ThirstyAffiliates contact form, or post to the ThirstyAffiliates support forum. The ThirstyAffiliates team actively monitors this forum and responds to questions quickly, so this is a great resource for anyone using the free plugin.

Winner – Tie

When it comes to support, both plugins offer plenty of options. After comparing and contrasting all of the free and premium support, we’re confident you’ll have no problems getting the help you need, no matter whether you choose Pretty Links or ThirstyAffiliates.

To help you build a successful affiliate marketing business, it’s important to find a plugin that fits your budget. Let’s see which plugin offers the best value for money.

Pretty Links – Price Comparison

Pretty Links has three pricing plans, which seem to target beginners, affiliate marketers with multiple websites, and established marketers who have up to 5 websites.

The Pretty Links pricing page

If you’re a new marketer with a single WordPress website, then the Beginner plan ($99.50 per year) has everything you need to get started. In fact, the only difference between Beginner and the more expensive plans is the number of websites you can use Pretty Links on.

If you have multiple websites, then you’ll need to upgrade to Marketer, which allows you to use Pretty Links on two websites for $149.50 a year.

If you own more than two websites, then Super Affiliate is the most expensive plan ($199.50 per year) and allows you to use Pretty Links on up to 5 websites.

ThirstyAffiliates – Price Comparison

Just like Pretty Links, the only difference between the different ThirstyAffiliates plans is how many sites you can use the plugin on.

If you’re a new affiliate marketer with a single website, then the Basic plan should have everything you need, for $79.50 per year.

The ThirstyAffiliates affiliate pricing page

If you have multiple websites, then ThirstyAffiliates does represent better value for money. Their Plus plan allows you to use ThirstyAffiliates on up to 5 websites, for $129.50 per year.

If you have more than 5 websites, then the most expensive ThirstyAffiliates plan is priced at $199.50 per year, but you can use it on up to 10 websites.

By comparison, Pretty Links’ most expensive plan is also priced at $199.50 per year, and you can only install the plugin on 5 websites.

Winner – ThirstyAffiliates

If you own a single website, then both Pretty Links and ThirstyAffiliates offer similar features, for a similar amount of money. However, if you own more than 2 websites, then ThirstyAffiliates seems to offer the best value for money.

In fact, if you have more than 5 websites, then you’ll almost certainly need to use the ThirstyAffiliates plugin.

If you’re looking for an affiliate link management plugin with advanced auto-linking features, then both Pretty Links and ThirstyAffiliates are great choices.

Both plugins can help you unlock extra revenue while saving you a ton of time. By allowing you to auto-link keywords and manage your links from a single location, Pretty Links and ThirstyAffiliates make affiliate marketing easy, no matter whether you’re a hobby blogger or an experienced business owner.

The affiliate marketing plugin that’s right for you will vary depending on your website, your affiliate partners, and the specific features you need.

With that being said, each plugin has its own strengths and drawbacks. If you want to schedule links in advance, then we recommend using ThirstyAffiliates. If Amazon is your main affiliate partner, then ThirstyAffiliates’ smart link uncloaking is a must-have feature that can help you comply with Amazon’s terms and conditions.

If you’re worried about bots or malicious third parties affecting the accuracy of your data, then the auto-trimming feature in Pretty Links is perfect. We’ve seen this feature significantly improve the accuracy of affiliate reports, so it’s a must-have if you want precise data.

We hope this article helped you decide whether Pretty Links or ThirstyAffiliates is right for your site. You may also want to see our guide on how to create an email newsletter and our expert picks of the best email marketing services for small businesses.

If you liked this article, then please subscribe to our YouTube Channel for WordPress video tutorials. You can also find us on Twitter and Facebook.

The post Pretty Links vs ThirstyAffiliates: Which is Right for Your Site? first appeared on WPBeginner.

Research: The Truth Behind Make Money Online Videos on YouTube and TikTok (We Analyzed 344 Videos)

Have you ever wondered whether those YouTube and TikTok influencers teaching how to make money online are telling the truth?

We analyzed 354 videos from YouTube and TikTok to see whether the business model or earning potential they share is realistic for an average person.

Here’s what we found out.

While a lot of these make money online influencer videos paint a rosier picture than the truth of online entrepreneurship, there are still a lot of options to earn consistent income through the internet.

Below are our findings on online business statistics along with the original research data that we collected from YouTube and TikTok.

How online entrepreneurs make money according to YouTube and TikTok

The Trend of Online Work: An Overview

The COVID-19 pandemic showed millions of people that they could work from anywhere and at any time. As offices closed and all but the most essential services shut down, many jobs moved onto the internet.

This trend towards flexibility has persisted: even as most of the world has returned to normal, people still like working remotely. In fact, 45% of employees said they were likely to look for a new job if their employer required them to report to work in person.

Online work can also open up new opportunities for people who lost their jobs during the financial crises spurred on by the pandemic, said Haiyi Zhu, a professor at Carnegie Mellon University’s Human-Computer Interaction Institute who studies gig work. These workers might “turn to online, virtual work as either a transitional job or to find additional income sources” as they look for new full-time employment, she explained.

At the same time, social media platforms like YouTube and TikTok have made it easier than ever for people to learn about online work opportunities. Searches for online gig work or investment opportunities can lead a user to hours upon hours of content, explaining potential business ideas and suggesting how much an aspiring worker could earn.

At WPBeginner, we’ve summarized the money-making advice from hundreds of top videos, exploring the trends in business options and earning potential.

Of course, some videos might paint a rosier picture than the truth of online entrepreneurship. But, there are still a lot of options for earning consistent income through the internet.

For this report, our team used 177 videos from YouTube and 177 videos from TikTok, available in this repository.

On YouTube, we selected videos that came up at the top of a search for “how to make money online.” While on TikTok, we used hashtags like #makemoneyonline and #entrepreneurship to select videos with this theme. We analyzed the videos based on the business options, potential earnings, and required skillsets they advertised.

The potential earnings we discuss in this article were taken directly from the YouTube and TikTok creators whose videos we analyzed.

These numbers do not necessarily reflect accurate trends. Rather, we are presenting them as a reflection of how online creators advertise work opportunities.

Wide Range of Earning Potential

After analyzing all of the videos from YouTube and TikTok, we found that the median pay these influencers advertised was about $50 per hour.

Distribution of Hourly Earnings by Platform - YouTube and TikTok Case Study

At the lowest end of the range, creators advertised microwork tasks, or series of small tasks (such as answering survey questions) that can be completed asynchronously over the internet. Microwork can lead to earnings as low as $1 per hour, according to the videos.

At the highest end of the range, video creators suggested that entrepreneurs can earn over $1,000 per hour for more skilled work like running a popular blog. In our expert opinion, this number is exaggerated and very rarely do individual bloggers get to such income level.

Overall, though, the earning potential mentioned in the videos skewed lower: 90% of the videos on both platforms advertised that workers would get under $300 per hour.

This statistic again should be taken with a grain of salt because it doesn’t factor in true-working hours because it’s unlikely to have a 40 hour work-week at that hourly rate.

Income instability is one of the most common challenges that online gig workers face, Zhu said. Her team has a paper currently undergoing peer review that names key issues across online gig workers and those that use online platforms to coordinate physical work, like driving for Uber or DoorDash. Other major challenges include a lack of employment benefits, health and safety (both physical and online), and a lack of power in the workplace, she said.

Some YouTube and TikTok creators advertise more lucrative career paths by talking about their own experiences getting rich, though their videos may be misleading.

For example, Adam Enfroy, a popular creator on both platforms, claims to make $300,000 a month through blogs and affiliate marketing, but this income is unrealistic for new marketers just starting out. According to statistics, the average earnings for professional, freelance marketers is $50 per hour or $100,000 per year only if you’re absolutely at the top of your game.

Making Money with Online Publishing

Business Types Mentioned by Platform on YouTube and TikTok

Online publishing Statistics, according to YouTube

Online publishing was the most popular type of online business advertised on YouTube, clocking in at 45% of the videos we analyzed.

Business Types Mentioned on YouTube Videos

This is a broad category of online work which might include setting up a blog that earns revenue through affiliate links, writing a newsletter, making videos on YouTube, or creating content as an influencer.

YouTube creators pushing online publishing advertised that workers could earn a median of:

  • $925 per hour writing a blog
  • $312 per hour writing a newsletter or similar periodic articles
  • $230 per hour for YouTube sponsorships
  • $106 per hour with affiliate marketing

Note: these rates shared in videos may not reflect actual earnings.

Affiliate marketing is one of the simpler options for a new writer with less experience. In this model, companies pay you to send customers to their products. Google a simple question like “best laptop for college,” and you’ll find hundreds of lists on sites ranging from independent blogs to the New York Times, taking advantage of the search engine to drive affiliate revenue.

Online publishing Statistics, according to TikTok

Creators on TikTok similarly advertised blogs and marketing as a high-earning strategy. The videos we analyzed claimed that writing a blog could net a median of $1,500 per year. Digging into this further, we analyzed the skills that TikTok creators claimed would be most lucrative for different online businesses.

Business Types Mentioned on TikTok Videos

According to the TikTok creators, marketing could lead to the highest (advertised) earnings at a median of $62.50 per hour, followed by investing at $56 per hour and video editing at $50 per hour.

As on YouTube, TikTok creators tend to provide fairly limited evidence for their earning estimates. Video creators also tend to advertise business ideas that are easier to sell to a broad audience as “easy money-making strategies”. In reality, getting extremely rich off of a blog is harder than video creators make it sound.

Instead, experts suggested that selling writing or another type of service as a freelancer might be more successful for online workers with prior talents under their belts.

Making Money with a Service Business

Service businesses can include a range of skillsets.

On TikTok, we found that services businesses were the most popular type of online work advertised by creators.

Hourly Earnings by Online Business Type

These businesses include a range of skills and activities such as: starting your own agency to provide a service like tech support to other companies, selling goods through an online store, making content for clients on platforms like Upwork and Fiverr, and performing microwork tasks like filling out surveys or tagging content.

Microwork can be particularly appealing for people who are not currently employed full-time and looking to make extra cash, said Melissa Keith, a psychology professor at Bowling Green State University whose research focuses on the platform Mechanical Turk. Mechanical Turk, run by Amazon, allows remote workers to make money by doing small tasks that can’t be completed by computers.

Microwork rates are low, but improving.

“It’s pretty unrealistic to think you’re going to make a full-time salary on most of these platforms,” Keith said. But the all-remote, fully flexible nature of the platform allows workers to earn money on their own terms — potentially even while working at another job. While TikTok videos advertise that workers might be able to earn over $50 per hour while on platforms like Mechanical Turk, Keith found this number is unrealistic compared to her research. “A good rate is closer to $10 an hour,” she said.

In recent years, workers on microwork platforms have pushed the companies posting jobs to improve their hourly rates, Keith noted. Tasks that might once have paid under $1 an hour will now earn a worker the U.S. minimum wage, if not more. These rates can be particularly attractive to workers in other countries where the cost of living is lower.

Related: 11 Best WordPress Developer Jobs Sites (+ Example Job Templates)

Balancing Expectations and Reality

Online videos paint a rosy picture of entrepreneurship opportunities. This is especially true for financial and investment advice, as creators advertise buying into cryptocurrency and other risky assets. As CNET contributor Ana Staples points out, anyone can claim to be an expert on TikTok. Short, punchy videos can make getting rich online look much easier than it really is.

It’s also important to consider the gap between who makes videos about earning money online and who actually comprises the online gig workforce.

Our analysis found that the creators of YouTube and TikTok videos skew towards men in their 20s; the user bases of platforms like Mechanical Turk tend to be pretty evenly split on gender, Keith said.

YouTube TikTok Case Study Presenter Demographic

Younger men might be “more willing to share their success stories,” said Zhu, the Carnegie Mellon researcher. Meanwhile, low-income immigrants who are doing more low-paid gig work might “not necessarily want to brag about their work, and also don’t have the time to create videos,” she added.

As online work remains popular in the wake of the pandemic, Zhu and Keith both anticipate that workers will continue to push for higher wages, flexibility on the job, and benefits that better align with those of typical full-time employment. “If people move towards these more flexible work arrangements, we’re going to have to have systems in place to protect workers,” Keith said.

List of Sources

Federal Reserve Board, Haiyi Zhu, Upwork, CNET, Melissa Keith, YouTube and TikTok

That’s a wrap! We hope this original research gave you an idea of what to expect if you’re looking to start an online business or become a freelancer.

If you’re looking to start earning online, you may found the following resources helpful:

If you liked this article, then please subscribe to our YouTube Channel for WordPress video tutorials. You can also find us on Twitter and Facebook.

The post Research: The Truth Behind Make Money Online Videos on YouTube and TikTok (We Analyzed 344 Videos) first appeared on WPBeginner.

6 Best Product Review Plugins for WordPress

Are you looking for the best product review plugins for WordPress? 

Product review plugins can help you get more traffic from search engines, boost affiliate link clicks, add user-submitted reviews to your website, and more.

In this article, we’ve hand-picked the best product review plugins for WordPress.

5+ best product review plugins for WordPress

Why Use Product Review Plugins in WordPress?

What do you do when you want to buy something online? If you’re like most people, then you probably check out product reviews to compare different options.

If you have an online store, then allowing your customers to submit reviews is a smart way to add social proof and boost sales.

Even niche review sites where you’re writing all the reviews yourself can use a product review plugin. The right review plugin will help you to optimize your reviews in search results so you can get more clicks and traffic.

WordPress makes it easy to add new blog posts and create important website pages, but writing review content or adding reviews to your website requires additional features offered by WordPress plugins. 

Product review plugins can help you make more sales, let users add reviews to your website, add reviews from third party platforms, and more. 

That being said, let’s take a look at some of the best product review plugins you can use on your WordPress site. 

1. WP Review Pro

WP Review Pro

WP Review Pro is the best WordPress product review plugin. It gives you full control over your WordPress product reviews and also makes it easy to create product comparisons and more. 

It includes a library of pre-designed templates you can customize to match the design of your website. There are different types of rating systems you can use, like percentage, star rating, points, and more. 

WP Review point rating example

By creating a custom review box, you can present all the important product information for your visitors, including a link to buy the product. Review schema markup is also automatically included, so you can show star ratings in the search results. 

You can also let your users add their own reviews to your products, rate features, and vote on other user’s comments. 

WP Review Pro user rating example

The plugin also lets you display reviews from third party sources like Facebook, Google Places, and Yelp, so you can easily add social proof to your WordPress website

2. AIOSEO

AIOSEO

All in One SEO (AIOSEO) is the best SEO plugin for WordPress in the market used by over 3 million websites. It offers the most beginner friendly and comprehensive SEO toolkit to help you get more traffic from the search engines.

It includes a setup wizard that will automatically help you choose the best SEO settings for your website to help improve your rankings.

Plus, it lets you easily add product review schema to your review blog posts. Schema markup doesn’t appear on your website for visitors to see, but it helps the search engines better understand your content and display your product reviews properly.

Rich snippets will catch potential visitor’s attention and are more likely to get clicks from the search results.

Rich snippets product schema example

When you’re writing your product reviews, AIOSEO will automatically detect the right type of schema based on what you’re writing. 

You also have full control over the product review schema and can enter relevant product information for search engine bots to read.

AIOSEO product schema

You can also add existing customer reviews to improve the search appearance even more.

You’ll find this option below the review schema box in your post editor.

AIOSEO customer reviews box

There is a free version of the plugin available, but you’ll need the pro version of the plugin to access the product review schema feature.

3. WP Customer Reviews

WP Customer Reviews

WP Customer Reviews allows you to collect customers reviews and testimonials as well as create your own product reviews. 

For example, you can create a specific page on your website to showcase your testimonials to help improve your social proof and conversions. 

You have full control over your review forms and the information you want to collect from your users. To display reviews, you can use shortcodes or the included block. 

You can review the reviews in your WordPress dashboard, so you have complete control over the ones that are displayed.

It also has the option to turn any existing WordPress blog post into a product review, and it adds product review schema to improve the search engine appearance of your review. 

4. Site Reviews

Site Reviews

Site Reviews is an easy to use review plugin that lets you collect customer reviews for your products, services, or local business, similar to a site like TripAdvisor or Yelp.

You can even let users review certain parts of your website, like posts, products, pages, and more. 

It comes with a simple settings page that allows you to control how you want to gather reviews and how you want to display them on your website. You can customize the review form and display it anywhere on your site.

You can also pin your best reviews to the top, so your customers will see them first.

Site Reviews sample review

It also integrates with WooCommerce, so you can improve how customers leave reviews on your WooCommerce product pages

You can display your reviews using the included Gutenberg block or shortcode to show specific reviews. 

5. Customer Reviews for WooCommerce

Customer Reviews for WooCommerce

Customer Reviews for WooCommerce lets you easily add more detailed reviews to your store.

This plugin helps to improve your social proof, so when visitors go to your product pages, they’re more likely to make a purchase. 

Your customers can attach pictures and vote on reviews, plus you can add a question and answer section, so your product listings look the same as Amazon.

Improved WooCommerce product page with reviews

There’s also a feature to send automated emails after a customer makes a purchase to help you generate more reviews. You can also send a coupon after a review is left on your product.

6. Schema — All in One Schema Rich Snippets

Schema All in One Schema Rich Snippets

Schema is a simple free plugin that lets you add product schema markup to your reviews, so you can display rich snippets in the search results.

It’s not as in-depth as the AIOSEO schema feature mentioned above, but it’s a solid free option. 

When you select the review schema type, you’ll have additional product details to fill in, like reviewer name, product name, price, star rating, and more. 

It also supports other types of schema markup, including articles, recipes, software, and events. 

Bonus: OptinMonster

OptinMonster

OptinMonster is the best popup plugin for WordPress used by over 1.2 million websites. You can easily create high-converting popup campaigns to grow your email list.

It comes with a library of over 400 templates you can use to quickly create spin to win optins, alert bars, yes/no optins, and many other types of popup campaigns for your website. 

You can use these popups in creative ways. For example, you can create a popup that displays a coupon for the product you’re reviewing in the article. 

OptinMonster affiliate popup example

This is a common way to increase affiliate income and earn more revenue that many of the most successful WordPress blogs use on their product review articles. 

Aside from OptinMonster, the two other plugins that could be useful based on your use case are Smash Balloon and Uncanny Automator.

Smash Balloon is the #1 social media feeds plugin for WordPress. It lets you show user generated content and product reviews from social media on your website without any code.

Uncanny Automator is the best WordPress automation plugin. It lets you automate the process of collecting reviews from customers after they purchase. It also helps you create other automated workflows on your site without any code.

We hope this article helped you find the best product review plugins for WordPress. You may also want to see our guide on how much it costs to build a WordPress website and our expert picks of the best business phone services for small businesses. 

If you liked this article, then please subscribe to our YouTube Channel for WordPress video tutorials. You can also find us on Twitter and Facebook.

The post 6 Best Product Review Plugins for WordPress first appeared on WPBeginner.

How to Create a Referral Program in WordPress

Do you want to create a referral program in WordPress?

Referral programs or affiliate programs are a great way to get more people to promote your products to a larger audience.

In this article, we’ll show you how to easily create a referral program in WordPress and get more customers.

Creating a referral program in WordPress

Why Create a Referral Program in WordPress?

A referral program or affiliate program allows you to get more people to help you sell your products and services. In return, you pay them a small commission on each sale they make. For more details, see our ultimate affiliate marketing guide to see how it works.

In simple terms, it is like building your own sales army without paying them a full-time salary.

Affiliate marketers are usually content creators who make money online by referring their users to the right products and services. There are several helpful affiliate marketing plugins and tools that affiliates can use to increase their sales.

But to manage your own referral or affiliate program, you’ll need a plugin that allows you to easily manage all aspects of an affiliate program. It should allow affiliate marketers to join your referral program while helping you track sales and traffic sent by each affiliate partner.

Now there are two types of affiliate management platforms that you can choose from.

  • A WordPress affiliate management plugin
  • A cloud based affiliate network

Both platforms have their pros and cons. For instance, using a WordPress plugin allows you to run your own affiliate program directly from your website. You wouldn’t be limited to the cloud platform’s policies and restrictions.

You also won’t have to pay a per transaction fee to any third-party network since you’re managing your own affiliate program. This is why most small businesses prefer to use a self-hosted affiliate management plugin.

On the other hand, cloud platforms like ShareASale, Partnerstack, and Impact make your affiliate program instantly accessible to thousands of affiliate marketers. They also have better tracking and payment systems which can streamline your workflow.

But for the sake of this tutorial, we’ll show you how to set up a referral program in WordPress using a plugin (no coding needed).

We’ll show you two top affiliate plugins that you can use with your WordPress website or WooCommerce store. You can pick one that works best for you.

Method 1. Create a Referral Program with Easy Affiliate (Recommended)

For this method, we’ll be using Easy Affiliate. It is the best WordPress affiliate management plugin on the market and allows you to easily add an affiliate program to your website.

It works with all top WordPress eCommerce platforms including WooCommerce and MemberPress.

Easy Affiliate is an all-in-one platform that comes with powerful features like affiliate dashboard, real-time reports, fraud detection, eCommerce integrations, email marketing, one-click payouts, and most importantly no transaction fees.

To get started, first you need to install and activate the Easy Affiliate plugin. For more details, see our step by step guide on how to install a WordPress plugin.

Upon activation, you need to visit the Easy Affiliate » Settings page and scroll down to the bottom. From here, you need to click on the ‘Launch Setup Wizard’ button to configure the plugin settings.

Launch set up wizard

Next, you’ll need to enter your plugin license key. You can find this information under your account on the Easy Affiliate website.

Enter your license key

If you have previously used another affiliate plugin, then the plugin will offer to import your data. If not, then you can skip to the next step.

After that, the plugin will attempt to detect the eCommerce plugin you’re using. Simply click on the toggle next to your platform and continue to the next step.

Select platform

Next, you need to provide your business information. Simply fill out the form and click on the continue button.

Add your business information

After that, you will be given the option to choose how affiliates will register on your website. You can allow affiliates to apply and then approve applications, allow public registration, or manually add affiliates.

affiliate registration settings

You can choose which information you want to collect from affiliate partners, such as business address and tax information. You can make it required, collect on registration, or allow affiliates to enter it in their account.

Below that, you can choose to show an affiliate agreement. The plugin also allows you to automatically generate an agreement by filling out a simple form.

Generate affiliate agreement

Next, click on the Save and Continue button to go the next step.

Now, you’ll be asked to set a default affiliate commission value as a percentage or fixed amount. Below that, you can configure payout options.

Commission and payout settings

East Affiliate supports recurring payments and allows you to send bulk payouts both manually and automatically.

After you click on the Save and Continue button, you’ll arrive at the Creatives section. These are marketing materials that you want to offer to your affiliates. You can share your website logo, product photos, banner ads, text documents, and more.

That’s all, you have successfully set up Easy Affiliate on your WordPress website. You can now click on the Finish Setup and Exit Wizard button.

Finish setup

Adding Links to Your Affiliate Referral Program

Easy Affiliate automatically generates pages where affiliate marketers can register, login, and manage their affiliate accounts.

You can view these pages by visiting Easy Affiliate » Settings. Simply scroll down to the Affiliate Pages section under the General tab.

Affiliate pages

You can now add the affiliate dashboard link to your website’s navigation menu or in the footer area. Users clicking on this link will be able to sign up or log in to their accounts.

Affiliate sign up page

Easy Affiliate Dashboard & Reports

Easy Affiliate makes it easy for both you and your affiliate partners to track their performance.

As the website owner, you can view all affiliate activity on your website by visiting the Easy Affiliate » Reports page.

Easy Affiliate reports dashboard

From here, you’ll see a graph overview of affiliate stats on your website with the same data in tables down below.

Easy Affiliate also includes link tracking. You can also switch to the Clicks tab and view which affiliate URLs are bringing you more clicks.

Clicks reports in Easy Affiliate

Managing Affiliates in Easy Affiliate

Depending on how your affiliate program is set up, Easy Affiliate makes it very easy to manage affiliates.

Simply go to the Easy Affiliate » Affiliates page and you will see the list of affiliates you have approved or added to your website.

Affiliate management in Easy Affiliate

You can approve new affiliate applications by switching to the applications tab. This will show you the list of affiliates awaiting approval.

Affiliate applications

You can click on an affiliate name to view more details of their application. If everything looks good, you can go ahead and approve them.

Using Addons to Extend Easy Affiliate Functionality

Easy Affiliate comes with a bunch of integrations and extensions that you can use to extend your affiliate program.

This includes integration with top email marketing platforms, a suite of fraud prevention tools, custom commission rules, advanced commission levels, and more.

Depending on your license plan, you can view the available addons by visiting the Easy Affiliate » Addons page.

Easy Affiliate addons

Overall, Easy Affiliate is a very robust affiliate management plugin for WordPress. It’s created by the same team behind MemberPress, so they genuinely understand the problem and have built a solution that’s both easy and powerful.

Method 2. Set up a Referral Program in WordPress with AffiliateWP

For this method, we’ll be using AffiliateWP. It is a great WordPress affiliate management plugin that helps you set up your own referral program in WordPress.

First thing you need to do is install and activate the AffiliateWP plugin. For more details, see our step by step guide on how to install a WordPress plugin.

Upon activation, you need to visit Affiliates » Settings page to enter your license key. You can find this information under your account on the AffiliateWP website.

AffiliateWP license key

After activating your license key, you need to select a page to be used for Affiliate Area. AffiliateWP automatically creates one for you, but if you want to use a different page, then you can select it here.

Next, you need to choose the terms of service page. You can check out affiliate program terms pages on other websites to create one for your own site. After creating the page you can select it here.

After that, you need to review other settings on the page and set them up based on your own referral program policies.

Don’t forget to click on the ‘Save Changes’ button to store your settings.

Next, you need to switch to the integrations tab on the Settings page. From here you need to select the integrations you want to enable. AffiliateWP supports most popular eCommerce, membership, contact form, and LMS plugins.

AffiliateWP integrations

Click on the save changes button and then switch to the ‘Emails’ tab on the Settings page.

AffiliateWP allows you to edit emails sent out to your affiliates. You can also upload your business logo, create your own email templates, and choose a professional email address to use to send out affiliate emails.

Setting up emails

Note: If you are unable to receive email notifications, then follow our guide on how to fix WordPess not sending email issue.

Lastly, switch to the Misc tab on the settings page to set up advanced settings for your affiliate program. The first option on the page is to allow affiliates to register themselves. You can check this if you want affiliates to be able to sign up for your referral program.

Misc settings

Next, you would also want to enable reCAPTCHA to prevent bots from registering as affiliates.

You will need to carefully review each setting and change them as needed. Don’t forget to click on the save changes button to store your settings.

Adding Links to Your Referral Program

Now that you have set up your referral program, the next step is to add links to it. For example, if you have enabled affiliate registration, then you may want to add a link to the affiliate area so that interested marketers can register themselves.

Simply go to Appearance » Menus page and add your affiliate area page to a navigation menu. For detailed instructions, see our beginner’s guide to adding navigation menus in WordPress.

Add link to affiliate area

Clicking on the link will take users to the affiliate area where they can register to join as a new affiliate, or login to their account to see their reports.

Affiliate area

Managing Your Referral Program in AffiliateWP

AffiliateWP comes with powerful tools to manage your affiliates, view reports, and effectively run your affiliate program without leaving WordPress.

To view affiliates that have joined your referral program, simply go to Affiliates » Affiliates page.

Affiliates

On this page, you can see a list of all your affiliate partners, their earnings, unpaid earnings, referral visits, and more. You can edit any affiliate account individually.

To view each sale made through a referral partner, you need to visit Affiliates » Referrals page. Here you will see all referral sales, affiliate partner, amount, and more. You can also click on the ‘Reject’ link if you suspect a referral to be fraudulent.

Referrals

Viewing Your Referral Program Reports in AffiliateWP

Reporting is crucial to run a successful referral program, and AffiliateWP comes with powerful reporting features. Head over to Affiliates » Reports page for a full overview.

Reports overview

You can filter the reporting period by time and specific affiliate partner name. You can also view reports for affiliates, referral visits, and campaigns.

Sending Payments to Your Affiliates

AffiliateWP comes with two types of Payouts.

The first one is AffiliateWP’s Payout Services features. It allows you to easily send payments to your affiliates via AffiliateWP’s parent company. They will be using Stripe to directly deposit payments to your affiliate’s debit card or bank account.

You can enable this feature by visiting Affiliates » Settings page and switching to the Payouts Service tab.

Payouts service

The second method is to use PayPal, which is available as a separate add-on under the Professional license plan.

Alternately, you can also manually pay your affiliates by visiting the Affiliates » Referrals page and click on the ‘Pay Affiliates’ button.

Manually pay affiliates

You can then select a time period and generate a payout list which you can then use to manually pay your affiliates using PayPal, credit card, online banking, or any other payment method of your choice.

We hope this article helped you learn how to create a referral program in WordPress. You may also want to see our guide on how to get a free SSL certificate for your website, or check out our showcase of must-have WordPress plugins for business sites.

If you liked this article, then please subscribe to our YouTube Channel for WordPress video tutorials. You can also find us on Twitter and Facebook.

The post How to Create a Referral Program in WordPress appeared first on WPBeginner.

10 Best Affiliate Marketing Tools and Plugins for WordPress

Are you looking for the best affiliate marketing tools and plugins for WordPress?

You can find hundreds of affiliate marketing tools on the market, and it can be difficult to choose the right one.

To help you, we have tested some of the most popular affiliate marketing software on real websites. While doing that, we examined different factors including ease of use, features, customization, and pricing.

In this article, we will share our handpicked list of the best WordPress affiliate marketing tools and plugins.

Best Affiliate Marketing Tools and Plugins for WordPress

If you are in a hurry, then you can take a quick look at our top picks to choose an affiliate marketing tool for your website.

#PluginBest ForPricing
🥇Pretty LinksAll-in-one affiliate marketing$99/year + Free
🥈ThirstyAffiliatesPowerful affiliate link management $99/year + Free
🥉MonsterInsightsTracking affiliate links$99/year + Free
4RafflePressHosting giveaways/contests to promote affiliate products$39/year + Free
5Constant ContactAdding affiliate links in email newsletters$12/month

How We Review Affiliate Marketing Tools and Plugins

WordPress is the most popular website builder among affiliate marketers and bloggers, mainly because it gives you access to the best plugins and tools to promote your partners while bringing more traffic to your website.

However, since there are so many WordPress plugins available, beginners often get confused about which tools they should use.

That’s why we researched for you and paid special attention to the following criteria when picking the best affiliate marketing tools:

  • Ease of Use: When testing different plugins, a user-friendly interface, technical documentation, and easy onboarding processes were our top priorities. We tried to include tools that are beginner-friendly.
  • Different Use Cases: Affiliate marketing tools can offer a lot of different features. We have included plugins for all kinds of use cases, including adding affiliate links to articles, saving links in the WordPress database, creating shareable affiliate links, tracking link performance, affiliate product promotion, and more.
  • Reliability: We have only recommended tools and plugins that we tested ourselves. Additionally, we kept positive customer reviews and customer support in mind.

That being said, let’s take a look at the best affiliate marketing tools and plugins that help you grow your business.

Why Trust WPBeginner?

At WPBeginner, we are a team of experts with over 16 years of experience in WordPress, SEO, web hosting, eCommerce, and online marketing.

We review each plugin or tool that is featured here and thoroughly test it on real websites. When doing that, we look at several factors like ease of use, features, customization, and pricing. To learn more, see our complete editorial process.

Video Tutorial

If you’d prefer written instructions, just keep reading.

1. Pretty Links

PrettyLinks

Pretty Links is the best affiliate link management plugin for WordPress, and it is trusted by over 300,000 websites.

It allows you to easily add links to your WordPress posts, create short and memorable affiliate URLs for podcasts / social media, cloak affiliate links, and more.

Add a title for your affiliate link and choose the Cloaked option as the redirection type

You can also enable the auto-linking feature to automatically add affiliate links for certain keywords. The plugin allows you to set up redirects, which are useful if an affiliate link returns a 404 error.

Plus, it also comes with a powerful broken link checker to identify and fix broken affiliate links on your WordPress site.

Pros

  • Pretty Links lets you redirect multiple links to the same destination, schedule redirects to launch at a specific time, and group and organize links together.
  • You can use the plugin to create an attractive affiliate product box.
  • It can password-protect your links, comes with custom redirects for different regions, performs A/B testing, and can integrate with popular marketing tools.
  • Pretty Links shows detailed link reports in your WordPress admin dashboard. This allows you to see which affiliate links are doing better on your website.

Cons

  • Pretty Links has a free plan, but most of the features can only be unlocked by upgrading to the pro version.

Why we recommend Pretty Links: We recommend this plugin because it is the best WordPress affiliate marketing tool on the market. Pretty Links allows you to create and cloak affiliate links easily, comes with a broken link checker, shows analytics and reports, and lets you create an affiliate product box, making it a great choice.

For more details, you can check out these proven affiliate marketing tips to grow revenue from the founder of Pretty Links.

Pricing: The beginner plan starts at $99.60 per year for a single-site license.

2. ThirstyAffiliates

ThirstyAffiliates

ThirstyAffiliates is another powerful affiliate link management tool for WordPress. It allows you to manage your affiliate links within the WordPress dashboard easily, and we actually use it on WPBeginner for our own link management.

With ThirstyAffiliates, you can quickly insert links into posts, cloak links, auto-insert affiliate links, export analytics data, and even see how each link performs on your site. Plus, you can sort your links into categories, which makes it easier to organize your affiliate partners.

Add a destination URL and attach an image to the affiliate link if you like

For more details, you can see our tutorial on how to add affiliate links with ThirstyAffiliates.

Pros

  • ThirstyAffiliates can integrate with powerful tools like Zapier and Google Analytics.
  • It can schedule link redirection to launch at a specific time.
  • The plugin can optimize links for social sharing and SEO.
  • It also comes with custom redirects, a broken link checker, and geolocation redirects.
  • ThirstyAffiliates lets you manage affiliate URLs for custom post types separately.

Cons

  • It has a free plan, but some of the features can be unlocked in the pro version.
  • While testing ThirstyAffiliates, we realized that it doesn’t have a built-in split testing feature for comparing affiliate landing pages.

Why we recommend ThirstyAffiliates: Overall, it is a great link management plugin that lets you create and organize affiliate URLs easily. If you have a WordPress blog and want to manage affiliate links for free, then you can opt for the free version of the plugin.

To choose the right affiliate link management plugin for your website, you can also see our comparison on Pretty Links vs. ThirstyAffiliates.

Pricing: The Basic plan costs $99.60 per year for a single-site license. It comes with a 14-day money-back guarantee.

3. MonsterInsights

MonsterInsights Website

As a smart affiliate marketer, you need to know which articles are getting more traffic, where users are coming from, and what they are doing while viewing your website.

This is where MonsterInsights comes in. It is the best Google Analytics plugin for WordPress (trusted by 3 million websites). It shows you actionable insights and web analytics reports within your WordPress dashboard.

MonsterInsights makes it super easy to automatically track your affiliate links. It comes with a link-tracking feature that helps you monitor URL clicks, banner ads, and other outbound links.

Edit affiliate link tracking settings

You can combine this information with page insights and other reports to get a more comprehensive analysis.

Pros

  • If you have an online store, then the plugin can also track your eCommerce affiliate sales.
  • MonsterInsights can track conversions from optin forms that are related to your affiliate links or offers. It also connects form submissions to specific affiliate URLs.
  • It can also track additional data points and integrate with email marketing services and Customer Relationship Management tools (CRMs).

Cons

  • MonsterInsights has a free plan that only offers basic affiliate tracking.
  • You cannot use it to create and cloak affiliate URLs.

Why we recommend MonsterInsights: If you want to track affiliate links and their performance on your website, then MonsterInsights is the best solution for you.

For more details, you can see our complete MonsterInsights review.

Pricing: The Plus plan costs $99.50 per year for a single site license. It works for unlimited pages and unlimited users.

4. RafflePress

RafflePress

RafflePress is the best WordPress giveaway plugin on the market. It allows you to create viral giveaways and contests on your website, which helps you quickly get a lot of traffic.

It comes with a drag-and-drop giveaway builder that helps you run campaigns promoting specific affiliate products and grow your email list.

In fact, we have plenty of firsthand experience with using RafflePress to get more email subscribers. For more details, you can see our guide on how to run a viral giveaway like WPBeginner.

You can use the plugin to create a giveaway to motivate users to purchase different products using your affiliate link in the future. For more details, see our tutorial on how to run a giveaway/contest in WordPress.

Pros

  • RafflePress is mobile-friendly and comes with giveaway templates.
  • It comes with social media integration and viral sharing.
  • The plugin can also track your giveaway contests for affiliate products.

Cons

  • The plugin’s free plan has limited features.
  • RafflePress does not allow you to manage or create any affiliate links.

Why we recommend RafflePress: If you want to host viral giveaways or contests to promote your affiliate products and services, then this is the perfect plugin for you.

For more details see our complete RafflePress review.

Pricing: The Plus plan, which is the basic plan, starts at $39.50 per year for a single site license.

5. Constant Contact

Constant Contact

Constant Contact is the best email marketing service. It allows you to stay in touch with your website visitors even after they leave your website.

You can easily create an email newsletter, run email campaigns, and grow your subscribers with their platform. You can then promote your affiliate partners via these emails, which will open up another site to grow your affiliate earnings.

During testing, we also liked that Constant Contact provides detailed stats on how your campaigns are doing, and you can run A/B tests to see what format your users find more engaging.

Pros

  • You can track clicks on your affiliate links within Constant Contact reports.
  • Constant Contact lets you create beautiful email campaigns in seconds by using its drag-and-drop email builder with tons of templates.
  • You can connect the tool with social media platforms and promote your affiliate products there.
  • You can also build a custom landing page for affiliate URLs.

Cons

  • Constant Contact does not offer a free plan.
  • You cannot use the tool to manage affiliate links that you add to your email newsletters.
  • It can be a bit difficult to use for beginners.

Why we recommend Constant Contact: If you want to add affiliate links to your email newsletters, then Constant Contact is the best choice for you. It easily integrates with WordPress and lets you build a powerful email campaign for your affiliate products.

Pricing: The Lite plan costs $12 per month for a single user, and it has a 30-day money-back guarantee.

6. OptinMonster

OptinMonster – The best WordPress popup plugin

OptinMonster is the best lead generation and conversion optimization tool on the market for affiliate marketers and website owners. It comes with powerful Exit-Intent® technology to convert your abandoning website visitors into subscribers and customers.

You can use OptinMonster to add affiliate links to lightbox popups, slide-in signup forms, sidebar forms, floating bars, and more.

Each optin allows you to create new opportunities to maximize your affiliate commissions, keep users engaged, and spend more time on your site.

Pros

  • OptinMonster allows you to run split tests and boost your email signup rates. You should check out our guide on how to build your email list in WordPress using OptinMonster.
  • It comes with a conditional logic feature to show different affiliate product popups on different posts or pages.
  • The plugins allow you to display targeted optin forms based on visitor behavior, location, or device to promote relevant affiliate links.
  • OptinMonster’s detailed reports can also track clicks, leads, and sales generated through your affiliate links.

Cons

  • OptinMonster does not offer a free plan. However, its connecting plugin is free.
  • It does not offer affiliate link management features.

Why we recommend OptinMonster: It is a great choice if you want to promote affiliate products using popups that will be displayed on specific pages or posts.

For more details, you can see our complete OptinMonster review.

Pricing: The Basic plan starts at $9 per month (billed manually) for a single site license with unlimited campaigns and subscribers.

7. WP RSS Aggregator

WP RSS Aggregator

WP RSS Aggregator is the best WordPress RSS plugin on the market that is ideal for fetching content from affiliate networks to share on your WordPress site. You can use it as a content aggregator or news curator and combine it with your original content to increase your affiliate earnings.

During our testing, we discovered that you can set up auto blogs with your affiliate networks. The plugin will automatically fetch products as posts, and you can edit them to add your original content.

Pros

  • WP RSS Aggregator can extract affiliate links from your chosen RSS feeds and automatically insert them into your aggregated content.
  • It shows different formats to display affiliate products attractively on your website.
  • It can categorize and manage aggregated content based on product categories, brand partnerships, or specific affiliate programs.

Cons

  • It has limited features related to affiliate marketing.
  • The quality of your affiliate product content can depend on the content quality of your chosen RSS feeds.
  • Aggregating content from different sources can lead to copyright issues.

Why we recommend WP RSS Aggregator: If you want to fetch content for your affiliate products from other sources, then WP RSS Aggregator is a great choice.

Pricing: The basic plan costs $79 per year for a single site.

8. Semrush

Semrush

Semrush is one of the best SEO tools on the market. It is a complete SEO and marketing toolkit for content creators and is highly effective for affiliate marketers.

It comes with an incredibly powerful keyword research tool, which allows you to track keywords, find new ideas, see your keyword rankings, and more.

We also like that you can use the keyword research and competition analysis tools to see which affiliate products are popular among your competitors, find new affiliate partners, or find new niche products to promote.

Pros

  • You can use it to run competitor analysis and see which keywords your competitors are ranking for. Semrush then provides actionable tips to beat them in search rankings with its SEO writing assistant tool.
  • You can use the tool to generate content ideas that are relevant to your affiliate products.
  • It can improve SEO rankings for your content and track brand mentions and conversations related to your affiliate products on social media.
  • It can also help find websites that could be potential sources of backlinks for your affiliate content.

Cons

  • Semrush’s free plan has limited features, and its paid plan is a bit expensive for small businesses. In this case, you can use the WPBeginner Keyword Generator to instantly get 300+ new keyword ideas. You can also use the free Keyword Density Checker to find out what keywords your competitors are optimizing for.
  • It is more focused on your site’s SEO than affiliate content.
  • Semrush has a steep learning curve.

Why we recommend Semrush: If you want to research keywords related to affiliate products and analyze your competitors, then Semrush is the perfect solution for you.

Pricing: The Pro plan costs $129.95 per month for up to 5 projects.

9. WPForms

WPForms Site

WPForms is the best WordPress contact form plugin. You can use WPForms to create an affiliate signup form and allow potential partners to send affiliate requests on your website.

It comes with a drag-and-drop form builder to create any type of form on your website easily.

It also offers multiple pre-built templates for a user registration form, a signup form, a poll/survey form, and more.

Pros

  • It integrates with popular services like Constant Contact to automatically send replies to your users.
  • The plugin can use data for user behavior, location, and device to show different forms to users.
  • All the form entries for affiliate request forms will be stored in the WordPress database.

Cons

  • Some of the plugin’s features are not available in the free plan.
  • WPForms does not offer any specific affiliate management features.

Why we recommend WPForms: If you want to build a specific form to accept affiliate requests from small businesses, then WPForms is the best choice for you.

For more information, see our complete WPForms review.

Pricing: The basic plan costs $49.50 per year for a single site license. It lets you create unlimited forms on your WordPress site.

10. AdSanity

AdSanity WordPress plugin

AdSanity is the best ad management plugin for WordPress. It comes with powerful display options to place affiliate ad banners in the header, sidebar, and footer of your website.

The plugin allows you to add affiliate links to your ads and get more clicks. With the publishing options, you can also set the start and end date for ads so you can promote exclusive deals from your affiliate partners.

It also shows complete graphical stats for individual ads, so you’ll know which ad placement is performing well on your website. You can also select a date range to view custom reports for specific ads.

Pros

  • It allows you to cloak affiliate links.
  • AdSanity lets you organize your affiliate links into groups and categories.
  • It allows you to show specific ads based on user location, device, or behavior.

Cons

  • AdSanity can be expensive for some users.
  • It has a learning curve.

Why we recommend AdSanity: It is the perfect tool for website owners who also use Google AdSense and other ad programs to supplement their revenue. You can easily place ad code on your website and dynamically display ads without editing WordPress theme files.

Pricing: The Basic plan costs $59 per year for the AdSanity core plugin and updates.

Bonus Entries for Affiliate Marketing Tools

11. AffiliateWP

AffiliateWP website

AffiliateWP is the best WordPress affiliate tracking and management tool for businesses that want to start their own affiliate programs.

You can use it to set up your affiliate program in a few minutes. With AffiliateWP, you can easily monitor affiliate clicks, sales, and payments.

It also allows you to have an unlimited amount of affiliates actively promoting your product or service. This means you can grow your business as quickly as you want.

Pros

  • Other features that we liked during testing include a built-in affiliate dashboard, automatic affiliate creation, and a referral link generator.
  • It lets you set up tiered commissions, recurring commissions, and custom commissions for programs.
  • AffiliateWP also creates and manages specific coupon codes for targeted promotions.

Cons

  • It does not have a free plan.

Why we recommend AffiliateWP: If you want to start your own affiliate program to promote your products on other websites, then AffiliateWP is the best choice.

For more details, you can see our complete AffiliateWP review.

Pricing: The Personal plan starts at $149.60 per year for a single-site license. It allows unlimited affiliates and no monthly fees.

12. WP Tasty Links

WP Tasty Links

WP Tasty Links is the perfect affiliate marketing plugin if you have a food blog or online restaurant website.

This plugin easily integrates with WP Tasty Recipes and lets you add affiliate links inside recipe cards, replace keywords with specific affiliate URLs, and cloak links to make them look pretty.

Plus, the plugin sets appropriate link attributes for SEO and analyzes the click-through rates of the affiliate links added to your site.

Pros

  • It can automatically insert relevant Amazon images next to your affiliate links.
  • WP Tasty Links offers seamless integration with Gutenberg to make link insertion easier.
  • It can link relevant keywords to internal pages or products within your website.

Cons

  • WP Tasty Links does not have a free plan.
  • It’s not a good choice for affiliate link management if you don’t have a restaurant or food-related site.

Why we recommend WP Tasty Links: It is the ideal plugin if you have a food blog because it easily integrates with WP Tasty Recipes, which is the best recipe plugin on the market. It makes it super easy to add affiliate links directly to your recipe cards.

For more information, see our complete WP Tasty review.

Pricing: Each of the plugins costs $49 per year separately. You can get all the plugins for $149 per year for a single site license.

Which Is the Best Affiliate Marketing Tool for WordPress?

In our expert opinion, Pretty Links is the best WordPress affiliate marketing tool on the market. It is an all-in-one affiliate link management tool that lets you cloak links, add them to specific keywords, and create affiliate product boxes easily.

It even has a free plan, making Pretty Links a great choice.

On the other hand, ThirstyAffiliates is also a great link management tool for your website. Similarly, if you want to track affiliate links, then we recommend MonsterInsights.

If you want to add affiliate links to your email campaigns, then Constant Contact is a great tool as well.

Additionally, you can use OptinMonster to promote your affiliate products in popups, sliders, or floating bars.

Frequently Asked Questions About Affiliate Marketing

Here are some questions that are frequently asked by our readers about affiliate marketing in WordPress.

What is the best free affiliate plugin for WordPress?

If you are on a budget and need to create affiliate links, then we recommend the free version of ThirstyAffiliates because it offers most of the features required to build and manage simple affiliate URLs.

Which WordPress theme is best for affiliate marketing?

In our expert opinion, Astra is the best theme for affiliate marketing because it has multiple layout choices for affiliate marketing websites and also supports third-party plugins to add more features.

For more options, you can see our showcase of the best WordPress themes for affiliate marketing.

What level of technical expertise do I need to use these tools and plugins?

Most of the affiliate marketing tools that we have mentioned above are super beginner-friendly and do not require any technical expertise to be used.

However, some other affiliate plugins may require some technical knowledge to integrate them with other tools.

Related Guides for Affiliate Marketing in WordPress

If you liked this article, then please subscribe to our YouTube Channel for WordPress video tutorials. You can also find us on Twitter and Facebook.

The post 10 Best Affiliate Marketing Tools and Plugins for WordPress first appeared on WPBeginner.

Refer Your Way to a WPMU DEV Lifetime Membership

We’ve heralded our disdain for affiliate programs for years, swearing them off for good. And yet, here I am, with a bold announcement… WPMU DEV affiliates are back and better than ever.

It’s been a dream to reimagine our rewards system in a way that protects the integrity of the web and honors our tens of thousands of faithful Devians and superfans.

The Struggle is Real!

Incentivized promotion distorts just about every “Top 10” and “Best of” post on the web. How can we get an unbiased helpful review when they are primarily made up of affiliate links?

Side note: It’s the reason we started the WhiP, to help cut through the crap. The WhiP is our affiliate-free, hand-picked, professionally-curated, pun-filled WordPress newsletter. The best tutorials, reviews, opinions, and more from around the web. It’s both ad free and $ free. Cheers!

On the other hand, we have thousands of members that need a, “thank you”. You love WPMU DEV and sing her praise on your website, to your friends and clients, at Meetups and at WordCamps.

So, we set out to create a tool that minimizes the damage done by a few that take advantage of and manipulate the system and honors the loyal long-standing readers and WPMU DEV fanatics.

From the bottom of Devman’s heart, thank you.

Introducing Our new ‘Refer a Friend’ Program

It’s not cash but it’s good as gold… and it could end up in a lifetime membership saving you thousands of dollars.

Refer your friends, clients, or social following to earn 3 months, 1 year, or a lifetime WPMU DEV membership!

Refer a friend and get 3 months, 12 months, or a lifetime membership free
A free WPMU DEV membership has never been so close.

How Does it Work… Points That Make Sense

We’ve had a point system in place for a long time… but like your facebook relationship status… it was complicated. Not anymore!

Get your referral link and share it with the world. Every time someone uses your link to become a paying member of WPMU DEV you get 200 hero points. Get 600 hero points and you can cash them in for 3 months of WPMU DEV for free. It’s like $147 in your pocket.

Trade hero points for a lifetime membership
Guess what I did? I traded my points for a lifetime membership.

Refer enough folks and you could earn yourself a lifetime membership. That’s $49 per month, every month, for the rest of your life… geez!

Set a Goal and Track Your Progress

Plus, we’ve added a referral link stats tracker so you can follow along as your friends click through, take advantage of the offer, join the WPMU DEV community, and get you one step closer to that lifetime membership.

WPMU DEV Hero Points tracker
Follow along as your friends join and add hero points to your account.

If you’re already a member go check it out. If you haven’t shared WPMU DEV yet click the Refer a Friend button to get your link.

We want you to get those free months and we want you to see it’s with in your grasp. You can do it!

A Referral Program for All

Who can participate in said program? (I’m glad you asked.)

Everyone! You don’t need to be a paying member or on a 30-day trial. Get your referral link here.

Want to Get There Quicker?

Start a 30-day free trial and get Hero Points for things like being helpful on the forums, completing your profile, or becoming someone’s hero. Members can gift you up to 200 points and heck, we give you 50 points just for becoming a member.

At this rate you’ll be to your 3-months-free thank you reward in no time ;)

Thank You and You’re Welcome

So whether you’re a long time member, WhiP subscriber, or avid reader of the WPMU DEV blog, share your affiliate link. We’re looking forward to upgrading you to lifetime member status as a big fat thank you.

If all this feels a little like insider baseball, or you’re not quite a WPMU DEV superfan, it’s time to upgrade. We think the best way to become a believer is to try it… so we’ll get you started for free. Enjoy your first 30-days on me. WPMU DEV makes WordPress about a bazillion times faster, more secure, automates a bunch of your site management and reporting, is packaged with 24/7 live chat support, and includes 3 sites of dedicated hosting. Boom… you’re gonna love it.

How to Build an Amazon Affiliate Store Using WordPress

Do you want to build an Amazon affiliate store using WordPress?

An Amazon affiliate store allows you to sell products from Amazon as an affiliate and earn money on each sale. Due to the low startup and running costs, an Amazon affiliate store is one of the easiest ways to start a new business and make money online.

In this article, we will show you how to easily build an Amazon affiliate store using WordPress. We will also share our expert tips on how to increase your Amazon affiliate earnings.

How to build an Amazon affiliate store using WordPress

What is an Amazon Affiliate Store?

An Amazon affiliate store is an online store that promotes products that are available to buy on Amazon.

Creating an Amazon affiliate store is very different to running your own online store, where you’ll need to source products, manage orders and refunds, ship products, and keep track of inventory. This can take a lot of time, effort, and money.

When you build an affiliate store, you don’t have to worry about any of these things. You can simply add some affiliate links to your website, and Amazon will handle the rest.

When visitors arrive at your website, they’ll see all the different products they can buy on Amazon using your unique affiliate links.

If a visitor clicks on one of your affiliate links and then buys this product on the Amazon website, you’ll earn money from that sale. This is known as an affiliate commission and it’s a great way to make money online blogging with WordPress.

Amazon affiliate stores are popular because of the low startup and running costs.

Amazon also sells a huge range of products. By creating an Amazon affiliate store, you’ll get access to over 75 million different products.

With that in mind, you should have no problems finding products that your visitors will be interested in buying, no matter whether you start a food blog, a photography website, a fashion blog, or any other kind of site.

However, you can’t add Amazon affiliate links to any sites that are mainly aimed at children under 13.

With that being said, let’s see how you can build an Amazon affiliate store using WordPress. If you prefer to jump straight to a particular step then you can use the links below.

Step 1. Getting Started With WooCommerce and WordPress

There are lots of different WordPress eCommerce plugins that you can use to build an Amazon affiliate store, but we recommend using WooCommerce because it’s powerful, flexible, and free.

WooCommerce is also the most popular eCommerce plugin on the market and powers millions of online stores all around the world.

Before you start building your WordPress website, just be aware that there are two types of WordPress software. To get started, you will need to be using the WordPress.org platform (see the difference between WordPress.com vs WordPress.org).

You will also need a WordPress hosting account and a domain name.

When you promote Amazon products on your affiliate site, Amazon is responsible for processing the customer’s credit card details. However, at some point you may want to expand your business and start selling your own products. These can be physical products or even digital downloads such as ebooks.

With that in mind, it’s a good idea to buy a SSL certificate, so you can securely accept credit card payments on your WordPress site in the future.

A domain name typically costs $14.99 per year and hosting costs start from $7.99 per month.

The price of an SSL certificate can vary depending on where you buy the certificate. However, as an estimate you can expect to pay anywhere between $50-200/year for an SSL certificate.

That is a lot of expense for a new affiliate business.

Thankfully, Bluehost, an official WordPress and WooCommerce recommended hosting provider, has agreed to offer our readers a free domain name, a free SSL certificate, and over 60% off web hosting.

Basically, you can start an Amazon affiliate business for $2.75 / month.

Note: Bluehost’s starter plan is a great choice for any Amazon affiliate store. However, if you want to sell your own products and services as well, then you want to take a look at our pick of the best WooCommerce hosting providers.

After buying your Bluehost package, you’ll need to install WordPress and choose a theme. For step by step instructions, see our guide on how to start a WordPress blog.

Once you’ve installed WordPress, you can log into the WordPress dashboard by going to example.com/wp-admin/ in your browser. Just replace “example.com” with your own domain.

Here, simply type in the username and password you created, and then click on ‘Log In.’

The WordPress login page

You’re now in your WordPress dashboard, ready to start building your Amazon affiliate store.

The first thing you’ll want to do is install and activate the WooCommerce plugin. For more details, see our step by step guide on how to install a WordPress plugin.

As soon as you activate WooCommerce, it will launch a setup wizard where you can type in an address for your store, the industry where your store operates, and the type of products you plan to sell.

Since we want to create an Amazon affiliate store, you don’t need to worry about configuring your WooCommerce settings. With that in mind, you can close the setup wizard by clicking on the ‘Skip setup store details’ link.

Setting up your WooCommerce eCommerce plugin

For step by step instructions on how to configure the WooCommerce settings, see our guide to WooCommerce.

Step 2. Sign up to the Amazon Associates Program

Now you’ve installed WordPress and WooCommerce, you’ll need to sign up to the Amazon Associates program.

Amazon automatically accepts everyone who applies to their affiliate program. However, the Amazon guidelines state that you must drive at least three qualified sales in the first 180 days of your application.

This means that at least three people need to click on your affiliate links and then make a purchase on the Amazon website. If you don’t meet this target within 180 days, then Amazon will remove you from their program and you will no longer earn money from your Amazon affiliate links.

With that in mind, you may want to spend some time increasing your blog traffic and fine-tuning your website’s SEO before applying to the Amazon affiliate program. If you need help, then please see our ultimate SEO guide for beginners.

When you’re ready to become an Amazon affiliate, simply head over to the Amazon Affiliate program website and click on the ‘Sign Up’ button.

The Amazon Associates affiliate program

At this point, you’ll be asked to log into your Amazon account.

There’s no need to create a special Amazon affiliate account, so you can go ahead and type in the email address and password for your existing Amazon account.

Registering for Amazon associates

If you don’t have an Amazon account, then click on ‘Create your Amazon account.’ Amazon will now guide you through the process of creating an account, step by step.

By default, Amazon will send all payments to the primary address for this account. If you’re happy to go ahead and use the default payee, then make sure that ‘The payee listed above’ is selected and then click on the ‘Next’ button.

Becoming an Amazon affiliate

If you want to use a different payee, then click on the ‘Someone else’ radio button.

You can then type in the name and contact phone number for this new payee, and click on the ‘Next’ button.

Adding a new payee to your Amazon associates account

On the next screen, you can type in the website domain where you plan to use your Amazon affiliate links, and then click on ‘Add.’

If you plan to advertise Amazon’s products on more than one domain, then simply repeat the same process described above.

Registering a domain with Amazon associates

After adding all the domains where you plan to use Amazon’s affiliate links, click on ‘Next.’

On the next screen, you’ll need to confirm that your website isn’t mainly aimed at children under 13.

Assuming this is the case, click to select the ‘No’ radio button and then click on ‘Confirm.’

Signing up to the Amazon Associates program

The next step is creating your Amazon Associates profile. To start, type the ID that you would like to use into the ‘What is your preferred Associates Store ID?’ field.

Amazon uses this ID to track and record your commissions. The ID will also be included in your Amazon affiliate links. With that in mind, it’s a good idea to type in the name of your website or company.

Registering as an Amazon affiliate

Amazon will then automatically create an ID based on your preferred ID.

After typing in this information, check that the ‘Your Website List’ box is showing all the domains where you plan to add your Amazon affiliate links.

Once you’ve done that, you’ll need to enter some information about your site. This includes the topics you cover on your website, and the kind of products you plan to promote on your Amazon affiliate store.

Choosing products for your Amazon affiliate store

Amazon will also ask for some basic analytics information such as how many people visit your site every month.

If you’re not already using Google Analytics to record this information, then see our step by step guide on how to install Google Analytics in WordPress for beginners.

Once you’ve entered all this information, click on the ‘Finish’ button.

That’s it. You’re now registered as an Amazon affiliate.

Step 3. How to Find the Best Products for Your Amazon Affiliate Site

Once you’ve signed up to the Amazon Associates program, you’re ready to start creating affiliate links.

You can get affiliate links for most of the physical and digital products sold on the Amazon store. However, there are some products that you can’t get affiliate links for, such as any products sold by Amazon Pharmacy.

Let’s find some products to promote on your new Amazon affiliate store.

To start, sign into your Amazon Associates account. If you scroll to the bottom of the screen, you’ll see some products that Amazon recommends you add to your website.

These recommendations are based on the products your site’s visitors have previously purchased or shown an interest in purchasing.

Amazon Affiliate's recommended products

To add one of these products to your site, simply hover your mouse over the product’s image.

Then, click on the Get Link button when it appears.

How to get an Amazon affiliates link

On the next page, click on the Text Only tab.

Once you’ve done that, click on the ‘Short link’ radio button. Amazon will now show the affiliate link that you can use to add this product to your website.

How to get an Amazon affiliate link for WordPress

Another option is to simply visit the normal Amazon store while logged into your Amazon affiliate account.

Along the top of the screen, you’ll see a new Amazon Associates SiteStripe banner.

How to get an Amazon affiliate link for your website

You can now simply browse the Amazon store as normal. When you find a product that you want to add to your Amazon affiliate store, simply click on the ‘Get Link: Text’ button in the SiteStripe banner.

In the popup that appears, click on the ‘Short link’ radio button. You will now see an affiliate URL for this product.

Getting an Amazon affiliate link for your online store

To help you get sales, it’s important to find products that your visitors will be interested in buying. Here, a good analytics solution for WordPress can help you learn more about the people visit your site, so you can identify the products they may want to buy.

It’s also a good idea to to think about the kind of content you’re publishing, and the content you plan to publish. For example, if you’re creating a fitness blog, then your target audience might be interested in buying gym equipment or health supplements.

Meanwhile, if you’re building an animals and pet related website then you may want to promote products from Amazon’s ‘Pet Supplies’ category.

No matter what products you choose, once you have an affiliate link you’re ready to start adding products to your Amazon affiliate store.

Step 4. Adding Amazon Affiliate Products in WooCommerce

WooCommerce is the best Amazon affiliate store plugin for WordPress. It allows you to import products that are for sale on third-party websites, and then show these products as part of your own online store.

In this way, you can deliver a seamless experience to the people who visit your website.

To start importing products from Amazon, go to the Products » Add New page.

Creating a new WooCommerce product

First, you need to type in a title for the product that you want to promote on your website.

Then, type a detailed description into the post editor.

Adding a product title and description

Once you’ve done that, scroll to the ‘Product data’ box.

Here, open the dropdown that shows ‘Simple product’ by default and click on ‘External/Affiliate product.’

Adding an affiliate product in WooCommerce

You can now either type in or paste the Amazon affiliate URL for this product.

Just because a product costs $10 now, doesn’t mean it will cost $10 forever. Amazon can change the price of its products at any point.

With that in mind, you’ll want to leave both the ‘Regular price’ and ‘Sale price’ fields blank. Your visitors can then check Amazon for the current price.

Next, scroll to the ‘Product short description’ section. Here, you can type in a short description that will appear on your affiliate store’s front page, product category pages, and in the search results.

Adding a short product description in WooCommerce

To encourage visitors to click your link and buy the product, it’s a good idea to add an engaging product image.

To do this, click on the ‘Set product image’ link.

Adding a product image to your Amazon affiliate store

You can then either choose an image from the WordPress media library or upload a file from your computer.

Another option is to create an image gallery by clicking on ‘Add product gallery images.’

When you’re happy with all the information you’ve entered, it’s time to click on ‘Publish.’ Now if you visit the shop page of your affiliate store, you’ll see your Amazon product live.

An Amazon affiliate store built with WooCommerce and WordPress

If you click on the ‘Buy product’ button then the affiliate link will take you to the product’s page on Amazon’s website.

You can now add more Amazon products to your affiliate store by following the same process described above.

Step 5. Customizing Your WordPress Amazon Affiliate Store

Themes control how your Amazon affiliate store looks including the colors, layout, and fonts. Your theme is the face of your online store and can encourage visitors to click on your affiliate links.

By default, WordPress comes with a basic design that has limited WooCommerce support.

The good news is that there are lots of different free and premium WooCommerce-ready themes that you can choose from. To get more sales, you’ll want to choose a theme that looks good, compliments your products, and has exactly the features you need.

To help you make the right choice, we’ve put together a list of the best WooCommerce WordPress themes. You may also want to look at our expert pick of the best WordPress themes for affiliate marketing.

Once you’ve chosen a theme, you can see our guide on how to install a WordPress theme.

Another option is to create your own custom theme using SeedProd. It’s the best page builder plugin for WooCommerce and is used by over 100 million websites.

You can use SeedProd to create a completely custom WordPress theme for your store without having to write a single line of code.

SeedProd even comes with special WooCommerce blocks that you can use to show off your Amazon affiliate products. For example, you can use the Products Grid block to show multiple affiliate products on any page in a nice layout.

SeedProd's WooCommerce blocks

As well as these special WooCommerce blocks, SeedProd also comes with ready-made templates including designs that you can use to create a landing page with WordPress.

For more details, check out our guide on how to create a custom WordPress theme.

You can also add powerful new features to your eCommerce site using plugins.

There are tons of free and premium WooCommerce plugins that you can choose from. To help you find the best plugins for your Amazon affiliate store, check out our expert pick of the best WooCommerce plugins.

Resources to Grow Your Amazon Affiliate Store

Now that you have set up your Amazon affiliate store, it’s time to focus on growing your new affiliate business.

Fortunately, there are many tools, plugins, and resources that can help you get more sales and make money from your Amazon affiliate store.

Let’s start with SEO. As a general rule, the higher your content appears in relevant search engine results, the more visitors you’ll get to your website. This means more potential clicks on your affiliate links.

For a step by step guide on how to fine-tune your Amazon affiliate store for the search engines, please see our WooCommerce SEO guide.

You may also want to install AIOSEO. AIl in One SEO is the best SEO plugin for WordPress and can help you optimize your affiliate site for the search engines.

Once you’re getting more visitors from search engines such as Google, you can check out the best affiliate marketing tools and plugins for WordPress.

By tracking your visitors you can understand what’s working on your Amazon affiliate store, and the areas that you can fine-tune to get more sales.

MonsterInsights is the best Google Analytics plugin for WordPress. It helps you find your best selling Amazon affiliate products as well as products that aren’t doing so well.

You can then make changes to your store based on real data. For more information, see our tutorial on how to track WooCommerce users in WordPress.

Abandoned carts are a huge problem for eCommerce stores. For an affiliate store, this means people will look at the products you’re promoting, but they won’t buy them. In this way, abandoned carts directly affect your affiliate earnings.

To help reduce your cart abandonment rates, we have a detailed guide on how to recover abandoned carts and boost your commissions.

Above all, make sure you continue to add new products to your Amazon affiliate store, post helpful reviews, and use content marketing tools to get more people to visit your website.

FAQs About Running an Amazon Affiliate Store Using WordPress

Since we first published this guide, we have got lots of questions from our readers about how to run a successful Amazon affiliate store using WordPress.

Here are the answers to some of those most frequently asked questions.

1. Can I add products from other affiliate networks?

Yes, you can add products from other affiliate networks to your website. This can be a great way to earn more money, and create a more diverse and robust affiliate business.

2. I live outside the United States, can I join Amazon Affiliate program?

Yes, you can. Currently, the Amazon Associates program is available in over 17 countries. However, every country has its own program and you’ll need to apply separately to each program that you want to join.

3. Do I need to disclose my affiliate partnership?

Yes, you do. Amazon’s program policies and the US laws require you to disclose that you’ll earn a commission when users buy a product.

It is not just limited to Amazon, all websites that use advertising or affiliate marketing to make money need to show a disclaimer. For an example, see our WPBeginner’s disclaimer page.

To meet Amazon’s requirements, you must include a legally compliant disclosure along with your affiliate links, and identify your site as an Amazon associate.

You must also include the following statement on your website:

“As an Amazon Associate I earn from qualifying purchases.”

4. Can I promote Amazon products without creating an affiliate store?

Yes, you can. For example, if you run a blog, then you can add affiliate links to your blog posts. If you do this, then you won’t need to install WooCommerce.

5. What are the Amazon affiliate commission rates?

The amount of commission you get changes depending on the product category. Commission rates can also vary depending on your location.

For a detailed look at the commission rates, you can see the Associates Program Standard Commission Income Statement for your location. For example, the Income Statement for the United States shows that you can expect to earn between 20% and 1% commission depending on the product category.

6. Can I promote Amazon services?

Yes. You’ll typically get a fixed fee every time someone signs up to an Amazon service using your affiliate link. This includes services such as the Prime Video Free Trial.

7. What is the difference between Amazon Associates and Amazon Affiliates?

While they’re very similar, the Amazon Associates program and Amazon Affiliates are two slightly different things.

You become an Amazon Affiliate by signing up to the Amazon Associates program. If you’ve been following along with this guide, then you’re now enrolled in the Amazon Associates program, which makes you an Amazon Affiliate.

8. How much does the Amazon Affiliate program cost?

It’s free to join the Amazon Associates program.

There is no minimum number of sales you need to make before you can start earning commission. However, you will need to refer at least three qualified sales within the first 180 days of becoming an Amazon affiliate.

9. How much does it cost to build an Amazon Affiliate store?

You can start with Bluehost for $2.75 per month and use the free WooCommerce plugin to limit your costs. There are also plenty of free WooCommerce-ready themes that can help you create a professional-looking Amazon affiliate website for minimum cost.

For more information, see our article on how much it costs to build a WordPress website.

We hope this article helped you start an Amazon affiliate store using WordPress. You may also want to see our ultimate step by step WordPress security guide and our expert pick of the best live chat software for small businesses.

If you liked this article, then please subscribe to our YouTube Channel for WordPress video tutorials. You can also find us on Twitter and Facebook.

The post How to Build an Amazon Affiliate Store Using WordPress first appeared on WPBeginner.

How to Set Up an Affiliate or Referral Program on Your WordPress Site

Wouldn’t it be nice if a WordPress site could be something more than just the digital face of one’s brand? That’s why you develop websites in the first place–to help companies do more with their digital presence. In other words, to generate more leads and conversions for their business.

But is that enough? Is the revenue that comes from direct efforts to sell a service or product on the site the only thing you should be focused on?

There are many ways in which a person could make money on a WordPress website besides adding a payment gateway and collecting payments from goods sold. You could also go the route of equipping your WordPress site (for your clients or your own site) with passive income streams. Like affiliate marketing.

There are two ways in which you can use affiliate marketing to your advantage in WordPress. Today, we’re going to focus on the method by which you develop your own affiliate or referral program. Continue reading, or jump ahead using these links:

The Basics of an Affiliate or Referral Program

Okay, so there are two ways to do affiliate marketing in WordPress. The first is to use your website to work as a sort of evangelist/unofficial salesperson for someone else’s site, service, or product. An example of this would be to create an affiliate WordPress site and then promote products found on Amazon (as well as Amazon’s own digital services). You would do this by planting affiliate links within relevant content.

As a consumer, you’re probably most familiar with this type of affiliate marketing from product review websites, like this one from Digital Trends:

Digital Trends Affiliate Link

This is a review of the best headphones on the market. When someone clicks on the Amazon or Jet links to the product page, Digital Trends then attaches a tag (which you can see in the URL) that lets Amazon or Jet know that this referral came from them.

As a registered affiliate for Amazon, Digital Trends will then make a commission on any sale generated from that referred visit.

But this isn’t the kind of affiliate or referral marketing we’re talking about today. Instead, we want to look at how you can set up this type of program on a WordPress website, so you can put others to work for you.

Affiliate vs. Referral Programs

An affiliate or referral marketing program will indeed help WordPress sites make money. But you can also use non-monetary offers (like a free security audit, for instance, if you’re a WordPress developer) for new business referred. You just need to remember that the exchange needs to be valuable enough to motivate customers to bring you that new source of revenue.

In exchange for the referral and payout, you will:

  • Increase traffic to your site.
  • Generate basic awareness of a brand new site.
  • Capture more email leads.
  • Get more plugin or theme downloads (for your WordPress business).
  • Get more downloads of your free PDF.
  • Make more sales.
  • Register more members.

There are two options you have if you’re interested in this type of marketing.

The first is the traditional affiliate marketing program.

If you have a website, service, product, ebook, or something else you know others would be interested in (if only they knew about it!), your affiliate marketing program would enable others to promote it on their website. You would simply need to create a landing page dedicated to the affiliate program, lay out the terms of use, and break down the commission payment structure based on successful sales that result from those affiliate links.

The other option is to have a referral program. Whereas affiliate programs rely on users to share links to your site that would earn them a commission on each sale, referral programs are more like refer-a-friend type deals.

Here is an example from the Leesa website:

As you can see, this type of program rewards loyal customers with money back on their own purchase or membership. You could also compensate referrers with discounts on future services, a free gift, etc. But whatever the revenue is that you generate from that referral, the reward to the customer should be of a proportionate value in order to even make it worth referring in the first place.

I realize the examples I’ve provided above make it seem like a commission or other type of payment is the only way to run an affiliate or referral program. But it doesn’t necessarily have to be that way. Think about what your customers would value most. Then create a rewards system that caters to that.

WordPress Plugins to Run an Affiliate or Referral Program

With regards to setting up an affiliate or referral program on your site, there’s the manual way of doing it (which doesn’t make much sense at all) or the plugin route (which makes all the sense in the world). Since our goal here is to create a streamlined and automated new source of revenue for your site, let’s review the WordPress plugins you can use to start your own affiliate or referral program.

  • Affiliates Manager Plugin

    Looking to give affiliate marketing a try, but aren’t ready to commit to paying for it just yet? You can try the Affiliates Manager plugin in that case. It does what you need it to do: help you recruit, register, and manage your affiliates. You can then track all referrals and issue commission payouts based on the guidelines you set within your program.

    This plugin also integrates with most major ecommerce plugins, which is great since you can leverage your customers’ trust and loyalty to motivate them to join the program.

    Interested in Affiliates Manager Plugin?

  • Ultimate Affiliate Pro WordPress Plugin

    This premium affiliate program plugin is a great choice if you want to add a lot of variety to how the affiliate or referral program runs on your website.

    For instance, you can set up different payment methods: direct with PayPal or Stripe, via a coupon code to be used at checkout, or to spend on a future purchase. You can also create different commission tiers depending on what the referral is for as well as the affiliate’s rank. And, for long-standing affiliates, you can pay out lifetime commissions, recurring referral payments, and even bonuses.

    This is really the ideal plugin if you want to create a membership system around affiliate marketing.

    Interested in Ultimate Affiliate Pro WordPress Plugin?

  • AffiliateWP Plugin

    This is the plugin that is suggested by WooCommerce in its list of extensions, so I would recommend using this if WooCommerce is your ecommerce plugin of choice. (Note: it does work with other ecommerce, payment gateway, and contact form plugins, so you’re free to use it with other WordPress plugins, too.)

    One of the nicest things about this plugin is that you can set up affiliate programs or referral programs with it–it differentiates between the two (among many other things) within the dashboard. I would say this solution is ideal for WordPress developers who build ecommerce and membership sites on a regular basis for clients. It’s also a good choice if you happen to manage one really massive online store that would benefit from referral revenue.

    Interested in AffiliateWP Plugin?

How to Set Up Affiliate or Referral Program on Your WordPress Site

To show you how painless it is to get an affiliate or referral program up and running on your website, I’m going to use the free Affiliate Managers plugin to walk you through the steps.

Step 1: Install the Plugin

Locate the plugin in your WordPress Plugins menu:

Affiliates Manager in WP

Install and Activate it.

Step 2: Define Your Settings

Your new Affiliates menu will now be on the sidebar. Click the Settings tab.

The General Settings tab allows you to set rules for things like:

  • The minimum amount you pay out to affiliates.
  • Cookie duration. Typically, affiliate payouts only apply to the current session of the referred visitor. However, if you want to give your affiliates a longer time period to be rewarded for referrals, you can update this.
  • The amount of commission you want to pay per sale (or percentage, if you prefer).
  • Default currency.
  • Affiliate notification upon commission payout.

The Affiliate Registration tab is where you’ll decide by which means you want to pay out affiliates as well as what sort of information you need from them in order to register to your system.

At the bottom of this page is also a spot where you can write a custom greeting for affiliates that tells them where to sign up or log in. As you can see, there isn’t much to this message at all, so take some time to personalize the greeting. Let affiliates and wannabe affiliates know how much you appreciate their help and what you would like to offer them in exchange for their patronage and assistance. You may just want to write the greeting from the Affiliates Home Page (more on that below).

If you would like to streamline the notification process, create custom messages under this settings tab.

If you want to pay your affiliates by PayPal, you will need to enable PayPal Mass Pay first.

Under the Pages/Forms Settings, you’ll be given the opportunity to define which URLs to place the necessary affiliate program pages at. These include:

The homepage:

The registration page:

The login page:

FYI: this is just the default login “page” affiliates will see. You can use the developer’s suggestion to create a custom Affiliates Login widget instead.

The Terms and Conditions page:

Once everything is configured and you’ve defined your pages, your affiliate program will be live on the site. You can use the other tabs under the Affiliates menu in the sidebar to track affiliate signups and referrals. You can also add them manually if you have a need to do so.

Step 3: Finish Setting Up Your Pages

As you can see in the previews above, the default messaging for your affiliates pages aren’t great.

So, be sure to go to your Pages and build out meaningful messages to your affiliates, encouraging them to join. This especially pertains to the home page that should provide them with all the information they need about what the program entails, what sort of commissions they will receive in exchange for their participation, payment schedules, and so on.

You can’t assume that your customers or clients know what an affiliate or referral program is — or what you are going to do in exchange for their help — so, be as thorough as possible.

Step 4: Integrate with Your Other Plugins

The next thing to do is go to the Add-ons tab. This is where you will find the built-in integration that matches up with whatever membership, contact form, or e-commerce plugin you are using.

By using these, you can create custom commission payouts and offers to your customers rather than rely on the system default percentage or flat rate you defined in the Settings page.

Step 5: Create Your Affiliate Links or Ads

Affiliate or referral links won’t be automatically created, so you’ll need to take care of this yourself.

Under the My Creatives tab, you’ll find this:

If you want to promote your referral program with a custom-designed button, you can upload it here. Or you can just create a text link for affiliates to use.

Give it a clear name so your affiliates know what they’re referring visitors to. For example, this is how it will show up on the affiliates side:

They’ll be given a bit of HTML for easy embedding of either a text or image link on their site.

Next, define the landing page (the page you want referrals to be driven to on your website).

For images, upload your creative. For links, write out the text you want to be embedded on your affiliate’s web page. Alt text is what will appear when someone hovers over the link.

For your reference, this is how they will appear once embedded on your affiliates’ websites:

Granted, the image affiliate link should actually promote your affiliate or referral program. I haven’t created any sort of creative ad for my own affiliate program and so this cute coffee mug will serve as a stand-in for now. But you get the point.

Be sure to share these links with your affiliates or let them know where to go in the dashboard under their profiles to retrieve them. You may also want to regularly blog and send out newsletters about ongoing affiliate promotions (being sure to reference the label you’ve assigned to them in the dashboard) so as to encourage affiliates to share more.

Step 6: Acquaint Yourself with the Dashboard and Start Paying

The final step is to settle in and watch as your affiliates start making money for you. Within the Affiliates dashboard, you’ll be able to track all of that activity.

If you’ve chosen to issue payment by check to your affiliates, you will, of course, have to be mindful of this and issue those payments on the promised timeline (which you should define with the main program’s homepage). If you’ve chosen to use PayPal Mass Pay, once that’s configured, you should be able to automate these payments and take some of the load off of your shoulders.

Of course, this is just one solution for creating an affiliate or referral program for your website using a plugin. As I mentioned above, there are premium WordPress plugins that allow you to do more, integrate with more WordPress solutions, and streamline the workflow even further. But this is a good place to start.

Wrapping Up

As you’re just starting a business or working on scaling and growing your brand’s reputation, affiliate programs can do a lot to help you reach a broader audience. It may also be more effective than trying to go it on your own–as we’ve seen how powerful user-generated content and referrals are in winning the favor of other customers. After all, consumers won’t necessarily know to trust you, but they will know to trust those close to them.