How to Add an Admin User in WordPress Using FTP (Easy Tutorial)

Do you need to add an admin user in WordPress but don’t have access to the dashboard?

At WPBeginner, we often help users who get locked out of their WordPress admin area and need to find a way back in. One easy fix is to add an admin user using FTP (File Transfer Protocol).

In this article, we will show you how to add an admin user in WordPress using FTP.

How to Add an Admin User in WordPress Using FTP

When You May Need to Add an Admin User in WordPress Using FTP

Adding a WordPress admin user using FTP instead of the WordPress admin area might be necessary in a few situations:

  • Lost admin access – If you can’t get into your WordPress admin dashboard because you forgot your password, a security plugin locked you out, or there’s a problem with a plugin or theme, then you can create a new admin user through FTP to regain access.
  • Corrupted WordPress – Sometimes, you may experience some common WordPress errors where you can’t reach the admin dashboard. Creating a new admin user via FTP can help you get control back.
  • Security issues – If your site gets hacked and the hacker gains admin access, then making a new admin user can help you kick them out and secure your site.
  • Migration problems – When moving your site to a new server, if there are issues with the admin user not working or you need to reset the info, then making a new admin user with FTP can be a quick fix.

With that in mind, we will walk you through a step-by-step guide on how to easily add an admin user to your WordPress website using FTP.

How to Add a New Admin Account in WordPress With FTP

First things first, you will need an FTP client. This software allows you to access files from your website without logging in to your WordPress dashboard. We will be using FileZilla in this tutorial, as it’s pretty easy to use.

Next, you will need to connect your website with the FTP client. To do this, you will need your FTP access details (usually accessible in cPanel or other hosting control panels).

For step-by-step guidance, you can see our guide on how to use FTP to upload files in WordPress.

Once your FTP client is connected to your website files, you will need to find your current WordPress theme’s functions.php file. You should be able to locate the file on the right side of the FTP window, inside your current theme’s folder, which is found in a path like this:

/public_html/wp-content/themes/your-current-theme/

Here’s what our screen looks like. Our demo site is using the default Twenty Twenty-Four theme.

Locating functions.php file in FTP

Once you have found the functions.php file, you can just double-click it. FileZilla will then download the file to your computer.

At this stage, just go ahead and locate that file on your computer. After that, open it using a plain text editor like Notepad.

Then, you need to insert this code snippet at the bottom of the file to add an admin user account:

function wpb_admin_account(){
$user = 'Username';
$pass = 'Password';
$email = 'email@domain.com';
if ( !username_exists( $user )  && !email_exists( $email ) ) {
$user_id = wp_create_user( $user, $pass, $email );
$user = new WP_User( $user_id );
$user->set_role( 'administrator' );
} }
add_action('init','wpb_admin_account');

Don’t forget to replace Username, Password, and email@domain.com with your own values. You can also use the same code snippet to create other user roles if needed.

Here’s what the file should look like:

Adding the new admin user account code in functions.php

Next, simply save the file and go back to your FTP client.

Here, you need to locate the file you just edited on the left side of the interface. Right-click on it, and click ‘Upload.’

Uploading the functions.php file via FTP

A new window will pop up saying that the file already exists in your website files.

Just select the ‘Overwrite’ option and click ‘OK.’

Overwriting an existing functions.php file via FTP

Now, open yourwebsitename.com/wp-admin in your browser. Remember to replace yourwebsitename.com with your own domain name.

If the code works, then you will be able to type your credentials into the login page and access the WordPress admin area again.

The default WordPress login page

Note: Once you have logged in to your WordPress site, you should go back to your FTP client to open the functions.php file again and delete the code you added.

Deleting the code will not remove the user. This is just to ensure that the code does not execute again, which could lead to unintended consequences. Plus, you can always add new users and authors to your WordPress site if needed.

Alternative: Add a New Admin User With Your Web Host’s File Manager

If your FTP connection was not successful and you are still locked out of the WordPress admin, then you can use your WordPress hosting’s file manager to add the code to functions.php. Beginners may also find this method much easier.

For the sake of this tutorial, we will use Bluehost’s file manager. In your hosting dashboard, just go to the ‘Websites’ tab, find the WordPress website you are locked out of, and click ‘Settings.’

Bluehost site settings

Once inside, scroll down to the Quick Links section.

Then, click ‘File Manager.’

Bluehost File Manager button

The same as the previous method, you need to find your current WordPress or WooCommerce theme’s functions.php file.

After you locate it, just right-click on the file and select ‘Edit.’

Editing a functions.php file in Bluehost file manager

Next, simply paste the same code snippet from the earlier method.

Click ‘Save Changes.’

Adding an add new admin user code in the WordPress functions.php file using Bluehost file manager

All you need to do next is go to your WordPress login URL and try signing in with your new admin user’s login details.

Bonus: Learn More WordPress functions.php Hacks

Besides adding a new admin user, there are actually a lot of cool tricks you can do with the functions.php file.

For example, you could add new widget areas that are not default in your WordPress theme. This way, you have more space to insert your widgets.

You can also disable automatic update email notifications, which can get annoying if you have a lot of plugins and themes that auto-update.

You can learn more about all of these hacks in our ultimate list of useful tricks for the WordPress functions.php file.

And if you want to try out all of these tips and tricks, then we recommend using WPCode. While it’s possible to edit functions.php with an FTP client, WPCode makes it safe and easy to manage all of the different code snippets that you add to the file.

This way, you can keep track of every custom code snippet that’s been added and disable it in a few clicks if an error occurs.

You can read more in our full WPCode review.

WPCode

We hope this WordPress tutorial helped you learn how to add an admin user to WordPress using FTP. You may also want to see our article on how to add a WordPress admin user to the MySQL database with phpMyAdmin and our ultimate WordPress SEO guide to boost your rankings.

If you liked this article, then please subscribe to our YouTube Channel for WordPress video tutorials. You can also find us on Twitter and Facebook.

The post How to Add an Admin User in WordPress Using FTP (Easy Tutorial) first appeared on WPBeginner.

How to Prevent Changes to Plugins, Themes, and WordPress Core Files

This is a common question I get from folks in the WordPress community. How can I “lock things down” and prevent any changes to plugins, themes, and WordPress core files. For example, how to prevent any themes and/or plugins from being updated or deleted, and how to prevent any new plugins from being installed. This is useful for certain projects where it’s necessary to lock a website to a static version. Fortunately, WordPress makes this super easy with a couple of PHP constants. Let’s take a quick look..

Contents

Prevent Changes via File Editor

Did you know that WordPress provides a Plugin File Editor and Theme File Editor in the WP Admin Area. You can find them:

  • Under the Appearance menu ▸ Theme File Editor
  • Under the Plugins menu ▸ Plugin File Editor

These tools enable admins to make changes to any plugin or theme files. Huge convenience for those that need it. For those that don’t, you can disable any changes via the file editors by adding the following line to your site’s wp-config.php file, which resides in the root WordPress directory:

// disable file changes via plugin and theme editors
define('DISALLOW_FILE_EDIT', true);

Once this line is included in the site’s configuration file, all file-editing via the Admin Area will be disabled. No menu items, no editing, nada. It’s another layer of security that effectively minimizes your site’s attack surface, so sensitive files cannot be modified by any user, including admins. This helps to protect against any changes that could compromise or crash your site.

Note: As explained at WordPress.org, disabling the file editors via DISALLOW_FILE_EDIT constant may affect any plugins that check for sufficient capabilities using current_user_can('edit_plugins'). Plugins should check if the constant is set, and if so display an appropriate error message.

Prevent All Changes via Admin Area

While the previous technique disables changes to plugins and themes via the file editors, this next technique prevents all changes to any files from inside the Admin Area. This includes:

  • Updating, deleting, installing plugins
  • Updating, deleting, installing themes
  • Updating the WordPress core files

It also includes changes made via the plugin and theme file editors. Basically this technique staticizes a site to its current version. So if that sounds like you, here is the magic code to lock it down:

// disable all changes to all files via admin area
define('DISALLOW_FILE_MODS', true);

Once this line is included in the site’s configuration file, all changes (installing, updating, deleting) to plugins and themes will be disabled. Note that the above line also disables updates to the WordPress core files, so trying to update WordPress via Dashboard ▸ Updates will not work.

Of course, it always is possible for changes to be made directly on the server via SFTP or similar method. But any file changes from within the Admin Area will be disabled completely.

Note: As mentioned, the above line disables all changes from anywhere within the Admin Area, including the file editors. So you do not need to set both DISALLOW_FILE_MODS and DISALLOW_FILE_EDIT. Just including DISALLOW_FILE_MODS takes care of everything.
Note: Be careful when adding DISALLOW_FILE_MODS to your site’s wp-config.php file. WordPress needs to be able to make changes in order to keep plugins, themes, and core files current via updates. So only disable changes if you are 100% certain that you don’t want any updates on your WordPress site.

Stay Logged in to WordPress

I work from home so can afford to leave tabs open for each of my WordPress sites. That way I can jump on anytime and update or add new content very quickly. The problem I kept running into is that WordPress automatically logs out users after 48 hours. Which means I have to log back in every day even when it’s not necessary. So I needed a way to stay logged in to WordPress indefinitely. Fortunately WordPress is very flexible and easy to customize, and the login duration can be changed via several different methods.

Here are three easy ways to stay logged in to WordPress for a longer period of time.

Three ways to do it..

Check the box

The easiest way to increase the expiration date/time for logins, is to simply check the “Remember Me” checkbox when logging in to WordPress. That will increase the expiration to 14 days, or whenever the browser is closed. After that time, the session cookie expires and you’ll need to log in once again.

This is useful if 14 days is enough time for your workflow.

One downside is that it requires an extra click to check the box. Fine I guess if you’re logging in manually. But if you’re using a password manager or other auto-login app, the extra checkbox step requires action on your part, thus adding friction and slowing things down.

Another downside is that 14 days is not always enough. For my own workflow, I prefer to minimize as many needless steps as possible. So I prefer the next method of extending the login duration, using a slice of custom code..

Add custom code

For more flexibility and less friction, you can add the following code snippet to stay logged in to WordPress for however long is necessary, even indefinitely if it makes sense to do so. This is the preferred technique for my own websites.

Important: Be mindful of any other users who may be logging in on public machines. Only extend the login duration if you know 100% that it’s safe and secure.

Here is the magic code to stay logged in to the WordPress Admin Area. You can add this code via your theme functions file, or add via simple custom plugin. Here is a guide that explains how to do both.

function shapeSpace_stay_logged_in($expires) {
	
	return 172800; // default 48 hours
	
}
add_filter('auth_cookie_expiration', 'shapeSpace_stay_logged_in');

As written, this code hooks into auth_cookie_expiration and filters the expiration duration (in seconds). By default the duration is 48 hours. You can change that to anything that works best.

To stay logged in forever, change the interval to some very large number, like 3153600000 to stay logged in for 100 years ;) To help with converting time to seconds, you can use a free time conversion calculator.

Thanks to Alex Mills (Viper007Bond) for sharing this code at Stack Exchange.

Install a plugin

If you want to extend the login beyond 14 days, but don’t want to go the custom code route, installing a plugin is the way to go. Currently there seems to be only a couple of capable plugins in the WP Plugin Directory:

Let me know if I’ve missed anything! :)


How to Disable Embeds for Any Specific URLs

Quick tip: how to disable embeds for any URL(s). The other day I was adding URLs to a draft post in WordPress. Some of the URLs were for Twitter tweets. Checking a preview of the post on the front end, I was surprised that WordPress had automatically embedded the actual tweet in place of the URL. After a few minutes searching for a way to disable the automatic embedded tweet, I remembered about WordPress oEmbed (now referred to as Embeds), which I’ve actually written about in several tutorials. Turns out the solution is dead simple.

Contents

How embed works

By default, WordPress embeds tweets, video, audio, and other media from third-party services like Facebook, Twitter, YouTube, and many other sites.

Embed media via block editor

To enable embed for any URL when using the Gutenberg Block Editor, add an Embed Block and enter the URL. WordPress takes care of the rest, and will automatically convert the URL to embedded media, right there on your page.

Embed media via classic editor

To enable embed for any URL when using the Classic Editor, simply add the URL on its own line, like this:

Lorem ipsum this is just an example..

https://twiter.com/perishable/status/1616553818183065601

Lorem ipsum dolor amet..

When WordPress finds any URLs on their own line, it auto-embeds the actual media. For example here is the previous tweet URL added to its own line:

If all is working correctly, a formatted tweet should be displayed. This method works for all supported media sites.

How to disable embed for any URL

As you’ve probably guessed, the solution to not auto-embedding media is simple. Here’s how to do it easily using either the Gutenberg Block Editor or the Classic Editor.

Disable embeds via block editor

To disable media embeds for any specific URL using the block editor, simply remove whichever Embeds block contains your URL. I know, it may seem obvious but not everyone knows or understands how it all works.

Disable embeds via classic editor

To disable media embeds for any specific URL using the classic editor, make sure that the URL is not written on its own line. There are numerous ways of doing it, the easiest is to simply prepend a word like “Link”, for example:

Link: https://twitter.com/perishable/status/1616553818183065601

Another method is to make the URL an actual link, by wrapping it with an HTML hyperlink, for example in the post we would write:

<a href="https://twitter.com/perishable/status/1616553818183065601">https://twitter.com/perishable/status/1616553818183065601</a>

On the page, wrapping a URL with a link looks like this:

https://twitter.com/perishable/status/1616553818183065601

See ma! No embed! :)

How to disable ALL media embeds

An easy way to disable WordPress oEmbed/Embeds is to use a plugin.

Currently there is only one available at the WordPress Plugin Directory, Disable Embeds by Pascal Birchler.

I’ve used this plugin on my sites for several years now. It does a great job of disabling all of the needless oEmbed scripts and functionality. BUT it only disables oEmbed for non-whitelisted sites. So media embeds for sites like Facebook, Twitter, YouTube, et al will continue to work normally.

SO at this point, in order to disable ALL media embeds, you’ve gotta do it with custom code. I’m not going to rewrite the wheel here, tutorials for this already exist, for example:

From what I can tell, either tutorial provides the same code/information, and should work great to completely disable ALL WordPress Embeds on your site.

CU Later

I didn’t see this information posted anywhere so thought I’d share here at DigWP.com. Cheers people :)


How to Add Custom Code to WordPress

There are many books and tutorials that share useful code snippets for WordPress. For example, you can find hundreds of custom functions right here at DigWP.com. You can also find them in my WordPress books, tutorials, and code snippets. For many code snippets and custom functions, the usage instructions will say something like:

Add this code to your theme (or child theme’s) functions.php file, or add the code via simple custom plugin.

So what does that actually mean? Let’s take a closer look. First we’ll go through how to add custom code via the functions.php file. Then we’ll explain how to add code by making a simple custom plugin. Finally we’ll wrap things up by explaining the difference between the two methods and how to go further.

Contents

Add custom code via theme functions.php

Every WordPress theme can have a file named functions.php. If present in a theme, the functions file must be located in the root directory of the theme:

/wordpress/
	/wp-content/
		/themes/
			/my-theme/
				functions.php

If the functions file does not exist, create it. Then open the file in a code or text editor and add your custom code. Save the file, upload to the server, and done. It is very straightforward. Just make sure to test any new code on a private/test site before adding to a live production site.

Learn more about building themes in my book, WordPress Themes In Depth.

Add custom code via simple custom plugin

With WordPress, plugins add functionality, and themes display content. There is some overlap (and grey area), but in general the best way to add functionality to WordPress is with a plugin. That’s one reason why there are over 50,000 plugins in the WordPress Plugin Directory.

Plugins range in complexity. They can be very advanced, comprising many files and lots of code. Or they can be very simple, made with one file and a few lines of code. To add a custom code snippet, a simple plugin will suffice.

How to make a simple custom plugin

To make a simple custom plugin, follow these steps:

  1. Create a new PHP file
  2. Name the file whatever makes sense, can be any alphanumeric string (plus dashes and underscores if needed)
  3. Open the file and add the header code provided below
  4. Save the file and done

After creating this file, it is ready for your custom code snippet(s). To save you some time, I’ve created an example plugin that you can download below. It’s ready to go for any custom code that you want to add.

Download a simple custom plugin

Download a copy of our simple custom plugin, ready for your custom code.

Download Simple Custom Plugin (ZIP file < 1 KB)

Usage: Download and unzip the file. Open simple-custom-plugin.php and customize the file header as explained below. Then add your custom code snippet, save changes and done.

Plugin file header

At the beginning of your plugin file, add the following lines:

<?php 
/*
	Plugin Name: Simple Custom Plugin
	Plugin URI: https://digwp.com/2022/02/simple-custom-plugin/
	Description: This is a simple plugin template for adding custom code to WordPress.
	Author: Jeff Starr
	Author URI: https://plugin-planet.com/
	Requires at least: 5.9
	Tested up to: 5.9
	Version: 1.0
*/

if (!defined('ABSPATH')) die();

// add custom code snippets below this line..

You can customize the header lines with your actual information. As our simple plugin is meant only for your site and will not be distributed publicly, the file header can be much simpler than what’s required for plugins destined for the WP Plugin Directory. Learn more about plugin file headers at WordPress.org.

Also: notice this line:

if (!defined('ABSPATH')) die();

That line is included to prevent direct access to the file. It basically checks if WordPress is loaded; if not, the script simply exits. This is a basic security measure to help prevent anyone from meddling with your custom code.

Remember to use code snippets only from trusted sources. And then test the code on a private site before going live.

What’s the difference?

What’s the difference between adding code via theme functions vs. simple plugin? The main difference is scope. When code is added via your theme template, it will run only when the theme is active. So for example, say we add a custom code snippet that displays social media buttons on posts. If we change themes, the custom code will not run, and the buttons will not be displayed.

Contrast that with adding custom code via simple plugin. As long as the plugin is active, the custom code will run always, regardless of which theme you’re using. Going the plugin route also benefits in terms of things like extensibility and maintainability. Managing custom code via plugins generally is easier than burying it within the theme’s functions file.

So which is best? Neither. The two methods are just different. Which one is best for any given code snippet depends on various factors. Most importantly whether or not the custom code is theme specific or global in scope.

For an easy, no-fuss way to add custom code snippets, check out WPCodeBox.

Going further..

The above simple plugin example is the most basic possible. To go further with plugin development, visit the Plugin Developer Handbook at WordPress.org.

Check out my complete video course on developing WordPress plugins »

Questions and comments welcome! :)


Database Tip: Clean Up User-Agent Data

I just finished up my latest book, Wizard’s SQL Recipes for WordPress. And it’s packed with over 300 time-saving code snippets for managing and optimizing your WordPress database. For example, one of the recipes from the book shows how to delete unwanted user-agent data from the WP comments table. This is an easy optimization step that can help to free up some precious disk space.

Check out the Demo/Table of Contents for Wizard’s SQL Recipes for WordPress.

Show all user-agent data

Did you know that WordPress collects the visitor’s user-agent data for every comment? In the database, user-agent data is stored in the comments table in the comment_agent column. But you would never know it because WordPress does not display the collected user-agent data anywhere in the Admin Area. No worries for us though. A simple SQL query will summon the information:

SELECT comment_ID, comment_author, comment_agent 
FROM wp_comments;

If comments have ever been enabled on your site, that simple query may return some surprising results. Or if you’re using an application like phpMyAdmin to manage your database, you can check out all of the user-agent data by visiting the wp_comments table and examining the comment_agent column. To give you a better idea, here is an example of a typical user agent:

Mozilla/5.0 (Macintosh; Intel Mac OS X 10_15_7) AppleWebKit/537.36
(KHTML, like Gecko) Chrome/94.0.4606.81 Safari/537.36

Most comments should have some sort of user agent recorded, although some may not. It depends entirely on the client that the visitor was using when leaving the comment. Incidentally, any collected user-agent data can be used to identify which browsers/clients people (and bots) are using to visit your site.

Tip: WhatIsMyBrowser.com provides an excellent tool for identifying user agents.

In general, user agents can vary greatly. Some user agents consist of a small number of characters, while many others (like the previous example) consist of many characters. Either way, depending on the number of comments, user-agent data can consume a significant amount of space.

Delete all user-agent data

Before going further, if your site uses a plugin that makes use of user agents (remember, WordPress itself does not use user agents for anything), then stop right here. You don’t want to delete any user-agent data. But for everyone else — like probably around 99% of WordPress sites — all of that user-agent information is pretty much useless. So it gives us an excellent opportunity to clean up the database by deleting all user-agent information from the comments table. Here is the magic SQL recipe to do it:

UPDATE wp_comments SET comment_agent = '';

Here we replace the user-agent data with a blank/empty value for all comments in the WordPress database. If you would rather replace the data with n/a or any other string, replace '' with 'n/a' or whatever makes sense for your site.

Depending on the number of comments on your site, that simple query can reduce the size of the database considerably. And that’s a good thing.

Want more SQL recipes like this one? Check out Wizard’s SQL Recipes for WordPress — includes an entire chapter on optimizing the WP database!


Fix Site Health Error: The authorization header is missing

Quick post that explains how to fix the error, “The authorization header is missing”. This error may be found under “recommended improvements” in the WordPress Site Health tool (located under the WP menu ▸ Tools ▸ Site Health).

When running a Site Health check, the “authorization header” warning happens when you’ve upgraded WordPress (to version 5.6 or better) and have Permalinks enabled, but the site’s .htaccess rules have not been updated with the latest. This DigWP tutorial explains what’s happening and shows how to fix the error easily with a few clicks.

The authorization header is missing.

Contents

The solution

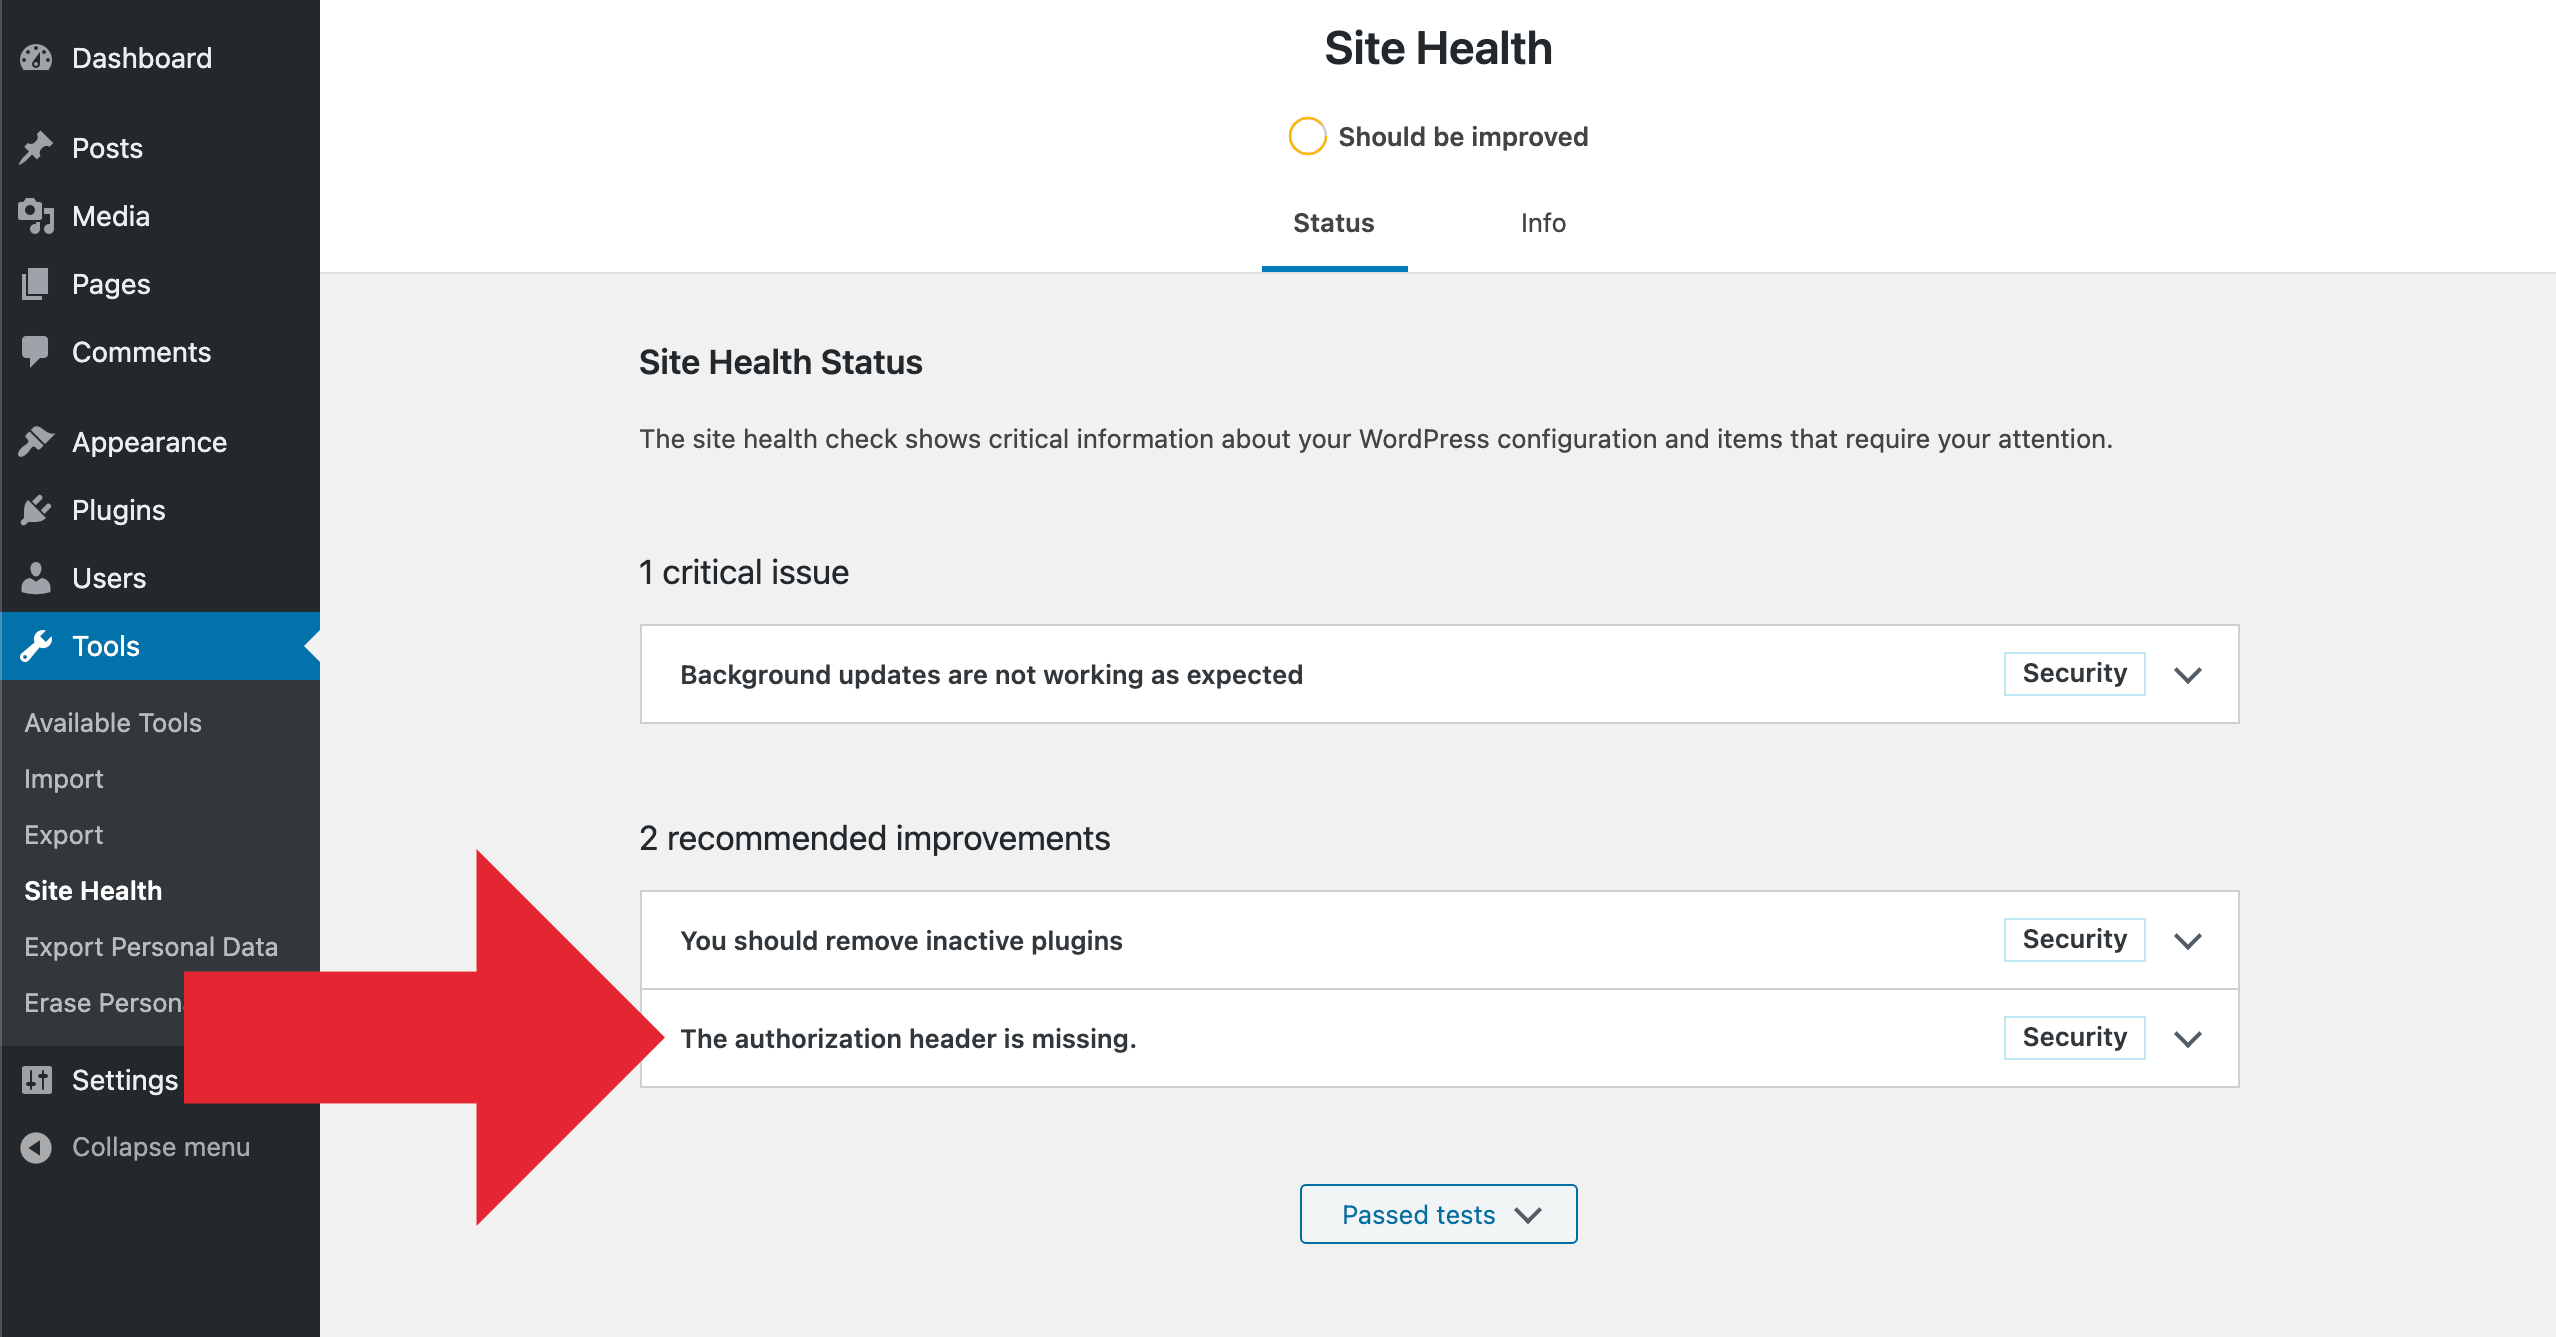
When testing your WordPress with the Site Health tool, if you get this:

Site Health Results: Authorization Header MissingWP menu ▸ Tools ▸ Site Health — The authorization header is missing. Click for full-size image.

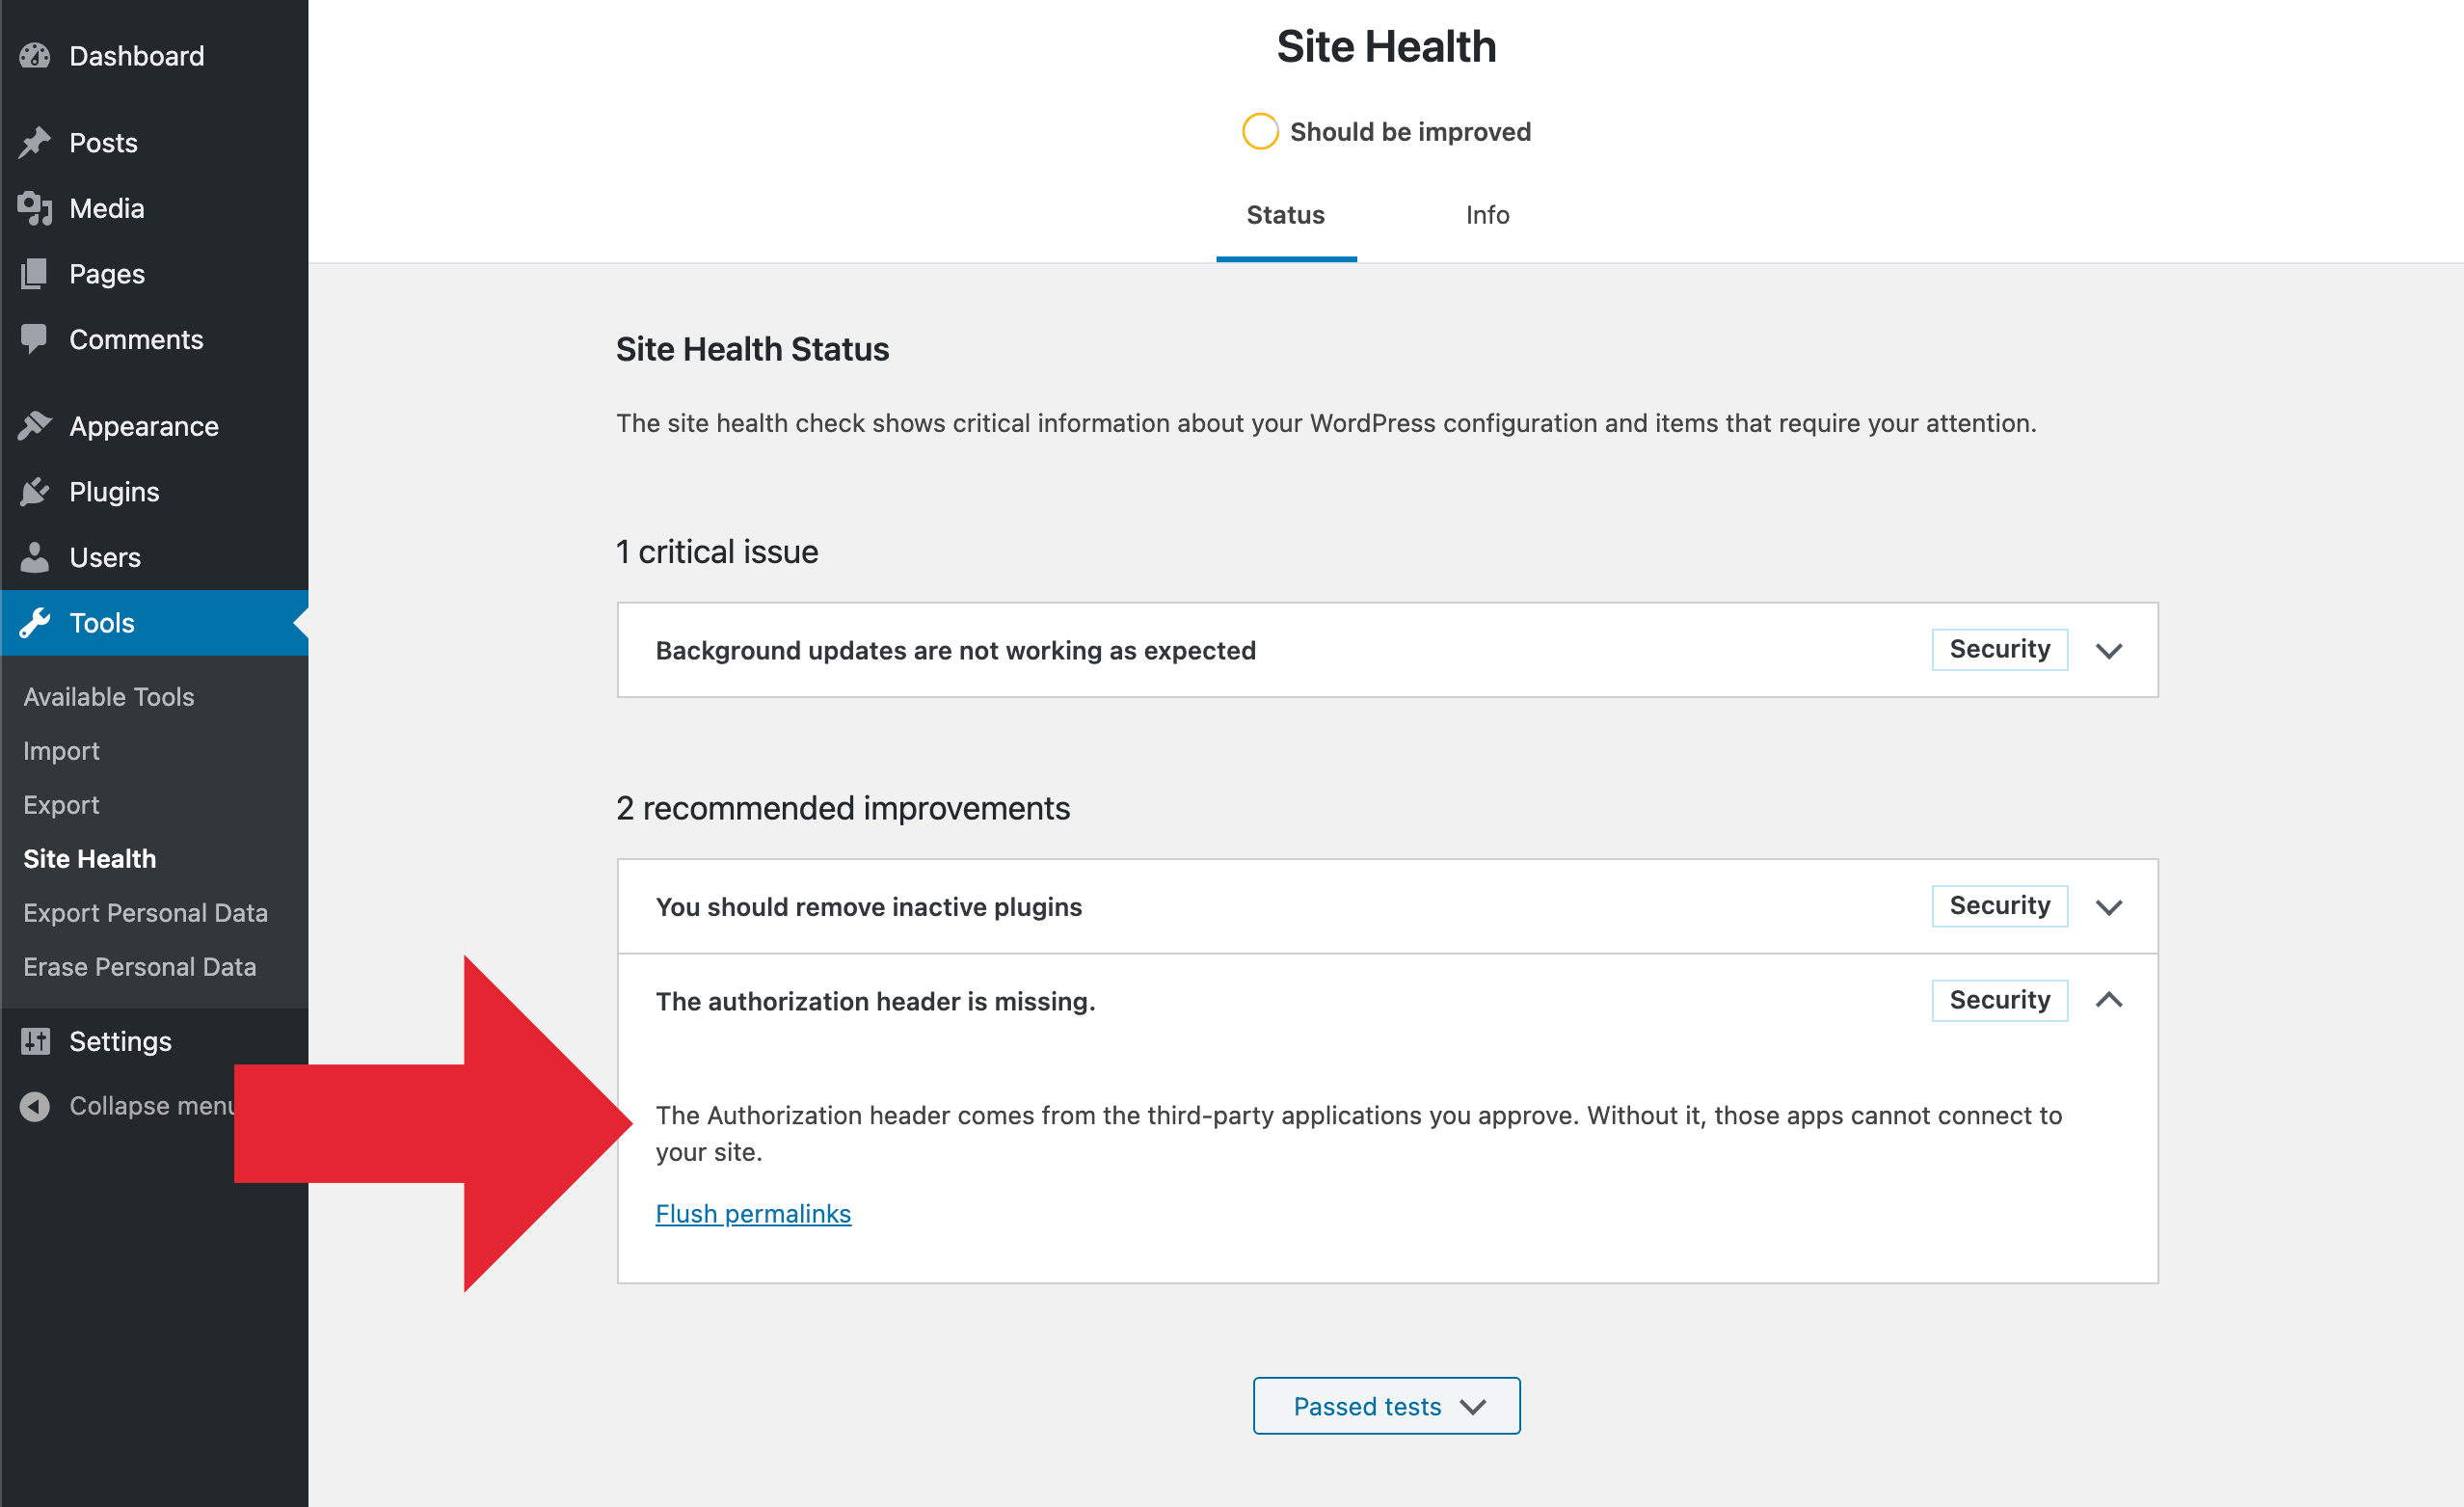
If you click the error and toggle it open, you’ll get a bit more information: “The Authorization header comes from the third-party applications you approve. Without it, those apps cannot connect to your site.” Screenshot:

Site Health Results: Authorization Header Missing (Details)Details about the authorization-header error. Click for full-size image.

This error means that your WordPress Permalink rules are not up-to-date. To fix the issue, you need to update the Permalink rules in your site’s .htaccess file. There are several ways to do this:

  • Easy — Visit your Permalink settings and click “Save Changes”
  • Manual — Manually update .htaccess with current Permalink rules

So try the easy method first. If it works, then stop; you’re done. If it does not work, the “manual” method definitely should resolve the issue. Let’s walk through each of these solutions..

Flush Permalinks

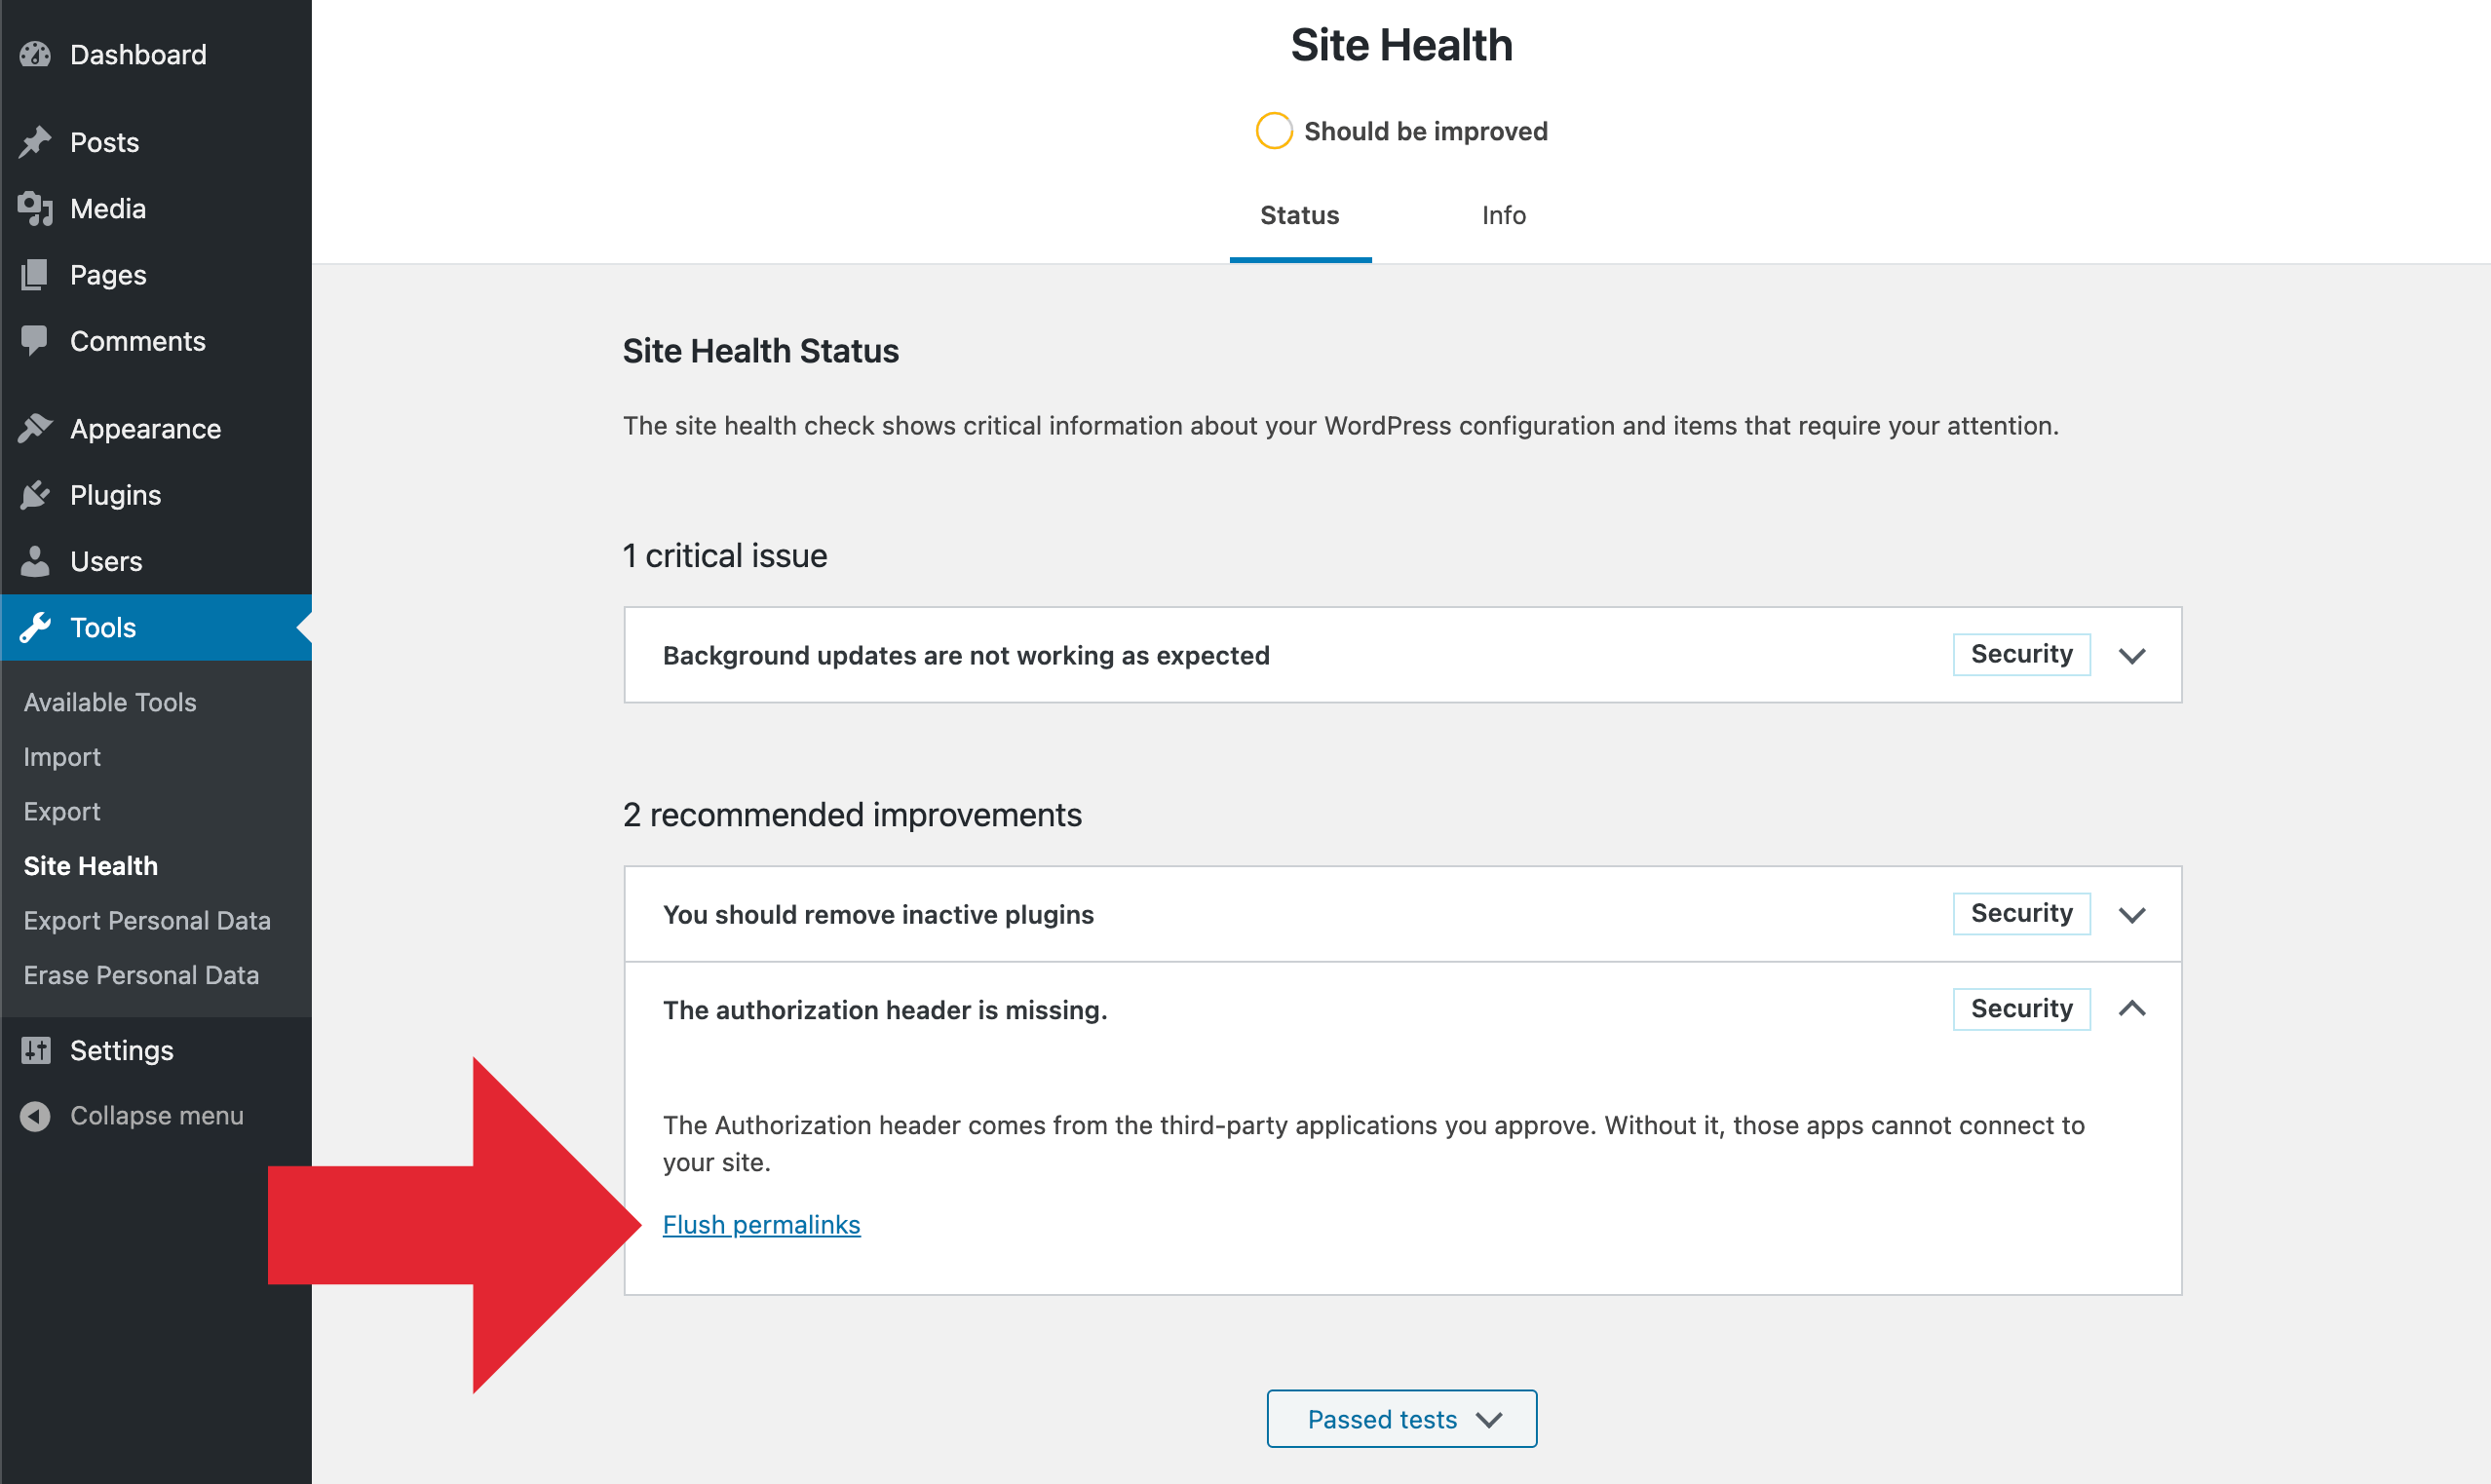
The easiest way to fix the authorization-header issue, is to click on the “Flush permalinks” link, which is displayed right there on the Site Health screen. Here is a screenshot:

Authorization Header Missing: Flush PermalinksShowing the location of the “Flush permalinks” link. Click for full-size image.

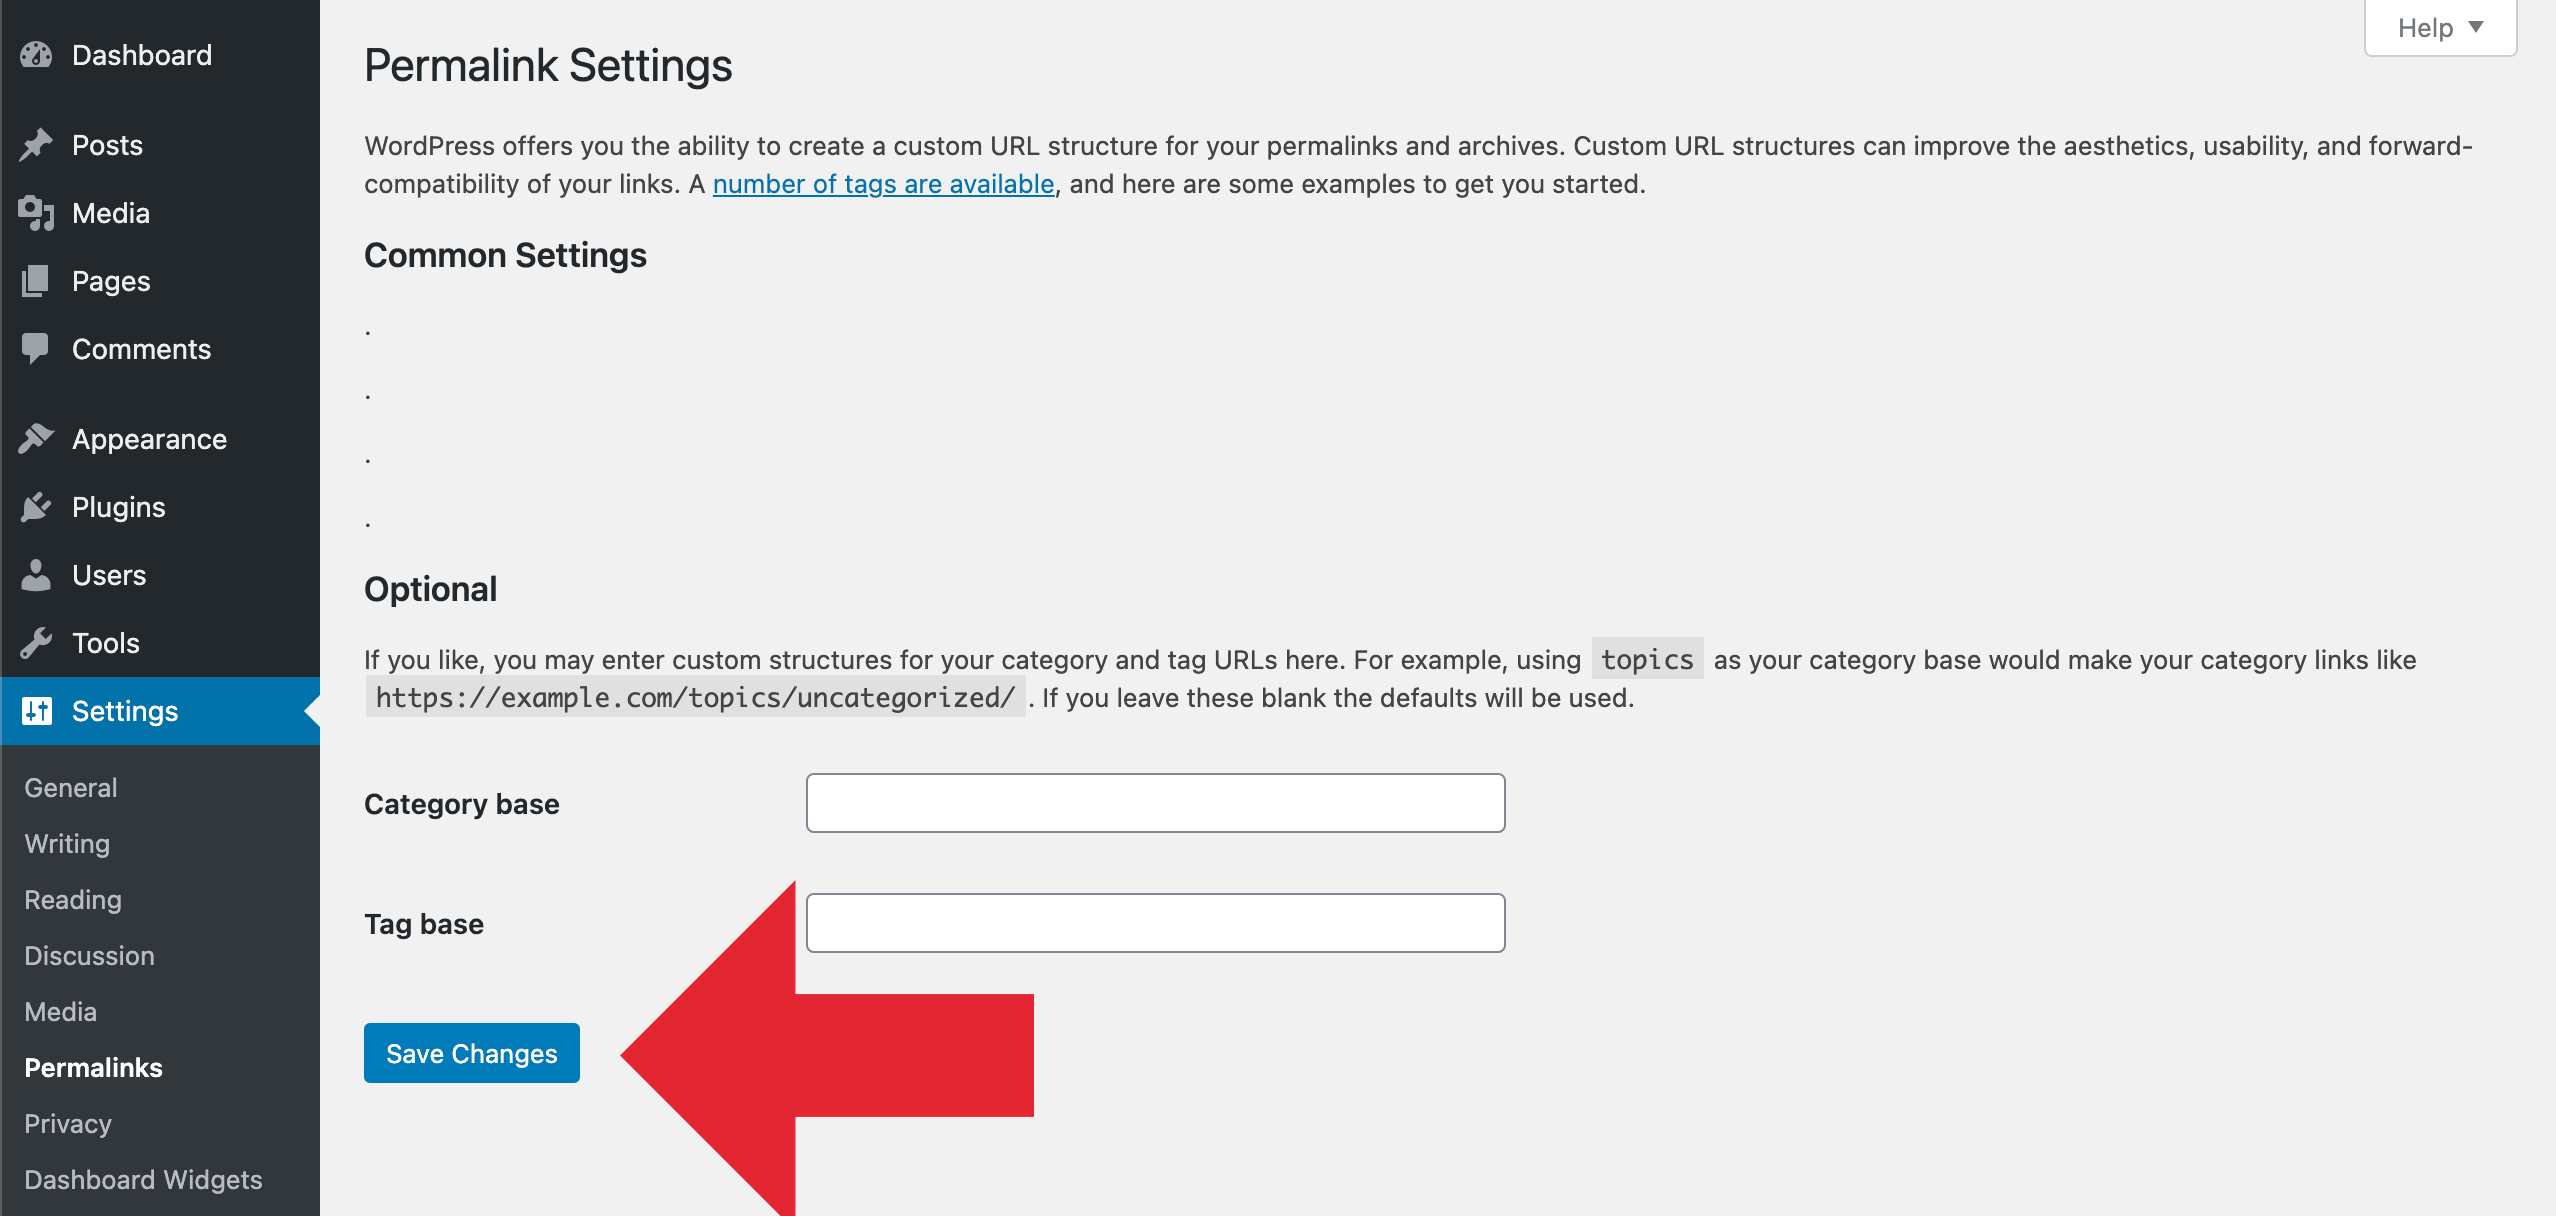
That will take you to the WordPress Permalinks settings. This is where you can “flush” (i.e., update) your site’s Permalink rules. You can do this by clicking the “Save Changes” button as shown here:

Permalink settings showing Save Changes buttonPermalink settings showing the “Save Changes” button. Click for full-size image.

You do NOT need to make any actual changes to any Permalink settings. All you need to do is click “Save Changes” and done. Once you do that, WordPress will attempt to update the site’s .htaccess file with the latest/current Permalink rules. Thus solving the authorization-header issue. You can verify the fix by running a fresh Site Health test.

Important! Updating/flushing Permalink rules via the Admin Area results in changes made to the .htaccess file on the server. Flushing does not affect the local copy of your .htaccess file. So make sure to update both local and server copies to avoid having to go through this again in the future.

Manually update .htaccess

If the easy method does not work to resolve the “authorization header is missing”, you will need to update your Permalink rules manually. To do it, open your site’s .htaccess file. Look for a block of code that begins with this line:

# BEGIN WordPress

..and ends with this line:

# END WordPress

Located between these two lines are the WordPress Permalink rules. Whatever you have there, you want to replace with the latest set of rules. You can find the current rules at WordPress.org. So grab a copy of the correct rules for your site (Basic or Multisite), and replace your existing rules via copy/paste. Save the file, upload, and done.

That should resolve the Site Health authorization-header issue. To verify success, try another test with the Site Health tool.

If after updating your Permalink rules, Site Health continues to show the error, most likely there is something else that is interfering with normal functionality. In this case you may contact your support team. Or if you’re savvy, follow our Troubleshooting Guide to help diagnose and resolve any outstanding issues.

About the error

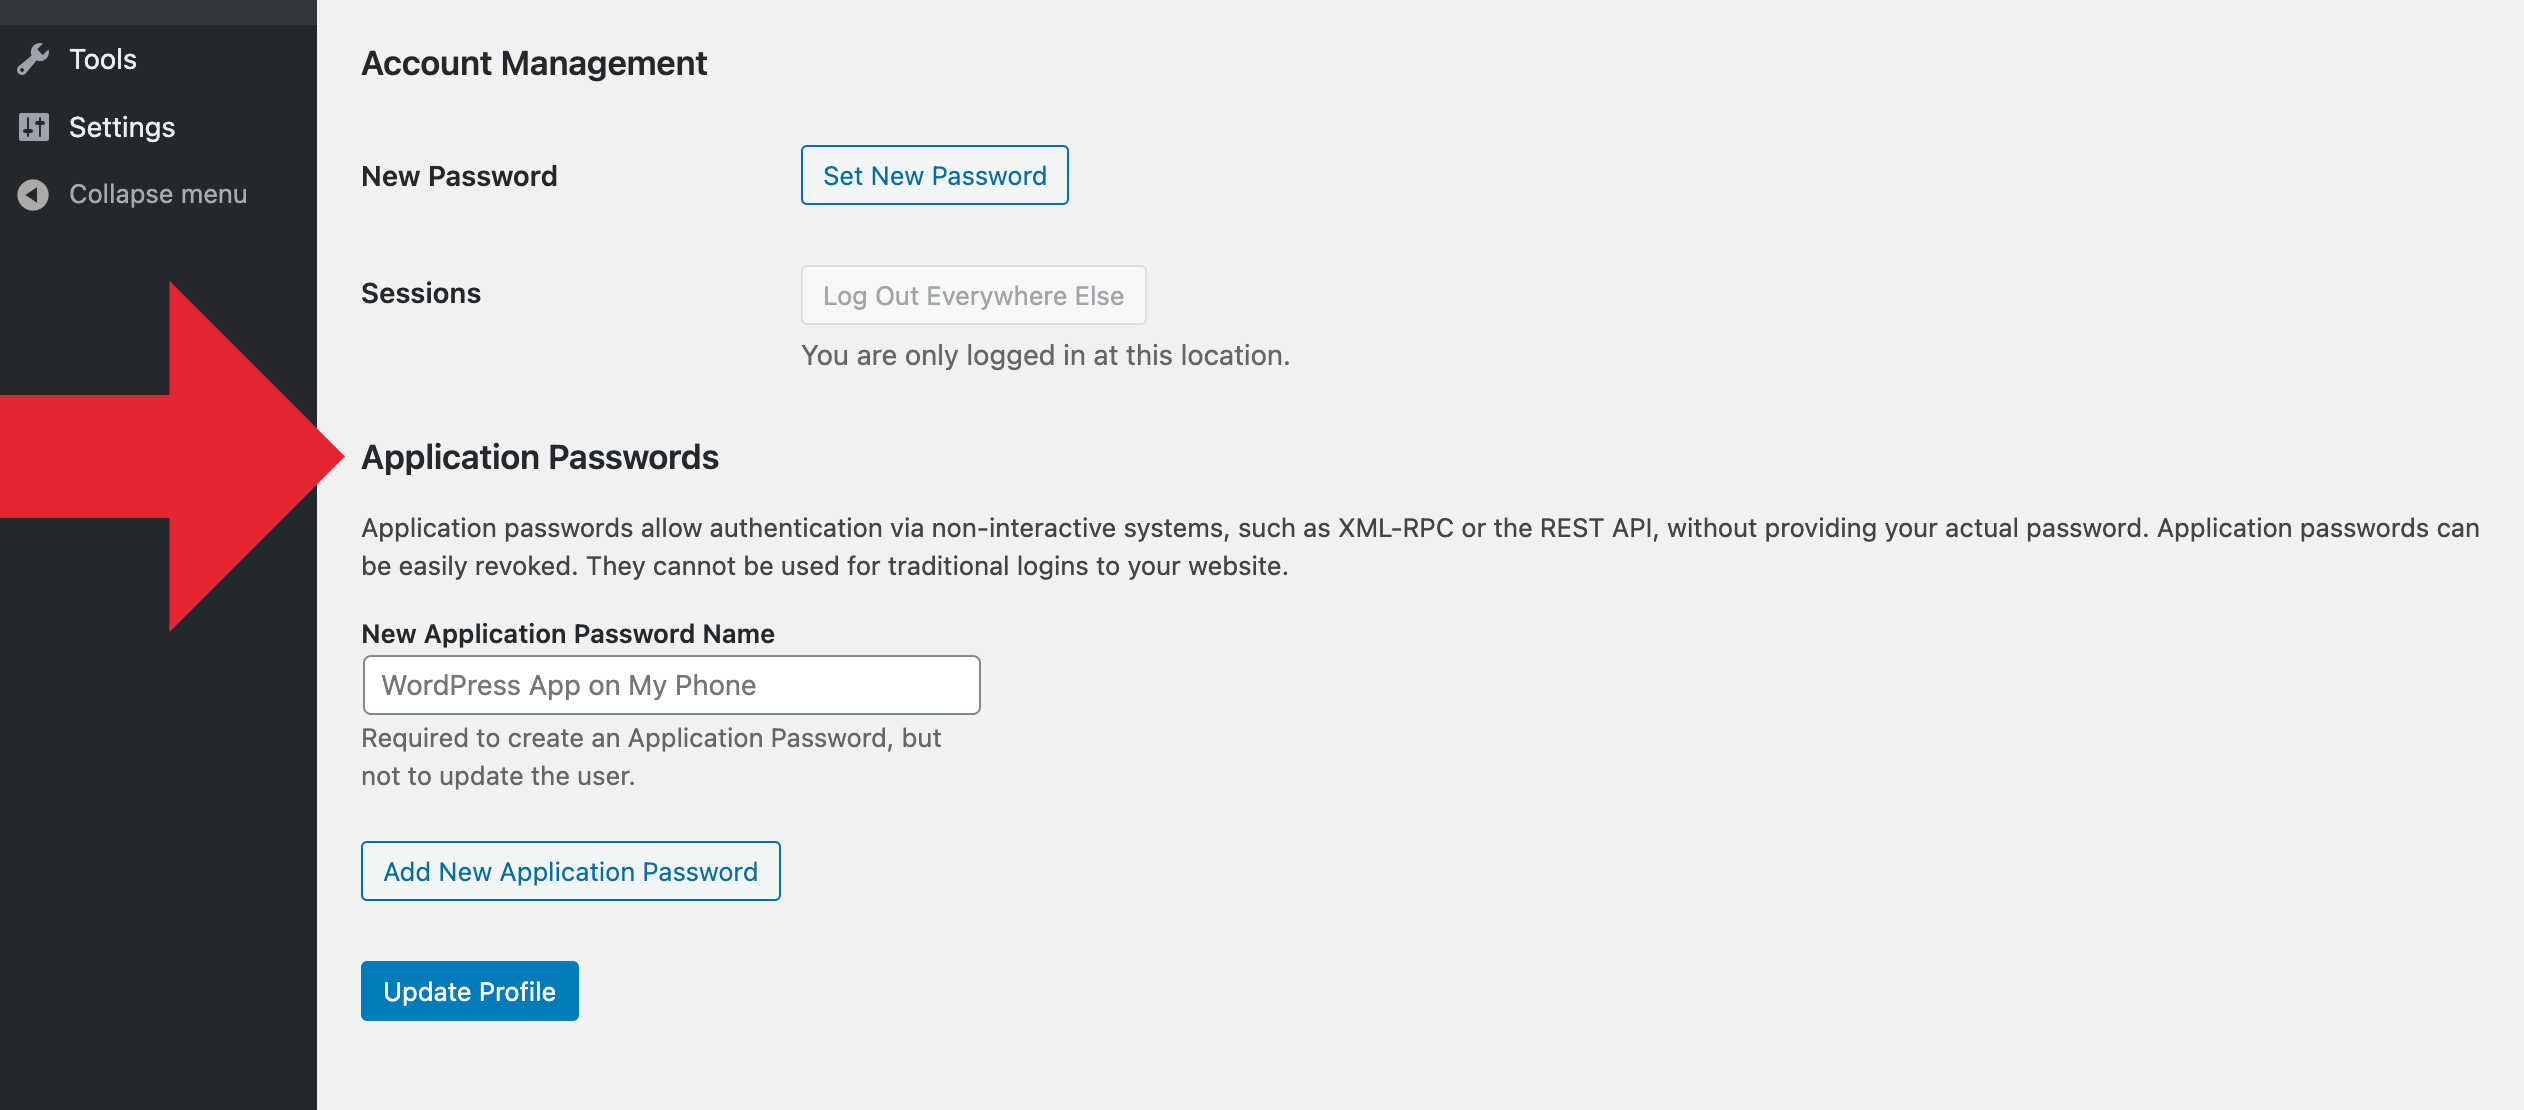
So what causes the “authorization header” error? WordPress version 5.6 introduces Application Passwords. This feature enables authenticated users and apps to interact with your site. Application Passwords started as an awesome free plugin that could be added to any WordPress site as needed. Now it’s been integrated into WordPress core so all sites must have it, whether needed or not.

DigWP Tip: If you have no need for Application Passwords, you can disable them easily with my free plugin, Disable Application Passwords.

WordPress users may be familiar with the new “Application Passwords” settings that are displayed on the Profile screen of every registered user. If you have yet to check it out, go take a look at the bottom of any “Edit User” screen. Here is a screenshot of how it looks in WordPress 5.6:

Application Passwords SettingsWP menu ▸ User Profile/Edit User ▸ Application Passwords settings. Click for full-size image.

That’s all great, but what most WordPress users probably are not aware of, is that the new Application Passwords feature brings changes to the WordPress Permalink rules located in the site’s .htaccess file. The changes are required for WordPress and Application Passwords to work properly.

.htaccess changes in WP 5.6

Here is the new line that is added to WordPress Permalink rules (via .htaccess) in version 5.6:

RewriteRule .* - [E=HTTP_AUTHORIZATION:%{HTTP:Authorization}]

This line helps to handle the Authorization header for HTTP requests coming from any approved third-party applications. Without proper handling of the Authorization header, apps will not be able to connect with your site.

So for sites using outdated Permalink rules, the above new line will be missing from .htaccess. This causes errors when WordPress tries processing requests. The Site Health error happens because WordPress expects certain authorization headers that are not included with the request.

As of now, here is what the WordPress Permalink rules look like in the site’s .htaccess file:

# BEGIN WordPress
# The directives (lines) between "BEGIN WordPress" and "END WordPress" are
# dynamically generated, and should only be modified via WordPress filters.
# Any changes to the directives between these markers will be overwritten.
<IfModule mod_rewrite.c>
RewriteEngine On
RewriteRule .* - [E=HTTP_AUTHORIZATION:%{HTTP:Authorization}]
RewriteBase /
RewriteRule ^index\.php$ - [L]
RewriteCond %{REQUEST_FILENAME} !-f
RewriteCond %{REQUEST_FILENAME} !-d
RewriteRule . /index.php [L]
</IfModule>

# END WordPress

Notice the E=HTTP_AUTHORIZATION rule added right up front there. When that line is included as shown here, the Site Health “authorization header” error should not happen.

DigWP Tip: For a complete guide to Apache/.htaccess, check out my book .htaccess made easy. Features an entire chapter covering all things WordPress :)

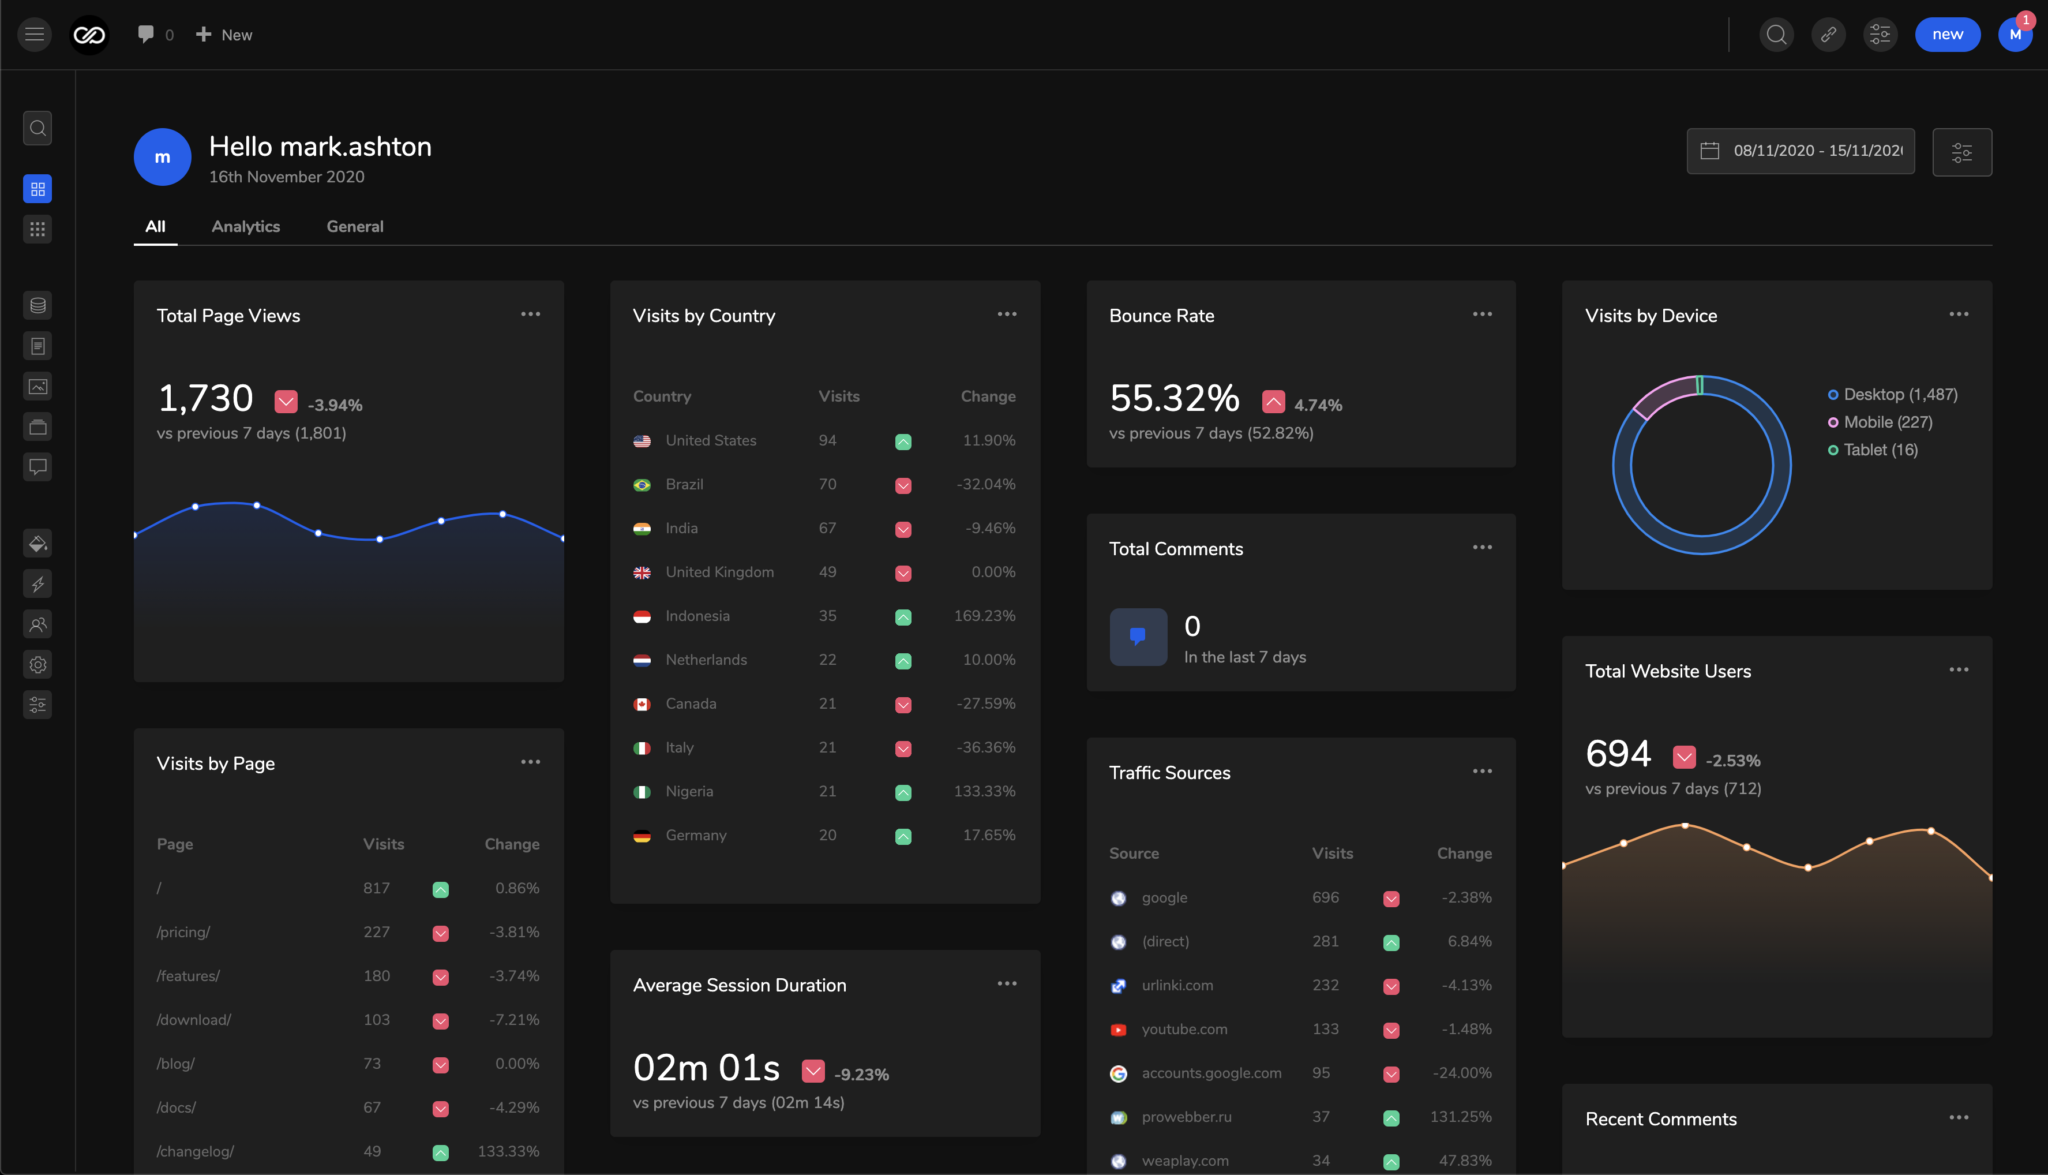
Admin 2020 Version 2 Introduces New Lite Version, Better Plugin Compatibility, and Modular Architecture

Six months ago, Admin 2020 captured the attention of WordPress users with its fresh approach to skinning the admin screens. Version 2 of the plugin has been completely rewritten to support a modular architecture so users can enable or disable features, or selectively enable them by user role or username. Some users prefer the default menu but want to be able to categorize their media into folders with the plugin’s CMS-friendly architecture for organizing media and posts. This update significantly improves performance for those who don’t require the analytics, admin bar, menu, or other features.

The plugin now has a new settings interface that is less cluttered than the previous version.

“Admin 2020 started off as a WordPress admin theme, and that was always at the core of the plugin,” developer Mark Ashton said. “As we grew, we added more and more features on top of that and it became very difficult in its current iteration to separate those feature sets, or disable some features and let others carry on.”

Version 2 also greatly improves compatibility with other plugins. Ashton was spending a lot of time adding support for other plugins, which slowed down development. The new approach to compatibility causes fewer styling conflicts and works without having to add custom stylesheets for other plugins. Prior to this version, Admin 2020 disabled 90% of WordPress admin styling and applied its own.

“While this gave us complete control over layouts and styling, it was one of the reasons we had to spend a lot of time adding support for other plugins,” Ashton said. “So for version 2, we kept the WP styling (most of it anyway) and applied a lightweight theme on top of it. The end result is a theme that is more refined, quicker, and the most compatible we have ever put out.
Usually the only plugins we have problems with these days are the ones that actively disable non standard WP scripts and styles, which obviously breaks admin 2020’s layout.”

In the interest of keeping Admin 2020 lightweight, the plugin now uses a custom build of the UIkit framework that is more tailored to its specific use case.

“Instead of having uikit as a base, and then layering on top of it, we just tailored it to suit the plugin needs and thanks to the wonders of scss it is an incredibly easy framework to modify,” Ashton said. “Doing this also allowed us to support RTL much easier which was a very common feature request.”

New Admin 2020 Lite Version Offers Basic Features, Coming to WordPress.org in 2021

Admin 2020 is now available on the plugin’s website in a Lite version for free. In recognition of WordPress.org’s undeniable force as a distribution channel, Ashton is considering changing his previous strategy of pursuing a fully commercial model to embrace the idea of marketing a free plugin with a paid upgrade.

“Admin 2020 has grown so much since we launched in May this year and it’s no longer just an admin theme,” Ashton said. “In fact, we see it as more of an admin extension now that also has a theme. Because of this, we felt there are now enough features to be able to offer the lite and pro versions.”

With the new modular system in version 2, the free and commercial versions are the same plugins, except the lite version has the paid modules removed.

“This means the development of the two versions is synched and updates, new features and bug fixes all rollout at the same time,” Ashton said. “For the time being we are going to stick to our own distribution channel just to keep everything streamlined, but releasing through wordpress.org is something we have planned for next year.”

Launching a new business during a pandemic is no easy feat but Ashton has grown Admin 2020’s user base to 3,642 active installations and is still looking to hire someone to assist in developing and maintaining the plugin.

“This has grown dramatically since the release of version 2 and will likely be around 5,000 or more in a week due to the sales from the Black Friday/Cyber Monday event,” he said.

Next up on the roadmap, Admin 2020 users can expect more customization options and deeper integration with WooCommerce. Ashton is currently working on the custom admin pages feature set that will allow users to create admin pages using the block editor and some of the more popular page builders.

“We are also working on expanding our WooCommerce integration with the idea of having a full suite of cards and data available on the overview page to help better visualize your business and sales,” Ashton said. “We are also going to be changing admin 2020’s name towards the end of the year but I won’t say what to just yet.”

How to Troubleshoot WordPress, Easy Step-by-Step Guide

Easily hands down the most common thing that I find myself explaining to WordPress users is how to troubleshoot WordPress in order to find the cause of some issue. And it makes sense if you think about it. WordPress and all of its plugins and themes are made of code. And code is a complex thing. The more code you add to a site, the more likely it is for bugs and issues to happen. And when they do, it can be confusing and frustrating to the average user.

Fortunately, there is a reliable, proven technique for figuring out why any given problem is happening. It's referred to as "troubleshooting", a very powerful tool that everyone should have in their belt. This DigWP tutorial explains two methods of troubleshooting using plain, easy to follow steps.

Troubleshooting is something that literally anyone can do. It is a straightforward, proven process that helps millions of people diagnose problems every day.

Table of Contents

Two different approaches

When it comes to troubleshooting WordPress, there are two ways to do it:

  • From the top down
  • From the ground up

Each of these methods uses basic logic to eliminate variables and determine causality. As one might imagine, either technique has its own pros and cons. In a nutshell, most common method is top-down, which is used to quickly diagnose plugin/theme conflicts, etc. The ground-up method is a more rigorous, clinical approach that generally requires more time.

Let's take a closer look at each..

Troubleshooting from the top down

Top-down testing is basically:

Temporarily deactivating each of your other plugins one at a time, re-testing the problem/issue after each, until the issue no longer happens. This tells you as quickly as possible which plugin is interfering with normal functionality.

Pros of top-down testing:

  • Can be the fastest way of diagnosing issues

Cons of top-down testing:

  • May not be feasible to test on a live site
  • Can be complicated if lots of other plugins used on site
  • May require lots of time if using lots of other plugins

To understand how it works, let's go thru an example..

Example

Let's say that you have a plugin named "Amazing Plugin". It is not working correctly, and you suspect there is some conflict with one of your other plugins or theme. You want to find out why the issue is happening, and hopefully get it resolved. Before contacting the plugin provider, take a few minutes to do some basic testing of your plugins and theme. Doing so will help the support team understand and provide help as quickly as possible.

Here are the magic steps to troubleshoot your setup using top-down troubleshooting..

Troubleshooting steps

To troubleshoot why "Amazing Plugin" is not working using top-down testing, it is necessary to test all other plugins and the theme. It doesn't matter which you start with, for this tutorial we'll start with testing the other plugins, as that is where I've found most conflicts can happen.

Note: The steps below are for testing a plugin called "Amazing Plugin". The steps also work if you are testing a theme. Just replace "Amazing Plugin" with "Amazing Theme" and you're good to go.

Test your other plugins

  1. Deactivate one of your other plugins
  2. Re-test if Amazing Plugin is working properly
  3. If Amazing Plugin now works, stop; you have found the conflict
  4. Otherwise, if Amazing Plugin still is not working, deactivate another one of your other plugins
  5. If Amazing Plugin now works, stop; you have found the conflict
  6. Otherwise, if Amazing Plugin still is not working, deactivate another one of your other plugins
  7. Repeat this process for all of your other plugins, or until Amazing Plugin is working properly

At this point, if the Amazing Plugin is working normally, then the cause of the issue is whichever plugin that was last deactivated. Otherwise, if you get through deactivating all of your other plugins and Amazing Plugin still is not working correctly, it is time to repeat the test with your theme.

Test your theme

If you follow the above steps and deactivate all of your other plugins, and the problem remains, it's time to repeat the process to test your current theme:

  1. With all of the other plugins deactivated, switch to one of the default WP themes (e.g., Twenty Twenty)
  2. With the default theme active, try retesting the Amazing Plugin
  3. If Amazing Plugin now works properly, you have found the issue: there is some conflict with your theme
  4. Otherwise, if you have deactivated all other plugins and switched to the default theme, and the issue persists, then there is something else that is interfering

Hopefully at this point, you have found out which plugin or theme is interfering. If not, then further sleuthing is required to solve the mystery.

Beyond plugins and theme

After completing the above troubleshooting steps, in 99% of the cases I've seen, the conflicting plugin (or theme) will be found. If that is not the case, then one of the following must be true:

  • Further testing/troubleshooting is required
  • The issue is with the plugin itself
  • The issue is with WordPress core
  • Something else outside of WordPress
  • Some combination of the above

So with all other plugins deactivated, and using the default WordPress theme, if the issue persists, then there may be a conflict with specific plugin settings, server configuration, network interference, or even WordPress itself (although rare, in my experience). In this case, further testing is required in order to find (and hopefully resolve) the issue.

This is where ground-up testing can be useful. Instead of trying to reverse-engineer your entire current site, you can start from scratch using the ground-up technique, which gives you a "clean slate" that eliminates all other variables. Let's take a look..

Troubleshooting from the ground up

Ground-up testing is basically:

Set up a new WordPress installation, leave everything at the defaults (e.g., plugins, theme, and settings), and then install the plugin or theme that you want to troubleshoot. This enables you to verify that the plugin works normally, without interference from any other plugins, theme, or settings.

Pros of ground-up testing:

  • Gives you a clean slate to work with
  • Does not interfere with your other/original site
  • Provides a baseline where the plugin works correctly

Cons of ground-up testing:

  • Takes more time to set up another WP install
  • May require transferring of plugin license(s)

Let's look at a quick example..

Example

For example, say you have a plugin named "Super Duper". It is not working correctly, and you suspect there is some conflict with one of your other plugins or theme. You want to find out why the issue is happening, and hopefully get it resolved. Before contacting the plugin provider, take some time to do some basic troubleshooting. Doing so will help the support team understand and provide help as quickly as possible.

Troubleshooting steps

To troubleshoot why the Super Duper plugin is not working using ground-up troubleshooting, follow these steps:

  1. Set up a new WordPress installation
  2. Leave the plugins, theme, and settings at default values
  3. Install only the plugin (or theme) that is not working

After following these steps, you can verify that the plugin or theme you are testing works normally on default WordPress. This is your baseline: the plugin works on default WordPress. IF that is not the case, then you have found a bug with the plugin (or theme) itself. And should be reported to the plugin developer.

Otherwise, if the plugin is working properly on default WordPress, then the problem is not a bug with the plugin, but rather a bug with your particular setup, configuration, etc. So further testing is required..

Test your other plugins

Once you verify that the plugin is working properly on default WordPress, you can begin troubleshooting by installing and activating each of your other plugins, one at a time. You want to re-test the problematic plugin after adding each new plugin. At some point, as you are doing this, the issue will return, and you will know exactly which plugin is breaking things.

If you get through adding all of your other plugins, and the issue has not reappeared, the next step is to test your theme.

Test your theme

If you get through adding all of your other plugins without the issue reappearing, then move on to the theme. Try installing and activating whichever theme you are using on the other site and re-test the issue again. If the theme breaks things, then you have the information you need to either:

  • Report the issue to both plugin and theme developers
  • Troubleshoot within the theme itself (or hire someone to do it for you)

And of course, if you get to this point and the issue has not resurfaced, then yep you guessed it, more digging is required.

Beyond plugins and theme

If you get through testing each of your plugins and theme, and the issue does not return, then there must be something else — some other difference between your original WordPress installation and the test/default installation — that is causing the problem.

In this case, the next step is to figure out the specific differences between the two WordPress sites. For the sites to behave differently (i.e., one showing the issue and the other working normally), there must be some difference between them. Your job is to continue the troubleshooting process by eliminating variables until the issue returns.

Take-home message

The take-home message for this tutorial is that troubleshooting is something that literally anyone can do. It is a straightforward, proven process that helps millions of people diagnose problems every day. And more importantly, a bit of troubleshooting provides valuable information that can help the plugin or theme provider to understand and hopefully resolve any issue.

Remember, the people who develop your WordPress plugins and themes love to help you, but they are only human. They do not possess a crystal ball or Palantír that magically reveals to them exactly what is happening on any given site.

Seriously none of us have anything like that.

We have no idea what's happening on your site unless you tell us. So by doing some basic troubleshooting, you can provide the developer precise information, increase the chance of getting the issue resolved quickly, and benefit from better understanding of your own website.

Going further..

For a more in-depth troubleshooting tutorial, check out my post at Perishable Press: The Art of Troubleshooting WordPress. That goes into much more depth, plus provides all sorts of tips and tricks, etc.

Thanks for reading and happy troubleshooting.


Is it okay to use plugins that are not current with latest version of WordPress?

People often ask me whether it is safe to run plugins that are not tested with the latest version of WordPress. And it's a good question, because software in general is something that you want to keep current and updated with all the latest. For WordPress plugins however, there are many plugins that simply don't need to be updated with each new version of WordPress.

The answer? It depends..

A safe answer for the general case would be that, unless there are known security or other outstanding issues, it may be fine but really depends on the plugin. For example, the original Subscribe to Comments plugin once went like 10 years without an update and kept working great. So even though it was many versions behind ("not tested"), the plugin had many happy users with no issues for years.

Ultimately you will need to do a little research to determine whether or not a particular plugin is safe for your site.

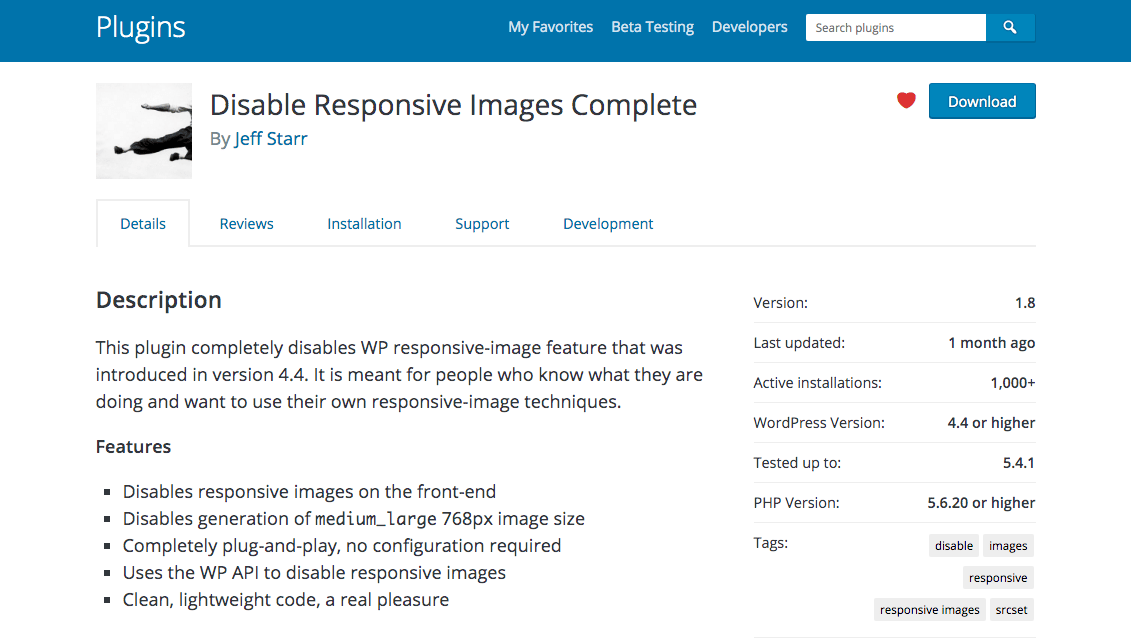
Why? Because many plugins are simple and use only well-established core WordPress functionality. For example, my plugin Disable WordPress Responsive Images contains fewer than 10 lines of code and uses two core hooks and some basic PHP logic. The code itself has not changed in over two years, and is safe to run on any version of WordPress 5.0 or better.

The difference is that some plugins (such as my own) are tested and updated with each WordPress update. So the changelog is kept current with everything even though none of the code may change from one version to the next.

That is why having a current readme.txt/changelog is so critical to plugin success. It eliminates the guesswork and saves the user time. Otherwise the infamous "hasn't been tested" warning is displayed on the plugin homepage at WordPress.org:

This plugin hasn't been tested with the latest 3 major releases of WordPress. It may no longer be maintained or supported and may have compatibility issues when used with more recent versions of WordPress.

You've seen that right? It is displayed for any plugin which has a readme.txt file that has not been updated for at least three major versions of WordPress.

The warning is helpful but does not tell the user whether or not the plugin is safe to use. There "may" be issues or there may not be issues. The plugin may be abandoned or may not be abandoned. It's just a "heads up" letting you know, essentially, that the plugin developer has not checked in with the plugin for at least three major versions of WordPress. Which is around a year or so.

The warning message essentially says, hey the developer of this plugin has not checked in for a while.

The warning message is NOT saying that there is any particular problem with the plugin, or that you should not use it. It is only telling you that the developer may be lazy or busy or whatever, and has not taken the time to check in and update the plugin or at least bump the version number in the readme.txt.

Subscribe to Comments WP Plugin"This plugin hasn't been tested" warning message for the Subscribe to Comments plugin

So the plugin may or may not work perfectly on the latest version of WordPress, even if its homepage displays the "not been tested" warning. This is why there is no one-size-fits-all answer to the question, "Is it okay to use plugins that are not current with latest version of WordPress?" Because it depends on the plugin.

As WordPress.org forum moderator Jan Dembowski clearly explains:

Because it's unnecessary to update the majority of plugins. The time of the last update does not mean anything to users nor does it mean that that plugin does not work or has any issues with the code.

Jan goes on to say that "it is nice when authors update the 'Tested up to' field to let users know that it works with newer versions but aside from that, this suggestion would generate a lot of work, punish authors and most importantly deprive users of plugins for a bad idea."

Determining if a plugin is safe to use

If you're a plugin developer, the easiest way to verify plugin functionality is to test it locally and examine the code.

For everyone else, and maybe developers too, you're gonna need to do some research. Here are some things that may help determine whether or not a plugin that is not current with latest WordPress is safe to use:

  • Look at the plugin's changelog (under the "Development" tab)
  • Post a question on the plugin's support forum
  • Read thru some posts in the plugin support forum
  • Contact the developer directly and ask if the plugin is safe to use
  • Search around online for other opinions and information
  • Examine the plugin source code, or hire a developer to do it
  • Test the plugin on a default installation of WordPress
  • Check the site error/debug logs for any signs of errors, warning, etc.

With a bit of effort, you can put the pieces together and get a clear picture of whether or not some "not current" plugin is safe to use.

If there is any doubt after a bit of research, do not use the plugin. Find another.

Also worth mentioning, if you notice any issue with the plugin, you can help the WP community by posting about the problem in the plugin's support forum at WordPress.org. Clearly explain the issue and any relevant information. Even if the plugin developer does not respond, maybe someone else in the community will. And if nothing else, your post may help others save some time with research and testing.

About the readme.txt file

The WordPress Plugin Directory uses the readme.txt file to determine whether or not to display the ominous "not been tested" warning on the plugin homepage. Each plugin includes a readme.txt file that includes information that looks like this:

Plugin Name: Disable Responsive Images Complete
Plugin URI: https://perishablepress.com/disable-wordpress-responsive-images/
Description: Completely disables WP responsive images
Tags: responsive, images, responsive images, disable, srcset
Author: Jeff Starr
Contributors: specialk
Requires at least: 4.4
Tested up to: 5.4
Stable tag: 1.8
Version: 1.8
Requires PHP: 5.6.20
License: GPL v2 or later

Notice the "Stable tag", "Tested up to", and "Version"? That all translates into the helpful information that is displayed on the plugin homepage. For example, the above readme header is converted to the following sidebar information on the plugin homepage at the WordPress Plugin Directory:

Disable Responsive Images Complete

The information displayed in the sidebar is super useful when determining whether or not the plugin is safe and healthy. If anything looks out of place or otherwise lacking, feel free to pass on the plugin and find something else.

For plugin developers

From one plugin dev to another, take a few moments for each major WordPress release and test/update your plugins. If the plugin does not require any changes, then at least bump the minimum-required and stable tags. It only takes a moment and definitely helps people in the community decide whether or not your plugin is safe to use on their site.


Which Pricing Model Do You Prefer: One-Time or Recurring?

For a long time, premium WordPress plugins and themes were sold as a one-time payment. So for example, if you wanted to buy a new WordPress theme, you would make a single purchase and own the theme indefinitely, with no future payments due. Then somewhere along the way, a recurring pricing model became popular. These days, it is very common for themes and plugins to be sold via recurring payment scheme. So for example, if you want to use some awesome pro plugin or theme, you pay an annual or in some cases monthly fee.

Different Pricing Models

For WordPress products, like plugins and themes, there are myriad pricing models available:

  • Free — no purchase required, use product indefinitely
  • Freemium — free for basic features, pay to unlock more
  • Trial-Based — free to use for limited time, then time to pay
  • One-time Payment — pay once and own/use the product indefinitely
  • Recurring Payment — pay every year, month, or other interval

You can find examples of each of these pricing models by simply shopping around for plugins and themes. The same thing is true for software and digital products outside of the WordPress marketplace. For example, a few years ago Adobe switched from one-time payment to a subscription-based plan, where you pay a monthly or yearly fee to use Photoshop, Illustrator, et al.

There also is a more subtle, sort of middle-of-the-road pricing model: one-time payments for a specific version of the software. For example, if you purchase apps like MAMP Pro, 1Password, Carbon Copy Cloner (a few examples that come readily to mind), the initial purchase is one-time, non-recurring. But you only get updates for one or two major versions. So if you purchased MAMP Pro version 4.0, you get free updates for all version-4 releases, like 4.1, 4.2, 4.3, etc. But then you have to pay again for version 5.0 and beyond.

Regardless of which pricing model you're talking about, ultimately it comes down to either paying only once or paying multiple times.

So my question for you: what is the BEST pricing model for WordPress plugins and themes?

As some of you may know, I strongly prefer to own the plugins that are used on my sites. I do not like the idea of having to pay more every year. It's probably because I am such an "old school" developer who is accustomed to one-time, flat-fee payments for scripts, plugins, and themes. In fact, I sell my own premium WordPress plugins using the one-time (non-recurring) pricing model.

Most if not all of my direct competitors sell their plugins using the recurring payments model. So users will have to pay more every year just to continue receiving updates and so forth. In my mind, this benefits the seller more than the customer. Whereas one-time purchases tend to benefit the customer more than the seller. But this is my own biased opinion, so I want to ask..

What do YOU think?

I think the most popular/no-brainer answer is that "there is no "best" pricing model" that applies to all products. Rather it depends on the nature of the product, scope of functionality, and other variables. Everything has to be factored in: development, support, marketing, the whole nine yards.

What do YOU think? Do you like paying more every year or month for plugins and scripts? Should plugins be considered more of a SaaS type deal? Is there a happy middle ground? Share your thoughts in the comments below!


WordPress Designers Explore Proposal to Simplify WP Admin Navigation

The admin can be intimidating to navigate if you’re just getting started with WordPress. After installing a few plugins, top-level menu items begin to pile on. This adds even more complexity to grapple with in a narrow space with long lists of items hidden behind flyout menus that make managing WordPress on mobile a frustrating experience.

The admin dashboard design hasn’t changed significantly since the MP6 plugin was merged into WordPress 3.8 in 2013. This project brought updated typography and improved contrast to the admin but didn’t tackle the increasing complexity of admin navigation.

A new proposal on trac aims to simplify the left sidebar navigation to improve accessibility, usability, and scalability by replacing the flyouts with accordion menus. Designer Dave Martin shared some mockups originally created by Joen Asmussen, and describes them as “a very early, exploratory concept.”

Martin listed several reasons for exploring a new design, including the inaccessibility of the hover/flyout menus and how poorly they scale on mobile interfaces. He also cited the abundance of top-level menu items that are rarely used, which he said contributes to the cognitive weight of admin navigation by still being permanently visible.

The major changes included in this proposal include the following:

  • Flyout menus are replaced with accordion behavior. This scales all the way from mobile to desktop, and affords better accessibility.
  • Menu is made 80px wider (240px vs. 160), affording a 14px minimum font size for all items, perhaps bigger icons in the future, more relaxed spacing, enhancing usability and accessibility.
  • Sidebar is grouped in major sections, “Site”, “Design”, “Tools” and “Manage”.
  • “Updates” are moved to a subsection of “Manage”, making Home a single item.
  • Items related to content on your site (such as “Posts” and “Pages”) are moved under “Site”.
  • Clicking major menu items just opens or closes the accordion, as opposed to go directly to the first subsection. This unifies the mobile and desktop behavior. You can keep the accordion open if you use it all the time (each click will save state, so you’ll see the same open/closed sections upon page refresh).
  • All “Settings” subsections are moved under “Manage”, along with “Plugins & Blocks” and “Users”.
  • Separators group major categories, like “Site” and “Design” together
  • Dashboard is renamed “Home”, because all of WordPress is a Dashboard, and “Home” is where you can get an overview at a glance.

WordPress core committer John Blackbourn commented on the proposal, recommending further exploration of what the menu could look like for different user roles and whether that might affect the appearance, grouping, and behavior of the menu items. For example, roles with more limited publishing capabilities, such as a subscriber, would see very few menu items.

There’s also a bit of discussion regarding the use of the word ‘Site’ where some might better understand that section as ‘Content.’ As this is just an initial mockup, nothing is set in stone and many iterations will likely follow.

Even with many changes expected as the concept evolves, the proposed design significantly reduces cognitive load, especially for new users who may not be as familiar with the admin menu. An updated admin navigation design might lend itself well to being tested as a feature plugin. As with any major change in WordPress, there are many considerations for how it will affect plugin developers. Major visual overhauls like this are exciting, but it takes time to get it right. This proposal already shows a lot of promise but needs more feedback and participation from diverse user groups across the WordPress community.

Official Resources for the Gutenberg Block Editor

Just a quick post to share some recommended useful resources for anyone working with the new Gutenberg Block Editor. Our book Digging Into WordPress now links to this post, so readers can learn more and dive deep into Gutenberg. Or just bookmark for future reference. What does that mean? It means that this page will be updated with any new useful and official resources. And by "official" just means the information is sourced/hosted at WordPress.org.

Learn more about Gutenberg

There are many official posts that are useful in specific contexts. This list focuses on just the main resources for learning more about Gutenberg Block Editor. Starting points for digging in and branching out.

Any one of these resources will open many doors for further learning and exploration of the Gutenberg Block Editor and related WordPress features.

Gutenberg Alternatives

The Gutenberg Block Editor has come a long way since it first began as a plugin. But not everyone is ready for the changes. Some folks like myself prefer the original "classic" editor. So for anyone looking for alternatives to Gutenberg, here are some resources that may be useful.

  • Classic Editor — official plugin by the WP team to restore the Classic Editor, already over 1 million active installations.
  • Disable Gutenberg — free WP plugin that completely disables all traces of Gutenberg and restores the Classic Editor. Includes robust options for custom configuration and selective enabling of the Block Editor.
  • ClassicPress — the new "Gutenberg-free" version of WordPress (forked at WP 4.9) that's focused on providing a reliable, consistent CMS.

Or if you are a developer and would like to know how to disable Gutenberg or selectively enable the Block Editor, check out these DigWP tutorials:

Plus there are lots of other plugins now available to help you configure, customize, and disable Gutenberg. Also lots of plugins to help you customize and extend the Block Editor, visit the WordPress.org Plugin Directory to explore the possibilities.

Bonus tip

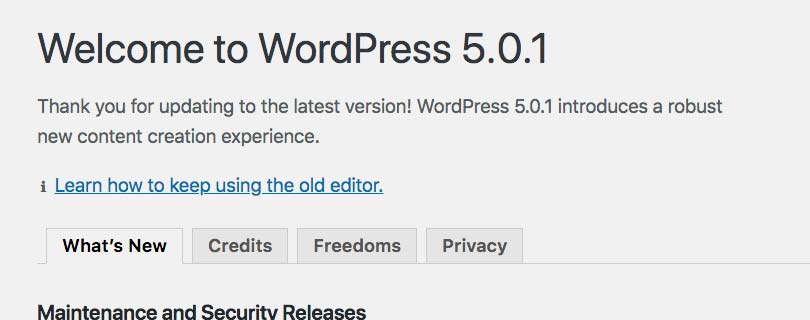
Also useful if you want to look at the "Welcome" screen for WordPress 5.0 (or whichever version you are using), just enter the following URL while logged into your WordPress site:

https://example.com/wp-admin/about.php?updated

Or if you have WordPress installed in a subdirectory, say, /wordpress/, you would enter this URL instead:

https://example.com/wordpress/wp-admin/about.php?updated

Then you would replace "example.com" with your actual domain. That should get you to the "Welcome" screen for your current version of WordPress. So for awhile you can get a broad look at Gutenberg, how it works, features, etc.

WordPress 5.0 Welcome Screen

Send any suggestions for useful/official Gutenberg resources that should be added to this post, please comment or contact direct, thank you! :)


How to Selectively Enable Gutenberg Block Editor

Previously, we covered numerous techniques to disable Gutenberg. For example, you can disable Gutenberg on specific post types, user roles, post IDs, and so forth. But what about doing the opposite and conditionally enabling Gutenberg? For example, if Gutenberg is disabled by default, you could then selectively enable it on whichever post types, user roles, or whatever criteria that's required. So this tutorial explains how to enable Gutenberg using simple WordPress filter hooks. You'll learn how to enable Gutenberg for any single posts, new posts, post meta, categories, tags, and post types. Plus some juicy tips and tricks along the way!

Update! To selectively enable Gutenberg only on certain posts, you can do it without touching any code. My free plugin Disable Gutenberg now provides whitelist options to always use Block Editor on any post IDs, slugs, or titles :)

First: Disable Gutenberg by default

In WordPress 5.0 and beyond, Gutenberg is enabled by default. So if you want to enable Gutenberg everywhere, you don't need to do anything: it just works.

Otherwise, if you want to enable Gutenberg only on specific post IDs, post types, and so forth, you will need to first disable Gutenberg everywhere. To do this, we can use either of the following filter hooks (depending on WP version):

// WP < 5.0 beta
add_filter('gutenberg_can_edit_post', '__return_false', 5);

// WP >= 5.0
add_filter('use_block_editor_for_post', '__return_false', 5);

So choose either or both of these hooks (to support all versions of WP), and add to your theme's functions.php. Or, if you would rather disable Gutenberg and restore the Classic Editor using a plugin, check out Disable Gutenberg, which is super lightweight, flexible, and easy to customize exactly where Gutenberg should be disabled on your site. However you choose to disable Gutenberg, you will need to do so in order for the following techniques to work properly.

Tip: Notice the third parameter (5) in the two filters above? Setting that value makes it possible to override and enable Gutenberg using techniques such as the ones provided below.

Enable Gutenberg for any Post IDs

Once Gutenberg is disabled everywhere, here is an example showing how to enable it only for specific post IDs:

function shapeSpace_enable_gutenberg_post_ids($can_edit, $post) {
	
	if (empty($post->ID)) return $can_edit;
	
	if (1 === $post->ID) return true;
	
	return $can_edit;
	
}

// Enable Gutenberg for WP < 5.0 beta
add_filter('gutenberg_can_edit_post', 'shapeSpace_enable_gutenberg_post_ids', 10, 2);

// Enable Gutenberg for WordPress >= 5.0
add_filter('use_block_editor_for_post', 'shapeSpace_enable_gutenberg_post_ids', 10, 2);

As written, this function will enable Gutenberg on post ID = 1. You can change that as needed in the third line of the function.

Tip: To selectively disable Gutenberg on any post, role, type, and so forth, check out my previous tutorial, How to Disable Gutenberg: Complete Guide.

Enable Gutenberg for new posts

To enable Gutenberg for all new posts, you can do something like this:

function shapeSpace_enable_gutenberg_new_posts($can_edit, $post) {
	
	if (empty($post->ID)) return $can_edit;
	
	$current = get_current_screen();
	
	if ('post' === $current->base && 'add' === $current->action) return true;
	
	return $can_edit;
	
}

// Enable Gutenberg for WP < 5.0 beta
add_filter('gutenberg_can_edit_post', 'shapeSpace_enable_gutenberg_new_posts', 10, 2);

// Enable Gutenberg for WordPress >= 5.0
add_filter('use_block_editor_for_post', 'shapeSpace_enable_gutenberg_new_posts', 10, 2);

As written, this function checks if the user is viewing the post-new.php screen, and if so returns true (to enable Gutenberg).

Tip: Notice the 10 value that these techniques are passing via the add_filter hooks. Why? Remember we set that parameter to 5 when we disable Gutenberg, so by setting it to 10 or any value greater than 5, we easily override the disabling function and thereby enable Gutenberg. It's all about hook priority!

Enable Gutenberg for specific Post Meta

What about enabling Gutenberg Block Editor only on posts that have some specific meta data attached? Easy, here is an example showing how to do it:

function shapeSpace_enable_gutenberg_post_meta($can_edit, $post) {
	
	if (empty($post->ID)) return $can_edit;
	
	if ('Happy' === get_post_meta($post->ID, 'current_mood', true)) return true;
	
	return $can_edit;
	
}

// Enable Gutenberg for WP < 5.0 beta
add_filter('gutenberg_can_edit_post', 'shapeSpace_enable_gutenberg_post_meta', 10, 2);

// Enable Gutenberg for WordPress >= 5.0
add_filter('use_block_editor_for_post', 'shapeSpace_enable_gutenberg_post_meta', 10, 2);

As written, this function checks the current post for a custom field named current_mood with a value of Happy. If it exists, the function then returns true to enable Gutenberg for that post. Note that these examples are kept as simple as possible to help understanding. Much more is possible!

Tip: Notice that we hook the function name into both Gutenberg filter hooks: gutenberg_can_edit_post and use_block_editor_for_post. This means that the function will run in all applicable versions of WordPress. So if you are not worried about supporting older or newer versions of WordPress, you can simply remove one or the other add_filter() functions and done.

Enable Gutenberg for specific categories

Here is an example showing how to enable Gutenberg only for specific categories:

function shapeSpace_enable_gutenberg_post_cats($can_edit, $post) {
	
	if (empty($post->ID)) return $can_edit;
	
	if (has_category(12)) return true;
	
	return $can_edit;
	
}

// Enable Gutenberg for WP < 5.0 beta
add_filter('gutenberg_can_edit_post', 'shapeSpace_enable_gutenberg_post_cats', 10, 2);

// Enable Gutenberg for WordPress >= 5.0
add_filter('use_block_editor_for_post', 'shapeSpace_enable_gutenberg_post_cats', 10, 2);

As written, this function uses WP's has_category() to check if the current post belongs to category 12; if so, true is returned thereby enabling Gutenberg. Of course, you can specify your own category or array of categories, or whatever.

Tip: To check if the current post contains any Gutenberg blocks, we can add this logic to any of our enabling functions: if (has_blocks($post)) return true;

Enable Gutenberg for specific tags

Here is an example showing how to enable Gutenberg only for specific tags:

function shapeSpace_enable_gutenberg_post_tags($can_edit, $post) {
	
	if (empty($post->ID)) return $can_edit;
	
	if (has_tag(50)) return true;
	
	return $can_edit;
	
}

// Enable Gutenberg for WP < 5.0 beta
add_filter('gutenberg_can_edit_post', 'shapeSpace_enable_gutenberg_post_tags', 10, 2);

// Enable Gutenberg for WordPress >= 5.0
add_filter('use_block_editor_for_post', 'shapeSpace_enable_gutenberg_post_tags', 10, 2);

As written, this function uses WP's has_tag() to check if the current post is tagged with tag ID = 50; if so, true is returned thereby enabling Gutenberg. Of course, you can specify your own tag or array of tags.

Tip: Notice the 3rd parameter, 2, passed to either of the add_filter() functions. That specifies the number of parameters passed to the hooked function, which in this case is shapeSpace_enable_gutenberg_post_tags. So if you look at that function, you will see that it accepts two parameters, $can_edit and $post.

Enable Gutenberg for any Post Type

One more for the road! Here is an example showing how to enable Gutenbeg only for specific post types:

function shapeSpace_enable_gutenberg_post_type($can_edit, $post) {
	
	if (empty($post->ID)) return $can_edit;
	
	if ('books' === $post_type) return true;
	
	return $can_edit;
	
}

// Enable Gutenberg for WP < 5.0 beta
add_filter('gutenberg_can_edit_post_type', 'shapeSpace_enable_gutenberg_post_type', 10, 2);

// Enable Gutenberg for WordPress >= 5.0
add_filter('use_block_editor_for_post_type', 'shapeSpace_enable_gutenberg_post_type', 10, 2);

This function is similar to the others, but hook-wise it does something a bit differently. When working with post types, WordPress/Gutenberg provide the following filter hooks for working with Post Types:

// WP < 5.0 beta
gutenberg_can_edit_post_type

// WP >= 5.0
use_block_editor_for_post_type

So we use these recommended hooks to enable Gutenberg for specific post types. Note also that our function currently checks the current post type. As written, it checks for a post type named books; feel free to modify as needed to suit your needs. The possibilities are endless!


About the “Warning! WordPress Encrypts User Cookies” Error

Upgrading from older versions of WordPress is designed to go without a hitch, but depending on the setup and the two versions involved, you may encounter some hangups along the way. For example, if you are upgrading from a version of WordPress older than 3.0, eventually you may encounter the dreaded "Warning! WordPress Encrypts User Cookies" error. This quick DigWP tutorial explains what it is, why it happens, and how to fix the problem asap.

The error message

For those who are experiencing this "encrypted cookie" issue, the error message that's displayed looks something like this:

Warning! WordPress encrypts user cookies ...

This error happens when trying to log in or when you try to do things in the Admin Area. Basically you keep getting logged out for no apparent reason.

Why it happens

Fortunately there is an easy solution for the "WordPress Encrypts User Cookies" error. Open your site's wp-config.php file. Scroll down the file to just after the database credentials. Depending on your version of WordPress, you should find something like this:

/**#@+
 * Authentication Unique Keys and Salts.
 *

..followed by a set of 3, 4, or 8 (depending on WP version) constant definitions. For example, in the latest version of WordPress (5.0), there are EIGHT Unique Keys and Salts, waiting to be filled with random characters:

define('AUTH_KEY',         'put your unique phrase here');
define('SECURE_AUTH_KEY',  'put your unique phrase here');
define('LOGGED_IN_KEY',    'put your unique phrase here');
define('NONCE_KEY',        'put your unique phrase here');
define('AUTH_SALT',        'put your unique phrase here');
define('SECURE_AUTH_SALT', 'put your unique phrase here');
define('LOGGED_IN_SALT',   'put your unique phrase here');
define('NONCE_SALT',       'put your unique phrase here');

The problem is that the number of these keys has changed along with WordPress. For those with better things to do, here is a brief history:

WordPress < 2.6

WP 2.6 has no secret keys:

[ none ]

WordPress 2.6

WP 2.6 has three secret keys:

define('AUTH_KEY',        'put your unique phrase here');
define('SECURE_AUTH_KEY', 'put your unique phrase here');
define('LOGGED_IN_KEY',   'put your unique phrase here');

WordPress 2.7 — 2.9

WP 2.7 thru 2.9 have four secret keys:

define('AUTH_KEY',        'put your unique phrase here');
define('SECURE_AUTH_KEY', 'put your unique phrase here');
define('LOGGED_IN_KEY',   'put your unique phrase here');
define('NONCE_KEY',       'put your unique phrase here');

WordPress >= 3.0

Versions of WP greater than or equal to 3.0 have eight secret keys:

define('AUTH_KEY',         'put your unique phrase here');
define('SECURE_AUTH_KEY',  'put your unique phrase here');
define('LOGGED_IN_KEY',    'put your unique phrase here');
define('NONCE_KEY',        'put your unique phrase here');
define('AUTH_SALT',        'put your unique phrase here');
define('SECURE_AUTH_SALT', 'put your unique phrase here');
define('LOGGED_IN_SALT',   'put your unique phrase here');
define('NONCE_SALT',       'put your unique phrase here');

What does this mean? It means that when you upgrade from an older version of WordPress, the number of Unique Keys and Salts may not be the same. And so, if the latest version of WordPress is expecting eight secret-key constants, but your site's wp-config.php only contains four constants, you're gonna get the "WordPress Encrypts User Cookies" error.

The solution

To resolve the "encrypts cookie" error, you need to update your site's Unique Keys and Salts (secret keys), so as to provide the correct number of key constants. So if your old WP site only has three key constants, and you upgrade to WordPress 5.0, you will need to add the five missing constants (for a total of eight), so that WordPress can operate normally and without error.

Example: Upgrade from any version of WP, to the latest version of WP

If you are upgrading from any version of WP to the latest version, you can fix the error by simply replacing your existing secret keys with a brand new set. To do so, visit the WordPress Keys & Salts Generator, copy the results, and replace your existing keys with the freshly generated code. Then save changes, upload to your server and done. Once the new, complete set of keys is added, the encrypted-cookie error will disappear.

Other upgrade paths

As explained previously, your site's wp-config.php file should have the same number of constants that is expected by WordPress. Although ideally everyone everywhere always would update to the latest version of WordPress, we know that's just not a realistic expectation.

So for any other "non-latest" upgrade path that you may be taking, just make sure that your new version of WordPress has the correct number of secret keys defined. Check out the previous section for a list of WP versions and their respective number of Unique/Key salts.