Building A Video Streaming App With Nuxt.js, Node And Express

Videos work with streams. This means that instead of sending the entire video at once, a video is sent as a set of smaller chunks that make up the full video. This explains why videos buffer when watching a video on slow broadband because it only plays the chunks it has received and tries to load more.

This article is for developers who are willing to learn a new technology by building an actual project: a video streaming app with Node.js as the backend and Nuxt.js as the client.

  • Node.js is a runtime used for building fast and scalable applications. We will use it to handle fetching and streaming videos, generating thumbnails for videos, and serving captions and subtitles for videos.
  • Nuxt.js is a Vue.js framework that helps us build server-rendered Vue.js applications easily. We will consume our API for the videos and this application will have two views: a listing of available videos and a player view for each video.

Prerequisities

  • An understanding of HTML, CSS, JavaScript, Node/Express, and Vue.
  • A text editor (e.g. VS Code).
  • A web browser (e.g. Chrome, Firefox).
  • FFmpeg installed on your workstation.
  • Node.js. nvm.
  • You can get the source code on GitHub.

Setting Up Our Application

In this application, we will build the routes to make requests from the frontend:

  • videos route to get a list of videos and their data.
  • a route to fetch only one video from our list of videos.
  • streaming route to stream the videos.
  • captions route to add captions to the videos we are streaming.

After our routes have been created, we’ll scaffold our Nuxt frontend, where we’ll create the Home and dynamic player page. Then we request our videos route to fill the home page with the video data, another request to stream the videos on our player page, and finally a request to serve the caption files to be used by the videos.

To set up our application, we create our project directory,

mkdir streaming-app

Setting Up Our Server

In our streaming-app directory, we create a folder named backend.

cd streaming-app
mkdir backend

In our backend folder, we initialize a package.json file to store information about our server project.

cd backend
npm init -y

we need to install the following packages to build our app.

  • nodemon automatically restarts our server when we make changes.
  • express gives us a nice interface to handle routes.
  • cors will allow us to make cross-origin requests since our client and server will be running on different ports.

In our backend directory, we create a folder assets to hold our videos for streaming.

 mkdir assets

Copy a .mp4 file into the assets folder, and name it video1. You can use .mp4 short sample videos that can be found on Github Repo.

Create an app.js file and add the necessary packages for our app.

const express = require('express');
const fs = require('fs');
const cors = require('cors');
const path = require('path');
const app = express();
app.use(cors())

The fs module is used to read and write into files easily on our server, while the path module provides a way of working with directories and file paths.

Now we create a ./video route. When requested, it will send a video file back to the client.

// add after 'const app = express();'

app.get('/video', (req, res) => {
    res.sendFile('assets/video1.mp4', { root: __dirname });
});

This route serves the video1.mp4 video file when requested. We then listen to our server at port 3000.

// add to end of app.js file

app.listen(5000, () => {
    console.log('Listening on port 5000!')
});

A script is added in the package.json file to start our server using nodemon.


"scripts": {
    "start": "nodemon app.js"
  },

Then on your terminal run:

npm run start

If you see the message Listening on port 3000! in the terminal, then the server is working correctly. Navigate to http://localhost:5000/video in your browser and you should see the video playing.

Requests To Be Handled By The Frontend

Below are the requests that we will make to the backend from our frontend that we need the server to handle.

  • /videos
    Returns an array of video mockup data that will be used to populate the list of videos on the Home page in our frontend.
  • /video/:id/data
    Returns metadata for a single video. Used by the Player page in our frontend.
  • /video/:id
    Streams a video with a given ID. Used by the Player page.

Let’s create the routes.

Return Mockup Data For List Of Videos

For this demo application, we’ll create an array of objects that will hold the metadata and send that to the frontend when requested. In a real application, you would probably be reading the data from a database, which would then be used to generate an array like this. For simplicity's sake, we won’t be doing that in this tutorial.

In our backend folder create a file mockdata.js and populate it with metadata for our list of videos.

const allVideos = [
    {
        id: "tom and jerry",
        poster: 'https://image.tmdb.org/t/p/w500/fev8UFNFFYsD5q7AcYS8LyTzqwl.jpg',
        duration: '3 mins',
        name: 'Tom & Jerry'
    },
    {
        id: "soul",
        poster: 'https://image.tmdb.org/t/p/w500/kf456ZqeC45XTvo6W9pW5clYKfQ.jpg',
        duration: '4 mins',
        name: 'Soul'
    },
    {
        id: "outside the wire",
        poster: 'https://image.tmdb.org/t/p/w500/lOSdUkGQmbAl5JQ3QoHqBZUbZhC.jpg',
        duration: '2 mins',
        name: 'Outside the wire'
    },
];
module.exports = allVideos

We can see from above, each object contains information about the video. Notice the poster attribute which contains the link to a poster image of the video.

Let’s create a videos route since all our request to be made by the frontend is prepended with /videos.

To do this, let’s create a routes folder and add a Video.js file for our /videos route. In this file, we’ll require express and use the express router to create our route.

const express = require('express')
const router = express.Router()

When we go to the /videos route, we want to get our list of videos, so let’s require the mockData.js file into our Video.js file and make our request.

const express = require('express')
const router = express.Router()
const videos = require('../mockData')
// get list of videos
router.get('/', (req,res)=>{
    res.json(videos)
})
module.exports = router;

The /videos route is now declared, save the file and it should automatically restart the server. Once it’s started, navigate to http://localhost:3000/videos and our array is returned in JSON format.

Return Data For A Single Video

We want to be able to make a request for a particular video in our list of videos. We can fetch a particular video data in our array by using the id we gave it. Let’s make a request, still in our Video.js file.


// make request for a particular video
router.get('/:id/data', (req,res)=> {
    const id = parseInt(req.params.id, 10)
    res.json(videos[id])
})

The code above gets the id from the route parameters and converts it to an integer. Then we send the object that matches the id from the videos array back to the client.

Streaming The Videos

In our app.js file, we created a /video route that serves a video to the client. We want this endpoint to send smaller chunks of the video, instead of serving an entire video file on request.

We want to be able to dynamically serve one of the three videos that are in the allVideos array, and stream the videos in chunks, so:

Delete the /video route from app.js.

We need three videos, so copy the example videos from the tutorial’s source code into the assets/ directory of your server project. Make sure the filenames for the videos are corresponding to the id in the videos array:

Back in our Video.js file, create the route for streaming videos.

router.get('/video/:id', (req, res) => {
    const videoPath = assets/${req.params.id}.mp4;
    const videoStat = fs.statSync(videoPath);
    const fileSize = videoStat.size;
    const videoRange = req.headers.range;
    if (videoRange) {
        const parts = videoRange.replace(/bytes=/, "").split("-");
        const start = parseInt(parts[0], 10);
        const end = parts[1]
            ? parseInt(parts[1], 10)
            : fileSize-1;
        const chunksize = (end-start) + 1;
        const file = fs.createReadStream(videoPath, {start, end});
        const head = {
            'Content-Range': bytes ${start}-${end}/${fileSize},
            'Accept-Ranges': 'bytes',
            'Content-Length': chunksize,
            'Content-Type': 'video/mp4',
        };
        res.writeHead(206, head);
        file.pipe(res);
    } else {
        const head = {
            'Content-Length': fileSize,
            'Content-Type': 'video/mp4',
        };
        res.writeHead(200, head);
        fs.createReadStream(videoPath).pipe(res);
    }
});

If we navigate to http://localhost:5000/videos/video/outside-the-wire in our browser, we can see the video streaming.

How The Streaming Video Route Works

There is a fair bit of code written in our stream video route, so let’s look at it line by line.

 const videoPath = `assets/${req.params.id}.mp4`;
 const videoStat = fs.statSync(videoPath);
 const fileSize = videoStat.size;
 const videoRange = req.headers.range;

First, from our request, we get the id from the route using req.params.id and use it to generate the videoPath to the video. We then read the fileSize using the file system fs we imported. For videos, a user’s browser will send a range parameter in the request. This lets the server know which chunk of the video to send back to the client.

Some browsers send a range in the initial request, but others don’t. For those that don’t, or if for any other reason the browser doesn’t send a range, we handle that in the else block. This code gets the file size and send the first few chunks of the video:

else {
    const head = {
        'Content-Length': fileSize,
        'Content-Type': 'video/mp4',
    };
    res.writeHead(200, head);
    fs.createReadStream(path).pipe(res);
}

We will handle subsequent requests including the range in an if block.

if (videoRange) {
        const parts = videoRange.replace(/bytes=/, "").split("-");
        const start = parseInt(parts[0], 10);
        const end = parts[1]
            ? parseInt(parts[1], 10)
            : fileSize-1;
        const chunksize = (end-start) + 1;
        const file = fs.createReadStream(videoPath, {start, end});
        const head = {
            'Content-Range': bytes ${start}-${end}/${fileSize},
            'Accept-Ranges': 'bytes',
            'Content-Length': chunksize,
            'Content-Type': 'video/mp4',
        };
        res.writeHead(206, head);
        file.pipe(res);
    }

This code above creates a read stream using the start and end values of the range. Set the Content-Length of the response headers to the chunk size that is calculated from the start and end values. We also use HTTP code 206, signifying that the response contains partial content. This means the browser will keep making requests until it has fetched all chunks of the video.

What Happens On Unstable Connections

If the user is on a slow connection, the network stream will signal it by requesting that the I/O source pauses until the client is ready for more data. This is known as back-pressure. We can take this example one step further and see how easy it is to extend the stream. We can easily add compression, too!

const start = parseInt(parts[0], 10);
        const end = parts[1]
            ? parseInt(parts[1], 10)
            : fileSize-1;
        const chunksize = (end-start) + 1;
        const file = fs.createReadStream(videoPath, {start, end});

We can see above that a ReadStream is created and serves the video chunk by chunk.

const head = {
            'Content-Range': bytes ${start}-${end}/${fileSize},
            'Accept-Ranges': 'bytes',
            'Content-Length': chunksize,
            'Content-Type': 'video/mp4',
        };
res.writeHead(206, head);
        file.pipe(res);

The request header contains the Content-Range, which is the start and end changing to get the next chunk of video to stream to the frontend, the content-length is the chunk of video sent. We also specify the type of content we are streaming which is mp4. The writehead of 206 is set to respond with only newly made streams.

Creating A Caption File For Our Videos

This is what a .vtt caption file looks like.

WEBVTT

00:00:00.200 --> 00:00:01.000
Creating a tutorial can be very

00:00:01.500 --> 00:00:04.300
fun to do.

Captions files contain text for what is said in a video. It also contains time codes for when each line of text should be displayed. We want our videos to have captions, and we won’t be creating our own caption file for this tutorial, so you can head over to the captions folder in the assets directory in the repo and download the captions.

Let’s create a new route that will handle the caption request:

router.get('/video/:id/caption', (req, res) => res.sendFile(assets/captions/${req.params.id}.vtt, { root: __dirname }));

Building Our Frontend

To get started on the visual part of our system, we would have to build out our frontend scaffold.

Note: You need vue-cli to create our app. If you don’t have it installed on your computer, you can run npm install -g @vue/cli to install it.

Installation

At the root of our project, let's create our front-end folder:

mkdir frontend
cd frontend

and in it, we initialize our package.json file, copy and paste the following in it:

{
  "name": "my-app",
  "scripts": {
    "dev": "nuxt",
    "build": "nuxt build",
    "generate": "nuxt generate",
    "start": "nuxt start"
  }
}

then install nuxt:

npm add nuxt

and execute the following command to run Nuxt.js app:

npm run dev

Our Nuxt File Structure

Now that we have Nuxt installed, we can begin laying out our frontend.

First, we need to create a layouts folder at the root of our app. This folder defines the layout of the app, no matter the page we navigate to. Things like our navigation bar and footer are found here. In the frontend folder, we create default.vue for our default layout when we start our frontend app.

mkdir layouts
cd layouts
touch default.vue

Then a components folder to create all our components. We will be needing only two components, NavBar and video component. So in our root folder of frontend we:

mkdir components
cd components
touch NavBar.vue
touch Video.vue

Finally, a pages folder where all our pages like home and about can be created. The two pages we need in this app, are the home page displaying all our videos and video information and a dynamic player page that routes to the video we click on.

mkdir pages
cd pages
touch index.vue
mkdir player
cd player
touch _name.vue

Our frontend directory now looks like this:

|-frontend
  |-components
    |-NavBar.vue
    |-Video.vue
  |-layouts
    |-default.vue
  |-pages
    |-index.vue
    |-player
      |-_name.vue
  |-package.json
  |-yarn.lock

Navbar Component

Our NavBar.vue looks like this:

<template>
    <div class="navbar">
        <h1>Streaming App</h1>
    </div>
</template>
<style scoped>
.navbar {
    display: flex;
    background-color: #161616;
    justify-content: center;
    align-items: center;
}
h1{
    color:#a33327;
}
</style>

The NavBar has a h1 tag that displays Streaming App, with some little styling.

Let’s import the NavBar into our default.vue layout.

// default.vue
<template>
 <div>
   <NavBar />
   <nuxt />
 </div>
</template>
<script>
import NavBar from "@/components/NavBar.vue"
export default {
    components: {
        NavBar,
    }
}
</script>

The default.vue layout now contains our NavBar component and the <nuxt /> tag after it signifies where any page we create will be displayed.

In our index.vue (which is our homepage), let’s make a request to http://localhost:5000/videos to get all the videos from our server. Passing the data as a prop to our video.vue component we will create later. But for now, we have already imported it.

<template>
<div>
  <Video :videoList="videos"/>
</div>
</template>
<script>
import Video from "@/components/Video.vue"
export default {
  components: {
    Video
  },
head: {
    title: "Home"
  },
    data() {
      return {
        videos: []
      }
    },
    async fetch() {
      this.videos = await fetch(
        'http://localhost:5000/videos'
      ).then(res => res.json())
    }
}
</script>

Video Component

Below, we first declare our prop. Since the video data is now available in the component, using Vue’s v-for we iterate on all the data received and for each one, we display the information. We can use the v-for directive to loop through the data and display it as a list. Some basic styling has also been added.

<template>
<div>
  <div class="container">
    <div
    v-for="(video, id) in videoList"
    :key="id"
    class="vid-con"
  >
    <NuxtLink :to="`/player/${video.id}`">
    <div
      :style="{
        backgroundImage: `url(${video.poster})`
      }"
      class="vid"
    ></div>
    <div class="movie-info">
      <div class="details">
      <h2>{{video.name}}</h2>
      <p>{{video.duration}}</p>
      </div>
    </div>
  </NuxtLink>
  </div>
  </div>
</div>
</template>
<script>
export default {
    props:['videoList'],
}
</script>
<style scoped>
.container {
  display: flex;
  justify-content: center;
  align-items: center;
  margin-top: 2rem;
}
.vid-con {
  display: flex;
  flex-direction: column;
  flex-shrink: 0;
  justify-content: center;
  width: 50%;
  max-width: 16rem;
  margin: auto 2em;

}
.vid {
  height: 15rem;
  width: 100%;
  background-position: center;
  background-size: cover;
}
.movie-info {
  background: black;
  color: white;
  width: 100%;
}
.details {
  padding: 16px 20px;
}
</style>

We also notice that the NuxtLink has a dynamic route, that is routing to the /player/video.id.

The functionality we want is when a user clicks on any of the videos, it starts streaming. To achieve this, we make use of the dynamic nature of the _name.vue route.

In it, we create a video player and set the source to our endpoint for streaming the video, but we dynamically append which video to play to our endpoint with the help of this.$route.params.name that captures which parameter the link received.

<template>
    <div class="player">
        <video controls muted autoPlay>
            <source :src="http://localhost:5000/videos/video/${vidName}" type="video/mp4">
        </video>
    </div>
</template>
<script>
export default {
 data() {
      return {
        vidName: ''
      }
    },
mounted(){
    this.vidName = this.$route.params.name
}
}
</script>
<style scoped>
.player {
    display: flex;
    justify-content: center;
    align-items: center;
    margin-top: 2em;
}
</style>

When we click on any of the video we get:

Adding Our Caption File

To add our track file, we make sure all the .vtt files in the captions folder have the same name as our id. Update our video element with the track, making a request for the captions.

<template>
    <div class="player">
        <video controls muted autoPlay crossOrigin="anonymous">
            <source :src="http://localhost:5000/videos/video/${vidName}" type="video/mp4">
            <track label="English" kind="captions" srcLang="en" :src="http://localhost:5000/videos/video/${vidName}/caption" default>
        </video>
    </div>
</template>

We’ve added crossOrigin="anonymous" to the video element; otherwise, the request for captions will fail. Now refresh and you’ll see captions have been added successfully.

What To Keep In Mind When Building Resilient Video Streaming.

When building streaming applications like Twitch, Hulu or Netflix, there are a number of things that are put into consideration:

  • Video data processing pipeline
    This can be a technical challenge as high-performing servers are needed to serve millions of videos to users. High latency or downtime should be avoided at all costs.
  • Caching
    Caching mechanisms should be used when building this type of application example Cassandra, Amazon S3, AWS SimpleDB.
  • Users’ geography
    Considering the geography of your users should be thought about for distribution.

Conclusion

In this tutorial, we have seen how to create a server in Node.js that streams videos, generates captions for those videos, and serves metadata of the videos. We’ve also seen how to use Nuxt.js on the frontend to consume the endpoints and the data generated by the server.

Unlike other frameworks, building an application with Nuxt.js and Express.js is quite easy and fast. The cool part about Nuxt.js is the way it manages your routes and makes you structure your apps better.

Resources

Optimize Performance and Render Websites Superfast in ReactJS

To optimize the performance of your React code, you have to make sure that it’s not re-rendering unnecessarily. This is the main reason behind performance bottleneck. Use these tips to improve your codebase and make your website super-fast:

  1. Avoid unnecessary code re-rendering.
  2. Keep your code files short and break them into components.
  3. Use minified production build.
  4. Remove console logs from production code.
  5. For big tables, render a few rows and columns at a time (like FlatList in React Native).
  6. Do not mutate state object.

Let’s discuss all these points, one at a time. Buckle up.

Let’s Create Our Own Authentication API with Nodejs and GraphQL

Authentication is one of the most challenging tasks for developers just starting with GraphQL. There are a lot of technical considerations, including what ORM would be easy to set up, how to generate secure tokens and hash passwords, and even what HTTP library to use and how to use it. 

In this article, we’ll focus on local authentication. It’s perhaps the most popular way of handling authentication in modern websites and does so by requesting the user’s email and password (as opposed to, say, using Google auth.)

Moreover, This article uses Apollo Server 2, JSON Web Tokens (JWT), and Sequelize ORM to build an authentication API with Node.

Handling authentication

As in, a log in system:

  • Authentication identifies or verifies a user.
  • Authorization is validating the routes (or parts of the app) the authenticated user can have access to. 

The flow for implementing this is:

  1. The user registers using password and email
  2. The user’s credentials are stored in a database
  3. The user is redirected to the login when registration is completed
  4. The user is granted access to specific resources when authenticated
  5. The user’s state is stored in any one of the browser storage mediums (e.g. localStorage, cookies, session) or JWT.

Pre-requisites

Before we dive into the implementation, here are a few things you’ll need to follow along.

Dependencies 

This is a big list, so let’s get into it:

  • Apollo Server: An open-source GraphQL server that is compatible with any kind of GraphQL client. We won’t be using Express for our server in this project. Instead, we will use the power of Apollo Server to expose our GraphQL API.
  • bcryptjs: We want to hash the user passwords in our database. That’s why we will use bcrypt. It relies on Web Crypto API‘s getRandomValues interface to obtain secure random numbers.
  • dotenv: We will use dotenv to load environment variables from our .env file. 
  • jsonwebtoken: Once the user is logged in, each subsequent request will include the JWT, allowing the user to access routes, services, and resources that are permitted with that token. jsonwebtokenwill be used to generate a JWT which will be used to authenticate users.
  • nodemon: A tool that helps develop Node-based applications by automatically restarting the node application when changes in the directory are detected. We don’t want to be closing and starting the server every time there’s a change in our code. Nodemon inspects changes every time in our app and automatically restarts the server. 
  • mysql2: An SQL client for Node. We need it connect to our SQL server so we can run migrations.
  • sequelize: Sequelize is a promise-based Node ORM for Postgres, MySQL, MariaDB, SQLite and Microsoft SQL Server. We will use Sequelize to automatically generate our migrations and models. 
  • sequelize cli: We will use Sequelize CLI to run Sequelize commands. Install it globally with yarn add --global sequelize-cli  in the terminal.

Setup directory structure and dev environment

Let’s create a brand new project. Create a new folder and this inside of it:

yarn init -y

The -y flag indicates we are selecting yes to all the yarn init questions and using the defaults.

We should also put a package.json file in the folder, so let’s install the project dependencies:

yarn add apollo-server bcrpytjs dotenv jsonwebtoken nodemon sequelize sqlite3

Next, let’s add Babeto our development environment:

yarn add babel-cli babel-preset-env babel-preset-stage-0 --dev

Now, let’s configure Babel. Run touch .babelrc in the terminal. That creates and opens a Babel config file and, in it, we’ll add this:

{
  "presets": ["env", "stage-0"]
}

It would also be nice if our server starts up and migrates data as well. We can automate that by updating package.json with this:

"scripts": {
  "migrate": " sequelize db:migrate",
  "dev": "nodemon src/server --exec babel-node -e js",
  "start": "node src/server",
  "test": "echo \"Error: no test specified\" && exit 1"
},

Here’s our package.json file in its entirety at this point:

{
  "name": "graphql-auth",
  "version": "1.0.0",
  "main": "index.js",
  "scripts": {
    "migrate": " sequelize db:migrate",
    "dev": "nodemon src/server --exec babel-node -e js",
    "start": "node src/server",
    "test": "echo \"Error: no test specified\" && exit 1"
  },
  "dependencies": {
    "apollo-server": "^2.17.0",
    "bcryptjs": "^2.4.3",
    "dotenv": "^8.2.0",
    "jsonwebtoken": "^8.5.1",
    "nodemon": "^2.0.4",
    "sequelize": "^6.3.5",
    "sqlite3": "^5.0.0"
  },
  "devDependencies": {
    "babel-cli": "^6.26.0",
    "babel-preset-env": "^1.7.0",
    "babel-preset-stage-0": "^6.24.1"
  }
}

Now that our development environment is set up, let’s turn to the database where we’ll be storing things.

Database setup

We will be using MySQL as our database and Sequelize ORM for our relationships. Run sequelize init (assuming you installed it globally earlier). The command should create three folders: /config /models and /migrations. At this point, our project directory structure is shaping up. 

Let’s configure our database. First, create a .env file in the project root directory and paste this:

NODE_ENV=development
DB_HOST=localhost
DB_USERNAME=
DB_PASSWORD=
DB_NAME=

Then go to the /config folder we just created and rename the config.json file in there to config.js. Then, drop this code in there:

require('dotenv').config()
const dbDetails = {
  username: process.env.DB_USERNAME,
  password: process.env.DB_PASSWORD,
  database: process.env.DB_NAME,
  host: process.env.DB_HOST,
  dialect: 'mysql'
}
module.exports = {
  development: dbDetails,
  production: dbDetails
}

Here we are reading the database details we set in our .env file. process.env is a global variable injected by Node and it’s used to represent the current state of the system environment.

Let’s update our database details with the appropriate data. Open the SQL database and create a table called graphql_auth. I use Laragon as my local server and phpmyadmin to manage database tables.

What ever you use, we’ll want to update the .env file with the latest information:

NODE_ENV=development
DB_HOST=localhost
DB_USERNAME=graphql_auth
DB_PASSWORD=
DB_NAME=<your_db_username_here>

Let’s configure Sequelize. Create a .sequelizerc file in the project’s root and paste this:

const path = require('path')


module.exports = {
  config: path.resolve('config', 'config.js')
}

Now let’s integrate our config into the models. Go to the index.js in the /models folder and edit the config variable.

const config = require(__dirname + '/../../config/config.js')[env]

Finally, let’s write our model. For this project, we need a User model. Let’s use Sequelize to auto-generate the model. Here’s what we need to run in the terminal to set that up:

sequelize model:generate --name User --attributes username:string,email:string,password:string

Let’s edit the model that creates for us. Go to user.js in the /models folder and paste this:

'use strict';
module.exports = (sequelize, DataTypes) => {
  const User = sequelize.define('User', {
    username: {
      type: DataTypes.STRING,
    },
    email: {
      type: DataTypes.STRING,  
    },
    password: {
      type: DataTypes.STRING,
    }
  }, {});
  return User;
};

Here, we created attributes and fields for username, email and password. Let’s run a migration to keep track of changes in our schema:

yarn migrate

Let’s now write the schema and resolvers.

Integrate schema and resolvers with the GraphQL server 

In this section, we’ll define our schema, write resolver functions and expose them on our server.

The schema

In the src folder, create a new folder called /schema and create a file called schema.js. Paste in the following code:

const { gql } = require('apollo-server')
const typeDefs = gql`
  type User {
    id: Int!
    username: String
    email: String!
  }
  type AuthPayload {
    token: String!
    user: User!
  }
  type Query {
    user(id: Int!): User
    allUsers: [User!]!
    me: User
  }
  type Mutation {
    registerUser(username: String, email: String!, password: String!): AuthPayload!
    login (email: String!, password: String!): AuthPayload!
  }
`
module.exports = typeDefs

Here we’ve imported graphql-tag from apollo-server. Apollo Server requires wrapping our schema with gql

The resolvers

In the src folder, create a new folder called /resolvers and create a file in it called resolver.js. Paste in the following code:

const bcrypt = require('bcryptjs')
const jsonwebtoken = require('jsonwebtoken')
const models = require('../models')
require('dotenv').config()
const resolvers = {
    Query: {
      async me(_, args, { user }) {
        if(!user) throw new Error('You are not authenticated')
        return await models.User.findByPk(user.id)
      },
      async user(root, { id }, { user }) {
        try {
          if(!user) throw new Error('You are not authenticated!')
          return models.User.findByPk(id)
        } catch (error) {
          throw new Error(error.message)
        }
      },
      async allUsers(root, args, { user }) {
        try {
          if (!user) throw new Error('You are not authenticated!')
          return models.User.findAll()
        } catch (error) {
          throw new Error(error.message)
        }
      }
    },
    Mutation: {
      async registerUser(root, { username, email, password }) {
        try {
          const user = await models.User.create({
            username,
            email,
            password: await bcrypt.hash(password, 10)
          })
          const token = jsonwebtoken.sign(
            { id: user.id, email: user.email},
            process.env.JWT_SECRET,
            { expiresIn: '1y' }
          )
          return {
            token, id: user.id, username: user.username, email: user.email, message: "Authentication succesfull"
          }
        } catch (error) {
          throw new Error(error.message)
        }
      },
      async login(_, { email, password }) {
        try {
          const user = await models.User.findOne({ where: { email }})
          if (!user) {
            throw new Error('No user with that email')
          }
          const isValid = await bcrypt.compare(password, user.password)
          if (!isValid) {
            throw new Error('Incorrect password')
          }
          // return jwt
          const token = jsonwebtoken.sign(
            { id: user.id, email: user.email},
            process.env.JWT_SECRET,
            { expiresIn: '1d'}
          )
          return {
           token, user
          }
      } catch (error) {
        throw new Error(error.message)
      }
    }
  },


}
module.exports = resolvers

That’s a lot of code, so let’s see what’s happening in there.

First we imported our models, bcrypt and  jsonwebtoken, and then initialized our environmental variables. 

Next are the resolver functions. In the query resolver, we have three functions (me, user and allUsers):

  • me query fetches the details of the currently loggedIn user. It accepts a user object as the context argument. The context is used to provide access to our database which is used to load the data for a user by the ID provided as an argument in the query.
  • user query fetches the details of a user based on their ID. It accepts id as the context argument and a user object. 
  • alluser query returns the details of all the users.

user would be an object if the user state is loggedIn and it would be null, if the user is not. We would create this user in our mutations. 

In the mutation resolver, we have two functions (registerUser and loginUser):

  • registerUser accepts the username, email  and password of the user and creates a new row with these fields in our database. It’s important to note that we used the bcryptjs package to hash the users password with bcrypt.hash(password, 10). jsonwebtoken.sign synchronously signs the given payload into a JSON Web Token string (in this case the user id and email). Finally, registerUser returns the JWT string and user profile if successful and returns an error message if something goes wrong.
  • login accepts email and password , and checks if these details match with the one that was supplied. First, we check if the email value already exists somewhere in the user database.
models.User.findOne({ where: { email }})
if (!user) {
  throw new Error('No user with that email')
}

Then, we use bcrypt’s bcrypt.compare method to check if the password matches. 

const isValid = await bcrypt.compare(password, user.password)
if (!isValid) {
  throw new Error('Incorrect password')
}

Then, just like we did previously in registerUser, we use jsonwebtoken.sign to generate a JWT string. The login mutation returns the token and user object.

Now let’s add the JWT_SECRET to our .env file.

JWT_SECRET=somereallylongsecret

The server

Finally, the server! Create a server.js in the project’s root folder and paste this:

const { ApolloServer } = require('apollo-server')
const jwt =  require('jsonwebtoken')
const typeDefs = require('./schema/schema')
const resolvers = require('./resolvers/resolvers')
require('dotenv').config()
const { JWT_SECRET, PORT } = process.env
const getUser = token => {
  try {
    if (token) {
      return jwt.verify(token, JWT_SECRET)
    }
    return null
  } catch (error) {
    return null
  }
}
const server = new ApolloServer({
  typeDefs,
  resolvers,
  context: ({ req }) => {
    const token = req.get('Authorization') || ''
    return { user: getUser(token.replace('Bearer', ''))}
  },
  introspection: true,
  playground: true
})
server.listen({ port: process.env.PORT || 4000 }).then(({ url }) => {
  console.log(`🚀 Server ready at ${url}`);
});

Here, we import the schema, resolvers and jwt, and initialize our environment variables. First, we verify the JWT token with verify. jwt.verify accepts the token and the JWT secret as parameters.

Next, we create our server with an ApolloServer instance that accepts typeDefs and resolvers.

We have a server! Let’s start it up by running yarn dev in the terminal.

Testing the API

Let’s now test the GraphQL API with GraphQL Playground. We should be able to register, login and view all users — including a single user — by ID.

We’ll start by opening up the GraphQL Playground app or just open localhost://4000 in the browser to access it.

Mutation for register user

mutation {
  registerUser(username: "Wizzy", email: "ekpot@gmail.com", password: "wizzyekpot" ){
    token
  }
}

We should get something like this:

{
  "data": {
    "registerUser": {
      "token": "eyJhbGciOiJIUzI1NiIsInR5cCI6IkpXVCJ9.eyJpZCI6MTUsImVtYWlsIjoiZWtwb3RAZ21haWwuY29tIiwiaWF0IjoxNTk5MjQwMzAwLCJleHAiOjE2MzA3OTc5MDB9.gmeynGR9Zwng8cIJR75Qrob9bovnRQT242n6vfBt5PY"
    }
  }
}

Mutation for login 

Let’s now log in with the user details we just created:

mutation {
  login(email:"ekpot@gmail.com" password:"wizzyekpot"){
    token
  }
}

We should get something like this:

{
  "data": {
    "login": {
      "token": "eyJhbGciOiJIUzI1NiIsInR5cCI6IkpXVCJ9.eyJpZCI6MTUsImVtYWlsIjoiZWtwb3RAZ21haWwuY29tIiwiaWF0IjoxNTk5MjQwMzcwLCJleHAiOjE1OTkzMjY3NzB9.PDiBKyq58nWxlgTOQYzbtKJ-HkzxemVppLA5nBdm4nc"
    }
  }
}

Awesome!

Query for a single user

For us to query a single user, we need to pass the user token as authorization header. Go to the HTTP Headers tab.

Showing the GraphQL interface with the HTTP Headers tab highlighted in red in the bottom left corner of the screen,

…and paste this:

{
  "Authorization": "eyJhbGciOiJIUzI1NiIsInR5cCI6IkpXVCJ9.eyJpZCI6MTUsImVtYWlsIjoiZWtwb3RAZ21haWwuY29tIiwiaWF0IjoxNTk5MjQwMzcwLCJleHAiOjE1OTkzMjY3NzB9.PDiBKyq58nWxlgTOQYzbtKJ-HkzxemVppLA5nBdm4nc"
}

Here’s the query:

query myself{
  me {
    id
    email
    username
  }
}

And we should get something like this:

{
  "data": {
    "me": {
      "id": 15,
      "email": "ekpot@gmail.com",
      "username": "Wizzy"
    }
  }
}

Great! Let’s now get a user by ID:

query singleUser{
  user(id:15){
    id
    email
    username
  }
}

And here’s the query to get all users:

{
  allUsers{
    id
    username
    email
  }
}

Summary

Authentication is one of the toughest tasks when it comes to building websites that require it. GraphQL enabled us to build an entire Authentication API with just one endpoint. Sequelize ORM makes creating relationships with our SQL database so easy, we barely had to worry about our models. It’s also remarkable that we didn’t require a HTTP server library (like Express) and use Apollo GraphQL as middleware. Apollo Server 2, now enables us to create our own library-independent GraphQL servers!

Check out the source code for this tutorial on GitHub.


The post Let’s Create Our Own Authentication API with Nodejs and GraphQL appeared first on CSS-Tricks.

You can support CSS-Tricks by being an MVP Supporter.

Building a Real-Time Chat App with React and Firebase

In this article, we’ll cover key concepts for authenticating a user with Firebase in a real-time chat application. We’ll integrate third-party auth providers (e.g. Google, Twitter and GitHub) and, once users are signed in, we’ll learn how to store user chat data in the Firebase Realtime Database, where we can sync data with a NoSQL cloud database.

The client application is going to be built in React, as it is one of the most popular JavaScript frameworks out there, but the concepts can also be applied to other frameworks.

But first, what is Firebase?

Firebase is Google's mobile platform for quickly developing apps. Firebase provides a suite of tools for authenticating applications, building reactive client apps, reporting analytics, as well as a host of other helpful resources for managing apps in general. It also provides back-end management for web, iOS, Android, and Unity, a 3D development platform.

Out of the box, Firebase is packaged with features that help developers like ourselves focus on building apps while it handles all server-side logic. Things like:

  • Authentication: This includes support for email and password authentication as well as single sign-on capabilities (via Facebook, Twitter and Google).
  • Realtime database: This is a “NoSQL” database that updates in real time.
  • Cloud functions: These run extra server-side logic.
  • Static hosting: This is a means of serving assets pre-built instead of rendering at runtime.
  • Cloud storage: This gives us a place to store media assets.

Firebase offers a generous free tier that includes authentication and access to their Realtime Database. The authentication providers we’ll be covering email and password — Google and GitHub — are free on that side as well. The Realtime Database allows up to 100 simultaneous connections and 1 gigabyte storage per month. A full table of pricing can be found on the Firebase website.

Here’s what we’re making

We’re going to build an application called Chatty. It will allow only authenticated users to send and read messages and users can sign up by providing their email and creating a password, or by authenticating through a Google or GitHub account. Check out source code if you want to refer to it or take a peek as we get started.

We’ll end up with something like this:

Setting up

You’re going to need a Google account to use Firebase, so snag one if you haven’t already. And once you do, we can officially kick the tires on this thing.

First off, head over to the Firebase Console and click the “Add project" option.

Next, let’s enter a name for the project. I’m going with Chatty.

You can choose to add analytics to your project, but it’s not required. Either way, click continue to proceed and Firebase will take a few seconds to delegate resources for the project.

Once that spins up, we are taken to the Firebase dashboard But, before we can start using Firebase in our web app, we have to get the configuration details down for our project. So, click on the web icon in the dashboard.

Then, enter a name for the app and click Register app.

Next up, we’ll copy and store the configuration details on the next screen in a safe place. That will come in handy in the next step.

Again, we’re going to authenticate users via email and password, with additional options for single sign-on with a Google or GitHub account. We need to enable these from the Authentication tab in the dashboard, but we’ll go through each of them one at a time.

Email and password authentication

There’s a Sign-in method tab in the Firebase dashboard. Click the Email/Password option and enable it.

Now we can use it in our app!

Setting up the web app

For our web app, we’ll be using React but most of the concepts can be applied to any other framework. Well need Node.js for a React setup, so download and install it if you haven’t already.

We’ll use create-react-app to bootstrap a new React project. This downloads and installs the necessary packages required for a React application. In the terminal, cd into where you’d like our Chatty project to go and run this to initialize it:

npx create-react-app chatty

This command does the initial setup for our react app and installs the dependencies in package.json. We’ll also install some additional packages. So, let’s cd into the project itself and add packages for React Router and Firebase.

cd chatty
yarn add react-router-dom firebase

We already know why we need Firebase, but why React Router? Our chat app will have a couple of views we can use React Router to handle navigating between pages.

With that done, we can officially start the app:

yarn start

This starts a development server and opens a URL in your default browser. If everything got installed correctly, you should see a screen like this:

Looking at the folder structure, you would see something similar to this:

For our chat app, this is the folder structure we’ll be using:

  • /components: contains reusable widgets used in different pages
  • /helpers: a set of reusable functions
  • /pages: the app views
  • /services: third-party services that we’re using (e.g. Firebase)
  • App.js: the root component

Anything else in the folder is unnecessary for this project and can safely be removed. From here, let’s add some code to src/services/firebase.js so the app can talk with Firebase.

import firebase from 'firebase';

Let’s get Firebase into the app

We’ll import and initialize Firebase using the configuration details we copied earlier when registering the app in the Firebase dashboard. Then, we’ll export the authentication and database modules.

const config = {
  apiKey: "ADD-YOUR-DETAILS-HERE",
  authDomain: "ADD-YOUR-DETAILS-HERE",
  databaseURL: "ADD-YOUR-DETAILS-HERE"
};
firebase.initializeApp(config);
export const auth = firebase.auth;
export const db = firebase.database();

Let’s import our dependencies in src/App.js:

import React, { Component } from 'react';
import {
  Route,
  BrowserRouter as Router,
  Switch,
  Redirect,
} from "react-router-dom";
import Home from './pages/Home';
import Chat from './pages/Chat';
import Signup from './pages/Signup';
import Login from './pages/Login';
import { auth } from './services/firebase';

These are ES6 imports. Specifically, we’re importing React and other packages needed to build out the app. We’re also importing all the pages of our app that we’ll configure later to our router.

Next up is routing

Our app has public routes (accessible without authentication) and a private route (accessible only with authentication). Because React doesn’t provide a way to check the authenticated state, we’ll create higher-order components (HOCs) for both types of routes.

Our HOCs will:

  • wrap a <Route>,
  • pass props from the router to the <Route>,
  • render the component depending on the authenticated state, and
  • redirect the user to a specified route if the condition is not met

Let’s write the code for our <PrivateRoute> HOC.

function PrivateRoute({ component: Component, authenticated, ...rest }) {
  return (
    <Route
      {...rest}
      render={(props) => authenticated === true
        ? <Component {...props} />
        : <Redirect to={{ pathname: '/login', state: { from: props.location } }} />}
    />
  )
}

It receives three props: the component to render if the condition is true, the authenticated state, and the ES6 spread operator to get the remaining parameters passed from the router. It checks if authenticated is true and renders the component passed, else it redirects to/login.

function PublicRoute({ component: Component, authenticated, ...rest }) {
  return (
    <Route
      {...rest}
      render={(props) => authenticated === false
        ? <Component {...props} />
        : <Redirect to='/chat' />}
    />
  )
}

The <PublicRoute> is pretty much the same. It renders our public routes and redirects to the /chat path if the authenticated state becomes true. We can use the HOCs in our render method:

render() {
  return this.state.loading === true ? <h2>Loading...</h2> : (
    <Router>
      <Switch>
        <Route exact path="/" component={Home}></Route>
        <PrivateRoute path="/chat" authenticated={this.state.authenticated} component={Chat}></PrivateRoute>
        <PublicRoute path="/signup" authenticated={this.state.authenticated} component={Signup}></PublicRoute>
        <PublicRoute path="/login" authenticated={this.state.authenticated} component={Login}></PublicRoute>
      </Switch>
    </Router>
  );
}

Checking for authentication

It would be nice to show a loading indicator while we verify if the user is authenticated. Once the check is complete, we render the appropriate route that matches the URL. We have three public routes — <Home>, <Login> and <Signup> — and a private one called <Chat>.

Let’s write the logic to check if the user is indeed authenticated.

class App extends Component {
  constructor() {
    super();
    this.state = {
      authenticated: false,
      loading: true,
    };
  }
}

export default App;

Here we’re setting the initial state of the app. Then, we’re using the componentDidMount lifecycle hook to check if the user is authenticated. So, let’s add this after the constructor:

componentDidMount() {
  this.removelistener = auth().onAuthStateChanged((user) => {
    if (user) {
      this.setState({
        authenticated: true,
        loading: false,
      });
    } else {
      this.setState({
        authenticated: false,
        loading: false,
      });
    }
  })
}

Firebase provides an intuitive method called onAuthStateChanged that is triggered when the authenticated state changes. We use this to update our initial state. user is null if the user is not authenticated. If the user is true, we update authenticated to true; else we set it to false. We also set loading to false either way.

Registering users with email and password

Users will be able to register for Chatty through email and password. The helpers folder contains a set of methods that we’ll use to handle some authentication logic. Inside this folder, let’s create a new file called auth.js and add this:

import { auth } from "../services/firebase";

We import the auth module from the service we created earlier.

export function signup(email, password) {
  return auth().createUserWithEmailAndPassword(email, password);
}


export function signin(email, password) {
  return auth().signInWithEmailAndPassword(email, password);
}

We have two methods here: signup andsignin:

  • signup will create a new user using their email and password. 
  • signin will log in an existing user created with email and password.

Let’s create our <Signup> page by creating a new file Signup.js file in the pages folder. This is the markup for the UI:

import React, { Component } from 'react';
import { Link } from 'react-router-dom';
import { signup } from '../helpers/auth';


export default class SignUp extends Component {


  render() {
    return (
      <div>
        <form onSubmit={this.handleSubmit}>
          <h1>
            Sign Up to
          <Link to="/">Chatty</Link>
          </h1>
          <p>Fill in the form below to create an account.</p>
          <div>
            <input placeholder="Email" name="email" type="email" onChange={this.handleChange} value={this.state.email}></input>
          </div>
          <div>
            <input placeholder="Password" name="password" onChange={this.handleChange} value={this.state.password} type="password"></input>
          </div>
          <div>
            {this.state.error ? <p>{this.state.error}</p> : null}
            <button type="submit">Sign up</button>
          </div>
          <hr></hr>
          <p>Already have an account? <Link to="/login">Login</Link></p>
        </form>
      </div>
    )
  }
}
Email? Check. Password? Check. Submit button? Check. Our form is looking good.

The form and input fields are bound to a method we haven’t created yet, so let’s sort that out. Just before the render() method, we’ll add the following:

constructor(props) {
  super(props);
  this.state = {
    error: null,
    email: '',
    password: '',
  };
  this.handleChange = this.handleChange.bind(this);
  this.handleSubmit = this.handleSubmit.bind(this);
}

We’re setting the initial state of the page. We’re also binding the handleChange and handleSubmit methods to the component’s this scope.

handleChange(event) {
  this.setState({
    [event.target.name]: event.target.value
  });
}

Next up, we’ll add the handleChange method that our input fields are bound to. The method uses computed properties to dynamically determine the key and set the corresponding state variable.

async handleSubmit(event) {
  event.preventDefault();
  this.setState({ error: '' });
  try {
    await signup(this.state.email, this.state.password);
  } catch (error) {
    this.setState({ error: error.message });
  }
}

For handleSubmit, we’re preventing the default behavior for form submissions (which simply reloads the browser, among other things). We’re also clearing up the error state variable, then using the signup() method imported from helpers/auth to pass the email and password entered by the user.

If the registration is successful, users get redirected to the /Chats route. This is possible with the combination of onAuthStateChanged and the HOCs we created earlier. If registration fails, we set the error variable which displays a message to users.

Authenticating users with email and password

The login page is identical to the signup page. The only difference is we’ll be using the signin method from the helpers we created earlier. That said, let’s create yet another new file in the pages directory, this time called Login.js, with this code in it:

import React, { Component } from "react";
import { Link } from "react-router-dom";
import { signin, signInWithGoogle, signInWithGitHub } from "../helpers/auth";


export default class Login extends Component {
  constructor(props) {
    super(props);
    this.state = {
      error: null,
      email: "",
      password: ""
    };
    this.handleChange = this.handleChange.bind(this);
    this.handleSubmit = this.handleSubmit.bind(this);
  }


  handleChange(event) {
    this.setState({
      [event.target.name]: event.target.value
    });
  }


  async handleSubmit(event) {
    event.preventDefault();
    this.setState({ error: "" });
    try {
      await signin(this.state.email, this.state.password);
    } catch (error) {
      this.setState({ error: error.message });
    }
  }


  render() {
    return (
      <div>
        <form
          autoComplete="off"
          onSubmit={this.handleSubmit}
        >
          <h1>
            Login to
            <Link to="/">
              Chatty
            </Link>
          </h1>
          <p>
            Fill in the form below to login to your account.
          </p>
          <div>
            <input
              placeholder="Email"
              name="email"
              type="email"
              onChange={this.handleChange}
              value={this.state.email}
            />
          </div>
          <div>
            <input
              placeholder="Password"
              name="password"
              onChange={this.handleChange}
              value={this.state.password}
              type="password"
            />
          </div>
          <div>
            {this.state.error ? (
              <p>{this.state.error}</p>
            ) : null}
            <button type="submit">Login</button>
          </div>
          <hr />
          <p>
            Don't have an account? <Link to="/signup">Sign up</Link>
          </p>
        </form>
      </div>
    );
  }
}

Again, very similar to before. When the user successfully logs in, they’re redirected to /chat.

Authenticating with a Google account

Firebase allows us to authenticate users with a valid Google account. We’ve got to enable it in the Firebase dashboard just like we did for email and password.

Select the Google option and enable it in the settings.

On that same page, we also need to scroll down to add a domain to the list of domains that are authorized to access feature. This way, we avoid spam from any domain that is not whitelisted. For development purposes, our domain is localhost, so we’ll go with that for now.

We can switch back to our editor now. We’ll add a new method to helpers/auth.js to handle Google authentication.

export function signInWithGoogle() {
  const provider = new auth.GoogleAuthProvider();
  return auth().signInWithPopup(provider);
}

Here, we’re creating an instance of the GoogleAuthProvider. Then, we’re calling signInWithPopup with the provider as a parameter. When this method is called, a pop up will appear and take the user through the Google sign in flow before redirecting them back to the app. You’ve likely experienced it yourself at some point in time.

Let’s use it in our signup page by importing the method:

import { signin, signInWithGoogle } from "../helpers/auth";

Then, let’s add a button to trigger the method, just under the Sign up button:

<p>Or</p>
<button onClick={this.googleSignIn} type="button">
  Sign up with Google
</button>

Next, we’ll add the onClick handler:

async googleSignIn() {
  try {
    await signInWithGoogle();
  } catch (error) {
    this.setState({ error: error.message });
  }
}

Oh, and we should remember to bind the handler to the component:

constructor() {
  // ...
  this.githubSignIn = this.githubSignIn.bind(this);
}

That’s all we need! When the button is clicked, it takes users through the Google sign in flow and, if successful, the app redirects the user to the chat route.

Authenticating with a GitHub account

We’re going to do the same thing with GitHub. May as well give folks more than one choice of account.

Let’s walk through the steps. First, we’ll enable GitHub sign in on Firebase dashboard, like we did for email and Google.

You will notice both the client ID and client secret fields are empty, but we do have our authorization callback URL at the bottom. Copy that, because we’ll use it when we do our next thing, which is register the app on GitHub.

Once that’s done, we’ll get a client ID and secret which we can now add to the Firebase console.

Let’s switch back to the editor and add a new method to helpers/auth.js:

export function signInWithGitHub() {
  const provider = new auth.GithubAuthProvider();
  return auth().signInWithPopup(provider);
}

It’s similar to the Google sign in interface, but this time we’re creating a GithubAuthProvider. Then, we’ll call signInWithPopup with the provider.

In pages/Signup.js, we update our imports to include the signInWithGitHub method:

import { signup, signInWithGoogle, signInWithGitHub } from "../helpers/auth";

We add a button for GitHub sign up:

<button type="button" onClick={this.githubSignIn}>
  Sign up with GitHub
</button>

Then we add a click handler for the button which triggers the GitHub sign up flow:

async githubSignIn() {
  try {
    await signInWithGitHub();
  } catch (error) {
    this.setState({ error: error.message });
  }
}

Let’s remember again to bind the handler to the component:

constructor() {
  // ...
  this.githubSignIn = this.githubSignIn.bind(this);
}

Now we’ll get the same sign-in and authentication flow that we have with Google, but with GitHub.

Reading data from Firebase

Firebase has two types of databases: A product they call Realtime Database and another called Cloud Firestore. Both databases are NoSQL-like databases, meaning the database is structured as key-value pairs. For this tutorial, we’ll use the Realtime Database.

This is the structure we’ll be using for our app. We have a root node chats with children nodes. Each child has a content, timestamp, and user ID. One of the tabs you’ll notice is Rules which is how we set permissions on the contents of the database.

Firebase database rules are defined as key-value pairs as well. Here, we’ll set our rules to allow only authenticated users to read and write to the chat node. There are a lot more firebase rules. worth checking out.

Let’s write code to read from the database. First, create a new file called Chat.js  in the pages  folder and add this code to import React, Firebase authentication, and Realtime Database:

import React, { Component } from "react";
import { auth } from "../services/firebase";
import { db } from "../services/firebase"

Next, let’s define the initial state of the app:

export default class Chat extends Component {
  constructor(props) {
    super(props);
    this.state = {
      user: auth().currentUser,
      chats: [],
      content: '',
      readError: null,
      writeError: null
    };
  }
  async componentDidMount() {
    this.setState({ readError: null });
    try {
      db.ref("chats").on("value", snapshot => {
        let chats = [];
        snapshot.forEach((snap) => {
          chats.push(snap.val());
        });
        this.setState({ chats });
      });
    } catch (error) {
      this.setState({ readError: error.message });
    }
  }
}

The real main logic takes place in componentDidMount. db.ref("chats") is a reference to the chats path in the database. We listen to the value event which is triggered anytime a new value is added to the chats node. What is returned from the database is an array-like object that we loop through and push each object into an array. Then, we set the chats state variable to our resulting array. If there is an error, we set the readError state variable to the error message.

One thing to note here is that a connection is created between the client and our Firebase database because we used the .on() method. This means any time a new value is added to the database, the client app is updated in real-time which means users can see new chats without a page refresh Nice!.

After componentDidMount, we can render our chats like so:

render() {
  return (
    <div>
      <div className="chats">
        {this.state.chats.map(chat => {
          return <p key={chat.timestamp}>{chat.content}</p>
        })}
      </div>
      <div>
        Login in as: <strong>{this.state.user.email}</strong>
      </div>
    </div>
  );
}

This renders the array of chats. We render the email of the currently logged in user.

Writing data to Firebase

At the moment, users can only read from the database but are unable to send messages. What we need is a form with an input field that accepts a message and a button to send the message to the chat.

So, let’s modify the markup like so:

return (
    <div>
      <div className="chats">
        {this.state.chats.map(chat => {
          return <p key={chat.timestamp}>{chat.content}</p>
        })}
      </div>
      {# message form #}
      <form onSubmit={this.handleSubmit}>
        <input onChange={this.handleChange} value={this.state.content}></input>
        {this.state.error ? <p>{this.state.writeError}</p> : null}
        <button type="submit">Send</button>
      </form>
      <div>
        Login in as: <strong>{this.state.user.email}</strong>
      </div>
    </div>
  );
}

We have added a form with an input field and a button. The value of the input field is bound to our state variable content and we call handleChange when its value changes.

handleChange(event) {
  this.setState({
    content: event.target.value
  });
}

handleChange gets the value from the input field and sets on our state variable. To submit the form, we call handleSubmit:

async handleSubmit(event) {
  event.preventDefault();
  this.setState({ writeError: null });
  try {
    await db.ref("chats").push({
      content: this.state.content,
      timestamp: Date.now(),
      uid: this.state.user.uid
    });
    this.setState({ content: '' });
  } catch (error) {
    this.setState({ writeError: error.message });
  }
}

We set any previous errors to null. We create a reference to the chats node in the database and use push() to create a unique key and pushe the object to it.

As always, we have to bind our methods to the component:

constructor(props) {
  // ...
  this.handleChange = this.handleChange.bind(this);
  this.handleSubmit = this.handleSubmit.bind(this);
}

Now a user can add new messages to the chats and see them in real-time! How cool is that?

Demo time!

Enjoy your new chat app!

Congratulations! You have just built a chat tool that authenticates users with email and password, long with options to authenticate through a Google or GitHub account.

I hope this give you a good idea of how handy Firebase can be to get up and running with authentication on an app. We worked on a chat app, but the real gem is the signup and sign-in methods we created to get into it. That’s something useful for many apps.

Questions? Thoughts? Feedback? Let me know in the comments!

The post Building a Real-Time Chat App with React and Firebase appeared first on CSS-Tricks.

How To Build A Music Manager With Nuxt.js And Express.js

How To Build A Music Manager With Nuxt.js And Express.js

How To Build A Music Manager With Nuxt.js And Express.js

Deven Rathore

Handling digital media assets such as audio and video in your application can be tricky because of the considerations that have to be made server-side (e.g. networking, storage and the asynchronous nature of handling file uploads). However, we can use libraries like Multer and Express.js to simplify our workflow on the backend while using Nuxt.js (Vue framework) to build out the front-end interactions.

Whenever a web client uploads a file to a server, it is generally submitted through a form and encoded as multipart/form-data. Multer is a middleware for Express.js and Node.js that makes it easy to handle this so-called multipart/form-data whenever your users upload files. In this tutorial, I will explain how you can build a music manager app by using Express.js with Multer to upload music and Nuxt.js (Vue framework) for our frontend.

Prerequisites

  • Familiarity with HTML, CSS, and JavaScript (ES6+);
  • Node.js, npm and MongoDB installed on your development machine;
  • VS code or any code editor of your choice;
  • Basic Knowledge of Express.js.

Building The Back-End Service

Let’s start by creating a directory for our project by navigating into the directory, and issuing npm init -y on your terminal to create a package.json file that manages all the dependencies for our application.

mkdir serverside && cd serverside
npm init -y

Next, install multer, express, and the other dependencies necessary to Bootstrap an Express.js app.

npm install express multer nodemon mongoose cors morgan body-parser --save

Next, create an index.js file:

touch index.js

Then, in the index.js file, we will initialize all the modules, create an Express.js app, and create a server for connecting to browsers:

const express = require("express");
const PORT = process.env.PORT || 4000;
const morgan = require("morgan");
const cors = require("cors");
const bodyParser = require("body-parser");
const mongoose = require("mongoose");
const config = require("./config/db");
const app = express();
//configure database and mongoose
mongoose.set("useCreateIndex", true);
mongoose
  .connect(config.database, { useNewUrlParser: true })
  .then(() => {
    console.log("Database is connected");
  })
  .catch(err => {
    console.log({ database_error: err });
  });
// db configuaration ends here
//registering cors
app.use(cors());
//configure body parser
app.use(bodyParser.urlencoded({ extended: false }));
app.use(bodyParser.json());
//configure body-parser ends here
app.use(morgan("dev")); // configire morgan
// define first route
app.get("/", (req, res) => {
  res.json("Hola MEVN devs...Assemble");
});
app.listen(PORT, () => {
  console.log(`App is running on ${PORT}`);
});

We, first of all, bring in Express.js into the project and then define a port that our application will be running on. Next, we bring in the body-parser, morgan ,mongoose and the cors dependencies.

We then save the express instance in a variable called app. We can use the app instance to configure middleware in our application just as we configured the cors middleware. We also use the app instance to set up the root route that will run in the port we defined.

Let’s now create a /config folder for our database config and multer config:

mkdir config and cd config
touch multer.js && touch db.js

Then open config/db.js and add the following code to configure our database:

module.exports = {
  database: "mongodb://localhost:27017/",
  secret: "password"
};

(This is actually an object that holds the database URL and the database secret.)

Running nodemon and navigating to localhost:4000 on your browser should give you this message:

"Hola MEVN devs...Assemble"

Also, this is what your terminal should now look like:

Running Nodemon using Terminal
Terminal preview (Large preview)

Setting Up Model, Routes, And Controllers

Let’s set up a file structure by typing in the following:

mkdir api && cd api
mkdir model && cd model && touch Music.js
cd ..
mkdir controller && cd controller && touch musicController.js
cd ..
mkdir routes && cd routes && touch music.js

In our terminal, we use mkdir to create a new directory, and then cd to move into a directory. So we start by creating a directory called api and then move into the api directory.

The touch command is used to create a new file inside a directory using the terminal, while the cd command is used to move out of a directory.

Now let’s head on over to our api/model/Music.js file to create a music schema. A model is a class with which we construct documents. In this case, each document will be a piece of music with properties and behaviors as declared in our schema:

let mongoose = require("mongoose");
let musicSchema = mongoose.Schema({
  title: {
    type: String,
    required: true
  },
  music: {
    type: Object,
    required: true
  },
  artist: {
    type: String,
    required: true
  },
  created: {
    type: Date,
    default: Date.now()
  }
});
let Music = mongoose.model("Music", musicSchema);
module.exports = Music;

Let’s head over to config/multer to configure Multer:

let multer = require("multer");
const path = require("path");
const storage = multer.diskStorage({
  destination: (req, res, cb) => {
    cb(null, "./uploads");
  },
  filename: (req, file, cb) => {
    cb(null, new Date().toISOString() + file.originalname);
  }
});
const fileFilter = (req, file, cb) => {
  if (
     file.mimetype === "audio/mpeg" ||
     file.mimetype === "audio/wave" ||
     file.mimetype === "audio/wav" ||
     file.mimetype === "audio/mp3"
  ) {
    cb(null, true);
  } else {
    cb(null, false);
  }
};
exports.upload = multer({
  storage: storage,
  limits: {
    fileSize: 1024 * 1024 * 5
  },
  fileFilter: fileFilter
});

In the multer.js file, we start by setting up a folder where all the uploaded music files will be uploaded. We need to make this file static by defining that in the index.js file:

app.use('/uploads', express.static('uploads'));

After that, we write a simple validator that will check the file mimetype before uploading. We then define the multer instance by adding the storage location, the limits of each file, and the validator that we created.

Create The Necessary Routes

Now let’s create our routes. Below is the list of endpoints we will be creating.

HTTP POST /music Add new music
HTTP GET /music Get all music
HTTP DELETE /music/:blogId Delete a music

Let’s start by creating the blog route. Head over to api/routes/music.js and write the following code:

const express = require("express");
const router = express.Router();
const musicController = require("../controller/musicController");
const upload = require("../../config/multer");
router.get("/",  musicController.getAllMusics);
router.post("/", upload.upload.single("music"), musicController.addNewMusic);
router.delete("/:musicId", musicController.deleteMusic);
module.exports = router;

Note: Now whenever we make a get request to /music. the route calls the getAllMusic function that is located in the ‘controllers’ file.

Let’s move on over to api/controllers/musicController to define the controllers. We start by writing a function to get all the music in our database using the mongoose db.collection.find method which will return all the items in that collection.

After doing that, we write another function that will create a piece of new music in the database. We need to create a new music instance using the new keyword and then define the music object. After doing this, we will use the mongoose save method to add new music to the database.

In order to delete a piece of music, we need to use the mongoose remove method by simply passing the music ID as a parameter in the remove instance. This results to mongoose looking into the music collection that has that particular ID and then removing it from that collection.

let mongoose = require("mongoose");
const Music = require("../model/Music");
exports.getAllMusics = async (req, res) => {
  try {
    let music = await Music.find();
    res.status(200).json(music);
  } catch (err) {
    res.status(500).json(err);
  }
};
exports.addNewMusic = async (req, res) => {
  try {
    const music = new Music({
      title:req.body.title,
      artist:req.body.artist,
      music:req.file
    });
    
    let newMusic = await music.save();
    res.status(200).json({ data: newMusic });
  } catch (err) {
    res.status(500).json({ error: err });
  }
};
exports.deleteMusic = async (req, res) => {
  try {
    const id = req.params.musicId;
    let result = await Music.remove({ _id: id });
    res.status(200).json(result);
  } catch (err) {
    res.status(500).json(err);
  }
};

Last but not least, in order to test the routes, we need to register the music routes in our index.js file:

const userRoutes = require("./api/user/route/user"); //bring in our user routes
app.use("/user", userRoutes);

Testing The End Points

To test our endpoints, we will be using POSTMAN.

Adding New Music

To test the Add Music functionality, set the method of the request by clicking on the methods drop-down. After doing this, type the URL of the endpoint and then click on the body tab to select how you want to send your data. (In our case, we will be using the form-data method.)

So click on the form-data and set up your model key. As you set it up, give the keys some value as shown in the image below:

Testing Adding new music API using Postman
Testing Adding new music API in Postman dashboard (Large preview)

After doing this, click on ‘Send’ to make the request.

Listing All Music

To list all of the music in our database, we have to type the endpoint URL in the URL section provided. After doing this, click on the ‘Send’ button to make the request.

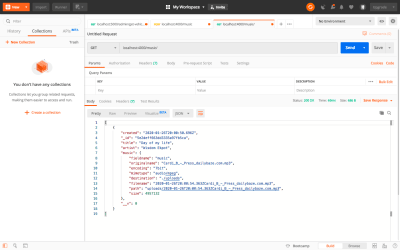
Testing Listing API using Postman
Testing Listing API in Postman dashboard (Large preview)

Deleting Music

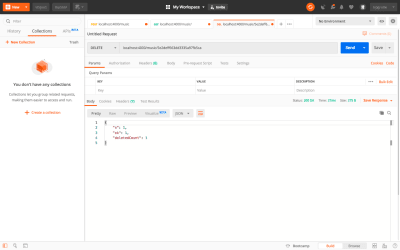
To delete a piece of music, we need to pass the music id as a parameter.

Testing Delete API using Postman
Testing Delete API Postman dashboard (Large preview)

That’s it!

Building The Frontend

For our frontend, we will be using a Vue framework: Nuxt.js.

“Nuxt is a progressive framework based on Vue.js to create modern web applications. It is based on Vue.js official libraries (vue, vue-router and vuex) and powerful development tools (webpack, Babel and PostCSS).”

NuxtJS Guide

To create a new Nuxt.js application, open up your terminal and type in the following (with musicapp as the name of the app we will be building):

$ npx create-nuxt-app musicapp

During the installation process, we will be asked some questions regarding the project setup:

Project name musicapp
project description A Simple music manager app
Author name <your name>
Package manager npm
UI framework Bootstrap vue
custom ui framework none
Nuxt modules Axios,pwa (use the spacebar on your keyboard to select items)
Linting tool Prettier
test framework None
Rendering Mode Universal (SSR)
development tool Jsonconfig.json

After selecting all of this, we have to wait a little while for the project to be set up. Once it’s ready, move into the /project folder and serve the project as follows:

cd musicapp && npm run dev

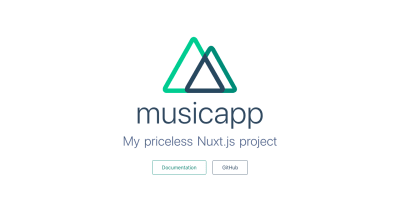
Open up the project in any code editor of your choice and then open the project in the browser by accessing localhost:3000.

Preview Of Nuxt.js project
Nuxt.js Project Preview (Large preview)

Configuring Axios

We will be using axios to make an HTTP request to our back-end server. Axios is already installed in our project, so we just have to configure the baseURL- to our backend server.

To do this, open the nuxt.config.js file in the root directory and add the baseURL in the axios object.

axios: {
  baseURL:'http://localhost:4000'
},

Building The Music Manager

Setting Up The UI

Let’s start by cleaning up the UI. Open up the pages/index.vue file and remove all of the code in there with the following:

<template>
<div>Hello</div>
</template>

After doing this, you should only be able to see a “Hello” in the browser.

In the root directory, create a /partials folder. Inside the /partials folder, create a navbar.vue file and add the following code:


<template>
  <header>
    <nav class="navbar navbar-expand-lg navbar-light bg-info">
      <div class="container">
        <a class="navbar-brand" href="#">Music App</a>
        <button
          class="navbar-toggler"
          type="button"
          data-toggle="collapse"
          data-target="#navbarNav"
          aria-controls="navbarNav"
          aria-expanded="false"
          aria-label="Toggle navigation"
        >
          <span class="navbar-toggler-icon"></span>
        </button>
        <div class="collapse navbar-collapse justify-content-end" id="navbarNav">
          <ul class="navbar-nav">
            <li class="nav-item active">
              <a class="nav-link" href="#">Player</a>
            </li>
            <li class="nav-item">
              <a class="nav-link" href="#">Manager</a>
            </li>
          </ul>
        </div>
      </div>
    </nav>
  </header>
</template>
<style scoped>
.nav-link,
.navbar-brand {
  color: #ffff !important;
}
</style>

Note: We will be using the component to navigate through pages in our application. This is just going to be a simple component made up of Bootstrap navbar. Check out the official Bootstrap documentation for more reference.

Next, let’s define a custom layout for the application. Open the /layouts folder, replace the code in the default.vue file with the code below.

<template>
  <div>
    <navbar />
    <nuxt />
  </div>
</template>
<script>
import navbar from '@/partial/navbar'
export default {
  components: {
    navbar
  }
}
</script>

We import the navbar into this layout, meaning that all the pages in our application will have that navbar component in it. (This is going to be the component that all other component in our application will be mounted.)

After this, you should be able to see this in your browser:

Nuxt.js Navbar component after modification
Nuxt.js Navbar component (Large preview)

Now let’s setup the UI for our manager. To do this, we need to create a /manager folder within the components folder and then add a file into the folder named manager.vue.

In this file, add the following code:

<template>
  <section class="mt-5">
    <div class="container mb-4">
      <div class="row">
        <div class="col-md-12">
          <div class="card">
            <div class="card-body">
              <div class="card-title mb-4">
                <h4>Add Music</h4>
              </div>
              <form>
                <div class="form-group">
                  <label for="title">Title</label>
                  <input type="text" class="form-control" />
                </div>
                <div class="form-group">
                  <label for="artist">Artist</label>
                  <input type="text" class="form-control" />
                </div>
                <div class="form-group">
                  <label for="artist">Music</label>
                  <div class="custom-file">
                    <input type="file" class="custom-file-input" id="customFile" />
                    <label class="custom-file-label" for="customFile">Choose file</label>
                  </div>
                </div>
                <div class="form-group">
                  <button class="btn btn-primary">Submit</button>
                </div>
              </form>
            </div>
          </div>
        </div>
      </div>
    </div>
    <div class="container">
      <div class="row">
        <div class="col-md-12">
          <div class="card bg-light p-1 showdow-sm">
            <div class="card-title">
              <button class="btn btn-info m-3">Add Music</button>
            </div>
            <div class="card-body">
              <table class="table">
                <thead>
                  <tr>
                    <th scope="col">#</th>
                    <th scope="col">Title</th>
                    <th scope="col">Artist</th>
                    <th scope="col">Date created</th>
                    <th scope="col">Action</th>
                  </tr>
                </thead>
                <tbody>
                  <tr>
                    <td>1</td>
                    <td>Demo Title</td>
                    <td>Wisdom.vue</td>
                    <td>12/23/13</td>
                    <td>
                      <button class="btn btn-info">Delete</button>
                    </td>
                  </tr>
                </tbody>
              </table>
            </div>
          </div>
        </div>
      </div>
    </div>
  </section>
</template>

Note: This is just a simple Bootstrap template for adding music into our application. The form will define a table template that will list all os the music that can be found in our database.

After defining this component, we need to register it in the /pages folder to initailize routing.

Nuxt.js doesn’t have a ‘router.js’ file like Vue.js. It uses the pages folder for routing. For more details, visit the Nuxt.js website.

To register the component, create a /manager folder within the /pages folder and create an index.vue file. Then, place the following code inside the file:

<template>
  <div>
    <manager />
  </div>
</template>
<script>
import manager from '@/components/manager/manager'
export default {
  components: {
    manager
  }
}
</script>

This is the component that will render in our pages route.

After doing this, head over to your browser and navigate to /manager — you should be seeing this:

UI of music Manager
Music manager UI (Large preview)

Listing All Music

Let’s continue by creating a function that will fetch all of the music. This function will be registered in the created life cycle hook, so that whenever the component is created, the function will be called.

Let’s start by creating a variable in the vue instance that will hold all of the music:

allmusic = [];
musicLoading: false,

Then, define a getAllMusics function and add the following code:

async getAllMusics() {
    this.musicLoading = true
    try {
      let data = await this.$axios.$get('/music')
      this.allmusic = data
      this.musicLoading = false
    } catch (err) {
      this.musicLoading = false
      swal('Error', 'Error Fetting Musics', 'error')
    }
  }

Next, register within the created life cycle hook:

created() {
    this.getAllMusics()
  }

Outputting The Data

Now it’s time to output all of the songs on the table which we’ve created earlier:

<table class="table">
              <thead>
                <tr>
                  <th scope="col">#</th>
                  <th scope="col">Title</th>
                  <th scope="col">Artist</th>
                  <th scope="col">Date created</th>
                  <th scope="col">Action</th>
                </tr>
              </thead>
              <div
                v-if="musicLoading"
                class="spinner-border"
                style="width: 3rem; height: 3rem;"
                role="status"
              >
                <span class="sr-only">Loading...</span>
              </div>
              <tbody v-else>
                <tr v-for="(music, index) in allmusic" :key="index">
                  <td>{{ index + 1 }}</td>
                  <td>{{ music.title }}</td>
                  <td>{{ music.artist }}</td>
                  <td>{{ music.created }}</td>
                  <td>
                    <button class="btn btn-info" @click="deleteMusic(music._id)">Delete</button>
                  </td>
                </tr>
              </tbody>
            </table>

Remember that table we created earlier? Well, we will need to loop through the response we get back from our backend to list all of the music received back from the database.

Adding Music

To add a new piece of music we need to make an HTTP request to the back-end server with the music details. To do this, let’s start by modifying the form and handling of the file uploads.

On the form, we need to add an event listener that will listen to the form when it is submitted. On the input field, we add a v- model to bind the value to the input field.

<form @submit.prevent="addNewMusic">
            <div class="form-group">
              <label for="title">Title</label>
              <input type="text" v-model="musicDetails.title" class="form-control" />
            </div>
            <div class="form-group">
              <label for="artist">Artist</label>
              <input type="text" v-model="musicDetails.artist" class="form-control" />
            </div>
            <div class="form-group">
              <label for="artist">Music</label>
              <div class="custom-file">
                <input
                  type="file"
                  id="customFile"
                  ref="file"
                  v-on:change="handleFileUpload()"
                  class="custom-file-input"
                />
                <label class="custom-file-label" for="customFile">Choose file</label>
              </div>
            </div>
            <div class="form-group">
               <button class="btn btn-primary" :disabled="isDisabled">
                <span
                  class="spinner-border spinner-border-sm"
                  v-if="addLoading"
                  role="status"
                  aria-hidden="true"
                ></span>Submit
              </button>
            </div>
          </form>

And the script section should look like this:

<script>
export default {
  data() {
    return {
      musicDetails: {
        title: '',
        artist: '',
        music: ''
      },
      allmusic = [],
        musicLoading: false,
      isValid: false;
      addLoading: false,
    }
  },
  computed: {
    isDisabled: function() {
      if (
        this.musicDetails.title === '' ||
        this.musicDetails.artist === '' ||
        this.musicDetails.music === ''
      ) {
        return !this.isValid
      }
    }
  },
  methods: {
    handleFileUpload() {
      this.musicDetails.music = this.$refs.file.files[0]
      console.log(this.musicDetails.music.type)
    },
    addNewMusic() {
      let types = /(\.|\/)(mp3|mp4)$/i
      if (
        types.test(this.musicDetails.music.type) ||
        types.test(this.musicDetails.music.name)
      ) {
        console.log('erjkb')
      } else {
        alert('Invalid file type')
        return !this.isValid
      }
    }
  }
}
</script>

We will define a function that will send a request to our back-end service to create any new music that has been added to the list. Also. we need to write a simple validation function that will check for the file type so that the users can only upload files with an extention of .mp3 and .mp4.

It’s important to define a computed property to make sure that our input field isn’t empty. We also need to add a simple validator that will make sure the the file we are trying to upload is actually a music file.

Let’s continue by editing the addMusic function to make a request to our back-end service. But before we do this, let’s first install sweetalert which will provide us with a nice modal window. To do this this, open up your terminal and type in the following:

npm i sweetalert

After installing the package, create a sweetalert.js file in the /plugins folder and add this:

import Vue from 'vue';
import swal from 'sweetalert';

Vue.prototype.$swal = swal;

Then, register the plugin in the nuxt.config.js file inside the plugin instace like this:

plugins: [
    {
      src: '~/plugins/sweetalert'
    }
  ],

We have now successfully configured sweetalert in our application, so we can move on and edit the addmusic function to this:

addNewMusic() {
    let types = /(\.|\/)(mp3|mp4)$/i
    if (
      types.test(this.musicDetails.music.type) ||
      types.test(this.musicDetails.music.name)
    ) {
      let formData = new FormData()
      formData.append('title', this.musicDetails.title)
      formData.append('artist', this.musicDetails.artist)
      formData.append('music', this.musicDetails.music)
      this.addLoading = true
      this.$axios
        .$post('/music', formData)
        .then(response => {
          console.log(response)
          this.addLoading = false
          this.musicDetails = {}
          this.getAllMusics() // we will create this function later
          swal('Success', 'New Music Added', 'success')
        })
        .catch(err => {
          this.addLoading = false
          swal('Error', 'Something Went wrong', 'error')
          console.log(err)
        })
    } else {
      swal('Error', 'Invalid file type', 'error')
      return !this.isValid
    }
  },

Let’s write a simple script that will toggle the form, i.e it should only display when we want to add new music.

We can do this by editing the ‘Add Music’ button in the table that displays all of the music that can be found:

<button
    class="btn btn-info m-3"
    @click="initForm">
    {{addState?"Cancel":"Add New Music"}}
</button>

Then, add a state that will hold the state of the form in the data property:

addState: false

After doing this, let’s define the initForm function:

initForm() {
    this.addState = !this.addState
  },

And then add v-if="addState" to the div that holds the form:

<div class="card" v-if="addState">

Deleting Music

To delete music, we need to call the delete endpoint and pass the music id as a param. Let’s add a click event to the ‘Delete’ button that will trigger the function to delete a function:

<button class="btn btn-info" @click="deleteMusic(music._id)">Delete</button>

The delete function will be making an HTTP request to our back-end service. After getting the music ID from the deleteMusic function parameter, we will add the ID in the URL that we are using to send the request. This specifies the exact piece of music that ought to be removed from the database.

deleteMusic(id) {
    swal({
      title: 'Are you sure?',
      text: 'Once deleted, you will not be able to recover this Music!',
      icon: 'warning',
      buttons: true,
      dangerMode: true
    }).then(willDelete => {
      if (willDelete) {
        this.$axios
          .$delete('/music/' + id)
          .then(response => {
            this.getAllMusics()
            swal('Poof! Your Music file has been deleted!', {
              icon: 'success'
            })
          })
          .catch(err => {
            swal('Error', 'Somethimg went wrong', 'error')
          })
      } else {
        swal('Your Music file is safe!')
      }
    })
  }

With all of this, we have just built our music manager. Now it’s time to build the music player.

Let’s start by creating a new folder in the components folder named /player. Then, create a player.vue file within this folder and add this:

<template>
  <section>
    <div class="container">
      <div class="row">
        <div class="col-md-12">
          <h3 class="text-center">Player</h3>
        </div>
      </div>
    </div>
  </section>
</template>
<script>
export default {
  data() {
    return {}
  }
}
</script>
<style  scoped>
</style>

Next, let’s import this component into the index.vue file in the /pages folder. Replace the code in index.vue file to this:

<template>
  <div>
    <player />
  </div>
</template>
<script>
import player from '@/components/player/player'
export default {
  components: {
    player
  }
}
</script>

Let’s configure routing in our navbar component to enable routing between our pages.

To route in a Nuxt.js application, the nuxt-link is used after which you have specified the page for that route to a particular instance. So let’s edit the code in the partials/navbar component to this:

<template>
  <header>
    <nav class="navbar navbar-expand-lg navbar-light bg-info">
      <div class="container">
        <nuxt-link to="/" class="navbar-brand">Music App</nuxt-link>
        <button
          class="navbar-toggler"
          type="button"
          data-toggle="collapse"
          data-target="#navbarNav"
          aria-controls="navbarNav"
          aria-expanded="false"
          aria-label="Toggle navigation"
        >
          <span class="navbar-toggler-icon"></span>
        </button>
        <div class="collapse navbar-collapse justify-content-end" id="navbarNav">
          <ul class="navbar-nav">
            <li class="nav-item active">
              <nuxt-link to="/" class="nav-link">Player</nuxt-link>
            </li>
            <li class="nav-item">
              <nuxt-link to="/manager" class="nav-link">Manager</nuxt-link>
            </li>
          </ul>
        </div>
      </div>
    </nav>
  </header>
</template>
<style scoped>
.nav-link,
.navbar-brand {
  color: #ffff !important;
}
</style>

With this, we can navigate through our pages by using the navbar.

Building The Player

Before we begin, we need to extend Webpack to load audio files. Audio files should be processed by file-loader. This loader is already included in the default Webpack configuration, but it is not set up to handle audio files.

To do this, go to the nuxt.config.js file and modify the build object to this:

build: {
    extend(config, ctx) {
      config.module.rules.push({
        test: /\.(ogg|mp3|mp4|wav|mpe?g)$/i,
        loader: 'file-loader',
        options: {
          name: '\[path\][name].[ext]'
        }
      })
    }
  }

Next, let’s write a function that will get all songs and then use the Audio constructor to play the first song in the allMusic array.

For starters, let’s modify our player.vue file to this:

<template>
  <section v-if="allMusic">
    <div class="container">
      <div class="row">
        <div class="col-md-12">
          <h3 class="text-center">Player</h3>
        </div>
      </div>
      <div class="row">
        <div class="col-md-6">
          <span>{{this.current.title}} - {{this.current.artist}}</span>
        </div>
      </div>
    </div>
  </section>
</template>
<script>
export default {
  data() {
    return {
      current: {
        title: '',
        artist: ''
      },
      song: true,
      isplaying: false,
      allMusic: null,
      index: 0,
      player: ''
    }
  },
  methods: {
     async initPlayer() {
      if (this.allMusic !== []) {
        this.current = await this.allMusic[this.index]
        this.player.src = `http://localhost:4000/${this.current.music.path}`
      } else {
        this.song = true
      }
    },
      async getAllSongs() {
        try {
        let response = await this.$axios.$get('/music')
        console.log(response)
        if (response === []) {
          this.song = true
          this.current = null
        } else {
          this.song = false
          this.allMusic = response
        }
        await this.initPlayer()
      } catch (err) {
        this.current = null
        console.log(err)
      }
    }
  },
  created() {
 if (process.client) {
      this.player = new Audio()
    }
    this.getAllSongs()
  }
}
</script>
<style  scoped>
</style>

Once the file is served, the music will play in the background and then you should be able to see this in your browser:

UI of Music player
Music player UI (Large preview)

To stop the music, all you need to do is comment out the await player.play() in the initPlayer function.

Creating The Player UI

Let’s now define our music player UI by replacing the template in our player.vue file with the following:

<template>
  <section v-if="allMusic">
    <div class="container">
      <div class="row mb-5">
        <div class="col-md-12">
          <h3 class="text-center">Player</h3>
        </div>
      </div>
      <div class="row mt-5">
        <div class="col-md-6">
          <img
            src="https://images.pexels.com/photos/3624281/pexels-photo-3624281.jpeg?auto=compress&cs=tinysrgb&dpr=1&w=500"
            class="image"
          />
          <div class="card player_card">
            <div class="card-body">
              <h6 class="card-title">
                <b>{{this.current.title}} - {{this.current.artist}}</b>
              </h6>
              <div>
                <i class="fas fa-backward control mr-4"></i>
                <i class="fas fa-play play"></i>
                <i class="fas fa-pause play"></i>
                <i class="fas fa-forward control ml-4"></i>
              </div>
            </div>
          </div>
        </div>
        <div class="col-md-6">
          <div class="card shadow">
            <table class="table">
              <thead>
                <tr>
                  <th scope="col">#</th>
                  <th scope="col">Title</th>
                  <th scope="col">Artist</th>
                  <th scope="col">Action</th>
                </tr>
              </thead>
              <tbody>
                <tr>
                  <th scope="row">1</th>
                  <td>Mark</td>
                  <td>Otto</td>
                  <td>
                    <button class="btn btn-primary">Play</button>
                  </td>
                </tr>
              </tbody>
            </table>
          </div>
        </div>
      </div>
    </div>
  </section>
</template>

Then, add the following style into the style section:

<style  scoped>
.image {
  border-radius: 5px !important;
  position: relative;
  height: 300px;
  width: 100%;
}
.player_card {
  text-align: center;
  bottom: 20px;
  margin: 0px 40px;
}
.text-muted {
  font-size: 15px;
}
.play {
  font-size: 40px;
}
.control {
  font-size: 25px;
}
</style>

After modifying this, the player should look like this:

Music player final UI
Final UI of music player (Large preview)

Adding The Play Function

We’ll continue by displaying the music description on the table. In order to do this, replace the table with the code below:

<table class="table">
              <thead>
                <tr>
                  <th scope="col">#</th>
                  <th scope="col">Title</th>
                  <th scope="col">Artist</th>
                  <th scope="col">Action</th>
                </tr>
              </thead>
              <tbody>
                <tr v-for="(music,index) in allMusic" :key="index">
                  <th scope="row">{{index+1}}</th>
                  <td>{{music.title}}</td>
                  <td>{{music.artist}}</td>
                  <td>
                    <button class="btn btn-primary">Play</button>
                  </td>
                </tr>
              </tbody>
            </table>

We don’t want to display the ‘Play’ and ‘Pause’ icons at the same time. Instead, we want a situation that when the song is playing, the ‘Pause’ icon is displayed. Also, when the song is paused, the play icon should be displayed.

To achieve this, we need to set a isPlaying state to the false instance and then use this instance to toggle the icons. After that, we will add a function to our ‘Play’ icon.

isplaying:false

After doing this, modify your ‘Play’ and ‘Pause’ icon to this:

<i class="fas fa-play play" v-if="!isplaying" @click="play"></i>
<i class="fas fa-pause play" v-else></i>

With all this let’s define the play method:

play(song) {
      console.log(song)
      if (song) {
        this.current = song
        this.player.src = `http://localhost:4000/${this.current.music.path}`
      }
      this.player.play()
      this.isplaying = true
    },

We, first of all, get the current song and pass it into the function parameter. We then define the JavaScript Audio() instance. Next, we check if the song is null: If it isn’t, we set this.current to the song we passed in the parameter, and then we call the Audio player instance. (Also, don’t forget that we have to set the isPlaying state to true when the music is playing.)

Adding The Pause Function

To pause a song, we will use the Audio pause method. We need to add a click event to the pause icon:

<i class="fas fa-pause play" @click="pause" v-else></i>

And then define the function in the methods instance:

pause() {
      this.player.pause()
      this.isplaying = false
    },

Playing A Song From The Music List

This is quite simple to implement. All we have to do is add a click event that will change the song parameter in the play method to the song we just created.

Simply modify the play button on the music list table to this:

<button class="btn btn-primary" @click="play(music)">Play</button>

And there you have it!

Adding The Next Function

To add the next function, we need to increment the index by one. To do this, add a click event to the next icon:

@click="next"

And then define the prev function in the methods instance:

next() {
      this.index++
      if (this.index > this.allMusic.length - 1) {
        this.index = 0
      }
       this.current = this.allMusic[this.index]
      this.play(this.current)
    },

This conditional is responsible for replaying all of the songs whenever the last song in the list has been played.

Adding The previous Function

This is actually the opposite of the next function, so let’s add a click event to the previous function:

@click="prev"

Next, we define the previous function:

prev() {
      this.index--
      if (this.index < 0) {
        this.index = this.allMusic.length - 1
      }
      this.current = this.allMusic[this.index]
      this.play(this.current)
    },

Our music player app is now complete!

Conclusion

In this article, we looked at how we can build a music manager with Nuxt.js and Express.js. Along the way, we saw how Multer streamlines the process of handling file uploads and how to use Mongoose to interact without a database. Finally, we used Nuxt.js to build the client app which gives it a fast and snappy feel.

Unlike other frameworks, building an application with Nuxt.js and Express.js is quite easy and fast. The cool part about Nuxt.js is the way it manages your routes and makes you structure your apps better.

  • You can access more information about Nuxt.js here.
  • You can access the source code on Github here
Smashing Editorial (dm, il)

How to Build a Twitter Bot With Node.js

How to Build a Twitter Bot With Node.js

Building a Twitter bot using Twitter's API is one of the fundamental applications of the Twitter API. To build a Twitter bot with Nodejs, you’ll need to take these steps below before proceeding:

  1. Create a new account for the bot
  2. Apply for API access at developer.twitter.com
  3. Ensure you have Node.js and NPM installed on your machine

We’ll be building a Twitter bot with Nodejs to track a specific hashtag then like and retweet every post containing that hashtag.