By leveraging React-Apollo, this article focuses on how a file upload functionality can be added to a new or existing front-end application being powered by a GraphQL API. To achieve this, we would build this demo application which allows users to upload a profile image when creating an account alongside their preferred username. While we do this, we would gradually work through the process of :
- Creating a Node GraphQL backend application capable of accepting and sending the uploaded file to a Storage Bucket within the Google Cloud.
- Setting up a connection to the Google Cloud Storage.
- Collecting files inputs in a React Application and sending them to a GraphQL backend application using React Apollo.
Note: Although all code snippets are explained, to fully understand them you should have an understanding of JavaScript's es6 syntax, GraphQL and React.js.
This article will be beneficial to developers who are interested in or considering using Google Cloud Storage for file uploads in their React and Nodejs GraphQL application. While this article is not an introduction to GraphQL, each GraphQL concept used within this article is explained and referenced for better understanding.
Setting Up A Node GraphQL API
We will be building a GraphQL API to be consumed by our React application. This backend application will receive the image uploaded by a user and send the uploaded file to Google Cloud Storage.
To begin, we use the Apollo-Server-express and Express.js library to quickly bootstrap a GraphQL API. We can do this by running the following commands :
# Create a new Project folder and( && ) move into it
mkdir Node-GraphQL-API && cd Node-GraphQL-API

# Create a new Node project
yarn init -y

# Install the two needed dependencies
yarn add apollo-server-express express
Next, we proceed to build a single GraphQL endpoint, which is accessible via port 4000.
const express = require('express')
const { ApolloServer } = require('apollo-server-express')

const { Queries , Mutations , TypeDefs } = require('./resolvers')

const resolvers = {
  Query : Queries ,
  Mutation : Mutations
}

const server = new ApolloServer({ TypeDefs, resolvers });

const app = express();
server.applyMiddleware({ app });

app.listen({ port: 4000 }, () =>
  console.log(Graphiql running at http://localhost:4000/${server.graphqlPath}));
We started by importing our queries, mutations and type definitions from the resolvers file, then we created a resolvers object containing the imported queries and mutations then passed it into the ApolloServer constructor alongside the imported type definition.
Next, we created an instance of express.js in the app variable and integrated it into apollo server by calling the applyMiddleware method. According to react-apollo’s documentation on the applyMiddleware method, this integration enables the addition of various small internal middlewares. Lastly, we called the listen method on the express instance, telling it to listen and serve HTTP connections on port 4000. We also added a callback to log out a message telling users the server has been started.
The Graph Query Language is strongly typed and this is where most of it’s auto-documenting feature comes from. This strong typing is achieved using the GraphQL Schema definition language. It is also what is used to specify the data resolved by the Query, Mutation and Subscription operations.
A practical example of this is our schema definition for our upload application below.
const { gql }  =  require('apollo-server-express')

const typeDefinitions  = gql`
  type File {
    filename: String!
    mimetype: String!
    encoding: String!
  }

  type User {
     username: String
     imageurl: String
  }

  type Query {
    getUser  : User
  }

  type Mutation {
    createUser (
      username : String!
      image : Upload!
     ) : User

    deleteUser () : Boolean!
   }
`
export default typeDefinitions
Above, we created a schema using gql, consisting of three types; the File and User types which are object types in the GraphQL Schema Definition Language and the Query and Mutation types respectively
The created File object type contains three string fields; filename, mimetype and encoding which are all typically contained in any uploaded file. Next, we created an object type for Users with two string fields; username and imageurl. The username field is the username typed in by a user when creating an account, while the imageurl is the url of the image uploaded to the Google Cloud Storage. It would be used passed into the image src attribute to render the stored image to the user.
Next, we create the Query type which defines the query resolver function we have in the application. In our case, it is a single query used to get the user’s data. The getUser query here returns all data in the User object type.
We also created the Mutation type, which defines the two following mutations resolver functions below;
- The first one
createUser takes in a username which is a string scalar type and an Upload input type which comes from React-Apollo. It returns all data contained in the User object type after a successful account creation
- The second one
deleteUser takes in no argument but returns a boolean value to indicate if the deletion was successful or not.
Note: The exclamation mark (!) attached to these values make them mandatory, meaning that data must be present in that operation.
Implementing Resolver Functions
Having written a schema which defines the resolver function in our application, we can now go ahead in implementing the functions for the resolvers which we previously defined in the schema.
We start with the getUser resolver function which returns the user’s data.
// stores our user data
let Data  = []

export const Queries = {
   getUser: () => {
      return Data
  }
}
We created a data array which stores the user’ data. This data array is to be used by both the mutation and query function and so it is declared globally.
Next, we implemented the getUser function which returns the array containing the user’s data when queried.
Mutating Data
In Graphql applications, CREATE, UPDATE and DELETE operations are performed through the use of the Mutation resolver functions, they are what mutate the data.
An example of these mutation resolvers are the two resolvers in our application which creates a user and deletes a user.
export const Mutations = {
    createUser: (_, { username, image }) => {
      # boilerplate resolver function
   },

 # resets the user's data
  deleteUser: (_ ) =>  {
    Data = []

    if (Data.length < 1) {
        return true
    } else {
        return false
    }
 },
}
Here is an explanation of the two resolvers above:
createUser
This creates a user using the passed in arguments. First, we specify the parent argument (_) and next we destructure the username and image which would be passed in when making the mutation in our frontend application.
This is where the uploading of files will take place. We will come back to the actual implementation of this mutation resolver after setting up a connection to the Google Cloud Storage.deleteUser
As we defined it in our schema, this resolver function takes no argument. The purpose is to empty the data array and by checking the length, it returns a boolean value; - true if the items are less than 1, meaning the array is empty and false if not.
Note: If we had a real database connection, this resolver function would take in an ID argument which would be used in selecting the user whose record is to be deleted.
Having created our schema and resolver functions, we can now start our node server and test it by making HTTP requests using curl at http://localhost:4000/graphql or more conveniently, using the offline GraphiQL web console on http://localhost:4000/graphql just as shown below:

Setting Up The Google Cloud Storage
The Google Cloud Storage, an online file storage service is used to store object data. It is flexible enough to serve the needs of either enterprise grade applications or personal projects such as this. Being one of the offerings of the Google Cloud Platform, it can be found within the Storage section of the Google Cloud Console.
To get started, follow the following steps :
- Visit the Google Cloud Platform to create an account and a project.
(First time users are given $300 worth of GCP credits so which is more than enough for this demo project.)
- Visit the Storage Browser section, within the Google Cloud Console and click on the Create Bucket button within the top navigation pane.
- Enter a preferred bucket name, leave other settings as default and click the create button at the bottom of the list.
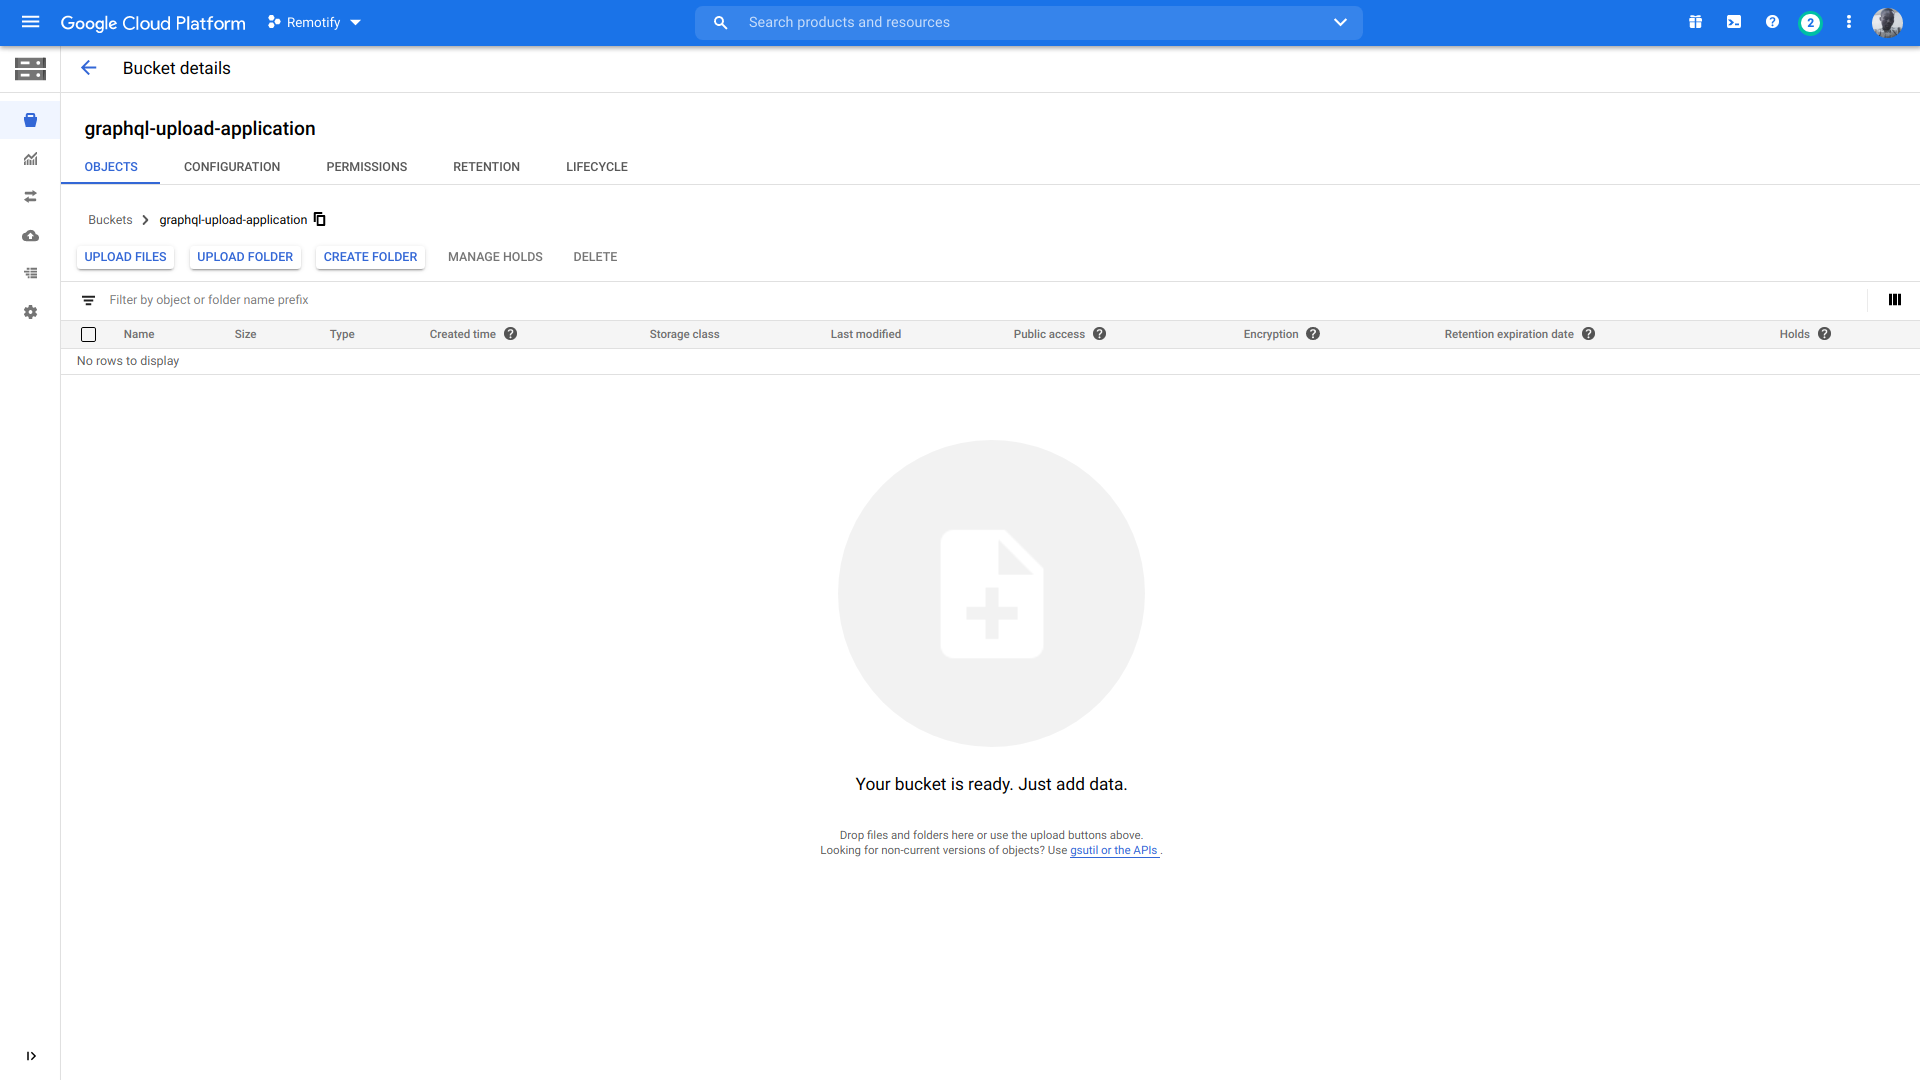
After being created, we would be redirected to the empty bucket similar to the one below;
At this point we have created a bucket where the uploaded files would be stored. Next we need a Service Account in order to enable a communication between our Node server and the Google Cloud.
What are Service Accounts?
Service accounts are a special type of account on the Google Cloud, created for non-human interaction, meaning communication through APIs. In our application, it would be used with a service account key by our API to authenticate with the Google Cloud when uploading stored user's images.
We follow the following steps in order to create a service account.
- Open the Identity Access Management ( IAM ) section of the Google Cloud Console
- From the left side navigation bar, click on Service Accounts and when there click on the Create Service Account button.
- Enter a preferred name and a description and click the Create button.
We would see a service account ID being auto generated using characters from our typed in name.
- Next, click the Select Role dropdown menu to select a role for this service account.
- Type “Storage Admin” and click the Storage Admin role.
This role gives our Node server a full control over stored resources in our storage buckets.
- Leave the remaining fields blank and click on the Done button.
After being created, we would be redirected to a list of all Service Accounts within our project, including the default created ones and the newly created service account.
Next, we need to create a secret Service Account Key in JSON format. The following steps below outline how to do that;
- Click on the newly created Service Account to get to the page for this Service Account.
- Scroll to the Keys section and click the Add Key dropdown and click on the Create new key option which opens a modal.
- Select a JSON file format and click the Create button at the bottom right of the modal.
After creating that, the key would be downloaded locally to our device and we would see an alert telling the user to keep the key private. This is because it contains sensitive fields about our project on the Google Cloud Platform.
Below is an example of the contained fields :
We now left with the following additional steps below in order to complete setting up our project on the Google Cloud Platform.
- Move the renamed file into our project directory
- Add the name of this file into our
.gitignore file inorder to prevent it getting pushed to Github or any preferred Version Control Service.
Implementing Create User Mutation
At this point, we can begin our implementation of the createUser resolver by connecting the Google Cloud Storage using @google-cloud/storage package. Aside using this library, we have the option of interacting with the Google Cloud Storage by make direct HTTP requests to the available API Endpoints, however the Google Storage Package does that internally and more for us.
First we initiate a connection process with the Google Cloud Storage in the createUser resolver
import  { Storage } from '@google-cloud/storage';


export const Mutations = {

createUser : (_, { username, image }) => {
const bucketName = "node-graphql-application"; // our bucket name

// We pass-in the downloaded SECRET KEY from our Service Account,
 const storage = new Storage({ keyFilename: path.join(__dirname, "../upload.json") });
  }
}
After initializing the Storage constructor import from the @google-cloud/storage package, using path we construct the file path to where the secret-key json file was stored. The is secret-key file has all the necessary data needed to authenticate with the Google Cloud.
Next, we expand our createUser resolver function to process and upload the passed in images to our Bucket on the Google Cloud Storage.
const removeWhiteSpaces = (name) => {
  return name.replace(/\s+/g, "");
};

export const Mutations = {
  createUser : async (_ , {filename , image}) => {
   const { filename, createReadStream } = await image;

    let sanitizedName = removeWhiteSpaces(filename);
    await new Promise((resolve, reject) => {
      createReadStream().pipe(
        storage
          .bucket(bucketName)
          .file(sanitizedName)
          .createWriteStream()
          .on("finish", () => {
            storage
              .bucket(bucketName)
              .file(sanitizedName)

           // make the file public
              .makePublic()
              .then(() => {
                Data = [];

            // save user's data into the Data array
                Data.push({
                  username: username,
                  imageurl: https://storage.googleapis.com/${bucketName}/${sanitizedName},
                });
                resolve();
              })
              .catch((e) => {
                reject((e) => console.log(exec error : ${e}));
              });
          })
      );
    });
  }
}
Above we are a performing a file upload of the file passed in to the resolver function. Here is a gradual breakdown of everything being done within the resolver;
- First, we asynchronously destructured
filename and createReadStream from the uploaded file. We then rid the destructured filename of whitespaces. The Storage library will try to do this by replacing the whitespace with the percentage character ( % )and this leads to a distorted file URL which can also choose to ignore.
- Next, we create a new promise and using Node Streams, we pipe the
createReadStream to the Google Storage constructor. We resolve this promise after a successful file upload or reject it in the error promise state from the makePublic method.
- We call the the bucket method on the storage class and pass in the name of our storage bucket and we further call the file method and pass in the name of the file and then we call the
createWriteStream method to upload the file.
- We make the file public, by calling the
makePublic method after passing the bucket name and filename of the recently uploaded file.
- We create an object of the user’s data containing the username, and a constructed url of the file uploaded to our storage bucket. The URL structure for public files on the Google Cloud Storage is
https://storage.googleapis.com/{BUCKET_NAME}/{FILENAME}, using JavaScript’s template literals, we can insert our bucket name into the BUCKET_NAME placeholder and also the name of the uploaded file into the FILENAME placeholder and this would give a valid URL of the file which we can access it through.
Note: Files are private by default on the Google Cloud Storage and cannot be accessed via URL, hence the need to make the file public after uploading into our cloud bucket.
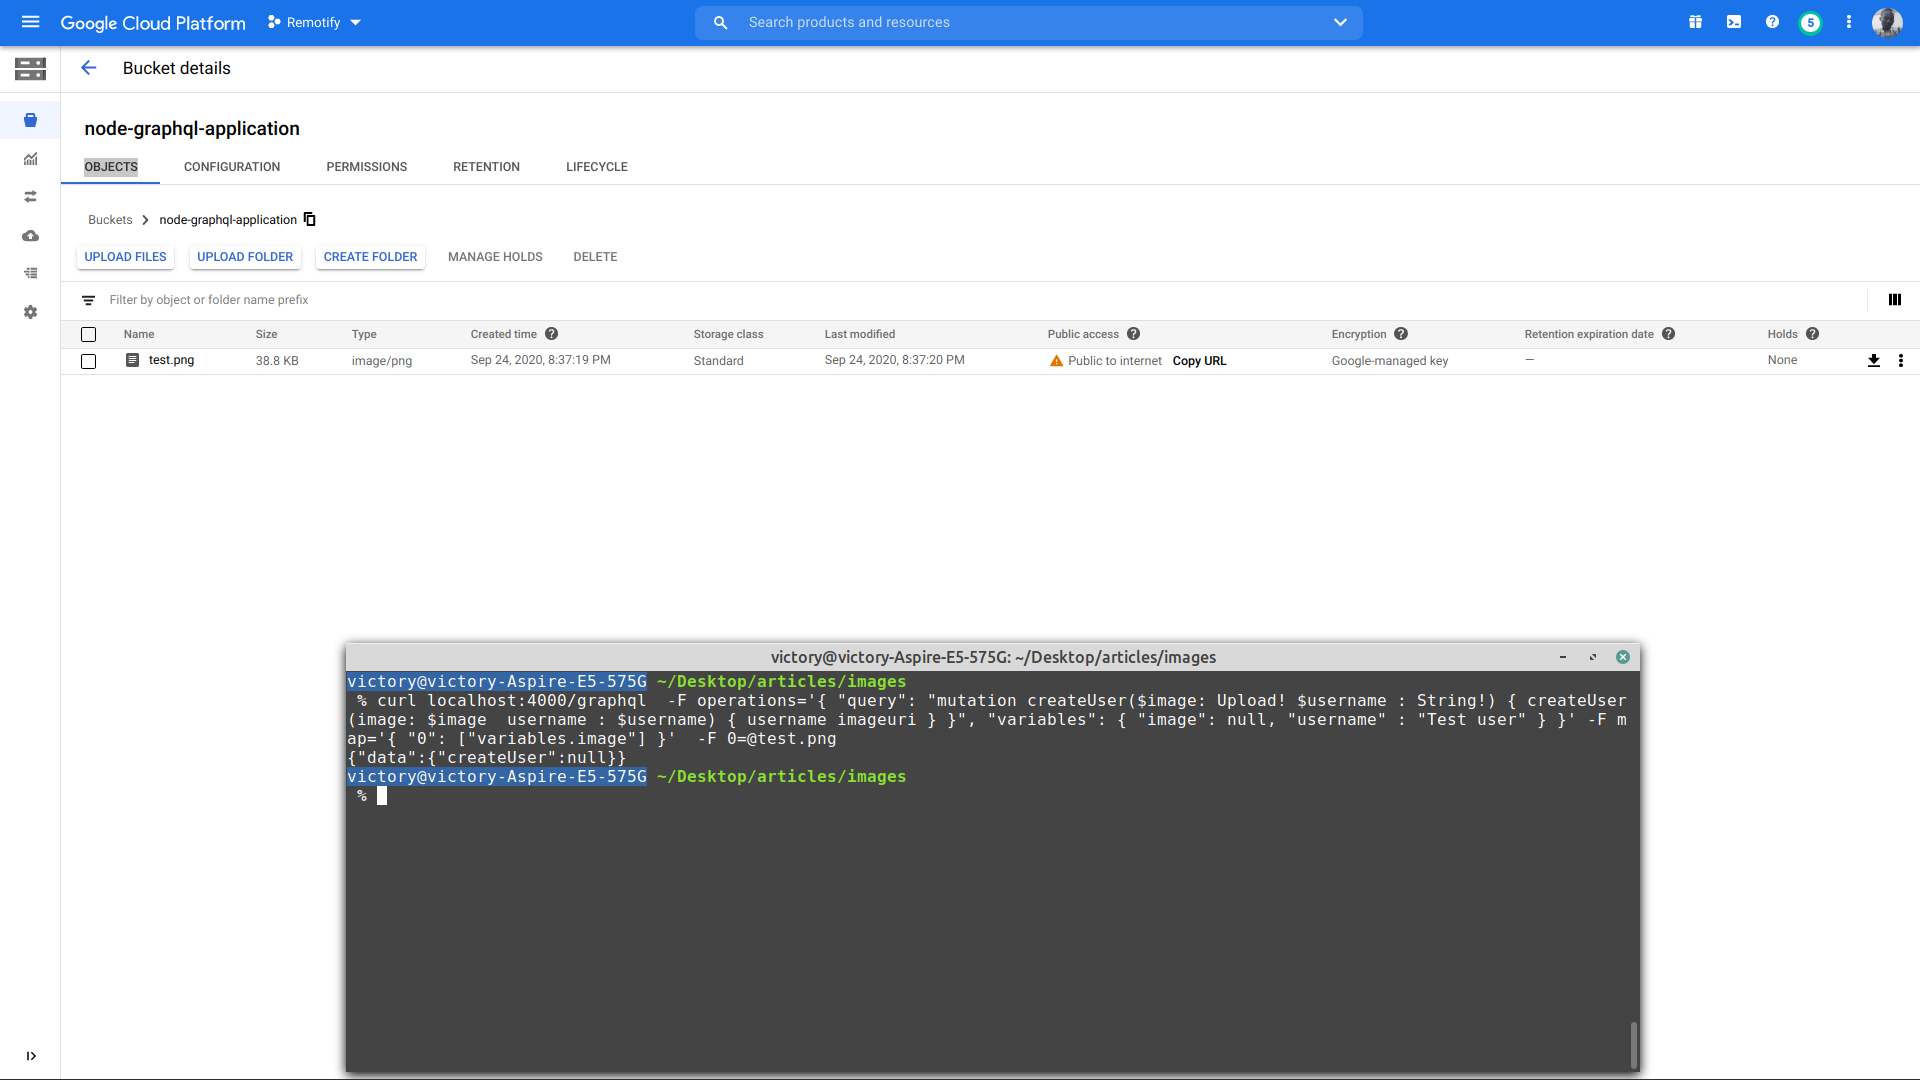
We can test the createUser endpoint using curl to perform a demo account creation.
curl localhost:4000/graphql -F operations='{ "query": "mutation createUser($image: Upload! $username : String!) { createUser(image: $image username : $username) { username imageuri } }", "variables": { "image": null, "username" : "Test user" } }' -F map='{ "0": ["variables.image"] }' -F 0=test.png
In the HTTP request above, we specified the HTTP verb as a POST request and our endpoint and other request headers. After that, we specified the GraphQL operation for the createUser resolver, inferring the username and image types. Then we specified the path to the test file.
If the request above is successful, we would see the uploaded file listed in our bucket like this:
Consuming Our GraphQL API
Now we are left with building the front-end part of our application which consumes our GraphQL API. We would be bootstrapping our React application using the create-react-app cli.
To get started, run the following commands from your terminal :
# Create A New Application using Create-React-App CLI
npx create-react-app Graphql-upload-frontend

# Move into newly created project directory
cd Graphql-upload-frontend

# Dependencies needed for our application
yarn add react-dropzone @apollo/react-hooks graphql apollo-cache-inmemory
Next, we create a link to our GraphQL endpoint and initiate the Apollo Client in a separate configuration file.
// config.js

import { ApolloClient } from "apollo-client";
import { InMemoryCache } from "apollo-cache-inmemory";
import { createUploadLink } from "apollo-upload-client";

const GRAPHQL_ENDPOINT = "http://localhost:3000/graphql";
const cache = new InMemoryCache()

const Link = createUploadLink({
  url: GRAPHQL_ENDPOINT,
});

export const Config = new ApolloClient({
  link: uploadLink,
  cache
})
If you have gone through the Getting Started section of the React-Apollo documentation, you would notice a slight difference in the packages used. Here is a breakdown of what we accomplished above:
- By initializing the
InMemoryCache constructor from the [apollo-cache-inmemor](https://www.npmjs.com/package/apollo-cache-inmemory)`y` package, we created a data store which stores the cache from all requests made in our application
- We created a connection link using the
apollo-upload-client package which has our single GraphQL endpoint as a value. This link handles the multi-part upload requests which is done when a file is being uploaded through a GraphQL endpoint and also handles the Query and Mutation operation.
- We initialized the Apollo Client constructor in a variable, passed in the upload link and the cache and then exported the variable to be used by the ApolloClient provider.
We then wrap our entire application tree with the ApolloProvider, so we can make a query, mutation or subscription from any component.
import React from "react";
import ReactDOM from "react-dom";
import App from "./App";
import * as serviceWorker from "./serviceWorker";
import { Config } from "./config";
import { ApolloProvider } from "@apollo/react-hooks";

ReactDOM.render(
    <ApolloProvider client={Config}>
      <App />
    </ApolloProvider>,
  document.getElementById("root")
);

serviceWorker.unregister();
We can above see the ApolloProvider wrap the root component and we passed in the Apollo Client which was exported from the configuration file as Config into the ApolloProvider’s client prop.
Working With GraphQL Data
At this stage, our application is almost ready to begin working with data from the GraphQL application but before that, we need to define our GraphQL operations. Remember the strong typing feature of GraphQL we previously talked about? It also applies on the Client Side.
We define our GraphQL operations using gql from the @apollo/react-hooks package. We use gql with grave accents (backticks) to parse a GraphQL string. First we define the operation type (either a mutation, subscription or query) then we give it a name. If the operation takes any arguments, we infer the types of the individual arguments in a parenthesis to a prefix identifier using a sigil operator) ($) and we can then use this typed argument through it’s prefix.
We can see a practical example of this in the three GraphQL operations we have defined below for our application.
# data.js
import { gql } from "@apollo/react-hooks";

export const CREATE_USER = gql`
  mutation createUser($username: String!, $image: Upload!) {
    createUser(username: $username, image: $image) {
      username
    }
  }
`;

export const DELETE_ACCOUNT = gql`
  mutation deleteAccount {
    deleteUser
  }
`;

export const GET_USER = gql`
  query getUser {
    getUser {
      username
      imageurl
    }
  }
`;
Above, we are defining our GraphQL operations to be used in variables and we are exporting these variables so they can be used by the application components. Here is a quick rundown of each variable:
CREATE_USER
It defines the createUser mutation which receives a username of a string type and also an image which has the Upload object type from React-Apollo. The image is represents the file which is uploaded by the user with all necessary fields within.DELETE_ACCOUNT
This is also defined as a mutation, but it receives nothing hence it has no parenthesis containing any defined scalar. It only defines and name the deleteUser mutation.GET_USER
This is defined as a Query operation. We can see the two values which are returned from this query being stated in the within the curly braces. Although this query receives no argument, GraphQL queries sometime also receive arguments when fetching a specific data and the arguments are also defined in the parenthesis just like a mutation.
Now that we have a GraphQL connection in our application, we can now build out Application Layout where we make use of the previously defined GraphQL operations in two components.
Application Layout
Our application would have the following states in order to welcome a new user, create an account and lastly keep that user logged in.
- Guest State
This is the initial state of the application where users are shown a default username and image. A user can switch this state by creating an account.
- Create Account State
Users at this point can type in a username and drag ‘n’ drop or click to add an image. This is the point where the createUser mutation is fired when the submit button is clicked.
- Signed In State
At this point an account has been created, the image displayed is that which was uploaded by the user and is accessed using the image url from the Google Cloud Bucket.
All the states would be implemented in two components: App Component and Create Account Component. These states would be managed using React Hooks.
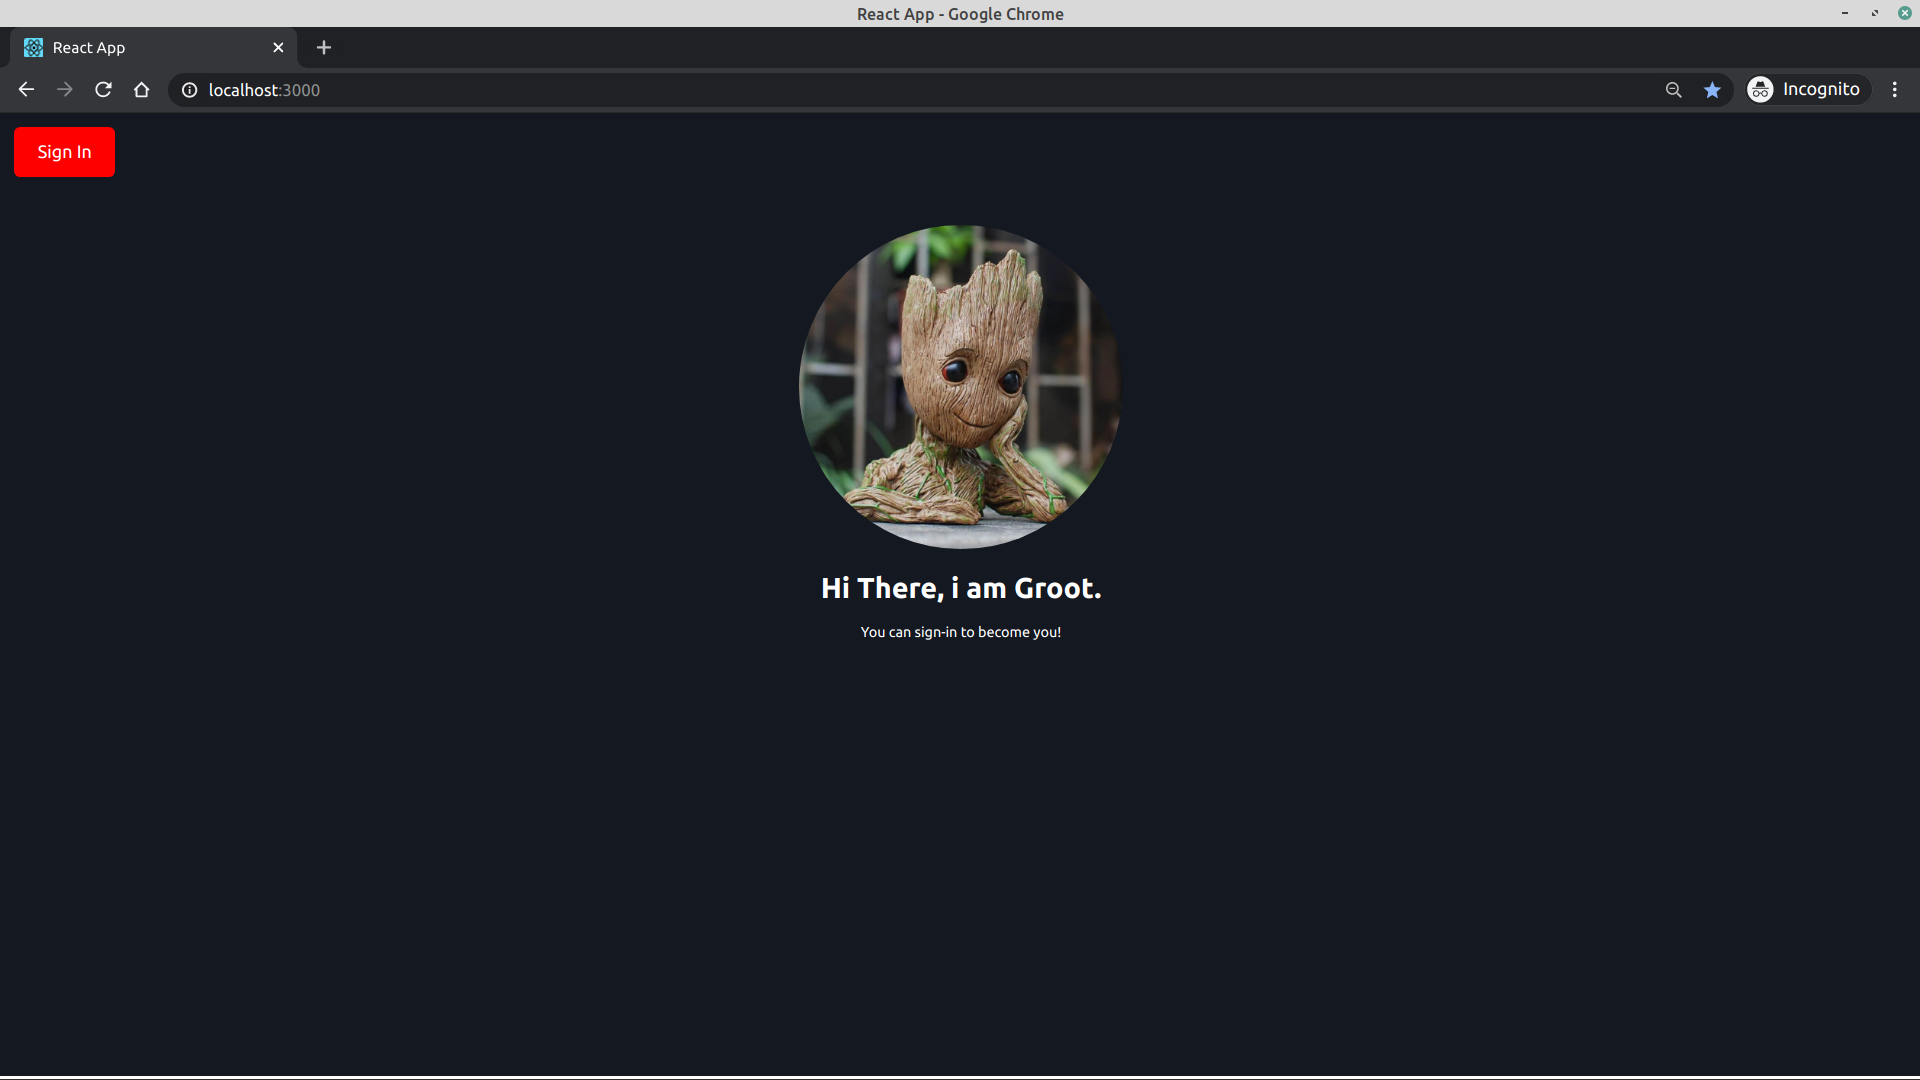
We begin with implementing the Guest state in the App Component, which shows a welcome text and a default stored image.
import React, { useState } from "react";

const App  = () => {
 const [ isCreatingAccount , setCreatingAccount ] = useState(false)

 return (
  <div className="App" style={{ height: window.innerHeight - 35 }}>
      <div onClick={() => {isCreatingAccount(true)}}  className="auth" >
        <p className="auth-text">
          Sign In
        </p>
      </div>
        <div className="content"
            <img
              className="user-img"
              src={ require("./assets/groot.jpg")}
              alt="default user and user"
            />
              <h1>  Hi There, i am   Groot </h1>
              <p> You can sign-in to become you!  </p>
          </div>
    </div>
   )
}

export default App
Above we have a React component which renders; a button, an image and a default welcome text. A user can switch the application state to create an account by the click of the Sign In button.
When placed in the app.js file in our project, our application becomes similar to the application below:
We expand the App Component to switch from the default view to the input fields at the click of the Create Account button.
import React, { useState, useEffect } from "react";
import { useMutation, useLazyQuery } from "@apollo/react-hooks";
import CreateUser from "./create-user";
import "../App.css";
import { DELETE_ACCOUNT, GET_USER } from "../data";

function App() {
  const [deleteUser] = useMutation(DELETE_ACCOUNT);
  const [getUser, { data, error }] = useLazyQuery(GET_USER);

  // state used to switch between a Guest and a user
  const [isLoggedIn, setLoggedIn] = useState(false);
  const [isCreatingAccount, beginCreatingAccount] = useState(false);

  // user data stored in state and passed to GraphQL
  const [userName, setuserName] = useState("");
  const [imgUrl, setImgUrl] = useState(null);

  // deleteAccount function which deletes the user's account
  const deleteAnAccount = () => {
    deleteUser()
      .then(() => {
        // resets all stored state
        setLoggedIn(false);
        setImgUrl(null);
        setuserName("");
      })
      .catch((e) => console.log(e));
  };

  useEffect(() => {
    if (isLoggedIn && data !== undefined) {
      setImgUrl(data.getUser[0].imageurl);
    }
  }, [data]);

  return (
    <div className="App" style={{ height: window.innerHeight - 35 }}>
      <div
        onClick={() => {
          if (!isLoggedIn) {
            beginCreatingAccount(!isCreatingAccount);
          } else if (isLoggedIn) {
            deleteAnAccount();
          }
        }}
        className="auth"
      >
        <p className="auth-text">
          {!isLoggedIn ? (!isCreatingAccount ? "Sign In" : "Cancel") : "Logout"}
        </p>
      </div>
      <div className="content">
        {!isCreatingAccount ? (
          <div>
            <img
              className="user-img"
              src={imgUrl ? imgUrl : require("../assets/groot.jpg")}
              alt="default user and user"
            />
            <h1>
              Hi There, i am
              {userName.length > 3 ? ${userName} : Groot}.
            </h1>
            <p>
              {!isLoggedIn
                ? "You can sign-in to become you!"
                : "You sign-out to become Groot!"}
            </p>
          </div>
        ) : (
          <CreateUser
            updateProfile={() => {
              getUser();
              setLoggedIn(true);
              beginCreatingAccount(false);
            }}
          />
        )}
      </div>
    </div>
  );
}

export default App;
In the code above, we have made the following additions to our application;
- We created two new states to track when the user is logged in and when the user is creating an account. These two states are updated by the Sign In button which can now start an account creation process or cancel it and return back to the default state.
Our application now uses the useLazyQuery hook which comes from apollo/react-hooks package to make a GraphQL query to fetch the user’s data using our previously created GET_USER definition.
- Our query here is said to be lazy because it is not executed immediately the application is loaded. It is executed after the
createUser mutation in the Create Account component has been executed successfully. According to the React - Apollo documentation, useLazyQuery does not execute it’s associated query immediately, but rather in response to events.
We watch the destructured data value which is undefined by default until the query is made, in a useEffect and then we switch the image src attribute to the imageurl returned from the query after querying the user’s data.
- At the click of the Sign In button the
isCreatingAccount state is updated to true and the Create Account component is shown for a user to input a username and add an image file.
- After creating an account, a user can click the Sign Out button to invoke the
deleteAUser function which executes the deleteUser mutation and when successful, it resets all state in the App Component.
Now, we can implement a drag ‘n’ drop functionality within the create-user component where an image can be dragged or clicked to open the device media explorer and after this we upload the added file to our Node server.
import React, { useState, useCallback } from "react";
import { useMutation } from "@apollo/react-hooks";
import { useDropzone } from "react-dropzone";
import "../App.css";
import { CREATE_USER, GET_USER } from "../data";

const CreateUser = (props) => {
  const { updateProfile } = props;
  const [createAccount, { loading }] = useMutation(CREATE_USER);
  // user data stored in state and passed to GraphQL
  const [userName, setuserName] = useState("");
  // user's uploaded image store in useState and passed to the GraphQL mutation
  const [userImage, setUserImage] = useState(null);

  // create user mutation function fired at the click of createAccount button
  const createAUser = () => {
    createAccount({
      variables: {
        username: userName,
        image: userImage,
      },
    })
      .then(() => {
        updateProfile();
      })
      .catch((e) => console.log(e));
  };

  const onDrop = useCallback(([file]) => {
    setUserImage(file);
  }, []);

  const {
    getRootProps,
    isDragActive,
    isDragAccept,
    getInputProps,
    isDragReject,
  } = useDropzone({
    onDrop,
    accept: "image/jpeg , image/jpg, image/png",
  });

  return (
    <div className="CreateUser" style={{ height: window.innerHeight - 35 }}>
      <div className="content">
        <div>
          <h1> {!loading ? "Create An Account" : "Creating Account ..."}</h1>
          <hr />
          <br />
          <form className="form">
            <div className="input-body">
              <label style={{ color: loading && "grey" }}> Username </label>
              <input
                disabled={loading}
                style={{ color: loading && "grey" }}
                onChange={(e) => setuserName(e.target.value)}
                placeholder="some nifty name"
                required={true}
                type="text"
              />
              <br />
              <br />
              {!userImage ? (
                <div
                  className="circle-ctn"
                  {...getRootProps({
                    isDragActive,
                    isDragAccept,
                    isDragReject,
                  })}
                >
                  <input {...getInputProps()} />
                  <div
                    className="box"
                    style={{
                      background: isDragActive && "#1b2733",
                    }}
                  >
                    <p
                      style={{ color: isDragReject && "red" }}
                      className="circle-text"
                    >
                      {!isDragActive
                        ? Tap or Drag 'n' Drop Image  to Add Profile Picture
                        : isDragReject
                        ? "Ooops upload images only"
                        : "Drop your image here to upload"}
                    </p>
                  </div>
                </div>
              ) : (
                <div className="img-illustration">
                  <img
                    style={{ filter: loading && "grayscale(80%)" }}
                    className="img-icon"
                    src={require("../assets/image-icon.png")}
                    alt="image illustration"
                  />
                  <p style={{ color: loading && "grey" }} className="file-name">
                    {userImage.path}
                  </p>
                </div>
              )}
              <br />
              <br />
              <button
                style={{
                  background: userName.length < 3 && "transparent",
                  color: userName.length < 3 && "silver",
                }}
                className="create-acct-btn"
                onClick={(e) => {
                  e.preventDefault();
                  createAUser();
                }}
                disabled={userName.length < 3 || loading}
              >
                {!loading ? "Create Account" : "Creating Account"}
              </button>
            </div>
          </form>
        </div>
      </div>
    </div>
  );
};

export default CreateUser;
Here is a gradual breakdown of all that’s happening above:
- We destructured
createAccount resolver function from the useMutation hook after passing in our previously defined CREATE_USER operation.
- We created a function;-
createAUser which is invoked at the click of the Create Account button after typing in a username and adding an image.
- We created an
onDrop function which is wrapped in the useCallback to avoid a recompution of this function. After the file is dropped, we keep it temporarily in the userImage state to be used when submitting the data.
- We destructured the four root properties from the useDropZone hook and then specified the acceptable file types alongside our custom onDrop function.
- Next, those root properties destructured are used in building a reactive dropzone, that reacts when an acceptable file or non - acceptable file is being dragged over our dropzone. This done by applying the root properties to our selected dropzone , which here happens to be a div element wrapping other smaller div elements. Also, by spreading the
…getInputProps() in the input element, it makes the input element hidden with a file type so when the dropzone is clicked, it opens the device media explorer.
- Lastly, we used the ternary operator in the inline styles to make the div have a border when a file is being dragged over it and also make this border red when a file type not specified is being dragged.
Now at the click of the Create Account button, using a ternary operator and the loading boolean value destructured from the useMutation hook, we switch the “Create Account “ text to “Creating Account …” to indicate that the data is being submitted and a network request is in flight.

Once the mutation has been executed successfully, we execute the lazy getUser query and we switch back to the Home Component but this time with data from the getUser query. Using the imageurl value returned in the getUser query result, we can access the uploaded image over the internet and also display it in the page.

Conclusion
In this article, we have walked through three aspects of creating a file upload pipeline. First we built a frontend application where users can drag and upload a file to upload it. Then we built a GraphQL API that connects the frontend application and a mutation to handle the incoming file. Lastly we connected our server to the Google Cloud Storage to store the file from the node server.
It is also recommended to read Apollo Server File Upload Best Practices on two more ways of performing file in a GraphQL application.
All files and code snippets referenced and used within this article is available Github.
References


