Operators are one of the most powerful tools when you are working with Kubernetes, especially when you are in a scenario where Stateful conditions are required like ordered and automated rolling updates, or graceful deployment/deletion and scaling/termination. The problem, however, is writing and building Operators require deep knowledge of Kubernetes internal and a lot lines of code.
Using Kubebuilder requires writing thousands lines of controller code in GO and existing implementations often don't cover the entire lifecycle. You can also go for Operator Framework in order to use Ansible or Helm charts but both have some limitations.
Hy everyone! :)
I'm Andreea, I'm 24 years old and I'm in love with all that have to do with the internet ;))
I sing up here to learn more about internet marketing and I hope to meet some amazing people too :)
I wish you all an awesome day!
Sarcasm disclaimer: This article is mostly sarcasm. I do not think that I actually speak for Dylan Thomas and I would never encourage you to foist a light theme on people who don’t want it. No matter how wrong they may be.
When Dylan Thomas penned the words, “Do not go gentle into that good night,” he was talking about death. But if he were alive today, he might be talking about Linux containers. There is no way to know for sure because he passed away in 1953, but this is the internet, so I feel extremely confident speaking authoritatively on his behalf.
My confidence comes from a complete overestimation of my skills and intelligence coupled with the fact that I recently tried to configure a Docker container as my development environment. And I found myself raging against the dying of the light as Docker rejected every single attempt I made like I was me and it was King James screaming, “NOT IN MY HOUSE!”
Pain is an excellent teacher. And because I care about you and have no other ulterior motives, I want to use that experience to give you a “gentle” introduction to using a Docker container as a development environment. But first, let’s talk about whyyyyyyyyyyy you would ever want to do that.
kbutwhytho?
Close your eyes and picture this: a grown man dressed up like a fox.
Wait. No. Wrong scenario.
Instead, picture a project that contains not just your source code, but your entire development environment and all the dependencies and runtimes your app needs. You could then give that project to anyone anywhere (like the fox guy) and they could run your project without having to make a lick of configuration changes to their own environment.
This is exactly what Docker containers do. A Dockerfile defines an entire runtime environment with a single file. All you would need is a way to develop inside of that container.
Wait for it…
VS Code and Remote – Containers
VS Code has an extension called Remote – Containers that lets you load a project inside a Docker container and connect to it with VS Code. That’s some Inception-level stuff right there. (Did he make it out?! THE TALISMAN NEVER ACTUALLY STOPS SPINNING.) It’s easier to understand if we (and by “we” I mean you) look at it in action.
Adding a container to a project
Let’s say for a moment that you are on a high-end gaming PC that you built for your kids and then decided to keep if for yourself. I mean, why exactly do they deserve a new computer again? Oh, that’s right. They don’t. They can’t even take out the trash on Sundays even though you TELL THEM EVERY WEEK.
This is a fresh Windows machine with WSL2 and Docker installed, but that’s all. Were you to try and run a Node.js project on this machine, Powershell would tell you that it has absolutely no idea what you are referring to and maybe you mispelled something. Which, in all fairness, you do suck at spelling. Remember that time in 4ᵗʰ grade when you got knocked out of the first round of the spelling bee because you couldn’t spell “fried.” FRYED? There’s no “Y” in there!
Now this is not a huge problem — you could always skip off and install Node.js. But let’s say for a second that you can’t be bothered to do that and you’re pretty sure that skipping is not something adults do.
Instead, we can configure this project to run in a container that already has Node.js installed. Now, as I’ve already discussed, I have no idea how to use Docker. I can barely use the microwave. Fortunately, VS Code will configure your project for you — to an extent.
From the Command Palette, there is an “Add Development Container Configuration Files…” command. This command looks at your project and tries to add the proper container definition.
In this case, VS Code knows I’ve got a Node project here, so I’ll just pick Node.js 14. Yes, I am aware that 12 is LTS right now, but it’s gonna be 14 in [checks watch] one month and I’m an early adopter, as is evidenced by my interest in container technology just now in 2020.
This will add a .devcontainer folder with some assets inside. One is a Dockerfile that contains the Node.js image that we’re going to use, and the other is a devcontainer.json that has some project level configuration going on.
Now, before we touch anything and break it all (we’ll get to that, trust me), we can select “Rebuild and Reopen in Container” from the Command Palette. This will restart VS Code and set about building the container. Once it completes (which can take a while the first time if you’re not on a high-end gaming PC that your kids will never know the joys of), the project will open inside of the container. VS Code is connected to the container, and you know that because it says so in the lower left-hand corner.
Now if we open the terminal in VS Code, Powershell is conspicously absent because we are not on Windows anymore, Dorthy. We are now in a Linux container. And we can both npm install and npm start in this magical land.
This is an Express App, so it should be running on port 3000. But if you try and visit that port, it won’t load. This is because we need to map a port in the container to 3000 on our localhost. As one does.
Fortunately, there is a UI for this.
The Remote Containers extension puts a “Remote Explorer” icon in the Action Bar. Which is on the left-hand side for you, but the right-hand side for me. Because I moved it and you should too.
There are three sections here, but look at the bottom one which says “Port Forwarding,” I’m not the sandwich with the most lettuce, but I’m pretty sure that’s what we want here. You can click on the “Forward a Port” and type “3000,” Now if we try and hit the app from the browser…
Mostly things, “just worked.” But the configuration is also quite simple. Let’s look at how we can start to customize this setup by automating some of the aspects of the project itself. Project specific configuration is done in the devcontainer.json file.
Automating project configuration
First off, we can automate the port forwarding by adding a forwardPorts variable and specifying 3000 as the value. We can also automate the npm install command by specifying the postCreateCommand property. And let’s face it, we could all stand to run AT LEAST one less npm install.
{
  // ...
  // Use 'forwardPorts' to make a list of ports inside the container available locally.
  "forwardPorts": [3000],
  // Use 'postCreateCommand' to run commands after the container is created.
  "postCreateCommand": "npm install",
  // ...
}
Additionally, we can include VS Code extensions. The VS Code that runs in the Docker container does not automatically get every extension you have installed. You have to install them in the container, or just include them like we’re doing here.
Extensions like Prettier and ESLint are perfect for this kind of scenario. We can also take this opportunity to foist a light theme on everyone because it turns out that dark themes are worse for reading and comprehension. I feel like a prophet.
// For format details, see https://aka.ms/vscode-remote/devcontainer.json or this file's README at:
// https://github.com/microsoft/vscode-dev-containers/tree/v0.128.0/containers/javascript-node-14
{
  // ...
  // Add the IDs of extensions you want installed when the container is created.
  "extensions": [
    "dbaeumer.vscode-eslint",
    "esbenp.prettier-vscode",
    "GitHub.github-vscode-theme"
  ]
  // ...
}
If you’re wondering where to find those extension ID’s, they come up in intellisense (Ctrl/Cmd + Shift) if you have them installed. If not, search the extension marketplace, right-click the extension and say “Copy extension ID.” Or even better, just select “Add to devcontainer.json.”
By default, the Node.js container that VS Code gives you has things like git and cURL already installed. What it doesn’t have, is “cowsay,” And we can’t have a Linux environment without cowsay. That’s in the Linux bi-laws (it’s not). I don’t make the rules. We need to customize this container to add that.
Automating environment configuration
This is where things went off the rails for me. In order to add software to a development container, you have to edit the Dockerfile. And Linux has no tolerance for your shenanigans or mistakes.
The base Docker container that you get with the container configurations in VS Code is Debian Linux. Debian Linux uses the apt-get dependency manager.
apt-get install cowsay
We can add this to the end of the Dockerfile. Whenever you install something from apt-get, run an apt-get update first. This command updates the list of packages and package repos so that you have the most current list cached. If you don’t do this, the container build will fail and tell you that it can’t find “cowsay.”
# To fully customize the contents of this image, use the following Dockerfile instead:
# https://github.com/microsoft/vscode-dev-containers/tree/v0.128.0/containers/javascript-node-14/.devcontainer/Dockerfile
FROM mcr.microsoft.com/vscode/devcontainers/javascript-node:0-14
# ** Install additional packages **
RUN apt-get update \
  && apt-get -y install cowsay
A few things to note here…
That RUN command is a Docker thing and it creates a new “layer.” Layers are how the container knows what has changed and what in the container needs to be updated when you rebuild it. They’re kind of like cake layers except that you don’t want a lot of them because enormous cakes are awesome. Enormous containers are not. You should try and keep related logic together in the same RUN command so that you don’t create unnecessary layers.
That \ denotes a line break at the end of a line. You need it for multi-line commands. Leave it off and you will know the pain of many failed Docker builds.
The && is how you add an additional command to the RUN line. For the love of god, don’t forget that \ on the previous line.
The -y flag is important because by default, apt-get is going to prompt you to ensure you really want to install what you just tried to install. This will cause the container build to fail because there is nobody there to say Y or N. The -y flag is shorthand for “don’t bother me with your silly confirmation prompts”. Apparently everyone is supposed to know this already. I didn’t know it until about four hours ago.
Use the command prompt to select “Rebuild Container”…
And, just like that…
It doesn’t work.
This the first lesson in what I like to call, “Linux Vertigo.” There are so many distributions of Linux and they don’t all handle things the same way. It can be difficult to figure out why things work in one place (Mac, WSL2) and don’t work in others. The reason why “cowsay” isn’t available, is that Debian puts “cowsay” in /usr/games, which is not included in the PATH environment variable.
One solution would be to add it to the PATH in the Dockerfile. Like this…
FROM mcr.microsoft.com/vscode/devcontainers/javascript-node:0-14
RUN apt-get update \
  && apt-get -y install cowsay
ENV PATH="/usr/games:${PATH}"
EXCELLENT. We’re solving real problems here, folks. People like cow one-liners. I bullieve I herd that somewhere.
To summarize, project configuration (forwarding ports, installing project depedencies, ect) is done in the “devcontainer.json” and enviornment configuration (installing software) is done in the “Dockerfile.” Now let’s get brave and try something a little more edgy.
Advanced configuration
Let’s say for a moment that you have a gorgeous, glammed out terminal setup that you really want to put in the container as well. I mean, just because you are developing in a container doesn’t mean that your terminal has to be boring. But you also wouldn’t want to reconfigure your pretentious zsh setup for every project that you open. Can we automate that too? Let’s find out.
Fortunately, zsh is already installed in the image that you get. The only trouble is that it’s not the default shell when the container opens. There are a lot of ways that you can make zsh the default shell in a normal Docker scenario, but none of them will work here. This is because you have no control over the way the container is built.
Instead, look again to the trusty devcontainer.json file. In it, there is a "settings" block. In fact, there is a line already there showing you that the default terminal is set to "/bin/bash". Change that to "/bin/zsh".
// Set *default* container specific settings.json values on container create.
"settings": {
  "terminal.integrated.shell.linux": "/bin/zsh"
}
By the way, you can set ANY VS Code setting there. Like, you know, moving the sidebar to the right-hand side. There – I fixed it for you.
// Set default container specific settings.json values on container create.
"settings": {
  "terminal.integrated.shell.linux": "/bin/zsh",
  "workbench.sideBar.location": "right"
},
And how about those pretentious plugins that make you better than everyone else? For those you are going to need your .zshrc file. The container already has oh-my-zsh in it, and it’s in the “root” folder. You just need to make sure you set the path to ZSH at the top of the .zshrc so that it points to root. Like this…
# Path to your oh-my-zsh installation.
export ZSH="/root/.oh-my-zsh"


# Set name of the theme to load --- if set to "random", it will
# load a random theme each time oh-my-zsh is loaded, in which case,
# to know which specific one was loaded, run: echo $RANDOM_THEME
# See https://github.com/ohmyzsh/ohmyzsh/wiki/Themes
ZSH_THEME="cloud"


# Which plugins would you like to load?
plugins=(zsh-autosuggestions nvm git)


source $ZSH/oh-my-zsh.sh
Then you can copy in that sexy .zshrc file to the root folder in the Dockerfile. I put that .zshrc file in the .devcontainer folder in my project.
COPY .zshrc /root/.zshrc
And if you need to download a plugin before you install it, do that in the Dockerfile with a RUN command. Just remember to group all of these into one command since each RUN is a new layer. You are nearly a container expert now. Next step is to write a blog post about it and instruct people on the ways of Docker like you invented the thing.
RUN git clone https://github.com/zsh-users/zsh-autosuggestions ${ZSH_CUSTOM:-~/.oh-my-zsh/custom}/plugins/zsh-autosuggestions
Look at the beautiful terminal! Behold the colors! The git plugin which tells you the branch and adds a lightning emoji! Nothing says, “I know what I’m doing” like a customized terminal. I like to take mine to Starbucks and just let people see it in action and wonder if I’m a celebrity.
Go gently
Hopefully you made it to this point and thought, “Geez, this guy is seriously overreacting. This is not that hard.” If so, I have successfully saved you. You are welcome. No need to thank me. Yes, I do have an Amazon wish list.
For more information on Remote Containers, including how to do things like add a database or use Docker Compose, check out the official Remote Container docs, which provide much more clarity with 100% less neurotic commentary.
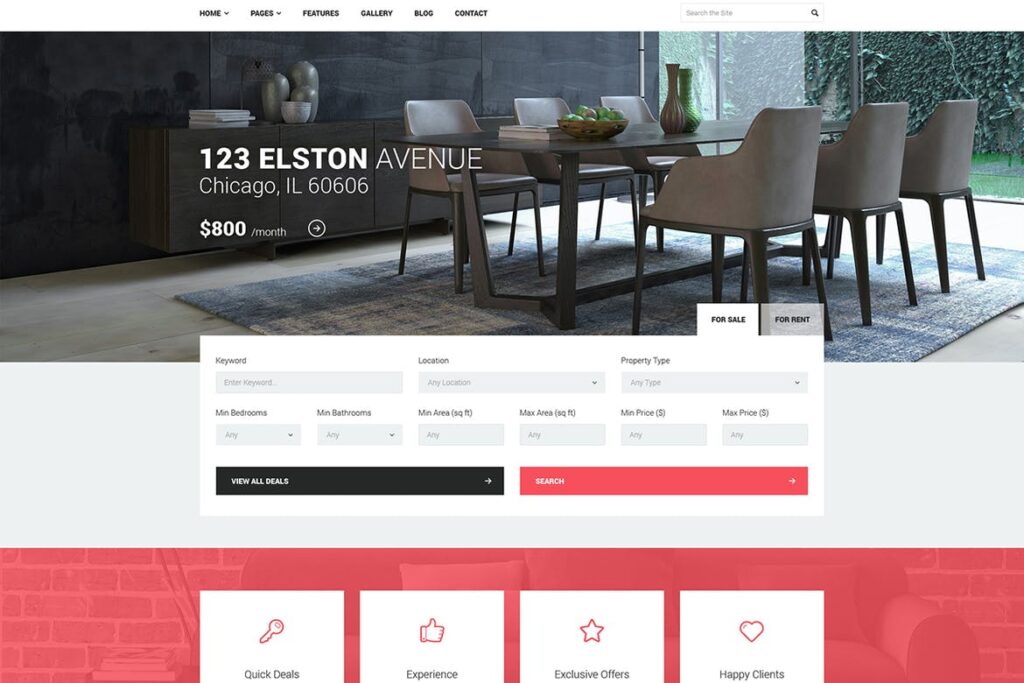
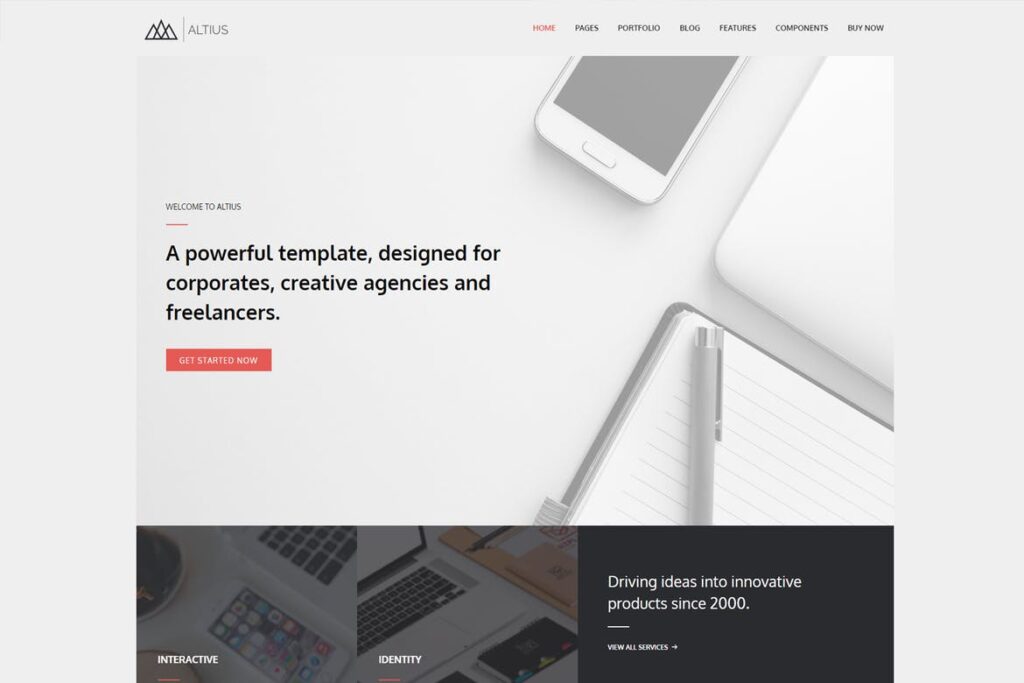
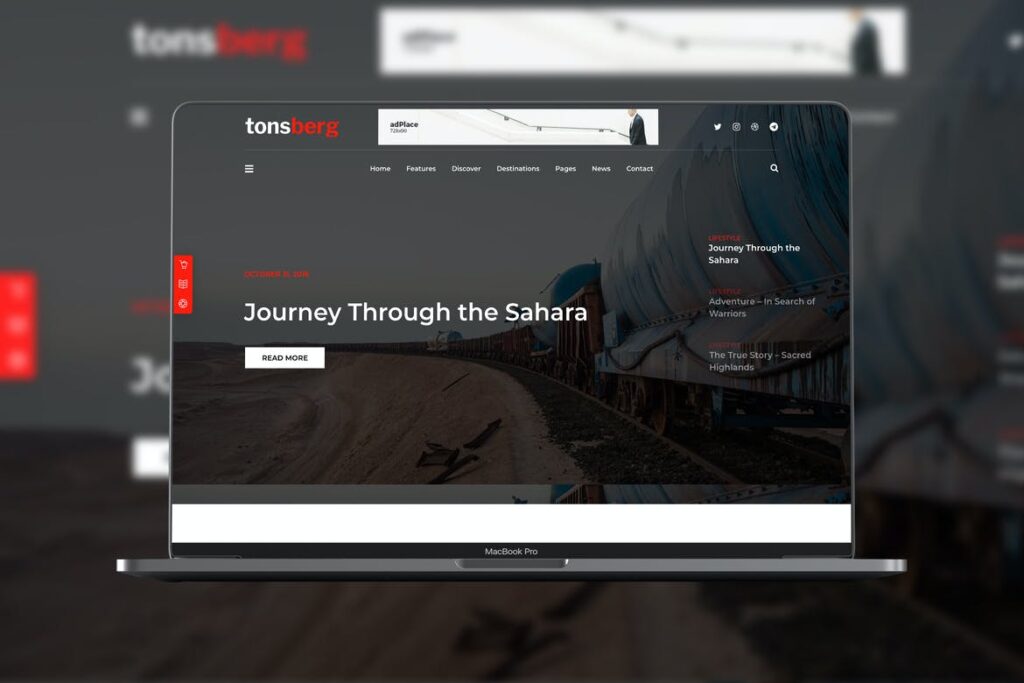
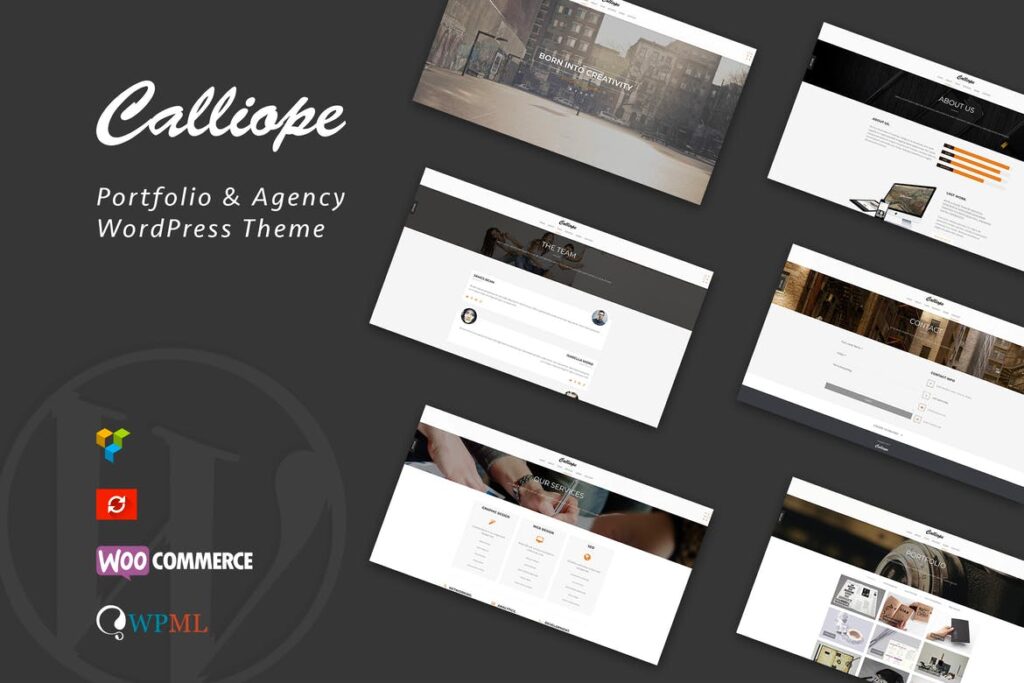
In this article we have compiled a list of 20 of the top WordPress themes available at Envato Elements. For those who are unaware, Envato Elements is a marketplace with millions (yes, that’s correct – millions) of assets you can use in your projects, including WordPress themes, template kits, stock photos and videos, graphics, fonts, and much more, all for a monthly subscription price starting at $16.50 per month! On top of that already low price, they are currently running a promotion where you can get 70% off your first month when you sign up right now (see the ad in our right sidebar). So rather than buying a single premium WordPress theme for $40 or more, you can have access to thousands of themes plus the millions of other assets for significantly less.
We realize this sounds a lot like a commercial for Envato Elements, but the truth is we simply can’t find a better deal anywhere that offers so much for so little! So have a look at the following top WordPress themes we’ve gathered below and hopefully they will help you find some you can use in your upcoming projects.
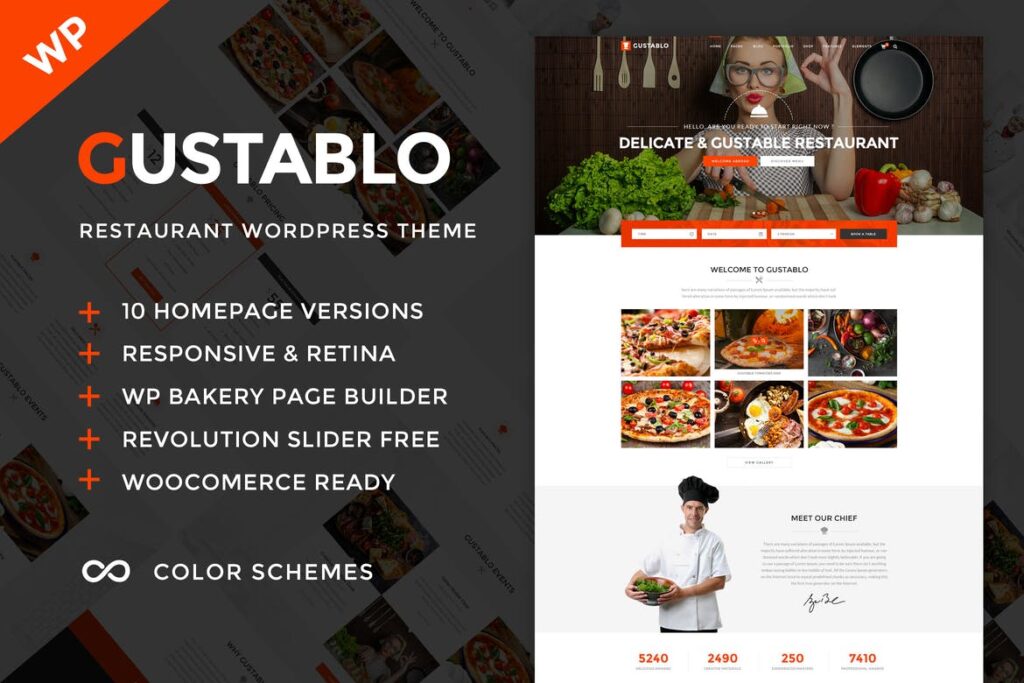
10 Unique Demo, individually arranged and well managed as different sets. You can further mix up any components across any variants. Complete creative freedom for you.
10+ Header Layout
Ultimate Header Layout ( Header Builder )
Ultimate Header Mobile Layout
Ultimate Footer Layout
5+ Blog layout combinations ( masonry, gird, slider …. )
8 Home page styles – We are providing you those home pages for your taste. Our pages are built on VC elements and you can mix them whatever you want and create new one from beginning.
37 inner pages – Events, About, Team, Contact, Branch, Pricing, Gallery, Portfolio, Blog, FAQ, 404, and Coming soon etc.
3 unique header styles – Wide, boxed, cloud headers with any custom background color.
WooCommerce support – Build your eCommerce site without a doubt.
Events calendar support – Make your events online and set schedule ease.
8 creative sliders – All our sliders come with simple elements. You can select your image and add additional details to bring your home slider.
Visual Composer Drag Drop page builder – Most advanced and Popular page builder which ever built in the world.
Additional 25 elements on Visual Composer – We’ve developed advanced element on this plugin those makes your live easier than ever. Accordion, Blog posts, Branch, Button, Image carousel, Category title, Client slider, Counter up, Event, Google maps, Icon box, Info box, Portfolio, Pricing table, Progress bar, Project, Service box, Service slider, Team, Testimonials and Title.
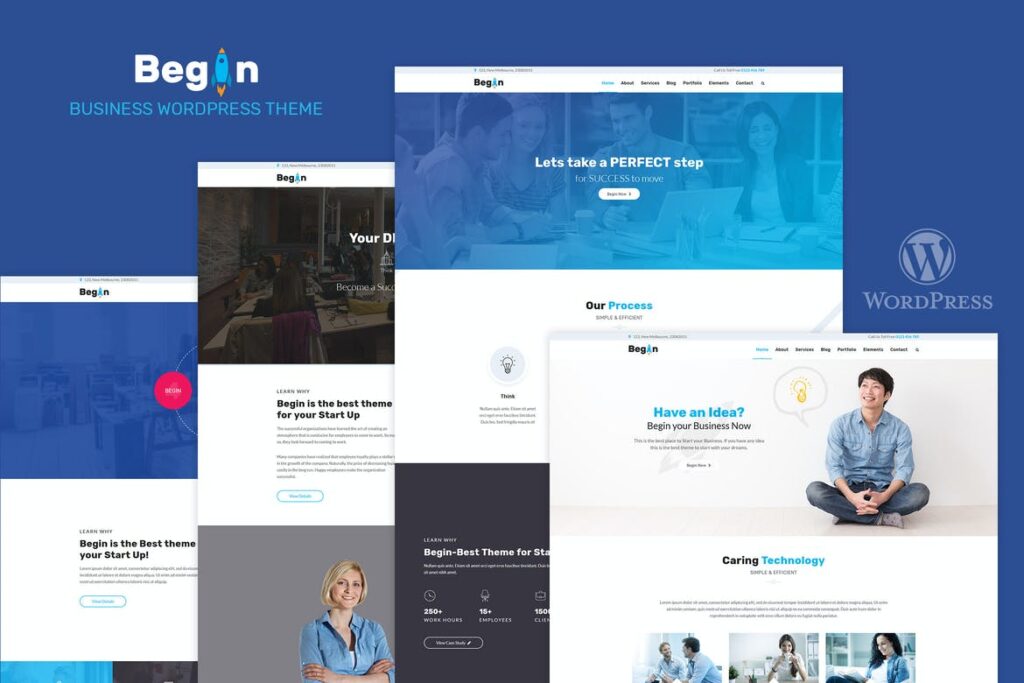
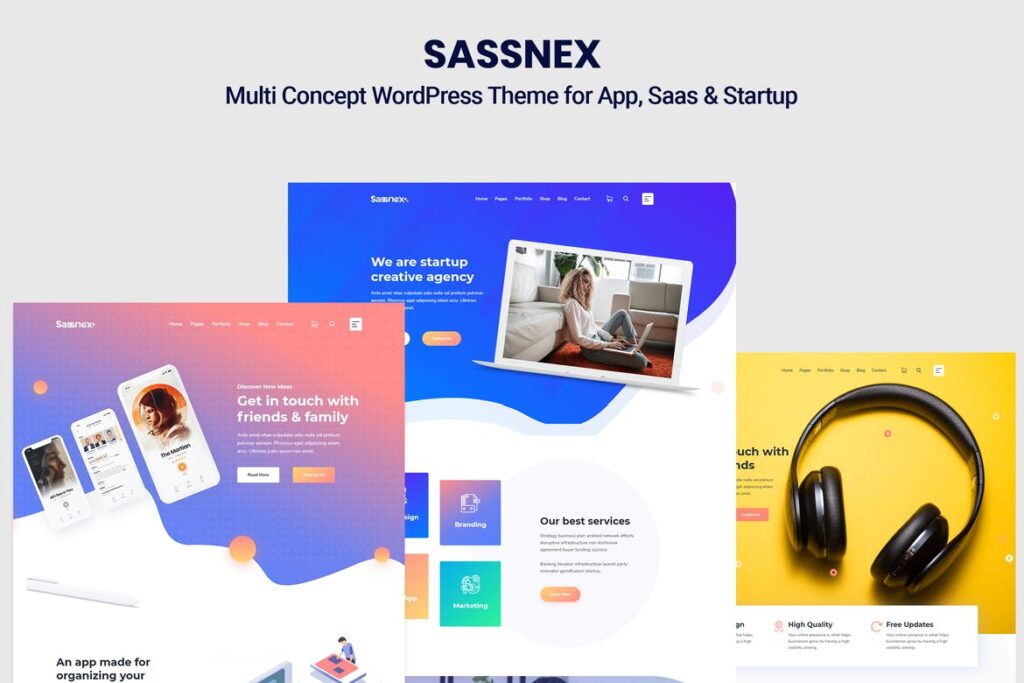
Begin is the gateway to your new startup business. Create your dream website using Begin and make your emphatic statements confidently! Begin offers you easy ways to customize your site without having to depend on developers. Everything is simple to configure-just drag and drop interface using which you can easily configure your web pages like a professional.
One Click Demo Importer – With demo data importer, you will be set up and ready to customize your site in minutes.
Page Builder – Page Builder for WordPress is drag and drop frontend and backend page builder plugin that will save you tons of time working on the site content.
Fully Responsive – Sassnex theme is fully responsive for all type of devices.
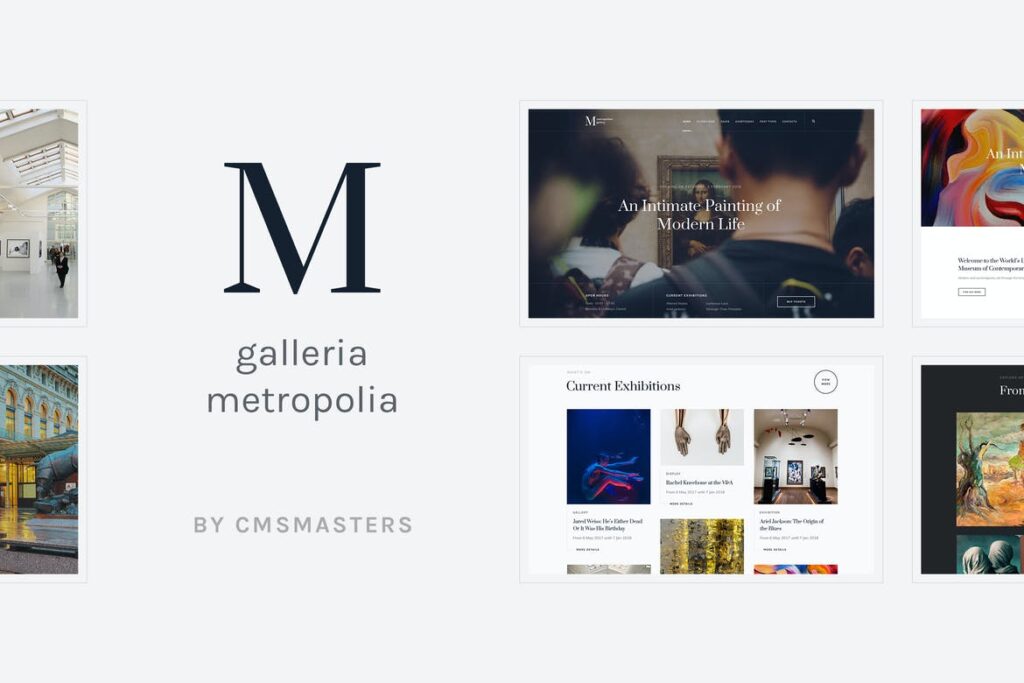
Metropolitan Gallery is a sophisticated theme for art galleries and museums, created in modern style, yet suitable also for classic art museums. The theme provides wide portfolio functionality to showcase exhibition items, describe their features and attract more visitors to the museum or art gallery. Also the theme provides an online store section where copies of art works can be sold.
Monyxi is a multi-purpose CryptoCurrency WordPress Theme. It is powerful, modern and bold, perfect for cryptocurrency and financial blog in general. You may also use it as a cryptocoach website or simply a financial advisor and bookkeeper website.
Laundry City is a responsive, modern & stylish WordPress Theme. It has a clean and functional design created for laundry company and dry cleaning services agency. With lots of customizable features, you can create a powerful website for representing your corporate business, or private firm online: laundry pickup & delivery, dry cleaning, launderette, drying, laundromat, leather cleaning, ironing, clothing repair, laundry pick-up, and delivery.
Good Homes is a powerful, modern & attractive Real Estate WordPress theme. It has a solid responsive & bright business design built for real estate agency, realtor firm, apartment manager services. Also it fits broker bureau, single estate agent, vacation rental, residential & commercial developer, realestate Mortgage, house building, broker center organization, office Rent, flat designer and property owner.
This is just a sampling of the available themes you can find at Envato Elements, but they are the 20 most popular. Be sure to check out their full selection of over 1,300 (and counting) WordPress themes, along with the millions of other assets you could use in your projects. And tell them 1WD sent you! And don’t forget to browse through our other compilations of top WordPress themes found here on our website.
Hi, I'm curious on how and which tools are used to develop an 8 ball pool game. The one I'm referring to is that you play online with strangers, and friends for coins and tournaments.
Can anyone point me to the right direction. This will be my first attempt in game development, but I'm a full stack developer and a software developer with Java, VB.NET, C++ ( very new)
Pop culture often serves as an important source of inspiration for many tattoo artists, including Eden Kozokaro. His body art often pays homage to his favorite movies, comic books, and TV shows, and...
When it comes to marketing your products, no channel should be left untapped. But how do you know which one will work for you specifically and which will not? One way to find out is to use call tracking software and get input from your customer base directly.
For more than five years I have been creating one digital artwork a day, using code to generate patterns, shapes, and animations. My daily art project has helped me to explore my artistic style and learn the practice of coding in a playful way. When I started the project it was a challenge to come up with something each day and publish it online. Now it’s simply a part of my daily life.
Time spent on my "daily" is a time during which I'm free to explore and be creative. When things get boring, I know I need to challenge myself again in order to create something fresh and different. I'm happy to share my thoughts and experience, and hope to yield the inspiration you need to start similar projects of your own.
Getting Started
So how did I end up so deep down this rabbit hole of making pieces of art on a daily basis?
During my studies, I was introduced to programming but didn't have the time to understand it well enough. Not because I was lazy, I believe, but because I excelled in design much more so than in code. However, a desire to understand how to code visual artworks stayed with me after I graduated.
In 2014, I began a quest to get back into exploring my artistic practice. As my education in graphic and interaction design was more focused on creating meaningful experiences, I wanted to explore more freely and still use the design knowledge I had learned. I started exploring the creation of generative patterns, grid-based artworks and animations.
It was scary to retake the first steps into exploring how to code, as I was convinced It might just be too hard for me to learn. You should not let your past experience lessen your desire to learn.
During my quest for subjects I wanted to explore I came across the “HYPE Framework”, and a SkillShare class by designer Joshua Davis. This got me into making generative patterns; it was the right combination of using my skills in making shapes in Illustrator and using a framework to learn how code works. When you’re starting out, finding something to learn that combines with a skill you already have makes it easier to achieve the desired result.
Overcoming Perfectionism
It was during that time that I started making animations with grid-based drawing software "Hexels", sometimes combining shapes I created with Hexels to use with the HYPE Framework. I was happy exploring and being creative with the tools I was learning. Only one dreaded factor was holding me back: perfectionism. The works I was creating were never "good enough" to show to other people. This is what made me challenge myself to start my "daily" experiment; I would create one artwork each day for one month and upload it to my Tumblr blog.
Starting something new was challenging, but it got me out of my comfort zone. Achieving small goals that are out of your comfort zone makes you want to achieve even more and bigger goals. After I finished the first month in September 2014, I continued making artworks for most of the days, but also allowed myself to skip others. When the first of January 2015 came I thought, let's get back to making them every single day. Maybe I could do two months, maybe more. I thought I would have created everything I could imagine in just a few months, but as you can see, it continues! You are never done with being creative.
Tools
The HYPE Framework helped me to get back into coding and back into creating artworks using “Processing”. Processing is an environment for learning how to code within the context of the visual arts, an open-source project that started in 2001. The HYPE Framework is a collection of Processing classes. Using the HYPE Framework I created patterns by using small vector drawings and randomly placing them on a canvas.
Assigning different colors and playing with a variety of other parameters I managed to generate different compositions. Using Hexels I would either draw animations or create small vector shapes that I could then use to generate patterns. These small shapes would prove ideal for creating more complex patterns and shapes, something I couldn't ever do without code so quickly. Playing with the amount of shapes, kinds of shapes, colors, and so on gave me countless options to explore.
Evolution
In August 2015, already eight months into making daily artwork, I started coding my first animation from a blank Processing sketch. It took me some time to research how to go about the animation process and how exactly to create something that loops, and I copied as many bits of code as I could find.
The code might have been very messy, and probably quite inefficient, but I got something that worked. In that sense, it doesn't really matter if it is not coded perfectly, or even that you truly understand how it works. Creating something as an outcome of your research and trying out other examples in order to create something new is a great start in whatever angle you look at it.
Play And Learn
So obviously, you don't always need to know how something works to start playing with it. A playful approach helped me to learn and understand how things work. Having a visual output as a result helped me with making small iterations. When learning something new, I would change small bits of code to try and understand what these things did. In the beginning, I definitely didn’t understand much, but by playing with the code, making small iterations, I grew to understand it bit by bit.
In projects like this, the art you create doesn’t have to be written from scratch every time. Iteration is the key to creation. In the first year the daily exploration was wide-ranging. In the mornings I would think about what I could make that day, sometimes reminiscing, reflecting on previous sketches. Other sources of inspiration would be things that would appear to me that day, which surprisingly often would be unrelated to code and art. Within this scope I was able to find the areas I was keen to explore further.
It’s totally fine to start creating with limited knowledge and without a big plan of what you want to make. You will figure it out, and learn even more.
Setting Themes
In addition to the everyday challenge, I slowly but surely came up with ongoing challenges. For instance, I would challenge myself to use the same color palette for three days in a row, but still create different compositions using different elements. This turned out to be a great way to explore how color worked with specific shapes and compositions.
These challenges grew out into prolonged challenges, what I would describe as themes. In year four of my dailies, I started working with a monthly theme, which would encourage me to try being creative within a specific framework or set of boundaries. This helped a lot with time efficiency, as I didn’t have to think about what I wanted to make that day, but instead could just be playful with the framework I started out with, expand it, alter it, and so forth. Apart from making some aspects of my process a lot easier and more efficient, this also enabled and challenged me to be creative with an ever-increasing set of self-imposed rules.
Geometric Animations / 181001 – 181031. One month using unicode characters.
After one year of monthly themes, I stepped up my game, moving on to weekly themes. Working with monthly themes I had experienced that the longevity of this approach was holding me back, leaving some creativity and inspiration unable to be expressed. Weekly themes, however, are perfect for me, for every week I will start fresh with a new theme and continue to explore it in-depth for seven days on end. Seeing a theme evolve over the course of a week is amazing. It’s good to try playing with different approaches, seeing how those feel and fit in your life.
New Explorations
A new beginning is often a bit ugly. When I start to explore a new area, chances are I lack certain knowledge needed to create the type of work I have in my head.
For instance, when I started to use 3D shapes in my animations I initially thought I had to do many hours of research into this topic before I could understand how to use 3D shapes in my sketches. As life will sometimes get too hectic to focus on working towards a specific goal, those “many hours” I envisioned to have needed didn't come naturally.
Usage of 3D shapes came one day, as a spark in my head when I was ready to make my daily. I simply looked up how to create 3D shapes and made a basic sketch, iterating from a previous 2D sketch.
As you can see in my first three 3D sketches, it’s not that pretty nor a groundbreaking new approach in my daily journey. But that’s totally fine because it’s a step forward nonetheless.
Over the next few days, I continued researching the use of 3D shapes in my sketches, and soon understood much more, such as the use of light. One more week into using 3D shapes results were already more aesthetically pleasing. With just a few days of being uncomfortable going a new direction, I had created another dimension to play in.
Geometric Animations / 180124
Finding Time
One of the biggest challenges to be creative daily might be finding the time. This is something you have to play with as well. For some creative projects might work best early in the morning, for others (like myself) the evening is excellent. You could say creating and playing with code has become a meditative tool; a stretch of personal me-time during which I can relax and be creative.
Doing something daily keeps me in a flow, but perhaps one wouldn’t want to create small things and favor doing a project each week instead. See what works for you. Don’t chase perfection, experimenting, and iterating is the core, not having the perfect artwork. It’s funny how sometimes artworks that don’t especially stand out for me personally still tend to receive more likes than other artworks I am way more crazy about.
Try It Yourself
You know by now that I love using simple shapes to create patterns. I’ve created a sketch for you to play with. Try changing specific numbers, make the rotations smaller, or make the grid bigger or smaller. Change the size of the shapes or add more shapes. Explore what you can do. Head to p5.js reference to find out more about the functions I used and add some yourself.
If you want to get started with creating artworks through code, p5js is a great Javascript library to explore. Check out the Getting Starting tutorial and its examples. Daniel Shiffman creates amusing video tutorials, named The Coding Train, for both p5js and Processing, as well in combination with other libraries. For more inspiration go to OpenProcessing and play around! All my works over the past year can be found on my Tumblr page or my Instagram.
Conclusion
Being creative is about exploring, playing with known and unknown tools. Don’t let your past experience influence your desires to learn. Challenge yourself to get out of your comfort zone.
You don’t need to start with a big project; create small ones that might become bigger as you nurture them. Find what time and approach works best for you, play with this as well. Don’t chase perfection in your art or your approach to it. And most of all, have fun exploring.
In this article, Bryan Robinson explores how to take a humble HTML page and make its content editable in a CMS with no frameworks and no client-side JavaScript.
This article provides a comprehensive overview of content delivery networks (CDNs). In addition, it explains how to choose, configure, and optimize a CDN setup.
Are you looking for easy ways to manage, track, and control file downloads on your WordPress site?
A WordPress file download manager can help you easily manage downloads, track analytics, and control permissions on file downloads. With the right tools, you can even sell file downloads and make money.
In this article, we will show you how to easily manage, track, and control file downloads in WordPress.
Why Manage, Track, and Control File Downloads in WordPress?
There are many reasons why you would want to manage, track, and/or control your file downloads in WordPress.
For example, you may to restrict certain files based on user roles or only give access to paying customers, or you might simply want to track how many people are downloading free files on your site.
In this article, we’re going to take you through 4 different methods. Just click on the links to jump straight to the method you want to use:
Method 1. Tracking File Downloads in WordPress Using MonsterInsights
You may not be concerned about managing or controlling downloads if you offer them for free on your WordPress website.
However, it is still best practice to at least track file downloads.
This lets you discover which of your free downloads are the most popular and where to invest your resources when creating new content.
Unfortunately, Google Analytics doesn’t automatically support file download tracking. The good news is that you can track downloads using MonsterInsights, the best Google Analytics plugin for WordPress.
You will then need to connect WordPress to your Google Analytics account, which is super easy using MonsterInsights. If you need help, then follow the instructions in our guide on installing Google Analytics in WordPress.
Note: File download tracking is also available in the free version of MonsterInsights and lets you see the reports inside Google Analytics. However, you’ll need the Pro version to see advanced reports inside your WordPress dashboard.
Once you have set up the plugin, there is no need to do any further configuration. It will automatically start tracking your file downloads as events.
To see statistics about your downloads, just go to the Insights » Reports page and switch to the Publishers tab:
Scroll down, and you’ll see your top download links.
These will be listed along with their anchor text:
If you have more than one link to a specific file, then those links will be listed separately here. This is useful if you want to find out exactly how users are downloading files.
What if you want a report of which files are the most popular, regardless of the links used? Simply click the ‘View All Download Links Report’ button.
This will take you straight into Google Analytics, where you will see a report with the URLs of your downloaded files:
You can also manually navigate to your file download report in Google Analytics GA4.
Simply log in to your Google Analytics account and then click on the Reports » Engagement » Events tab.
From here, click on the ‘file_download’ link under the ‘Event name’ column to view your file downloads report.
By default, MonsterInsights tracks downloads for all common file types including documents (.doc and .docx), spreadsheets (.xls and .xlsx), presentations (.ppt and .pptx), PDFs, and zip files.
If you want to track other file types, then that’s easy to do as well. Simply go to Insights » Settings page and then switch to the Engagement tab:
Now, scroll down to the File Downloads section.
Here you’ll see a list of file extensions currently being tracked:
Simply type in any additional file extensions you want to track. Just make sure you put a comma between them.
Once you’re done, don’t forget to click the Save Changes button at the top to save your settings.
MonsterInsights will now start tracking all files ending with the file extensions you added in settings.
Even if you choose another solution below for managing and controlling file download access, we recommend always installing MonsterInsights alongside it. Doing so will help you see the right stats, which you need for growing your business.
Method 2. Controlling File Downloads in WordPress Using MemberPress
If you want to sell online courses or access to downloadable files, then a great way to control and manage file downloads is to use MemberPress.
It is the best WordPress membership plugin that lets you lock premium content on your site so that it’s only available to registered users or paying members.
MemberPress has an addon called MemberPress Downloads that lets you track each file that your members download. The addon also lets you upload multiple files, tag, categorize, and list them easily.
Aside from files, you can protect other content on your site as well. This is a great option if you are building courses or premium content library that you only want members to be able to access.
Upon activation, enter your license key into the MemberPress » Settings » License page in the WordPress admin area. You will find this information under your account on the MemberPress website.
Next, go to the MemberPress » Add-ons page.
Here, you simply need to find the Downloads add-on. Go ahead and click the ‘Install Add-on’ button to add it to your site:
Now, you just need to go to the MP Downloads » Files page.
From here, click the ‘Add New’ button to create a new download.
On the next screen, first, you need to enter a title for your download.
Once you’ve done that, upload the file you want to use. You can also choose additional options on this page, such as adding categories or tags to your download.
We’re going to give our file the tag ‘paid-members’ so that this file and others can be easily protected by a MemberPress rule.
When you’re ready, click the Publish button to make your downloadable file live.
If you don’t already have a rule defining conditions that must be matched to access files with this tag, simply create one under MemberPress » Rules.
Just click the ‘Add New’ button to create a new rule:
You will then see the page for adding a new rule.
From here, you can customize the new rule for the tag.
In the ‘Content & Access’ section, click on the dropdown below Protected Content.
Select ‘Files with File Tag,’ and in the box next to it, type and select the tag you’re using:
Then, under ‘Access Conditions,’ click the dropdown. Simply select ‘Membership’ and then the name of the appropriate membership level.
If you haven’t yet set up any memberships, then you can go ahead and do so under MemberPress » Memberships.
Now, go to the MP Downloads » Files page again. You will see your file listed here. It should have the correct access type based on its tag.
Click the ‘Copy Shortcode’ link to get the shortcode for this file.
Next, paste this shortcode into any post or page on your WordPress site.
You can also create a new page just for your file download.
First, go to Pages » Add New in your WordPress admin. Then, go ahead and paste your shortcode into your page. WordPress will automatically create a shortcode block for you if you’re using the block editor.
Once you’ve added all the content you want on your page, simply click the ‘Publish’ button to put it live on your site.
Remember to protect your page using MemberPress rules if you want both the page and the file to only be accessible to members.
You can view your download stats by visiting the MP Downloads » Stats page.
You will see the list of users who downloaded the file with a time stamp.
Upon activation, you need to visit the Downloads » Settings page to configure the plugin. You’ll start by providing your business details and choosing a currency.
Next, switch to the ‘Payments’ tab to configure a payment gateway.
Easy Digital Downloads supports PayPal and Stripe out of the box. You can download extensions to add support for more payment gateways if needed.
After that, just switch to the tab for the gateway you’re using and enter your account details.
After setting up payments, you can start adding your file downloads.
Simply go to the Downloads page and click on the ‘Add New’ button at the top.
On the next page, go ahead and provide the title and description for your download.
Below that, add pricing for your digital download. If you want to offer a download for free, then simply enter $0 under ‘Pricing Options.’
After that, scroll down to the ‘Download Files’ section.
From here, you can add a title for your file download, and then either select the file from your media library or upload the file from your computer.
Next, you can add categories or tags for your file download, add images, set download limits, and more.
Finally, click the ‘Publish’ button to make your download live on your website.
You can now preview or visit your file download page to see it in action.
Your users will be able to add the download to their cart and continue shopping or complete their purchase.
You will be able to track and manage everything using Easy Digital Downloads reporting.
Viewing Advanced Reports for Easy Digital Downloads
Easy Digital Downloads doesn’t come with advanced reporting features in the core software.
It is perfect for users who want to sell file downloads or make an online store.
WooCommerce can be used to sell both digital downloads and physical goods. You can also use it as your WordPress download manager to offer free downloads. It lets you easily track customers, manage downloads, and view stats.
Upon activation, you should see the WooCommerce setup wizard. You can start by providing your store details and then follow on-screen instructions.
On the ‘Product Types’ screen, you need to select Downloads as one of the product types that you’ll be selling in your store.
Once you finish the setup process, you will see your WooCommerce store’s dashboard.
Go to the Products » Add New page to add your first file download.
Go ahead and give your new product a title and a description. After that, scroll down to the ‘Product data’ section.
Here, you need to check the ‘Virtual’ and ‘Downloadable’ checkboxes to indicate that the product is a digital download.
Virtual products are products that don’t require shipping and can be delivered online, such as memberships, subscriptions, digital passes, and more. Similarly, Downloadables are products that users can download on their computers.
You also need to enter the price. If you’re creating a free download, you need to put 0 here.
After that, click on the ‘Add File’ button to upload the file for your digital download.
If you want, you can also fill out other options on the page. For example, you can add product images, add a short description, select a product category, and more.
Once satisfied, click the ‘Publish’ button near the top of the page to make your product available.
Your users can now go to the product page and add the product to their cart. If it is a free product, then they will be able to check out without adding payment information. Otherwise, they can pay as normal.
After checkout, the user will be given instructions about how to download the file to their computer.
Tracking File Downloads in WooCommerce
To view how your file downloads are doing, just go to Analytics » Downloads in your WordPress dashboard. From here, you will see an overview of file downloads with a list of popular downloads below.
You can also switch to different pages under ‘Analytics’ to see how your store is doing.
For instance, you can see your top products/downloads under the ‘Products’ page.
Bonus: Tracking Conversions For Your File Downloads in WordPress
You may have noticed that three of the platforms we mentioned come with only basic reporting features.
For instance, they can show you the number of downloads, customers, and the files they bought. However, they will not show you what led a customer to conversion.
This information is significant as it tells you what’s working on your website and helps you make decisions for your business’s growth.
We hope this article helped you learn how to manage, track, and control file downloads in WordPress. You may also want to see our tips on the best email marketing services to sell your digital downloads better.
If you liked this article, then please subscribe to our YouTube Channel for WordPress video tutorials. You can also find us on Twitter and Facebook.
Robotic Process Automation (RPA): Choose Your Process Wisely
The word "Process" within Robotic Process Automation (RPA) is very vital and utmost care should be taken and we should choose our process wisely. The right selection of the same determines the make or break of successful RPA implementation. The observation is RPA projects don't meet the Return Of Investment (ROI) expectations only due to the wrong choice in selection of the process.
With so much hype around RPA the customers or business leaders with limited awareness of RPA often end up selecting wrong one's as part of their debut RPA implementation. The wrong choice of process doesn't yield them the expected ROI leaving them dejected. Looking at their lower ROI even other Business Leaders tend to loose the confidence in RPA implementation.
Choosing process wisely what does that mean. Let's first understand your key purpose or objective while doing RPA implementation and what is that you as a Business Leader want to achieve.
(a) Are you trying to introduce RPA only to reduce the employee head count?
(b) Are you looking forward to simplify or automate the process to increase productivity?
(c) Are you looking forward to automate only the complex process?
Before we can address these questions let us be clear in understanding what contributes in wrong selection of RPA process.
(a) If your process logic or business rules they keep on changing often with increasing regularity then such process does not fit to be a good candidate in RPA process selection. New business rules means re-configuration each time the business rules or logic changes.
(b) If your process has dependency on government or regulatory changes which do keep changing often then such process too won't yield the optimum ROI as far as RPA implementation goes.
(c) If your process has low volume of data or if your process selected is one that runs just once in a given year (E.g. Annual Appraisal of Employees) such process don't give the best ROI results or equate in man hours saving.
Before you get into the heart of the process understanding it would be ideal if we first do an Initial Process Assessment and determine which process fits the best with the above few pointers in mind.
To sum it up - Choose your process for robotic process automation wisely - Those process that are rule based, stable, having high volume data and where business rules don't change often.
We are a friendly, volunteer-based community of members helping members. Take the time to help us to help you. Please be thoughtful, detailed and courteous.
i have Fedora 28 (with xfce) installed on my laptop. As Fedora 28 is now an old version, I'd like to know if there is a way to upgrade directly to Fedora 32, with no risk (I mean no data loss, in particular my /home dir)..
Can you help me?
In any case I've put an iso of Fedora 32 on a DVD, but I'm scared to try intsall it from the DVD and lose my most important data.
What is your advice(s)? Thanks in advance dear fellows!
Artificial intelligence and machine learning are part of the computer science field. Both terms are correlated and most people often use them interchangeably. However, AI and machine learning are not the same and there are some key differences that I will discuss here. So, without further ado, let's go into the details to know the difference between AI and machine learning.
Artificial intelligence is a machine's ability to solve tasks that are commonly done by intelligent beings or humans. So, AI allows machines to execute tasks "smartly" by imitating human abilities. On the other hand, machine learning is a subset of Artificial intelligence. It is the process of learning from data that is fed into the machine in the form of algorithms.
Artificial Intelligence and its Real-World Benefits
Artificial intelligence is the science of training computers and machines to perform tasks with human-like intelligence and reasoning skills. With AI in your computer system, you can speak in any accent or any language as long as there is data on the internet about it. AI will be able to pick it up and follow your commands.
We can see the application of this technology in a lot of the online platforms that we enjoy today, such as retail stores, healthcare, finance, fraud detection, weather updates, traffic information and much more. As a matter of fact, there is nothing that AI cannot do.
Machine Learning and its Process
This is based on the idea that machines should be able to learn and adapt through experience. Machine learning can be done by giving the computer examples in the form of algorithms. This is how it will learn what to do on the basis of the given examples.
Once the algorithm determines how to draw the right conclusions for any input, it will then apply the knowledge to new data. And that is the life cycle of machine learning. The first step is to collect data for a question you have. Then the next step is to train the algorithm by feeding it to the machine.
You will have to let the machine try it out, then collect feedback and use the information you gained to make the algorithm better and repeat the cycle until you get your desired results. This is how the feedback works for these systems.
Machine learning uses statistics and physics to find specific information within the data, without any specific programming about where to look or what conclusions to draw. These days' machine learning and artificial intelligence are applied to all sorts of technology. Some of them include CT scan, MRI machines, car navigation systems and food apps, to name a few.
Conclusion
In simple words, artificial intelligence is the science of creating machines that have human-like properties of reasoning and problem-solving. And this allows machines to learn and make decisions from past data without explicit programming. In short, the goal of AI is to create intelligent machines. And it does that by combining machine learning and deep learning etc
I just spent way too long realizing that by setting the boundary property for Twitter Bootstrap popover Javascript to viewport (I believe it's parent element by default), it gets rid of the flickering issue I was having with popovers triggered on hover. If anyone else is having that problem, this fixes it. :)