We can use JavaScript to get the value of a CSS custom property. Robin wrote up a detailed explanation about this in Get a CSS Custom Property Value with JavaScript. To review, let’s say we’ve declared a single custom property on the HTML element:
html {
  --color-accent: #00eb9b;
}
In JavaScript, we can access the value with getComputedStyle and getPropertyValue:
Perfect. Now we have access to our accent color in JavaScript. You know what’s cool? If we change that color in CSS, it updates in JavaScript as well! Handy.
What happens, though, when it’s not just one property we need access to in JavaScript, but a whole bunch of them?
We’re repeating ourselves a lot. We could shorten each one of these lines by abstracting the common tasks to a function.
const getCSSProp = (element, propName) => getComputedStyle(element).getPropertyValue(propName);
const colorAccent = getCSSProp(document.documentElement, '--color-accent'); // #00eb9b
// repeat for each custom property...
That helps reduce code repetition, but we still have a less-than-ideal situation. Every time we add a custom property in CSS, we have to write another line of JavaScript to access it. This can and does work fine if we only have a few custom properties. I’ve used this setup on production projects before. But, it’s also possible to automate this.
Let’s walk through the process of automating it by making a working thing.
What are we making?
We’ll make a color palette, which is a common feature in pattern libraries. We’ll generate a grid of color swatches from our CSS custom properties.
Here’s the complete demo that we’ll build step-by-step.
Here’s what we’re aiming for.
Let’s set the stage. We’ll use an unordered list to display our palette. Each swatch is a <li> element that we’ll render with JavaScript.
<ul class="colors"></ul>
The CSS for the grid layout isn’t pertinent to the technique in this post, so we won’t look at in detail. It’s available in the CodePen demo.
Now that we have our HTML and CSS in place, we’ll focus on the JavaScript. Here’s an outline of what we’ll do with our code:
Get all stylesheets on a page, both external and internal
Discard any stylesheets hosted on third-party domains
Get all rules for the remaining stylesheets
Discard any rules that aren’t basic style rules
Get the name and value of all CSS properties
Discard non-custom CSS properties
Build HTML to display the color swatches
Let’s get to it.
Step 1: Get all stylesheets on a page
The first thing we need to do is get all external and internal stylesheets on the current page. Stylesheets are available as members of the global document.
document.styleSheets
That returns an array-like object. We want to use array methods, so we’ll convert it to an array. Let’s also put this in a function that we’ll use throughout this post.
When we invoke getCSSCustomPropIndex, we see an array of CSSStyleSheet objects, one for each external and internal stylesheet on the current page.
Step 2: Discard third-party stylesheets
If our script is running on https://example.com any stylesheet we want to inspect must also be on https://example.com. This is a security feature. From the MDN docs for CSSStyleSheet:
In some browsers, if a stylesheet is loaded from a different domain, accessing cssRules results in SecurityError.
That means that if the current page links to a stylesheet hosted on https://some-cdn.com, we can’t get custom properties — or any styles — from it. The approach we’re taking here only works for stylesheets hosted on the current domain.
CSSStyleSheet objects have an href property. Its value is the full URL to the stylesheet, like https://example.com/styles.css. Internal stylesheets have an href property, but the value will be null.
Let’s write a function that discards third-party stylesheets. We’ll do that by comparing the stylesheet’s href value to the current location.origin.
With the third-party stylesheets discarded, we can inspect the contents of those remaining.
Step 3: Get all rules for the remaining stylesheets
Our goal for getCSSCustomPropIndex is to produce an array of arrays. To get there, we’ll use a combination of array methods to loop through, find values we want, and combine them. Let’s take a first step in that direction by producing an array containing every style rule.
We use reduce and concat because we want to produce a flat array where every first-level element is what we’re interested in. In this snippet, we iterate over individual CSSStyleSheet objects. For each one of them, we need its cssRules. From the MDN docs:
The read-only CSSStyleSheet property cssRules returns a live CSSRuleList which provides a real-time, up-to-date list of every CSS rule which comprises the stylesheet. Each item in the list is a CSSRule defining a single rule.
Each CSS rule is the selector, braces, and property declarations. We use the spread operator ...sheet.cssRules to take every rule out of the cssRules object and place it in finalArr. When we log the output of getCSSCustomPropIndex, we get a single-level array of CSSRule objects.
This gives us all the CSS rules for all the stylesheets. We want to discard some of those, so let’s move on.
Step 4: Discard any rules that aren’t basic style rules
CSS rules come in different types. CSS specs define each of the types with a constant name and integer. The most common type of rule is the CSSStyleRule. Another type of rule is the CSSMediaRule. We use those to define media queries, like @media (min-width: 400px) {}. Other types include CSSSupportsRule, CSSFontFaceRule, and CSSKeyframesRule. See the Type constants section of the MDN docs for CSSRule for the full list.
We’re only interested in rules where we define custom properties and, for the purposes in this post, we’ll focus on CSSStyleRule. That does leave out the CSSMediaRule rule type where it’s valid to define custom properties. We could use an approach that’s similar to what we’re using to extract custom properties in this demo, but we’ll exclude this specific rule type to limit the scope of the demo.
To narrow our focus to style rules, we’ll write another array filter:
const isStyleRule = (rule) => rule.type === 1;
Every CSSRule has a type property that returns the integer for that type constant. We use isStyleRule to filter sheet.cssRules.
One thing to note is that we are wrapping ...sheet.cssRules in brackets so we can use the array method filter.
Our stylesheet only had CSSStyleRules so the demo results are the same as before. If our stylesheet had media queries or font-face declarations, isStyleRule would discard them.
Step 5: Get the name and value of all properties
Now that we have the rules we want, we can get the properties that make them up. CSSStyleRule objects have a style property that is a CSSStyleDeclaration object. It’s made up of standard CSS properties, like color, font-family, and border-radius, plus custom properties. Let’s add that to our getCSSCustomPropIndex function so that it looks at every rule, building an array of arrays along the way:
If we invoke this now, we get an empty array. We have more work to do, but this lays the foundation. Because we want to end up with an array, we start with an empty array by using the accumulator, which is the second parameter of reduce. In the body of the reduce callback function, we have a placeholder variable, props, where we’ll gather the properties. The return statement combines the array from the previous iteration — the accumulator — with the current props array.
Right now, both are empty arrays. We need to use rule.style to populate props with an array for every property/value in the current rule:
rule.style is array-like, so we use the spread operator again to put each member of it into an array that we loop over with map. In the map callback, we return an array with two members. The first member is propName (which includes color, font-family, --color-accent, etc.). The second member is the value of each property. To get that, we use the getPropertyValue method of CSSStyleDeclaration. It takes a single parameter, the string name of the CSS property.
We use trim on both the name and value to make sure we don’t include any leading or trailing whitespace that sometimes gets left behind.
Now when we invoke getCSSCustomPropIndex, we get an array of arrays. Every child array contains a CSS property name and a value.
This is what we’re looking for! Well, almost. We’re getting every property in addition to custom properties. We need one more filter to remove those standard properties because all we want are the custom properties.
Step 6: Discard non-custom properties
To determine if a property is custom, we can look at the name. We know custom properties must start with two dashes (--). That’s unique in the CSS world, so we can use that to write a filter function:
In the function signature, we have ([propName]). There, we’re using array destructuring to access the first member of every child array in props. From there, we do an indexOf check on the name of the property. If -- is not at the beginning of the prop name, then we don’t include it in the props array.
When we log the result, we have the exact output we’re looking for: An array of arrays for every custom property and its value with no other properties.
Looking more toward the future, creating the property/value map doesn’t have to require so much code. There’s an alternative in the CSS Typed Object Model Level 1 draft that uses CSSStyleRule.styleMap. The styleMap property is an array-like object of every property/value of a CSS rule. We don’t have it yet, but If we did, we could shorten our above code by removing the map:
At the time of this writing, Chrome and Edge have implementations of styleMap but no other major browsers do. Because styleMap is in a draft, there’s no guarantee that we’ll actually get it, and there’s no sense using it for this demo. Still, it’s fun to know it’s a future possibility!
We have the data structure we want. Now let’s use the data to display color swatches.
Step 7: Build HTML to display the color swatches
Getting the data into the exact shape we needed was the hard work. We need one more bit of JavaScript to render our beautiful color swatches. Instead of logging the output of getCSSCustomPropIndex, let’s store it in variable.
We use reduce to iterate over the custom prop index and build a single HTML-looking string for innerHTML. But reduce isn’t the only way to do this. We could use a map and join or forEach. Any method of building the string will work here. This is just my preferred way to do it.
I want to highlight a couple specific bits of code. In the reduce callback signature, we’re using array destructuring again with [prop, val], this time to access both members of each child array. We then use the prop and val variables in the body of the function.
To show the example of each color, we use a b element with an inline style:
But how does that set a background color? In the full CSS we use the custom property --color as the value of background-color for each .color__swatch. Because external CSS rules inherit from inline styles, --color is the value we set on the b element.
.color__swatch {
  background-color: var(--color);
  /* other properties */
}
We now have an HTML display of color swatches representing our CSS custom properties!
This demo focuses on colors, but the technique isn’t limited to custom color props. There’s no reason we couldn’t expand this approach to generate other sections of a pattern library, like fonts, spacing, grid settings, etc. Anything that might be stored as a custom property can be displayed on a page automatically using this technique.
Every web developer has had the experience of dealing with large, menial tasks (A.K.A. grunt work). Perhaps a client needs to swap out a file that’s linked from various pages. Or terminology that’s splashed all over the place needs to be changed in a hurry. It happens.
The good news is that the WordPress community has dealt with these issues too. That’s why a number of plugins have been developed to help you make quick work of even the most painful items on your to-do list.
Today, we’ll introduce you to a selection of plugins that you can use to rip through those tasks with ruthless efficiency. But don’t worry – you won’t have to tell your client how fast you did it. A developer needs a chance to kick back and relax, after all.
We’ve all been there. An image or other downloadable file is uploaded to a WordPress site. Sometimes, that item is used in multiple places. When a change is required, it means hunting down every single instance. That’s exactly what Enable Media Replace intends to fix. It enables you to replace any file uploaded to the WordPress Media Library. In addition, it replaces each instance of it throughout your site. You can even rename the file.
There are times when a word, phrase or URL needs to be changed en masse throughout a website. It can take a whole lot of grunt work to find them all. That’s where Better Search Replace comes in to make quick work of the job. The plugin will search your database, even allowing you to select which tables to look in. From there, it will automatically replace each matching occurrence with the content of your choosing. Thankfully, the “Dry Run” mode lets you see changes before they are made.
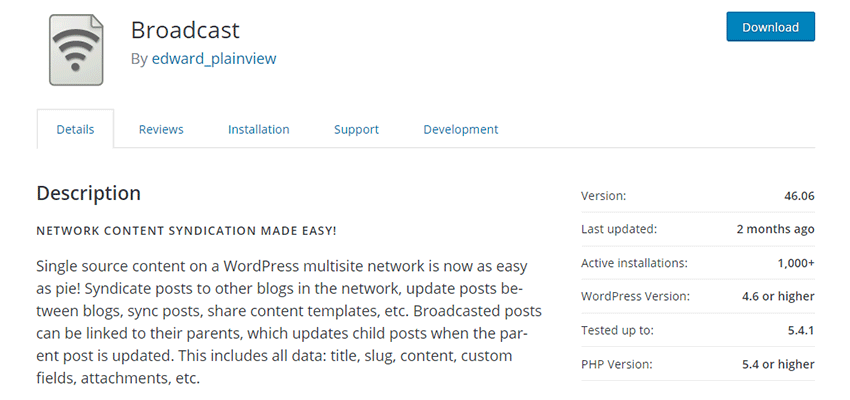
Broadcast is a plugin built exclusively for sharing content within WordPress Multisite installations. Pages, posts, file attachments and more can be synced between websites. Update the “parent” content, and the changes will be automatically synced throughout the network. It even works with custom fields.
If your website has multiple users making changes in the back end, it can be difficult to track down who made a particular change. Instead of asking everyone in a mass email, try installing Simple History. The plugin keeps track of all sorts of changes to content, plugins, menus and a whole lot more. It’s an easy way to keep tabs on what users are doing.
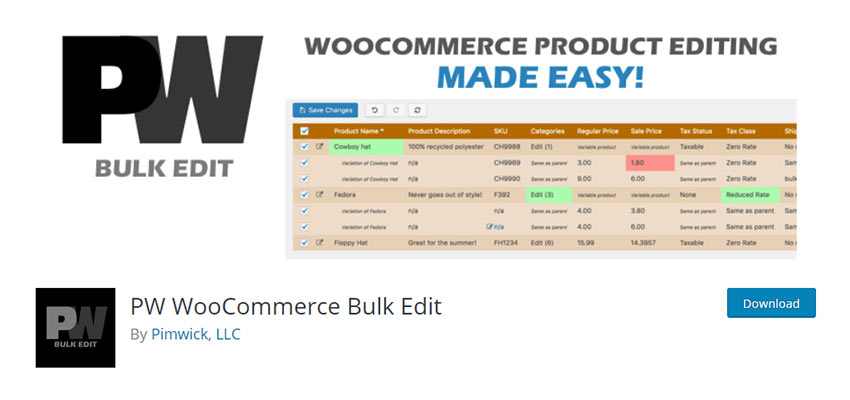
Running a WooCommerce shop can be a lot of work. And editing products is one of the most time-consuming tasks. PW WooCommerce Bulk Edit takes some of that pain away by enabling you to edit all of your products on a single screen. In-line editing means that you can click on a setting, like a product description or price, and make changes right then and there.
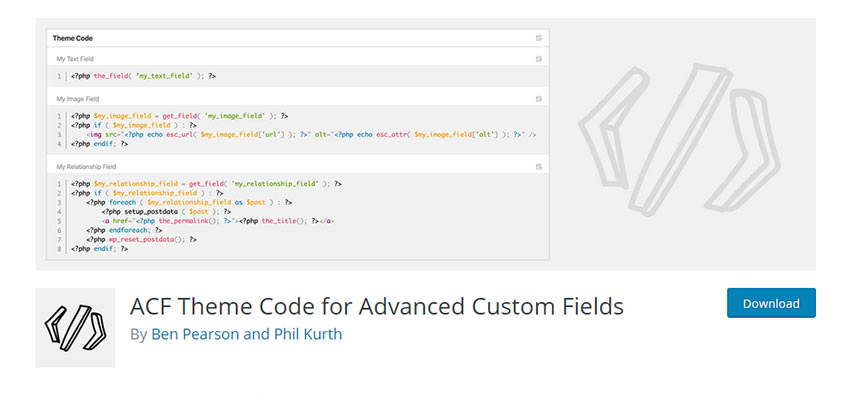
Advanced Custom Fields (ACF) is one of the most popular and powerful plugins for WordPress. You can use it to add all sorts of content and functionality to your website. But it does require writing code to get those fields to show up in your theme. ACF Theme Code can save you tons of time by generating that code for you. Copy and paste the generated code into your theme, then customize to meet your needs. Easy!
Adding multiple users to your WordPress website can be time-consuming. Import and Export Users and Customers makes it easy, with the ability to import users via a CSV file. The plugin also works with WooCommerce, BuddyPress and a number of popular membership plugins. Need to export the entire list? That’s only a few clicks away as well.
Talk about a tedious process. Creating HTML tables in WordPress the old-fashioned way means adding data cell-by-cell. TablePress has a better way. This free plugin allows you to import CSV or MS Excel files and turn them into tables. It also utilizes the DataTables JavaScript Library, allowing users to sort tables by column and a whole lot more.
Manage WordPress More Efficiently
The best WordPress plugins tend to make quick work of otherwise difficult tasks. That’s why the selections above are at the top of their class. They’re great at saving you time and eliminating that pesky grunt work. Plus, they may just save you from the sore wrists that accompany click after click of repetitive work.
The more you can streamline site management, the better. We hope these plugins will turbocharge your workflow.
Getting started with email newsletter design isn’t hard if you know what the pros do. In this post, we’ll discuss five essential email newsletter design practices that will make you feel confident about starting your first projects. Unlike web design …
What Is Web Hosting ? Comparisation Of The Best Web Hosting Services 2021! Are you looking for the best web hosting service for your website? If so, click here for cheap web hosting services. Keep...
Do you want to add a horizontal line across your post or page in WordPress?
Horizontal line dividers are a great way to break long posts into smaller sections, highlight special announcements or promotion, and clearly separate different parts of a page.
In this article, we’ll show you how to easily add a horizontal line divider in WordPress.
Since this is a comprehensive guide on how to add a horizontal line divider in WordPress, you may find it helpful to use our table of content:
Adding a Horizontal Line in the WordPress Block Editor
To add a horizontal line using the WordPress block editor, click the (+) icon to add a new block wherever you want the line to be.
Next, select the Separator block from the Layout Elements section or search for it using the search bar.
Once added, you’ll see your horizontal line divider in your content area.
Styling the Horizontal Line in the WordPress Block Editor
By default, the horizontal divider is a pale gray line across the center of your post or page.
You can change how it looks by clicking on the line to select its block. Then, the ‘Block’ editing panel will open up on the right-hand side of your screen.
To change the style of your line, just click the little arrow next to Styles. Then, you’ll see the different options.
You can change the horizontal line to one of these, if you want:
A wide line that covers the full width of your post’s content.
Three dots that display in the center of your post.
Note: In some WordPress themes, both the wide line and the default line will cover the whole width of your post.
You can also change the color of your horizontal line under the Color settings. Simply click on one of the options displayed, or use the ‘Custom color’ link to pick any color at all.
If you want to go back to the default gray color, just click ‘Clear’ button under the color options.
Here, our horizontal line is blue and uses the “wide” style.
Adding a Horizontal Line in the WordPress Classic Editor
If you’re still using the classic editor, then you can add basic horizontal lines. To do so, simply edit an existing post or page or create a new one.
If you only see one row of buttons in the toolbar above the post editor, then click on the Toolbar Toggle icon on the right:
This will open up the second row of buttons, which includes the horizontal line option.
Now, go ahead and put a line break between the paragraphs where you want the horizontal line to go. You can then click the Horizontal Line button. It’s the second from the left on the second row:
Your horizontal line will be light gray. It’ll cover the whole width of your post like this:
Manually adding a Horizontal Line divider using HTML
In some rare cases, you may need to manually add a horizontal line divider in your WordPress content.
If so, you can simply do that by using the hr HTML tag in your content:
<hr>
This will add the horizontal line separator in your post content.
Other Separators You Can Use in Your Posts and Pages
The default WordPress block editor allows you to add multiple types of separators to your posts and pages.
Aside from the horizontal line separator, the other options in the Layout Elements set of blocks include the Spacer, the More link, and the Page Break blocks.
The Spacer Block
The Spacer lets you add white space between blocks. For instance, if you want a slight gap at the end of your post before a special offer, you can use the Spacer.
You can customize the height of the spacer. Here’s how it looks when you’re creating your post in the block editor:
And here’s how the spacer appears on your site:
The More Block
If your theme shows full posts (rather than excerpts) on your main blog page, then adding a ‘More’ link will break off your post at that point. The visitor can click to read more.
Here’s how it looks when you’re creating your post:
And here’s how the More link appears on your site:
The Page Break lets you split long blog posts into multiple pages. You can’t customize it in any way. Here’s how it looks when you’re creating your post:
And here’s how the page break appears on your site:
Any of those could be good alternatives to adding a horizontal line in WordPress, depending on what you’re aiming to do.
Adding a Page Break in WordPress Forms Using WPForms
What if you want to put a break not in a post or page, but in a WordPress contact form? You can do that, too. We’re going to be using WPForms for this.
Next, go to WPForms » Add New in your WordPress dashboard.
Enter a name for your form then pick a template. We’re going to use the ‘Request a Quote Form’ template for ours. Run your mouse cursor over the template and click the button to create your form.
Next, scroll down the Add Fields tab on the left hand side to the Fancy Fields section. Drag and drop the Page Break to wherever you want it on the form. We’re putting it just before the Request box.
You’ll see that the form is now broken into two parts. WPForms has automatically added a ‘Next’ button, too.
You can change the ‘Next’ label if you want to and you can add a ‘Previous’ button to go on the second page of the form. Just click on the page break field to edit it.
Save your form once you’re done, by clicking the Save button on the top right.
You can now add the form to your website. First, you’ll need to create a new post or page, or edit an existing one.
Click the (+) to add a new block to your post or page and find the WPForms block. You can use the search bar or look in the Widgets section. Add the block to your page.
Now, select your form from the dropdown list.
Once you’ve done that, you can publish the post or page and view how your form looks on your website.
We hope this tutorial helped you learn how to add a horizontal line separators in WordPress. If you want to add more design and layout elements to your posts and pages, check out our article on the best drag and drop WordPress page builders.
If you liked this article, then please subscribe to our YouTube Channel for WordPress video tutorials. You can also find us on Twitter and Facebook.