Recently the "fattest" of my Spring Boot based microservices became too big. The entire project was hosted on the AWS EC2 environment and the instances used were t2.micro or t3.micro. The service started to get down very often even with minimum load on it. The obvious option was to choose a bigger instance for the service (t3.small) which I did initially.
Technology has a way of updating faster than security standards. OAuth 2.0 is the latest and greatest standard for modern applications, but it’s eight years old now! Its contributors are working on the next version as we speak, and in the meantime, they release “guidance” periodically to help developers use OAuth 2.0 with new technology.
Last year, the developers submitted two drafts of important pieces of guidance for OAuth 2.0. OAuth 2.0 Security Best Current Practices gives advice for securing modern apps with OAuth 2.0, and OAuth 2.0 for Browser-Based Apps focuses specifically on web app best practices.
With over 30 security settings under the control of every single developer, you need to be a Kubernetes expert to understand if the final configuration introduces a high risk to your cluster. With a single change to a single file, you can open your entire Kubernetes cluster to attacks, leak secrets, risk confidential data, or accidentally give public access to private services.
We at Octarine believe in making security easy for everyone. We released the open source kube-scan tool that allows you to run a quick and easy security risk assessment on your Kubernetes workloads to instantly understand the security posture of your clusters.
At the time (March 2020) of writing this article, there are 600+ arguments that you can pass to JVM just around garbage collection and memory. If you include other aspects, the number of JVM arguments will easily cross 1000+. It’s way too many arguments for anyone to digest and comprehend. In this article, we will highlight seven important JVM arguments that you may find useful.
1. -Xmx and -XX:MaxMetaspaceSize
-Xmx is probably the most important JVM argument. -Xmx defines the maximum amount of heap size you are allocating to your application. (To learn about different memory regions in a JVM, you may watch this short video clip). You can define your application’s heap size like this:
There is a popular saying, which has been used in several memes, among my developer and remote-working friend groups. It goes something like the following:
Government and Doctors:Practice physical distancing during this pandemic.
Remote Workers:I’ve been preparing my whole life for this moment. I got this.
The truth is that we don’t “got this,” at least I know I don’t.
While practicing physical distancing during the COVID-19 pandemic, it is those little moments that you do not think you will miss that suddenly become important.
Every Saturday, I awake around 6 or 6:30 a.m. I go through my normal routine and get dressed for a morning drive into the city. My home is in a quiet area in rural Alabama. I am a Millennial living within a neighborhood of mostly Baby Boomers. For the most part, it is an ideal place for remote work. Few people bother me, and I can tend to my animals and get my work done in peace. However, it is not exactly the most socially invigorating place in the world.
Those Saturday mornings are important. Assuming I have no other social plans for the week, it is my one chance to get out into the world. I stop by the local Co-Op, pick up any feed or seed I need, and chat with the people there about the farming season or the weather — mostly the weather. I drop into Hidden Treasures, a flea market, and talk with a seller who shares an interest in finding old DVDs, VHS tapes, and Laserdiscs. I grab a sandwich at Subway and am greeted by the Indian-American manager who learned my name on my first visit years ago. He asks about my family. I ask how his family is doing.
These fleeting moments are almost forgettable. They are routine. Run-of-the-mill. When they are happening, you do not think about them. However, when they are gone, there is a void remaining that is hard to fill.
Yes, I have been practicing physical distancing for over a decade, at least to some degree. That makes those small moments where I interact with others in person crucial to my mental health.
This Saturday, I will once again head into the city after a hiatus. However, my trip will be different. This time, I will be gathering necessities for myself and some of my elderly neighbors who want to avoid the public for a while. The trip will be quick. Some of the places I normally visit are closed. My Subway meal will be carryout.
Even after a couple of weeks, and feeling like I was prepared for this moment, I am still coming to grips with the world as it is now.
Staying Strong as a Community
The WordPress community, the people, have put up a strong front. Bloggers have written posts on remote work. Developers, designers, and others have willingly shared their knowledge with others. Companies are offering discounts to help ease the burden for those looking to begin a shop or blog online. Yes, our community will get through this, and we will be stronger for it.
However, it is OK for us to share our vulnerabilities during these uncertain times.
Ultimately, this community is not about software. It is about people. The software is the way we connect. It is a tool that we program, design, and evangelize. We do it for ourselves. We do it for millions of others to have a voice online. But, it is always about people.
Sometimes, people need to know that others in our community are struggling. This is a collective pain that we are working through. Remote work does not always mean physical distancing from everything and every one of the outside world. Many of us may have a bit of a head-start on staying put at home for hours on end, but we are also dealing with a new reality every day. Showing strength is good, but sharing our stories of struggle is just as important.
For some of us, that weekly trip into the city plays a vital role in our well-being. Others are dealing with children who would normally be in school or daycare. Kids can be disruptive, even when you have the best-laid plans and every hour of their day mapped out. Even for us remote workers, life is a little out of balance now. It is OK to admit that. If you are running a WordPress business, it is OK for you to provide a little more flexibility for your workers who are at home. Many of them will need it.
It is not time to break down. It is time to find a new balance in our current environments. That may mean starting up a family board game night. It may mean making sure that you set up a video chat with those loved ones you have been too busy to call in several months. Maybe you will start taking a daily walk for better health. It might also be time to set up WordPress blogs for your children as part of their education. Some of these new things may and probably should become routine, especially that last one.
Do not become overwhelmed if you feel like you should be handling this situation better because you have practice at remote work.
Hop over to your personal WordPress blog. You may have to dust that thing off; some of you have not used it in a while. Write about the things you are struggling with. Share them with the community and find support among others. Post about your experiences. Tell us about your tough days and those small wins that are helping you get through this.
For me, it is having my dad call to check in for the third time this week, and it is only Wednesday.
How did you first get started kind of writing comics, and why did you tailor them specifically toward developers?
When I was young, I used to draw pictures, comics of situations that happened in my day. I've liked to draw since I was a little kid, but I started to draw comics related to development because I love it. I am a developer and software programming teacher, so it's something that I really know and we can find a lot of fun situations in the development world, even when we start to pretend that processes and software are living things, as I do. No one was doing this kind of commentary. I like to draw and I like to make fun of people and situations so I joined these two things and stared to do this as kind of a hobby.
You mentioned that there was a story you wanted to tell, about how you became involved with DZone, about "a rare disease and a DZone editor." Can you share?
Ah, yes, yes. I started to run my site, I think, at the end of 2015. So, at that time, I was diagnosed with a rare disease. It was a very difficult time of my life because I didn't know if I would live, as it was a very, very difficult disease. I had to stop going to work, so I was at my home and I had nothing to do, so I started to draw more. I sent an email to Joe Esposito [a former DZone editor], and he answered me saying that it was okay that I started to publish them on my own.
Markdown has traditionally been a favorite format for programmers to write documentation. It’s simple enough for almost everyone to learn and adapt to while making it easy to format and style content. It was so popular that commands from Markdown have been used in chat applications like Slack and Whatsapp as document applications, like Dropbox Paper and Notion. When GitHub introduced Markdown support for README documentation, they also rendered HTML content from it — so, for example, we could drop in some link and image elements and they would render just fine.
Even though Markdown isn’t broken by any stretch of the imagination, there’s always room for improvement. This is where Markdown Extended (MDX) comes in.
When would we consider MDX over Markdown? One thing about MDX is that JavaScript can be integrated into cases where normal Markdown is used. Here are few examples that illustrate how handy that is:
Frontend Armory uses MDX on its education playground, Demoboard. The playground supports MDX natively to create pages that serve both as demo and documentation, which is super ideal for demonstrating React concepts and components..
Brent Jackson has a brand new way of building websites pairing MDX and Styled System. Each page is written in MDX and Styled System styles the blocks. It’s currently in development, but you can find more details on the website.
Using mdx-deck or Spectacle could make your next presentation more interesting. You can show demos directly in your deck without switching screens!
MDX Go, ok-mdx and Docz all provide tools for documenting component libraries in MDX. You can drop components right in the documentation with Markdown and it will just work™.
MDX shines in cases where you want to maintain a React-based blog. Using it means you no longer have to create custom React component pages when you want to do something impossible in Markdown (or create a plugin). I have been using it on my blog for over a year and have been loving the experience One of my favorite projects so far is a React component I call Playground that can be used to demo small HTML/CSS/JavaScript snippets while allowing users to edit the code. Sure, I could have used some third-party service and embed demos with it, but this way I don’t have to load third party scripts at all.
Speaking of embedding, MDX makes it so easy to embed iFrames created by third-party services, say YouTube, Vimeo, Giphy, etc.
Use it alongside Markdown
You’ll know a file is written in MDX because it has an .mdx extension on the filename. But let’s check out what it looks like to actually write something in MDX.
import InteractiveChart from "../path/interactive-chart";


# Hello - I'm a Markdown heading


This is just markdown text


<InteractiveChart />
See that? It’s still possible to use Markdown and we can write it alongside React components when we want interactive visualizations or styling. Here is an example from my portfolio:
Another benefit of MDX is that, just like components, the files are composable. This means that pages can be split into multiple chunks and reused, rendering them all at once.
import Header from "./path/Header.mdx"
import Footer from "./path/Footer.mdx"

<Header />

# Here goes the actual content.

Some random content goes [here](link text)

<Footer />
Implementing MDX into apps
There are MDX plugins for most of the common React based integration platforms, like Gatsby and Next.
To integrate it in a create-react-app project, MDX provides a Babel Macro that can be imported into the app:
You can also try out MDX on the playground they created for it.
MDX contributors are very actively working on bringing support for Vue. A sample is already available on GitHub. This is though in Alpha and not ready for production.
Editor support
Syntax highlighting and autocomplete have both been increasing support for VS Code, Vim, and Sublime Text. However,in use, these do have some sharp edges and are difficult to navigate. A lot of these come from the inability to predict whether we are going for JavaScript or Markdown within the context of a page. That’s something that certainly can be improved.
MDX plugins and extensions
A key advantage of MDX is that it is part of the unified consortium for content that organizes remark content. This means that MDX can directly support the vast ecosystem of remark plugins and rehype plugins — there’s no need to reinvent the wheel. Some of these plugins, including remark-images and remark-redact, are remarkable to say the least. To use a plugin with MDX, you can add them to them to your corresponding loader or plugin. You can even write your own MDX plugins by referring to the MDX Guide for creating plugins.
MDX is only a few years old but its influence has been growing in the content space. From writing blog posts and visualizing data to creating interactive demos and decks, MDX is well suited for many uses — well beyond what we have covered here in this introduction.
By default, <input> and <textarea> elements don't change size based on the content they contain. In fact, there isn't any simple HTML or CSS way to make them do that. Kinda funny, as that seems like a reasonable use-case. But of course, there are ways, my friend. There are always ways.
I was thinking about this after Remy Sharp blogged about it recently in the context of inline <input> elements.
Non-input elements expand naturally
It's weird to me that there is no way to force an input element to mimic this behavior, but alas.
We can make any element editable and input-like with the contenteditable attribute:
That <span> will naturally grow to be the width it needs to be for the content it contains. If it was a <div> or any other element that is block-level, it would also expand vertically as needed.
But are non-input elements accessible?
I'm not entirely sure. Notice I put role="textbox" on the element. That's just a best-guess based on some docs.
Even if that's helpful...
What about the fact that forms can be submitted with the Enter key?
What about the idea that form data is often serialized and sent along, while the code that's doing it probably isn't looking for a span?
Does it actually read the same as an input in a screen reader?
What other things¹ do inputs naturally do that I'm not thinking of?
As attracted as I am to the idea that we can get auto-resizing for free from the browser by using non-input elements, I'm also a little worried about (my) unknown usability and accessibility risk.
Resizing actual input elements
So let's say we stick with <input> and <textarea>. Can we make them resize-able even though it's not particularly natural?
One idea I had is to wrap the input in a relative inline parent and absolutely position it inside. Then, with JavaScript, we could sync the input value with a hidden span inside that wrapper, pushing the width wider as needed.
For textareas, one classic technique is to count the number of line-breaks, use that to set the height, then multiply it by the line-height. That works great for preformatted text, like code, but not at all for long-form paragraph-like content.
Here are all these ideas combined.
Other ideas
Shaw has a little JavaScript one-liner that is very clever. The JavaScript sets a data-* attribute on the element equal to the value of the input. The input is set within a CSS grid, where that grid is a pseudo-element that uses that data-* attribute as its content. That content is what stretches the grid to the appropriate size based on the input value.
Your ideas
I absolutely know that you fellow web nerds have solved this six ways to Sunday. Let's see 'em in the comments.
Eric Bailey hit me up with a few thoughts off the top of his head: (1) There's no accessible name. (2) It probably won't work with voice control. (3) It will get ignored in High Contrast Mode.
How Should Designers Learn To Code? Git, HTML/CSS, Engineering Principles (Part 2)
How Should Designers Learn To Code? Git, HTML/CSS, Engineering Principles (Part 2)
Paul Hanaoka
Literally, tomes have been written on version control. Nevertheless, I will start by sharing a brief explanation and other introductory content to whet your appetite for further study.
Version control (not to be confused with version history) is basically a way for people to collaborate in their own environments on a single project, with a single main source of truth (often called the “master” branch).
I’ll go over today is the bare minimum you’ll need to know in order to download a project, make a change, and then send it to master.
There are many types of version control software and many tools for managing and hosting your source code (you may have heard of GitLab or Bitbucket). Git and GitHub are one of the more common pairs, my examples will reference GitHub but the principles will apply to most other source code managers.
Did you know that CSS can be used for collecting statistics? Indeed, there's even a CSS-only approach for tracking UI interactions using Google Analytics. Read a related article →
Your First Contribution
Before doing these steps, you’ll need a few things set up:
A high tolerance for pain or a low threshold for asking others for help.
Step 1: Fork (Get A Copy Of The Code On Your GitHub Account)
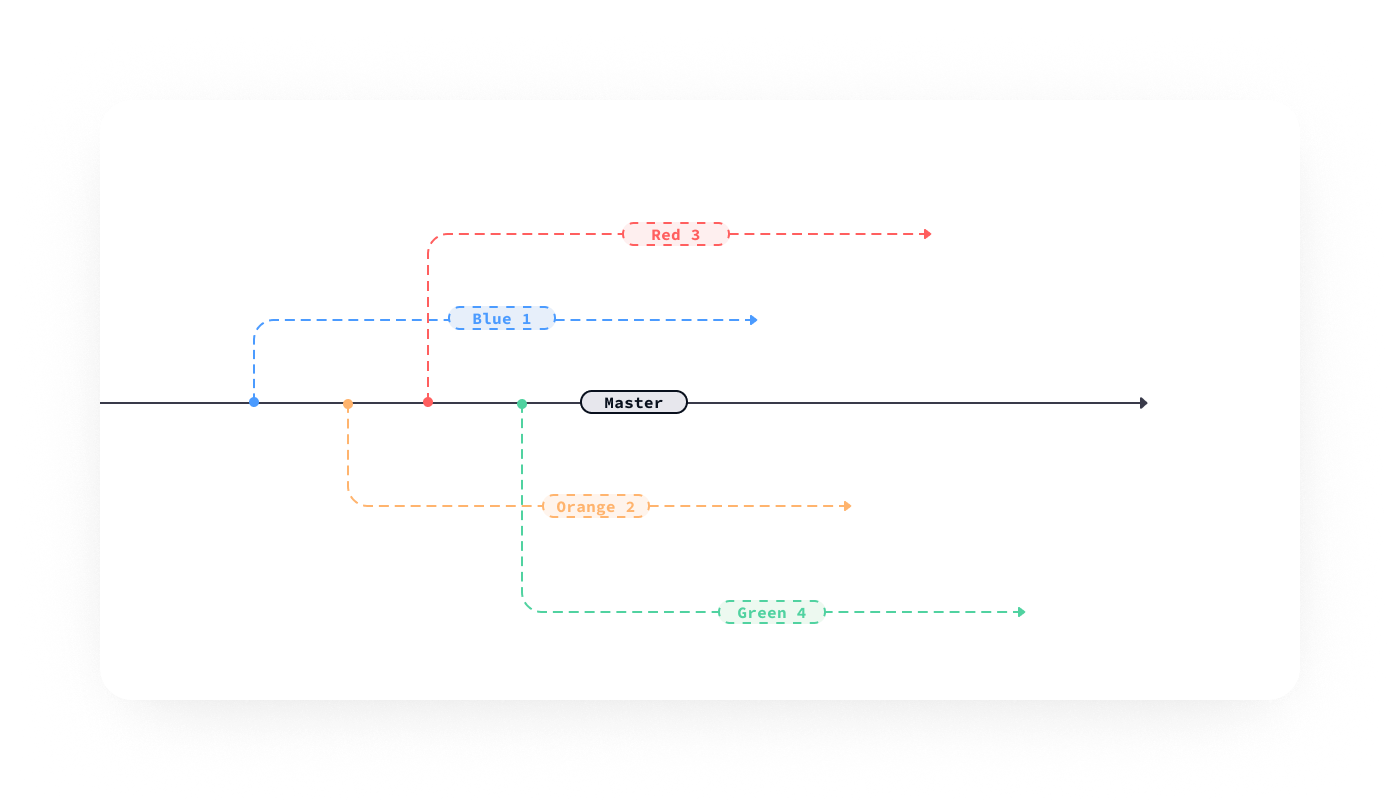
On GitHub, you will fork (fork = create a copy of the code in your account; in the following illustration, the blue, orange, red, and green lines show forks) the repository (repo) in question.
By creating branches off of the master, it’s possible for multiple people to contribute to different areas of a project and then merge their work together. (Large preview)
You do this by navigating to the repo in GitHub and clicking the “Fork” button, currently at the top right-hand corner of a repo. This will be the “origin” — your fork on your GitHub account.
Step 2: Clone (Download The Code To Your Computer)
In your terminal, navigate to where you’d like to store the code. Personally, I have a /github folder in my /user folder — it makes it easier for me to organize it this way. If you’d like to do that, here are the steps — after typing these commands into your terminal window, press the ↵ key to execute:
cd ~/             ## you'll usually start in your root directory, but just in case you don't this will take you there
mkdir github      ## this creates a "github" folder — on OSX it will now be located at users/your-username/github
cd github         ## this command navigates you inside the github folder
Now that you’re in the /github folder, you will clone (download a copy of the code onto your computer) the repo.
Navigate into the /project folder. In this case, we’ll enter cd liferay.design. Most projects will include a README.md file in the /root folder, this is typically the starting place for installing and running the project. For our purposes, to install, enter npm install. Once it’s installed, enter npm run dev.
Congratulations! You now have the site available on your local computer — typically projects will tell you where it’s running. In this case, open up a browser and go to localhost:7777.
Step 4: Commit (Make Some Changes And Save Them)
A commit is a collection of changes that you make; I’ve heard it described as saving your progress in a game. There are many opinions on how commits should be structured: mine is that you should create a commit when you’ve achieved one thing, and if you were to remove the commit, it wouldn’t completely break the project (within reason).
If you aren’t coming to a repo with a change in mind, a good place to go is the ‘Issues’ tab. This is where you can see what needs to be done in the project.
If you do have an idea for some change, go ahead and make it. Once you’ve saved the file(s), here are the steps required to create a commit:
git status                                         ## this will print out a list of files that you've made changes in
git add path/to/folder/or/file.ext                 ## this will add the file or folder to the commit
git commit -m 'Summarize the changes you've made'  ## this command creates a commit and a commit message
Tip: The best recommendation I’ve ever seen for commit messages is from Chris Breams’s “How To Write A Git Commit Message”. A properly formed Git commit subject line should always be able to complete the following sentence: “If applied, this commit will [your subject line here].” For more info on commits, check “Why I Create Atomic Commits In Git” by Clarice Bouwer.
Step 5: Push (Send Your Changes To Your Origin)
Once you’ve made some changes on your computer, before they can be merged into the master branch (added to the project), they need to be moved from your local to your remote repo. To do this, enter git push origin in the command line.
Step 6: Pull Request (Ask For Your Changes To Be Merged Into Upstream)
Now that your changes have gone from your fingers to your computer, to your remote repository — it’s now time to ask for them to be merged into the project via a pull request (PR).
The easiest way to do this is by going to your repo’s page in GitHub. There will be a small message right above the file window that says “This branch is X commits ahead repo-name:branch” and then options to “Pull request” or “Compare”.
Clicking the “Pull request” option here will take you to a page where you can compare the changes and a button that says “Create pull request” will then take you to the “Open a pull request” page where you’ll add a title and include a comment. Being brief, but detailed enough in the comment, will help project maintainers understand your proposed changes.
There are CLI tools like Node GH (GitHub also recently released a beta of their CLI tool) that allow you to initiate and manage pull requests in the terminal. At this point you may prefer to use the web interface, and that’s great! So do I.
The ‘Pull request’ and ‘Compare’ options will appear once your fork has diverged from the upstream repo. (Large preview)
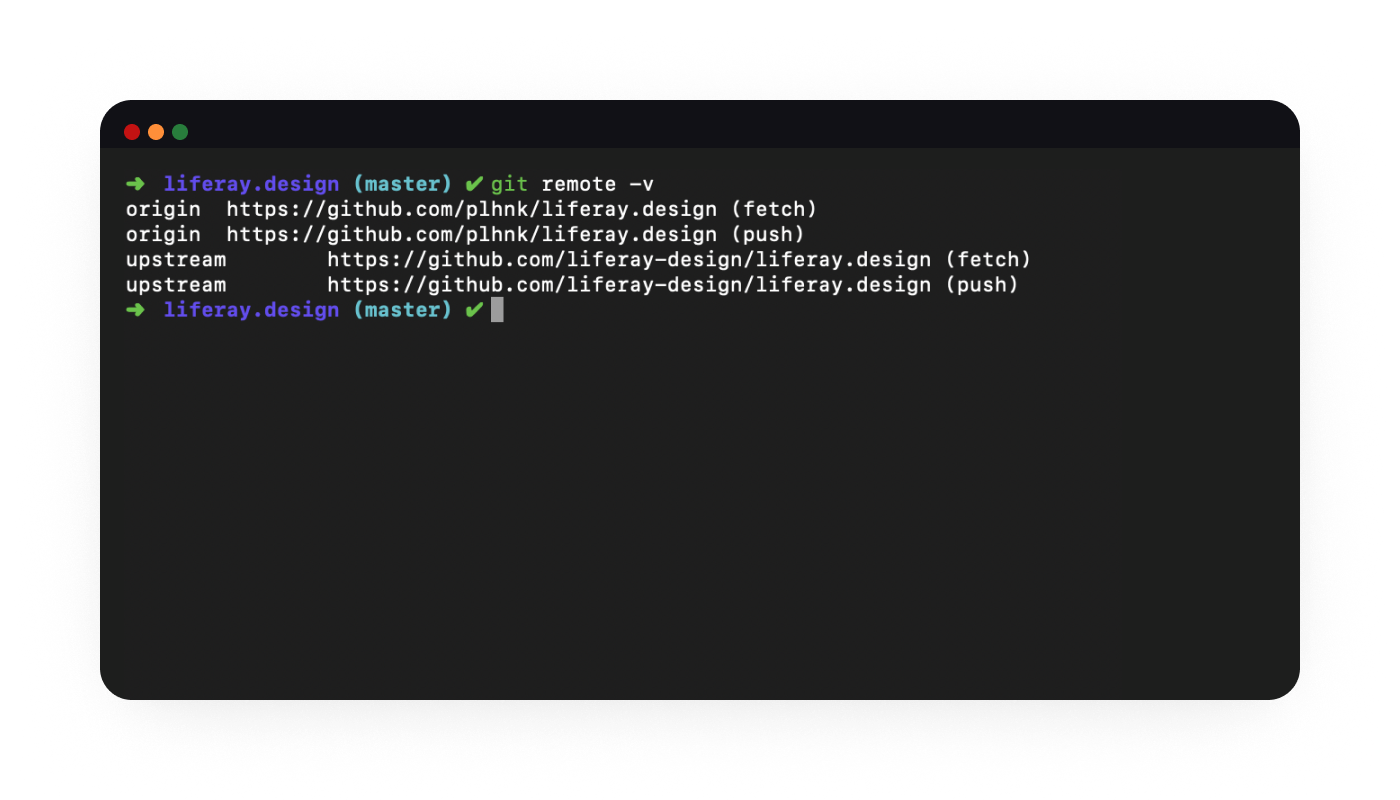
Bonus Step: Remote (Link All The Repos)
At this point, we have three repository references:
upstream: the main repo that you’re tracking, often it’s the repo that you forked;
origin: the default name of the remote that you clone;
local: the code that is currently on your computer.
So far, you have #2 and #3 — but #1 is important because it’s the primary source. Keeping these three things in-line with each other is going to help the commit history stay clean. This helps project maintainers as it eliminates (or at least minimizes) merge conflicts when you send pull requests (PR’s) and it helps you get the latest code and keep your local and origin repositories up-to-date.
Set An Upstream Remote
To track the upstream remote, in your terminal enter the following:
This will allow you to quickly get the latest version of what is upstream — if you haven’t worked in a repo in a long time and don’t have any local changes that you want to keep, this is a handy command that I use:
On the web, there is an endless supply of resources for learning HTML and CSS. For the purposes of this article, I’m sharing what I would recommend based on the mistakes I made how I first learned to write HTML and CSS.
What Are HTML And CSS?
Before we get any further, let’s define HTML and CSS.
In case you also don’t know what a lot of those words mean — briefly put, HTML is the combination of references (links) between documents on the web, and tags that you use to give structure to those documents.
There’s an HTML5 tag for pretty much any basic element — otherwise you can always use a div! (Large preview)
For a thorough introduction to HTML and CSS, I highly recommend the Introduction to HTML and CSS first steps, both on the Mozilla Developer Network (MDN) web docs. That, along with the excellent articles that websites such as CSS Tricks, 24 Ways and countless of others provide, contain basically everything you’ll ever need to reference with regards to HTML/CSS.
There are two main parts of an HTML document: the <head> and the <body>.
- The <head> contains things that aren’t displayed by the browser — metadata and links to imported stylesheets and scripts.
- The <body> contains the actual content that will be rendered by the browser. To render the content, the browser reads the HTML, provides a base layer of styles depending on the types of tags used, adds additional layers of styles provided by the website itself (the styles are included in/referenced from the <head>, or are inline), and that is what we see in the end. (Note: There is often also the additional layer of JavaScript but it’s outside of the scope of this article.)
CSS stands for Cascading Style Sheets — it is used to extend the HTML by making it easier to give documents a custom look and feel. A style sheet is a document that tells the HTML what elements should look like (and how they should be positioned) by setting rules based on tags, classes, IDs, and other selectors. Cascading refers to the method for determining which rules in a sheet take priority in the inevitable event of a rule conflict.
“‘Cascading’ means that styles can fall (or cascade) from one style sheet to another, enabling multiple style sheets to be used on one HTML document.”
CSS often gets a bad reputation — in sites with lots of style sheets it can quickly become unwieldy, especially if there aren’t documented, consistent methods used (more on that later) — but if you use it in an organized fashion and following all the best practices, CSS can be your best friend. Especially with the layout capabilities that are now available in most modern browsers, CSS is not nearly as necessary to hack and fight as it once was.
Rachel Andrew wrote a great guide, How To Learn CSS — and one of the best things to know before you start is that:
“You don’t need to commit to memorizing every CSS Property and Value.”
Don’t worry about memorizing the syntax for the background property, and don’t worry if you forget about how exactly to align stuff in Flexbox (the CSS Tricks Guide to Flexbox is possibly one of my top-10 most visited pages, ever!); Google and Stack Overflow are your friends when it comes to CSS properties and values.
Some code editors even have built-in autocomplete so you don’t even need to search on the web in order to be able to figure out all the possible properties of a border, for example.
One of my favorite new features in Firefox 70 is the inactive CSS rules indicator. It will save you hours of time trying to figure out why a style isn’t being applied.
Let’s start with semantic code. Semantics refers to the meanings of words, semantic code refers to the idea that there is meaning to the markup in any given language.
There are many reasons why semantics are important. If I could summarize this, I would say that if you learn and use semantic code, it will make your life a lot easier because you will get a lot of things for free — and who doesn’t like free stuff?
Default styles
For example, using a headline tag <h1> for the title of your document will make it stand out from the rest of the document’s contents, much like a headline would.
Performance benefits Clean HTML is the foundation for a high-performing site. And clean HTML will also likely lead to cleaner CSS which means less code overall, making your site or app faster.
There are tons of applications, tangents, and levels we could explore over the concept of abstraction — too many for this article which is intended to give you a brief introduction into concepts so that you are aware of them as you continue to learn.
Abstraction is a foundational engineering paradigm with a wide variety of applications — for the purposes of this article, abstraction is separating form from function. We’ll apply this in three areas: tokens, components, and the Don’t Repeat Yourself principle.
Tokens
If you’ve used a modern design tool for any length of time, you’ve probably encountered the idea of a token. Even Photoshop and Illustrator now have this idea of shared styles in a centralized library — instead of hard-coding values into a design, you use a token. If you’re familiar with the concept of CSS or SASS variables, you’re already familiar with tokens.
One layer of abstraction with tokens is to assign a name to a color — for example, $blue-00 can be mapped to a hex value (or an HSL value, or whatever you want) — let’s say #0B5FFF. Now, instead of using the hex value in your stylesheets, you use the token value — that way if you decide that blue-00 is actually #0B36CE, then you only have to change it in a single place. This is a nice concept.
Tokens for colors in the Lexicon Alerts component helps keep things DRY. (Large preview)
If you take this same paradigm of abstraction and go a layer further, you can token-ception — and assign a variable to a functional value. This is particularly useful if you have a robust system and want to have different themes within the system. A functional example of this would be assigning a variable like $primary-color and map that to $blue-00 — so now you can create markup and instead of referencing blue, you’re referencing a functional variable. If you ever want to use the same markup, but with a different style (theme), then you only need to map $primary-color to a new color, and your markup doesn’t need to change at all! Magic!
Components
In the past 3-4 years, the idea of components and componentization has become more relevant and accessible to designers. The concept of symbols (pioneered by Macromedia/Adobe Fireworks, later expanded by Sketch, and then taken to the next level by Figma and Framer), is now more widely available in most design tools (Adobe XD, InVision Studio, Webflow, and many others). Componentization, even more than tokens, can separate the form of something from the function of it — which helps to improve both the form and the function.
One of the more notable early examples is Nicole Sullivan’s media object component. At first glance you might not realize that a whole page is essentially composed of a single component, rendered in different ways. In this way, we can re-use the same markup (form), modifying it slightly by passing in options or parameters, and styles — and have it provide a variety of value (function).
Don’t Repeat Yourself
DRY (Don’t Repeat Yourself) is one of my favorite principles — creating things that can be reused over and over is one of the small victories you can have when coding.
While you often can’t (and arguably shouldn’t) strive to apply the DRY principle 100% of the time, every time — it’s at least beneficial to be aware of this so that as you’re working, you can consider how you can make whatever you’re working on more reusable.
A note on the Rule of Three: A corollary to the DRY principle is the rule of three — essentially, once you re-use (copy/paste) something three times, you should rewrite it into a reusable component. Like the Pirate’s Code, it’s more of a guideline than a hard and fast rule, and can vary from component to component and from project to project.
CSS And Styling Methodologies: Atomic vs. BEM
There are a lot of different ways to organize and write CSS code — Atomic and BEM are only two of the many that you’re likely to come across. You don’t have to “pick” a single one, nor do you have to follow them exactly. Most of the teams I’ve worked with usually have their own unique blend, based on the project or technology. It is helpful to be familiar with them so that over time, you can learn which approach to take depending on the situation.
All of these approaches go beyond “just” CSS and styling, and can often influence the tooling you use, the way you organize your files, and potentially the markup.
Atomic CSS
Not to be confused with Atomic Web Design — atomic (perhaps more aptly referred to as “functional”) CSS, is a methodology that essentially favors using small, single-purpose classes to define visual functions. A few notable libraries:
What I like about this method is that it allows you to quickly style and theme things — one of the biggest drawbacks is that your markup can get pretty cluttered, pretty fast.
Basically, everything that can be reused is a block. Blocks are comprised of elements, something that can’t be used outside of a block, and potentially other blocks. Modifiers are things that describe the status of something or the way it looks or behaves.
Personally, I like the theory and philosophy of BEM. What I do not like is the way that things are named. Way too many underscores, hyphens, and it can feel unnecessarily repetitive (.menu, .menu__item, etc).
After you have sufficiently mastered these topics, don’t worry, there is still plenty to learn. Some suggestions:
Functional and object-oriented programming
We touched on it lightly, but there’s plenty more to learn beyond CSS.
Higher-level languages and frameworks
Typescript, Ruby, React, Vue are the next things you’ll tackle once you have a strong grasp of HTML and CSS.
Querying languages and using data
Learning about GraphQL, MySQL, REST APIs will take your coding ability to the next level.
Conclusion: Designers Who Code != Software Engineers
Hopefully, this article has shown you that learning to code isn’t as difficult as you may have previously thought. It can take a lot of time, but the amount of resources available on the internet is astounding, and they’re not decreasing — quite the opposite!
One significant point that I want to emphasize is that “coding” is not the same as “software engineering” — being able to fork a repo and copy/paste in code from Stack Overflow can get you a long way, and while most, if not all, software engineers that I know have done that — you must use your new-found skills with wisdom and humility. For everything you can now access with some engineering prowess, there is that much more that you don’t know. While you may think that a feature or style is easy to accomplish because — “Hey, I got it working in devtools!” or “I made it work in Codepen.” — there are many engineering processes, dependencies, and methods that you probably don’t know that you don’t know.
All of that is to say — don’t forget that we are still designers. Our primary function is to add business value through the lens of understanding customer or user problems and synthesizing them with our knowledge of design patterns, methods, and processes. Yes, being a “designer who writes code” can be very useful and will expand your ability to add this value — but we still need to let engineers make the engineering decisions.
Anything Amiss?
There’s a good chance that something in this post was obscure, obtuse, and/or obsolete and I’d love the opportunity to make it better! Please leave a comment below, DM me, or @mention me on Twitter so I can improve.
Making a logo is typically one of your first tasks as a new, up-and-coming designer.
I know I had my fair share of making logos for far too cheap, and mostly for my close friends and their small businesses, but it’s something I’ll never forget.
Although there are a few things that I wish I had known when I was at the beginning of my career, so I’m here to shed some light on a few basic design principles that I swear by.
6 Basic Logo Design Principles For Beginners
There are a few things, in my opinion, that every novice designer should know about logo design. Of course, you’ll end up doing whatever feels right for you, but just hear me out.
Alright guys, let’s do this.
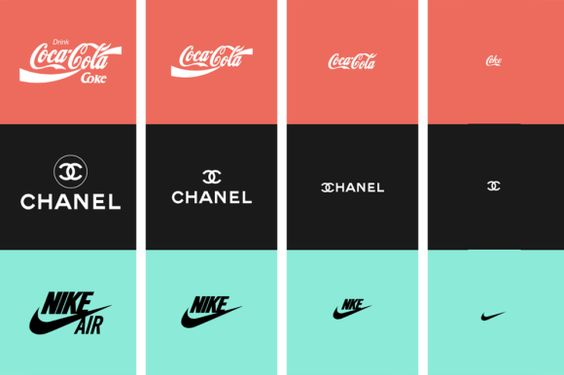
1. Keep it simple
By now you’ve already heard of the K.I.S.S. principle.Keep it stupid simple.
No one should have to stare at your logo, cock their head to the side like a confused, adorable puppy, and wonder just what the heck you have created there.
Back in the 60’s… Well, only they knew what they created for a logo.
But as the years went by, they kept simplifying and simplifying it.
And that was the key!
By simplifying their logo, it was easy to understand, it was easy on the eyes, and of course, it was memorable as heck.
Which brings me to my next point.
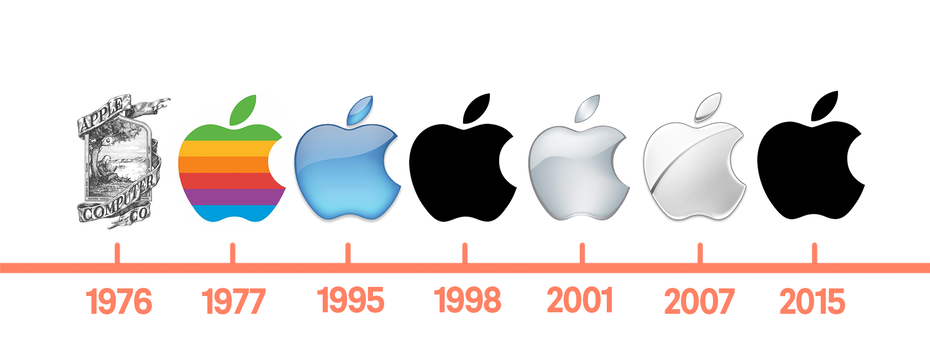
2. Make It Memorable
I know you immediately recognized my first simple logo example, which was obviously the Nike swoosh.
But why did you recognize it so quickly?
Because it was simple and memorable.
What’s the point in having an amazing design, if it’s not memorable?
You’ll lose brand recognizability. If your logo design is no good, well, you’ll have people talking about the business you’re designing for like this, “You know… that one place! With the thing… You know what I’m talking about!”
Nobody wants that. You need something simple, and memorable.
Let me show you some memorable logos that I know you’ll recognize.
Using a bunch of colors that don’t match won’t be a good choice.
You can always do a quick google search and see what colors are predicted to be most popular this year, or you can use color psychology and pick a color scheme that will match your service best.
4. Make It Scalable And Versatile
Keep in mind that the company, business, or client that you’re designing for will be using their logo on a multitude of services.
From big signs to coffee mugs, you need to make sure your logo won’t lose its quality and that it’s recognizable no matter where it’s displayed.
One way to make sure that your design looks good across all platforms is by creating mockups. We know lots of free mock-up sites that you might be interested in using.
You always, always, always have to remember who you’re designing for, and adapt.
If you’re designing for kids, you don’t want to go with neutral colors and a minimalist, flat design. You’re going to want to use bright colors that catch their eye and look fun.
On the other hand, if you’re designing for a winery, you’re going to want something sleek, minimal, and elegant.
So whoever the audience is, you have to take your unique style and just adapt it to your situation.
6. Go With Your Gut
And finally, go with your gut and make the designs you love.
Not everyone will understand your designs, and you won’t always understand everyone’s request.
But you’re going to live and learn from those experiences and in the end, it’ll make you a better and more experienced designer.
Try to make a new logo design every day. It doesn’t need to be spectacular, but just something that will keep your creative wheels turning.
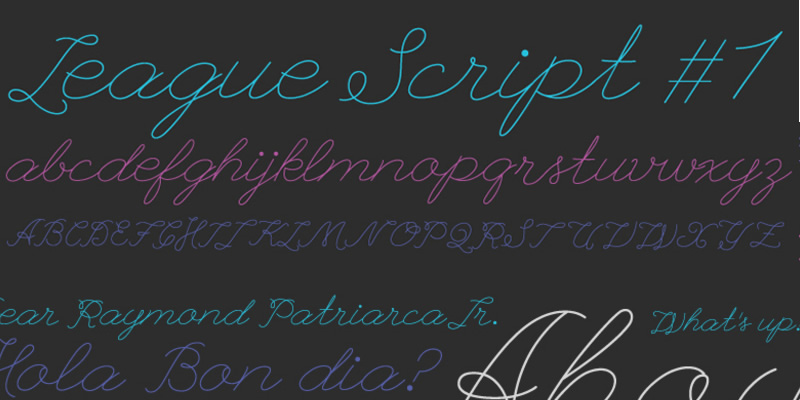
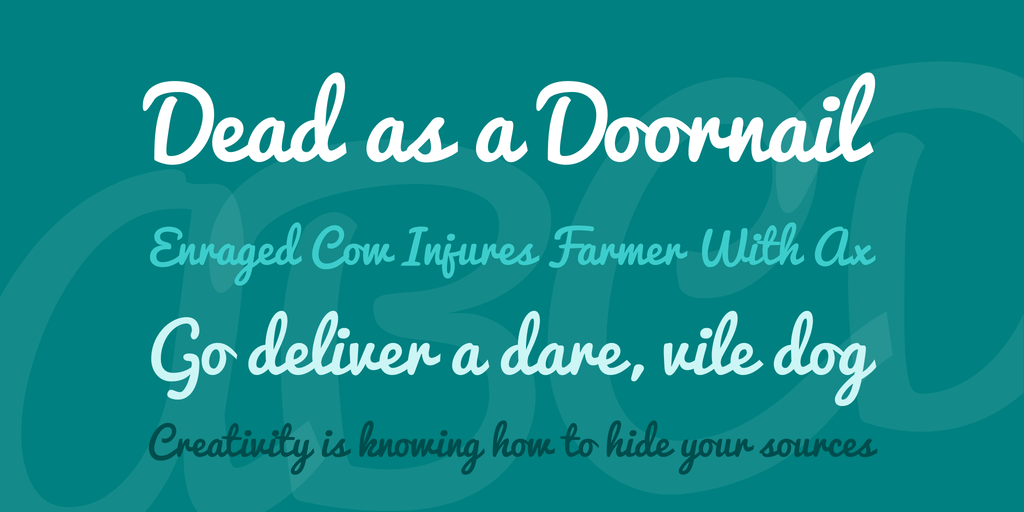
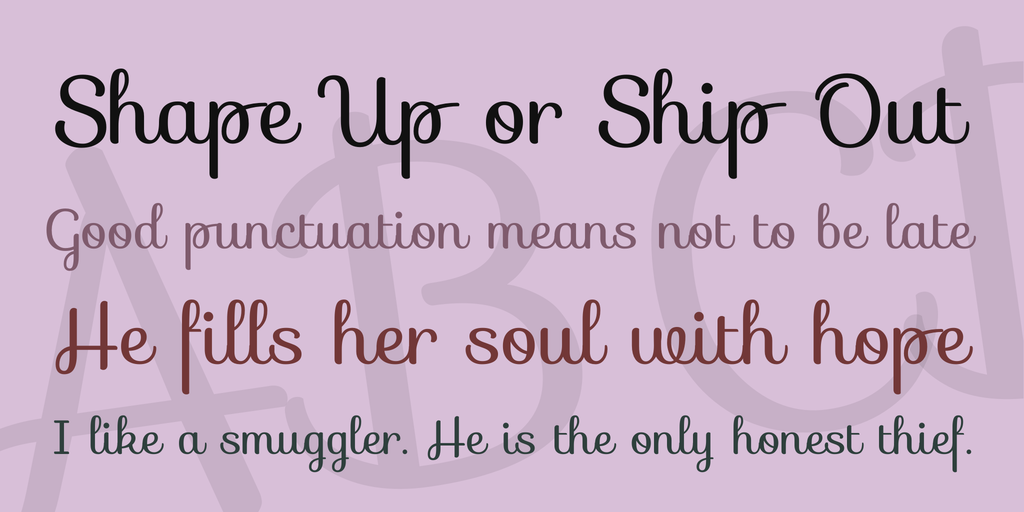
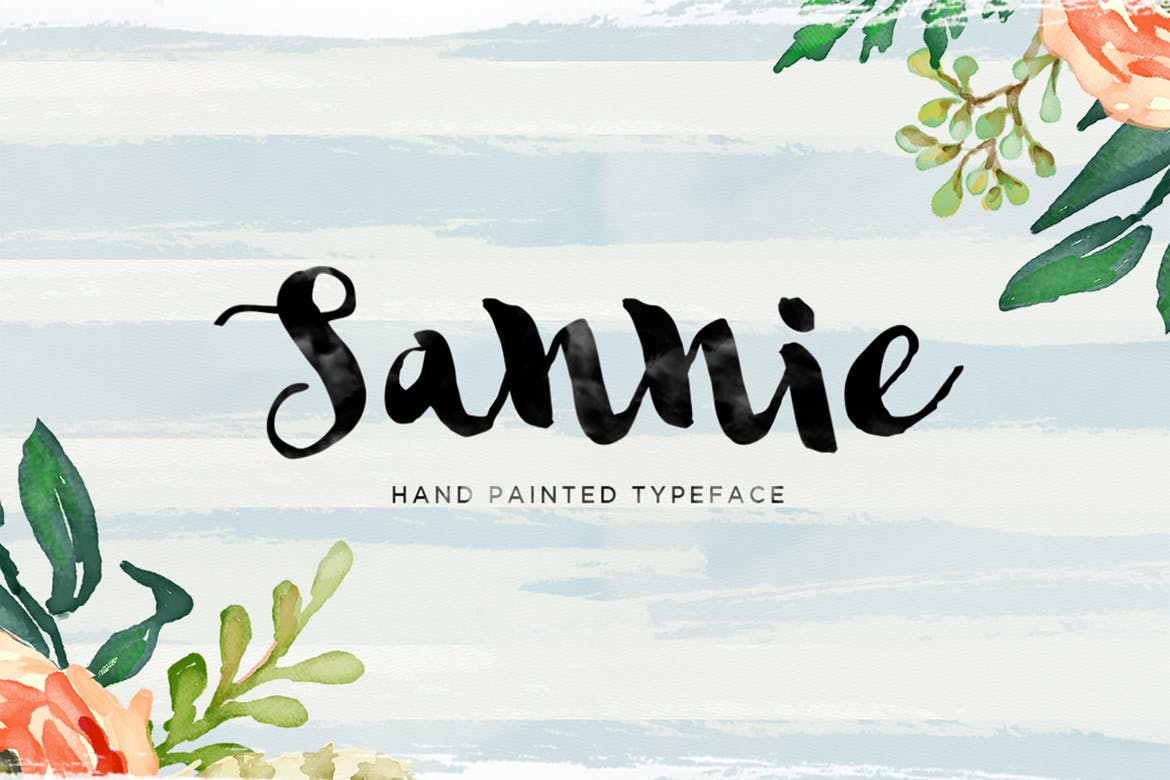
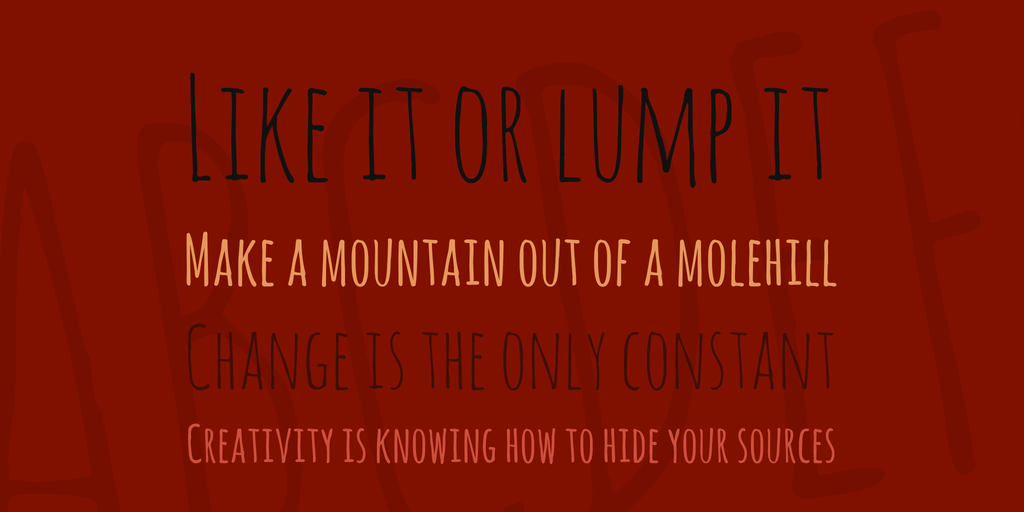
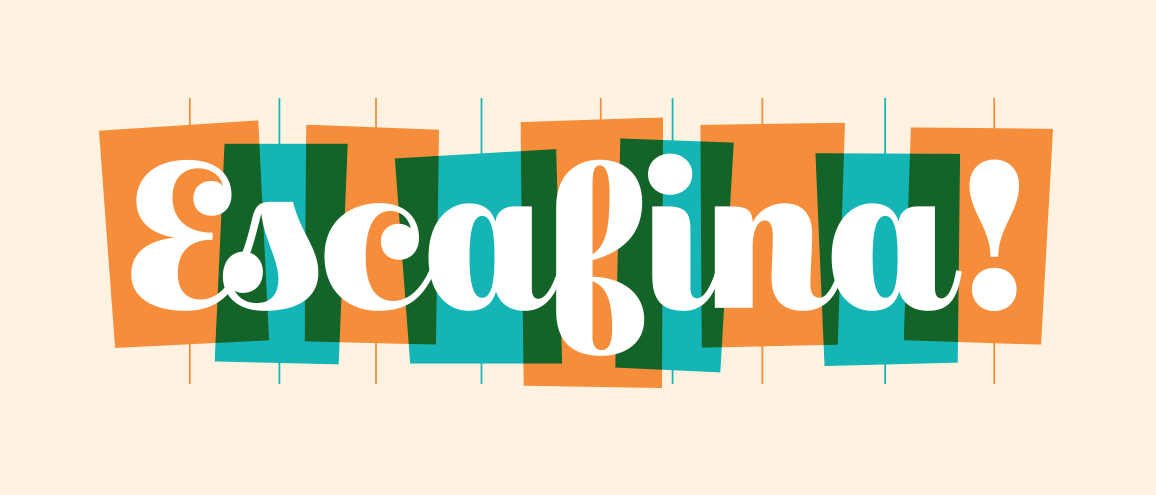
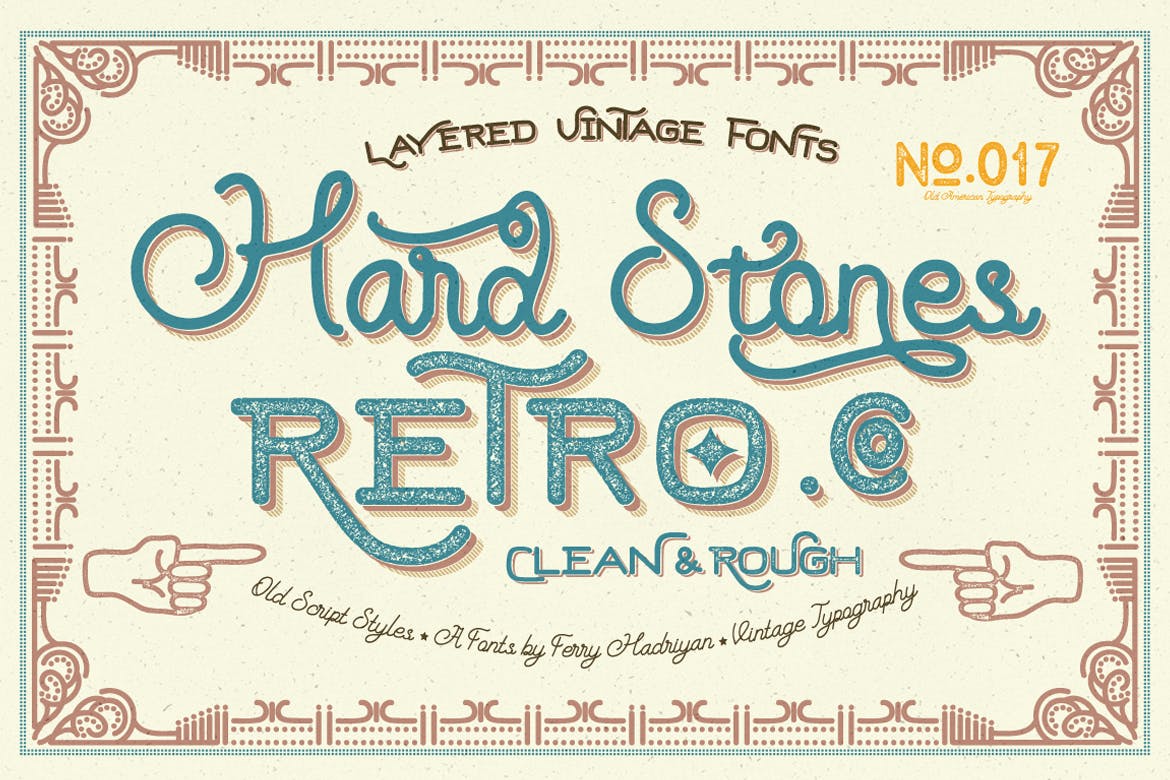
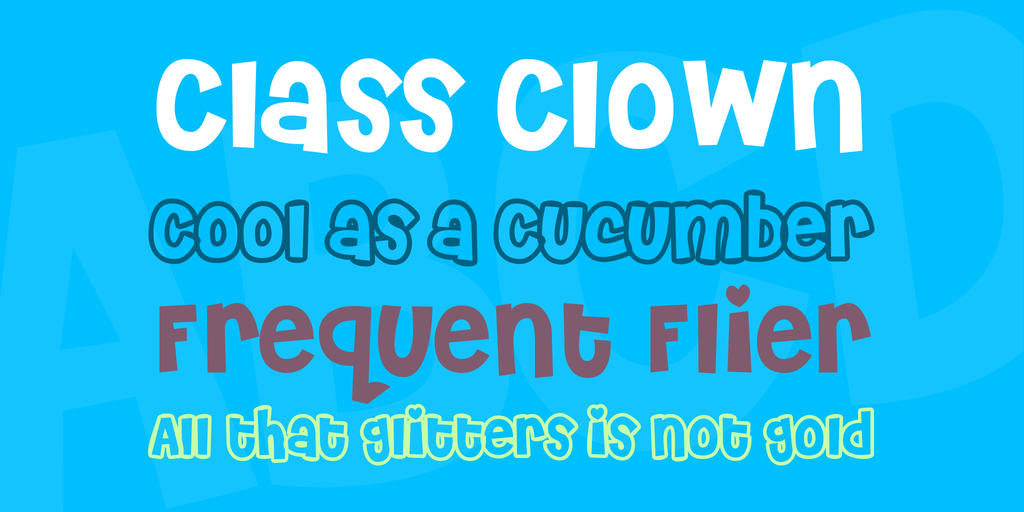
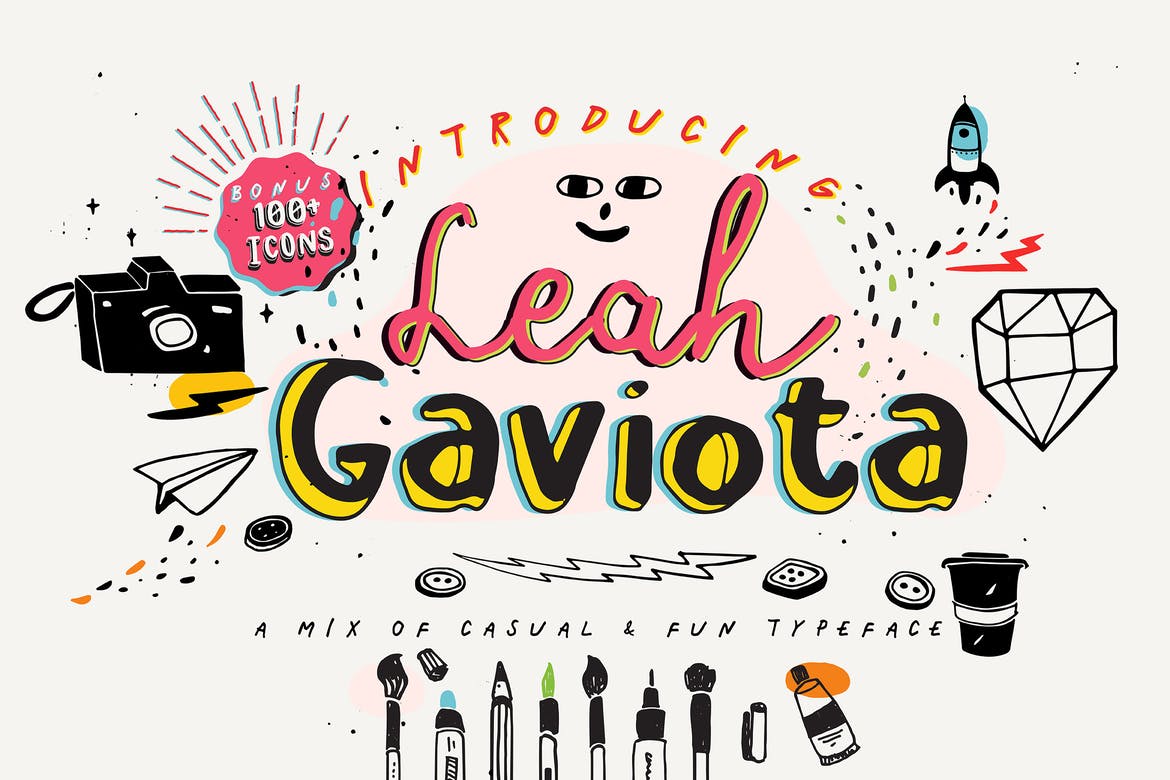
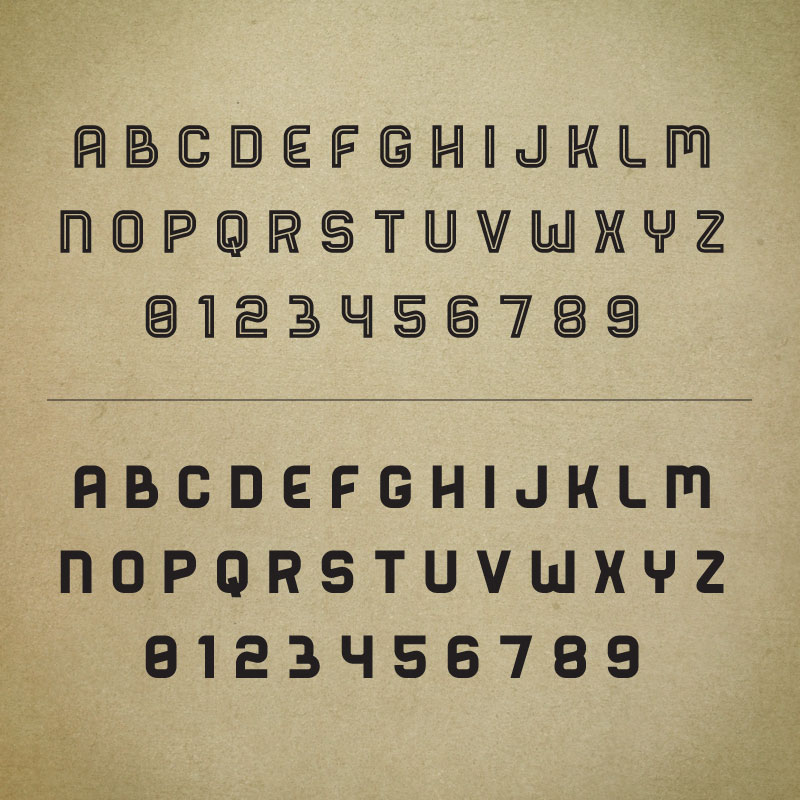
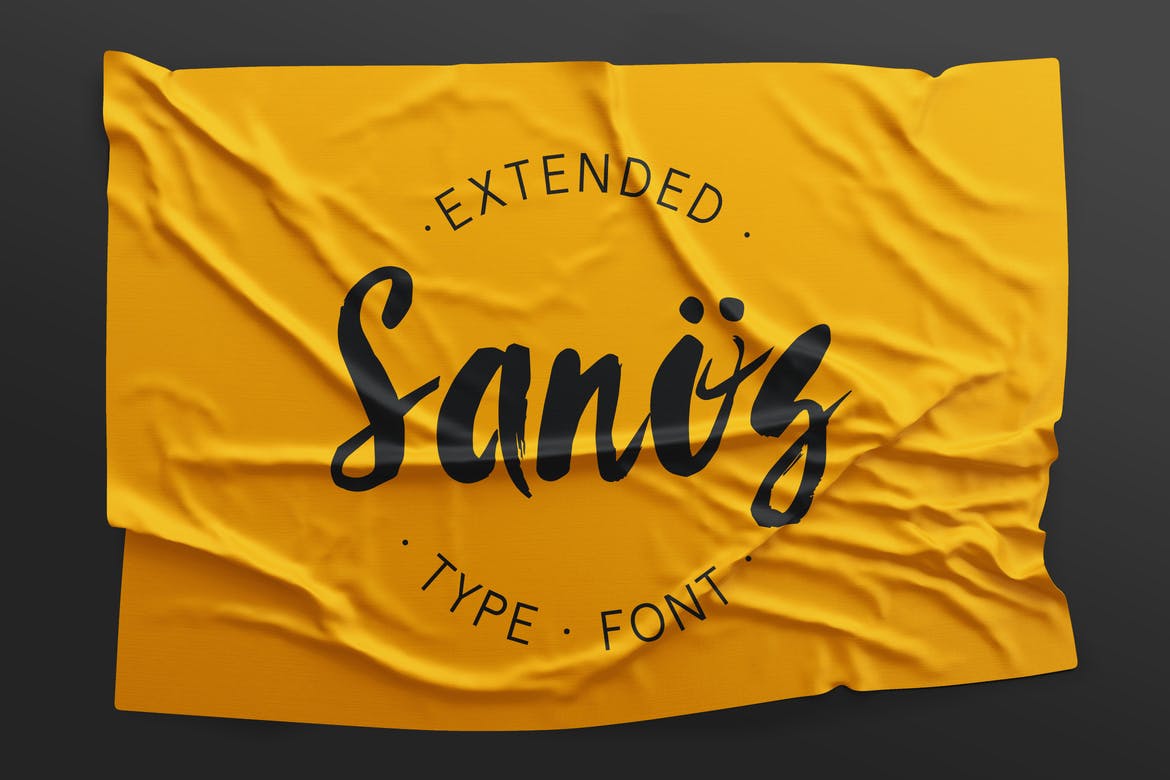
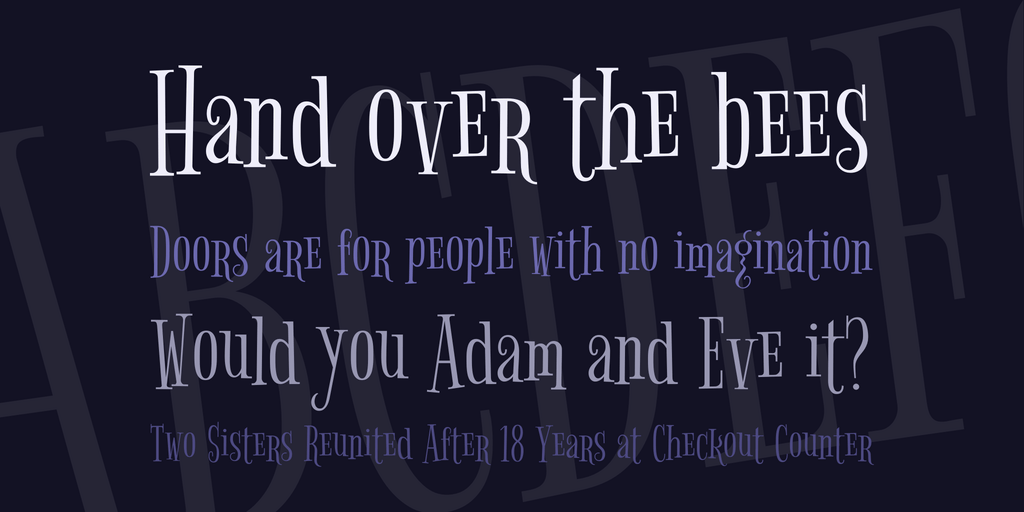
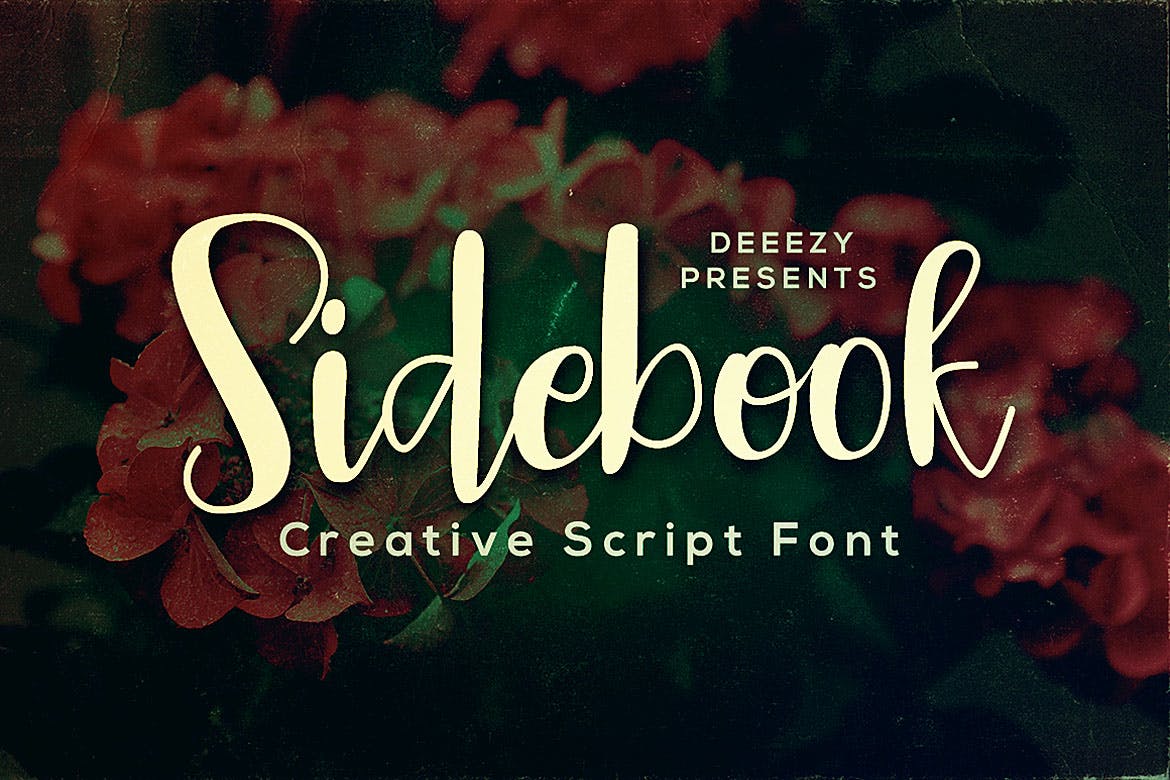
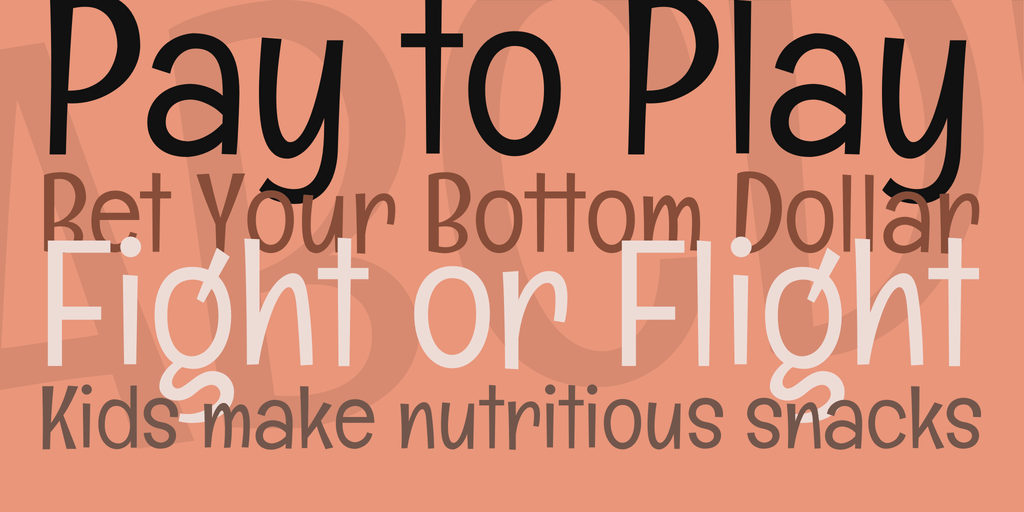
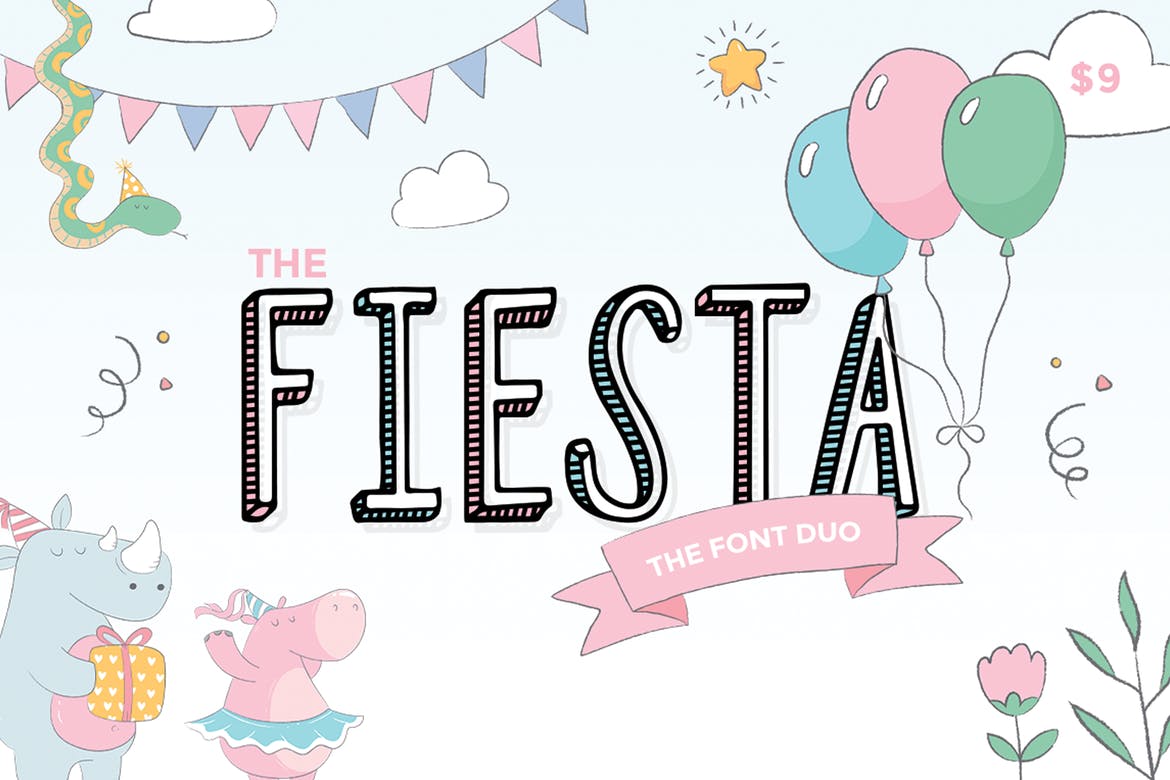
Web designers are always on the lookout for new fonts to use in our designs, and there are a plethora of resources and type foundries that provide countless fonts for web use, so the task of browsing through these collections can be very time-consuming. We have a number of web font collections here on 1WD to aid in your search, but here we’ve created a new list focusing on fun and playful fonts for web design as we head into the Spring season.
Regardless of whether you are looking for seasonal fonts, or just something different from the norm, the free and premium fonts for web use listed below will surely provide you with some unique and interesting options to use in your design projects.
Note: be sure to check license information on these popular fonts. They may be free but some of them require reference or may not be used for commercial projects for free, although most of them are.
Building option panels for plugins have never been a fun task. It is usually the thing developers do at the end, and most developers do not put much effort into designing their options panel at all. But can you make an options page with components from Gutenberg?
My code executes as follow -
1) a Search page is loaded where session was already started, var-dump() shows the correct session info like username etc.
2) User enters a search value in a 3rd party script search box that forms part of my search page, I have no control over this script. 3) User presses the enter button, my javascript listens for the press event - key13.
4) The search criteria is then passed to a PHP page that adds values to the current session, which is then returned to the search page.
5)This is where the problem arises, when then user pressed entered, the 3rd party script executes additional shown data maps, it refreshes the entire page and my additional session data is lost. -By lost I mean the following - If I do not run the 3rd party script, I get the additional session data back into hidden inputs - var_dump() shows the data correctly on the search page, no problem, if I run the 3rd party script, the only session data that is returned is the login data from the beginning of the session.
I need this data to perform additional data enquiries, so my question is, how can I still keep the session data even if the 3rd party script is refreshing my page.
I tried to add it to its own form and used ajax to load only that form, did not work as it seems the script overrides my code. No errors is returned as all code works as it should, just the refresh that looses my returned data. I used alert to see if my javascript is running, no alerts where returned which means that mine was not running. Without the 3rd party script, I get a return on all the alerts.
I also tried to run the script in different parts of my page, still the same return.
The novel coronavirus has made a huge impact on the world as we know it.
People have been asked to stay home as much as possible and practice social distancing.
For many of us, this means that we’re taking our jobs home, and we get to work remotely.
If you’ve never worked remotely before, it might seem like a dream come true and a walk in the park.
“You get to work from home? That’s so easy.” “Lucky!” “I’d like to wake up late, stay in my pajamas all day and do whatever I want too.”
As a person who works from home, these are a few of the things I hear quite often.
And while working from home is something I cherish and it truly is a dream come true, it certainly does come with its own set of difficulties. Staying focused and getting things done can be difficult sometimes.
When you work from home, you are accountable for yourself. No one is there looking over your shoulder and pushing you to get your work done.
It all comes down to how you’re going to take on your day.
10 Tips For Working From Home and How To Stay Focused While Social Distancing
So today, I’m going to be sharing 10 things I learned while working from home, what habits helped me stay productive and on top of my tasks, and what I do to stay focused. Let’s get into it!
1. Have a Designated Space for Working
This is my biggest tip that I could ever give you when it comes to working from home.
Don’t just roll over in your bed in the morning, grab your laptop, and start working.
You need to have a designated workspace where your brain recognizes that “this is a place that we get stuff done”.
Your bed is a place your brain recognizes as a sleepy place. So if you get all cozy and work there, you won’t be as productive and will likely get tired.
What you can do is go to a corner in your home where there is lots of natural light, set up a little table, and make it aesthetically pleasing so that it’s a place your where brain says “I want to go there because it’s nice and clean, looks good, and I get work done there.”.
I have learned from experience that I get the most work done when I’m sitting at my desk. I only work at my desk and do nothing else there, so it’s easy for me to get work done there, as opposed to sitting on the couch where I could easily be distracted by the tv. Or my cute dogs
2. Have A Good Morning Routine – Get Dressed
My second most important tip for staying focused while working from home is to have a great morning routine and treat workdays, like workdays.
I admit, some days I do like to relax and chill in my sweats, throw on my glasses, get a cup of coffee, work and call it a day.
But those days are not my most productive.
I recommend that every day before you start work that you wake up reasonably earlier than when you should start working, that you shower and get dressed, have some time to relax and wake up, then start working.
The way you look can directly correlate to how you feel.
When you work from home and no one sees you, you have to show up for you.
When you dress for success, you’re going to have a better day. Guaranteed.
3. Make a To-Do List
Once you’re in your designated working space, you’re dressed and have your coffee in your hand, it’s time to get to work.
But what are you going to do today?
It’s so important to make a to-do list every day before you start work. When you work from home, lots of the days get jumbled together and you can’t seem to remember things as well as you would in an office in town.
I recommend that you make a “weekly goals” list, and then a to-do list every day.
This will keep you on track and motivated to keep going when you see all the little tasks you get to tick off every few hours.
4. Have a Schedule Guideline
This is optional, but something I enjoy writing along with a to-do list is an hourly timeline.
When you work from home, it’s easy to get distracted, so I find that if I say, “Okay, from 8-10, I want to focus on emails and communicating with my clients and from 10-12 I want to work on my new visuals,” then I’m way more motivated to get things done than if I just set vague goals.
When I set some hourly goals, I am much more satisfied with my workflow, and reward myself with a pretty long break to play with the dogs and go for a short walk.
5. Try Out The Pomodoro Technique
Another highly useful productivity tip is to follow and practice the Pomodoro technique.
This technique states that you should work in increments, as it is one of the most productive ways to work.
So here’s how you do it.
Set a 20 minutes timer. In those 20 minutes, you smash out as much work as you can, with no distractions.
Have the timer will set a sense of urgency and you’ll get things done quickly. It’s like a game that awakens our inner, competitive child to beat the clock.
Once the timer goes off, you take a short, 5-minute break as a reward for your focused work. In this time you can stretch, get a cup of tea, or check your social media and reply to texts.
You repeat this 20-minutes-of-work-and-5-minutes-of-break cycle 4 times before you take a long, proper break of 15 to 20 minutes.
Try this method out and let me know how it worked for you! It works wonders for me and my easily distracted self.
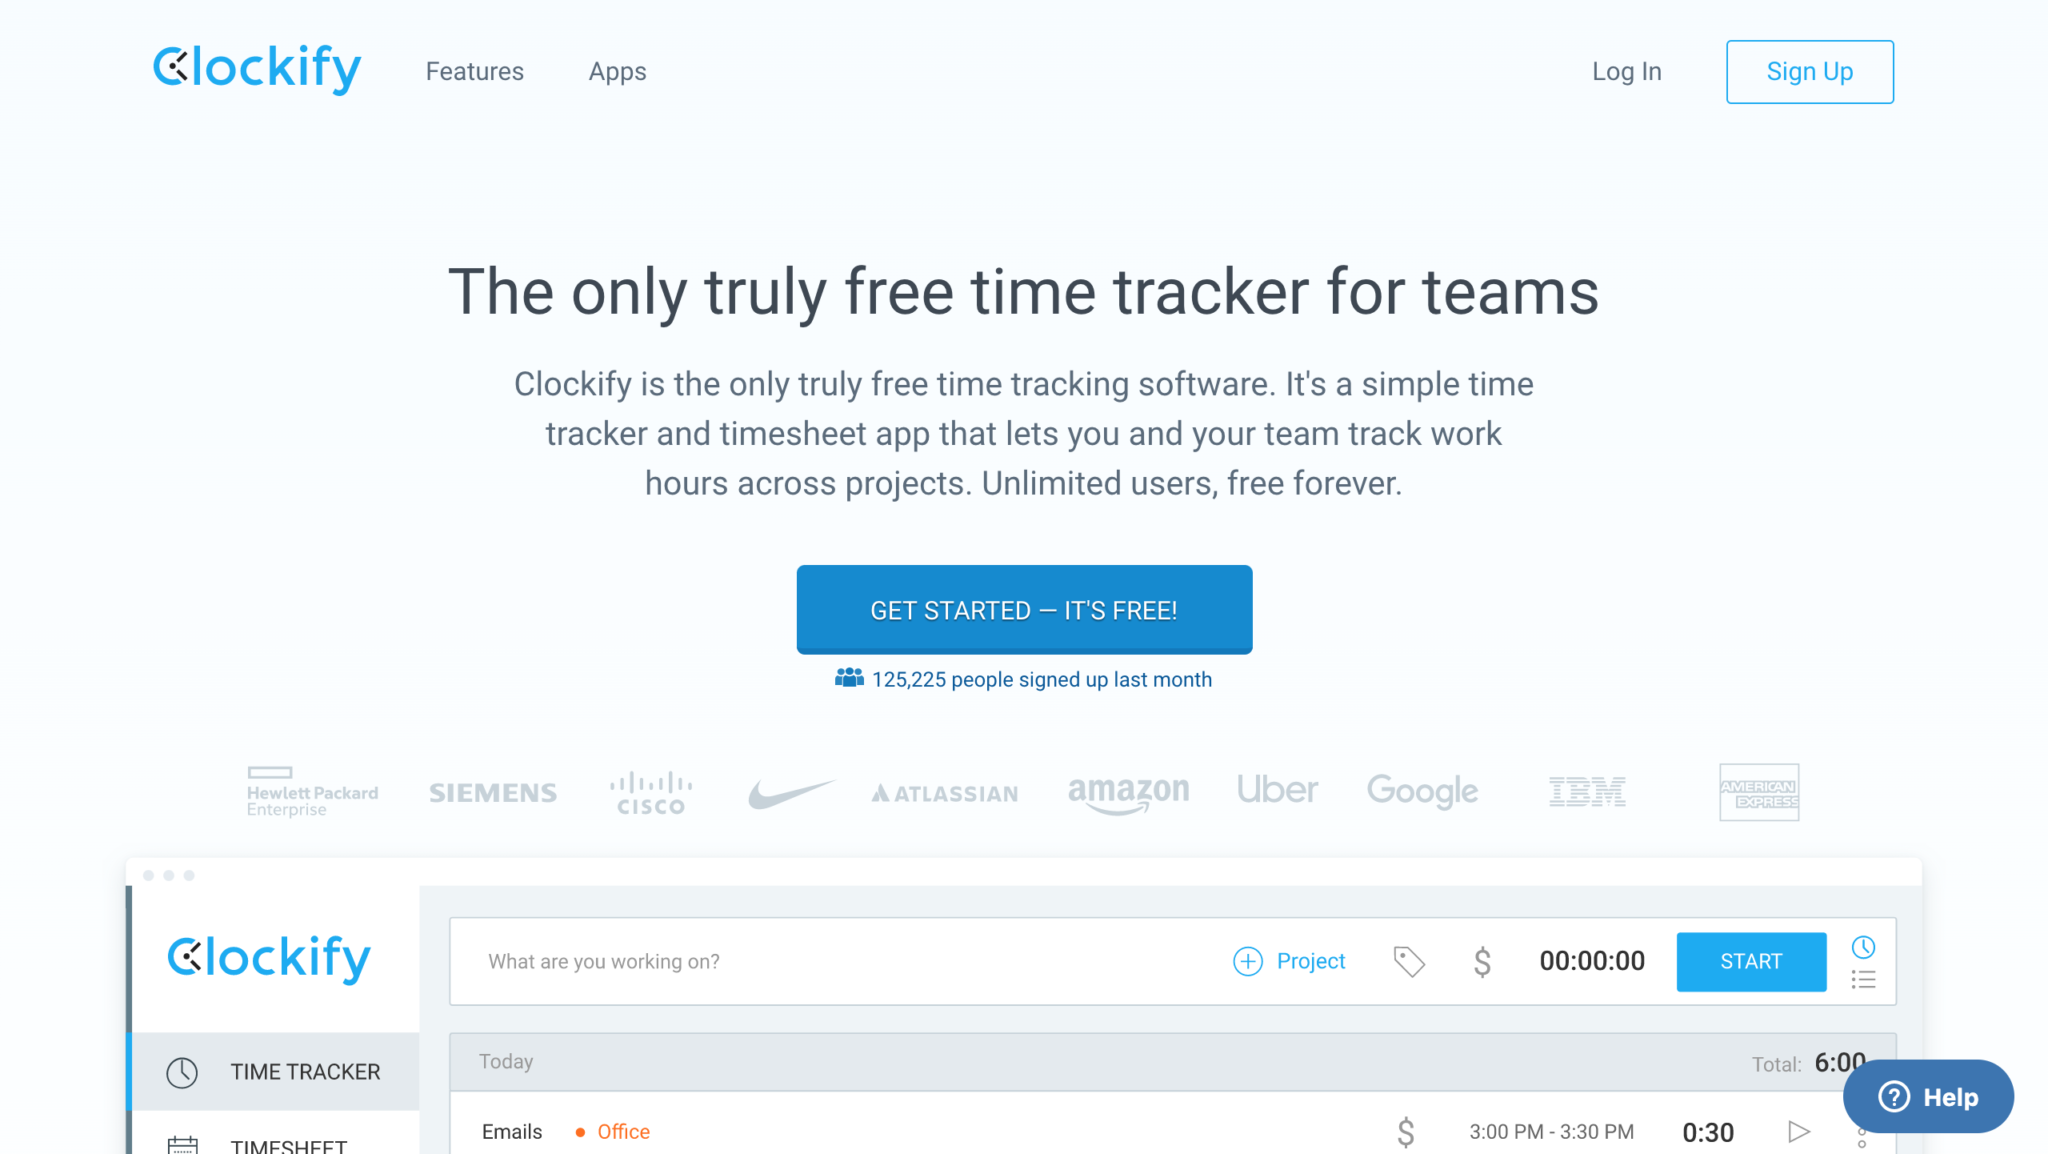
6. Use a Time Tracking Tool
The Pomodoro technique is awesome because even though you’re taking a lot of breaks, you’re working way more efficiently and the breaks don’t add up to much time at the end of the day.
If you catch yourself taking more breaks than working, then maybe you should consider using a time tracking tool.
Clockify is a free time tracker that will keep you accountable throughout the day so you get your tasks done.
It’s also nice to see how much you’ve done throughout the day so that you can adjust your workflow for the next day until you get the hang of staying focused working from home.
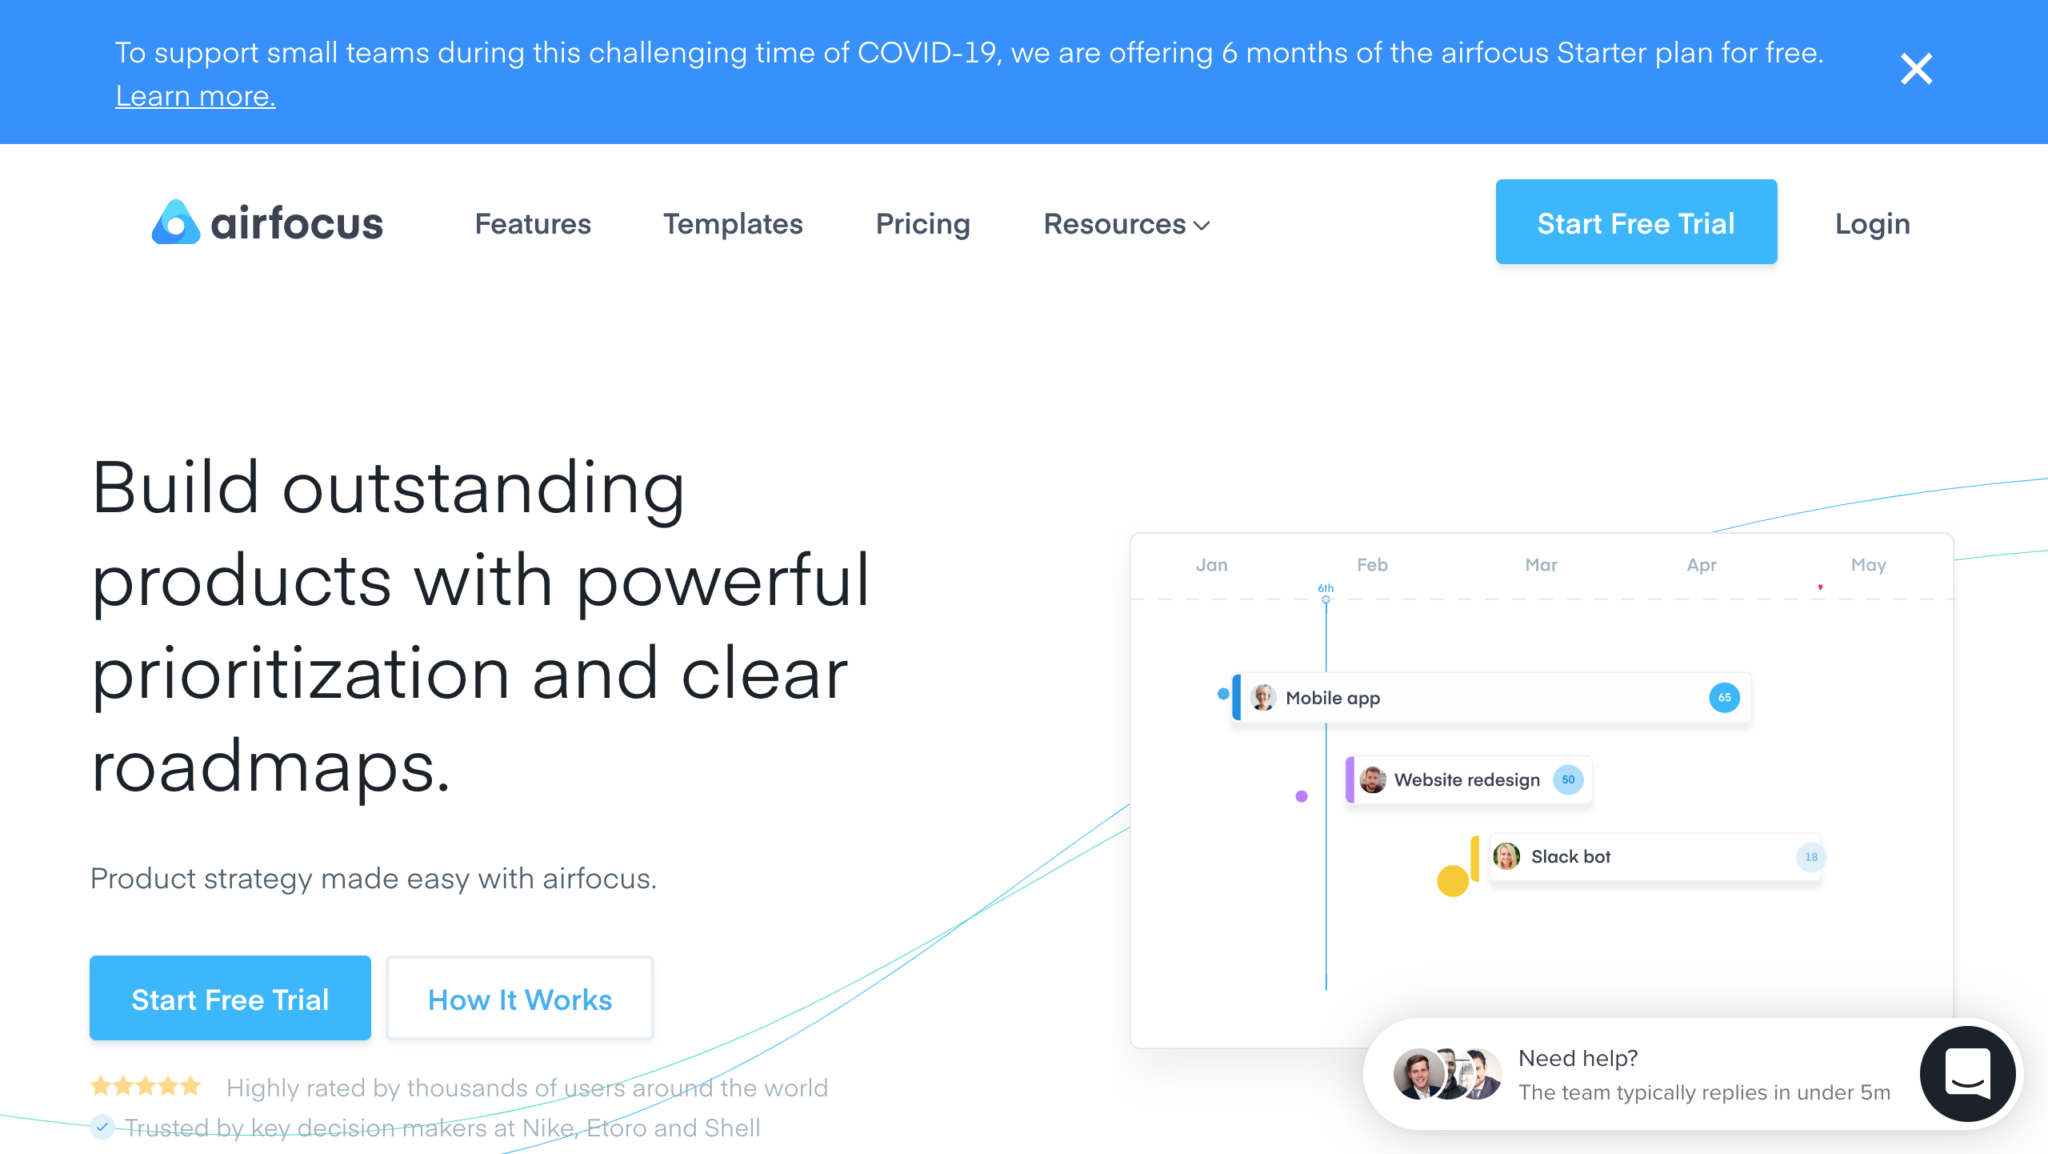
7. Use a Team Collaboration Tool
If you used to work from an office with all your colleagues and planning was done easily, but now you’re all working remotely and can’t stay on top of tasks, you’re not alone.
That’s where a team collaboration tool comes in handy.
Airfocus is a team collaboration tool that’s going to help you and your team prioritize what needs to get done and when. Everyone will have access to the schedule so no one is left out of the loop.
Not only did they develop an amazing tool, but they’re also supporting small businesses that are taking hits from COVID-19 and giving them 6 months of the starter plan for free.
Airfocus is definitely my team’s favorite tool that we ever used, and I highly recommend that you and your team try it out.
Get your hands on it while you can!
8. Set Boundaries For Yourself
You need to set up some boundaries for yourself if you’re truly serious about staying focused while working from home.
You need to decide how much downtime you’re going to give yourself, how long you’re going to spend on social media, how long your lunch break will be, etc.
Without setting boundaries for yourself, you can get lost in your free time, only to realize that “omg it’s 5 o’clock already??” and then pull an all-nighter, which nobody wants.
Setting boundaries will create freedom for you.
9. Talk to People You Care About
Working from home, especially if you don’t live with someone or have a roommate can get really lonely.
Especially now that you can’t even go on a walk in town and socialize a little.
Even though we are social distancing, that doesn’t mean that we are socially distant.
Facetime someone that you care about, that makes you happy.
Even just a call on the phone and seeing or hearing the person you care about is going to make your day that much better and make you feel less lonely.
Set up a lunch date with someone and have lunch over a video chat.
Trust me, it’s a must.
10. Get Some Fresh Air and Sunshine
Finally, get a breath of fresh air every time you need it.
Follow the rules and regulations that your country has given, and if you can, go for a brisk walk. This will boost your creativity by a million and you’ll be more inspired to work when you come back inside.
If you can’t go for a walk, open a window and let your face meet the sun for a few minutes.
Fresh air brings new ideas and the sun is scientifically proven to boost your mood.
Stay Safe
Alright you guys, this is where I’m going to wrap things up.
The more we stay inside, the more we slow down this terrible virus, and the sooner we can all go back to the beautiful world as we know it.
Stay safe during this time and enjoy working from home while you can.