Salesforce Commerce Cloud has launched a newly redesigned API developer portal that, for the first time, publicly exposes the type of API reference documentation and tooling that was previously only available in closed-door fashion for subscribers to the service.
I’ve got bad news. Most online legal services are a waste of time and money. We don’t use any of them ourselves. And we’ve tried a bunch over the years. Almost all of them are trying to suck you into an annual subscription and then hope you forget about it. […]
KubeVirt is an open-source project that offers you a VM-based virtualization option on top of any Kubernetes cluster. Lots of work happened in this area in the last couple of years, and Kubevirt is reaching the maturity stage to become production-ready. In this article, we will see how to deploy this in Openshift Container Platform (OCP) 4.2 and get your first windows VM up and running inside OCP.
Prerequisites
Up and running OCP 4.2 cluster.
KubeVirt V0.24.0.
Windows 2012 R2 ISO download.
Containerize Data Importer (CDI) operator for ISO image upload.
virtctl for operating on VM.
High-Level Steps
To run a windows-based VM using Windows ISO file, the following 8 steps are required:
A URL shortener is a service that is used to create short links from very long URLs. Usually, short links have the size of one third or even one-fourth of the original URL, which makes them easier to type, present, or tweet. Clicking on a short link user will be automatically redirected to the original URL.
There are many URL shortening services available online, like tiny.cc, bitly.com, cutt.ly, etc. Implementing a URL shortening service is not a complex task, and it is often part of system design interviews. In this post, I will try to explain the process of implementing the service.
As the frontend world grows, the architectural solutions for it should grow as well. The main idea behind micro-frontends is to divide frontends into independent parts so that independent teams can maintain them.
“An architectural style where independently deliverable frontend applications are composed into a greater whole”
There are dozens of decent lock-free hashtable implementations. Usually, those data structures, instead of using plain locks, are using CAS-based operations to be lock-free. with this narrative, it might sound I’m gonna use this post to build an argument for lock-free data structures. that’s not the case, quite surprisingly. on the contrary, here we’re going to talk about plain old locks.
Now that everybody’s onboard, let’s implement a concurrent version of Map with this simple contract:
From time to time, we run into a memory problem that is not related to Java Heap but Native Memory. Let's imagine the situation where we have a running container that is restarted once per day. We look at Prometheus/Grafana to check the reason behind this issue. However, we don't spot any problem with Java Heap size (exported via JMX) and start blaming our container scheduler to do any inconvenient operations with our containers :). The real problem can be hidden a bit deeper — in Native Memory.
Do you use any native memory allocator in your code or do you use any library that stores its internal state outside the Java Heap? It could be whatever third-party code that tries to minimize GC, such as I/O libraries or databases/caches keeping data in memory inside your process.
When it comes to motion and animations, there is probably nothing I love more than particles. This is why every time I explore new technologies I always end up creating demos with as many particles as I can.
In this post, we'll make even more particle magic using the Web Animations API to create a firework effect when clicking on a button.
Browser support
At the time I'm writing this article, all major browsers — with the exception of Safari and Internet Explorer — at least partially support the Web Animations API. Safari support can be enabled in the "Experimental Features" developer menu.
This browser support data is from Caniuse, which has more detail. A number indicates that browser supports the feature at that version and up.
Desktop
Chrome
Firefox
IE
Edge
Safari
83
76
No
80
TP
Mobile / Tablet
Android Chrome
Android Firefox
Android
iOS Safari
80
68
80
13.3
If you're interested in reproducing the Twitter heart animation you could also have a look at this cool article by Ana Tudor which is another great example of exploding particles on a button.
HTML setup
We won't need much HTML for this demo. We will use a <button> element but it could be another type of tag element. We could even listen to any click on the page to make particles pop from anywhere if we really wanted to.
<button id="button">Click on me</button>
CSS setup
Since every particle has a few CSS properties in common, we can set them in the global CSS of the page. As you can create custom tag elements in HTML, I will use a <particle> tag name to avoid using semantic tags. But truth is, you could animate <p>, <i> or any tag of your choice.
The particles should not interact with the layout of our page, so we're setting a fixed position with top and left at 0px each.
We're also removing pointer events to avoid any user interaction on the HTML particles while they are on the screen.
Because styling the button and the page layout is not really the purpose of this article I will leave that on the side.
JavaScript setup
Here are the six steps we will follow in our JavaScript:
Listen to click event on the button
Create 30 <particle> elements and append them into the <body>
Set a random width, height and background for every particle
Animate each particle from the mouse position to a random place as they fade out
Remove the <particle> from the DOM when the animation is complete
Step 1: The click event
// We first check if the browser supports the Web Animations API
if (document.body.animate) {
  // If yes, we add a click listener on our button
  document.querySelector('#button').addEventListener('click', pop);
}
Step 2: The particles
// The pop() function is called on every click
function pop(e) {
  // Loop to generate 30 particles at once
  for (let i = 0; i < 30; i++) {
    // We pass the mouse coordinates to the createParticle() function
    createParticle(e.clientX, e.clientY);
  }
}
function createParticle(x, y) {
  // Create a custom particle element
  const particle = document.createElement('particle');
  // Append the element into the body
  document.body.appendChild(particle);
}
Step 3: Particle width, height and background
function createParticle (x, y) {
  // [...]
  // Calculate a random size from 5px to 25px
  const size = Math.floor(Math.random() * 20 + 5);
  // Apply the size on each particle
  particle.style.width = `${size}px`;
  particle.style.height = `${size}px`;
  // Generate a random color in a blue/purple palette
  particle.style.background = `hsl(${Math.random() * 90 + 180}, 70%, 60%)`;
}
Step 4: Animate each particle
function createParticle (x, y) {
  // [...]
  // Generate a random x & y destination within a distance of 75px from the mouse
  const destinationX = x + (Math.random() - 0.5) * 2 * 75;
  const destinationY = y + (Math.random() - 0.5) * 2 * 75;

  // Store the animation in a variable because we will need it later
  const animation = particle.animate([
    {
      // Set the origin position of the particle
      // We offset the particle with half its size to center it around the mouse
      transform: `translate(${x - (size / 2)}px, ${y - (size / 2)}px)`,
      opacity: 1
    },
    {
      // We define the final coordinates as the second keyframe
      transform: `translate(${destinationX}px, ${destinationY}px)`,
      opacity: 0
    }
  ], {
    // Set a random duration from 500 to 1500ms
    duration: 500 + Math.random() * 1000,
    easing: 'cubic-bezier(0, .9, .57, 1)',
    // Delay every particle with a random value from 0ms to 200ms
    delay: Math.random() * 200
  });
}
Because we have a random delay, the particles waiting to start their animation are visible on the top-left of the screen. To prevent this, we can set a zero opacity on every particle in our global CSS.
particle {
  /* Same as before */
  opacity: 0;
}
Step 5: Remove particles after the animation completes
It is important to remove the particle elements from the DOM. Since we create 30 new elements on every click, the browser memory can fill up pretty quickly and cause things to get janky. Here's how we can do that:
function createParticle (x, y) {
  // Same as before
  // When the animation is finished, remove the element from the DOM
  animation.onfinish = () => {
    particle.remove();
  };
}
Final result
Putting everything together gives us what we're looking for: a colorful explosion of particle goodness.
Not seeing the animation in the demo? Check if your browser supports the Web Animations API. in the support table at the top of the post.
Be creative!
Because all this is using CSS, it's pretty simple to modify the particle styles. Here are five examples using various shapes... and even characters!
After exploring some distortion effects on line elements for links, I couldn’t wait but try them on some big style menus. So here is a little set of demos that shows some ideas for how to use those distortion effects. They were a great excuse to play with some of my favorite typefaces available on Adobe Fonts including Bely Display, Freight and Rigatoni.
How about a tiny squiggly line under an outlined text:
Or some distortion on a thick line with a gradient:
Or maybe two lines hugging the lovely Rigatoni typeface:
Let’s put that swirly line in front of a sexy serif:
Or be bold and make a strong contrasty box with a wave inside:
Agile has always been about colocation, about direct communication, physical boards, and all the other haptic and analog moments to create value in the digital realm. As a Professional Scrum Trainer, I strive to provide training classes without using PowerPoint or digital devices. Moreover, admittedly, I love index cards. However, times are changing. So, let’s dive into the particularities of practicing remote Agile with distributed teams.
We start with basic techniques and tools and follow up with how to apply Liberating Structures in the remote realm.
It’s a huge challenge for QA engineers to roll out robust web-applications that provide a seamless user experience across a variety of devices. Considering a large number of devices and browsers in the market, QAs need to test web-applications in different environments to ensure they meet market requirements.
These environments include different mobile devices, web-browsers, emulators, or simulators. To use the desired environment, QAs use DesiredCapabilities in test automation frameworks like Selenium. This article aims to explain in detail what DesiredCapabilities is and how it helps QAs test web-apps for cross-browser compatibility testing across multiple devices and platforms.
Testing is an essential part and success factor of the software development process. If the test management is carried out correctly, tests can help to avoid software errors and ensure a high quality of the product. There are a lot of testing practices to make sure that your solution works correctly and can be used easily across multiple environments and platforms. These methods are usually divided into functional and non-functional tests.
A smart city is an urban area that uses different types of electronic Internet of Things (IoT) sensors to collect data and then use insights gained from that data to manage assets, resources, and services efficiently. This includes data collected from citizens, devices, and assets that are processed and analyzed to monitor and manage traffic and transportation systems, power plants, utilities, water supply networks, waste management, crime detection, information systems, schools, libraries, hospitals, and other community services.
Do you want to sell digital products online? Perhaps you’re planning to create ebooks, online courses, software, or something else entirely.
Regardless of which type of digital product you create, you will need an easy to use platform to sell your digital products and deliver them to your customers.
In this article, we will share the best platforms to sell digital products online. As we go through them, we’ll explain their pros and cons to help you choose the best option for your needs.
Why You Need a Platform to Sell Digital Products
If you are selling a single product, then you can probably create a contact form and accept credit card payments using Stripe or PayPal.
However, if you are selling multiple products and need an efficient way for users to access downloads, then you need a proper platform to sell digital products.
These platforms provide you with all the features you’ll need to grow your online business, including:
Easy ways to accept payments using multiple payment methods
Deliver product downloads to the customers
You can provide an account management area for customers
You can sell subscriptions based access to downloads
You can offer courses, lessons, quizzes, etc.
Built-in tools to display and promote products on your website
That being said, let’s take a look at some of the best platforms to sell digital and downloadable products online.
You can create subscriptions for your digital or downloadable products, so customers can access them from their accounts after purchasing the membership.
You can use MemberPress to create as many members only pages or sections on your site. You could deliver your paid content in the form of posts, pages, or downloads that are accessed through a protected “members only” page.
There’s no limit to how many different membership levels you can set up in MemberPress. You can define these however you like.
MemberPress allows for one-off payments or recurring memberships. You can even set up a free trial membership, create coupon codes to offer discounts, or release drip content to convert more sales.
There are loads of reports available, so you can see which products and membership levels are selling well.
You can use MemberPress with any WordPress theme, but we recommend the following WordPress membership themes since they look beautiful. It can also be easily integrated with other WordPress plugins.
Cons
MemberPress is geared towards sellings subscriptions and memberships and may not be well-suited for businesses that just want to sell one-off downloads.
MemberPress is incredibly powerful and flexible. You may need to read their getting started tutorials to familiarize yourself with all the features.
Pricing
MemberPress costs $149 at the Basic level which is enough for most users who’re just getting started. You can upgrade to their Plus or Pro plan unlock other powerful features.
WooCommerce has dozens of payment gateways available as add-ons including all the top payment services.
Cons
WooCommerce can seem a little overwhelming at times as there are so many options.
Additional paid plugins or tools can increase your eCommerce website costs. However, you can easily control it by using free options whenever possible.
Pricing
Although WooCommerce itself is free, you might want to pay to add extra functionality. That might mean buying some premium plugins or a premium WooCommerce theme.
We recommend using either Bluehost or SiteGround because they offer the best WooCommerce hosting at affordable rates. After that you can follow our complete WooCommerce tutorial to get started.
LearnDash supports a huge range of pricing models. These include one time sales, subscriptions, memberships, bundles, and more.
There’s lots of help available, including video tutorials, community forums, and documentation. There’s also a support team.
If you’re running an online course, you’ll find loads of helpful features. These include certificates and badges that you can use as incentives for your students.
You can create your own forums, specific to your courses, so that students can interact with one another.
There’s a 30-day money-back guarantee, so you can get a refund if you decide that LearnDash isn’t the right option for you.
Cons
You can only contact the support team by submitting a ticket. There’s no live chat or phone option.
There’s no free version or trial period available.
Pricing
The Basic plan costs $199 at full price. You’ll almost certainly find that it’s on sale for $159 when you visit the site, though.
If you want to use LearnDash on several site, the Plus packet lets you install it on up to 10 sites. That costs $229 full price, though it’s normally on sale for $189.
For more details, see our guide on how to create and sell online courses with LearnDash.
Often users use LearnDash in combination with MemberPress to get the most value.
You can use Easy Digital Downloads for free, just like you can with WooCommerce. If you want extra features, there are lots of free and paid extensions available.
Easy Digital Downloads is specifically designed for selling digital products. If you have no intention of selling physical products, then it could be a great fit for you.
There’s plenty of support available. This includes support forums, videos, and tutorials. If you’re a premium user, you can get priority support.
You can use the Easy Digital Downloads shortcodes to display your products anywhere you want, such as in a blog post.
Cons
There aren’t all that many WordPress themes out there that are designed specifically for use with Easy Digital Downloads.
Easy Digital Downloads is free but you may need paid extensions to add extra features. This may increase your costs.
Pricing
The basic version of Easy Digital Downloads is free. If you want more features, then you will need their extensions. Some of them are free and others are paid addons.
You can also opt for one of the pricing plans, which are billed yearly. These give access to email support and various extras through included extensions. They start at $99/year.
Restrict Content Pro is the paid version of the Restrict Content plugin. It’s a WordPress membership plugin produced by the same team that’s behind Easy Digital Downloads.
Pros
Restrict Content Pro is really easy to get started with. Even if you’ve had little experience of WordPress, you should find it fairly straightforward.
Restrict Content Pro works seamlessly with Easy Digital Downloads. If you want to use both plugins on your site, it’s easy to do so.
It comes with a lot of built-in integrations, like Stripe, PayPal, MailChimp, WooCommerce, and more.
You can create as many different membership levels as you want, including free and trial memberships.
Your customers can move between subscription levels and only pay the difference. This happens automatically and could save you a lot of admin time.
You can easily view reports on your earnings, membership numbers, and more.
There’s an “Unlimited” plan available which includes lifetime updates and supports for a single one-off fee.
Cons
The free version of the plugin doesn’t handle payments. You’ll need to upgrade to Pro if you want people to pay to register.
Some of the most useful addons aren’t included in the Personal or Plus plans. These include the ability to drip content, which most membership plugins include as a basic feature.
There’s no phone or live chat support, even at the higher pricing tiers. You have to submit a support ticket instead.
Although there’s a 30 day refund period, you can only get a refund if you can explain why the plugin won’t work for you.
Pricing
There’s a free version of the plugin available, called Restrict Content. The Restrict Content Pro plugin costs from $99/year, which comes with 13 free add-ons.
Shopify is an all in one platform for eCommerce. This means it handles everything for you such as your site hosting, updates, and security. You just pay a single monthly fee.
Pros
Shopify is really easy to get started with. You don’t need to buy hosting or even a domain name. You just sign up for an account with Shopify and start creating your store.
You can sell both physical and digital products using Shopify. This could be useful if you might want to offer physical products in the future.
There are loads of apps available for Shopify. These add functionality to your store. Most of these will cost you money, but some are free integrations with other software that you might be paying for, such as OptinMonster.
You can pick from lots of different Shopify themes (templates) for your site, or even buy a premium theme from the Shopify themes store.
There’s 24/7 support available through live chat, phone, email, and Twitter. There’s also lots of documentation, plus video tutorials and support forums.
Cons
You can’t easily integrate Shopify with WordPress, so it’s not a good option if you want to sell directly from your existing website.
Shopify has a built-in payment system called Shopify Payments. If you want to use third-party payment gateways, like PayPal or Amazon Payments, Shopify charges an extra 2% fee on these transactions.
Pricing
Shopify costs $29/month for the basic plan. This gives you access to the majority of features that you’re likely to want, apart from reports and gift cards. Those are available on the next tier up, at $79/month.
Teachable is a platform where you can create your own online courses. It hosts your course for you, so you don’t need a website in order to use it.
Pros
Teachable is easy to get started with. It has a straightforward dashboard to guide you through the process.
There’s a generous free plan available, so you can get started without paying anything. This plan lets you have unlimited courses and students, and you can have a discussion forum and basic quizzes too.
It’s easy to arrange and organize your content in Teachable using the drag and drop interface.
You can upload your own logo, images, text, colors, and so on to customize how your Teachable sales pages looks.
Teachable can handle lots of different file types. It does a particularly good job of dealing with videos, which should look great whatever device your student is using.
There are great analytics that can show you how your students are doing. You can even track individual students’ progress.
You can communicate with students directly from your Teachable platform.
Cons
If you want to customize your course homepage using the Power Editor, you’ll need to understand HTML and CSS code.
Teachable is designed for courses. It’s not really going to work for you if you want to sell something like an ebook or software.
Pricing
Teachable’s free plan doesn’t cost anything. However, you will pay $1 plus 10% for every paid course that you sell. That means that if you have a course costing $200, you’ll pay Teachable $21 on each sale.
The cheapest plan is $29/month. If you’re on this plan, you’ll also be charged an additional 5% on each sale. To avoid paying any commission at all, you’ll need to be on the Professional Plan for $79/month.
Choosing the Best Platform for Your Needs
The best platform to sell digital products depends entirely on your needs.
If you want to sell subscription-based digital products, premium content, or pay-per-view website, then MemberPress is the best option.
If your products include ebooks, music, or software, then Easy Digital Downloads might well be all you need.
If you want to sell an online course, pick a platform like LearnDash or Teachable. These are specifically designed for online course creators, and it’s easy to use them to create a professional looking course.
Finally, if you’re also selling physical products, or might want to do so in the future, go with WooCommerce or Shopify. Both of these options make it easy to sell both digital and physical goods.
We hope this article has helped you compare the best platforms to sell digital products. You may also want to see our guide on the best WordPress plugins and our proven tips to grow your website traffic.
If you liked this article, then please subscribe to our YouTube Channel for WordPress video tutorials. You can also find us on Twitter and Facebook.
Dark website designs are where it’s at. Don’t believe me? They’ve become increasingly popular over the past year. Dark designs are thought to be easier on eye strain and make for a more pleasant viewing experience. They can also add atmosphere to your site.
As more and more websites have shifted to dark mode in 2020, we thought it imperative to highlight some designs that really capture the concept of dark designs well. What follows is a list of over 20 delightfully dark website designs you’ll definitely want to check out.
The Serge Thoraval: Atelier website doesn’t just offer a dark design — it also features some really interesting effects. From a mouse hover effect when the site is loading to transition effects when you scroll down the page, this site sets itself apart.
This site offers a dark design that makes each portfolio piece really stand out. Plus, when you hover over each item, they color shift and descriptive text scrolls across it from right to left.
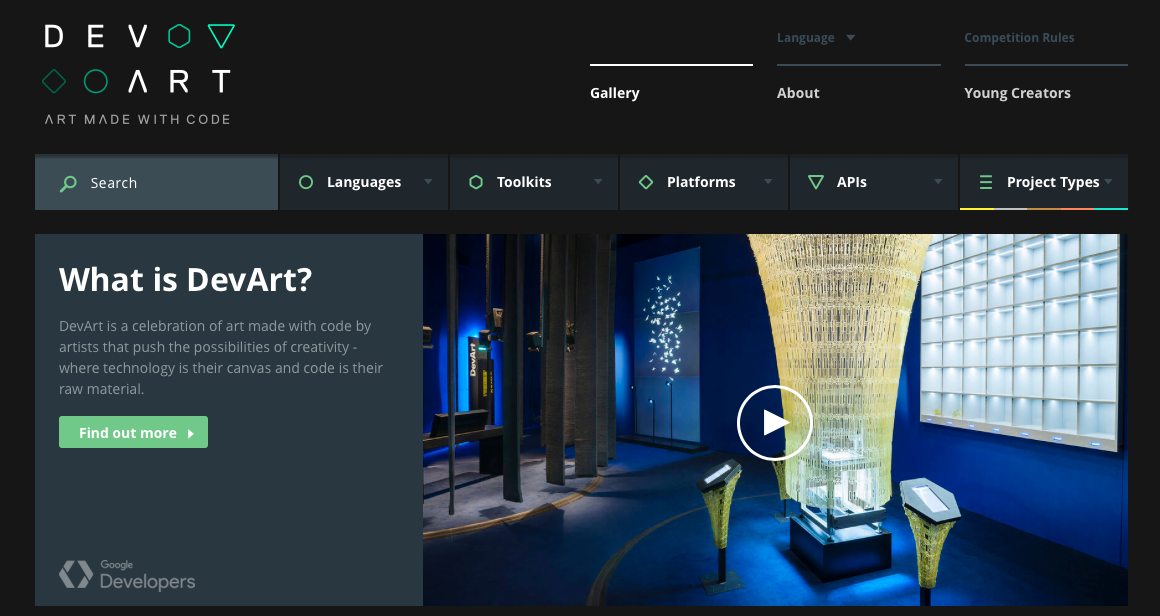
DevArt is another site with a dark design that helps to make the artwork it features stand out. It’s also easier on the eyes than sites with brighter backgrounds.
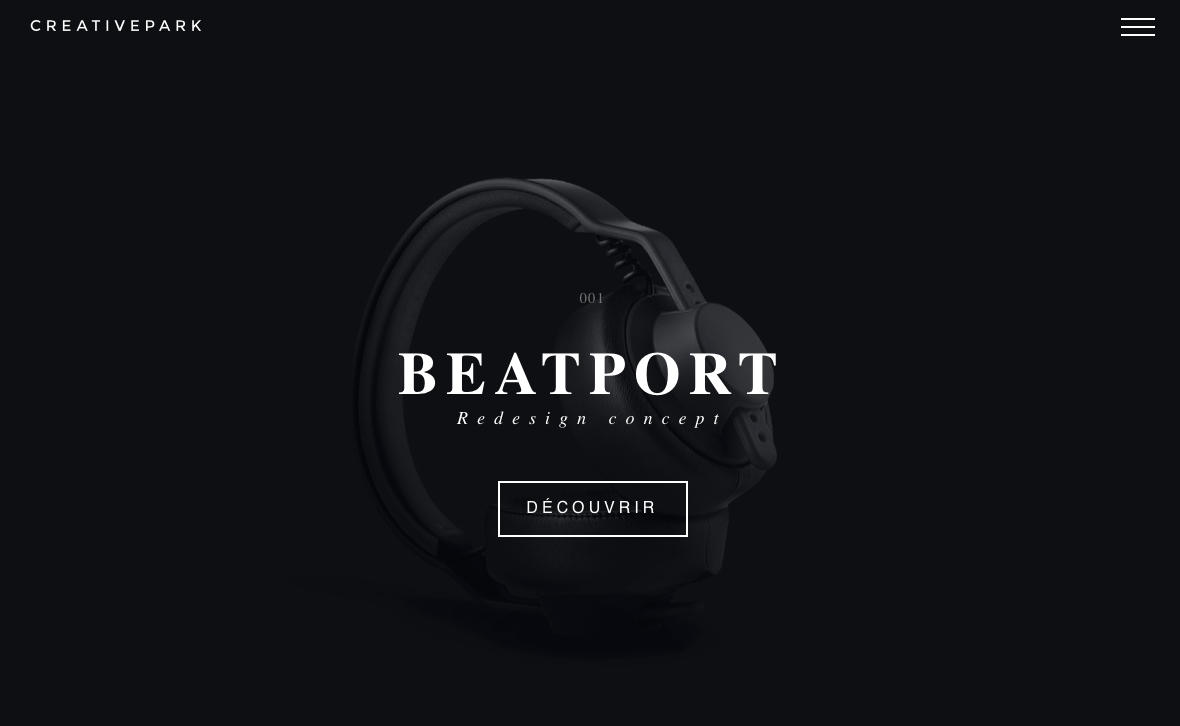
The Creative Park website offers up a delightfully dark design that allows the subject of photos to really stand out. It also has some really interesting transition effects for changing slides, clicking links, and opening menus.
The 3D Hubs website leverages its dark design to make the components it features stand out. This also works well for displaying video and individual items the company offers.
Welford Media is a web design firm that uses a dark design on its website to engage visitors. This design choice allows the company’s tagline stand out at a glance and builds immediate interest.
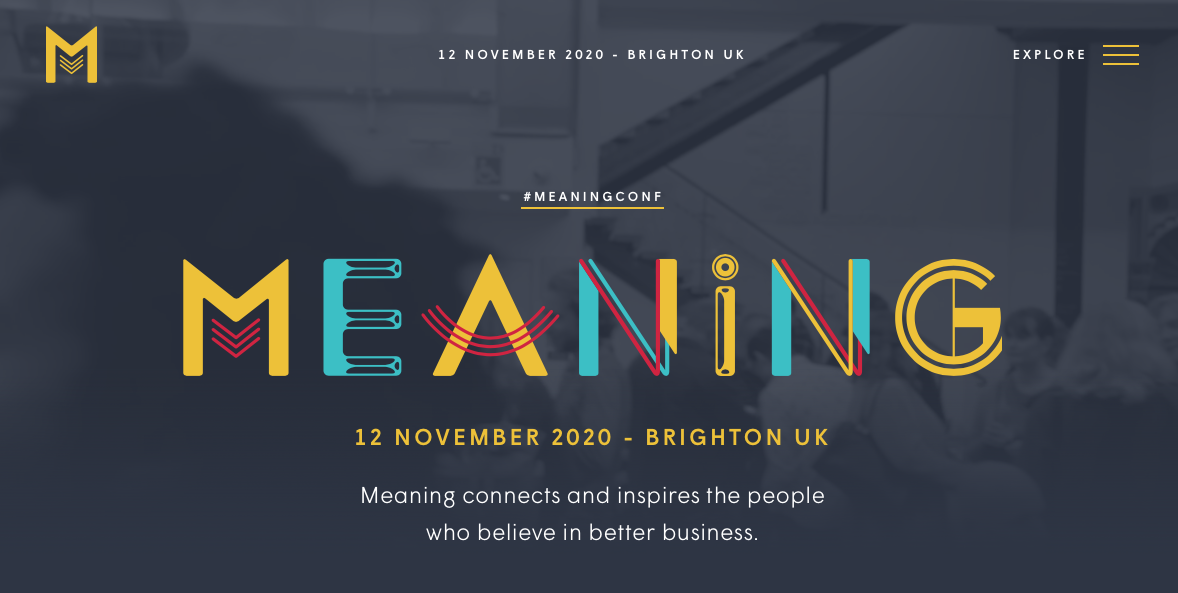
The website for the Meaning 2020 Conference has a dark design as well. The gray background allows the colorful logo to stand out and offers a subdued backdrop onto which videos and photos are placed.
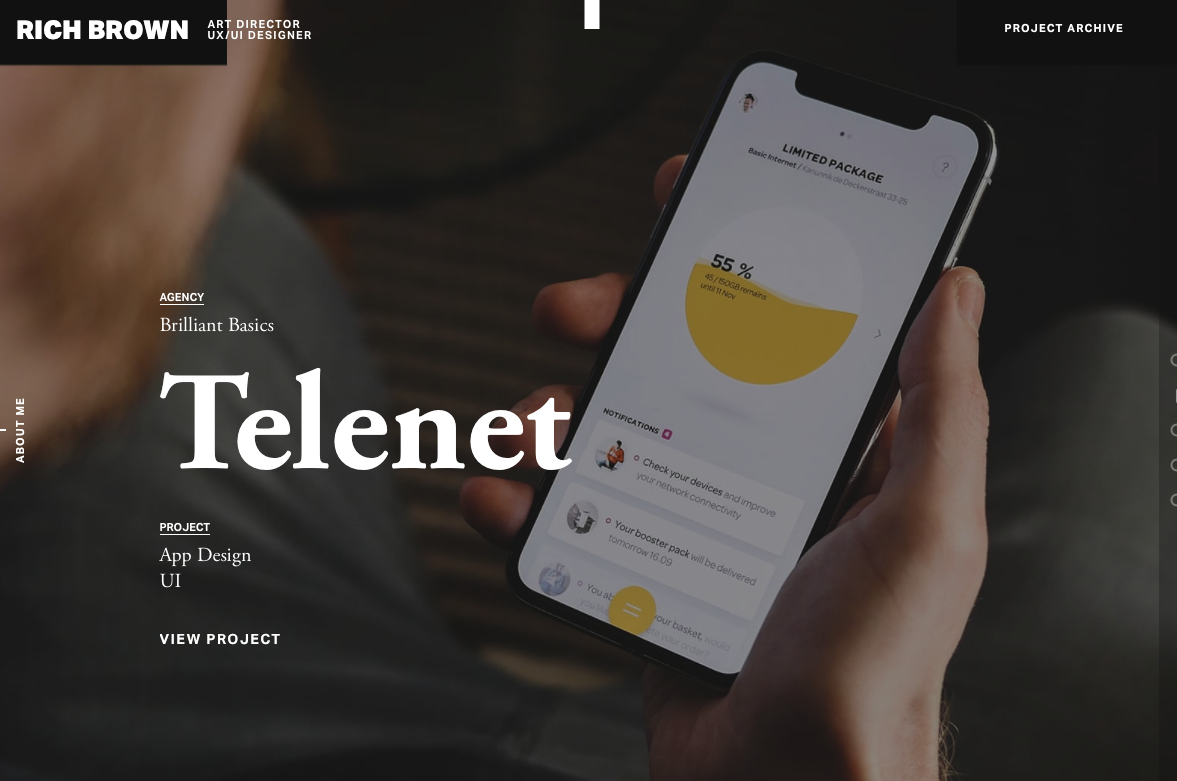
This is a website dedicated to the work of Rich Brown, an art director and UX/UI designer. The site itself features a dark design onto which video backgrounds play seamlessly.
The design on this website is super interesting. Artem Pivovarov has a dark design with a prominent photo background. It also has interactive elements in this background that react on hover.
Formigari Srl is another site you should check out for dark design inspiration. It highlights videos and photos on a deep gray background that makes the entirety of the content feel immersive.
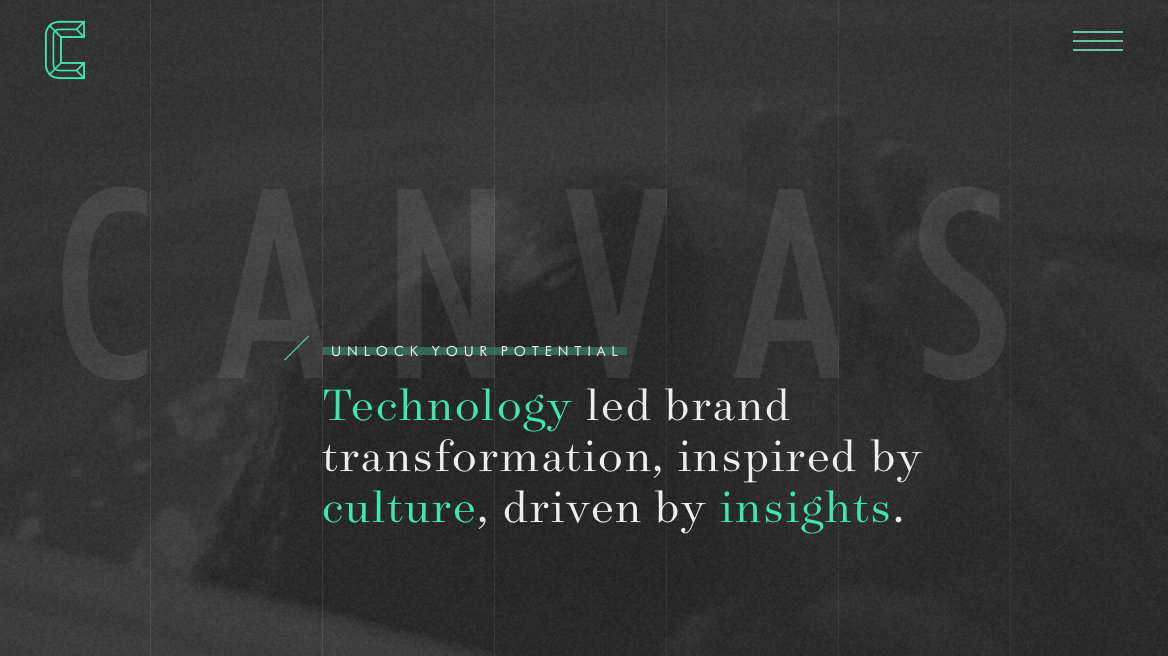
Still another site you should check out is Canvas United. This site is for a New York-based digital agency that provides some cool transition effects and an immersive experience.
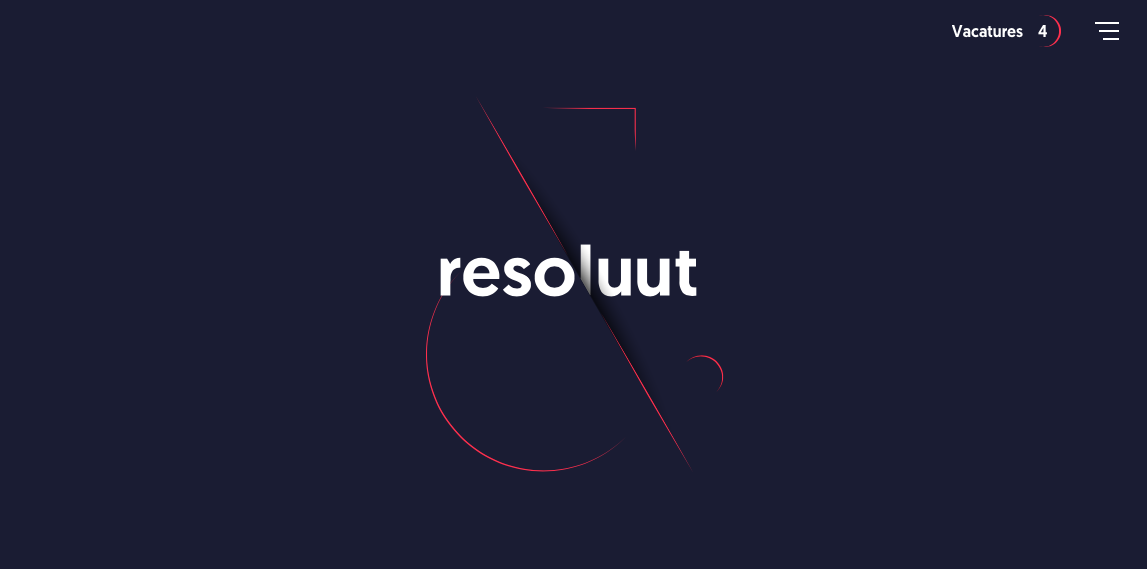
The Resoluut website offers a dark purple background with images that appear as though they’re hovering on top of it. There is a lot of play with depth of field here.
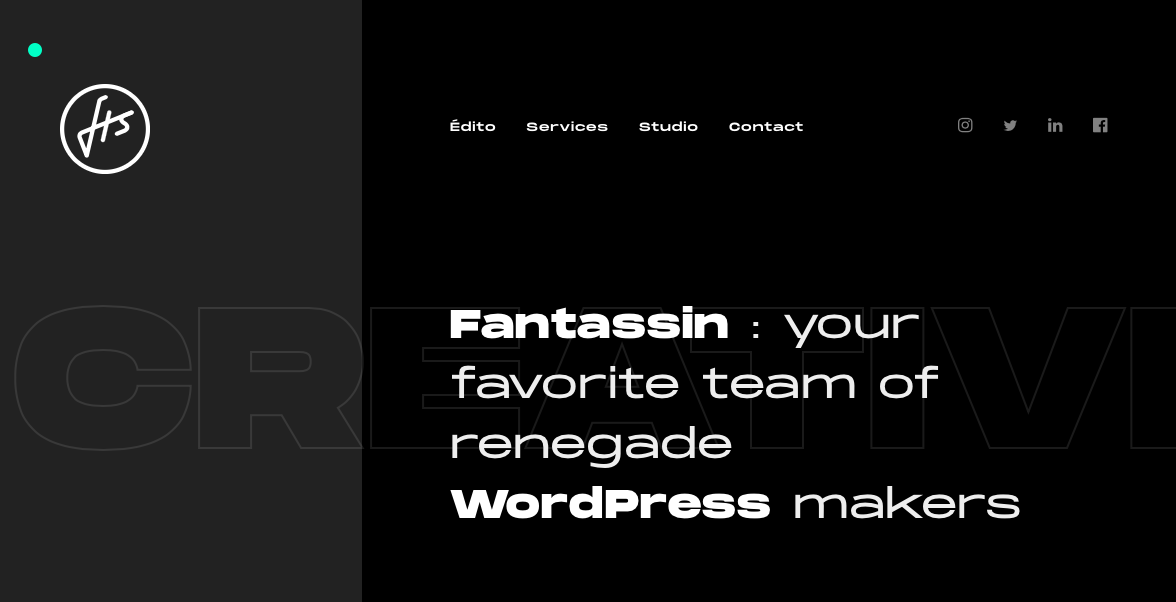
Still another option is the Fantassin website, which features a dark background and tons of cool scroll effects that draw the eye further down the page.
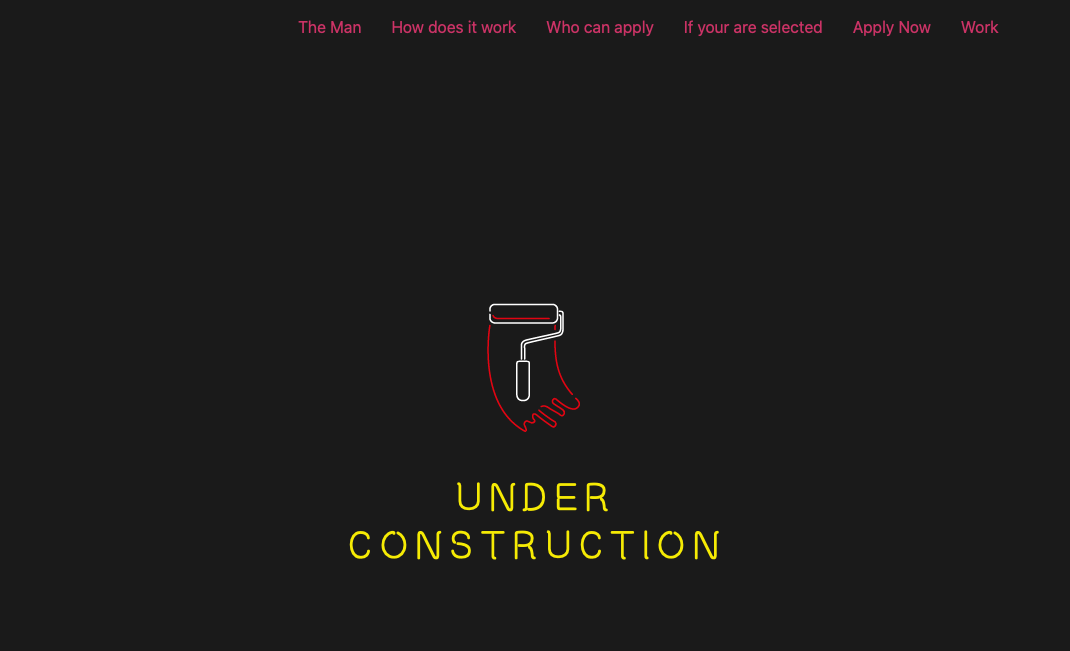
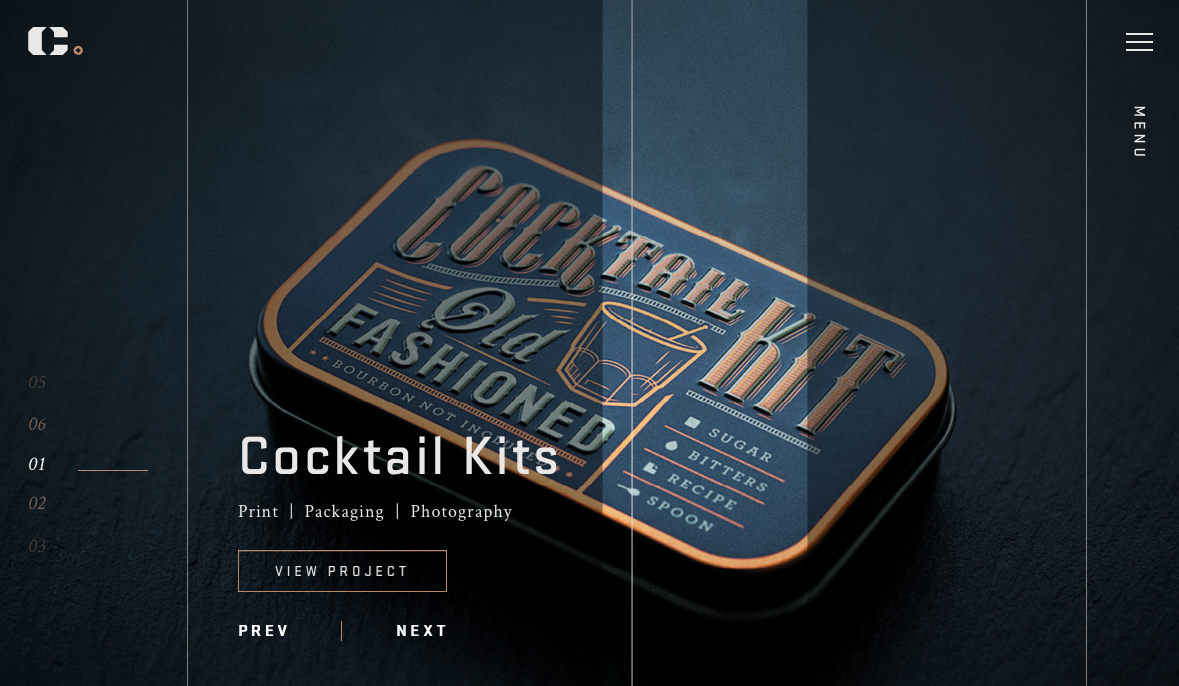
The Cody Petts Studio website highlights the work of Cody Petts, including print and packaging designs as well as photography. It’s dark, gritty, and extremely compelling.
The design for the Kazuma Kurata website offers a dark background that’s intimately inviting. It makes the colorful aspects of featured photos stand out even more. The design and function of the site make it clear why it’s deserving of its AWWWARDs Nominee status.
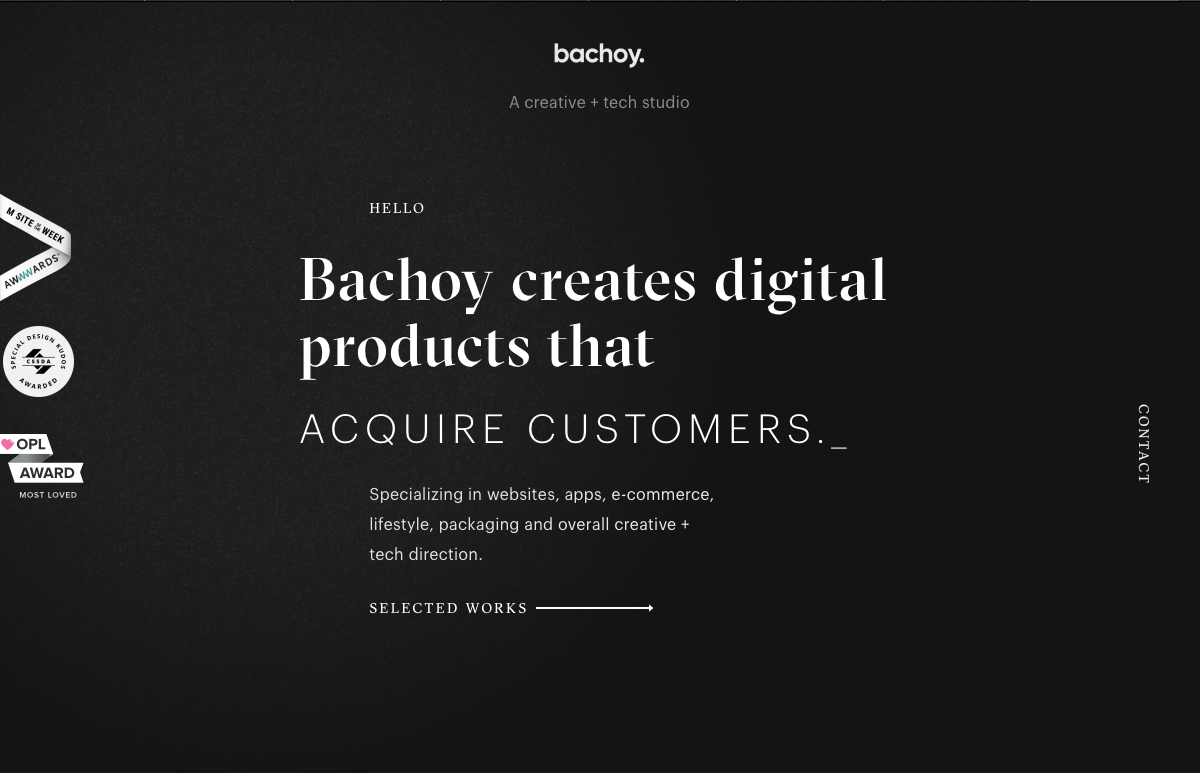
The Bachoy website highlights a creative and tech studio. The dark design featured here uses a cool spotlight hover effect and interesting interactions with photos as you scroll down the page.
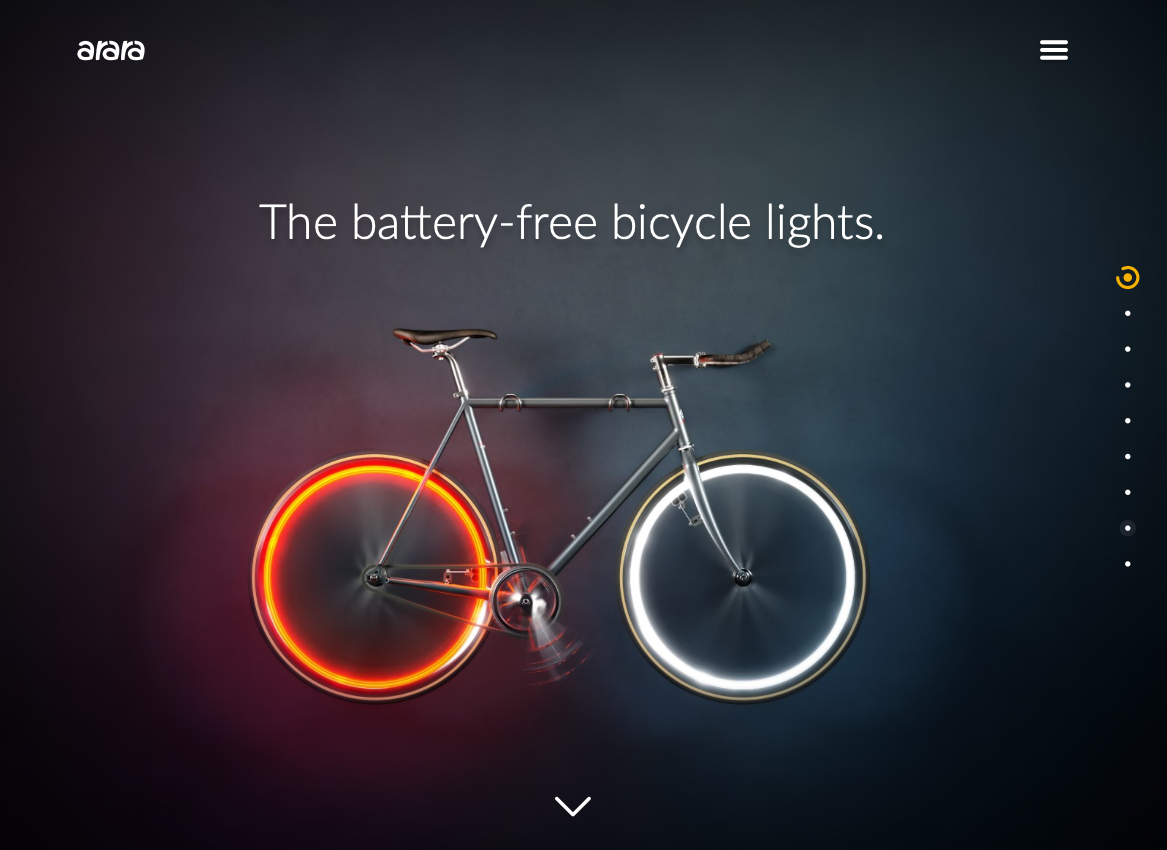
Last on our list is the website for Arara, which offers battery-free bicycle lights. This site is dark but not brooding, and instead uses the darker background to make the bright colors featured in images and videos “pop.”
Dark Website Designs Can Serve You Well
As you can see from the examples listed above, dark website designs can really take the overall look of your website to the next level — whatever that means for you. Whether you want to make colors look more vibrant, ease eye strain, or provide a mood, dark designs offer flexibility in both form and function. Have fun playing with them!
How Should Designers Learn To Code? The Terminal And Text Editors (Part 1)
How Should Designers Learn To Code? The Terminal And Text Editors (Part 1)
Paul Hanaoka
As a designer with many years of experience, I often encourage my colleagues and reports to pick up some coding skills. While many are open to the idea, others balk at the notion. I usually hear some variation of “I didn’t study design to become a developer.” Although this is a valid concern, I’d like to emphasize two points: a better understanding of the materials usually leads to better outcomes, and there is an important distinction between “coding” and “software engineering.”
This two-part series of articles should be useful for any designers out there who’d like to gain also some coding skills.
Understanding The Raw Materials
Contrary to what some may think, design isn’t about creating beautiful mockups, it’s about delivering an intuitive, functional experience to the end user. That simply can’t be done without an understanding of the building blocks of a solution. An architect isn’t going to be very good at her job if she doesn’t understand the materials her plans demand and a designer isn’t going to be very good if he doesn’t understand the materials that make his designs come to life — the code. Experience with coding helps designers understand what’s possible and what’s not and whether or not their designs will be able to effectively perform their desired functions.
I also reassure my colleagues that knowledge of coding doesn’t mean one has to become an engineer. The two refer to different, though related, skill sets. As Kyle Thayer, a PhD candidate at the University of Washington recently wrote, the field of computer science (or engineering) is about giving students “an overview of the scientific field of computing”:
“The purpose of a Computer Science degree is to give students an overview of the scientific field of computing. While this includes some programming, programming is done primarily for the purpose of learning about other areas (e.g., operating systems, algorithms, machine learning, human-computer interaction). A CS degree is a good first step into the academic field of computer science.”
By contrast, coding simply means becoming familiar enough with a given programming language to complete a task. Asking someone to learn basic HTML or JavaScript does not necessitate their becoming a full-stack software architect. Despite what some might think, forking a repo and copy/pasting Stack Overflow answers in does not make you a software engineer — but it can increase the value you bring as a designer to a product development team.
What About “Low Code”?
Some may say that we’re entering a low code future where designers (and developers) are able to build applications through drag-and-drop functionality and a GUI (graphical user interface). So taking the time to learn a programming language isn’t “worth it.” The emergence of tools like Webflow, Modulz, FramerX, UXPin, etc., seems to support this line of reasoning. And this can be very true for many applications — it’s easier than ever to create a site or app without a single line of code. However, if you don’t understand the underlying principles, you will be capping the value you can deliver with a low code application.
Modulz, Studio.Design, FramerX, and other apps — there’s still a lot of code in there... (Large preview)
We’re also not yet at the point where you can build enterprise-scale applications with low code platforms. As designers we have to work in the world we live in, not the one we imagine is coming.
That being said, everyone brings a unique blend of skills to the table. Knowledge of code is not an absolute necessity and it should just be encouraged, not required.
Where To Start?
There is an endless amount of tools, languages, schools, guides, and other resources available for anyone who has access to the internet — so where to begin? An important disclaimer — I am by no means an expert, or anything close to a software engineer — and the following are insights from my personal experience, not a guaranteed path to success.
Many of the designers/developers I know have usually started hacking HTML and CSS templates on sites like MySpace, Geocities, Tumblr, Neopets, or others. Now that I have sufficiently dated myself, for anyone starting out today, I would recommend beginning in your friendly command-line interface (CLI) shell.
The Terminal: An Essential Tool
The go-to application for Hollywood directors whenever there’s a computer hacker on the screen, the terminal is simply an interface that allows you to execute actions via a text input rather than the graphical user interface (GUI) that most people are accustomed to. I’ll let real developers explain the intricacies and technical how-to, but for our purposes it’s good enough to know that familiarizing yourself with the CLI is beneficial for a number of reasons.
The terminal gives you access to your computer’s file and folder structure — the same way that you click through Finder or Explorer, you navigate using your keyboard in the terminal. It definitely takes some time getting used to, but developing your mental model in this area is foundational to working in code.
Like a lot of designers, I am using the macOS environment (formerly known as OS X), but the following applies to other *nix operating systems (Linux, Unix), and also to Windows PowerShell. While there is a lot of overlap between different modern operating systems, there are some differences that I will do my best to highlight.
Note: For a more complete introduction to the terminal, I recommend reading Paul Tero’s article, “Introduction To Linux Commands”.
Regular Expressions
A key feature in a CLI is the ability to use regular expressions (regex) in your commands. Think of regex as boolean search operations (using quotation marks to search for exact phrases or the minus sign to exclude words) on steroids — they allow you to define a pattern in a string of text so that you can perform some action on the output. Here are some real-world examples:
If you have a long list of phone numbers in a variety of formats, you could define a script that would give you a consistent output based on a regular expression — e.g.: (###) ###-#### for the U.S. phone numbers format.
If you want to quickly rename a group of files to a specific case — from kebab-case to CamelCase or anything in between.
I highly recommend watching Wes Bos’ Command Line Power User series — or at the very least his intro video which will give you a good idea about a few essentials commands that you can use.
Here are some basic terminal commands* to help you getting started:
cd stands for “Change Directory”, type this and then a file or a folder path to go — note that you can type a folder name but it needs to be inside your current folder to go to it.
ls lists the files and folders in your current folder.
pwd stands for “Print Working Directory” — this will list out where you currently are in your computer.
mkdir and a folder name will create a folder in your working directory.
using cd with .. takes you one level up — if you’re in /users/username/documents/2019 and you enter cd ../.. you’ll end up in /users/username.
Bonus tip — hitting the Tab key will autocomplete as you type a folder/file path.
Note: The following will work on the Windows command line (cmd):
cd, cd .., mkdir, Tabkey for path autocomplete (lsandpwdwon’t work).
The more modern Windows command line (Windows PowerShell) supports all of them:
cd, cd .., ls, pwd, mkdir, andTabfor path autocomplete.
For a complete list of commands available in PowerShell, check this Microsoft’ Help page “Using Familiar Command Names”.
Mass-File Management
You can manipulate files and folders en masse via the terminal — here are a few ideas:
You can create three years of folders with subfolders for each month in a single command — using mkdir -p and {list-of-years}/{list-of-months} will create folders for each year with subfolders for each month. Use your imagination, I’m sure you can put this to good use!
You can quickly clean up your desktop by using mv Screen\ Shot* Screenshots — this will move all of your files that start with “Screen Shot” to a folder named “Screenshots”.
Create 36 folders on your computer with a single line of code! (Large preview)
Note: These two examples will most likely only work in *nix environments — but the theory still applies. And Windows PowerShell is also a very powerful command line tool, you just need to learn its features and specific commands.
Scripting And Maintenance
Now that we have a glimpse into the power of regular expressions and the options available in the terminal we can start combining those things into scripts. One very simple, yet powerful and commonly used script is Mike G’s file renamer:
criteria=$1
re_match=$2
 replace=$3
 for i in $( ls *$criteria* );
 do
     src=$i
     tgt=$(echo $i | sed -e "s/$re_match/$replace/")
     mv $src $tgt
 done
What this script allows you to do, is define the scope (criteria), define what you’d like to change (re_match), and what you’d like to change it to (replace) — and then execute it.
There are countless other scripts that you can create beyond creating and renaming files — Vlad’s Batch Resizing script is an excellent example of the time-saving capabilities that you can create using bash scripts.
Advanced Tips And Tricks
Something I have found over the years is that regularly resetting my computer and reinstalling the operating system helps it stay relatively clutter-free and prevents the slowdowns everyone experiences after years of digital detritus that accumulates on harddrives. For many, the prospect of wiping a computer and re-setting everything back at best sounds like a few days of work, and at worst an impossible nightmare that you may never recover from.
But it doesn’t have to be — by using a few command-line tools, once you’ve backed up, wiped, and reinstalled your OS, you can install not only your list of favorite apps, but also fonts in a matter of minutes using Homebrew. (Homebrew is for Mac and Linux only. For Windows, try Chocolatey which is a solid alternative.)
If you’re interested — we’ve created an easy-to-follow setup guide to get your computer in good shape for most development. Our guide is for macOS, but Owen Williams has written a solid guide for Windows as well.
If you don’t have the time for Wes’ entire series of tutorials about the command line — at the very least I highly recommend the following stack:
There are many options when it comes to choosing a code editor — Sublime Text and VS Code (Visual Studio Code) are the two I have the most experience with and am currently using.
Sublime Text was one of the earlier text editors that became popular with front-end developers — it was the gold standard up until a few years ago. Features like multiple cursors, a powerful package manager, and highly customizable shortcuts that allowed you to quickly navigate in and between files and folders. Not to mention it was an incredibly lightweight and fast application which made it an easy choice.
VS Code (Visual Studio Code) came on the scene around 2015, it took a while for people to switch from Atom and Sublime, but VS Code has established itself as many developers’ favorite editor. In addition to pretty much all of Sublime’s features, VS Code differentiated itself with a built-in terminal and tight integration with Git. In addition, Visual Studio Code has a rich plugin ecosystem that allows you to extend and customize your environment to your heart’s delight.
All that is to say — you don’t need to be a developer to appreciate the features of a good code editor. I have found many uses for it in my daily work; two, in particular, are the ability to use multiple cursors, and using regex to find-and-replace text across folders of files. Let’s take a closer look at both.
Editing With Multiple Cursors
Picture your typical word processor — that blinking vertical line that shows where the text you’re entering will go? Now picture the ability to add more than one cursor to this window so that whatever you type will appear wherever there is a cursor!
This might not be blowing your mind just yet — so here’s an example that shows a few ways that an advanced text editor can help you create everyday efficiencies in your workflow.
Mass-editing in a text editor is much faster and more intuitive than in a spreadsheet. (Large preview)
Here we have a list of names that we need to convert into email addresses — we’d also like to make them all lowercase and then sort them alphabetically. This can be done with a few keystrokes.
Using a text editor to quickly manipulate lots of text in Sublime Text (short video).
Once you paste the list in, Cmd + Shift + P brings up the Command Palette (fancy term for a searchable menu that gives you all the available functionalities). You can basically type in this menu what you want to do, pretty much anything you can do to text is available here. If it’s not, there’s likely a plugin or an extension that you can find.
We’re able to change the case and sort the lines in a matter of seconds — then pressing Ctrl + Shift + arrow keys adds cursors, then whatever we type gets added to every line — in this case, we’re turning the names into email addresses, but your wild imagination could find myriad other ways to use this.
You might be saying — well I can do this in Excel or Google Sheets, which is true, but I have found that it is a lot quicker to handle these types of things in a text editor. You avoid having to write formulas and select things with a mouse.
Which Code Editor Should I Use?
I’m a designer — so of course, my answer is “it depends”.
If you’re new to these concepts, I would recommend getting a free trial of Sublime — it continues to be a very lightweight app and does not consume too many system resources. You can customize Sublime’s key bindings(fancy word for hotkeys) and extend its built-in functionality with plugins.
If you’ve been using Sublime, Atom, or another editor — I’d recommend checking out VS Code as well. The team at Microsoft has really done an excellent job making it a powerful, yet easy-to-use text editor.
Personally, I use both editors — Sublime is lightning quick and opens in a fraction of a second allowing me to easily paste and manipulate text. But when I want to get some more serious work done, I use VS Code. It’s difficult to top the all-in-one package that VS Code provides — a vibrant plugin and extension ecosystem, powerful command palette, and hyper-customizable interface means you can really make it your own. Not to mention the fact that Microsoft is very incentivized to ensure that it’s a first-class experience for developer productivity.
Conclusion, And What’s Next?
In this first article, you will have learned the basics of the terminal, a few productivity hacks to get you started, and should have a better idea of what code editor to choose. In the next part, we’ll continue with the topics of version control, HTML and CSS, and an introduction to engineering principles.
Anything Amiss?
There’s a good chance that something in this post was obscure, obtuse, and/or obsolete and I’d love the opportunity to make it better! Please leave a comment below, DM me, or @mention me on Twitter so I can improve.
Many people wonder how to make a WordPress website. They’ve heard about WordPress, its incredible popularity, excellent features and designs, and now they want to join the pack and build a WordPress website of their own. So, where does one get started? Regardless of how advanced you might be with the platform, we have a tailor-made resource for you here. What follows is a choose-your-own-adventure guide on how to make a WordPress website.