If you’re itching to go deeper into the legal aspects of navigating WordPress’ relationship to the GPL license, Richard Best has recently made his ebook (and the audio version) called “A Practical Guide to WordPress and the GPL” available for free. Best, a technology and public lawyer based in New Zealand, had previously sold the book with other products as part of a business package that is still available for purchase. After receiving feedback on his most recent post titled “Taking GPL’d code proprietary,” he found that the issues addressed in the book are still relevant and decided to release it for free.
The first two sections provide a brief history of WordPress, its adoption of the GPL, and a summary of the license. These sections are a bit dry, but Chapter 3 is where it gets more interesting, particularly for theme and plugin developers who have questions about licensing GPL-derivatives. Best explores the practical application of the GPL in common business scenarios:
If I modify the core WordPress software or a GPL’d theme or plugin, must I release the source code of the modified versions(s) to the public?
I’m a theme/plugin developer. I’ve put huge effort into writing my theme/plugin and I’m going to release it under the GPL but I want to make sure that everyone who receives my theme or plugin, even if from someone else, is obliged to pay me a licensing fee or notify me that they have it. Can I do that?
I’ve purchased some fully GPL’d themes or plugins from a commercial theme or plugin provider. May I sell those themes or plugins from my own website for my own benefit or publish those themes or plugins on my own website and give them away for free?
Subsequent chapters cover controversies surrounding “GPL non-compliant” sales models, applications of copyright law, GPL compatibility with other licenses, and trademarks. Both the audio and the PDF ebook are available for download on Best’s website. The text of the book is licensed under the Creative Commons Attribution 4.0 International License.
Most API gateways and API managers are focused on REST, which makes them problematic for GraphQL environments. This week Arboric was announced in its proof of concept version 0.1. Arboric is an API manager specifically dedicated to GraphQL. The Arboric API gateway is open source and free to use.
We've got a small feature update to talk about that's a big deal to some folks: private by default. For some people & teams, having everything private by default on CodePen is critical to their work. Chris & Marie talk about how we added this option and the steps we took to validate and notify users about the feature.
Mux Video is an API-first platform that makes it easy for any developer to build beautiful video. Powered by data and designed by video experts, your video will work perfectly on every device, every time.
Mux Video handles storage, encoding, and delivery so you can focus on building your product. Live streaming is just as easy and Mux will scale with you as you grow, whether you're serving a few dozen streams or a few million.
This week Google announced changes to the 15-year old nofollow attribute that was previously recommended for identifying links related to advertising, sponsors, or content for which users are not intending to pass along ranking credit. The nofollow attribute is no longer a catchall for these types of instances, as Google has introduced two new rel values (“sponsored” and “ugc”) to further specify the purpose of the link to the search engine:
rel=”sponsored”:
Use the sponsored attribute to identify links on your site that were created as part of advertisements, sponsorships or other compensation agreements.
rel=”ugc”:
UGC stands for User Generated Content, and the ugc attribute value is recommended for links within user generated content, such as comments and forum posts.
rel=”nofollow”:
Use this attribute for cases where you want to link to a page but don’t want to imply any type of endorsement, including passing along ranking credit to another page.
Google is also shifting to using a “hint model” for interpreting the new link attributes:
When nofollow was introduced, Google would not count any link marked this way as a signal to use within our search algorithms. This has now changed. All the link attributes — sponsored, UGC and nofollow — are treated as hints about which links to consider or exclude within Search. We’ll use these hints — along with other signals — as a way to better understand how to appropriately analyze and use links within our systems.
The announcement includes a few notable instructions regarding usage. Although all the new link attributes are working today as hints for ranking purposes, there is no need to change existing links. For sponsored links, Google recommends switching over to using rel=”sponsored” if or when it is convenient. Users can also specify multiple rel values (e.g. rel=”ugc sponsored”). Google plans to use the hints for crawling and indexing purposes beginning March 1, 2020.
The new ways to identify nofollow links impacts not only how users create links in their sites but also plugins that add the nofollow attribute sitewide or other otherwise. Plugin authors will want to reevaluate the options provided in their products.
Progress on the relevant Gutenberg PR for adding a nofollow option has stalled and is not currently listed for any upcoming milestones. Last week Gutenberg designer Mark Uraine expressed hesitation on adding this feature to the plugin.
“I’m hesitant on this one,” Uraine said. “I think it’s been a long-standing discussion and there are reasons behind not including this option in the Classic Editor.
“How does it adhere to the WordPress 80/20 rule? We’re looking to implement this as an option (not a decision)… so will 80% of WP users benefit from it?”
Gutenberg users are continuing to advocate on the ticket for the necessity of nofollow link options.
“Now, with Gutenberg, you can only add a nofollow by switching to the HTML version and manually add the nofollow attribute,” Andreas de Rosi said. “It’s a big pain. I don’t know how to best implement it (I am not a programer), but this is an important feature the Gutenberg editor should have.”
Paal Joachim Romdahl commented on the ticket, requesting a simple way for plugins to extend the link dialog box if the Gutenberg team decides to reject the PR for adding nofollow options.
More general discussion regarding how to implement link settings extensibility is open in a separate ticket on the Gutenberg repository.
Hatchet has grown from the status of a bright idea to a fully realized solutions provider, connecting businesses in Perth with a unique set of comprehensive web services across app development, software development, web design, hosting and databases.
We’re digital agency you bring in when you want a effective, no compromise digital solution, built within the latest technology frameworks in a human centred design.
If you’re a web designer, you probably see the term “accessibility” mentioned quite a bit. And that’s a wonderful thing. The industry has become very much aware of the need to ensure that what we build can be accessed by everyone.
While some locales (the United States being a prime example) don’t have crystal-clear laws pertaining to accessibility, there are a lot of great guidelines for implementing it. So, even if there isn’t necessarily a legal imperative, there certainly is a moral one. Better still is that we have the technology to do it.
But, if you’re building sites with WordPress, there are some additional challenges when it comes to accessibility. By itself, WordPress is accessible (although the Gutenberg editor still has some work to do in that area).
However, we don’t just use WordPress alone. We implement themes, plugins and our own customizations into the mix. This can muddy up the waters when it comes to ensuring our websites follow best practices.
And although we can’t snap our fingers to instantly make everything accessible, there are some common sense actions we can take. Here are a few tips for putting accessibility at the forefront of your WordPress website.
Use or Build an Accessible Theme
Choosing the right theme is about so much more than looks or fancy features. Since it provides the outward face for how users interact with a website, accessibility has to be baked in from the start. Make the wrong decision here and it’s akin to having a beautiful house with a faulty foundation.
If you’re building your own theme, the process is a little easier. Since you’re not reliant on a third-party developer, you can implement only the features you need and test as you go.
But for those looking at either free or commercial themes, it can take some research. You’ll need to look for themes that claim to be accessible. The trouble is that many themes either don’t mention this or are very vague when it comes to details.
In that case, try contacting the theme author and find out what (if anything) they did to ensure that the theme doesn’t get in the way of screen readers or other assistive technology. You might also want to run a demo version through one of the validation or simulation tools out there. Then, try navigating the site via a keyboard.
Since many themes allow you to choose colors and typography, it’s also important to keep contrast and readability in mind. Is the text too small? Do the colors provide enough contrast to allow text to be read? This is something that should be relatively easy for you to control.
Determine the Effect of Plugins
WordPress plugins are another area worth paying attention to. While some simply adopt your theme’s CSS, others add their own markup. Both the accessibility and quality of this code can vary.
This means that, even if you have a theme that follows best practices, the wrong plugin could cause unintended issues. And the bigger the plugin’s front-end footprint on your website, the more potential it has to negatively impact accessibility.
For example, a page builder plugin could theoretically add a ton of HTML, CSS and JavaScript beyond your theme. If it’s not been built with accessibility in mind, that could be a problem. But this goes for any plugin that injects its own markup.
If you can’t avoid using these types of plugins, that’s okay. But it is recommended you run tests with and without plugins active to gauge the impact. You can also utilize your web browser’s inspector tools to pinpoint any troublesome code.
Have an Existing Site? Add Accessible Features
For websites that are already out there in the public space, retrofitting can be difficult. Factors such as a site’s age and how it was initially built can play a role in just how much work is involved. In some cases, a full-on revamp may not be within a reasonable budget.
Certainly, if you’re working on a site that has so many challenges, an argument can be made for a redesign. That might well be the best path forward, as you can establish accessibility as a primary goal. But it’s understandably not always realistic, either.
In these situations, there are still some things you can do:
Make Small Enhancements
Maybe those big, all-encompassing changes aren’t going to happen. Instead, look for little things you can change without too much trouble. For instance, bumping up the font size and increasing line spacing will offer a cleaner look and allow your content to be more easily consumed. The same goes for colors.
Other possibilities include making sure that images have descriptive ALT text and that hyperlinks have a :focus state defined. There are any number of small changes that can add up to a better user experience.
Provide Users with Options
Another way to make an existing site more accessible is by empowering users make some choices for themselves. By allowing them (within reason) to adjust things such as font sizes or color contrast, you’re helping to meet their needs.
One simple and cost-effective way to do this is by installing a plugin, such as WP Accessibility. It adds font and contrast features in a handy front-end toolbar. Plus, it can optionally add :focus states to your links, add a skip link to your pages, along with other goodies.
Awareness Is Half the Battle
Because the WordPress platform offers so many possible looks and functionalities, we often take things for granted. It’s easy to pick a theme or install a plugin and not think twice about how they affect accessibility. Yet, each decision makes a difference.
Just having an awareness of the potential impact makes us better designers. It encourages us to take that extra step of testing and to be more discerning about what we use.
The result is that we start putting users first – in front of unreadable color schemes and special effects that hurt usability. Once we do that, accessibility becomes just another feature we build in by default.
Very often, while using switch variables (a variable that's either 0 or 1, a concept that's explained in a greater detail in in this post), I wish I could perform logical operations on them. We don't have functions like not(var(--i)) or and(var(--i), var(--k)) in CSS, but we can emulate these and more with arithmetic operations in a calc() function.
This article is going to show you what calc() formulas we need to use for each logical operation and explain how and why they are used with a couple of use cases that lead to the writing of this article.
How: the formulas
not
This is a pretty straightforward one: we subtract the switch variable (let's call it --j) from 1:
--notj: calc(1 - var(--j))
If --j is 0, then --notj is 1 (1 - 0). If j is 1, then --notj is 0 (1 - 1).
and
Now, if you've ever taken electronics classes (particularly something like Programmed Logic Systems or Integrated Circuits), then you already know what formula we need to use here. But let's not jump straight into it.
The and of two operands is true if and only if both are true. The two operands in our case are two switch variables (let's call them --k and --i). Each of them can be either 0 or 1, independently of the other. This means we can be in one out of four possible scenarios:
--k: 0, --i: 0
--k: 0, --i: 1
--k: 1, --i: 0
--k: 1, --i: 1
The result of the and operation is 1 if both our switch variables are 1 and 0 otherwise. Looking at it the other way, this result is 0 if at least one of the two switch variables is 0.
Now you need to think of it this way: the result of what arithmetic operation is 0 if at least one of the two operands is 0? That's multiplication, as multiplying anything by 0 gives us 0!
So, our --and formula is:
--and: calc(var(--k)*var(--i))
Considering each of our four possible scenarios, we have:
for --k: 0, --i: 0, we have that --and is 0 (0*0)
for --k: 0, --i: 1, we have that --and is 0 (0*1)
for --k: 1, --i: 0, we have that --and is 0 (1*0)
for --k: 1, --i: 1, we have that --and is 1 (1*1)
nand
Since nand is not and, we need to replace the --j in the not formula with the formula for and:
--nand: calc(1 - var(--k)*var(--i))
For each of our four possible scenarios, we get:
for --k: 0, --i: 0, we have that --nand is 1 (1 - 0*0 = 1 - 0)
for --k: 0, --i: 1, we have that --nand is 1 (1 - 0*1 = 1 - 0)
for --k: 1, --i: 0, we have that --nand is 1 (1 - 1*0 = 1 - 0)
for --k: 1, --i: 1, we have that --nand is 0 (1 - 1*1 = 1 - 1)
or
The result of the or operation is 1 if at least one of our switch variables is 1 and 0 otherwise (if both of them are 0).
The first instinct here is to go for addition, but while that gives us 0 if both --k and --i are 0 and 1 if one is 0 and the other one is 1, it gives us 2 if both of them are 1. So that doesn't really work.
But we can use the good old De Morgan's laws, one of which states:
not (A or B) = (not A) and (not B)
This means the result of the or operation is the negation of the and operation between the negations of --k and --i. Putting this into CSS, we have:
--or: calc(1 - (1 - var(--k))*(1 - var(--i)))
For each scenario, we get:
for --k: 0, --i: 0, we have that --or is 0 (1 - (1 - 0)*(1 - 0) = 1 - 1*1 = 1 - 1)
for --k: 0, --i: 1, we have that --or is 1 (1 - (1 - 0)*(1 - 1) = 1 - 1*0 = 1 - 0)
for --k: 1, --i: 0, we have that --or is 1 (1 - (1 - 1)*(1 - 0) = 1 - 0*1 = 1 - 0)
for --k: 1, --i: 1, we have that --or is 1 (1 - (1 - 1)*(1 - 1) = 1 - 0*0 = 1 - 0)
nor
Since nor is not or, we have:
--nor: calc((1 - var(--k))*(1 - var(--i)))
For each of our four possible scenarios, we get:
for --k: 0, --i: 0, we have that --nor is 1 ((1 - 0)*(1 - 0) = 1*1)
for --k: 0, --i: 1, we have that --nor is 0 ((1 - 0)*(1 - 1) = 1*0)
for --k: 1, --i: 0, we have that --nor is 0 ((1 - 1)*(1 - 0) = 0*1)
for --k: 1, --i: 1, we have that --nor is 0 ((1 - 1)*(1 - 1) = 0*0)
xor
The result of the xor operation is 1 when one of the two operands is 1 and the other one is 0. This feels trickier at first, but, if we think this means the two operands need to be different for the result to be 1 (otherwise it's 0), we stumble upon the right arithmetic operation to use inside calc(): subtraction!
If --k and --i are equal, then subtracting --i from --k gives us 0. Otherwise, if we have --k: 0, --i: 1, the result of the same subtraction is -1; if we have --k: 1, --i: 0, the result is 1.
Close, but not quite! We get the result we want in three out of four scenarios, but we need to get 1, not -1 in the --k: 0, --i: 1 scenario.
However, one thing that -1, 0 and 1 have in common is that multiplying them with themselves gives us their absolute value (which is 1 for both -1 and 1). So the actual solution is to multiply this difference with itself:
Testing each of our four possible scenarios, we have:
for --k: 0, --i: 0, we have that --xor is 0 ((0 - 0)*(0 - 0) = 0*0)
for --k: 0, --i: 1, we have that --xor is 1 ((0 - 1)*(0 - 1) = -1*-1)
for --k: 1, --i: 0, we have that --xor is 1 ((1 - 0)*(1 - 0) = 1*1)
for --k: 1, --i: 1, we have that --xor is 0 ((1 - 1)*(1 - 1) = 0*0)
Why: Use cases
Let's see a couple of examples that make use of logical operations in CSS. Note that I won't detail other aspects of these demos as they're outside the scope of this particular article.
Hide disabled panel only on small screens
This is a use case I came across while working on an interactive demo that lets users control various parameters to change a visual result. For more knowledgeable users, there's also a panel of advanced controls that's disabled by default. It can, however, be enabled in order to get access to manually controlling even more parameters.
Since this demo is supposed to be responsive, the layout changes with the viewport. We also don't want things to get crammed on smaller screens if we can avoid it, so there's no point in showing the advanced controls if they're disabled and we're in the narrow screen case.
The screenshot collage below shows the results we get for each the four possible scenarios.
Collage of the possible cases.
So let's see what this means in terms of CSS!
First off, on the <body>, we use a switch that goes from 0 in the narrow screen case to 1 in the wide screen case. We also change the flex-direction this way (if you want a more detailed explanation of how this works, check out my second article on DRY switching with CSS variables).
We then have a second switch on the advanced controls panel. This second switch is 0 if the checkbox is unchecked and 1 if the checkbox is :checked. With the help of this switch, we give our advanced controls panel a disabled look (via a filter chain) and we also disable it (via pointer-events). Here, not comes in handy, as we want to decrease the contrast and the opacity in the disabled case:
We want the advanced controls panel to stay expanded if we're in the wide screen case (so if --k is 1), regardless of whether the checkbox is :checked or not, or if the checkbox is :checked (so if --i is 1), regardless of whether we're in the wide screen case or not.
This is precisely the or operation!
So we compute an --or variable:
.advanced {
  /* same as before */
  --or: calc(1 - (1 - var(--k))*(1 - var(--i)));
}
If this --or variable is 0, this means we're in the narrow screen case and our checkbox is unchecked, so we want to zero the height of the advanced controls panel and also its vertical margin:
.advanced {
  /* same as before */
  margin: calc(var(--or)*#{$mv}) 0;
  height: calc(var(--or)*#{$h});
}
Use the same formulas to position multiple faces of a 3D shape
This is a use case I came across while working on the personal project of CSS-ing the Johnson solids this summer.
Let's take a look at one of these shapes, for example, the gyroelongated pentagonal rotunda (J25), in order to see how logical operations are useful here.
The shape we want to get.
This shape is made up out of a pentagonal rotunda without the big decagonal base and a decagonal antiprism without its top decagon. The interactive demo below shows how these two components can be built by folding their nets of faces into 3D and then joined to give us the shape we want.
As it can be seen above, the faces are either a part of the antiprism or a part of the rotunda. This is where we introduce our first switch variable --i. This is 0 for the faces that are a part of the antiprism and 1 for the faces that are a part of the rotunda. The antiprism faces have a class of .mid because we can add another rotunda to the other antiprism base and then the antiprism would be in the middle. The rotunda faces have a class of .cup because this part does look like a coffee cup... without a handle!
The rotunda looks like an upside down up cup without a handle.
.mid { --i: 0 }
.cup { --i: 1 }
Focusing only on the lateral faces, these can have a vertex pointing up or down. This is where we introduce our second variable --k. This is 0 if they have a vertex pointing up (such faces have a .dir class) and 1 if they're reversed and have a vertex pointing down (these faces have a class of .rev)
.dir { --k: 0 }
.rev { --k: 1 }
The antiprism has 10 lateral faces (all triangles) pointing up, each attached to an edge of its decagonal base that's also a base for the compound shape. It also has 10 lateral faces (all triangles as well) pointing down, each attached to an edge of its other decagonal base (the one that's also the decagonal base of the rotunda and is therefore not a base for the compound shape).
The rotunda has 10 lateral faces pointing up, alternating triangles and pentagons, each attached to the decagonal base that's also a base for the antiprism (so it's not a base for the compound shape as well). It also has 5 lateral faces, all triangles, pointing down, each attached to an edge of its pentagonal base.
The interactive demo below allows us to better see each of these four groups of faces by highlighting only one at a time. You can use the arrows at the bottom to pick which group of faces gets highlighted. You can also enable the rotation around the y axis and change the shape's tilt.
As previously mentioned, the lateral faces can be either triangles or pentagons:
.s3gon { --p: 0 }
.s5gon { --p: 1 }
Since all of their lateral faces (.lat) of both the antiprism and the rotunda have one edge in common with one of the two base faces of each shape, we call these common edges the base edges of the lateral faces.
The interactive demo below highlights these edges, their end points and their mid points and allows viewing the shapes from various angles thanks to the auto-rotations around the y axis which can be started/ paused at any moment and to the manual rotations around the x axis which can be controlled via the sliders.
In order to make things easier for ourselves, we set the transform-origin of the .lat faces on the middle of their base edges (bottom horizontal edges).
Highlighting the base edges and their midpoints (live).
We also make sure we position these faces such as to have these midpoints dead in the middle of the scene element containing our entire 3D shape.
Having the transform-origin coincide with the midpoint the base edge means that any rotation we perform on a face is going to happen around the midpoint of its base edge, as illustrated by the interactive demo below:
We place our lateral faces where we want them to be in four steps:
We rotate them around their y axis such that their base edges are now parallel to their final positions. (This also rotates their local system of coordinates — the z axis of an element always points in the direction that element faces.)
We translate them such that their base edges coincide with their final positions (along the edges of the base faces of the two components).
If they need to have a vertex pointing down, we rotate them around their z axis by half a turn.
We rotate them around their x axis into their final positions
These steps are illustrated by the interactive demo below, where you can go through them and also rotate the entire shape (using the play/pause button for the y axis rotation and the slider for the x axis rotation).
The y axis rotation value is based mostly on the face indices and less on our switch variables, though it depends on these as well.
The structure is as follows:
- var n = 5; //- number of edges/ vertices of small base

section.scene
  //- 3D shape element
  .s3d
    //- the faces, each a 2D shape element (.s2d)

    //- lateral (.lat) antiprism (.mid) faces,
    //- first half pointing up (.dir), others pointing down (.rev)
    //- all of them being triangles (.s3gon)
    - for(var j = 0; j < 4*n; j++)
      .s2d.mid.lat.s3gon(class=j < 2*n ? 'dir' : 'rev')

    //- lateral (.lat) rotunda (.cup) faces that point up (.dir),
    //- both triangles (.s3gon) and pentagons (.s5gon)
    - for(var j = 0; j < n; j++)
      .s2d.cup.lat.s3gon.dir
      .s2d.cup.lat.s5gon.dir
    //- lateral (.lat) rotunda (.cup) faces that point down (.rev)
    //- all of them triangles (.s3gon)
    - for(var j = 0; j < n; j++)
      .s2d.cup.lat.s3gon.rev

    //- base faces,
    //- one for the antiprism (.mid),
    //- the other for the rotunda (.cup)
    .s2d.mid.base(class=`s${2*n}gon`)
    .s2d.cup.base(class=`s${n}gon`)
Which gives us the following HTML:
<section class="scene">
  <div class="s3d">
    <!-- LATERAL faces -->
    <div class="s2d mid lat s3gon dir"></div>
    <!-- 9 more identical faces,
         so we have 10 lateral antiprism faces pointing up -->

    <div class="s2d mid lat s3gon rev"></div>
    <!-- 9 more identical faces,
         so we have 10 lateral antiprism faces pointing down -->

    <div class="s2d cup lat s3gon dir"></div>
    <div class="s2d cup lat s5gon dir"></div>
    <!-- 4 more identical pairs,
         so we have 10 lateral rotunda faces pointing up -->

    <div class="s2d cup lat s3gon rev"></div>
    <!-- 4 more identical faces,
         so we have 5 lateral rotunda faces pointing down -->

    <!-- BASE faces -->
    <div class="s2d mid base s10gon"></div>
    <div class="s2d cup base s5gon"></div>
  </div>
</section>
This means faces 0... 9 are the 10 lateral antiprism faces pointing up, faces 10... 19 are the 10 lateral antiprism faces pointing down, faces 20... 29 are the 10 lateral rotunda faces pointing up and faces 30... 34 are the 5 lateral rotunda faces pointing down.
So what we do here is set an index --idx on the lateral faces.
$n: 5; // number of edges/ vertices of small base

.lat {
  @for $i from 0 to 2*$n {
    &:nth-child(#{2*$n}n + #{$i + 1}) { --idx: #{$i} }
  }
}
This index starts at 0 for each group of faces, which means the indices for faces 0... 9, 10... 19 and 20... 29 go from 0 through 9, while the indices for faces 30... 34 go from 0 through 4. Great, but if we just multiply these indices with the base angle1 of the common decagon to get the y axis rotation we want at this step:
...then we get the following final result. I'm showing the final result here because it's a bit difficult to see what's wrong by looking at the intermediate result we get after only applying the rotation around the y axis.
So let's see what problems the above result has and how to solve them with the help of our switch variables and boolean operations on them.
The first issue is that the lateral antiprism faces pointing up need to be offset by half of a regular decagon's base angle. This means adding or subtracting .5 from --idx before multiplying with the base angle, but only for these faces.
The second issue is that the lateral rotunda faces pointing down are not distributed as they should be, such that each of them has a base edge in common with the base pentagon and the vertex opposing the base in common with the triangular rotunda faces pointing up. This means multiplying --idx by 2, but only for these faces.
What we're targeting now are the faces for which both --i and --k are 1 (so the faces for which the result of the and operation is 1), so what we need is to multiply --idx with 1 plus their and:
The next step is the translation for which we use translate3d(). We don't move any of our faces left or right, so the value along the x axis is always 0. We do move them however vertically (along the y axis) and forward (along the z axis)
Vertically, we want the cup faces that will later get rotated to point down to have their base edge in the plane of the small (pentagonal) base of the cup (and of the compound shape). This means the faces for which --i is 1 and --k is 1 get moved up (negative direction) by half the total height of the compound shape (a total height which we have computed to be $h). So we need the and operation here.
// same as before
--and: calc(var(--i)*var(--k));
--y: calc(var(--and)*#{-.5*$h});

transform: rotatey(var(--ay))
           translate3d(0, var(--y, 0), var(--z, 0));
We also want all the other cup faces as well as the antiprism faces that will eventually point down to have their base edge in the common plane between the cup and the antiprism. This means the faces for which --i is 1 and --k is 0 as well as the faces for which --i is 0 and --k is 1 get translated down (positive direction) by half the height of the compound shape and then back up (negative direction) by the height of the antiprism ($h-mid). And what do you know, this is the xor operation!
// same as before
--xor: calc((var(--k) - var(--i))*(var(--k) - var(--i)));
--and: calc(var(--i)*var(--k));
--y: calc(var(--xor)*#{.5*$h - $h-mid} -
          var(--and)*#{.5*$h});

transform: rotatey(var(--ay))
           translate3d(0, var(--y, 0), var(--z, 0));
Finally, we want the antiprism faces that will remain pointing up to be in the bottom base plane of the compound shape (and of the antiprism). This means the faces for which --i is 0 and --k is 0 get translated down (positive direction) by half the total height of the compound shape. So what we use here is the nor operation!
Along the z direction, we want to move the faces such that their base edges coincide with the edges of the base faces of the compound shape or the edges of the common base (which is not a face of the compound shape) shared by the two 3D components. For the top faces of the cup (which we later rotate to point down), the placement is on the edges of a pentagon, while for all the other faces of the compound shape, the placement is on the edges of a decagon.
This means the faces for which --i is 1 and --k is 1 get translated forward by the inradius of the pentagonal base while all the other faces get translated forward by the inradius of a decagonal base. So the operations we need here are and and nand!
// same as before
--and: calc(var(--i)*var(--k));
--nand: calc(1 - var(--and));
--z: calc(var(--and)*#{$ri5gon} + var(--nand)*#{$ri10gon});

transform: rotatey(var(--ay))
           translate3d(0, var(--y, 0), var(--z, 0));
Next, we want to make all .rev (for which --k is 1) faces point down. This is pretty straightforward and doesn't require any logical operation, we just need to add a half a turn rotation around the z axis to the transform chain, but only for the faces for which --k is 1:
// same as before
--az: calc(var(--k)*.5turn);

transform: rotatey(var(--ay))
           translate3d(0, var(--y), var(--z))
           rotate(var(--az));
The pentagonal faces (for which --p is 1) are then all rotated around the x axis by a certain angle:
--ax: calc(var(--p)*#{$ax5});
In the case of the triangular faces (for which --p is 0, meaning we need to use --notp), we have a certain rotation angle for the faces of the antiprism ($ax3-mid), another angle for the faces of the rotunda that point up ($ax3-cup-dir) and yet another angle for the rotunda faces pointing down ($ax3-cup-red).
The antiprism faces are those for which --i is 0, so we need to multiply their corresponding angle value with --noti here. The rotunda faces are those for which --i is 1, and out of these, the ones pointing up are those for which --k is 0 and the ones pointing down are those for which --k is 1.
1 For any regular polygon (such as any of the faces of our shapes), the arc corresponding to one edge, as well as the angle between the circumradii to this edge's ends (our base angle) is a full circle (360°) over the number of edges. In the case of an equilateral triangle, the angle is 360°/3 = 120°. For a regular pentagon, the angle is 360°/5 = 72°. For a regular decagon, the angle is 360°/10 = 36°. ↪️
It does to me, but the closing </p> tags are optional. The browser will detect it needs them and manifest correctly in the DOM anyway.
This probably happens to HTML you write and you don't even know it. For example...
<table>
  <tr>
    <td></td>
  </tr>
</table>
That looks perfectly fine to me, but the browser will inject a <tbody> in there around that <tr> for you. Optional in HTML, but the DOM will put it in anyway.
Heck, you don't really even need a <body> in the same fashion! Jens Oliver Meiert shares more:
<link rel=stylesheet href=default.css>
Some attributes are "optional" too in the sense that they have defaults you can leave out. For example, a <button> is automatically <button type="submit">.
Jens further argues that these are almost considered optimizations, as it reduces file size and thus network speed.
Me, I don't like looking at HTML like that. Makes me nervous, since there are actual situations that screw up if you don't do it right. Not all file names can be left unquoted. Sometimes, leaving off closing tags means enveloping a sibling element in a way you didn't expect. I'd even sacrifice a tiny smidge of performance for a more resilient site. Sorta like how I know that * {} isn't a particularly efficient selector, but worrying about CSS selector performance is misplaced worry in most cases (the speed difference is negligible).
I actually quite like JSX in how strict it forces you to write "HTML." That strictness helps code formatting (e.g. Prettier) too, as a bonus.
But hey, a perf gain is a perf gain, so I wouldn't say no to tooling that automatically does this stuff to compiled output. That's apparently something HTMLminifier can do.
A hosted site on Netlify like that is production-grade hosting in a way that Pens on CodePen aren't really
Netlify opens up fancy features for you, like form handling, redirect rules, mapping your domain name to it, etc.
That first "drop" is kind of a one-way trip to Netlify, so if you were hoping to have a simple path to keep working, I'd recommend exporting with our build process, putting that on GitHub, and connecting to Netlify from GitHub. Although note that you can always do the drop, then connect up a fancier process later.
Projects on CodePen do offer some of those features (deployment, domain mapping), so that might be worth a look as well.
The past month has been full of creative experimentation including WebGL goodness and lots of exciting animations, variable fonts playfulness and CSS layout magic. There’s much to discover and learn from.
We hope you enjoy this demo collection and get inspired!
They are both highly recommended and incredibly helpful in keeping your WordPress site secure. This makes it hard for beginners to choose which one is right for them.
While Sucuri and Wordfence have a lot of similar features, each has its own pros and cons.
In this article, we will compare Wordfence vs Sucuri to share which one is better for overall WordPress security in our expert opinion.
Comparing Wordfence vs Sucuri – What to Look For?
Wordfence and Sucuri are the two top WordPress security plugins. They both offer comprehensive protection against brute force attacks, malware infection, and data theft.
As a website owner, you need to choose a security plugin that not only protects your website but does it efficiently. You would also want something that requires little maintenance, so you can focus on growing your business.
Lastly, you need to pick a security plugin that is easy to use and does not require technical skills to setup / maintain.
For this guide, we will be comparing Sucuri vs Wordfence side by side. Our comparison is divided into the following categories:
Ease of use
Website Application Firewall (WAF)
Security Monitoring and notifications
Malware scanner
Hacked website clean up
That being said, let’s take a look at how Wordfence vs Sucuri stack up and which one comes out as the best overall WordPress security plugin.
Ease of Use
Website security is a highly complex and technical field. That’s why our first comparison category is ease of use.
Let’s see how easy it is to use Wordfence vs Sucuri to protect your website.
Wordfence – Ease of Use
Setting up Wordfence is quite easy. Immediately after installing the plugin, it will ask you to provide an email address where you would like to receive security notifications. You would also need to agree with their Terms of service.
After that, you will see an onboarding wizard that will help you become familiar with the Wordfence dashboard. It points out where you’ll see security notifications and scans.
The plugin will turn on the website application firewall in the learning mode and run an automatic scan in the background. Depending on the size of your website, you will see notifications when the scan is finished.
Clicking on a notification will show its details with recommended action that you need to take. For example, here it showed us that our WordPress theme has a newer version available.
The firewall by default runs as a WordPress plugin which is not very effective. Wordfence does allow you to run it in the extended mode for better protection, but you’ll have to set it up manually (more on this later).
The basic Wordfence plugin setup is quite simple and does not require too much user input. The user interface is a bit cluttered which may make it difficult for beginners to find certain settings / option.
Sucuri – Ease of Use
Sucuri offers a cleaner user interface with no unnecessary prompts popping up on the screen. It also runs a quick scan upon activation, and you will see notifications on the plugin’s dashboard.
Sucuri’s website application firewall (WAF) is a cloud-based firewall which means it does not run on your server. In other words, no technical maintenance required on your end.
You will need to add your API key and configure DNS settings for your domain name. This will allow the firewall to catch malicious traffic before it even reaches your WordPress hosting server.
Once setup, you will not need to worry about updating or maintaining it in the future.
Sucuri also makes it easy to perform recommended security hardening settings on your website. All you need to do is click to apply various security hardening setting.
The overall user interface is nice. However, users will still need to dig deeper to find options that they are looking for.
Updating nameservers on domain registrar is an additional step that’s required to setup Sucuri’s firewall, and it can be a bit difficult for some non-techy users. The good thing is that most popular domain registrars like Domain.com, GoDaddy, etc will be able to help you set it up.
Winner: Sucuri
Website Application Firewall (WAF)
A web application firewall monitors your website traffic and blocks common security threats. There are different ways to implement a firewall (application based vs cloud based).
We believe cloud based firewalls are more efficient and reliable in the long run.
Both Sucuri and Wordfence offer website application firewall, let’s see how they differ.
Wordfence Website Application Firewall
Wordfence offers a website application firewall that monitors and blocks malicious website traffic.
This is an application-level firewall, which means that it runs on your server and is less efficient than a cloud-based firewall.
By default, Wordfence turns it on with the basic mode. This means the firewall runs as a WordPress plugin, so before an attack can be blocked, WordPress has to load. This can take up a lot of server resources, and it’s not efficient.
To change that, you will need to manually setup Wordfence firewall in the extended mode. This will allow Wordfence firewall to monitor traffic before it reaches your WordPress installation.
Since it’s an endpoint firewall, Wordfence can only block traffic once it has already reached your hosting server. In case of a DDOS attack or brute force attempt, your server resources will still be affected and your website performance will be down. It may even crash.
When you first activate Wordfence, their firewall is in learning mode. It learns how you and other users access your WordPress website. During this time several firewall rules are not applied to make sure that legitimate website users are not accidentally blocked.
Sucuri Website Application Firewall
Sucuri offers a cloud-based website application firewall, which means that it blocks suspicious traffic even before it reaches your hosting server.
This saves you a lot of server resources and instantly improves your website speed. Sucuri’s CDN servers are located in different regions which is another added bonus for website speed.
To use the firewall, you will need to change your domain name’s DNS settings. This change would allow all your website traffic to go through Sucuri’s servers.
There is no basic or extended mode. Once setup is complete, Sucuri’s WAF would start protecting your website from malicious requests, DDOS attacks, and password guessing attempts.
They have a robust machine learning algorithm that is sophisticated enough to prevent false positives.
Sucuri does let you go from High Security mode to Paranoid mode when you experience DDoS. This makes sure that your website server doesn’t crash.
Winner: Sucuri
Security Monitoring and Notifications
As a website owner, you need to know if something is wrong on your website as soon as possible. A security issue can cost you customers and money.
To receive these notifications, you need to make sure that your WordPress site can send emails. The best way to ensure that is by using an SMTP service to send WordPress emails.
Let’s see how Wordfence and Sucuri handle website monitoring and alerts.
Wordfence Monitoring and Alerts
Wordfence has an excellent notification and alerts system. First, notifications will be highlighted next to the Wordfence menu in the WordPress admin sidebar and dashboard.
They are highlighted according to their severity. You can click on a notification to learn more about it, and how to fix it.
However, you would see this only when you login to the WordPress dashboard.
Wordfence also comes with instant notifications via email. To configure email alerts, go to Wordfence » All Options page and scroll down to the ‘Email Alert Preferences’ section.
From here you can turn email alerts on/off. You can also choose the severity level to send an email alert.
Sucuri Monitoring and Alerts
Sucuri also displays critical notifications on your dashboard. The top right corner of the screen is dedicated to display the status of core WordPress files.
Below that, you’ll see the audit logs and site health status.
Sucuri comes with a complete alert management system. Simply visit the Sucuri Security » Settings page and switch to the Alerts tab.
You can add email addresses that you want to be notified. After that, you can further customize email alerts.
You can choose events you want to be notified about, number of alerts per hour, and customize settings for brute force attacks, post types, and alert email subjects.
Their website application firewall will also send automated high level alerts to your email.
Winner: Tie
Malware Scanner
Both plugins come with built-in security scannerss to check your WordPress site for malware, changed files, and malicious code.
Let’s see how Wordfence and Sucuri scan for malware and other issues.
Wordfence Malware Scanner
Wordfence comes with a powerful scanner which is highly customizable to meet your hosting environment and security concerns.
By default, the scan is enabled with limited scan settings (to save server resources on shared hosting plans).
For free version, Wordfence automatically decides a scan schedule for your site. Premium version users can choose their own scan schedule.
You can set up the scanner to run in different modes. Some scan options are only available with the premium version.
Wordfence scanner can also check your plugin and themes to match the repository version.
Sucuri Malware Scanner
Sucuri Malware scanner uses Sucuri’s Sitecheck API. This API automatically checks your site against multiple safe-browsing APIs to ensure that your website is not blacklisted.
It automatically checks the integrity of your core WordPress files to make sure that they are not modified.
You can customize the scan settings from Sucuri Security » Settings page and clicking on the scanner tab.
Sucuri’s free scanner runs on the publicly available files on your website. It is not a WordPress specific scanner, so it is incredibly good at detecting any type of malware and malicious code.
It is also less intrusive on your server resources which is an added bonus.
Winner: Sucuri
Hacked Website Clean up
Cleaning up a hacked WordPress site is not easy. Malware can affect several files, inject links in your content, or block you out of your own website.
Manually cleaning everything by yourself is not possible for most beginners.
Luckily, both Wordfence and Sucuri offer site clean up and malware removal service. Let’s take a look at which one does it better.
Wordfence Site Clean Up
Wordfence site cleanup service is not included in their free or premium plans. It is sold separately as an add-on service.
Site clean up will also give you a premium Wordfence license for one website.
The malware clean up process is pretty straight forward. They will scan your site for malware / infections, and then clean up all affected files.
Their team will also investigate how hackers got access to your site. They will prepare a detailed report of the entire clean up process with suggestions for future prevention.
Sucuri Site Clean up
All paid Sucuri plans include website clean up service. This comes with site clean up, blacklist removal, SEO spam repair, and WAF protection for future prevention.
They are really good at cleaning up malware, injected spam code, and backdoor access files.
The process is quite straight forward. You open a support ticket and their team will start working on the cleanup process.
They will use your login credentials for FTP/SSH access or cPanel. During the process, they keep a log of every file they touch and automatically backup everything.
Winnner: Tie
Conclusion
Both Wordfence and Sucuri are excellent WordPress security plugins. However, we believe that Sucuri is the best WordPress security plugin overall.
It offers a cloud-based WAF which improves your website’s performance and speed while blocking malicious traffic and brute force attacks.
Wordfence is a good free option if you don’t mind using a server-side firewall and scanner.
If you are looking for a free cloud-based website firewall, then you can use Cloudflare as a free alternative, but it doesn’t offer comprehensive protection. See our comparison of Sucuri vs Cloudflare.
Editor’s note: We use Sucuri on WPBeginner website to boost our security. See our detailed Sucuri review.
We hope this article helped you compare Wordfence vs Sucuri and find out which one is better for your needs. You may also want to follow our complete WordPress security guide for step by step instructions to protect your website.
If you liked this article, then please subscribe to our YouTube Channel for WordPress video tutorials. You can also find us on Twitter and Facebook.
The internet is a great place to pick up a skills and knowledge. Right from your study table at home, you can explore the internet for courses, sign up for them, work through the lessons and add a completion certificate to your resume (like these awesome WordPress courses for beginners). And there are tons of […]
Moving Your JavaScript Development To Bash On Windows
Moving Your JavaScript Development To Bash On Windows
Burke Holland
I’m one of those people who can’t live without their Bash terminal. This sole fact has made it difficult for me to do frontend work on Windows. I work at Microsoft and I’m on a Mac. It wasn’t until the new Surface hardware line came out a few years ago that I realized: I gotta have one of those.
So I got one. A Surface Book 2 running Windows 10 to be exact. I’m drafting this article on it right now. And what of my sweet, sweet Bash prompt? Well, I brought it along with me, of course.
In this article, I’m going to take an in-depth look at how new technology in Windows 10 enables you to run a full Linux terminal on Windows. I’ll also show you my amazing terminal setup (which was named “best ever” by “me”) and how you too can set up your very own Windows/Linux development machine.
If you’ve been craving some of that Surface hardware but can’t live without a Linux terminal, you’ve come to the right place.
Note: At the time of this writing, a lot of the items in this article will require you to use or switch to “preview” or “insiders” builds of various items, including Windows. Most of these things will be in the main Windows build at some point in the future.
Windows Subsystem For Linux (WSL)
The Windows Subsystem for Linux, or, “WSL” is what enables you to run Linux on Windows. But what exactly is this mad science?
The WSL, in its current incarnation, is a translation layer that converts Linux system calls into Windows system calls. Linux runs on top of the WSL. That means that in order to get Linux on Windows, you need to do three things:
Enable the WSL,
Install Linux,
Always include three items in a list.
As it turns out, that translation layer is a tad on the slow side — kind of like me trying to remember if I need splice or slice. This is especially true when the WSL is reading and writing to the file system. That’s kind of a big problem for web developers since any proper npm install will copy thousands of files to your machine. I mean, I don’t know about you, but I’m not going to left-pad my own strings.
Version 2 of the WSL is a different story. It is considerably faster than the current version because it leverages a virtualization core in Windows instead of using the translation layer. When I say it’s “considerably faster”, I mean way, way faster. Like as fast as me Googling “splice vs slice”.
For that reason, I’m going to show how to install the WSL 2. At the time of writing, that is going to require you to be on the “Insider” build of Windows.
First things first: follow this short guide to enable the WSL on Windows 10 and check your Windows version number.
Once you have it installed, hit the Windows key and type “windows insider”. Then choose “Windows Insider Program Settings”.
You’ll have a couple of different options as to which “ring” you want to be on. A lot of people I know are on the fast ring. I’m a cautious guy, though. When I was a kid I would go down the slide at the playground on my stomach holding on to the sides. Which is why I stay on the slow ring. I’ve been on it for several months now, and I find it to be no more disruptive or unstable than regular Windows.
It’s a good option if you want the WSL 2, but you don’t want to die on the slide.
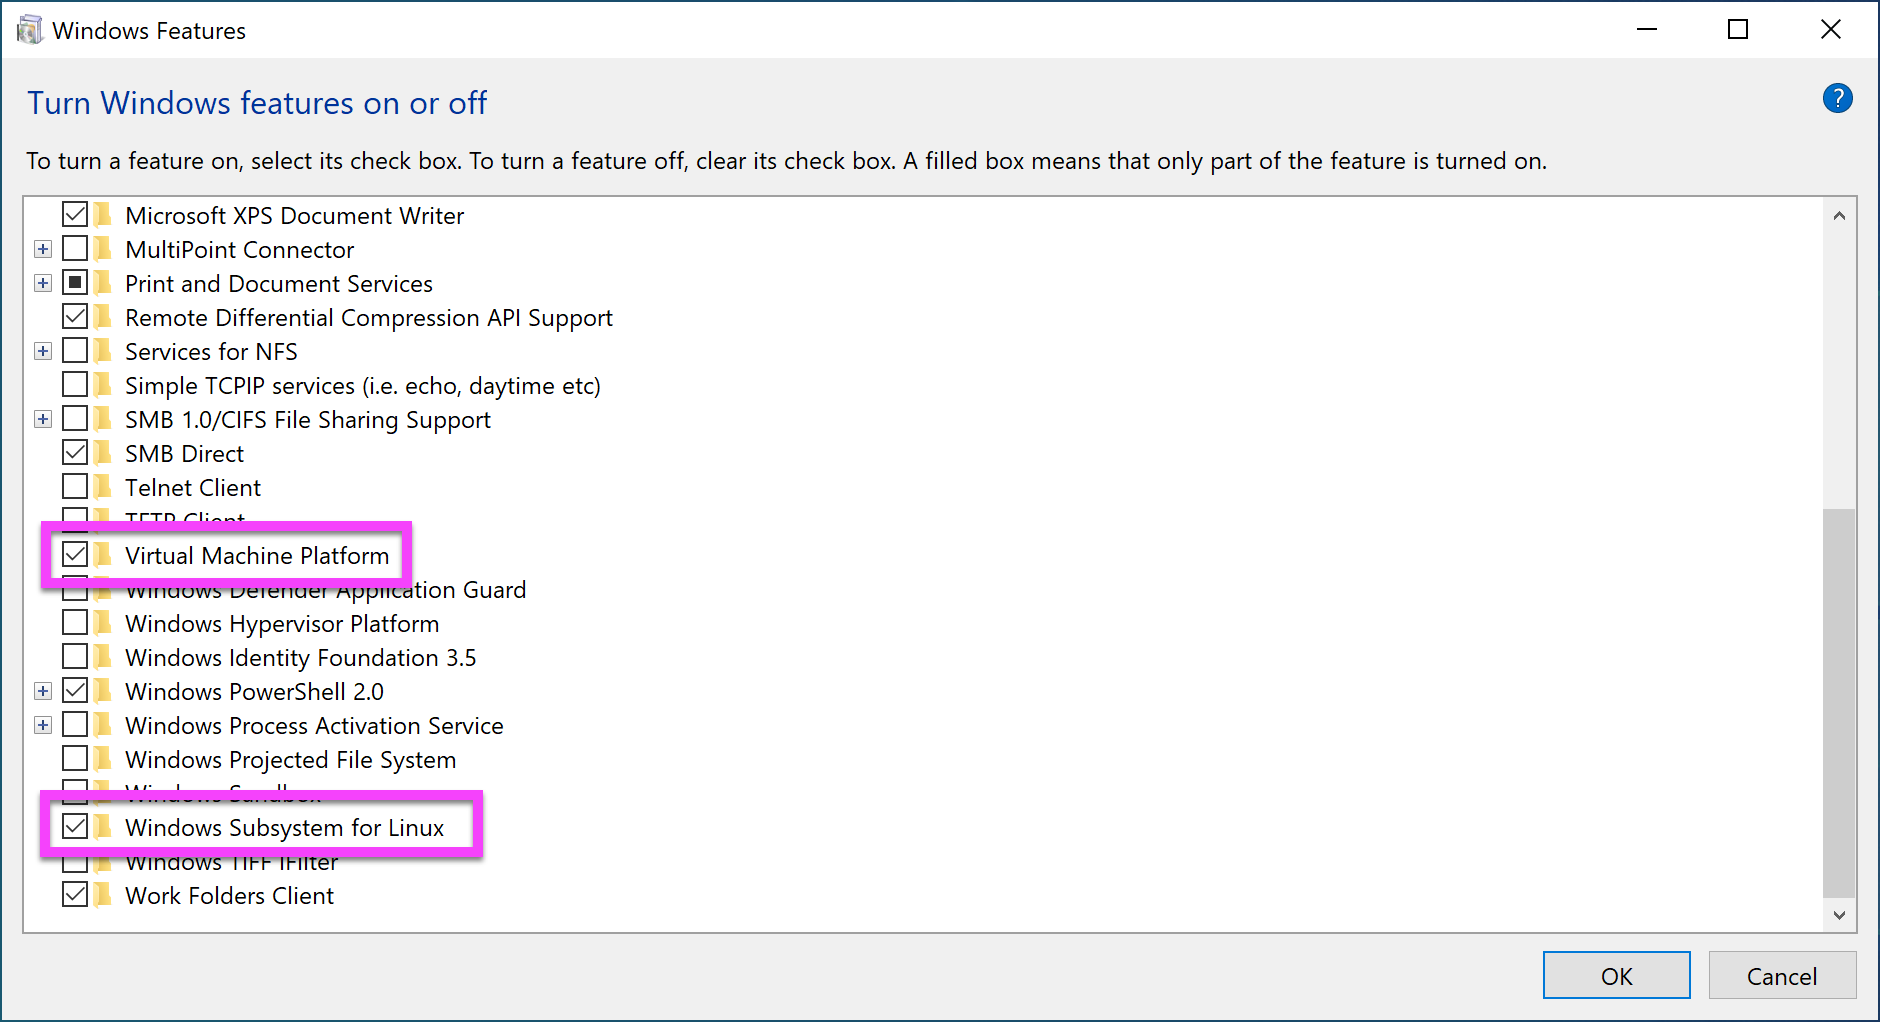
Next, you need to enable the “Virtual Machine Platform” feature in Windows, which is required by the WSL version 2. To get to this screen, press the Windows key and type “windows features”. Then select “Turn Windows Features on or off”. Select “Virtual Machine Platform”. The “Windows Subsystem for Linux” option should already be enabled.
Now that the WSL is enabled, you can install Linux. You do this, ironically enough, directly from the Windows Store. Only in 2019 would I suggest that you “install Linux from the Windows store”.
There are several different distributions to choose from, but Ubuntu is going to be the most supported across all the tools we’ll configure later on — including VS Code. All of the instructions that come from here on out with assume a Ubuntu install. If you install a different distro, all bets are off.
Search for “Ubuntu” from the Windows Store. There will be three to choose from: Ubuntu, Ubuntu 18.04, and Ubuntu 16.04. Ubuntu really likes that 04 minor version number, don’t they?
The “Ubuntu” distro (the first one in this screenshot) is the “meta version”, or rather a placeholder that just points to the latest version. As of right now, that’s 18.04.
I went with the meta version because later on I’ll show you how to browse the Linux file system with Windows Explorer and it’s kinda messy to have “Ubuntu 18.04” as a drive name vs just “Ubuntu”.
This install is pretty quick depending on your internet connection. It’s only about 215 megabytes, but I am on a gigabit connection over here and how do you know if someone is on a gigabit connection? Don’t worry, they’ll tell you.
Once installed, you’ll now have an “Ubuntu” app in your start menu.
If you’re showing version 1, you’ll need to execute the --set-version command and specify the name of the instance (Ubuntu) and the version you want (2).
This is going to take a bit, depending on how much meat your machine has. Mine took “some minutes” give or take. When it’s done, you’ll be on the latest and greatest version of the WSL.
The Is Your Brain On Linux… On Windows.
Linux is not Windows. WSL is not a bash prompt on top of a Windows operating system. It is a full operating system unto itself with its own folder structure and installed applications. If you install Node with the Windows installer, typing node in Linux is going to fail because Node is not installed in Linux. It’s installed on Windows.
The true magic of the WSL, though, lies in the way it seamlessly connects Windows and Linux so that they appear as one file system on your machine.
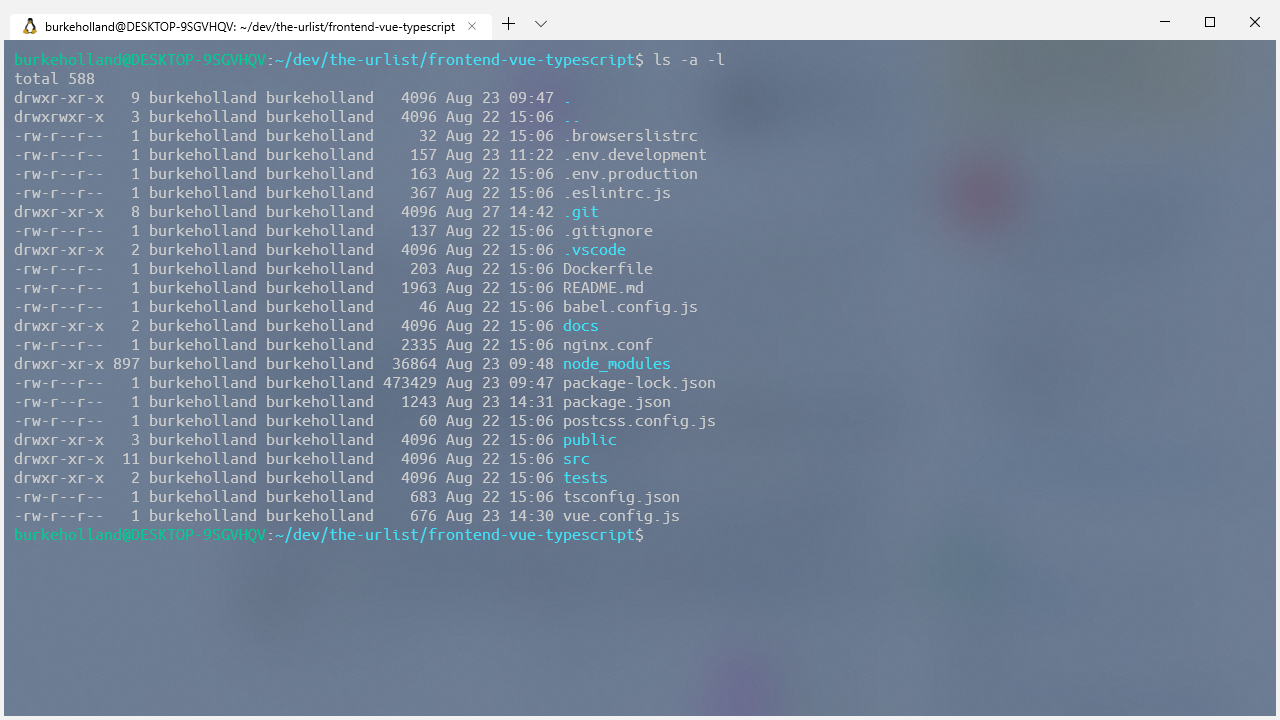
File And Folder Navigation
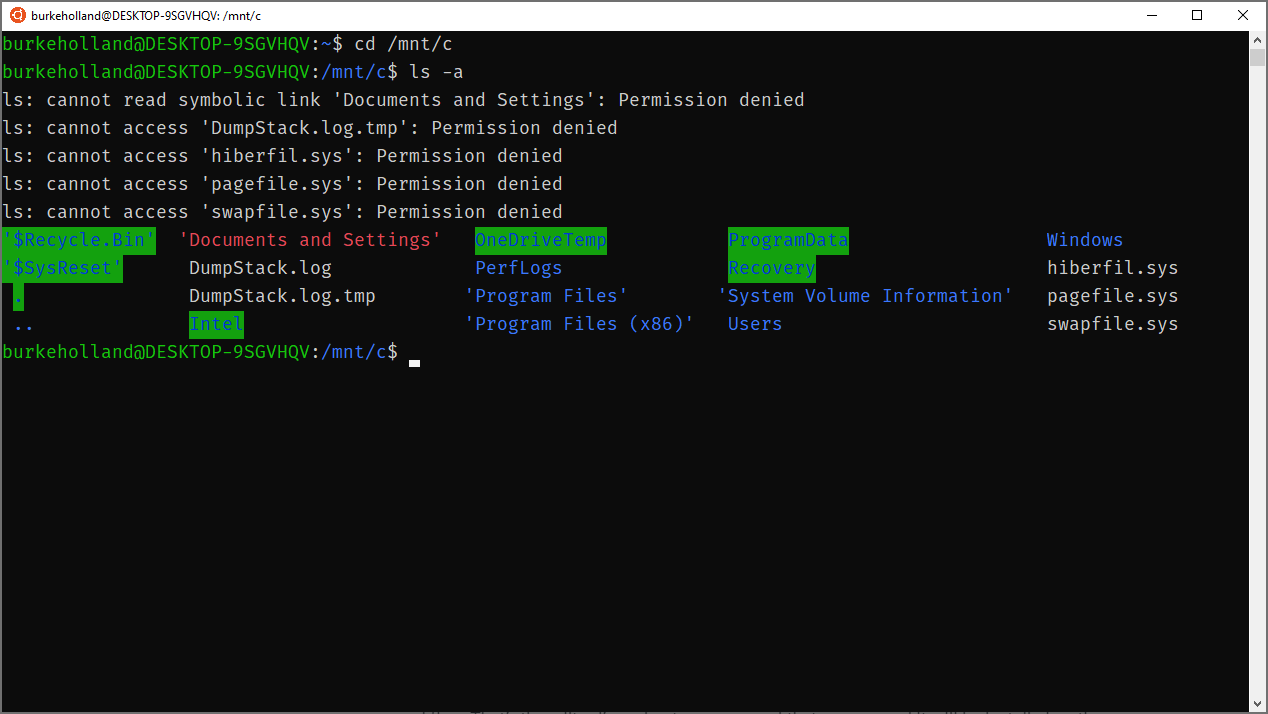
By default, the Ubuntu terminal drops you into your Linux home directory (or /home/your-user-name). You can move onto the Windows side by going to /mnt/c.
Notice that some permissions are denied here. I would have to right-click the Ubuntu icon and click “Run as Administrator” to get access to these files. This how Windows does elevated permissions. There is no sudo on Windows.
Launching Applications
You can launch any Windows application from the Ubuntu terminal. For instance, I can open Windows Explorer from the Unbuntu terminal.
This also works in reverse. You can execute any application installed on the Linux side. Here I am executing “fortune” installed in Linux from the Windows command line. (Because it ain’t a proper Linux install without random, meaningless fortunes.)
Two different operating systems. Two different file systems. Two different sets of installed applications. See how this could get confusing?
In order to keep everything straight, I recommend that you keep all your JavaScript development files and tools installed on the Linux side of things. That said, the ability to move between Windows and Linux and access files from both systems is the core magic of the WSL. Don’t forget it, cause it’s what makes this whole setup better than just a standard Linux box.
Setting Up Your Development Environment
From here on out, I’m going to give you a list of opinionated items for what I think makes a killer Linux on Windows setup. Just remember: my opinions are just that. Opinions. It just happens that just like all my opinions, they are 100% correct.
Getting A Better Terminal
Yes, you got a terminal when you installed Ubuntu. It’s actually the Windows Console connected to your Linux distro. It’s not a bad console. You can resize it, turn on copy/paste (in settings). But you can’t do things like tabs or open new windows. Just like a lot of people use replacement terminal programs on Mac (I use Hyper), there are other options for Windows as well. The Awesome WSL list on Github contains a pretty exhaustive list.
Those are all fine emulators, but there is a new option that is built by people who know Windows pretty well.
Microsoft has been working on a new application called “Windows Terminal”.
Windows Terminal can be installed from the Windows Store and is currently in preview mode. I’ve been using it for quite a while now, and it has enough features and is stable enough for me to give it a full-throated endorsement.
The new Windows Terminal features a full tab interface, copy/paste, multiple profiles, transparent backgrounds, background images — even transparent background images. It’s a field day if you like to customize your terminal, and I came to win this sack race.
Here is my current terminal. We’ll take a walk through some of the important tweaks here.
Windows terminal is quite customizable. Clicking the “⌄” arrow at the top left (next to the “+” sign) gives you access to “Settings”. This will open a JSON file.
Bind Copy/Paste
At the top of the file are all of the key bindings. The first thing that I did was map “copy” to Ctrl + C and paste to Ctrl + V. How else am I going to copy and paste in commands from Stack Overflow that I don’t understand?
The problem is that Ctrl + C is already mapped to SIGINT, or the Interrupt/kill command on Linux. There are a lot of terminals out there for Windows that handle this by mapping Copy/Paste to Ctrl + Shift + C and Ctrl + Shift + V respectively. The problem is that copy/paste is Ctrl + C / Ctrl + V every other single place in Windows. I just kept pressing Ctrl + C in the terminal over and over again trying to copy things. I could not stop doing it.
The Windows terminal handles this differently. If you have text highlighted and you press Ctrl + C, it will copy the text. If there is a running process, it still sends the SIGINT command down and interrupts it. The means that you can safely map Ctrl + C / Ctrl + V to Copy/Paste in the Windows Terminal and it won’t interfere with your ability to interrupt processes.
Whoever thought Copy/Paste could cause so much heartache?
Change The Default Profile
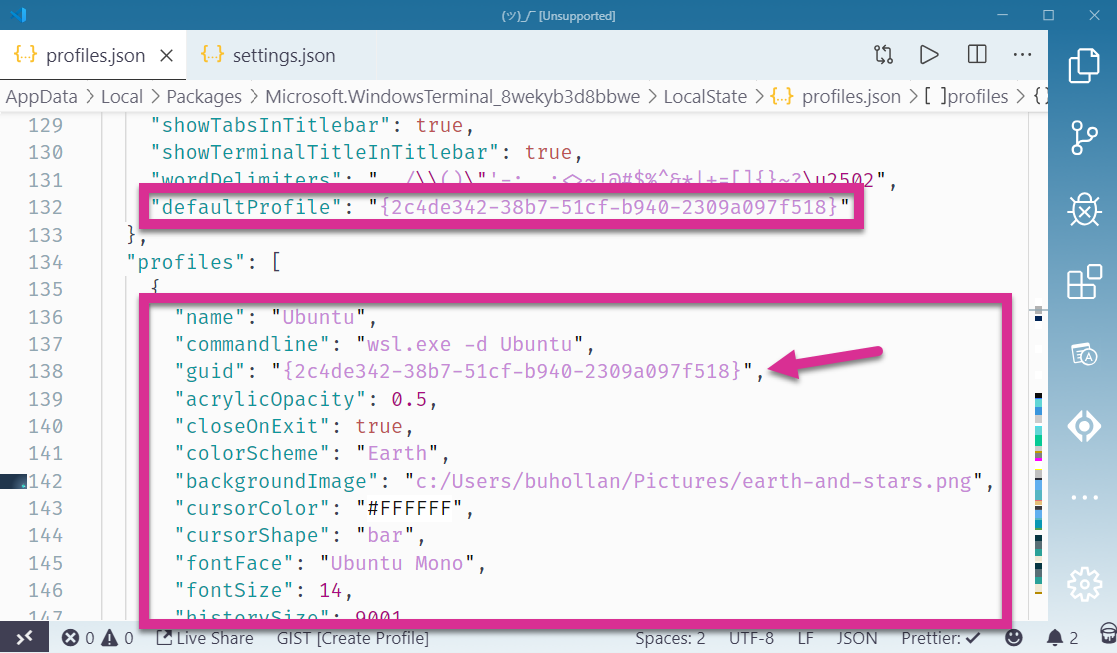
The default profile is what comes up when a new tab is opened. By default, that’s Powershell. You’ll want to scroll down and find the Linux profile. This is the one that opens wsl.exe -d Ubuntu. Copy its GUID and paste it into the defaultProfile setting.
I’ve moved these two settings so they are right next to each other to make it easier to see:
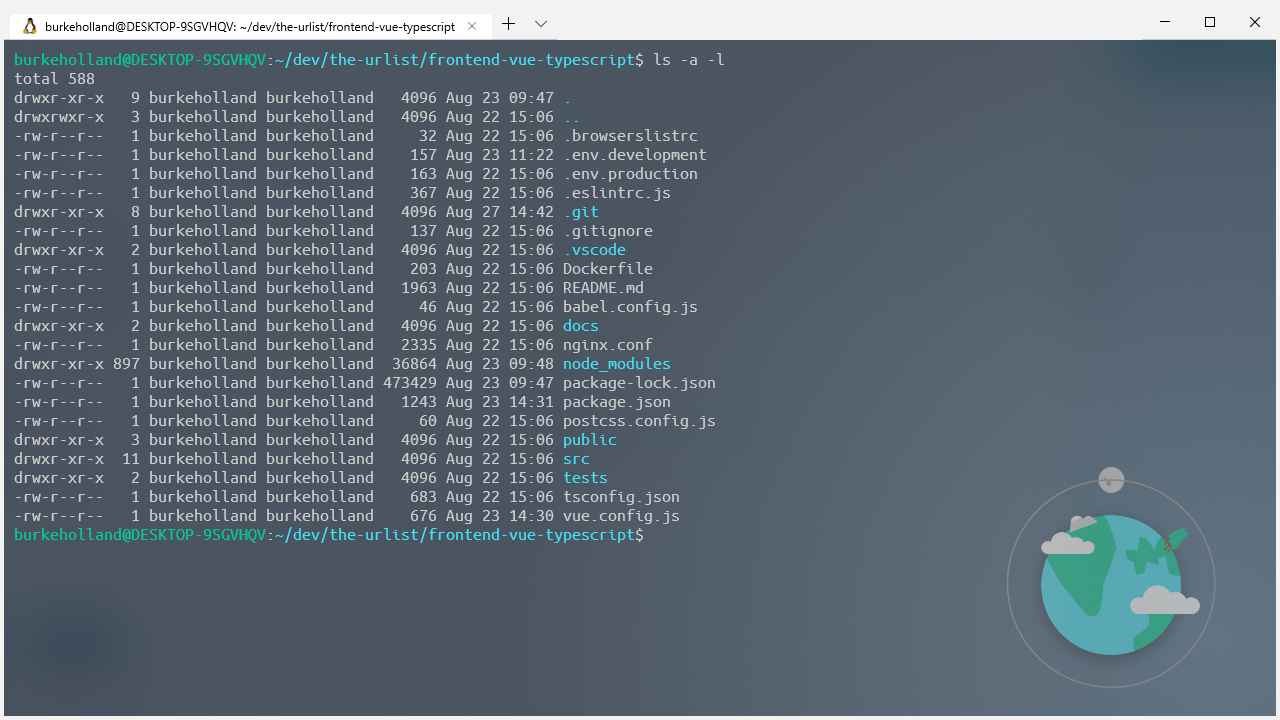
I like my background to be a dark solid color with a flat-ish logo in the right-hand corner. I do this because I want the logo to be bright and visible, but not in the way of the text. This one I made myself, but there is a great collection of flat images to pick from at Simple Desktops.
The background is set with the backgroundImage property:
You’ll also notice a setting called “acrylic”. This is what enables you to adjust the opacity of the background. If you have a solid background color, this is pretty straightforward.
For my theme, transparency makes everything look muted, so I keep the useAcrylic set to false.
Change The Font
The team building the Windows Terminal is also working on a new font called “Cascadia Code”. It’s not available as of the time of this writing, so you get the default Windows font instead.
The default font in the Windows Terminal is “Consolas”. This is the same font that the Windows command line uses. If you want that true Ubuntu feel, Chris Hoffman points out how you can install the official Ubuntu Mono font.
Here’s a before and after so you can see the difference:
They look pretty similar; the main difference being in the spacing of Ubuntu Mono which makes the terminal just a bit tighter and cleaner.
Color Schemes
The color schemes are all located at the bottom of the settings file. I copied the “Campbell” color scheme as a baseline. I try to match colors with their names, but I’m not afraid to go rogue either. I’ll map “#ffffff” to “blue” — I don’t even care.
If you like this particular scheme which I’ve named “Earth”, I’ve put together this gist so you don’t have to manually copy all of this mess out of a screenshot.
Note: The color previews come by virtue of the “Color Highlight” extension for VS Code.
Change The Default Starting Directory
By default, the WSL profile drops you into your home directory on the Windows side. Based on the setup that I am recommending in this article, it would be preferable to be dropped into your Linux home folder instead. To do that, alter the startingDirectory setting in your “Ubuntu” profile:
If you’ve never used Zsh and Oh-My-Zsh before, you’re in for a real treat. Zsh (or “Z Shell”) is a replacement shell for Linux. It expands on the basic capabilities of Bash, including implied directory switching (no need to type cd), better-theming support, better prompts, and much more.
To install Zsh, grab it with the apt package manager, which comes out of the box with your Linux install:
sudo apt install zsh
Install oh-my-zsh using curl. Oh-my-zsh is a set of configurations for zsh that improve the shell experience even further with plugins, themes and a myriad of keyboard shortcuts.
sh -c "$(curl -fsSL https://raw.githubusercontent.com/robbyrussell/oh-my-zsh/master/tools/install.sh)"
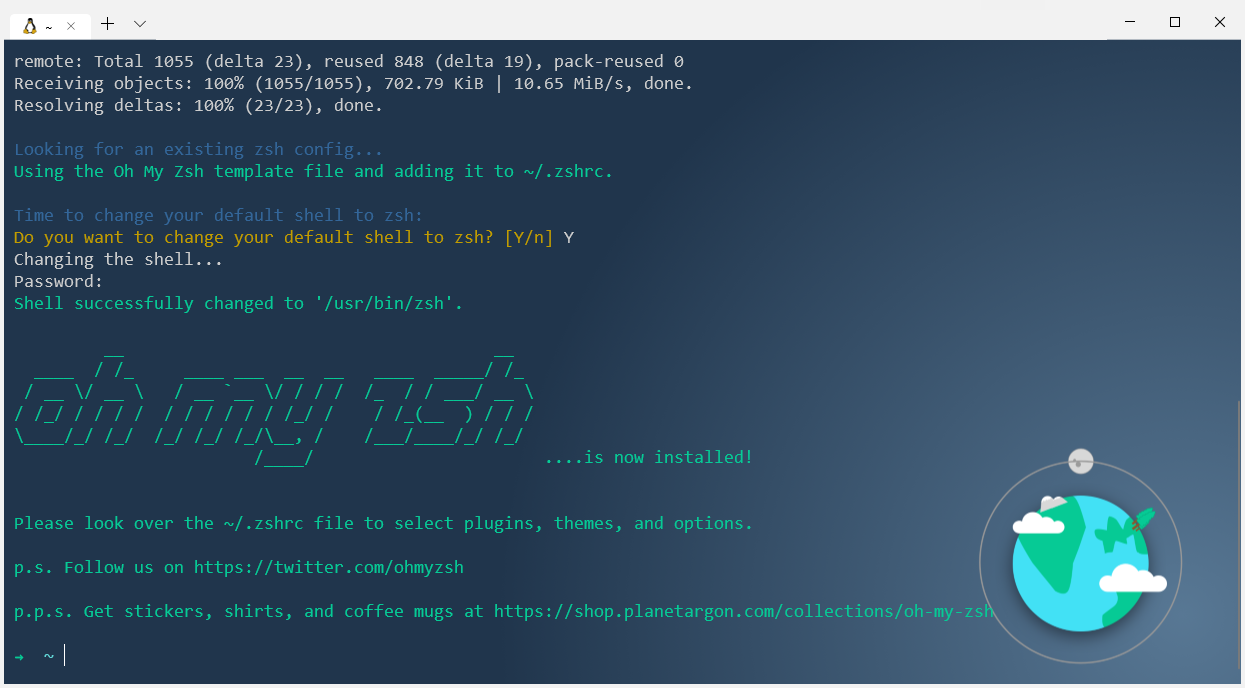
Then it will ask you if you want to change your default shell to Zsh. You do, so answer in the affirmative and you are now up and running with Zsh and Oh-My-Zsh.
Note: If you pick a theme like “agnoster” which requires glyphs, you’ll need a powerline infused version of Ubuntu Mono that has… glyphs. Otherwise, your terminal will just be full of weird characters like you mashed your face on the keyboard. Nerd Fonts offers one that seems to work pretty well.
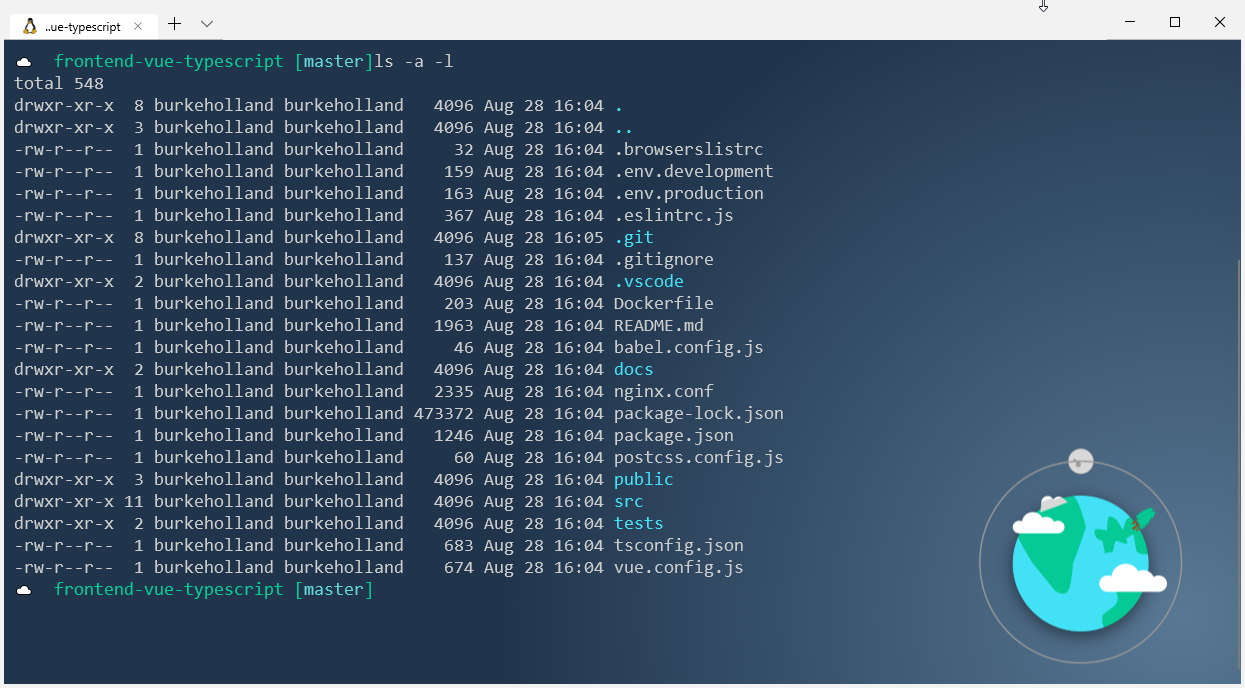
Now you can do things like changing directories just by entering the directory name. No cd required. Wanna go back up a directory? Just do a ... You don’t even have to type the whole directory name, just type the first few letters and hit tab. Zsh will give you a list of all of the files/directories that match your search and you can tab through them.
As a web developer, you’re probably going to want to install Node. I suppose you don’t have to install Node to do web development, but it sure feels like it in 2019!
Your first instinct might be to install node with apt, which you can do, but you would regret it for two reasons:
The version of Node on apt is dolorously out of date;
You should install Node with a version manager so that you don’t run into permissions issues.
The best way to solve both of these issues is to install nvm (Node Version Manager). Since you’ve installed zsh, you can just add the nvm plugin in your zshrc file and zsh takes care of the rest.
First, install the plugin by cloning in the zsh-nvm repo. (Don’t worry, Git comes standard on your Ubuntu install.)
Now you can install node with nvm. It makes it easy to install multiple side-by-side versions of node, and switch between them effortlessly. Also, no permissions errors when you do global npm installs!
nvm install --lts
I recommend this over the standard nvm install because the plugin gives you the ability to easily upgrade nvm. This is kind of a pain with the standard “curl” install. It’s one command with the plugin.
nvm upgrade
Utilize Auto Suggestions
One of my very favorite plugins for zsh is zsh-autosuggestions. It remembers things you have typed in the terminal before, and then recognizes them when you start to type them again as well as “auto-suggests” the line you might need. This plugin has come in handy more times than I can remember — specifically when it comes to long CLI commands that I have used in the past, but can’t ever remember.
Then add it to your zsh plugins and source the zshrc file:
nano ~/.zshrc

# In the .zshrc file
plugins(zsh-nvm zsh-autosuggestions git)

source ~/.zshrc
The plugin reads your zsh history, so start typing some command you’ve typed before and watch the magic. Try typing the first part of that long clone command above.
If you hit ↹, it will autocomplete the command. If you keep hitting ↹, it will cycle through any of the commands in your history that could be a match.
Important Keyboard Shortcuts
There are a few terminal shortcuts that I use all the time. I find this with all of my tools — including VS Code. Trying to learn all the shortcuts is a waste of time because you won’t use them enough to remember them.
Here are a few that I use regularly:
Terminal Shortcut
What does it do?
Ctrl + L
This clears the terminal and puts you back to the top. It’s the equivilant of typing “clear”.
Ctrl + U
This clears out the current line only.
Ctrl + A
Sends the cursor to the beginning of the command line.
Ctrl + E
Move to the end of the line.
Ctrl + K
Delete all the characters after the cursor.
That’s it! Everything else I’ve probably learned and then forgotten because it never gets any use.
Configuring Git(Hub/Lab/Whatevs)
Git comes on Ubuntu, so there is no install required. You can follow the instructions at your source control hoster of choice to get your ssh keys created and working.
Note that in the Github instructions, it tells you to use the “copy” utility to copy your ssh key. Ubuntu has the “xcopy” command, but it’s not going to work here because there is no interop between the Linux and Windows in terms of a clipboard.
Instead, you can just use the Windows Clipboard executable and call it directly from the terminal. You need to get the text first with cat, and then pipe that to the Windows clipboard.
cat ~/.ssh/id_rsa.pub | clip.exe
The Github docs tell you to make sure that the ssh-agent is running. It’s not. You’ll see this when you try and add your key to the agent:
You can start the agent, but the next time you reboot Windows or the WSL is stopped, you’ll have to start it again. This is because there is no initialization system in the WSL. There is no systemd or another process that starts all of your services when the WSL starts. WSL is still in preview, and the team is working on a solution for this.
In the meantime, believe it or not, there’s a zsh plugin for this, too. It’s called ssh-agent, and it comes installed with oh-my-zsh, so all you need to do is reference it in the .zshrc file.
zsh-nvm zsh-autosuggestions ssh-agent git
This will start the ssh-agent automatically if it’s not running the first time that you fire up the WSL. The downside is that it’s going to ask you for your passphrase every time WSL is started fresh. That means essentially anytime you reboot your computer.
The WSL has no GUI, so you can’t install a visual tool like VS Code. That needs to be installed on the Windows side. This presents a problem because you have a program running on the Windows side accessing files on the Linux side, and this can result in all manor of quirks and “permission denied” issues. As a general rule of thumb, Microsoft recommends that you not alter files in the WSL side with Windows programs.
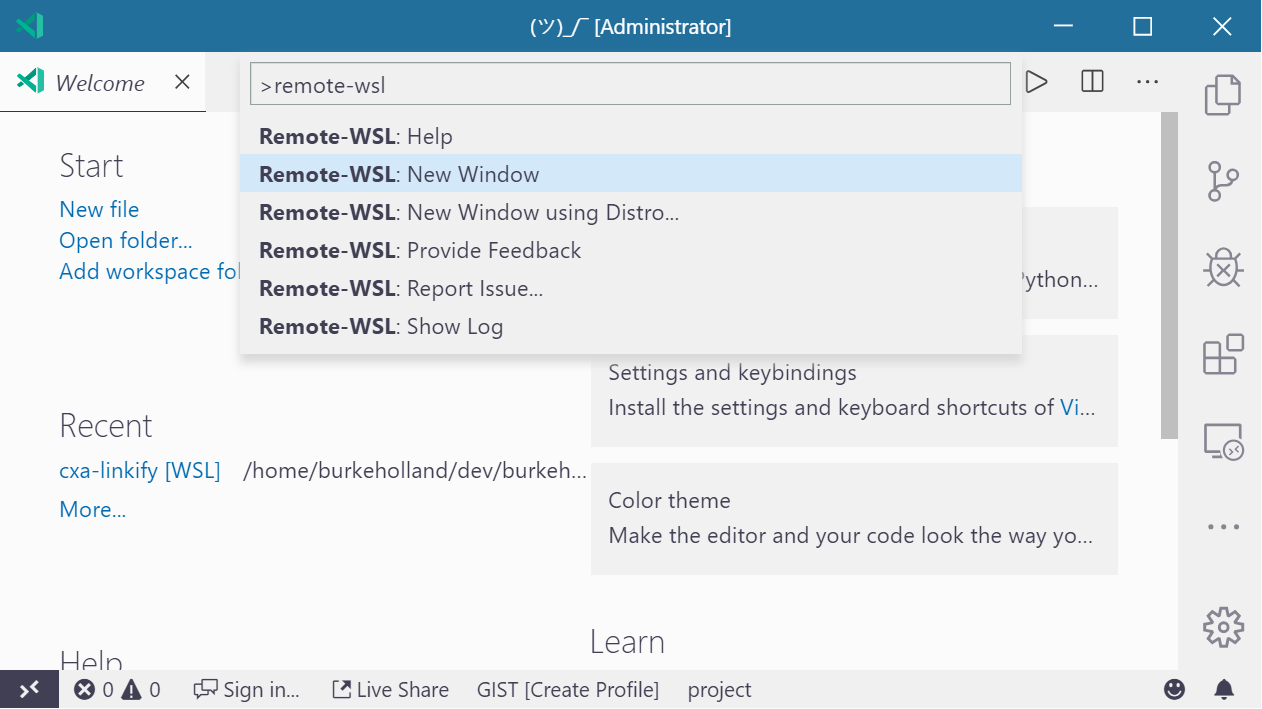
To resolve this, there is an extension for VS Code called “Remote WSL”. This extension is made by Microsoft, and allows you to develop within the WSL, but from inside of VS Code.
Once the extension is installed, you can attach VS Code directly to the Ubuntu side by opening the Command Palette (Ctrl + Shift + P) and select “Remote-WSL: New Window”.
This opens a new instance of VS Code that allows you to work as if you were fully on the Linux side of things. Doing “File/Open” browses the Ubuntu file system instead of the Windows one.
The integrated terminal in VS Code opens your beautifully customized zsh setup. Everything “just works” like it should when you have the Remote WSL extension installed.
If you open code from your terminal with code ., VS Code will automatically detect that it was opened from the WSL, and will auto-attach the Remote WSL extension.
VS Code Extensions With Remote WSL
The Remote WSL extension for VS Code works by setting up a little server on the Linux side, and then connecting to that from VS Code on the Windows side. That being the case, the extensions that you have installed in VS Code won’t automatically show up when you open a project from the WSL.
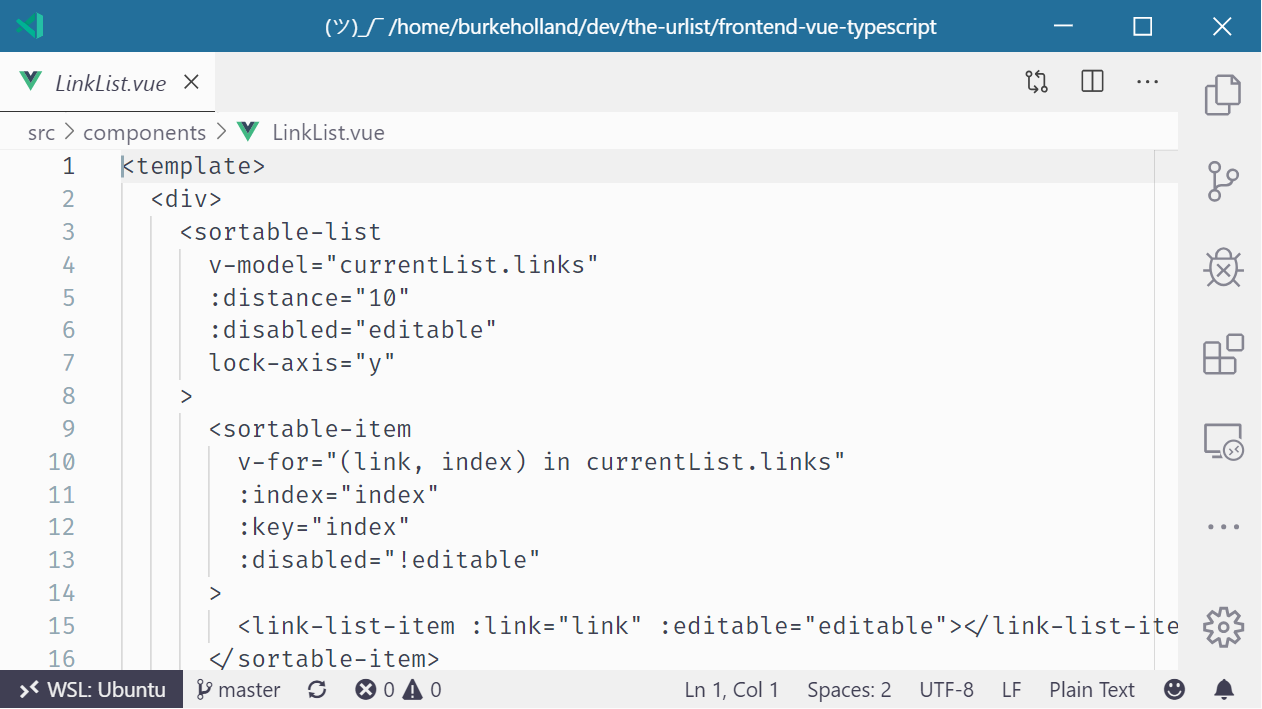
For instance, I have a Vue project open in VS Code. Even though I have all of the right Vue extensions installed for syntax highlighting, formatting and the like, VS Code acts like it’s never seen a .vue file before.
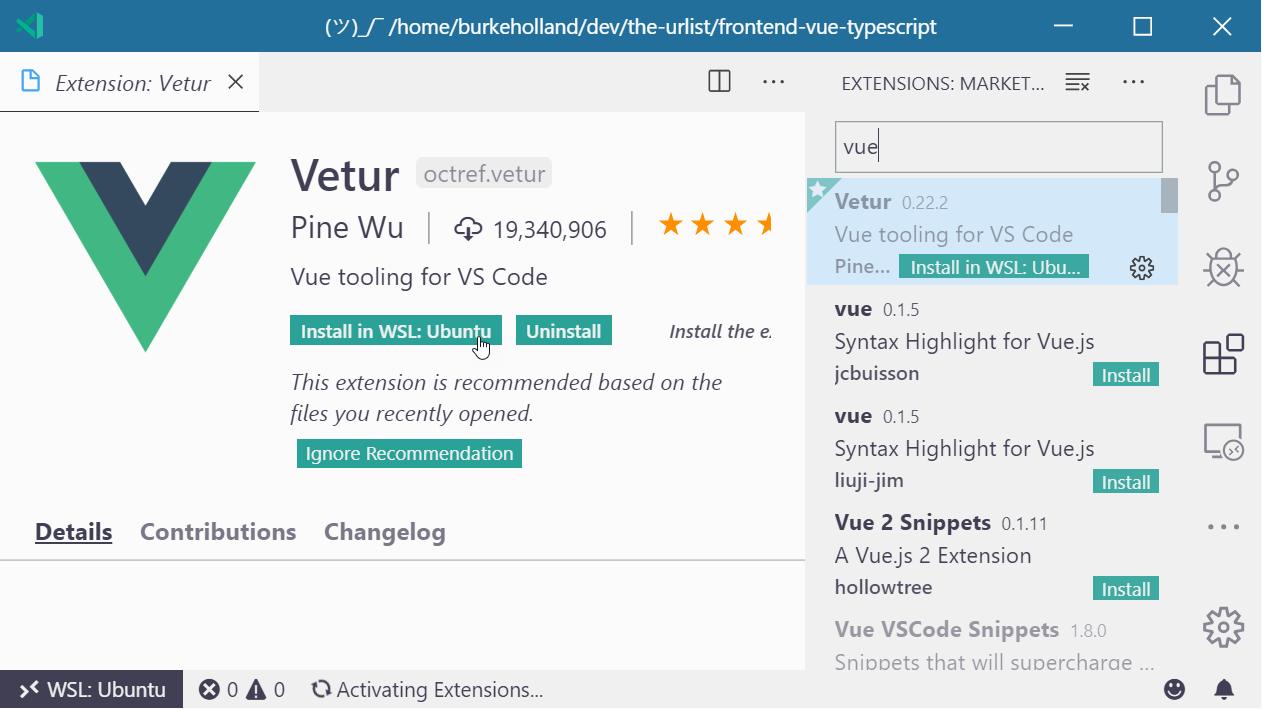
All of the extensions that you have installed can be enabled in the WSL. Just find the extension that you want in the WSL, and click the “Install in WSL” button.
All of the extensions installed in the WSL will show up in their own section in the Extensions Explorer view. If you have a lot of extensions, it could be slightly annoying to install each one individually. If you want to just install every extension you’ve got in the WSL, click the little cloud-download icon at the top of the ‘Local - Installed’ section.
This is already an opinionated article, so here’s one you didn’t ask for on how I think you should structure your projects on your file system.
I keep all my projects on the Linux side. I don’t put my projects in “My Documents” and then try and work with them from the WSL. My brain can’t handle that.
I create a folder called /dev that I put in the root of my /home folder in Linux. Inside that folder, I create another one that is the same name as my Github repo: /burkeholland. That folder is where all of my projects go — even the ones that aren’t pushed to Github.
If I clone a repo from a different Github account (e.g. “microsoft”), I’ll create a new folder in “dev” called /microsoft. I then clone the repo into a folder inside of that.
Basically, I’m mimicking the same structure as source control on my local machine. I find it far easier to reason about where projects are and what repos they are attached to just by virtue of their location. It’s simple, but it is highly effective at helping me keep everything organized. And I need all the help I can get.
You might do this for a number of different reasons. For instance, just today I needed a Chrome extension that isn’t in the web store. So I cloned the repo in WSL, then navigated to it as an “Unpacked Extension” and loaded it into Edge.
One thing that I do with some frequency in Linux is to open the directory that contains a file directly from the terminal. You can do this in the WSL, too, by directly calling explorer.exe. For instance, this command opens the current directory in Windows Explorer.
$ explorer.exe .
This command is a bit cumbersome though. On Linux, it’s just open .. We can make that same magic by creating an alias in the ~/.zshrc.
alias open="explorer.exe"
Docker
When I said all tooling should be on the Linux side, I meant that. That includes Docker.
This is where the rubber really starts to meet the road. What we need here is Docker, running inside of Linux running inside of Windows. It’s a bit of a Russian Nesting Doll when you write it down in a blog post. In reality, it’s pretty straightforward.
You’ll need the correct version of Docker for Windows. As of the time of this writing, that’s the WSL 2 Tech Preview.
When you run the installer, it will ask you if you want to use Windows containers instead of Linux containers. You definitely do. Otherwise, you won’t get the option to run Docker in the WSL.
After you start the service, you can use Docker within the WSL just as you would expect to be able to. Running Docker in the WSL provides a pretty big performance boost, as well as a boost in cold start time on containers.
Might I also recommend that you install the Docker extension for VS Code? It puts a visual interface on your Docker setup and generally just makes it easier to work with Docker because you don’t have to remember all those command-line flags and options.
Get More Bash On Windows
At this point, you should get the idea about how to put Bash on Windows, and how it works once you get it there. You can customize your terminal endlessly and there are all sorts of rad programs that you can add in to do things like automatically set PATH variables, create aliases, get an ASCII cow in your terminal, and much more.
Running Bash on Windows opened up an entirely new universe for me. I’m able to combine Windows which I love for the productivity side, and Linux which I depend on as a developer. Best of all, I can build apps for both platforms now with one machine.
Further Reading
You can read more about Bash on Windows over here:
Seeing all the time, effort, emojis, drawings, and true works of art put into an Insta story, we know for sure stories are not what they once were. They’re no longer just pictures and videos shot in real-time. Stories have become a true marketing platform, with intensely strategic moves behind each piece of content published. Every Insta story most likely has a cool (maybe expensive) story app that was used to produce the content.
With Insta stories looking more polished and aesthetically pleasing than ever, as a designer, you have to be on top of your game. But to what end and to what cost?
I’m here to help you save a good buck. I’ve got the 10 best free Insta story apps for you to use to improve your Insta stories game without breaking the bank. Without further ado, let’s jump right in.
10 Best Free Insta Story Apps
1. Unfold
Unfold is an amazing Insta story app that is free, but also has in-app purchases if you fancy a certain look and template theme. With many texts and elements to choose from, and themes spanning from elegant or retro, there’s something for everyone.
A very underappreciated and not talked about enough app, in my opinion, is Jane. The app is free and has very many free beautiful templates for you to use to spice up your stories. They are quite girly and are perfect for maintaining an elegant or playful story vibe. Create amazing videos with royalty-free music and amazing visuals. Again, this app is free but has in-app purchases.
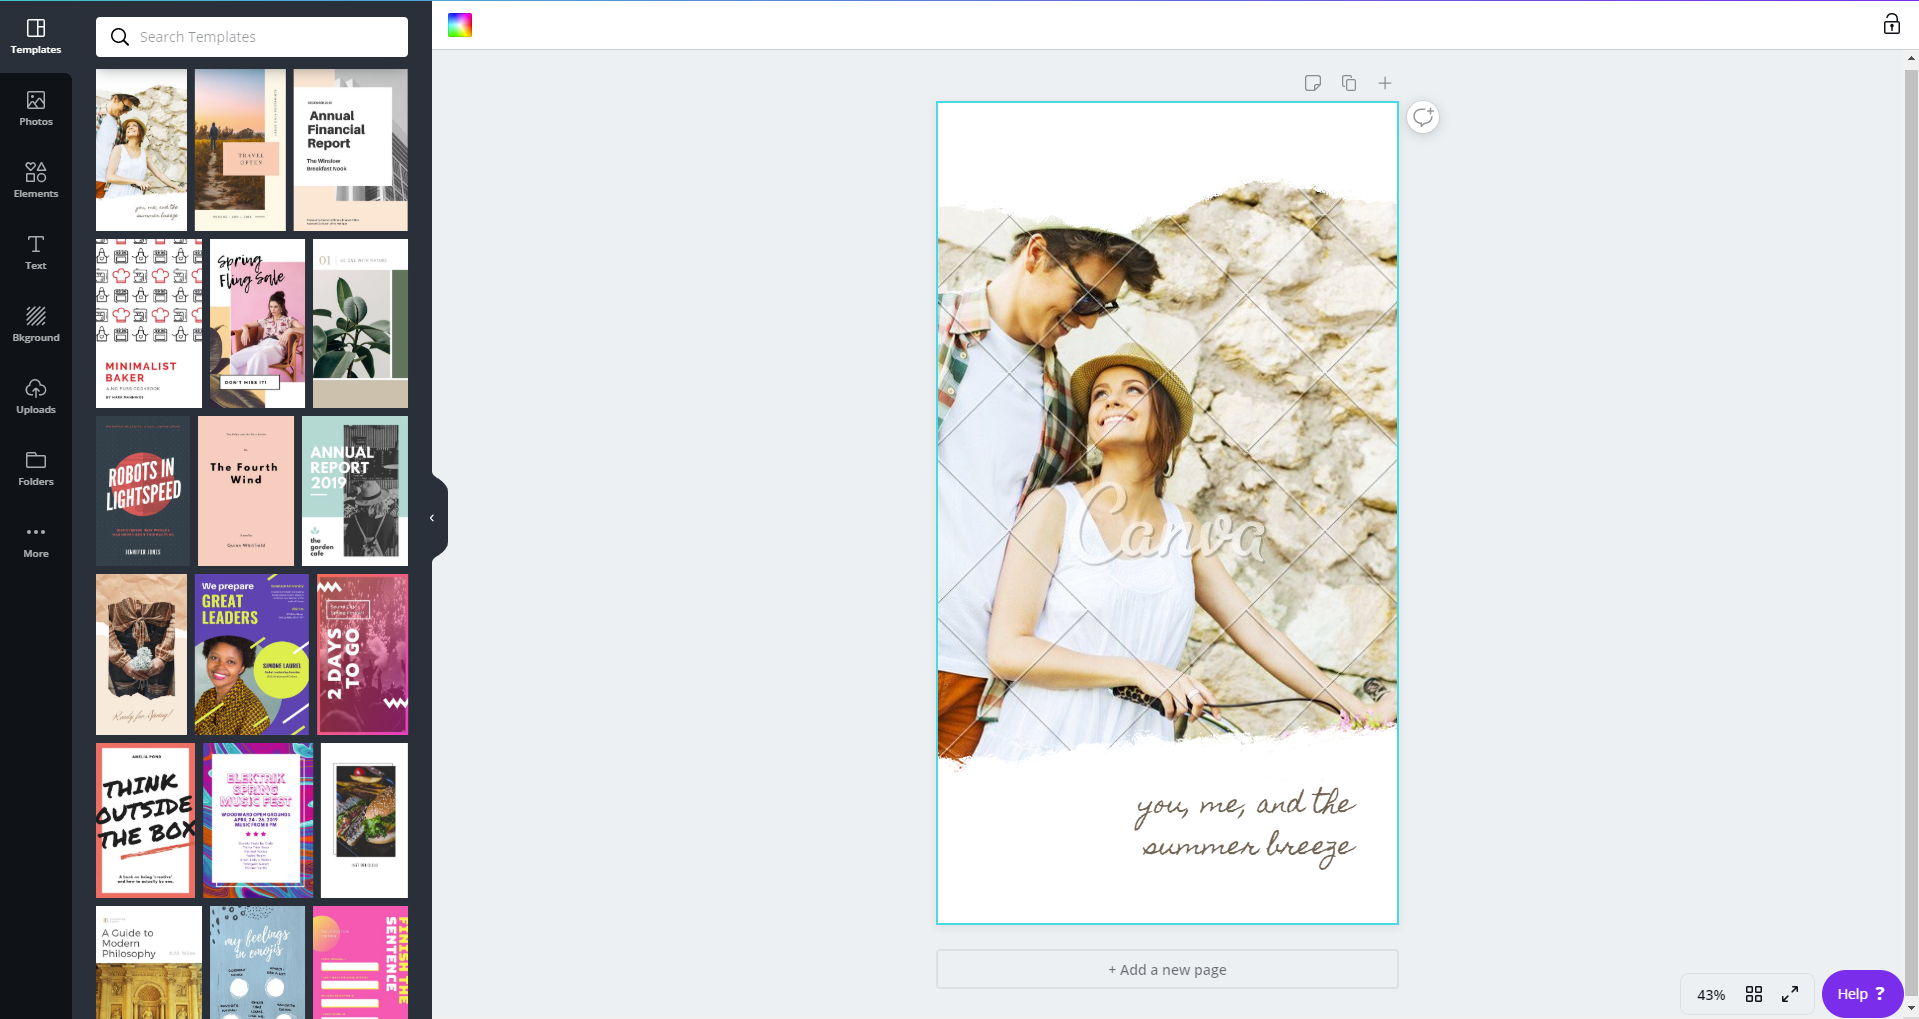
Canva is hands-down one of the best online CMP’s out there. It’s great for beginner and advanced designers alike. With tons of templates to choose from and customize, you’ll surely find the one that suits your style best. The mobile app is free and has in-app purchases, although you can totally rock with all the free elements and templates and just tune them to your liking.
With a vast and wide collection of fonts, you can do some serious designing with this app. Hype type is absolutely killing the font game. If you’re focused on spreading a message, then this is absolutely the app for you. The app is free with some paid features, but it’s up to you to decide if they’re a necessary buy.
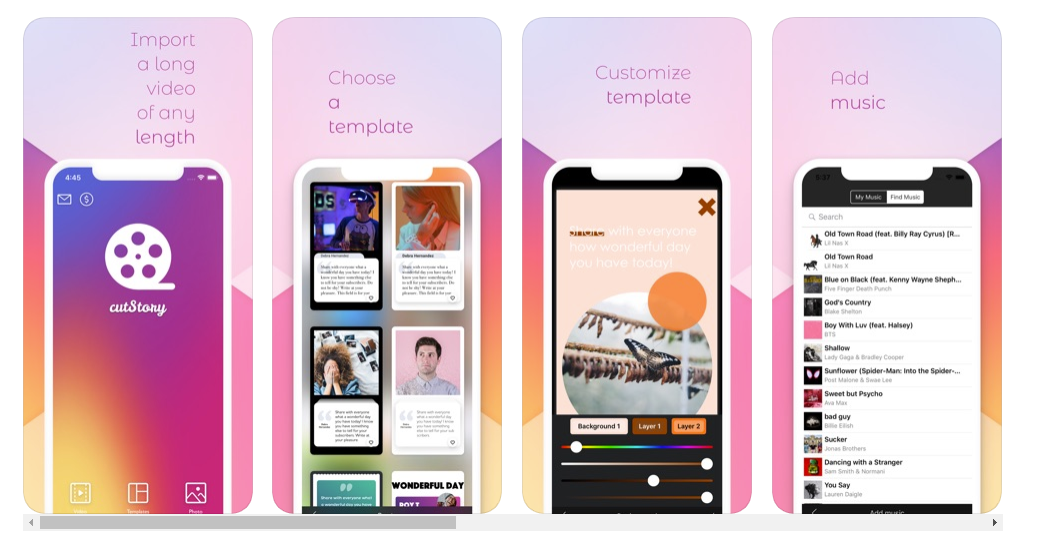
Another great app for managing your stories is Cut Story. Cut Story’s is an amazing video editing app where you can create engaging videos and add music, texts, elements, your logo and more to your video. There are special features that you can buy to enhance your UX, but only if you deem necessary.
Mojo is the way to go for Insta stories because they have 100 templates for you to choose from! Customize your stories with text to create relevance, engage with your followers and make them feel what you feel, and share the message you want to portray with them. A huge plus to this app is that you can share your new and improved story directly to your Instagram and also your Snapchat!
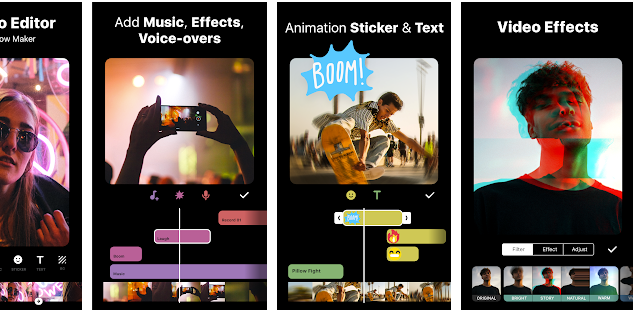
For all my influencers out here, Inshot is the app for you. We don’t always have time to film, import, and edit our footage on our laptops or computers, so having this app will be a valuable asset for you. Edit all your video content in a single app on your phone and import it directly to your Instagram. This app is truly a gift to all of us creators out there.
Adobe, king of all things editing programs, in my own personal opinion. Adobe has great editing programs, from video-editing to photoshopping images, and when they saw an opportunity to create an app to help you create amazing stories to tell your followers, well, we all know they wouldn’t pass that up. With this app you can do more than edit stories photos, you can also edit video and image posts. The app is initially free and then they offer you the chance to upgrade if you end up falling in love with the app.
And last, but not least, we have the app called Over. I love that when you visit their webpage, it’s just absolutely inspiring. It inspires you to be different, to stand out, the influence others. A great app for you to use to for free to make your Insta stories more engaging for your followers and for you to really create a brand name and grow your recognizability.
Now that you have 10 new and fresh apps for you to choose from to start stepping up your Insta story game, it’s time for you to hop on it. Download any one of these apps and tag us in any of your Instagram stories for a chance to be featured on our stories. Our Instagram handle is @webdesignledger.
Don’t sleep on these amazing free Insta story apps! Try them out today.


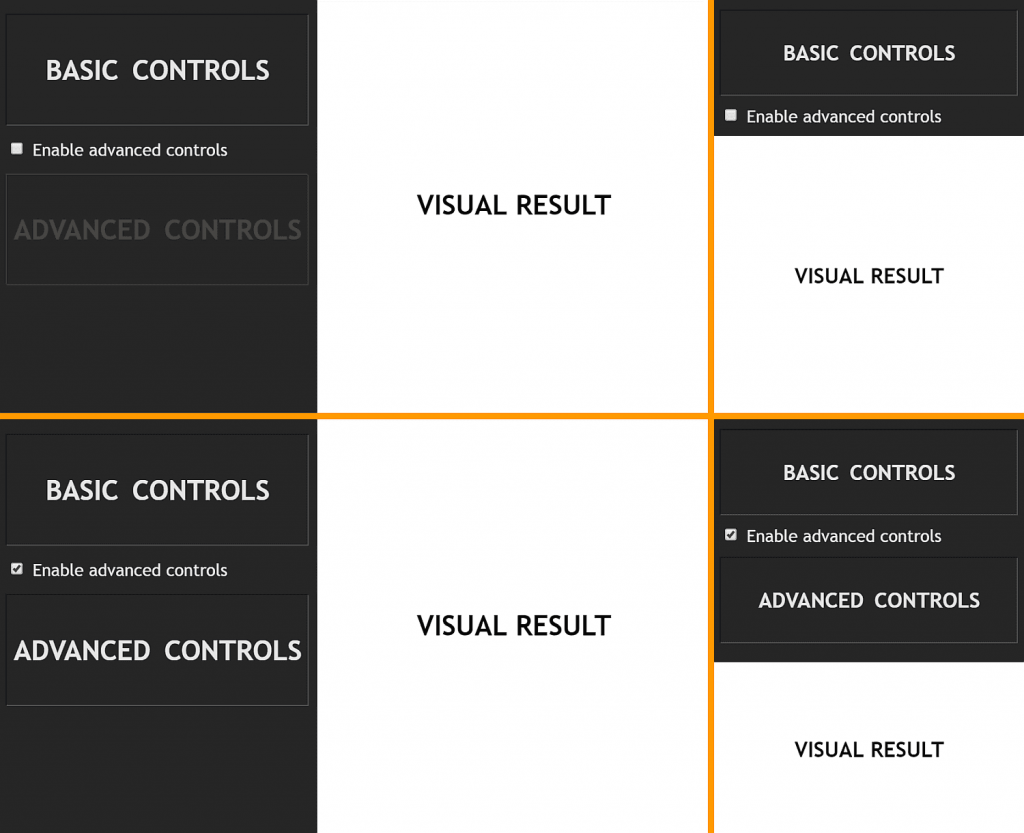


 The internet is a great place to pick up a skills and knowledge. Right from your study table at home, you can explore the internet for courses, sign up for them, work through the lessons and add a completion certificate to your resume (like these awesome WordPress courses for beginners). And there are tons of […]