Creative Commons has released an official WordPress plugin for attributing and licensing content. It is an updated and revamped version of the organization’s WPLicense plugin. It is also loosely based on an old plugin called License, which seems to have been abandoned after not receiving any updates for six years.
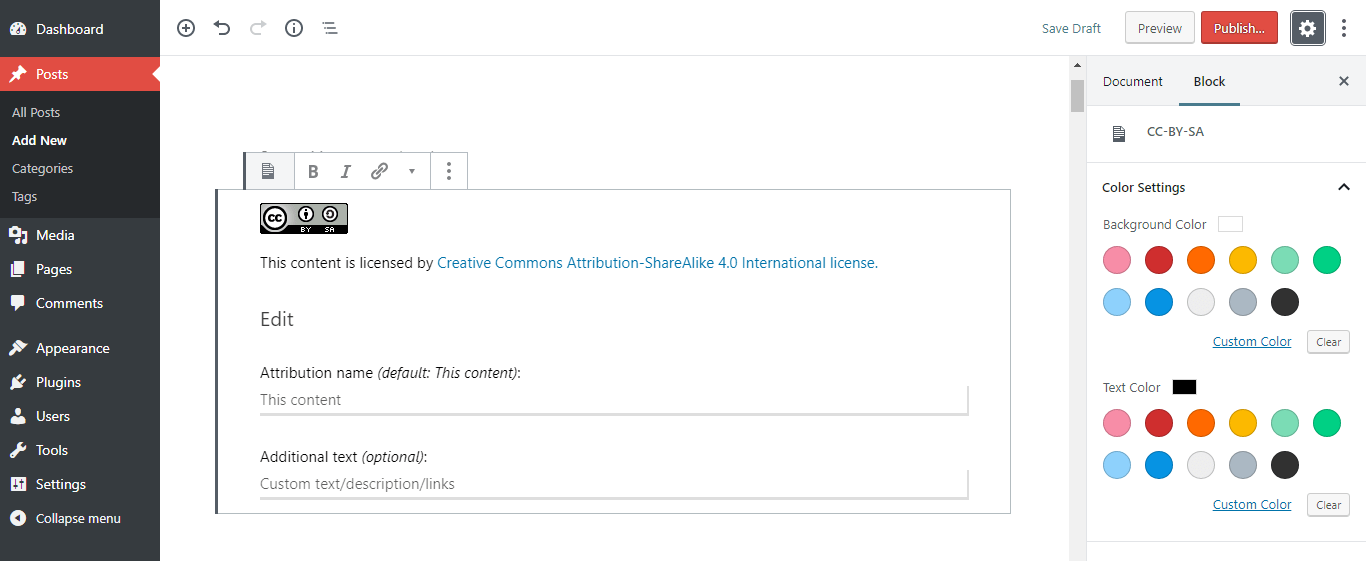
The new Creative Commons plugin is an attribution tool that is compatible with the block editor. It comes with eight different blocks for licensing any post, page, image, or other type of media.
The block settings allow the user to specify the Attribution text, add additional text after the license, and customize the block’s background and text colors.
The plugin also retains several features from the older versions, including the ability to set a default license and display it as a widget or in the footer. Users can license their entire sites or license some posts, pages, or images differently on a per-content basis using the CC Gutenberg blocks. It is also multisite compatible, where network admins can license the entire network with a default license or allow site admins to choose their own. License information can be displayed with “One Click Attribution” for images.
Software developer Ahmad Bilal worked on the Creative Commons plugin with help from a mentor as part of his Google Summer of Code project. This update is long overdue, as the older version of the plugin was not compatible with newer versions of WordPress beyond 3.8.1. The new plugin is compatible with the latest version of WordPress (5.2.2) and is now available in the official plugin directory.
From its inception, the block editor was always intended to be more than just an editor for the main content area. Gutenberg phase 2 brings the block editor to other parts of the site, including widgets, menus, and other aspects of site customization. Matias Ventura, one of the lead engineers on the project, has offered a glimpse of the team’s vision for how the block editor will tackle full-site editing with an intriguing new prototype.
Ventura shared a video demo, introducing the concept of “block areas,” which he said would include headers, footers, sidebars, and any other meaningful template part outside of the post content that contains blocks. In the example below, every element on the page is made of blocks and can be directly manipulated by the user.
The prototype wasn’t necessarily created to prescribe a specific implementation but rather shows some of the possibilities of how block areas could be organized within the page. Each block area is saved separately and any of the template parts can have a distinct name. Ventura suggested they might be saved as individual posts in an internal custom post type, which can be isolated and edited individually or within the scope of the whole page. This would allow for different view modes and possibly even a design mode with a grid overlay:
The prototype demonstrates the possibility of drilling down into the individual blocks nested within theme templates and post content. This offers users a better understanding of the page structure and allows them to easily navigate nested blocks.
Ventura’s writeup is somewhat technical and implementation details are still being actively discussed across several tickets on GitHub, but initial community reactions to the prototype have been positive overall.
A Closer Look at How Block Areas Could Replace the Customizer
With WordPress closing in on the one year anniversary of having the block editor in core, the interface presented in the block areas prototype seems immediately more familiar than the Customizer. Full-site editing in the Gutenberg era will fundamentally change how users approach their site designs. The block editor stands to unify customization and content interfaces that were previously unable to make the jump into full-on frontend editing.
“It’s too early to say for sure, but in a world where everything is a block, there isn’t much need for the Customizer’s current interface where the preview is disconnected from the controls in a separate window,” Customizer component maintainer Weston Ruter said. “If theme templates are built entirely with blocks which support direct manipulation, then it’s essentially a frontend editing paradigm.”
Ruter, who was instrumental in architecting a great deal of the Customizer, said the current interface, which splits the design and controls into separate windows, was necessary because so many of the controls required full-page reloads. The split interface ensures that the controls don’t constantly disappear while the page reloads to display the changes.
“The better Customizer integrations are the live ‘postMessage’ updating-controls which didn’t require reloads (e.g. color picker),” Ruter said. “More recently the ‘selective refresh’ capability also facilitated themes and plugins to re-generate partial templates without having to reload the entire page. In theory, those capabilities did allow for inline editing without having to reload the page.”
While the Customizer gave users more control over their site designs, the component has always struggled to provide powerful controls and live refreshing in the same interface with a limited amount of page real estate. Ruter highlighted a few of the advantages of making the block editor the primary vehicle for customization in WordPress.
“Blocks bring a common interface to be able to do such inline editing for any part of the page, not just special areas in the Customizer preview that get the extra user interface goodies added,” he said. “And so with this common block interface with direct manipulation paradigm, there’s no need for a separate controls panel and there is no need to do full page reloads to do preview changes. So there would be no need for the current Customizer interface.”
Although much of the Customizer is likely to become obsolete in the new era of Gutenberg-powered full-site editing, the Customizer changeset is one key concept that Ruter thinks could be preserved. This is the code that enables users to stage and schedule sitewide design changes.
“This is independent of the current Customizer interface and relates to the underlying data model of WordPress,” he said. “If changes made to Gutenberg blocks were put into such a changeset prior to being published, then the changes could be previewed across a site before going live. The need for this has not been so apparent until now because the changes have been scoped to post content. But once the block data being manipulated across various entities of a site, then it becomes important to have some place to stage those changes prior to going live.”
Plugin and theme developers will want to monitor the conversations surrounding the implementation of block areas for full site editing. When this prototype become a reality, it will have a significant impact on themes and plugins that are currently extending the Customizer. Many product developers will need to re-architect their solutions to be better suited to site customization that is powered by the block editor. Ventura lists all the relevant GitHub issues in his post introducing content-block areas.
In this article, Charlie Gerard covers the three main features currently available using Tensorflow.js and sheds light onto the limits of using machine learning in the frontend.
You’ve never built a WordPress website like this before. Divi is more than just a WordPress theme, it’s a completely new website building platform that replaces the standard WordPress post editor with a vastly superior visual editor.
Since the beginning on CodePen, our default syntax highlighting theme on CodePen has been our take on "Twilight". I'm not even sure what the original canonical source of Twilight is, but just about everywhere that offers syntax highlighting themes has some version of it.
In addition to the default Twilight, we have a total of 6 dark and 6 light themes to choose from in your settings.
Now we have one more one each side!
These are entirely new and hand-crafted by our own Klare Frank. They are somewhat based on the colors from CodePen's own branding and design system colors.
High contrast darkHigh contrast light
AAA
All the colors have been designed to pass WCAG AAA color contrast guidelines.
But I don't really need a high contrast theme as my vision is pretty good...
That's cool, me too. Sometimes I even worry that picking a high-contrast theme will be too intense for me and I'd prefer something more subtle. But that's not the case here at all, I've switched to using the dark theme myself and I find it entirely pleasing.
I'd highly recommend trying them out, as you may find out, as I have, that they are extremely nice to work in!
Default?
We haven't flipped over to one of them as the default theme for new users, but we just might! We'd love to tweak them if you see any bugs or have suggestions.
The following is going to get slightly opinionated and aims to guide someone on their journey into open source. As a prerequisite, you should have basic familiarity with the command line and Git. If you know the concepts and want to dive right into the step by step how-to guide, check out this part of the article.
Truly, there is no one way to contribute to an open source project, and to be involved often means more than code slinging. In this article, though, we’re going to focus on the nitty-gritty of contributing a pull request (PR) to someone else’s project on GitHub.
Let's set the stage...
You come across someone's project on Github and you love it! You may even decide to use it in your own project. But there’s one small thing you notice... it could be a bug. It could be an enhancement to what’s already there. Maybe you looked through the code and found a nice, optimized way of writing things that’s a little more legible, even as small as an extra indentation in the code.
Here are some initial suggestions and instructions on where to go from here.
Look for a CONTRIBUTING.md document or Contributing Guide in the documentation
Many open source projects know that other people might want to contribute. If they find themselves answering the same question again and again, this document intends to make it easier to get everyone on the same page.
Some things you might find in a Contributing guide:
Style guidelines
Prerequisites for submitting a PR
How to add your change to their documentation
A checklist for contribution
Explaining the project’s architecture and setup
This document can be as simple as a few notes, or it can be so robust that it takes you a little while to read through it all (like Atom’s Contributing guide, for example).
For larger projects, it makes sense to communicate contributing guidelines up front because PRs and issues can pile up and be a real drag on a maintainer's time, sorting through contributions that might be out of the project's scope. Make sure to take some of your own time reading through this guide if it exists because your PR will require some of the maintainer's time as well.
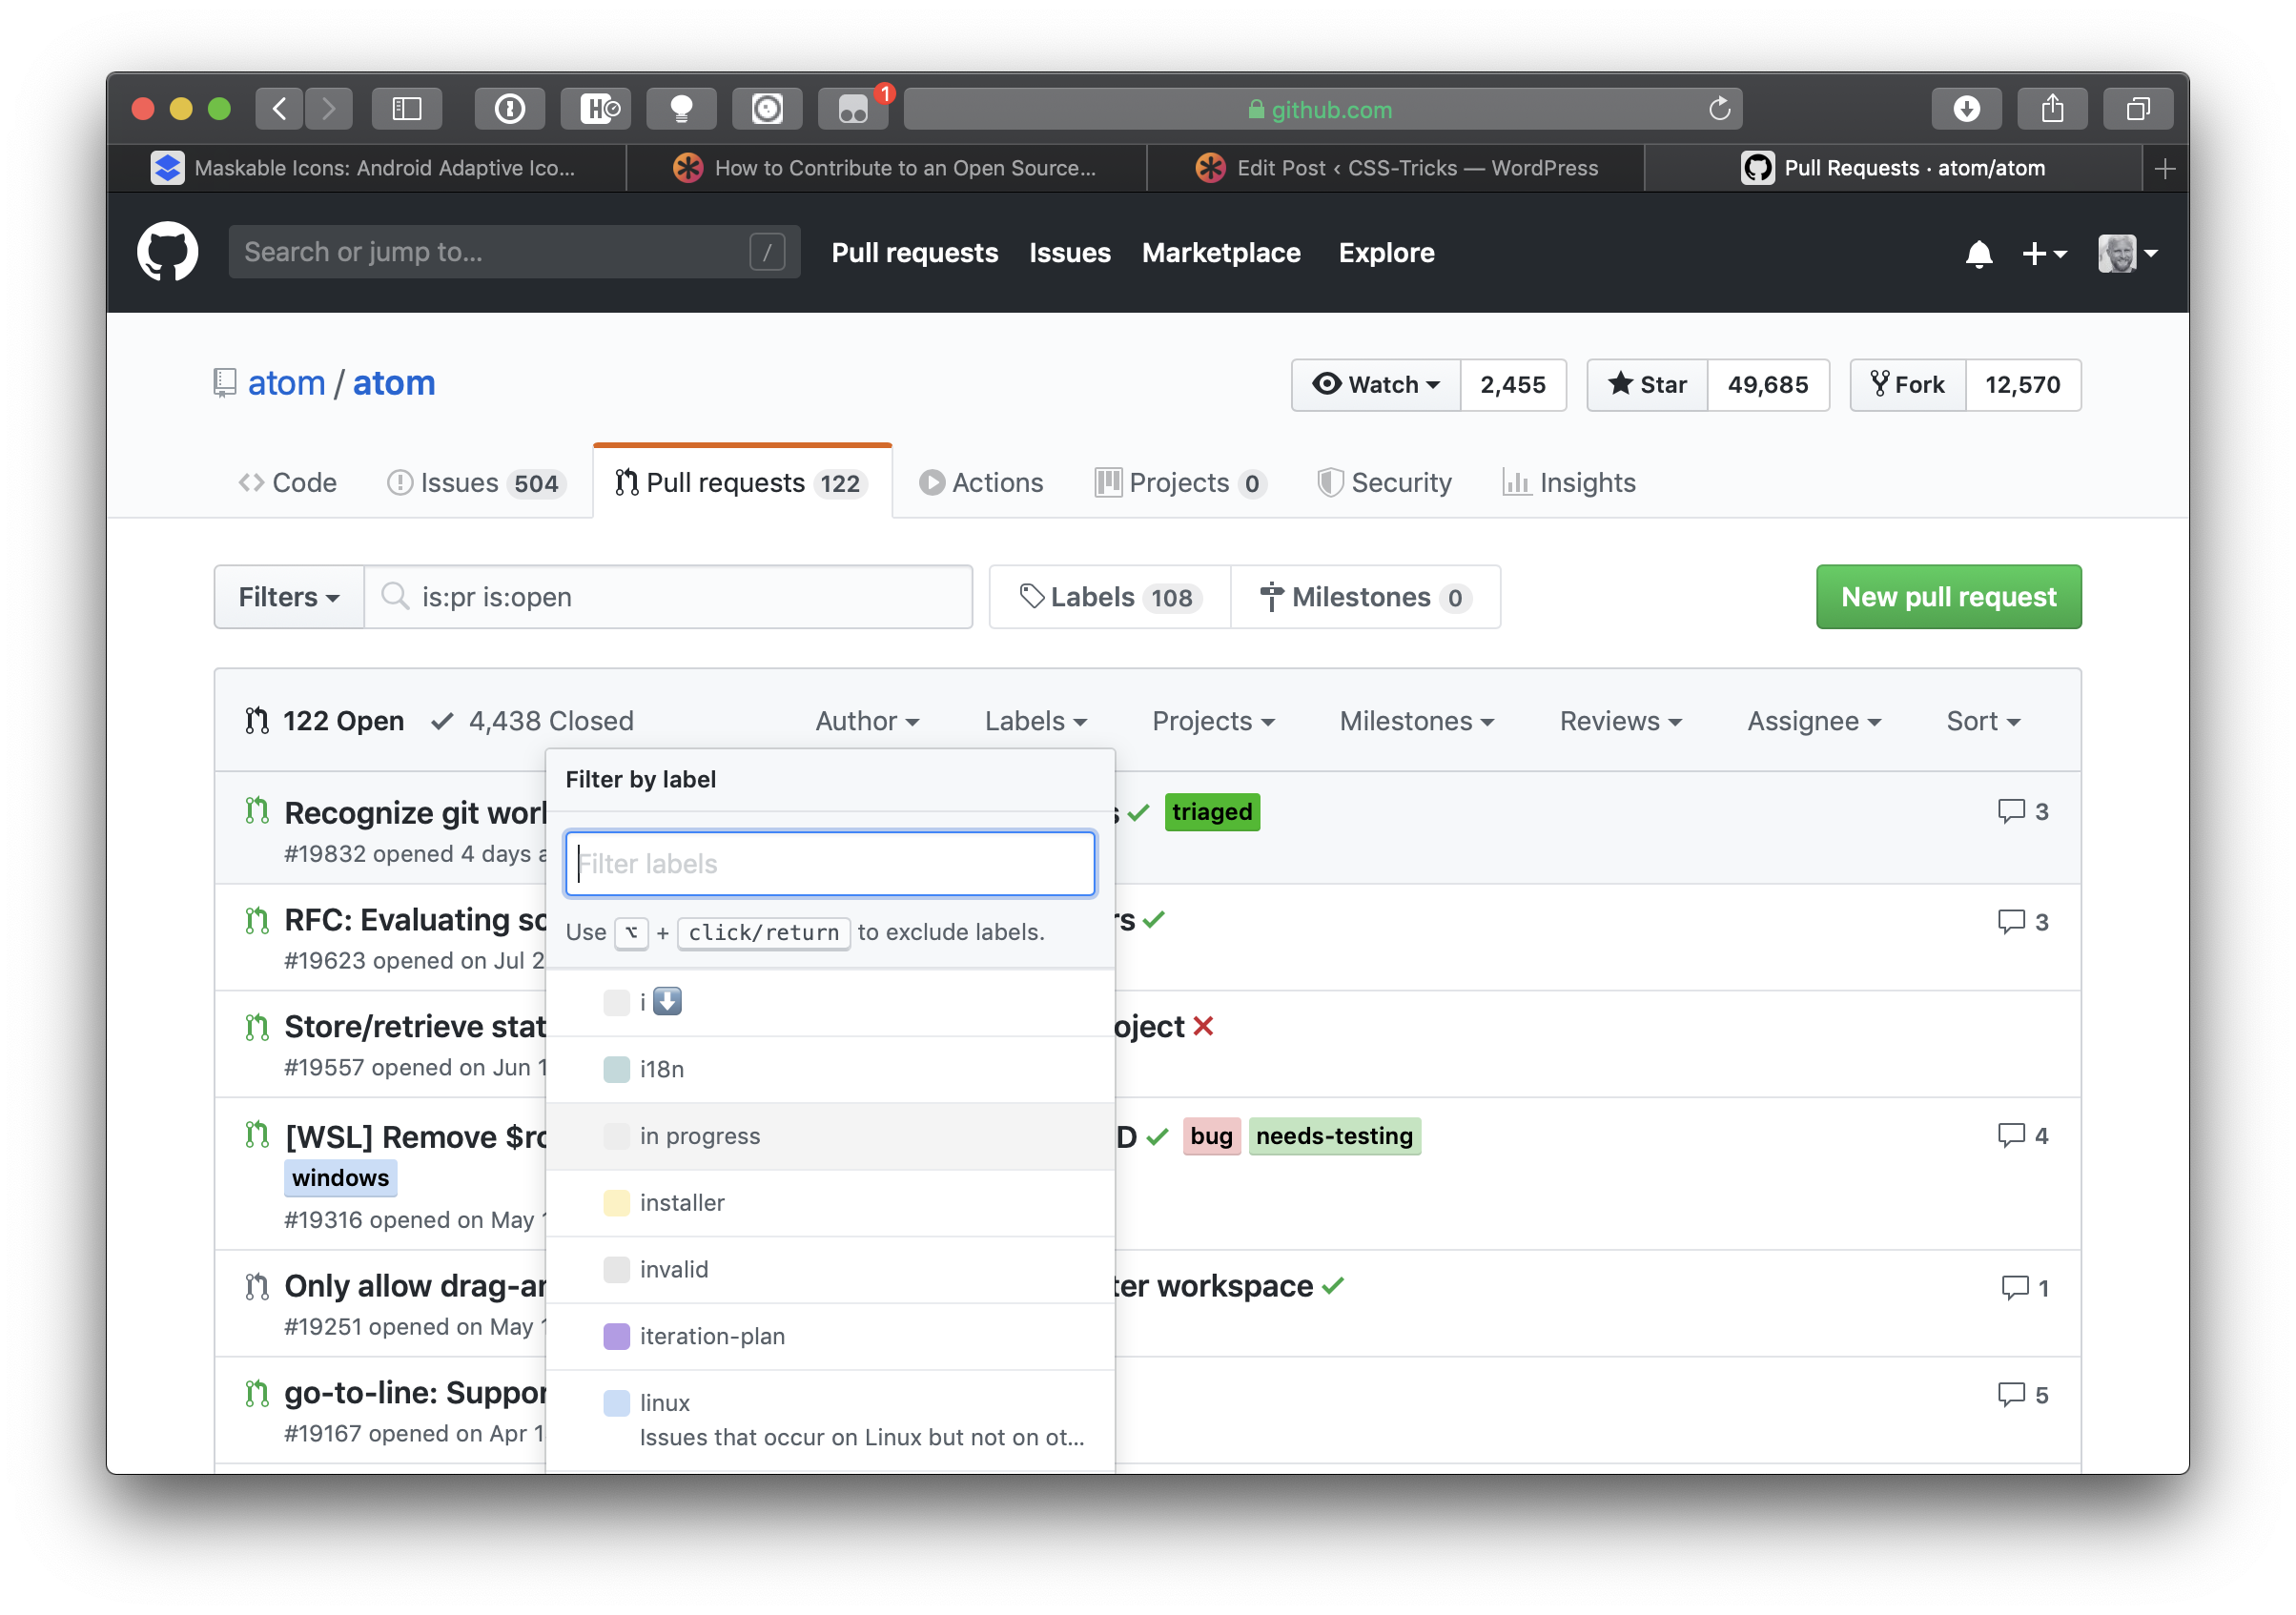
Look through the existing issues and PRs
Before adding a new issue or submitting a PR, it’s good to check what else is out there. You might find someone has already asked about the same thing, or submitted something similar. You can check in the project's search box — I usually search through issues that are both open and closed, as it’s important to know if someone already raised my concern and perhaps the maintainer decided to go in another direction. Again, it's about saving both you and the maintainer time.
Submit an issue
Submitting issues is a core part of the PR submission process. They provide an opportunity to articulate the situation, establish context around it, and provide a forum for discussion that can be attached to the PR itself.
When submitting an issue, I like to write out what my concern is and then re-read it as if I was on the receiving end. People are human — even if what you say is technically correct, you’re not likely to get buy-in for your idea if your tone is off-putting. Consider this: you may be asking for someone to do a lot of work in their spare time. If someone asks you to do work on a Saturday, are you more likely to do so if they ask respectfully with condescension? You get the picture.
When submitting an issue, make sure you give them all the details they need to get the work done. Some things you might note:
If it’s a bug, then what environment you’re seeing the problem in? Is it development or production? Perhaps somewhere else?
If it’s a feature request, then explain the problem. Sometimes framing this from the perspective of the end user in the form of user stories can be helpful, both to conceptualize the situation and abstract it from any personal feelings.
If it’s a general question, then state that up front so the maintainer can avoid spending time trying to figure out if you’re asking for a bug or a feature.
If you’d like to submit a PR to improve on the issue, mention that you’d like to do this, then ask permission to proceed (because sometimes maintainers have other items planned you may be unaware of).
Make considerations before starting work
You're probably eager to start working on your PR by this point. But first, there are still a few customary things to check off before you dig in.
Ask first
I’m a big fan of people asking in an issue if a PR makes sense before they work on one. I don’t hold it as a strict rule, but sometimes I can save them buckets of time and going in the wrong direction if we can clarify what we both want together first. It also helps others know to not implement the same thing (assuming they, too, look through open and closed PRs.
Use labels
If you do submit an issue and everyone agrees a PR is a good idea, then it’s nice for you (or the owner of the repo) to add the label in progress. You can search labels so it’s really clear to everyone you’re working on it.
Work in small chunks!
As a maintainer, it’s frustrating when someone put in a lot of work and submits a giant honking PR that does 10 different things. It’s really tough to review, and inevitably, they’re doing six things you want, and four things you don’t. Not only that, it’s usually spread out over multiple files which is difficult to untangle. I’ve definitely closed PRs with some high-quality code I would like just because it would take forever for to review and manage it. (I will communicate that this is the issue if they would like to resubmit the work as separate PRs, though.)
In my opinion, you have about 1,000% more chance of getting your PR merged and your time spent honored if you split things over multiple, smaller PRs. I love it when people submit a PR per topic. And it can be nice, not required, if each submission is a little spaced out as well to help with the cognitive overload.
Submit your PR
These are the steps I personally use to submit a PR. You can get this done other ways, of course, but I have found the following to be effective in my experiences. Also, anything in the commands that are written in ALL CAPS is information you will need to change for your use.
First off, go to the repo, and fork a copy of the project to your personal GitHub account. Clone it locally and change directory (cd) to where it's located. (I use HTTPS, but SSH is totally fine as well.)
git clone https://github.com/YOUR-USERNAME/YOUR-FORKED-REPO.git
cd into/cloned/fork-repo
Next up, add a remote upstream to the original branch. This means it will share a connection with that original branch so that you can keep in sync and pull down any updates to the project when they happen.
Now you can create a new branch and give it a name that relates to the PR topic. Note that a maintainer might have a specific naming convention in mind that is documented in the repo.
git add -A
git commit -m “ADDING IN A TACO DISPENSER”
git push origin GOOD-FORKIN-NAME
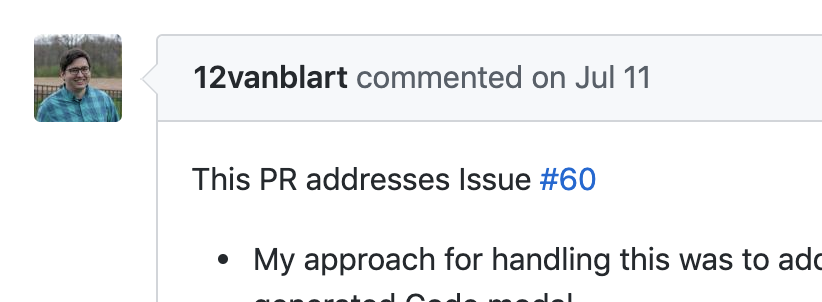
GitHub will see the new fork and prompt you to make the PR, which is a nice, helpful touch. You click the button and fill in details: what issue does it close? you can refer to them by their number and GitHub will automatically associate it:
On the PR:
In the Issue:
What are some of the things to note in the PR? These details help the maintainer understand context. These can be all the changes you made, they can be larger strategy or context.
And you’re on your way! 🎉
You may find you need to keep your fork up-to-date with the remote, and pull their changes into yours. To do so, you would run this command:
git pull upstream master
Props to Christina Solana for her Gist which I’ve used as a reference for years and years now.
Always remember: maintainers are often swamped, sacrificing nights and weekends to keep open source projects active and updated. Being respectful, both in terms of their time, and in tone, can set you up for success in contributing.
Open source can be extremely rewarding! Knowing other people are benefitting and directly using something you contributed can be a great way to give back to the community and learn.
Free stock videos are an insanely valuable resource for web designers and video editors. A sweeping landscape shot can set the scene for a website’s animated background, or nicely fill a transition in a video. But of course, most people can’t afford the equipment to record such footage.
Stock videos are a quick and easy way to find short, high quality clips when you need them. But videography isn’t cheap, so buying footage will often cost you quite a bit.
Luckily, there are sites out there that collect free videos you can use in personal and commercial projects, and we’re going to go over the features of each today. Here are a few of the best free stock footage sites you can find.
On Mixkit, you’ll find professional HD videos, all sorted and tagged so they’re easy to search for. There’s business, landscape, and lifestyle videos, alongside abstract and even animation footage. The Mixkit license has a few light stipulations, but that’s all.
There’s quite the variety of unique stock footage in this modest, but quality collection. There are a few hundred videos here, and they can be used anywhere as long as you add unique value and credit the website.
Pexels is jam packed with awesome stock videos that nobody will believe you downloaded for free. As far as the license goes, pretty much anything is allowed, so get as much of this great footage as your project requires.
Pixabay is full of diversity, and that’s no exception in their video section. You can sort by effects, categories, resolution, or tags. Many videos on Pixabay are focused around pretty aesthetics, so try it out if you need eye-catching footage. The license here is very unrestrictive.
If you’re looking for gorgeous CC0-licensed stock footage, ISO Republic is the first place to check. There’s not a ton here, but what exists would make a great addition to your project. You’ll love these videos. As a bonus, there is plenty of outstanding free stock photography here as well.
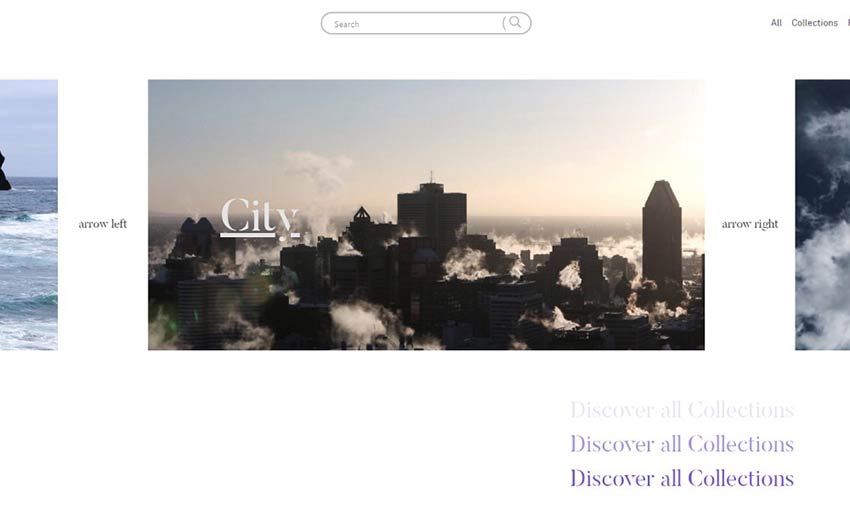
Coverr was created just for web designers who need a full screen hero video for their homepage. There’s plenty of exceptional, well-sorted footage to look through, all free to use and optimized for your website.
There’s so many HD and 4K videos to choose from here. Get lost in the collections of vivid nature- and people-focused imagery. There are absolutely no restrictions except for a 10-video redistribution limit.
Looking for stunning landscape videos to beautify your video or website? Take a look through SplitShire’s collection and see if they have what you need. Though SplitShire is a stock photography website, they’ve branched out into footage and are doing awesome at it.
With nearly 8,000 videos and more being added every day, Videvo is a great place to start in your hunt for the perfect clip. Sort by popular or recent, or check out the tags and the incredibly helpful “similar clips” on each entry. There’s a lot of licenses, so make sure to check out Licensing 101 before you download.
Stock footage, animation, After Effects templates, and plenty of nature videography in 4K and HD are waiting to be found on Videezy. Some licenses allow commercial use while others require credit, so check the licensing page before you grab up these great free videos.
Free Videos for Your Projects
There are many places to find free stock videos on the internet, and we’ve just scratched the surface. If you need footage, one of these 10 choice collections should have what you need. Supplement your full videos, or include them in your website designs.
Just make sure you always check the site license before you download free videos. Most of these are totally free for use, but some may only be used commercially or with other stipulations. Check for a CC0 license or read the terms carefully.
If everything seems right, then you’re good to start downloading some beautiful stock videos.
No matter how small or big your business is, managing its financial side can be frustrating. Thanks to technology, you can bypass that stress and have the best accounting software for small business do all the heavy lifting for you. Once you find your top accounting software among all what’s out there, you will be able to do away with Excel spreadsheets and things similar. In fact, there are a bunch of software options that give you the ability to manage payroll and handle other business-y things in just a few clicks.
Machine Learning For Front-End Developers With Tensorflow.js
Machine Learning For Front-End Developers With Tensorflow.js
Charlie Gerard
Machine learning often feels like it belongs to the realm of data scientists and Python developers. However, over the past couple of years, open-source frameworks have been created to make it more accessible in different programming languages, including JavaScript. In this article, we will use Tensorflow.js to explore the different possibilities of using machine learning in the browser through a few example projects.
What Is Machine Learning?
Before we start diving into some code, let’s talk briefly about what machine learning is as well as some core concepts and terminology.
Definition
A common definition is that it is the ability for computers to learn from data without being explicitly programmed.
If we compare it to traditional programming, it means that we let computers identify patterns in data and generate predictions without us having to tell it exactly what to look for.
Let’s take the example of fraud detection. There is no set criteria to know what makes a transaction fraudulent or not; frauds can be executed in any country, on any account, targeting any customer, at any time, and so on. It would be pretty much impossible to track all of this manually.
However, using previous data around fraudulent expenses gathered over the years, we can train a machine-learning algorithm to understand patterns in this data to generate a model that can be given any new transaction and predict the probability of it being fraud or not, without telling it exactly what to look for.
Core Concepts
To understand the following code samples, we need to cover a few common terms first.
Model
When you train a machine-learning algorithm with a dataset, the model is the output of this training process. It’s a bit like a function that takes new data as input and produces a prediction as output.
Labels And Features
Labels and features relate to the data that you feed an algorithm in the training process.
A label represents how you would classify each entry in your dataset and how you would label it. For example, if our dataset was a CSV file describing different animals, our labels could be words like “cat”, “dog” or “snake” (depending on what each animal represents).
Features on the other hand, are the characteristics of each entry in your data set. For our animals example, it could be things like “whiskers, meows”, “playful, barks”, “reptile, rampant”, and so on.
Using this, a machine-learning algorithm will be able to find some correlation between features and their label that it will use for future predictions.
Neural Networks
Neural networks are a set of machine-learning algorithms that try to mimic the way the brain works by using layers of artificial neurons.
We don’t need to go in-depth about how they work in this article, but if you want to learn more, here’s a really good video:
Now that we’ve defined a few terms commonly used in machine learning, let’s talk about what can be done using JavaScript and the Tensorflow.js framework.
Depending on the problem you are trying to solve, there might be a model already trained with a specific data set and for a specific purpose which you can leverage and import in your code.
For example, let’s say we are building a website to predict if an image is a picture of a cat. A popular image classification model is called MobileNet and is available as a pre-trained model with Tensorflow.js.
And finally, inside the script tag, we have the JavaScript code that loads the pre-trained MobileNet model and classifies the image found in the image tag. It returns an array of 3 predictions which are ordered by probability score (the first element being the best prediction).
And that’s it! This is the way you can use a pre-trained model in the browser with Tensorflow.js!
Note: If you want to have a look at what else the MobileNet model can classify, you can find a list of the different classes available on Github.
An important thing to know is that loading a pre-trained model in the browser can take some time (sometimes up to 10s) so you will probably want to preload or adapt your interface so that users are not impacted.
If you prefer using Tensorflow.js as a NPM module, you can do so by importing the module this way:
import * as mobilenet from '@tensorflow-models/mobilenet';
Feel free to play around with this example on CodeSandbox.
Now that we’ve seen how to use a pre-trained model, let’s look at the second feature available: transfer learning.
2. Transfer Learning
Transfer learning is the ability to combine a pre-trained model with custom training data. What this means is that you can leverage the functionality of a model and add your own samples without having to create everything from scratch.
For example, an algorithm has been trained with thousands of images to create an image classification model, and instead of creating your own, transfer learning allows you to combine new custom image samples with the pre-trained model to create a new image classifier. This feature makes it really fast and easy to have a more customized classifier.
To provide an example of what this would look like in code, let’s repurpose our previous example and modify it so we can classify new images.
Note: The end result is the experiment below that you can try live here.
Below are a few code samples of the most important part of this setup, but if you need to have a look at the whole code, you can find it on this CodeSandbox.
We still need to start by importing Tensorflow.js and MobileNet, but this time we also need to add a KNN (k-nearest neighbor) classifier:
The reason why we need a classifier is because (instead of only using the MobileNet module) we’re adding custom samples it has never seen before, so the KNN classifier will allow us to combine everything together and run predictions on the data combined.
Then, we can replace the image of the cat with a video tag to use images from the camera feed.
Now, let’s move to the JavaScript file where we’re going to start by setting up a few important variables:
// Number of classes to classify
const NUM_CLASSES = 2;
// Labels for our classes
const classes = ["Left", "Right"];
// Webcam Image size. Must be 227.
const IMAGE_SIZE = 227;
// K value for KNN
const TOPK = 10;

const video = document.getElementById("webcam");
In this particular example, we want to be able to classify the webcam input between our head tilting to the left or the right, so we need two classes labeled left and right.
The image size set to 227 is the size of the video element in pixels. Based on the Tensorflow.js examples, this value needs to be set to 227 to match the format of the data the MobileNet model was trained with. For it to be able to classify our new data, the latter needs to fit the same format.
If you really need it to be larger, it is possible but you will have to transform and resize the data before feeding it to the KNN classifier.
Then, we’re setting the value of K to 10. The K value in the KNN algorithm is important because it represents the number of instances that we take into account when determining the class of our new input.
In this case, the value of 10 means that, when predicting the label for some new data, we will look at the 10 nearest neighbors from the training data to determine how to classify our new input.
Finally, we’re getting the video element. For the logic, let’s start by loading the model and classifier:
Following that, let’s set up some button events to record our sample data:
setupButtonEvents() {
    for (let i = 0; i < NUM_CLASSES; i++) {
      let button = document.getElementsByClassName("button")[i];

      button.onmousedown = () => {
        this.training = i;
        this.recordSamples = true;
      };
      button.onmouseup = () => (this.training = -1);
    }
  }
Let’s write our function that will take the webcam images samples, reformat them and combine them with the MobileNet module:
// Get image data from video element
const image = tf.browser.fromPixels(video);

let logits;
// 'conv_preds' is the logits activation of MobileNet.
const infer = () => this.mobilenetModule.infer(image, "conv_preds");

// Train class if one of the buttons is held down
if (this.training != -1) {
  logits = infer();

  // Add current image to classifier
  this.knn.addExample(logits, this.training);
}
And finally, once we gathered some webcam images, we can test our predictions with the following code:
And finally, you can dispose of the webcam data as we don’t need it anymore:
// Dispose image when done
image.dispose();
if (logits != null) {
  logits.dispose();
}
Once again, if you want to have a look at the full code, you can find it in the CodeSandbox mentioned earlier.
3. Training A Model In The Browser
The last feature is to define, train and run a model entirely in the browser. To illustrate this, we’re going to build the classic example of recognizing Irises.
For this, we’ll create a neural network that can classify Irises in three categories: Setosa, Virginica, and Versicolor, based on an open-source dataset.
Before we start, here’s a link to the live demo and here’s the CodeSandbox if you want to play around with the full code.
At the core of every machine learning project is a dataset. One of the first step we need to undertake is to split this dataset into a training set and a test set.
The reason for this is that we’re going to use our training set to train our algorithm and our test set to check the accuracy of our predictions, to validate if our model is ready to be used or needs to be tweaked.
Note: To make it easier, I already split the training set and test set into two JSON files you can find in the CodeSanbox.
The training set contains 130 items and the test set 14. If you have a look at what this data looks like you’ll see something like this:
What we can see is four different features for the length and width of the sepal and petal, as well as a label for the species.
To be able to use this with Tensorflow.js, we need to shape this data into a format that the framework will understand, in this case, for the training data, it will be [130, 4] for 130 samples with four features per iris.
In the code sample above, we start by instantiating a sequential model, add an input and output layer.
The parameters you can see used inside (inputShape, activation, and units) are out of the scope of this post as they can vary depending on the model you are creating, the type of data used, and so on.
Once our model is ready, we can train it with our data:
async function train_data(){
    for(let i=0;i<15;i++){
      const res = await model.fit(trainingData, outputData,{epochs: 40});
    }
}

async function main() {
  await train_data();
  model.predict(testSet).print();
}
If this works well, you can start replacing the test data with custom user inputs.
Once we call our main function, the output of the prediction will look like one of these three options:
The prediction returns an array of three numbers representing the probability of the data belonging to one of the three classes. The number closest to 1 is the highest prediction.
For example, if the output of the classification is [0.0002, 0.9494, 0.0503], the second element of the array is the highest, so the model predicted that the new input is likely to be a Virginica.
And that’s it for a simple neural network in Tensorflow.js!
We only talked about a small dataset of Irises but if you want to move on to larger datasets or working with images, the steps will be the same:
Gathering the data;
Splitting between training and testing set;
Reformatting the data so Tensorflow.js can understand it;
Picking your algorithm;
Fitting the data;
Predicting.
If you want to save the model created to be able to load it in another application and predict new data, you can do so with the following line:
await model.save('file:///path/to/my-model'); // in Node.js
Note: For more options on how to save a model, have a look at this resource.
Limits
That’s it! We’ve just covered the three main features currently available using Tensorflow.js!
Before we finish, I think it is important to briefly mention some of the limits of using machine learning in the frontend.
1. Performance
Importing a pre-trained model from an external source can have a performance impact on your application. Some objects detection model, for example, are more than 10MB, which is significantly going to slow down your website. Make sure to think about your user experience and optimize the loading of your assets to improve your perceived performance.
2. Quality Of The Input Data
If you build a model from scratch, you’re going to have to gather your own data or find some open-source dataset.
Before doing any kind of data processing or trying different algorithms, make sure to check the quality of your input data. For example, if you are trying to build a sentiment analysis model to recognize emotions in pieces of text, make sure that the data you are using to train your model is accurate and diverse. If the quality of the data used is low, the output of your training will be useless.
3. Liability
Using an open-source pre-trained model can be very fast and effortless. However, it also means that you don’t always know how it was generated, what the dataset was made of, or even which algorithm was used. Some models are called “black boxes”, meaning that you don’t really know how they predicted a certain output.
Depending on what you are trying to build, this can be a problem. For example, if you are using a machine-learning model to help detect the probability of someone having cancer based on scan images, in case of false negative (the model predicted that a person didn’t have cancer when they actually did), there could be some real legal liability and you would have to be able to explain why the model made a certain prediction.
Summary
In conclusion, using JavaScript and frameworks like Tensorflow.js is a great way to get started and learn more about machine learning. Even though a production-ready application should probably be built in a language like Python, JavaScript makes it really accessible for developers to play around with the different features and get a better understanding of the fundamental concepts before eventually moving on and investing time into learning another language.
In this tutorial, we’ve only covered what was possible using Tensorflow.js, however, the ecosystem of other libraries and tools is growing. More specified frameworks are also available, allowing you to explore using machine learning with other domains such as music with Magenta.js, or predicting user navigation on a website using guess.js!
As tools get more performant, the possibilities of building machine learning-enabled applications in JavaScript are likely to be more and more exciting, and now is a good time to learn more about it, as the community is putting effort into making it accessible.
Further Resources
If you are interested in learning more, here are a few resources:
Do you want to create an auto loan or car payment calculator in WordPress?
If you run a car dealership, then a loan payment calculator can help you get more sales. Visitors can also use the calculator to get an estimate for their monthly loan payments, compare offers, and find the best deals on their car purchases.
In this article, we will show you how to easily create an auto loan car payment calculator for your WordPress website.
What Is a Car / Auto Loan Payment Calculator?
A car or auto loan payment calculator allows users to get estimates for a monthly loan payment, check the amortization schedule, and calculate the total cost of a loan.
It enables visitors to easily perform a complete auto loan calculation with an account of sales tax, dealer fees, trade-in value, interest rate, length of the loan, and more.
An auto loan payment calculator is especially useful for car dealership websites and auto loan financing businesses.
Adding a loan calculator on your WordPress website helps both you and potential customers. Visitors can simply type in their information and see the different financing plans available.
This means they can find the plan that best suits their budget without leaving your website, which will increase engagement and reduce your bounce rate. You can also collect user email addresses through the calculator, making it a great tool for generating leads.
With that being said, let’s see how you can add a car or auto loan payment calculator to your WordPress blog or website. We show you 2 methods, so you can click the links below to jump ahead to any section:
Method 1: Create a Car Payment Calculator Using WPForms
In the past, creating an auto loan car payment calculator would require you to program complex mathematical calculations or hire a WordPress developer.
Luckily, it’s now possible to build an auto loan calculator without writing any code using WPForms. This popular WordPress contact form plugin offers an all-in-one form builder plus 1300+ ready-made templates.
WPForms offers a powerful Calculations addon that lets you create different calculator forms for your website. It comes with pre-built calculator templates and a drag-and-drop form builder, so you get flexibility and control over your form’s appearance.
Setting Up WPForms on Your WordPress Site
For this tutorial, we will use the WPForms Pro version because it includes the Calculations addon. There is also a WPForms Lite version available for free.
First, you will need to install and activate the WPForms plugin. If you need help, then please see our guide on how to install a WordPress plugin.
Upon activation, you can go to WPForms » Settings from the WordPress dashboard and enter the license key. You can find the license key in your WPForms account area.
Next, you will need to install and activate the Calculations addon in WPForms.
Simply go to WPForms » Addons from the WordPress admin area and then navigate to the Calculations Addon.
From here, click the ‘Install Addon’ button, and the addon will automatically install and activate.
Next, you can create a new form with an auto loan/car payment calculator.
Creating an Auto Loan / Car Payment Calculator Form
To start, you will need to head to WPForms » Add New from the WordPress dashboard.
On the next screen, you will see different form templates offered by WPForms.
To get started, you can use the search feature in WPForms and find the ‘Car Payment Calculator Form’ template. Then click the ‘Use Template’ button to customize the form.
After that, you will see your form template in the WPForms drag-and-drop form builder.
The default template offers a multipage form with all the necessary fields to calculate car payments.
For instance, you will see the field for ‘Car price’, where you can enter the total value of the car. After that, there are fields to set the initial deposit and down payment percentage.
The template also lets you adjust the payment duration, where you can use the slider to change the number of years. Aside from that, the template lets you set the annual interest rate on your payments.
The template also asks if you are trading your car. There are fields for entering the loan amount, total interest paid, and more.
Using the WPForms form builder, you can edit the form template, remove existing fields, and add different form fields. Simply drag a new field from the menu on the left and drop it onto the template.
For example, you can add standard fields like checkboxes, dropdown menus, and numbers. Or use fancy fields like phone number, address, file upload, and more.
Each field in the template can be further customized. Simply select a field you’d like to edit.
For example, if you click on the Car price field in the template, then you will see more options in the menu on the left. You can change the name of the form field and add a description.
There are more options if you switch to the ‘Advanced’ tab.
You can change the field size, add placeholder text, enter a CSS class, enable calculations, and more.
WPForms also lets you edit the formula for the calculator fields.
Simply select a field, and you will see a ‘Formula’ option in the menu on the left. Here, you can change make changes to the calculations and click on the ‘Cheatsheet’ if you need more help.
Next, you can go to the ‘Settings’ tab from the menu on the left.
Under ‘General’ settings, you will see options to change the form name, add a form description, edit the submit button text, and more.
After that, you can view the ‘Spam Protection and Security’ settings.
Here, WPForms lets you enable anti-spam protection, store spam entries in the database, enable country and keyword filters, set up CAPTCHA, and more.
Next, you can go to the ‘Notifications’ settings tab.
Here, you’ll be able to edit the settings for email notifications that you and your users will receive when submitting a form.
Lastly, you can go to the Confirmations settings for your auto loan calculator form.
WPForms lets you show a message, show a page, or redirect users to a URL when they submit the form.
After making these changes, don’t forget to save your settings.
Add the Auto Loan / Car Payment Calculator to WordPress
Next, you can add the auto loan/car payment calculator form to your WordPress site.
Simply click the ‘Embed’ button at the top of the form builder.
You will now see a popup window where you can embed the form into an existing page or create a new one.
For this tutorial, we will select the ‘Create New Page’ option.
Next, you’ll need to enter a name for the new page.
Once that’s done, simply click the ‘Let’s Go!’ button.
As an alternative, you can also add a WPForms block in the content editor.
From here, simply choose your auto loan calculator form from the dropdown menu.
Next, you should see a preview of your car payment calculator form in the content editor.
Once you are happy with its appearance, simply publish or update your page. After that, you can visit your website to see the auto loan calculator in action.
Method 2: Create an Auto Loan Calculator Using Formidable Forms
Another way of creating auto loan/car payment calculators for your WordPress site is by using Formidable Forms. This is the best solution if you are looking to make a more advanced and complex calculator for your website.
Formidable Forms comes with a powerful car payment calculator template that lets you build an auto loan calculator with just a few clicks.
The car payment template has the loan calculation formula already set up, so you don’t need to program any complex mathematical equations or use additional WordPress plugins.
Note: To use the car payment feature, you will need to buy a Formidable Forms Business plan.
Install Formidable Forms on Your WordPress Site
The first thing you need to do is to install and activate both the Formidable Forms Lite and Formidable Forms premium plugins. The free plugin has limited features, but Formidable Forms Pro uses it as the base for its more advanced features.
Upon activation, you can go to Formidable » Global Settings in the WordPress dashboard.
Here, you can click on ‘Connect an Account’ and follow the instructions to connect WordPress to your Formidable Forms account.
You can also select ‘Click to enter a license key manually’ and then paste your license key into the field.
You’ll find the license key by logging in to your account on the Formidable Forms website.
After entering the information, click on the ‘Save License’ button.
Build an Auto Loan and Car Payment Calculator in WordPress
Now that you have successfully set up Formidable Forms, you are ready to build a car payment calculator form.
To start, simply go to Formidable » Forms and then click on the ‘Add New’ button.
Next, you’ll need to select a form template.
You’ll find the Car Payment Calculator template by clicking on the ‘Calculator’ section.
This will open the template in the Formidable Forms editor.
The default template offers fields like ‘Price of Car’ and ‘Sales Tax’. There are sliders for adjusting the annual interest rate and length of loan (in months). Besides that, there are fields to select whether you are trading in a car and to enter the trade-in value.
At this point, you may want to customize the form to match your needs.
To change a field’s label, default value, or placeholder text, simply click on that field.
You can then use the ‘Field Options’ settings in the left-hand menu.
If you want to customize the ‘Loan Calculation’ or ‘Monthly Payment’ fields, then be careful not to change the settings under ‘Advanced’ as they include the calculation formula.
If you change these settings, then it might break the entire form.
Once you’ve finished customizing the fields, you can review the form’s settings by clicking on the ‘Settings’ tab.
First, you can change the form’s title and description in the ‘General’ tab.
You can also change what will happen when a visitor submits the form by selecting ‘Actions & Notifications’ in the left-hand menu.
If you click to expand the ‘Confirmation’ section, then you’ll see the message that Formidable Forms shows to visitors by default.
To change this, simply type your own message into the text editor.
If you prefer, then you can redirect visitors to a page after submitting the form. For example, you might create a custom ‘thank you’ page using a drag-and-drop WordPress page builder such as SeedProd.
To set up a redirect, click on the ‘Redirect to URL’ tab. You can then type or paste a link into the ‘Redirect URL’ field.
Another option is to show content from another WordPress page by selecting the ‘Show Page Content’ tab.
You can then open the ‘Select a Page’ dropdown and choose a page from the list.
After that, click to expand the ‘Email Notification’ section.
Here, you can see the message that Formidable Forms will send to your WordPress admin.
You can add more email addresses, change the body text, add an email subject, and more.
After that, you may want to add more actions that Formidable Forms will perform when a visitor submits the form. To do that, simply scroll to the top of the page and click on any of the actions.
There are more tabs and settings in the left-hand menu that you can look at, but this is enough to create a car payment calculator.
When you are happy with how the form is set up, click on the ‘Update’ button. After a few moments, you’ll see a ‘successfully updated’ message.
Adding the Car Payment Calculator on Your WordPress Site
Now you’ve created a car payment calculator, it’s time to add it to your online store or WordPress website. Simply create a new page or open an existing page where you want to show the calculator.
You can then click on the ‘+’ icon and type in ‘Formidable Forms.’ When the right block appears, give it a click to add it to the page.
After that, simply open the ‘Select a form’ dropdown and choose the payment calculator you created earlier.
WordPress will now load the form automatically.
To make the calculator live, simply click on the ‘Update’ or ‘Publish’ button.
Now, if you visit your site, then you will see the car payment calculator.
We hope this article helped you learn how to create an auto loan car payment calculator in WordPress. You may also want to see our guide on how to sell car parts online and our expert picks of the best email marketing services for small businesses.
If you liked this article, then please subscribe to our YouTube Channel for WordPress video tutorials. You can also find us on Twitter and Facebook.
If you’re aware of recruitment rules and on-going available positions in different companies and sectors around your area or even country then a great way to help users and also earn tons of money is...


