Retention is the act of getting your members to use your product in such a way that it becomes habitual. That’s why we call them users at this stage. if you retain them then they are literally using your product often. If you are a SaaS company then this means lowering your churn. If you are an ecommerce site then this means helping people become repeat buyers. If you are a content company then this means getting people to consume your content on a regular basis. You get the point. Many growth hackers actually consider retention the most important aspect of the funnel. There are a number of reasons for this:
If your retention is low then all of the ingenious growth hacks that you apply to your product are basically meaningless. Your members will leave your product at the 11th hour (the very end of your funnel). Leaky buckets don’t need more water. They need their holes fixed.
By the time someone has become an activated member then they’ve shown themselves to be extremely interested in your product. They are the most qualified people you have to work with. If you don’t focus on retaining them then you are neglecting the most high quality leads that you have.
Since all the stages of the funnel work together, sometimes retention can affect the bottom line more easily than getting new visitors.
Increasing your retention by 20% is the same as increasing your overall traffic by 20%. A 20% increase in traffic might cost more in time and tangible resources than increasing retention by 20%.
An increase in retention increases the lifetime value of the customer (LTV). This opens up the potential to try a number of push methods at the top of the funnel that might not have been possible before. Retention benefits the funnel as a whole more than we sometimes realize.
People that have been retained for long periods of time are more likely to evangelize for your product. If your product is built into their weekly routine then they are going to talk to their friends about it, take it into the workplace, and generally be an advocate for you.
Retention, like anything, is a skill set that can be learned. Here are the tactics that we recommend trying as you focus on retention:
1. Staged Traffic
When you look at the growth hacker funnel it might seem as if you should focus on getting traffic first, then activating members, then retaining users. However, in reality this is not the smartest way to work through the funnel if you want to make the most of your efforts. It’s better if you put some effort into getting traffic, then use those visitors to test the rest of your funnel before you decide to put more of your resources into getting traffic.
Imagine that you have a growth budget of $4,000. Let’s say you spend all of it in a couple weeks. You spend some on the production of a whitepaper for inbound leads (1k), you spend some on Google ads (2k), and some on a contest (1k). You probably feel good about what you’ve done, but what if you realize after a month or so that even though you effectively got traffic that your activation and retention methods were totally broken. You spent your budget and have very little to show for it.
It would be smarter to try a single tactic and use only some of your resources just so that you can track the progress of your traffic through your funnel. Then you can fix the obvious holes that were uncovered using this test traffic. Now when you spend more of your resources on traffic your product will be better optimized to capitalize on it. In essence, you test your funnel, including retention, when the stakes are low, so that when it’s time to accelerate growth you’ve done the requisite work that will allow your product to handle it. Early on, stage your traffic in order to master retention.
2. Speed to Aha
People come to your product and give you a chance because of the promises you’ve made to them. You’re going to save them X, provide them Y, and make Z much more simple. The moment that a visitor or member actually feels the truth of your promise, and sees the obvious benefit of your product, that’s what we call the “aha moment”. If you want to retain users then part of your task is to get them to the aha moment as quick as humanly possible.
When someone is new to your product then they are open to your promises. They are excited about the possibility that you will deliver on them. If you waste time getting them to the aha moment then they will not stay around. Here are some questions to ask yourself:
Do you know what the aha moment for your product is? What are the actions which a member can take on your product which are leading indicators of their retention rate?
If it currently takes two days to get someone to the aha moment, can you make it two hours?
If you currently ask them to create an account to see the benefit of your product, is there a way to show them a sandboxed version of your product that allows them to have an aha moment before signing up?
Are there features which you promote in your product which don’t lead people to an aha moment, thereby cluttering your product and lowering the chances they will ever get to the aha moment?
Is there an email you can send to a new user which outlines exactly what the aha moment is? Can you give them a clear call to action to have that kind of moment?
Twitter realized that after you followed a certain number of people that your retention rate would increase drastically. So guess what they did? Yep, now they help you follow people as a part of the signup process. Retention is built into their registration flow because they knew the speed to aha matters.
3. Don’t Fear Email
Engineers and product purists have a hard understanding email. They actually think email is universally unwanted, and that most of it is borderline spam. This is just patently false. People opt-in to receive emails, and they opt-out when they no longer want them. Let people make their own decisions about the email they want or don’t want, and don’t preemptively decide for them, handicapping your product in the process. Email is a massively useful tactic for retaining users, and those who ignore this are at an instant disadvantage. There are a number of different kinds of emails that your product should send, and they each have their own purpose.
Drip Campaigns
A drip campaign is when you send people prewritten emails at preselected intervals. A new member might get an email on day 1, day 3, day 7, day 14, and day 21. You can use a drip campaign to introduce them to your product, share testimonials, give them case studies or other inspirational reasons to use your product, and many other things. A drip campaign burns your product into people’s minds when they are most impressionable, right after they’ve signed up. Every email sent is a chance to bring them back into your product and retain them. Fools ignore drip campaigns.
Event Based Notifications
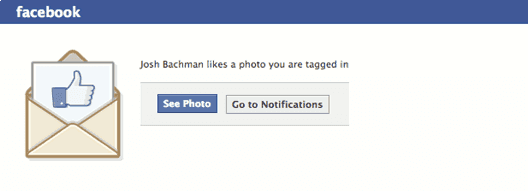
Another category of emails are those which are based on specific event triggers. We are all familiar with these because of Facebook. Every time someone does anything which is remotely related to us on their social network then we get an email notifying us about it. Facebook has become very clever with their event based emails, and one of the things they do is force you to click through to their website to get the most out of their emails. They tell me that someone liked a photo I was in, but I have to click a call to action to see the photo. This is smart because once I’m back on their site then I’m sucked into the Facebook world again. What actions are people already taking in your product that could also warrant an email?
General Updates
The third kind of email is a general update. These are emails that update people about new product features, new staff additions, and other kinds of things that wouldn’t make sense in a drip campaign, but aren’t tied to specific events either. People love to see how other people work (it’s a weird obsession, I know), so use these emails to also give people a behind the scenes view of your company. Show them photos of your new workspace. Show them an image of your team next to the company logo. If people feel like they know you then they will be more likely to be retained by you.
4. Alerts and Notifications
If you are building a mobile app then in addition to email you have another avenue available to get people back into your product. You can also use alerts and notifications to help retain users. Are you currently using push notifications within your mobile app? Are you currently using badges to alert people to new features, or new updates, or anything else? The same hangup that some people have with email also carries over into alerts and notifications. Remember, people can turn off alerts and notifications within their settings. Let people manage their own life, and send them relevant updates.
5. Exit Interviews
Talking directly to customers can be very difficult. People aren’t afraid to tell you the truth, and the truth can hurt your ego. Well, get over it, because one of the best ways to learn is by dialoguing with your members. Recently, we’ve heard a lot in the startup world about customer development (the process of talking to customers early), but there is another kind of communication with customers that can be very beneficial as well, and that’s an exit interview.
When people cancel your service, or go long periods of time being inactive, or generally show themselves to not be retained, then you have an opportunity to learn from them. I would recommend emailing them and asking them the worst thing about your product that made them cancel (or whatever the appropriate verbiage is for your situation). Just cut to the chase and ask them what sucks the most. Have thick skin. You can use the responses of this exit interview to inform the product roadmap, and thereby increase future retention.
If you want to ask people to fill out a full survey at this point you can try it, but think about the situation first. They’ve already walked away from you. They probably won’t give you 10 more minutes of their time. They might shoot you back a quick response if you send them a short, one sentence email. Be wise about how much you ask for at this point.
An exit interview like this can also be a chance to bring them back into your product. You could offer them an exclusive discount. You could give them the option of choosing a less expensive package that isn’t advertised during signup. You’ve already lost them, so you might as well try something to bring them back.
6. The Red Carpet
One way to keep people from leaving your product is to roll out the red carpet for your most engaged users. Exit interviews are about getting the most out of a bad situation, but the red carpet is about avoiding a bad situation. Here some ways that you can give the red carpet treatment to your best users:
Send 100 shirts to your first 100 customers.
Give your best users a shout out in an email newsletter.
Keep a Twitter list of your best users and retweet them often.
Give your VIP users access to exclusive content.
Have a drawing for a free trip to a relevant conference, but only power users can enter.
Every product is different, but the point is to do something periodically that makes your primary users feel appreciated. Not only will this help prevent them from churning, but when someone feels like the center of attention, or unique, or important, then they will definitely share the experience on social networks and other places. Give your best users yet another reason to advertise for you by giving them a treat every once in awhile.
7. Increase Value
At the heart of any product is the value it provides. This means that keeping one eye on the value of your product is always going to help retention. Just because someone found value in your product on day 1 doesn’t mean they will necessarily find value in it on day 100. You have to always stay ahead of the value curve if you want to retain users. Here are a few generic ways to provide value:
Add Features
If your product is lacking important features then adding them might lead to better retention. If two out of every three people tell you the same thing during the exit interview, and it pertains to something that you don’t currently provide, then it might make sense to just give them what they want. This isn’t about feature creep, it’s about giving people what they actually need to hang around as retained users.
Subtract Features
It may seem odd to now discuss taking away features, but sometimes that’s also the way to increase value. Features that aren’t useful (or aren’t used), only serve one purpose. They keep people from finding out what actually is awesome about your product. People don’t stay around because of the number of features you have. They stay around because you have the right features that provide them value.
8. Community Building
A product is good, but a movement is better. A startup is good, but a family is better. Are there things you can do to actually make people feel like they are a part of something? This is community building. People who belong to something stay longer than people who subscribe to something. Here are some ways that you can build community around your product:
Customer Support
Great customer support can be the difference in a life long customer and someone who spreads the news of how horrible you are. We may not all be Zappos, but we can still up our game to the point that people feel like they belong to a community and they are not bothering us with their support requests.
Documentation
If your product needs documentation then providing it in the best possible way is actually a service to your community. Besides, if people don’t have the needed documentation to install or use your product then you’re not going to retain them.
Social Features
Is there a way that you can let your users interact with each other within your product. One of the best ways to retain users is by providing a way for them to connect to others. The other people may be the reason they stay around, even though they might have left if is was just about your product.
9. Make Them Happy
All retention comes down to one thing: happiness. If people are happy they will become habitual users. If people are unhappy then you won’t retain them. Don’t overthink retention. Just make people happy with your product.
The ability to use the product itself to get new visitors is one of the most exciting aspects of growth hacking. Pulling visitors into the top of your funnel is good, and so is pushing them in, but there is something magical about using the product itself to drive traffic. When done well, it can have a compounding effect which cannot be replicated with push and pull methods alone.
For instance, if you utilize the pull method of creating an infographic then you can expect to get traffic, but the inbound visitors to that infographic will decrease each day and eventually level out at a relatively low number. Compare that with some of the product tactics listed in this chapter. It’s possible, using the product itself, that each time someone comes to your site they bring their own network of relationships into your funnel as well. This is where the idea of viral loops come into play. If you are able to use a product tactic in such a way that for every visitor that enters your product, they bring along more than one other person into your product, then you’ve created a viral coefficient of over 1 (sometimes referred to as K). You’ve achieved exponential growth. You’ve gone viral.
However, I need to caution you at this point. Most products don’t go viral. If you are trying to growth hack a B2B enterprise product then I highly doubt that you will have a viral coefficient anywhere near 1. Not because you’re doing something wrong, but because it’s just hard to use these tactics in certain markets. Even if you have a consumer facing product virality is still extremely difficult.
So how should you view these tactics? If it really is that hard to get a K factor of 1+ then should you just scrap the product as a strategy for getting visitors? Absolutely not. Any K factor above 0 will positively impact all of your other marketing efforts, even if it never approaches the illustrious 1+. Let me explain.
If you have a K of .5, then this essentially means that for every one new visitor to your product they bring half a person into your funnel. 10 new visitors actually becomes 15. This isn’t virality because it doesn’t keep going up and to the right exponentially, but you’re still bringing new people in that wouldn’t have seen your product. Consider the pull method of creating an infographic in this light. If you bring 500 people into your product this month because of an infographic then this actually becomes 750 people with a K of .5. You’ve amplified a pull tactic by using a product tactic. That’s how to think about product tactics. They amplify anything that comes into your funnel.
A K factor of .5 also means that if you’re using the push tactic of purchasing ads then you can spend less to get a certain number of visitors because every 10 ad clicks becomes 15 visitors. Saving money is obviously a good thing, but this also allows you to pay more per click, and possibly outbid competitors. Remember what we said in the last chapter. Ads are just a business model competition and your product tactics, which amplify your product activity, strengthen the efficiency of your business model.
Network Invitations
We now live in a world where many people have already compiled their social networks in various places. We have a group of friends on Facebook. We follow people on Twitter. We are connected to business relationships on LinkedIn. We have a list of email addresses in Gmail. We have the phone numbers of friends and family in our mobile phones. The first product tactic that we’ll discuss for getting visitors hinges on our ability to use pre-existing, pre-defined, networks of relationships to our advantage.
Phone Contacts
If you are building a mobile app then you are basically a few clicks away from permission to message their entire phone book about your app. We don’t usually think of a phone book as a social network, but it might be our most intimate network of relationships. Umano, a new service that provides the ability to listen to popular online articles, utilizes this tactic. They prompt you to share with friends after using their service a couple of times, or you can do so from the settings menu (below). Notice how they preselect everyone for you, and you have to either manually deselect people or “unselect all.” This is a common practice for many of the network invitation tactics. It is also worth noting that you can call or text with access to a phone number, so this gives you a few options on how to message people once you’ve gained permission. There might also be email addresses associated with a phone number that you can also access.
Email Contacts
Another network which people have already developed, that we can use to our advantage, is their email contacts. This was much more popular a few years ago, but variations of it are still possible. LinkedIn allowed you to import your email addresses, which they would subsequently message, and this jump started their initial traffic.
Social Contracts
Besides phone books and email contacts, the third kind of network that we can leverage is social contacts. Twitter, Facebook, LinkedIn, Instagram, Pinterest, and more, are all networks where we’ve created a social graph. We have existing relationships which can be invited to a new product. It’s difficult to target every social network because people probably won’t give you access to all of them, but one can be enough. Focus also helps you make technical decisions about your own product. If you know that you are going to use Facebook as the primary social network for inviting new users into your product then this might cause you to use Facebook Connect as your product login. This means that it will be fewer clicks on the end user, and less friction, when you ask them to invite their Facebook friends later. Below is the example from the Facebook developer documentation of what a friend invitation screen looks like.
Social Sharing
Social sharing, as defined here, is not about explicitly inviting people into your product via their established connections or friends. This tactic is more about allowing anyone to talk about your product on their social network for whoever may be reading it. For instance, instead of asking someone to invite their Facebook friends to use your product, you instead allow them to easily post something to their Facebook feed about your product. If they have a public profile then this can be seen by anyone, not only their friends. The most prevalent example of this is seen in popular blogs. The Next Web prominently displays the ability to share each and every post with your social connections in various places.
Most social networks have code snippets that you can copy and paste into your product to make this kind of social sharing extremely easy. There are also solutions that combine all the popular social sharing options into a single interface.
Although it may not be obvious at first, another thing to keep in mind when implementing a social sharing strategy is to consider where your traffic naturally comes from. If you get most of your inbound traffic from Twitter, but you only allow people to share your product on Facebook then you are missing an easy opportunity. Make sure that people can share your product in the places that are most likely to bring you back more inbound visitors. This will have a compounding effect.
API Integrations
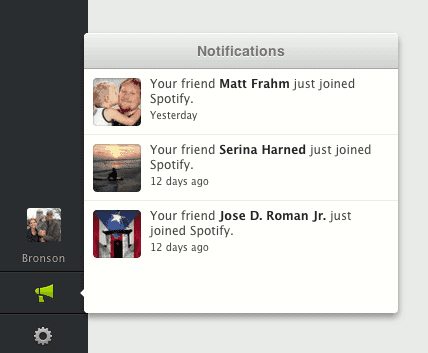
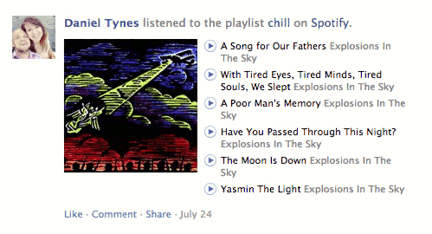
The next step, beyond social sharing, is to actually integrate your product with an existing social network at the API level. Instead of just asking them to share, you can actually bake sharing into the experience and make it happen in the background without forcing the user to give you permission each time. A great example of this is Spotify. It’s no secret that Spotify heavily used Facebook to grow their product, and they did so through an API integration. Once you login to Spotify using Facebook Connect and give Spotify the needed access, then your activity on their service is automatically published to your Facebook feed, and it’s also published inside of the Spotify app to anyone that you are connected with on Facebook. Below is a screenshot of the Spotify app, notifying me of new users who are also connected to me on Facebook, and another screenshot showing notifications within Facebook itself of my friend’s listening habits. These are done completely in the background, which creates frictionless sharing that can only really happen through an API integration.
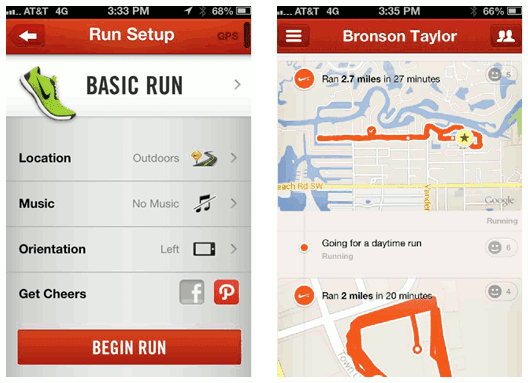
Another example of this tactic is the Nike+ API integration with Path and Facebook. Everytime I go for a run and track it using the Nike+ app on my phone, then the data about my run is pushed to Path and Facebook, so that my friends can see my activity. Friends can even cheer me on from within Path or Facebook which will trigger an applause sound as I run. This is borderline genius. Below you can see my Nike+ app asking me to share on Path, and on the right you can see the results being published to my Path friends. Again, this it totally seamless. Once I set it up initially it does this automatically.
API integrations, despite their incredible upside, are not 100% stable. As certain products become extremely popular, and gain momentum on existing social network, then it is not entirely uncommon for exposure to be throttled. Facebook, for instance, has the incentive to give you access to their platform. This keeps them in a dominant position if many developers use them. However, Facebook does not have incentive to give you the complete social graph of their billion users. If you start to have too much success with an API integration then you can’t count on the rules staying the same for you.
On a similar note, API integrations are great as a way to growth hack your product, but the more you intertwine your product with a 3rd party service, the more at risk you are. Twitter is a great example of this. Many companies were built on the Twitter API, but then Twitter changed the number of API calls allowed. This left many Twitter clients without a backup plan. Use APIs to grow your product, but be wary that the API doesn’t become your product.
Powered By Links
One of the first examples of product growth hacking actually used the powered by link tactic. When Hotmail first came out they did something that was simple, but which would drastically change their trajectory. They included a link at the bottom of emails that were sent using their service that said “Get your free email at Hotmail.” A viral loop was born.
This tactic is still being used to this day. A modern example is found in services that allow you to embed a popup on your website for various reasons. Widgets of any kind are good candidates for these powered by links.
Incentives
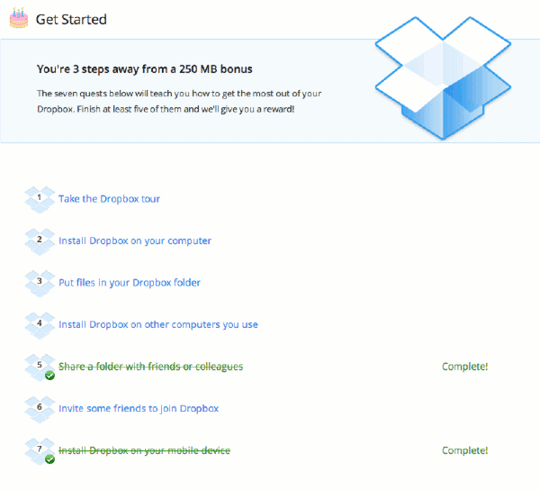
Certain products lend themselves easily to creating incentives for users to bring new people into the product. The classic example of this is Dropbox. They have a number of incentives that they offer users for various actions that they can take. This tactic works especially well if you have something which is of low cost to you, but of high value to users. In Dropbox’s case, they use storage space like a currency because the exchange rate is in their favor. Storage is not that expensive, but getting new users is very valuable to them. The user is in the opposite situation. Storage space is valuable to them, and their contacts don’t seem that valuable. This makes for a perfect storm.
It’s worth cautioning that many startups, in an attempt to imitate Dropbox, have been frustrated with their inability to pull off the incentive tactic. Their product might not have much intrinsically to offer their users as incentives. Also, notice that Dropbox goes beyond just giving away storage for friend invitations, but they also give away storage for actions that will help you understand their product. Educated users churn less.
Organic Viral Growth
As much as technology within the product can spread the product, there is something that can be even more effective, organic word of mouth. Organic word of mouth is when someone shares your product, online or offline, in ways that you didn’t orchestrate. They are compelled to tell people whether you incentivized them or not. Organic communication can’t be measured, and it can’t be controlled, but it can be a force that propels your product forward. You can’t make someone share your product organically with their coworkers or friends and family, but you can do certain things to make it more probable. These types of products all tend to spread organically:
Simple
Beautiful
Pain relieving
Products that make people look cool
Emotional
Fun
Unique
Surprising
You can’t be all these things, but you must be one of these things, or you probably don’t have a chance of spreading organically.
On Monday, Visa unveiled a suite of beta APIs, specifications and developer tools for a new payments platform called Visa Next that the company says "opens [the] door to digital-first payment experiences."
Specific design systems, I mean. Design systems, as a concept, are something just about any site can benefit from.
A lot of hype goes into design systems these days. Just the other day, an organization's published their design system publicly and I got a slew of DMs, emails, and Slack messages encouraging me to check it out. "Looks good to me," I said. But I'm merely knocking on the hood of a new car, so to speak. I haven't sat in it. I haven't driven it around the block, let alone driven it cross-country or tried to dig Cheerios out from between the seats. I'm sure I'd have more opinions after building a site or 10 with it (excuse the mixed metaphors).
So that leads me to a few questions. Can I build a site with this design system? Should I build a site with it? Is it for me? Or wait... who is this for?
They all have accordions.
Well not all of them, but bear with me, because there is a point to be made.
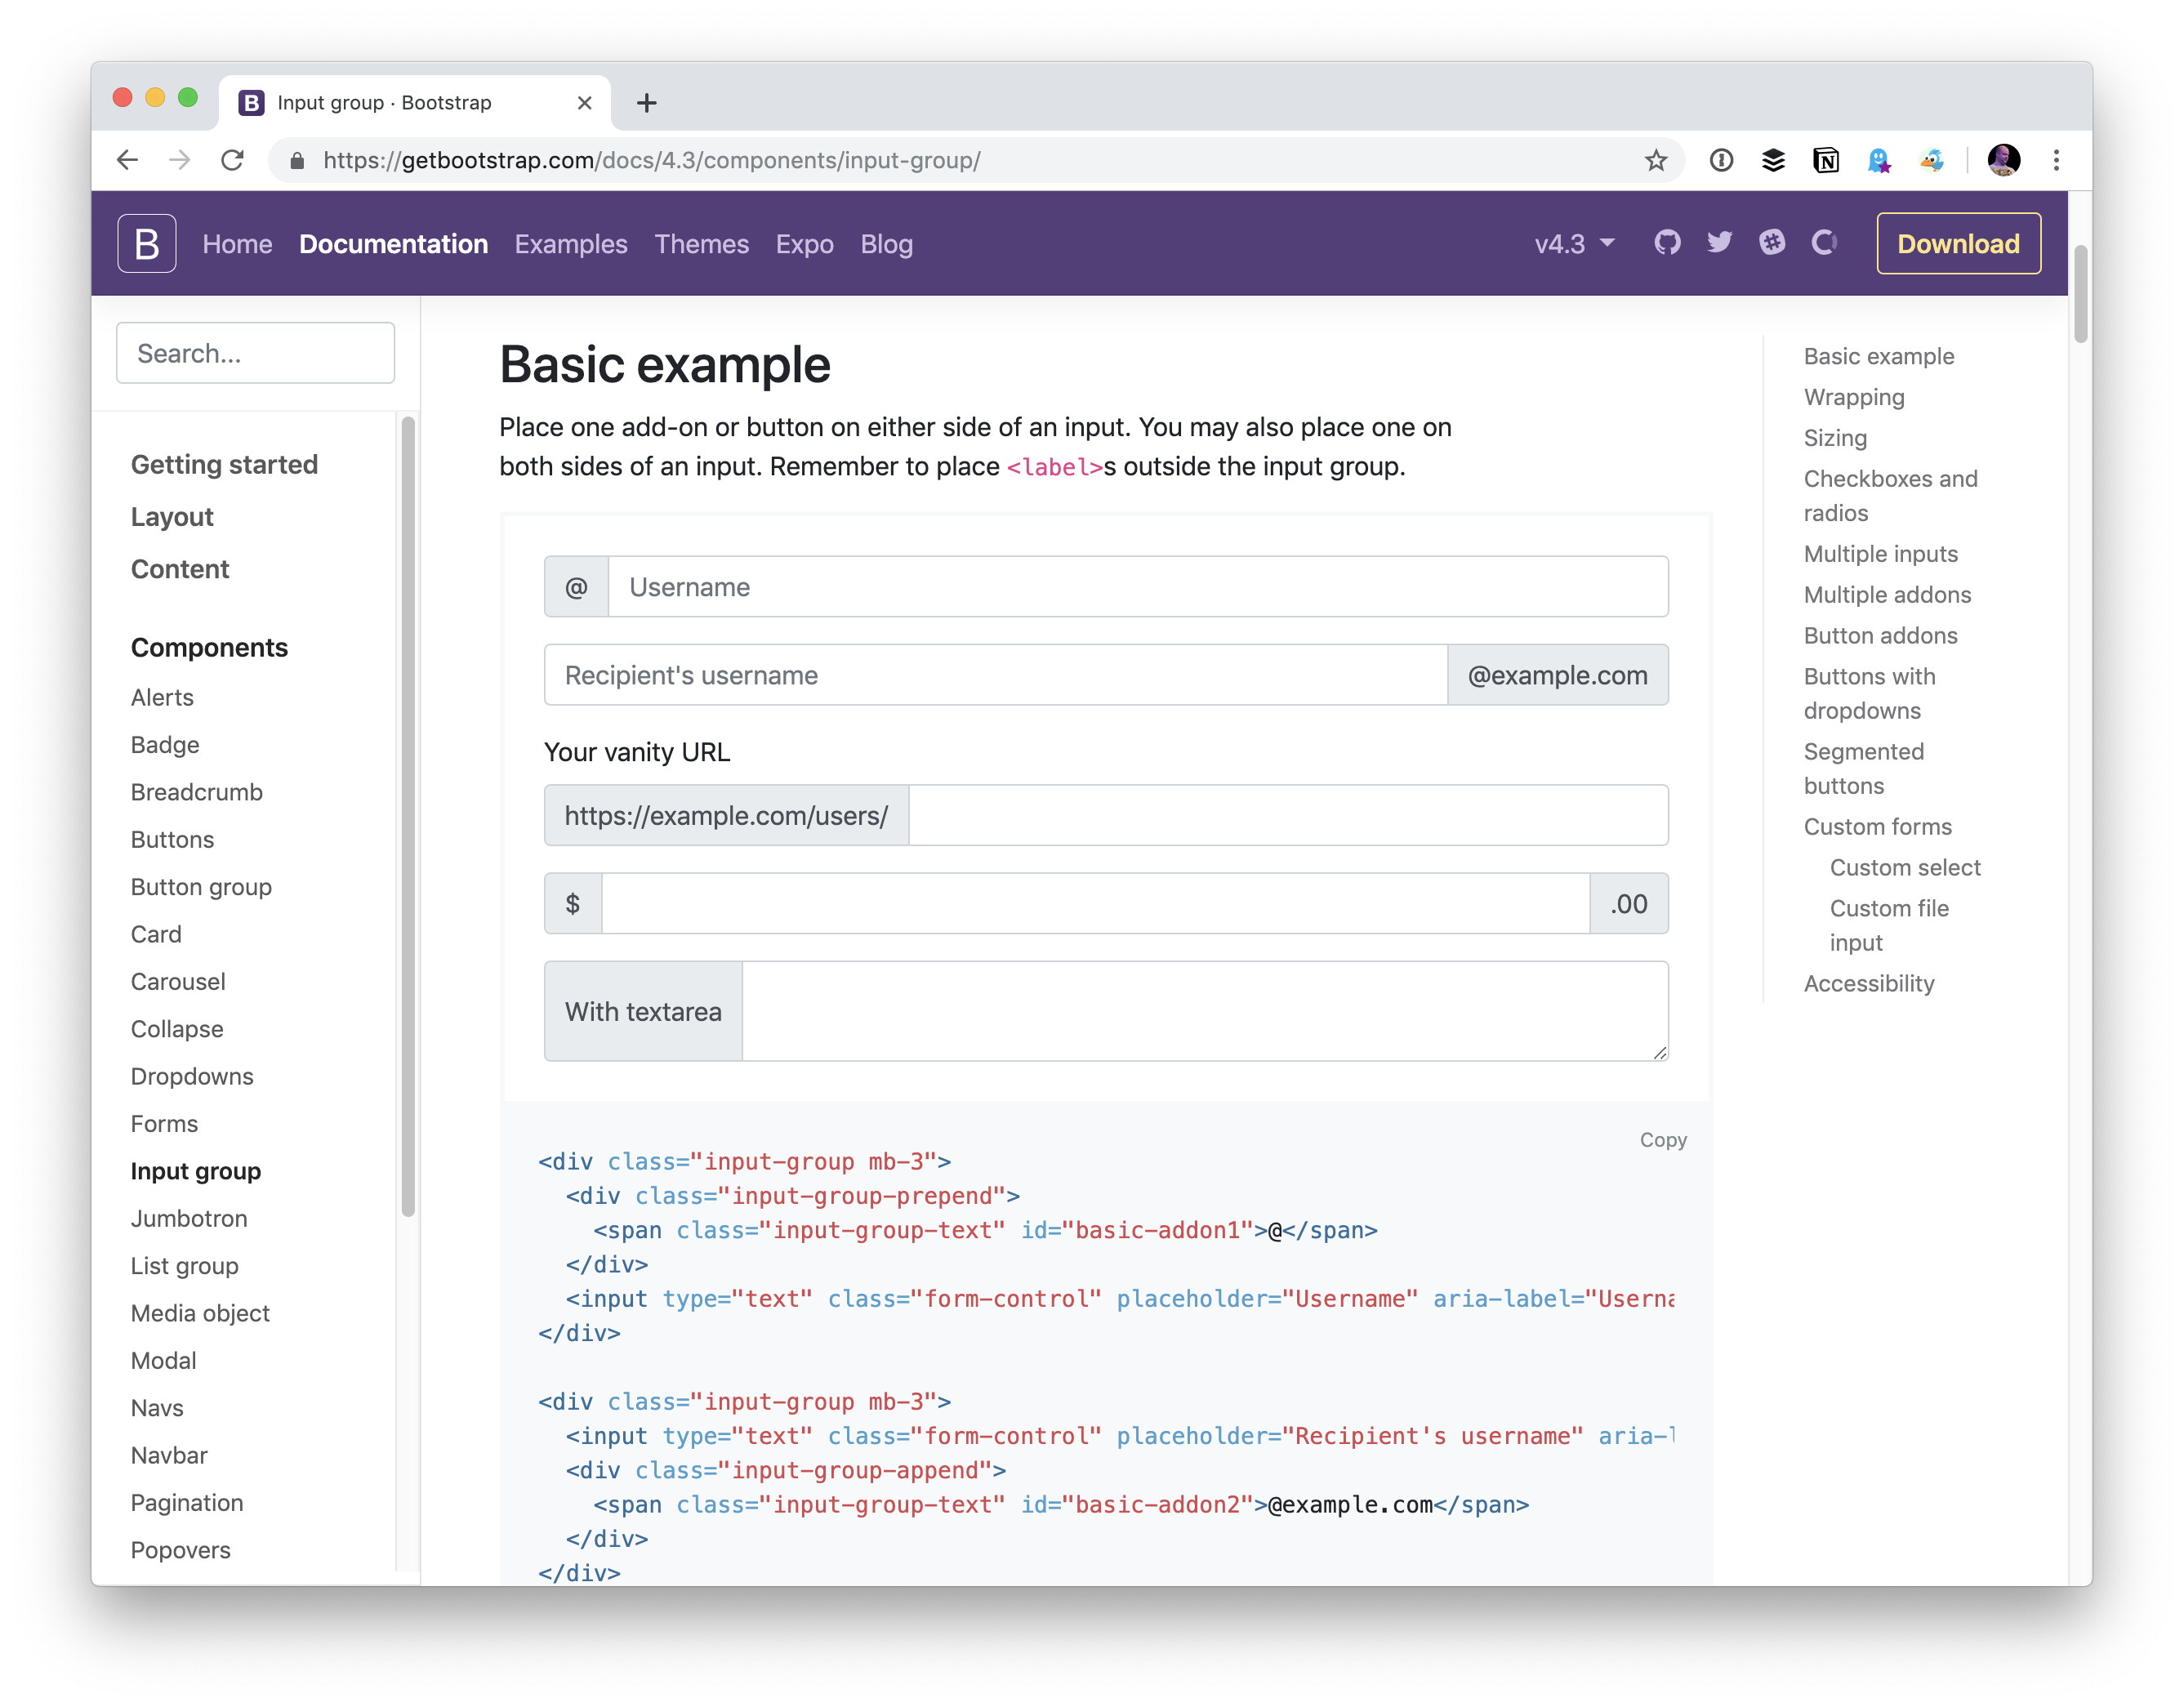
Bootstrap has an accordion too! Developers totally understand Bootstrap.
Whatever you think of it, I don't see much confusion around Bootstrap. You link up the CSS, you use the HTML they give you and — 💥 — you have components that are ready to rock.
It's possible that Bootstrap is a more of a "pattern library" than a "design system." I dunno. There is probably something to that distinction, but the naming semantics (if there are any) seem to be used interchangeably, so distinguishing Bootstrap as one or the other doesn't alleviate any confusion.
Developers reach for Bootstrap because...
It helps them build faster.
They get good quality "out of the box" if they aren't particularly great at HTML and CSS themselves.
They want to be accessible and Bootstrap has been through the accessibility ringer.
[Insert your reason.]
Appealing, yet these seem to be somewhat table stakes for any design system and not exclusive to Bootstrap alone.
Hmmmm... Maybe I'll have a gander around and choose a non-Bootstrap solution for my next project.
A lot of people are in this boat.
Maybe the next project is React so we want a design system that makes React a first-class citizen. Maybe we had trouble customizing Bootstrap to our liking. Maybe we just saw the default look of another design system and thought that would be a better fit. Maybe we are just bored of Bootstrap. Lots of reasons to look outside of Bootstrap, just as there are lots of reasons to look to it.
Since other design systems have accordions, too, can't I just... pick one?
Sorta?
One immediate consideration is the license. Salesforce's Lightning Design System is often pointed to as a leader in the world of design systems and has influenced a lot of the current thinking around them. Yet, it is not open source licensed.
That's not a problem — it's probably a good thing for Lightning. It's not a general purpose grab-it-and-go for all web developers on Earth as the target audience. It's for Salesforce and the slew of teams on different development stacks building things for Salesforce. If you're not building a Salesforce thing, it's not for you.
Then why is it public and not some internal document for the Salesforce team? I can't answer for them, but as I understand it, Salesforce is so enormous that they have both internal and external teams using it. So, perhaps making Lightning a public document is the most useful way to make it available to everyone who needs it.
This is something we’re actively discussing on the SLDS team. What exactly does “open source” mean to design systems when the usage is so specific? Is it more “source available?
There's also the nice side effect that they get good press for it, and that can't hurt hiring efforts. I've also heard having a public design system can spark interesting and useful conversations.
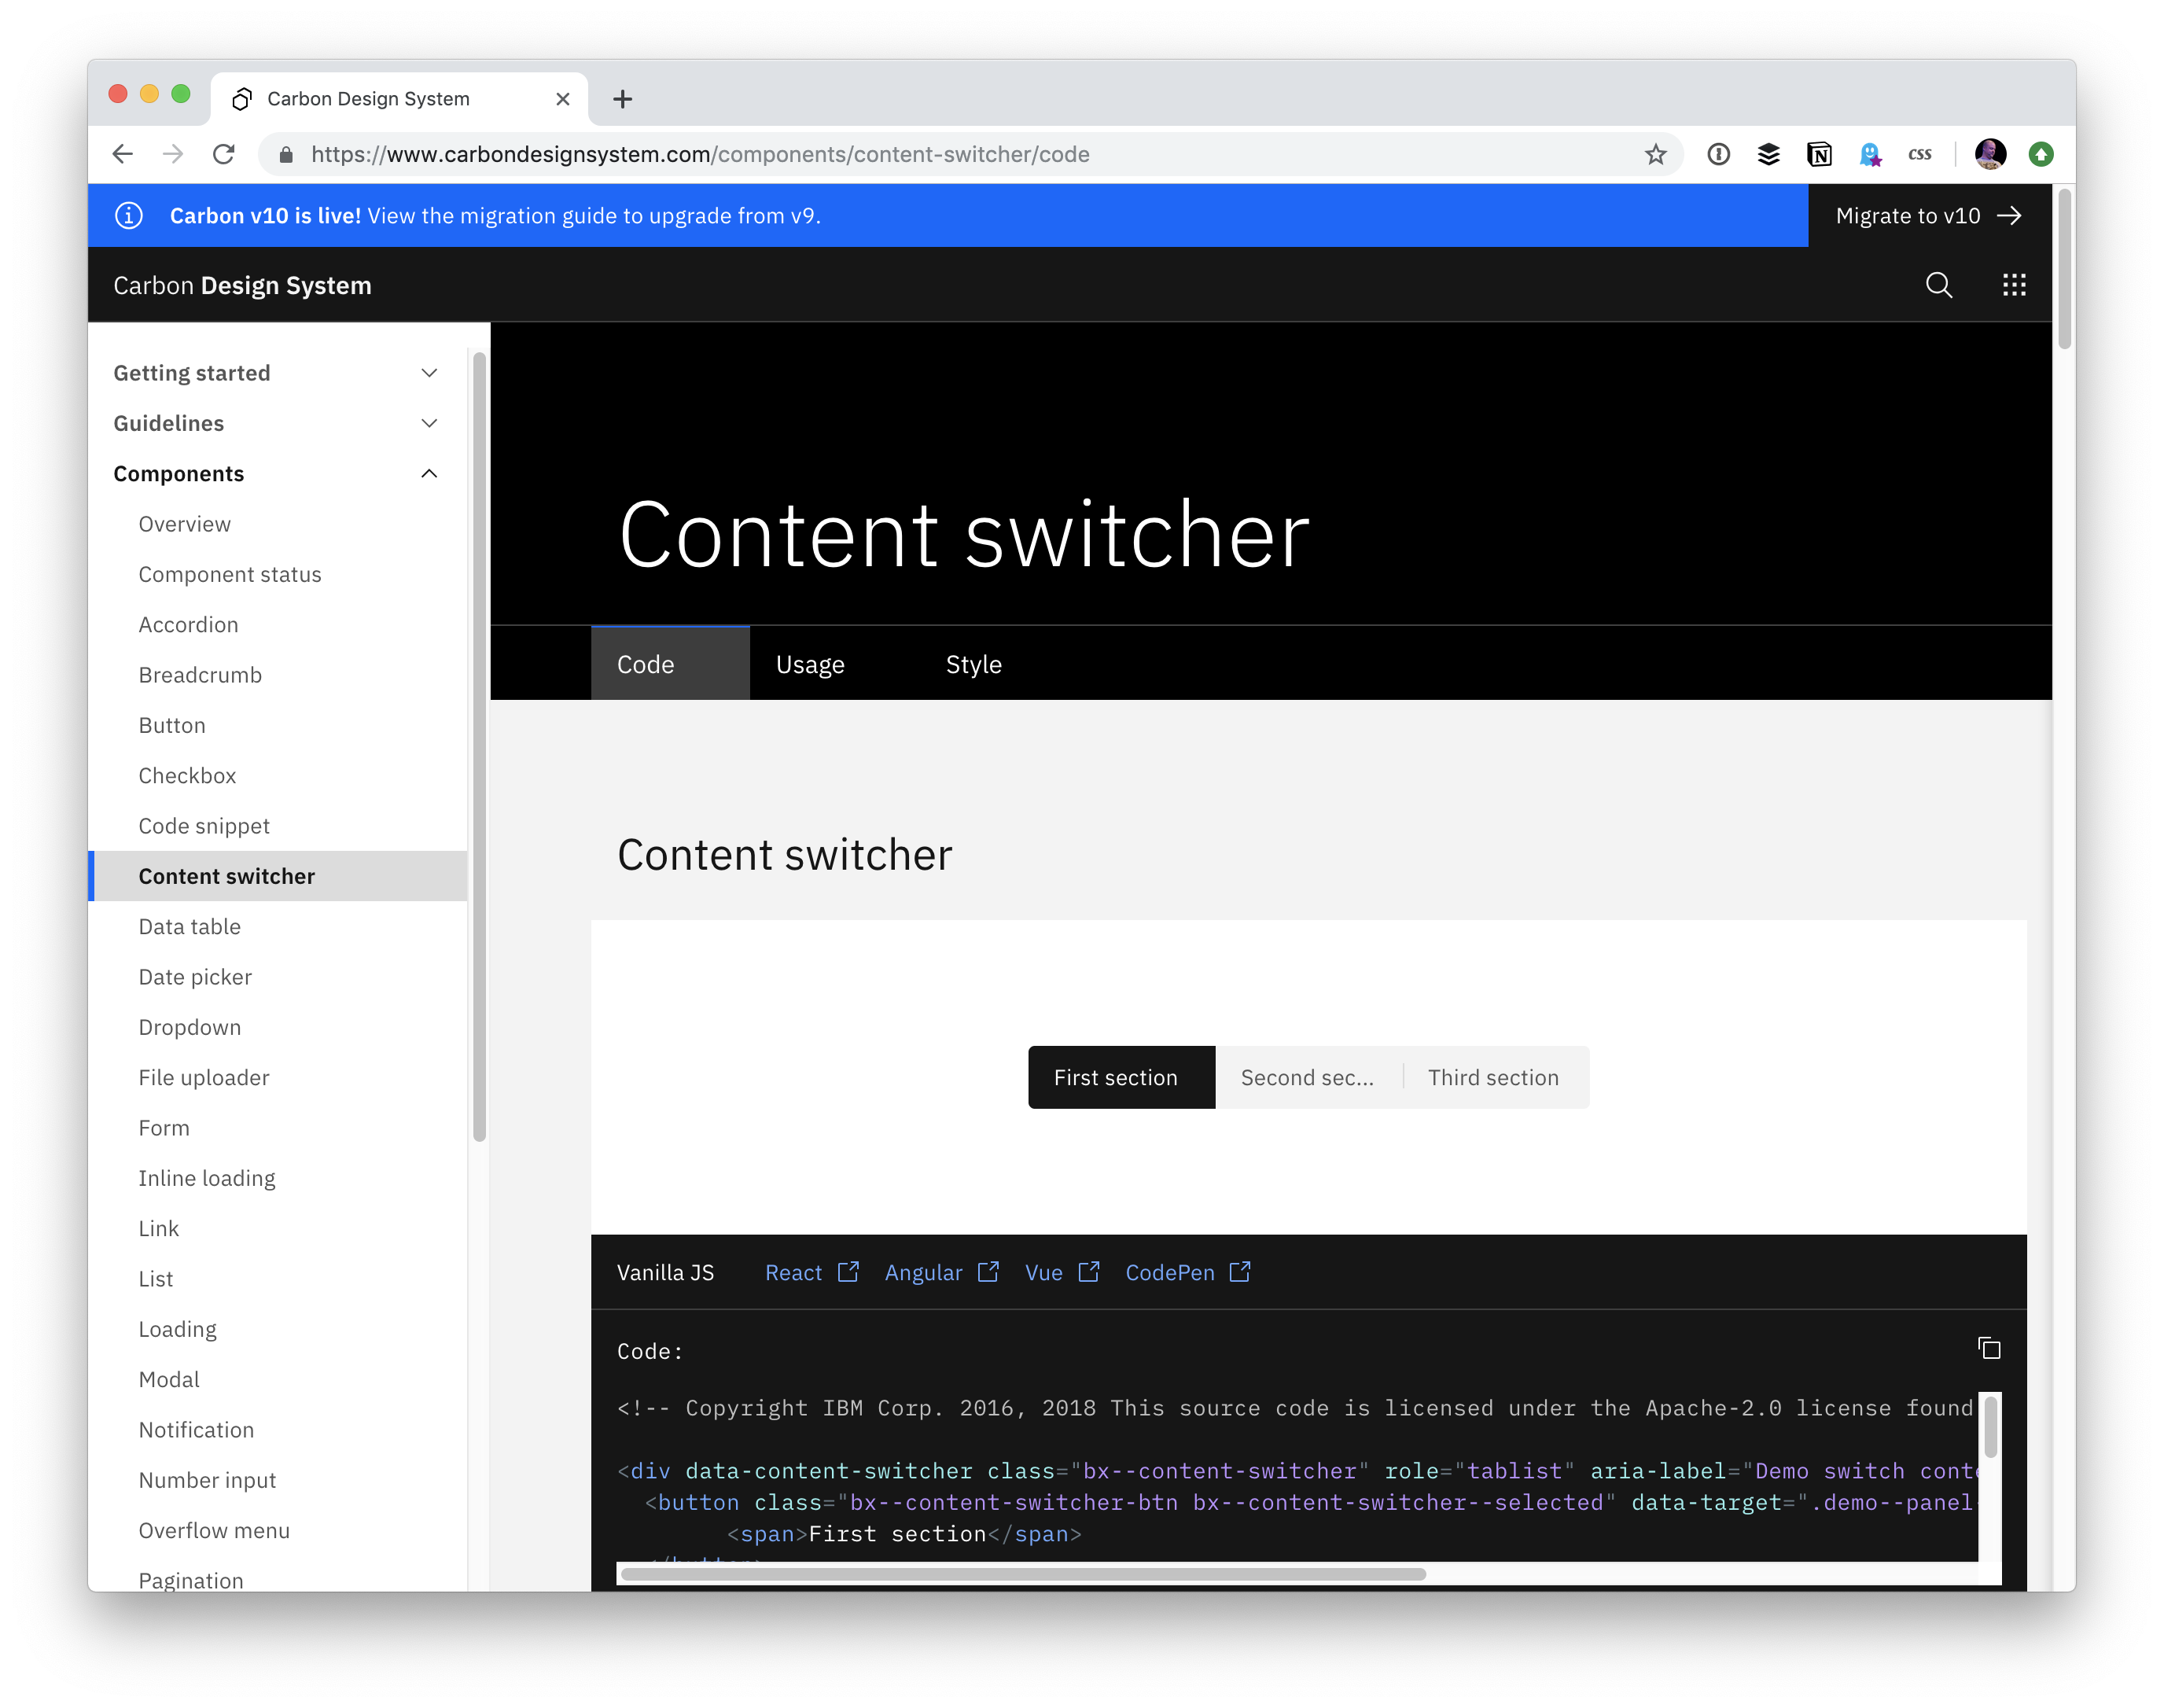
Carbon is the official implementation of the IBM Design Language for product and web designers, and represents an ever-growing ecosystem of design assets and guidance. With a comprehensive set of human interface guidelines, design kits, and documentation, Carbon helps designers work faster and smarter.
That doesn't quite tell me what I want to know. It looks like IBM stuff out of the box, so it's definitely for IBM.
It's open source so I can use it if I want to. But is it really for me and my random projects? Do they want me to use it for that? Am I, random developer, who they are thinking about with this project? Or is it IBM-first, random developer second?
Company first, the world second.
If a design system is by a company, then it's for the company. It might also be open source, but any ol' random developer who wants to use it isn't the target audience.
It might not even technically be a company who makes it. It could be a government!
One really great design system is the U.S. Web Design System, which just went 2.0. It's gorgeous! It looks very complete and has some great features. It's got a classy custom font, it was designed with incremental adoption in mind, it has both useful components as well as utilities, and was built atomically from design tokens. Perhaps the best feature is that it's extremely accessible because it has to be by law.
The U.S. Web Design System is mostly public domain, so you totally can use it. But it's not designed with you in mind; it's designed to help people who make website for the government.
(By the way, The U.S. Web Design System is open to contribution, which is pretty cool because it's a way you could make a significant impact on websites that are very important to people's lives.)
My mindset is that open source design systems are not meant be reused and spin up for yourself, but to learn from and apply to your own
Here's another kicker: There is a spectrum of customizability to design systems, on purpose.
Even if you technically can use a public design system you've found and like, you might consider the customizability angle. There is a whole spectrum to this, but let's consider the extreme edges and middle:
Zero Customizability: We built this to strongly enforce consistency for ourselves.
Pre-Selected Variations: We've got accordions in three different colors.
BYO Theme: We'll give you a skeleton that loosely achieves the pattern and you apply the styles to your liking.
There are design systems at all points on this spectrum. Bootstrap might be in between the last two, where you get a fully styled theme, but customizability largely comes via setting Sass variables and that creates infinite variations.
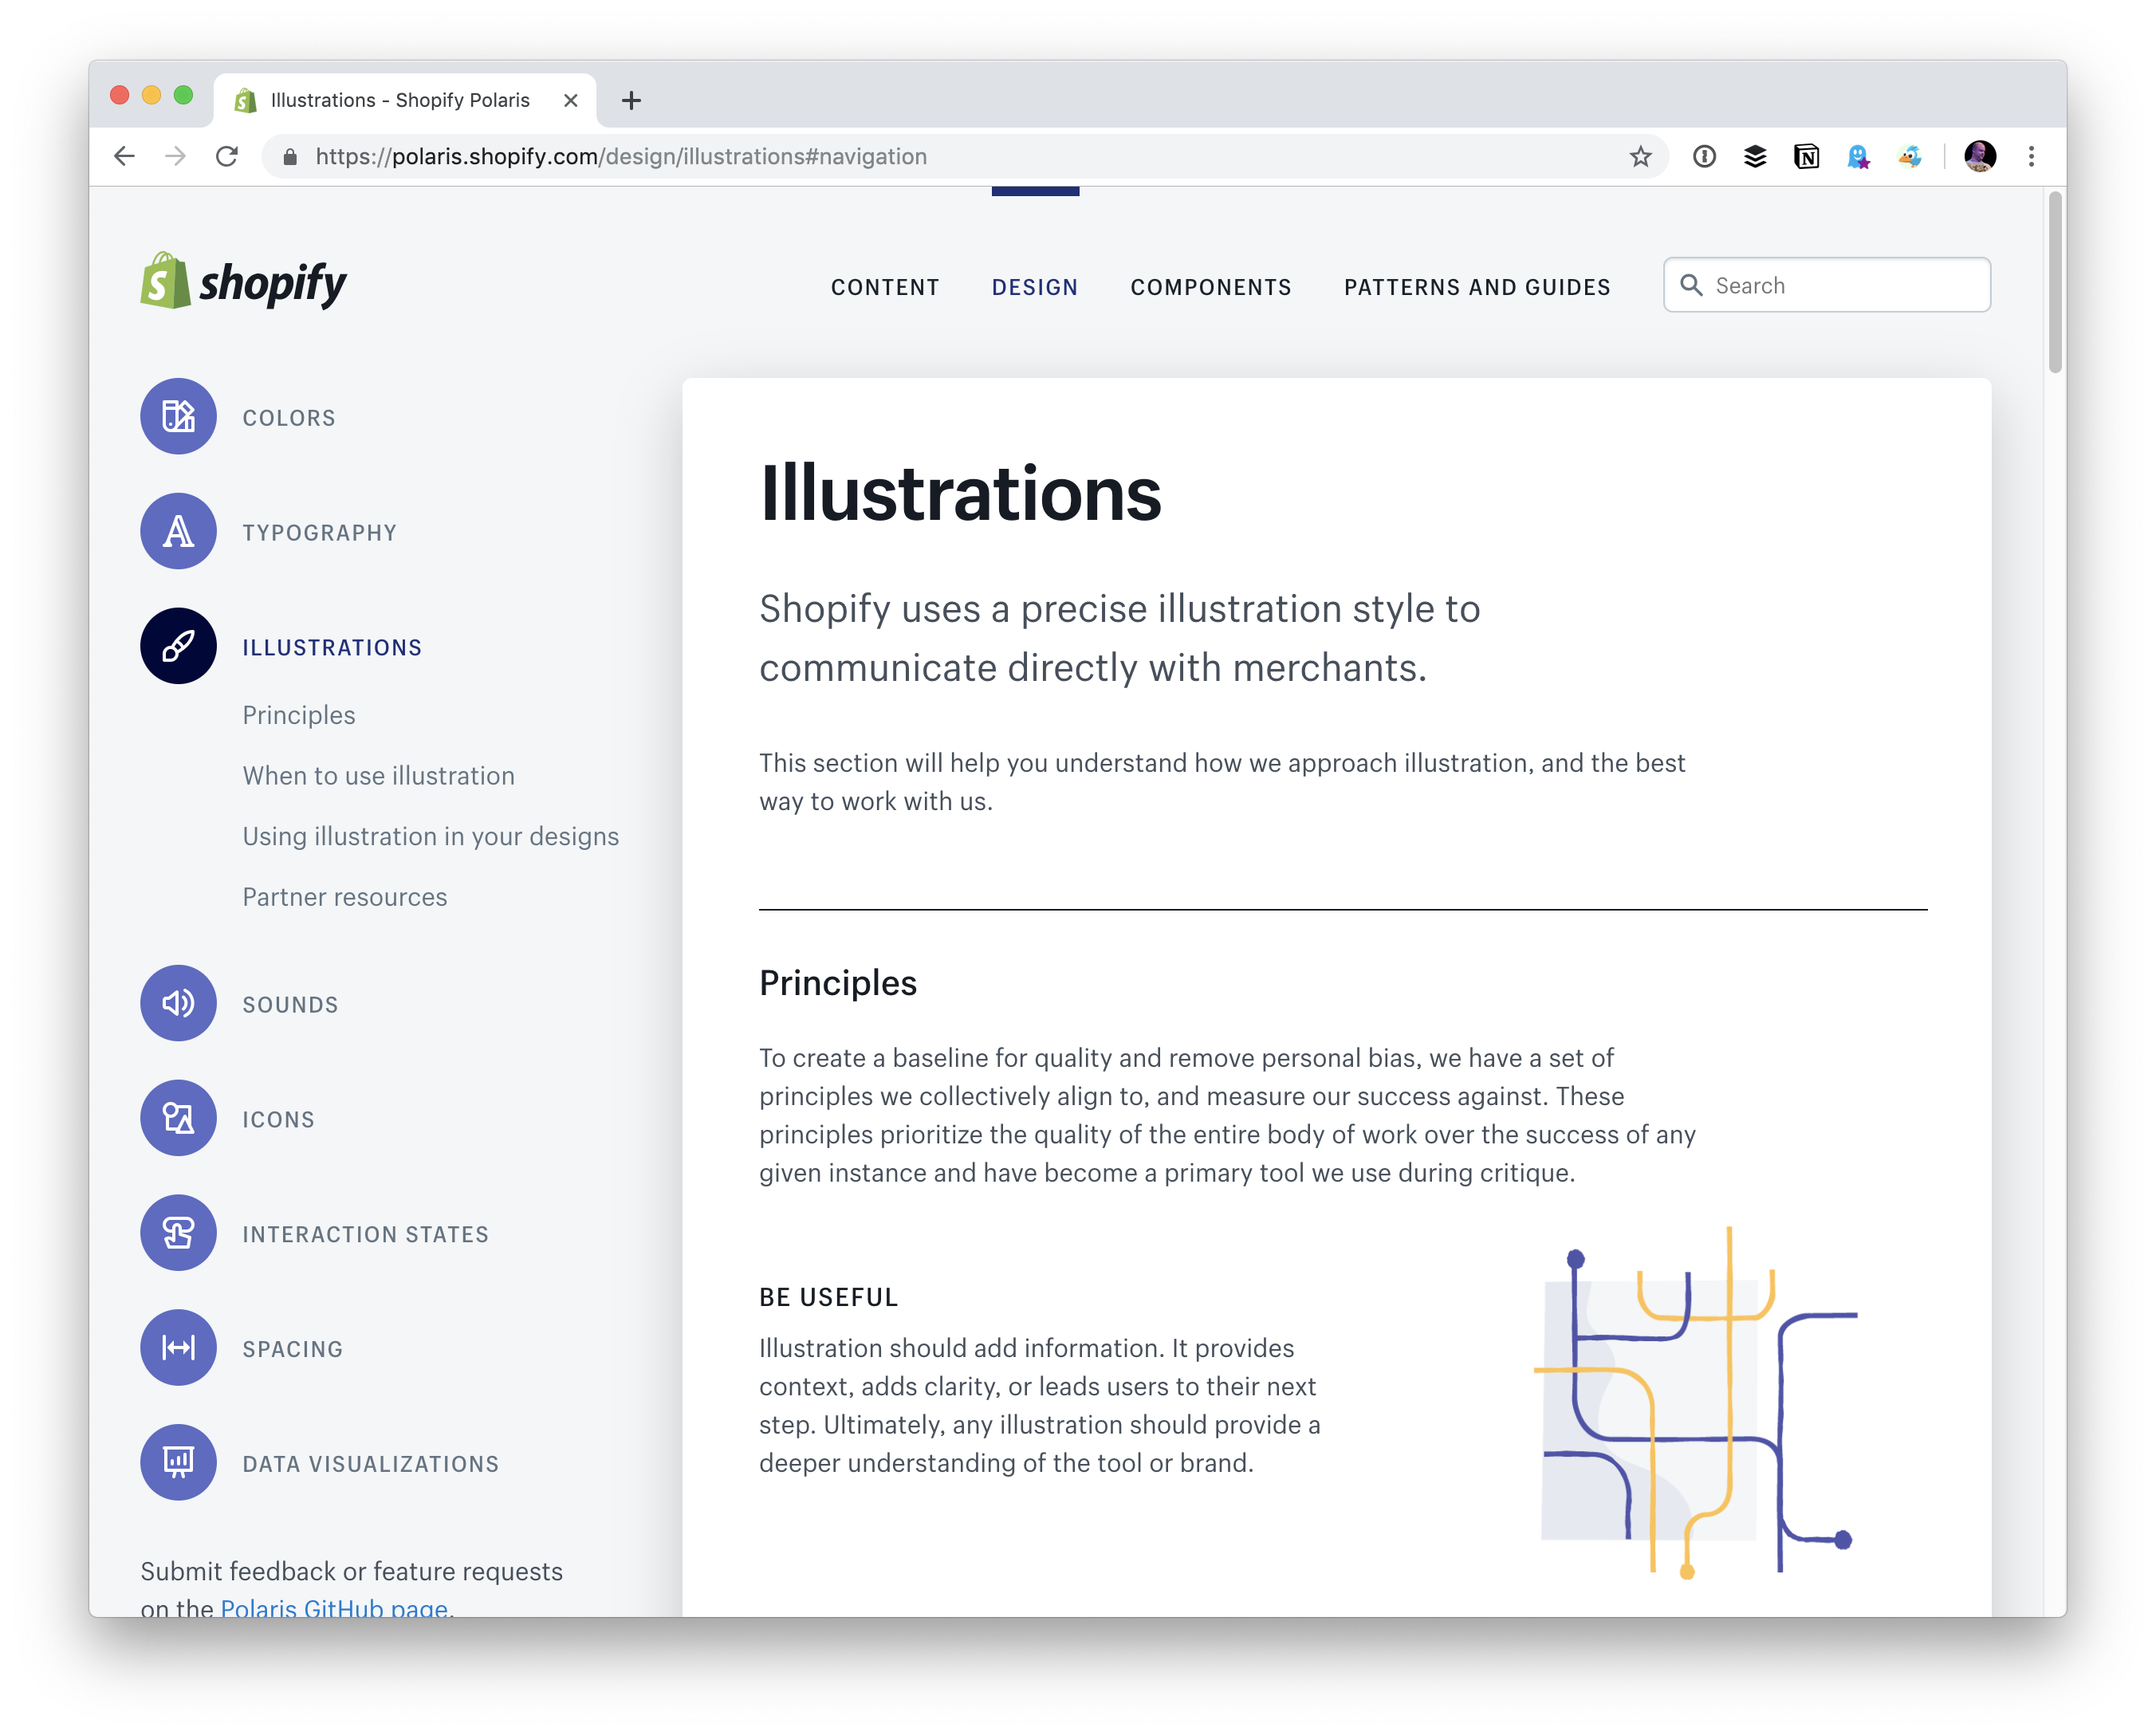
Polaris, Shopify's design system, is open source, but definitely for Shopify stuff. They are intentionally not trying to do what Bootstrap does. It's far more about enforced consistency and adhering to a cohesive brand than it is slapping together and customizing a page.
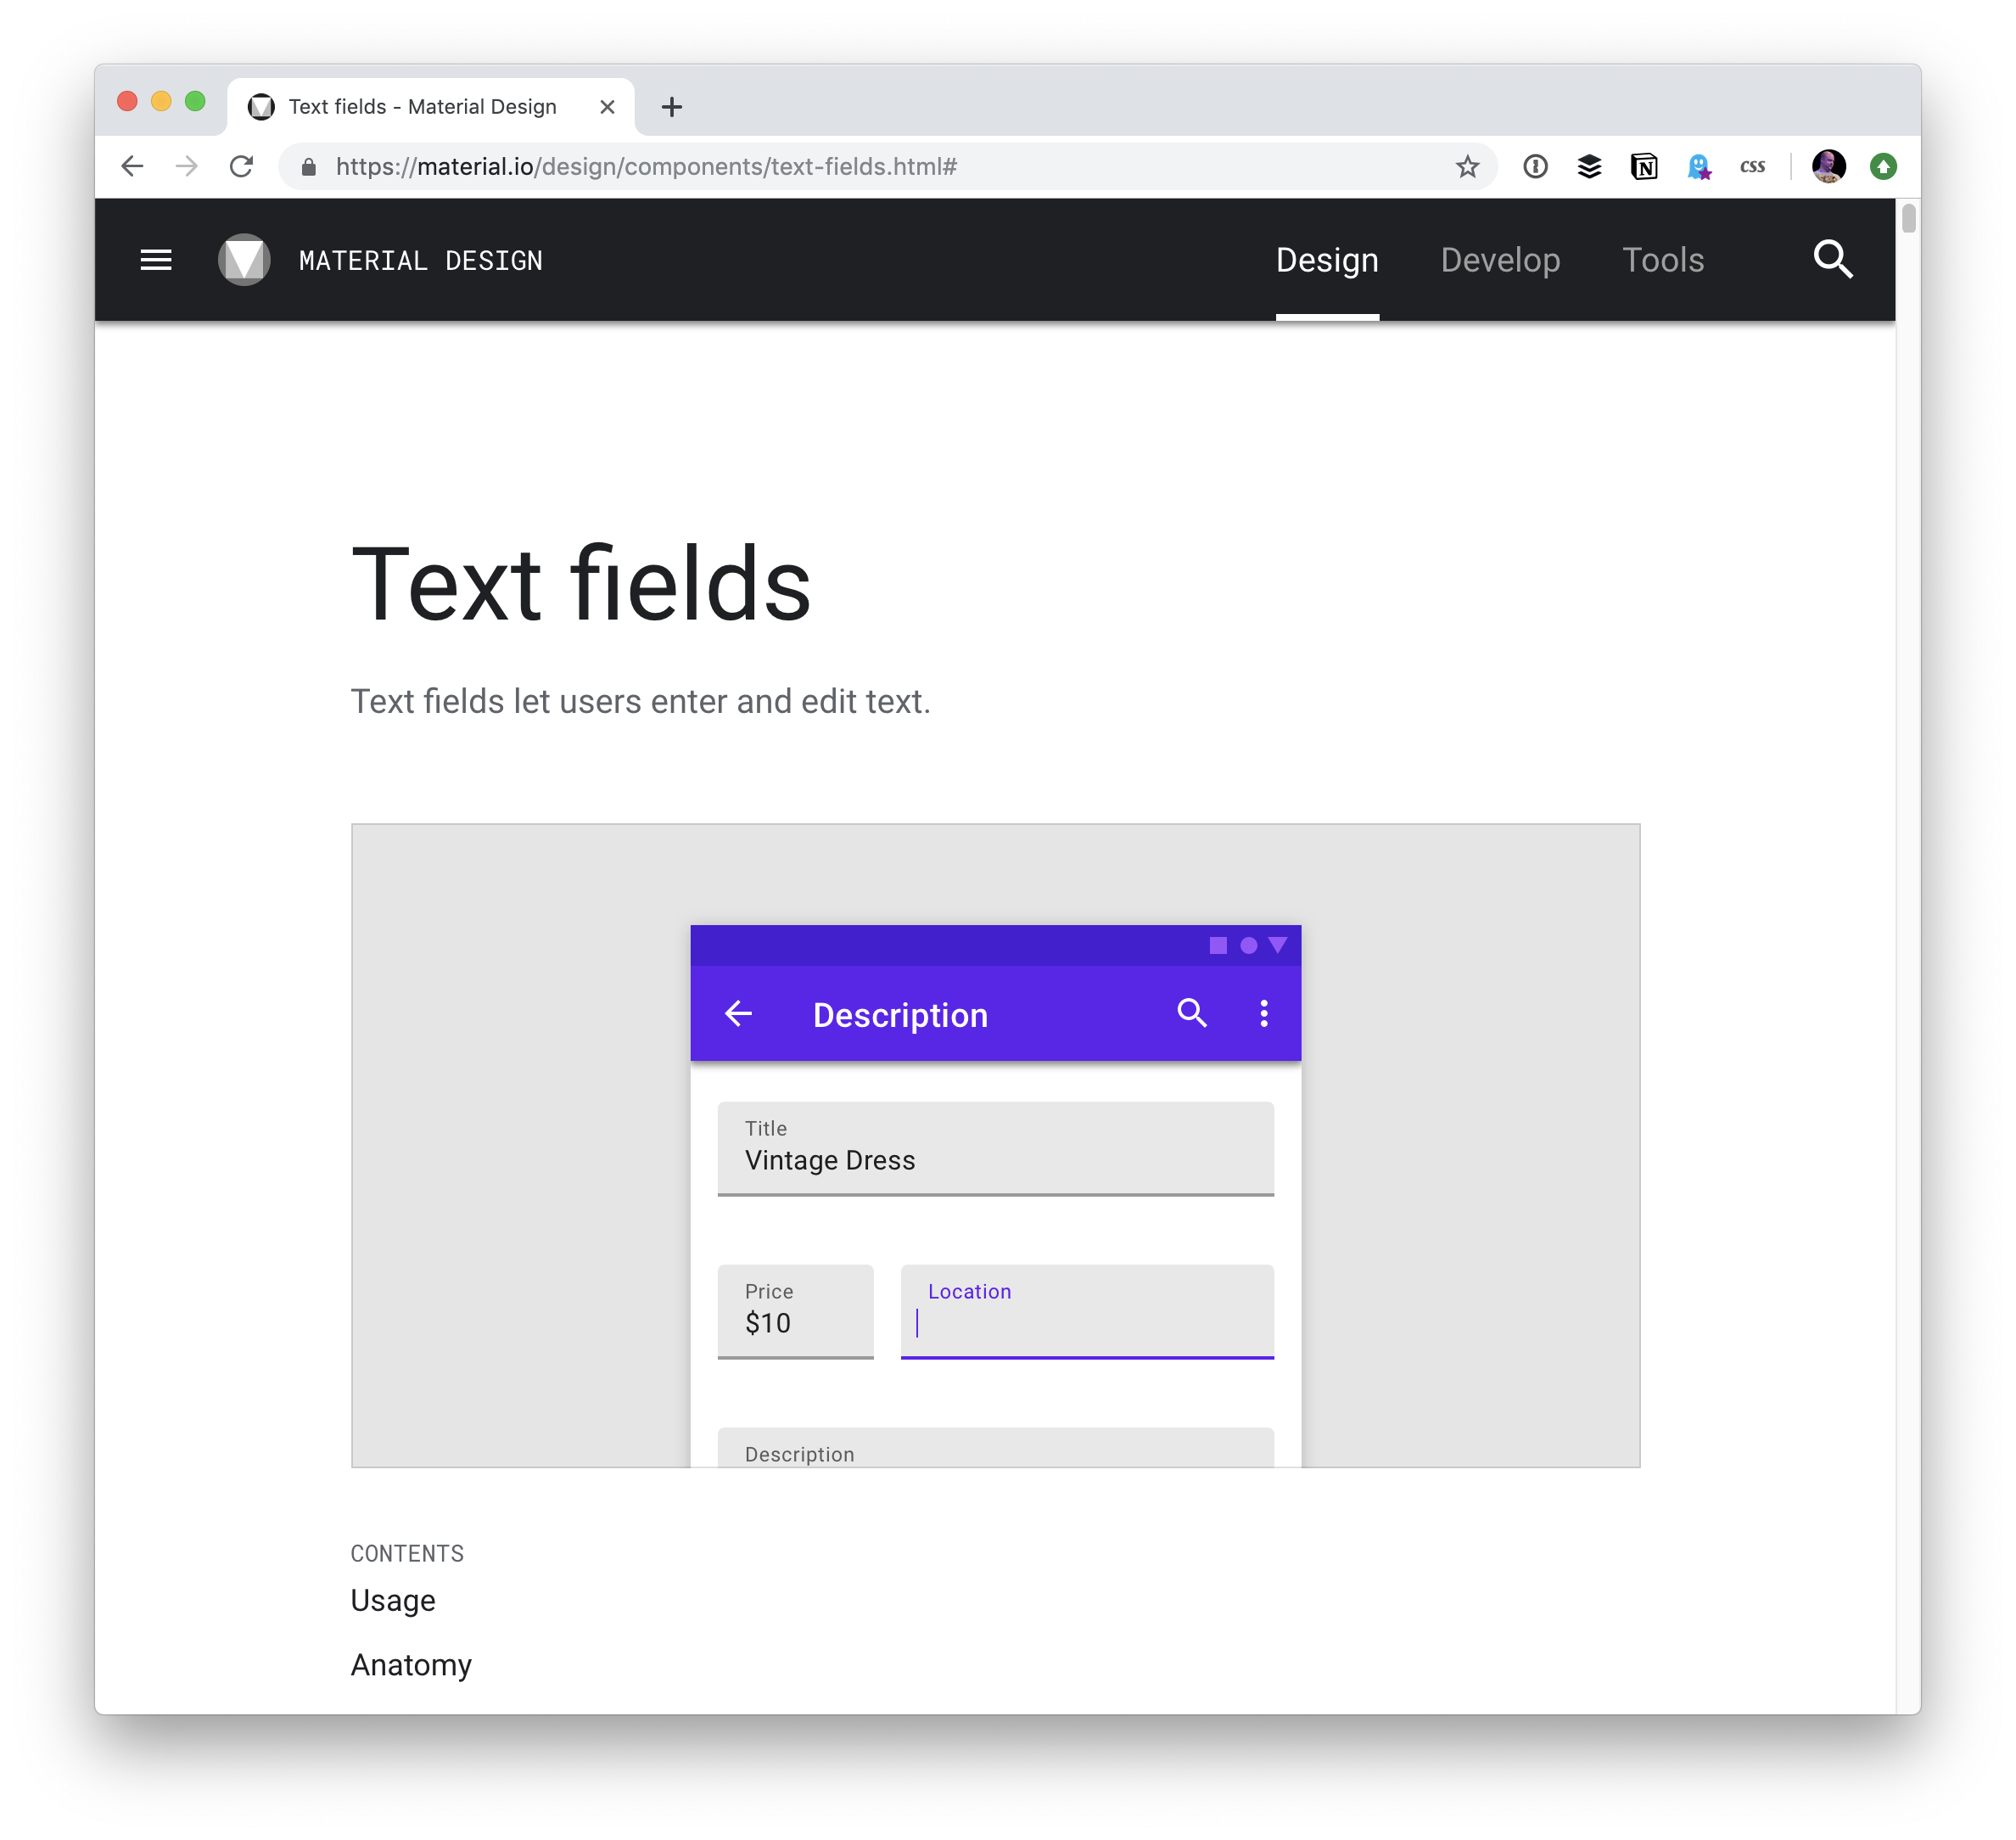
Material Design is definitely Google's thing. In its early days, I feel like the messaging was that this is Google's cohesive design work. But these days, they definitely encourage other developers to use it too. If you do, your thing will look a lot like a Google thing. Maybe that's what you want, maybe it's not. Either way, you should know what you're getting into.
Google's take on customizability so far is a Sketch plugin. They have no incentive to allow for a level of customization to make things not look like Google, because that would be antithetical to the whole thing.
In case this isn't obvious (and I very much fear that it isn't), design systems aren't a commodity. We don't get to simply pick the one that has the nicest accordion and use it on the next project. We might not even be allowed to use it. It might be intentionally branded for a specific company. There are all kinds of factors to consider here.
My parting advice is actually to the makers of public design systems: clearly identify who this design system is for and what they are able to do with it.
I'd also like to note that everyone who I've brought this up to in the last few weeks has had different opinions about all this target audience messaging stuff in design systems. Of course, I'd love to read your comments about how you feel about it.
Every world-class growth hacker relies on a series of steps in their growth process.
We’ve broken down the six core steps below.
Define Actionable Goals
Everything begins by focusing on a narrow, actionable goal. This is important because a growth hacker can easily have a focus that is so broad it becomes meaningless. Yes, the overall goal is growth, but you don’t attain that kind of end-result without breaking it into smaller, achievable, tasks.
Let’s say you have a product and you want your DAU (daily active users) to increase, but that’s too broad of a goal. Then you decide to focus just on the retention of existing users since this will increase the DAU, but retention is still too broad. Then you decide to focus on helping current users create content because your numbers show that when someone becomes a content creator (and not just a consumer) within your product then their activity on the site is far greater. Content creation leads to retention which leads to increased DAU. Therefore, you decide to make the goal to increase content creation by 2x.
Too Broad: Increase daily active users
Appropriate: Increase content creation by 2x
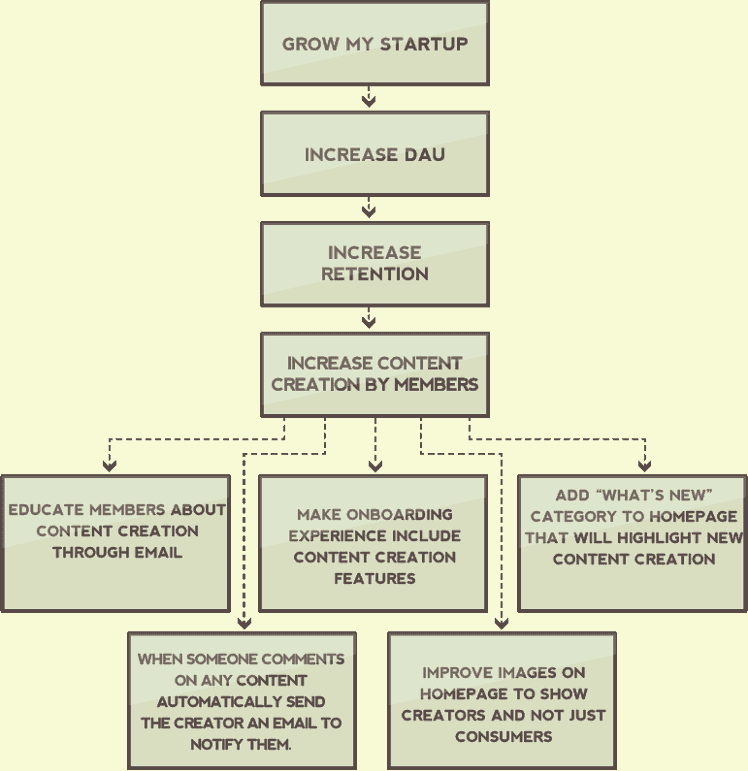
Many people have a hard time knowing when they’ve narrowed their goal enough. Here is a rule of thumb that I use. Think about your goals as nested hierarchies, and until you reach the “nest” where things can actually be marked off as individual tasks which can be completed once and for all, then you’re not narrow enough. In this case our hierarchy might look something like this:
Will there ever conceivably be a day when you can mark off “grow my startup” from a to-do list? No. The goal is too broad. Is there ever going to be a time when you can say that you’ve finished “increasing DAU.” No. Too broad. However, you can mark off that you’ve “educated members about content creation through an email.” When you find yourself at the part of the hierarchy that can be checked off as done, then you’ve narrowed your goal appropriately.
Implement Analytics to Track Your Goals
Now that you’ve decided to increase content creation by 2x, the next question is, are you in a position to know if you actually attain this goal? Are the appropriate analytics in place? Here are some questions to ask yourself:
Do you currently track content creation metrics at all?
Do you track content creation by cohorts or just in aggregate?
Do you track metrics around the content itself (file size, length, views, shares, etc.)
Do you track the devices that are used to create and consume the content?
Do you track the referring URL’s which are most responsible for content creation?
Without analytics, goals are empty. If you can’t definitively say when a goal has been reached then you have not completed the requisite requirements before moving ahead. Furthermore, analytics will give you valuable data which can change your goals. Your analytics and your goals create a reflexive equilibrium, where they actual inform, refine, and shape each other.
As an example of a reflexive equilibrium, consider this. If your goal began as “increase content creation by 2x,” but then you realize that there is something more important than just content creation in general as it relates to retention, then you might restate your goal. If content over three minutes is the only kind of content which improves the retention of the creator and the consumer then your goal might need to be refined.
One of the great things about implementing specific analytics to track goal progress is the effect this has over time on your overall analytics. Once you’ve spent a few years on a startup, attacking one goal after the other, you’ll realize that the amount of historical data you have to work with has become very powerful. Eventually, when you create a new goal you might already have the relevant metrics being tracked, and now you have past data to look at which predates even the goal creation.
All growth hackers begin with a dull axe, but the edge gets sharper as a function of time. Just don’t give up.
Leverage Your Existing Strengths
Every startup has inherent strengths or assets that can be used as leverage. When there is something at your disposal which requires little energy, but can produce big results, then you’ve found a lever.
Continuing our example from above, you may be trying to decide if you should send out the educational email first, or if you should add a “what’s new” category first. If you have 200,000 emails on file, and you have a system of email distribution that is rock solid, and you can probably create the email in question within a day, then this looks like a promising lever.
If the “what’s new” category will require at least a few days of planning, a few days of design mockup revisions, a few days of programming, and your engineers are already completely stressed out about their to-do list, then this doesn’t look like a promising route. Especially, if you’re looking for low hanging fruit.
The law of leverage essentially makes the decision for you at this point. Send out the email. Your startup’s unique leverage comes from the size of your email list and your email distribution system, not the amount of engineering horsepower that you can throw at problems. A different startup might choose a different option, but only if their leverage takes a different form.
Plans, goals, and tasks, that are stack-ranked in a vacuum, without concern for leverage, are usually misordered. Plan your attack based on strengths. I would recommend reading chapters 3-6 of this book and then give each tactic that is mentioned a score based on your company’s specific leverage.
Execute the Experiment
You’ve already completed step 1, and you defined your goal as increasing content creation by 2x. You’ve already completed step 2, and now you are tracking the necessary data that will tell you if you’re successful in your goal. You’ve already completed step 3, and now you are going to focus on educating your members through an email blast, since this is where you possess leverage. Now it’s time to execute the experiment, which means actually sending an email in this case. Here are some things to keep in mind as you execute the experiment:
1. Write Down Your Hypothesis Before You Execute an Experiment
Before you actually run the experiment you should write down your best guesses at to what will happen. Do you think this email will have a higher or lower click through rate than the emails you already send? Why do you think this? How much do you think the email will increase content creation over the next month? Will it single handedly give you the 2x content creation goal you’re shooting for, or do you think it will get you part of the way there?
It may seem silly to write these kinds of things down when you can just send the email and find out what’s going to happen. If that’s your attitude then you’re missing the point. Hypotheses are accurate reflections of your assumption before you are given the chance to rewrite the past to make yourself look like a genius.
For instance, imagine that you write down the hypothesis that the click through rate will be lower because you already send users one email a week, and you think the second email will annoy them. Then you run the experiment and it has a higher click through rate. If there wasn’t proof of your wrong hypothesis you would be tempted to rewrite history, and you would tell the team members that this is what you expected to happen because you’re such a godsend to the startup world. Hypothesis keep you honest. Now, instead of trying to prove to everyone how smart you are, the discussion is about why your assumptions were wrong. You might come to realize that you underestimate the amount your users want to be in contact with you, and this insight has benefits which stretch far beyond email.
If the idea of forming a hypothesis makes this feel too much like science and less like the traditional culture of startups, that’s probably a good thing.
2.Do Not be Naive About the Resources Needed to Run the Experiment
Anytime you run experiments it is going to disrupt the normal flow of events in your startup. First, the entire team needs to be notified about upcoming experiments so that they can be ready for any mishaps that might occur. Second, know when your startup is already resource constrained, and be mindful of this when planning your experiments. If Tuesdays are when the server is already on the brink of failure, then don’t do something that will send 30% more traffic on that day if you can avoid it. Third, if you need a certain amount of time to finish the components of the experiment before it can be ran, then don’t overlook the time requirements needed. You would do well to remember Hofstadter’s Law:
It always takes longer than you expect, even when you take into account Hofstadter’s Law.
3.Do Not Get Discouraged by the Initial Results
There is a phenomenon which I have experienced countless times, and that is the ever-present belief that whatever experiment I’m working on right now is the one that will change everything for the better. The experiment that I’m currently devoted to seems to be the obvious answer to my company’s problems. If it’s worthy of my time then it must be the thing that will allow us to reach escape velocity. Oh, the joys of the entrepreneur’s disease.
Like we mentioned in the last chapter, most things fail. It’s ok to be optimistic (hey, it keeps me going too), but then you can’t be devastated every time an experiment produces mediocre results. That’s why a defined goal should be attacked from multiple angles. Most of the attacks simply won’t work.
4. Learn from Success and Failure from Success and Failure
Data is like publicity. There is no such thing as bad publicity and there is no such thing as bad data. Even if an experiment fails you will have undoubtedly gathered a lot of information about your product and your users that can be used in future experiments. Thomas Edison failed more than 1,000 times when trying to create his light bulb. When asked about it, Edison allegedly said, “I have not failed 1,000 times. I have successfully discovered 1,000 ways to not make a light bulb.” You can learn from successes, and you can learn from failures. You only stop learning when you give up.
Optimize the Experiment
Experiments are meant to be optimized. Experiments are fluid. They are not things you do one time and then move on. You tweak experiments. You re-run experiments. You only give up on experiments when it’s appropriate to do so, not when you’ve grown tired of them.
Have a Control Group
You should always have a control group when you are able to because this will account for environmental changes that are hard to track. If you send out the email to only 80% of your users then you can track how much content creation goes up in that group as opposed to the control group. There might be an unforeseen reason, outside of your company’s control or knowledge, that has actually led to a widespread decrease in content creation on your site. Without a control group you might be led to think that the email actually decreased content creation, which would be far from the truth.
Utilize an A/B Test
A/B tests are championed by growth hackers for a reason. They’re magical! You may think you know what the subject line of an email should be to ensure it’s opened, but an A/B test will tell you the truth. You may think you know what landing page the email should send them to, so that they will start creating content, but an A/B will tell you the truth. There are very few tools that create such large gains overall.
Remember, if you are going to run A/B tests then you must decide this before you start running an experiment. Otherwise, in our example, you would have emailed everyone on your list and then there would be no one left to benefit from what you are learning.
When to Give Up on an Experiment
I usually will not give up on an experiment until my leverage has proven to be weaker than I initially thought, or I can’t logically conceive of the experiment yielding better results without an inordinate amount of resources dedicated to it.
Repeat
Now it’s time to select a new experiment, or an optimized version of a previous experiment, and move through these steps all over again. If you work the system that I’ve enumerated here, then success is more a byproduct of tenacity, and less a child of luck.
Now you have visitors to your product, but that’s the problem. They are just visitors. You’ve found a way to get them to come to your product, but if this is all you do then they will bounce at an incredibly high rate. Your goal is to activate them. Activation is the act of getting them to take an action in your product that you are guiding them toward. Activation is not just the act of them clicking around randomly and not bouncing. Activation is when they do something that you’ve decided beforehand that they should do, something which furthers your goals. Here are some possible activation goals:
Email address
Create an account
Read something
Comment on something
Share something
Buy something
Fill out something
Watch something
Interact with someone
Friend request someone
Some of these activation goals may seem silly, while others seem relevant, but your particular goals will depend entirely upon your product. If your product is a blog that makes money from advertising then you may want to focus on numbers 1, 3, 4, or 5. If you have an email address then you can message them in the future about new articles. If they read what is already on your site they will see the quality of your journalism and want to read more. If they comment on an article then they will be more apt to come back, especially if others respond to them. If they share your article on Twitter then it will get you more readers. All of these goals lead to eyeballs that will make you more money with advertisers. A different product will have completely different goals.
It is also important to recognize that the fewer goals you have, the more likely you are to achieve them. If you have 5 activation goals then it’s difficult to use the tactics in this chapter to achieve any of them effectively. At a minimum, for a given section of your product you should have one primary activation goal.
Landing Pages
When someone visits your website the use of a landing page can greatly increase your chances of activating them. A landing page is different than your homepage. It might have some of the same elements, but not all. A landing page is a page you create within your product that you can direct people toward for certain campaigns. For instance, if you are always tweeting about certain kinds of things from the company Twitter account then you might make your Twitter bio URL send them to a landing page that highlights those same topics. Here are some of the distinct characteristics of a landing page and why you would use one:
Limited Navigation
If someone comes to a landing page from a specific campaign then this means that you can hide many of the navigational elements, since this will just distract people from completing the goal you have decided on. They’ve already shown interest by being on a landing page in the first place, so you can focus their attention.
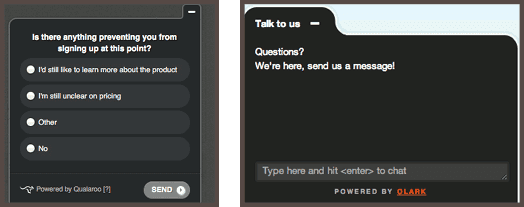
Single Call To Action
A landing page only needs one call to action for the same reason that you don’t need many navigational elements. If you give them options then you will lose them, and no one can end up on a landing page unless they came through a specific campaign, which means they are ripe for activation.
Congruous Language
Since you know the source of a person that ends up on a particular landing page then you can tailor the experience for them. You should use language which will appeal to them, even if it doesn’t appeal to your visitors at large. The language, and even imagery, of your landing page should be congruous with their expectations based on the source they came from.
There is a specific kind of landing page which is becoming very popular, and it has some distinct characteristics, and that is the launch page, or coming soon page. A launch page is a landing page that you put up before your product is even public, and the goal is to collect email addresses of visitors so that you can inform them about your product when you do go live. Here are some things to understand about this kind of landing page:
Use it to Get Traffic, Not Just Activations
Before you actually launch is one of the best times to get traffic. You can tell people that they will be let into your product first if they share your launch page with others, or you can only let them sign up on your beta list if they tweet about you first. Get creative.
The Headline and Subhead is Everything
Since you haven’t launched yet you probably won’t have much detail to add to the launch page. This means that the headline and subhead become very important. If those few words don’t get someone’s attention then they will bounce.
Emotional Imagery is a Must
Besides the headline and subhead, you also need a very emotional image. A fullscreen background image is the common practice. Make them feel emotion, despite your lack of content.
Don’t Let the List Grow Cold
As you build a list of people that are interested in the launch of your product you must not let the list get cold. If you don’t email them for months, then suddenly tell them about your launch, your click through rate will be very low. Stay in touch with them through the process of building your product to keep them warm, or don’t even take email addresses until you are within a month (or less) of launch.
If you are trying to create landing pages quickly then you can use a service like unbounce.com, and if you are creating a launch page then you can use a service like Launchrock.
Copywriting
If you want people to take a certain action, and not bounce, then the words you use are more important than you realize. We spend so much time obsessing over visuals that copywriting sometimes takes a back seat. As important as visuals are, if you want someone to know something, or understand something, or do something, then you probably have to use words. Here are some insights around copywriting:
The Headline Should Mention Your Unique Value Proposition
Why is your product unique? What do you do that competitors don’t do, or can’t do. If you don’t tell people that you’re unique then visitors will assume you’re not.
The Subhead Should Further Explain Your Unique Value Proposition
The subhead is smaller text below your headline that further illustrates your unique value. It might give reasons why the headline is true. Use this to take away doubts or clarify the headline.
Long Copywriting is Good for Expensive Items
If you are selling something that costs $500 then you need lengthier copywriting. This will give you a chance to inform, answer objections, and just generally convince them to become activated members.
Short Copywriting is Good for Less Expensive Items
If you are selling something for $20 then long copywriting will bring up more objections than it answers. It will confuse people more than it helps people. For low cost products, short, precise, copy is better.
Different Audiences Will Respond to Different Kinds of Words
Don’t just imitate someone else’s copywriting style. Your words need to fit your audience. You should use jargon if you’re talking to doctors, but not if you’re talking to laymen. You can use slang if you’re targeting kids, but not if your audience is filled with grandmothers.
Use Customer Development to Inform Copywriting
By researching your audience online (message boards, surveys, etc.) you will start to see which words they already use. If you use their own words in your copywriting then you’ll be able to activate them much easier.
Social Proof is Copywriting
It would be wise to use testimonials within your product because humans behave with a herd mentality. If everyone else is doing something then so will I. Social proof is a form of copywriting that will help you activate visitors.
Don’t Forget the Microcopy
Microcopy is the short tooltips, hover boxes, or other text that helps a visitor navigate the interface. Little clues, at the right place, can help people navigate your UI. Confused visitors don’t usually do what you want.
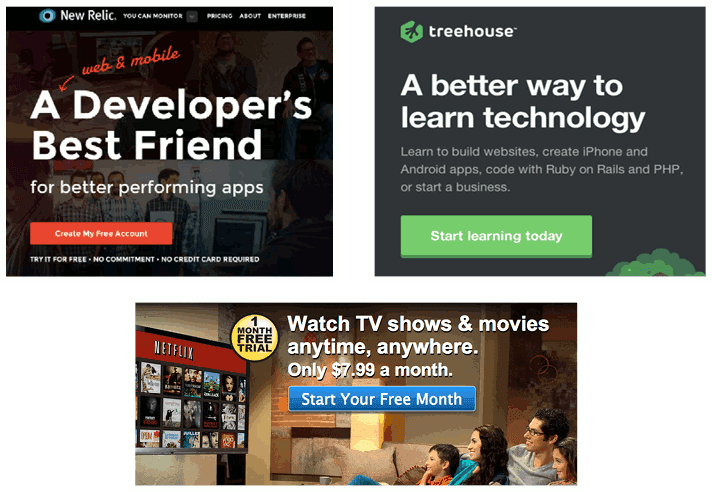
Calls to Actions
We’ve already mentioned it a few times, but calls to action deserve their own section. The best way to get someone to do what you want is by giving them a clear call to action. Leave nothing to their imagination. Tell them where to click and make the button obvious. Tell them who to call and make the phone number prominent. Activate visitors by telling people, in the most explicit way you can, what you want them to do. Below are some examples of great call to actions.
Onboarding
When people arrive on your site it’s like they’ve been dumped in the middle of New York City without a map and no sense of direction. Your job is to give them orientation, and lead them to the places where you want them to go. One of the best ways to guide visitors is through onboarding. Onboarding can take the form of visual directions placed on top the screen, or a series of pages that lead visitors from one place to another. Think of onboarding like a digital tour guide for your product. An explanatory video could even be a part of your onboarding strategy.
Twitter has one of the most talked about onboarding experiences because they carefully guide people from creating an account to using an account, and it’s all through the onboarding. They know that an account that doesn’t follow anyone is kind of useless, so they make following others a part of the signup process.
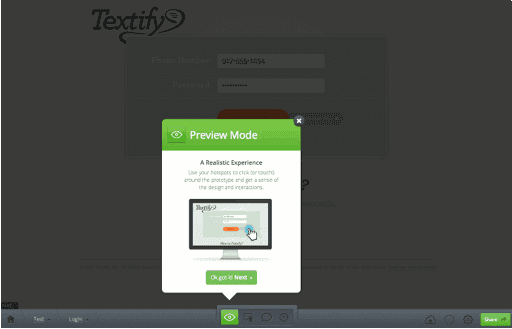
Another great example of onboarding is InVision. They give you large, obvious, pop ups throughout their product that guide you and tell you what you need to know.
People are not patient, and they don’t care about your product enough to find out how to use it. If you want to activate visitors, making them take certain actions, then you must carefully craft your onboarding experience.
Gamification
There is something about gameplay that is hardwired into the human brain. We love progressing, getting awards, ranking on leaderboards, finishing tasks, leveling up, and having fun while we do it. Gamification is when you use game mechanics within your product, and this can be used to activate members. Gamification can cause someone to complete actions they normally wouldn’t complete. Here are some examples:
Progress
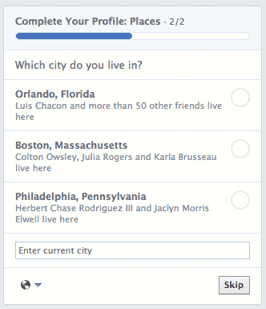
It is common within products to tell people that their profile is only a certain percentage complete. This prompts us to get to 100% because we hate not finishing something. Just by adding a progress bar with a percentage then we have gamified our product.
Awards
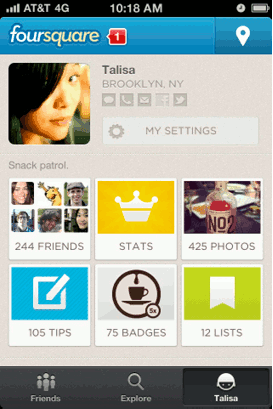
We are all still in little league baseball. Trophies matter, even if they are meaningless. If you can award something within your product then you will create a gamified incentive for people to take certain actions. Just think about Foursquare. It’s one big baseball game for adults with mayorships and badges instead of cheap trophies.
Leaderboards
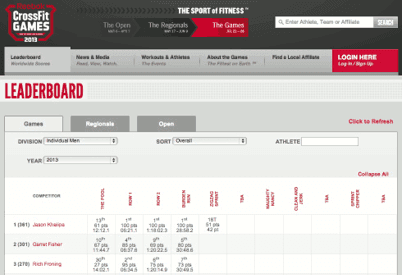
Just by showing someone their rank you can prompt them to compete. If you let someone know that they are in 3rd place for most comments on your message board there is a good chance they’ll take actions to get in 2nd place. Leaderboards can activate people to take certain actions.
There are countless ways to gamify your product, but you have to think about your product as a game (even if it is a B2B app).
Pricing Strategies
Getting someone to make a purchase is really just a unique kind of activation. You are getting a visitor to take a certain action, that action just happens to be making a purchase. There are a number of best practices around activating people to make a purchase. They may not all apply to your situation, but some of them probably will.
Perfect Price Discrimination
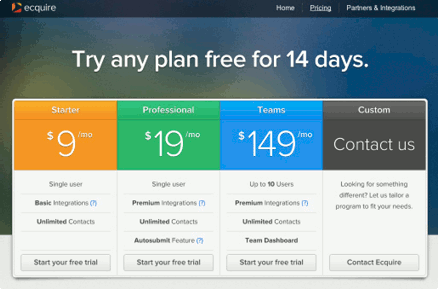
Pricing is an important aspect of activating people to make a purchase. There is something called perfect price discrimination which is the act of creating a pricing structure that charges based on the consumer’s purchasing power. Ecquire does this well by making their lowest tier only support basic integrations. This is everything except Salesforce. They know if you are using Salesforce then you can afford to pay for an expensive plan.
Multiple Tiers
Another popular strategy to activate purchases is to have three pricing tiers. Just the fact that there is a more expensive option makes you feel like you’re not wasting money, and you are getting a good deal. Having a pricing tier below you can make you feel like you’re not a cheap person. Options give people confidence to buy.
Suggestive Tier Naming
If you name your pricing tiers something vague like gold, silver, and bronze, then you don’t really help people discover which tier is good for them. By naming the tiers things like “Starter,” “Professional,” or “Team,” you are giving people the confidence that they are in the correct tier.
Free Trials
People are afraid to make an irreversible mistake with their money. If you give them a money back guarantee, or a free trial of some kind, then you are taking the risk away from them and placing it on yourself.
Discount Codes
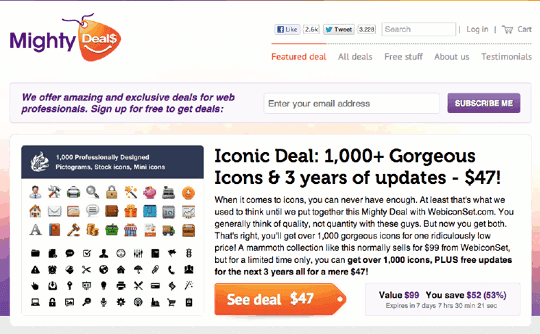
One of the most powerful forces, in terms of getting someone to make a purchase, is a discount code. But there is a trick that makes discount codes even more effective. If you include a time limit on the discount then you force people to make a decision. Udemy is a great example of this kind of activation tactic. They send out emails on a regular basis which include discount codes that are only valid for a limited time.
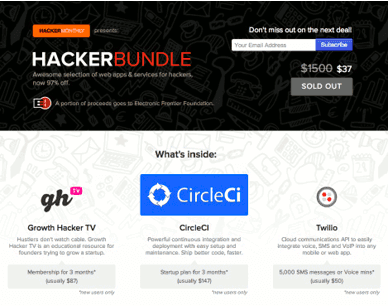
Bundling
Another way to get people to make a purchase is through bundling your product with other products. If you can overwhelm people with value then they are more willing to make a buying decision. Hacker Bundle is a good example of a service that uses this activation tactic.
Maintainers Anonymous is a new podcast created by Henry Zhu, who has been the primary maintainer of Babel for the past two years. Babel is a JavaScript compiler used by Facebook, Netflix, Spotify, and millions of others. It is downloaded over 18 million times per month and used by more than 1.8 million repositories on GitHub. Zhu recently left his job at Adobe to work on Babel and open source full-time.
In his new podcast, Zhu is talking with other maintainers to unearth their valuable perspectives and share similar struggles. By presenting them as regular people, rather than faceless code projects, Zhu is aiming to encourage empathy for maintainers.
Maintainers Anonymous is centered around the “how” of maintenance and Zhu is open to having guests from a variety of fields and disciplines, such as a librarian, gardener, or moderator. In an episode titled “Speedrunning with Omnigamer,” Zhu and his first guest, Eric Koziel, discuss the intricacies of “speedrunning,” playing a video game with the goal of beating it as fast as possible. Koziel describes it as a medium for doing an optimization challenge. Since the games are just software, he and Zhu explored how speedrunning intersects with coding and talked about some of the parallels with maintaining open source software.
The next two episodes are a series with guest Stephanie Hurlburt, a graphics engineer and owner of the company that makes Basis, an image/texture compression product. They delve deeper into how business development is relevant to open source, setting healthy boundaries, inherent vs. perceived value, marketing, and more.
If you’re looking for a new podcast to add to your subscriptions, Zhu’s Maintainers Anonymous offers a wide variety of topics and perspectives that touch on open source, maintainership, and other aspects of life and business in the world of technology. New episodes are available on the podcast’s website, and listeners can also subscribe via RSS, Apple Podcasts, Google Podcasts, or Spotify. Follow @MaintainersAnono on Twitter for all the latest.
There are three fundamental ways to get traffic. No more. No less. You can pull people in, push people in, or you can use the product to get people in. These are the 3 p’s of getting traffic. What’s the difference in these methods? I’m glad you asked.
Pull
The first way to get visitors to your site is to pull them in. This is where you give them a reason to come to you. You entice them, incentivize them, and draw them to you. This book is an example of the pull methodology. You were drawn to us. We didn’t have to go find you online, but rather, you found us.
Push
As the name implies, this is a bit more aggressive than pulling. Instead of enticing people, you just go get them and push them onto your site. Someone may be wanting to watch a YouTube video, but not until they see your ad. They may want to do a Google search, but not until they see your paid result. You go out and find where they are online and you push them towards your product.
Product
The third way that traffic can end up on your site is through the product itself. If you’ve ever invited your friends to a new social network, then you understand how a product can be used to get new traffic. Everyone that uses the product gets more people to use the product.
Pull and push tactics are examples of growth hacking which hinge on the redefinition of distribution. If you know how people flow online then you can accurately entice them or strong arm them onto your site, but if you don’t understand where people congregate and what causes them to travel to other places (digitally), then you can’t effectively push or pull them on onto your site. The third P (product) doesn’t rely on a redefinition of distribution (like pull and push), but it relies on the redefinition of what a product is. Like we said in the first chapter, now products can play a role in their own customer acquisition, which is a very radical concept in the history of the world.
It is important to realize that all three P’s work really well in the right context, when executed by the right person. As you were reading about the differences you probably assumed that one method was better than the other, but they all have their place in the growth hacker’s arsenal. Many products actually employ a combination of push, pull, and product methodologies. This isn’t the time to get on a soapbox for a certain camp. Growth hackers are about growth, not just a certain kind of narrowly defined growth for a priori reasons.
The Fundamentals of a Pull Strategy
A great pull strategy is based on two fundamentals:
The cost of these tactics are usually measured in time or personnel, but you are not directly paying to get visitors.
These tactics revolve around providing something of value that entices people to visit your site. If you stop providing value then you’ll stop pulling them in.
Blogging
One of the tried and true ways of getting traffic to your product is through blogging or guest blogging. Blog posts are suited perfectly to send you traffic for a number of reasons.
Blog posts are keyword rich, and are easily indexed by Google, which aides an overall SEO strategy.
Blog posts have a compounding effect. The more you write, the more total chances you’ll have of pulling people towards your product over time.
Blogs are usually based around specific niches, so if you are guest blogging then you can tap into large swaths of your market with a single post.
Blogs are usually disseminated through RSS readers, so there is an inbuilt mechanism to deliver your thoughts to others.
Blog posts are great at educating people, and people that are informed about your product are more likely to move through your funnel.
Blog posts can position you as a thought leader, and people would rather use a product that has been created by an expert rather than a nobody.
Blog owners are always looking for new guests post, which makes this low hanging fruit in many cases.
Blogging is a no brainer. The only decision you have to make is whether to start your own blog or guest blog for others. The main reason to guest blog is that you don’t have to create the audience. You only have to create the post. Trust me, it’s easier to create a post than to gather the people together that are willing to read it. However, the main benefit to starting your own blog is your ability to have full control. If you build your own audience you have more flexibility over the content. You might choose to get more aggressive in the future with sending traffic to your product from the blog, but if someone else owns all your content then you don’t have this possibility. Neither answer is wrong as long as you choose for strategic reasons. Remember, you can always do both. Maybe you start by guest blogging but then transition to your own blog.
Whichever route you choose you must not make your blog posts an extended pitch for your product. You’re gently pulling people in, not begging them to visit your site. If you get too overt about your intentions it will turn people away. With a little creativity you can easily get click throughs without making your post feel like an ad. Always start a new post with a bio that links to your product (no one will begrudge you this), and try to link to your product once within the post, but only when it’s relevant to what you’re saying.
Also, the blog posts that get read and shared are the ones that tap into something emotional, trendy, educational, enjoyable, or surprising (amongst others). Take note of the kinds of posts that get your attention, and then reverse engineer them to inform your own writing.
Podcasting
Podcasting is another great pull tactic because audio has inherent inbound qualities. When you hear someone speak then you are given a window into their mind that is different, and sometimes even better, than reading their thoughts. Like blogs, podcasts have inbuilt distribution mechanisms (podcast listening apps), but there are differences between blogging and podcasting when viewed through the lens of getting traffic:
Podcasts are not easily indexed by search engines.
It’s easy to click a link in a blog post, but it’s hard to visit a site that is mentioned in a podcast.
Podcasts are fewer in number, and tend to have smaller audiences.
It is highly unlikely that a podcast will be a viable channel for traffic, unless you think very creatively about it. Here are some twists that you could try:
Whatever you do, go niche. You probably don’t have the production experience or the budget to compete with general interests podcasts. Instead, select a very narrow niche, and dominate it.
Don’t start a podcast with a goal of doing an episode every week. Rather, set a goal of 10 episodes total and make it more like an educational course on a certain topic that your market would love to learn. With beautiful album art and a great audio intro, people will find you in the podcast directories and get curious. Never promise more episodes, and tell them upfront in the first episode what your intention is.
Go on a few podcasts as a guest, and then use those episodes as a part of a drip email campaign in order to inform your email list about your product further, via audio, to increase conversions. Note: the same thing can be done with blog posts also.
Of course, it is possible to go the traditional route by creating a podcast that publishes new episodes every week, but there is something you must know. Podcasts require a lot of time to do well, and low quality offerings will not gain enough traffic to matter. Therefore, get creative and think like a growth hacker, not like a podcaster. Use their medium, but not their methods.
Ebooks, Guides, and Whitepapers
Part of creating an effective pull strategy is to use the unique makeup of your team to inform which tactics you try. Some people love the idea of doing little things on a very regular basis (like blogging, or maybe podcasting). Others would rather invest large chunks of energy at spread out intervals, and produce things that are a bit more monumental. This is a valid tactic, and large written documents have a number of advantages in terms of getting traffic:
Ebooks, guides, and whitepapers have a certain draw to them. It’s somewhat easy to ignore a new blog post, but when there is a new hefty document on a niche subject you care about, it’s hard to ignore.
Ebooks, guides, and whitepapers have a high perceived value, and you can ask for an email address in exchange for downloading them. It feels like a fair trade, and it helps you build an email list that you will eventually work through your funnel.
Ebook, guides, and whitepapers spread through social media very effectively when they are executed well.
As an author (even a self-published one) you are a thought leader of sorts, and people will want to use the product you’ve created.
Ebook, guides, and whitepapers can be written to specifically educate people about your product. Informed visitors are more likely to become members and users.
MailChimp has a number of guides which they publish for all the reasons listed above.
Infographics
Infographics can entice people to your product because they simultaneously display expertise and aesthetic taste. Visualizations are powerful tools, and they are spread using social media extremely easily. Adam Breckler, of Visual.ly, provides the following advice when creating an infographic:
Select a Good Topic
Pick something that is clever, exciting, noteworthy, or that stands out for some other reason. Just don’t be boring or irrelevant.
Find the Right Data
People sometimes assume that they have to create the data themselves, but often a simple Google search will uncover data sets that have already been compiled.
Analyze the Data
Look at the data that you have with journalistic integrity. Don’t bend the data to suit your needs.
Build the Narrative
Brainstorm what story the data should tell. You need to transform the numbers into a coherent narrative, and not just present them as a collection of facts.
Come Up With a Design Concept
Now it’s time to consider ways to tell your narrative visually.
Polish and Refine the Design
Put on the finishing touches and make sure everything is as high quality as it needs to be to gain the public’s attention.
Distribute the Infographic
You can distribute it using your own audience (email list, social media, etc.), or you can use services like Visual.ly which is a marketplace for browsing inforgraphics.
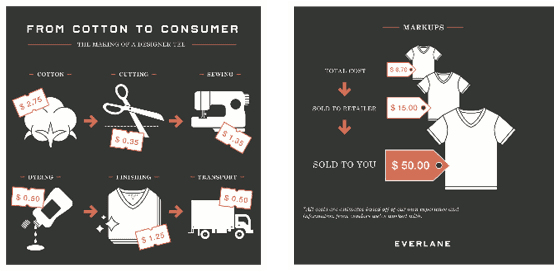
Everlane produced a couple of controversial infographics that created a firestorm online. Their infographics showed the typical markups that department stores charge for t-shirts. Since Everlane sells similar quality shirts at lower prices it’s easy to see how this infographic brought them the right kind of visitors.
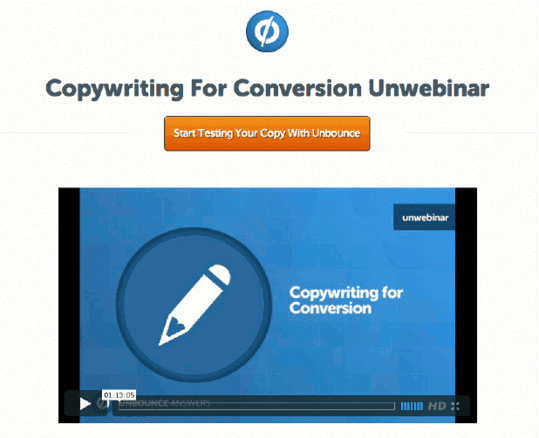
Webinars
The offline world has seminars, but the online world has webinars. These are very successful channels at bringing in new visitors for a few reasons:
Webinars are usually live, so people are forced to put them in their schedule, and view it as an event. A YouTube video can be watched anytime, but people must “attend” a webinar. When something is in their calendar they tend to take it seriously, and they take the information shared during the webinar seriously.
Webinars usually have limited seats, and this faux scarcity makes people feel like the content is exclusive and important. If you are important in someone’s mind then they are likely to move through your funnel more efficiently.
Webinars allow for interaction, and if someone gets to interact with you then they will have a connection to you and your product that will carry over into activity on your product.
Webinars educate people, and the more you give away in terms of educational value the more visitors will reciprocate in different ways.
A webinar can end with a special promotion of some kind for your product and this can drive traffic to your product.
A webinar can be done in conjunction with another company so that you can benefit from their audience learning about your product for maybe the first time.
Unbounce hosts something called “unwebinars.” Above is one they did with Joanna Wiebe in order to benefit from her expertise and her audience.
Speaking at Conferences
Conferences may feel like a very non-growth-hacker way to get traffic, but that’s just because you’re not thinking of it creatively enough. A conference presentation may pull in a few more visitors to your product, but not many, and the amount of preparation required is very high. However, a conference presentation creates a number of by-products which can be used to pull in visitors more effectively.
Slide Deck
If you’re presenting at a conference then you probably have a slide deck. This deck can be uploaded to slideshare.com and now you have a left over piece of collateral that can easily be shared, and it will bring people into you product for the foreseeable future. Sildeshare.com is a social network in it’s own right, and you would do well to invest in it.
Video/Audio
Many conferences will record your presentation, and this will allow you to put it on your company blog, upload it to YouTube, place it in email signatures, or use it during a drip email campaign.
Besides the by-products of a presentation, here are some other things to keep in mind:
Instant Retweets
I once spoke at a conference, and I ended my presentation by telling the audience that if they retweeted my last tweet that I would give them a discount to my product. I created a social media tornado in a matter of seconds.
Persuasion
Why did Steve Jobs do presentations? Because they’re are powerful. If you have the gift of gab, and can command an audience, then sometimes a few moments on stage can create a number of traffic sources for your product. Remember, growth hackers are right-brained and left-brained. Sometimes the ROI is fuzzy, but that doesn’t mean it is non-existent.
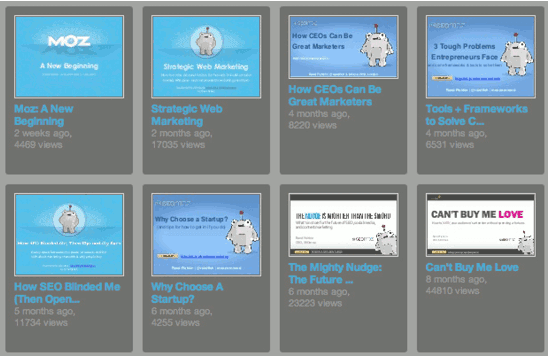
Rand Fishkin, the former CEO of Moz, has over 60 slideshares, and they have been viewed hundreds of thousands of times, creating countless new visitors for his product at Moz.com.
SEO
In a sense, all the tactics we’ve covered so far are incredible from an SEO point of view. As you create content of various kinds (blogs, podcasts, ebooks, whitepapers, guides, infographics, webinars, slide decks, video/audio presentations) then the search engines are going to realize that you are an authority on your topic of choice, and you’ll rank high for certain keywords. However, there are really two kinds of SEO strategies. I call them content and code.
Content
By virtue of creating content, even if you don’t know how SEO works, you will be optimizing for it. Just keep producing and you’ll be using SEO to your advantage even if you don’t know what an algorithm is.
Coder
There are also things you can do at the code level which enable a solid SEO strategy. Are your links seo optimized with keywords? Are H1 tags properly labeled. Do you use Schema.org tags for specific kinds of content? Do you have an up-to-date site map?
If you can use both content and code to your advantage then this is obviously the best case scenario. However, even if you can’t do both, you should do at least one or the other. Search engines are still the primary way we navigate the internet, and to ignore this simple truth is very unwise. SEO is important, and for many businesses it’s the primary way they gain traffic at the top of their funnel.
Social Media
One of the ways to gain traffic at the top of your funnel is through social media (Twitter, Facebook, Tumblr, etc.). There are actually so many spammy ways to do this that first I feel the need to tell you what not to do.
Don’t follow and unfollow people on a social network just to get their attention if you don’t intend to actually have some kind of relationship with them.
Don’t buy followers of any kind. They aren’t your market. They can’t amplify your message. They are a waste of money.
Don’t bother people. Ask yourself what kind of pings you would like to receive if you were in their shoes.
Here are some tips to help you bring in traffic to the top of your funnel using social media:
Engage with people who might actually use your product. Know your demographic.
Provide value at every chance. Answer questions. Give advice. Help them in some way. Don’t just take, but also be a giver.
Become a hub of interesting content, whether you produce it or not. If you gain a reputation as a great curator of content then people will pay attention to your posts and tweets simply because of your track record (even though you actually didn’t produce anything yourself).
Social media is a marathon, not a sprint. Social media usually will not give you massive traffic instantly. In fact, you should actually underestimate what follower counts and like counts represent. Even if someone with 100k followers retweets you it probably won’t give you much new traffic unless your demographics are perfectly aligned (but even then I’d be skeptical).
Social media is as much about customer support as anything else. Surprisingly, this can be a tool for new traffic. As people watch your stellar customer support happening in public then they will be more apt to try your product themselves.
Use social media to amplify all the content you created in tactics 1-8. Social media works great in conjunction with other tactics.
Like everything, creativity can open up new possibilities. Skittles once made their entire homepage a Twitter feed of a search for the word Skittles. They received countless mentions of Skittles on Twitter that day, and the internet collectively paid attention to their ingenious ploy.
Contests
Contests are an awesome way to drive new traffic to your product. A lot of people are actually unaware of how well contests work. Ever heard of AppSumo? Want to know how they grew an email list to over 700k emails? They started with contests. Ever heard of AirBNB? Want to know what they started doing this week to drive new traffic to their product? They started promoting a contest. Contests are good for small companies and big companies alike, so here are a few of things to remember as you create a contest:
Give away prizes that are meaningful to your audience. Every contest shouldn’t include a free iPad. Give them something that represents you. As an example, if you are AirBNB then give away free housing (which they are). This is important because if you are capturing their email address as a part of the giveaway then you don’t want a junk list that doesn’t represent your demographic. Just giving away iPads will give you an unqualified list, and you will have difficulty moving them through your funnel.
Giveaway experiences, not just goods and services. What do you think someone will remember more, an iPad or a trip to some awesome destination to see their favorite band? They might cost about the same, but the impact could be drastically different.
As an example, if you work for Uber, then giveaway a ride with some celebrity in an Uber cab. Now that’s an experience.
Have prizes for at least first, second, and third place. People want to feel like they have a chance of winning, and if you only have a grand prize then they might not play along.
Give them more entries to win the contest based on how much they give you in exchange. For an email address they get one entry. If they share a friend’s email address with you they get two more entries. For a retweet they might get three more entries. You get the point. Help them increase their chances of winning the more they grow your list and promote your product.
Run the contest long enough to gain some traction. Consider running it for a month. Anything less and you might not get enough entries to make the ROI work.
Make a big deal when you announce the winner and use this occasion as another event that generates noise online, and potentially traffic.
AppSumo ran a ton of contests over the years. They found something that worked so why should they stop? Also, notice how experiential their prize is.
App Marketplace
One of the channels for gaining new visitors which has arisen in the past few years is marketplaces. The Apple App Store is a marketplace. The Google Play Store is a marketplace. There are actually two kinds of app marketplaces, and they are different.
B2C App Marketplaces
If your company made an app for a consumer then you’ll probably be in a B2C app store like the Apple App Store. Here are some things to keep in mind if you are trying to get new users through this method:
Reviews matter immensely. Do whatever is necessary to not get bad reviews in the first place, and try to get people to change their reviews after they’ve left a bad one.
Screenshots are a window into your app so make them perfect. If you don’t visually entice people you can’t pull them in.
Think about your app’s name carefully. Will it be easy to search for and easy to find.
You cannot rely on the marketplaces alone for new traffic. There are simply too many apps now and you are a needle in a haystack. You must use the other tactics in this book also.
B2B App Marketplaces
If your product can be used for businesses then you might consider this relatively new kind of marketplace. Companies like Salesforce or Mailchimp now have their own marketplace for apps that integrate with their product. Here are some helpful tips concerning B2B app marketplaces.
These marketplaces are less crowded so they are easier to stand out in.
B2B marketplaces are apt to promote your product on their blog, in an email blast, or other ways, if you just ask them.
Sometimes B2B marketplaces will even pay you to build an integration with their product. Shopify recently had a fund that they used for this very purpose.
As with consumer marketplaces, reviews and screenshots matter, so don’t skimp on these.
You can include a “coming soon” in your description on these marketplaces which will list upcoming products that you will also integrate with. This is a great way to be found more easily on the B2B search engine since you will have a number of products listed in your description as keywords (this was one of the tactics that Wishery used, and they were eventually purchased).
The AppExchange is Salesforce’s B2B app marketplace.
Deal Sites
In the aftermath of Groupon’s rise (and slow demise) there have been a number of deal sites created in their wake. For many niches there is a deal site which has a substantial email list and is willing to promote your product. The arrangement with these companies is usually pretty straight forward. You provide a discount to their audience, and in exchange they provide you with distribution. This is a quick way to get traffic, and given how easy it is to set up this kind of relationship it’s worth trying. Another unexpected side benefit of these deal sites is the number of people who will purchase your product at full price even though they came from the deal site. The internet is a strange place and this will happen more than you would guess.
Mighty Deals is a niche deal site that serves designers. It would be worth it to see if you can find a deal site for your niche.
Leverage Other Peoples Audience (LOPA)
Although this is built into many of the tactics already covered I still wanted to talk about LOPA explicitly. Basically, building an audience is incredibly hard. So if you can find any way to leverage someone else’s audience then you will be taking advantage of a traffic shortcut. Guest blogging is a form of LOPA. Guest podcasting is a form of LOPA. Even marketplaces are a form of LOPA. Here are some other ways that you can take advantage of LOPA:
Create a giveaway for a specific blog that has your demographic as their audience.
Reach out to group leaders on Meetup.com that run communities that could use your product, and ask them if they’d tell their group about you.
Offer free accounts to thought leaders in your industry and if they have a great experience they will share it with their audience.
There are literally too many possibilities of LOPA to even begin listing them all. If you are creative enough you will always have new opportunities for LOPA.
A React component goes through different phases as it lives in an application, though it might not be evident that anything is happening behind the scenes.
Those phases are:
mounting
updating
unmounting
error handling
There are methods in each of these phases that make it possible to perform specific actions on the component during that phase. For example, when fetching data from a network, you’d want to call the function that handles the API call in the componentDidMount() method, which is available during the mounting phase.
Knowing the different lifecycle methods is important in the development of React applications, because it allows us to trigger actions exactly when they’re needed without getting tangled up with others. We’re going to look at each lifecycle in this post, including the methods that are available to them and the types of scenarios we’d use them.
The Mounting Phase
Think of mounting as the initial phase of a component’s lifecycle. Before mounting occurs, a component has yet to exist — it’s merely a twinkle in the eyes of the DOM until mounting takes place and hooks the component up as part of the document.
There are plenty of methods we can leverage once a component is mounted: constructor() , render(), componentDidMount() and static getDerivedStateFromProps(). Each one is handy in it’s own right, so let’s look at them in that order.
constructor()
The constructor() method is expected when state is set directly on a component in order to bind methods together. Here is how it looks:
// Once the input component is mounting...
constructor(props) {
  // ...set some props on it...
  super(props);
  // ...which, in this case is a blank username...
  this.state = {
    username: ''
  };
  // ...and then bind with a method that handles a change to the input
  this.handleInputChange = this.handleInputChange.bind(this);
}
It is important to know that the constructor is the first method that gets called as the component is created. The component hasn’t rendered yet (that’s coming) but the DOM is aware of it and we can hook into it before it renders. As a result, this isn’t the place where we’d call setState() or introduce any side effects because, well, the component is still in the phase of being constructed!
I wrote up a tutorial on refs a little while back, and once thing I noted is that it’s possible to set up ref in the constructor when making use of React.createRef(). That’s legit because refs is used to change values without props or having to re-render the component with updates values:
The render() method is where the markup for the component comes into view on the front end. Users can see it and access it at this point. If you’ve ever created a React component, then you’re already familiar with it — even if you didn’t realize it — because it’s required to spit out the markup.
class App extends React.Component {
  // When mounting is in progress, please render the following!
  render() {
    return (
      <div>
        <p>Hello World!</p>
      </div>
    )
  }
}
We can also use it to render components outside of the DOM hierarchy (a la React Portal):
// We're creating a portal that allows the component to travel around the DOM
class Portal extends React.Component {
  // First, we're creating a div element
  constructor() {
    super();
    this.el = document.createElement("div");
  }

  // Once it mounts, let's append the component's children
  componentDidMount = () => {
    portalRoot.appendChild(this.el);
  };

  // If the component is removed from the DOM, then we'll remove the children, too
  componentWillUnmount = () => {
    portalRoot.removeChild(this.el);
  };

  // Ah, now we can render the component and its children where we want
  render() {
    const { children } = this.props;
    return ReactDOM.createPortal(children, this.el);
  }
}
And, of course, render() can — ahem — render numbers and strings...
Does the componentDidMount() name give away what it means? This method gets called after the component is mounted (i.e. hooked to the DOM). In another tutorial I wrote up on fetching data in React, this is where you want to make a request to obtain data from an API.
It’s kind of a long-winded name, but static getDerivedStateFromProps() isn’t as complicated as it sounds. It’s called before the render() method during the mounting phase, and before the update phase. It returns either an object to update the state of a component, or null when there’s nothing to update.
To understand how it works, let’s implement a counter component which will have a certain value for its counter state. This state will only update when the value of maxCount is higher. maxCount will be passed from the parent component.
In the Counter component, we check to see if counter is less than maxCount. If it is, we set counter to the value of maxCount. Otherwise, we do nothing.
You can play around with the following Pen below to see how that works on the front end:
The updating phase occurs when a component when a component’s props or state changes. Like mounting, updating has its own set of available methods, which we’ll look at next. That said, it’s worth noting that both render() and getDerivedStateFromProps() also get triggered in this phase.
shouldComponentUpdate()
When the state or props of a component changes, we can make use of the shouldComponentUpdate() method to control whether the component should update or not. This method is called before rendering occurs and when state and props are being received. The default behavior is true. To re-render every time the state or props change, we’d do something like this:
When false is returned, the component does not update and, instead, the render() method is called to display the component.
getSnapshotBeforeUpdate()
One thing we can do is capture the state of a component at a moment in time, and that’s what getSnapshotBeforeUpdate() is designed to do. It’s called after render() but before any new changes are committed to the DOM. The returned value gets passed as a third parameter to componentDidUpdate().
It takes the previous state and props as parameters:
Use cases for this method are kinda few and far between, at least in my experience. It is one of those lifecycle methods you may not find yourself reaching for very often.
componentDidUpdate()
Add componentDidUpdate() to the list of methods where the name sort of says it all. If the component updates, then we can hook into it at that time using this method and pass it previous props and state of the component.
We’re pretty much looking at the inverse of the mounting phase here. As you might expect, unmounting occurs when a component is wiped out of the DOM and no longer available.
We only have one method in here: componentWillUnmount()
This gets called before a component is unmounted and destroyed. This is where we would want to carry out any necessary clean up after the component takes a hike, like removing event listeners that may have been added in componentDidMount(), or clearing subscriptions.
Things can go wrong in a component and that can leave us with errors. We’ve had error boundary around for a while to help with this. This error boundary component makes use of some methods to help us handle the errors we could encounter.
getDerivedStateFromError()
We use getDerivedStateFromError() to catch any errors thrown from a descendant component, which we then use to update the state of the component.
In this example, the ErrorBoundary component will display “Oops, something went wrong” when an error is thrown from a child component. We have a lot more info on this method in a wrap up on goodies that were released in React 16.6.0.
componentDidCatch()
While getDerivedStateFromError() is suited for updating the state of the component in cases where where side effects, like error logging, take place, we ought to make use of componentDidCatch() because it is called during the commit phase, when the DOM has been updated.
componentDidCatch(error, info) {
  // Log error to service
}
Both getDerivedStateFromError() and componentDidCatch() can be used in the ErrorBoundary component:
There’s something neat about knowing how a React component interacts with the DOM. It’s easy to think some “magic” happens and then something appears on a page. But the lifecycle of a React component shows that there’s order to the madness and it’s designed to give us a great deal of control to make things happen from the time the component hits the DOM to the time it goes away.
We covered a lot of ground in a relatively short amount of space, but hopefully this gives you a good idea of not only how React handles components, but what sort of capabilities we have at various stages of that handling. Feel free to leave any questions at all if anything we covered here is unclear and I’d be happy to help as best I can!
Let's say you're rocking a JAMstack-style site (no server-side languages in use), but you want to do something rather dynamic like send an email. Not a problem! That's the whole point of JAMstack. It's not just static hosting. It's that plus doing anything else you wanna do through JavaScript and APIs.
Here's the setup: You need a service to help you send the email. Let's just pick Sparkpost out of a hat. There are a number of them, and I'll leave comparing their features and pricing to you, as we're doing something extremely basic and low-volume here. To send an email with Sparkpost, you hit their API with your API key, provide information about the email you want to send, and Sparkpost sends it.
So, you'll need to run a little server-side code to protect your API key during the API request. Where can you run that code? A Lambda is perfect for that (aka a serverless function or cloud function). There are lots of services to help you run these, but none are easier than Netlify, where you might be hosting your site anyway.
Get Sparkpost ready
I signed up for Sparkpost and made sure my account was all set up and verified. The dashboard there will give you an API key:
Toss that API Key into Netlify
Part of protecting our API key is making sure it's only used in server-side code, but also that we keep it out of our Git repository. Netlify has environment variables that expose it to functions as needed, so we'll plop it there:
Let's spin up Netlify Dev, as that'll make this easy to work with
Netlify Dev is a magical little tool that does stuff like run our static site generator for us. For the site I'm working on, I use Eleventy and Netlify Dev auto-detects and auto-runs it, which is super neat. But more importantly, for us, it gives us a local URL that runs our functions for testing.
Once it's all installed, running it should look like this:
In the terminal screenshot above, it shows the website itself being spun up at localhost:8080, but it also says:
◈ Lambda server is listening on 59629
That'll be very useful in a moment when we're writing and testing our new function — which, by the way, we can scaffold out if we'd like. For example:
netlify functions:create --name hello-world
From there, it will ask some questions and then make a function. Pretty useful to get started quickly. We'll cover writing that function in a moment, but first, let's use this...
Sparkpost has their own Node lib
Sparkpost has an API, of course, for sending these emails. We could look at those docs and learn how to hit their URL endpoints with the correct data.
But things get even easier with their Node.js bindings. Let's get this set up by creating all the folders and files we'll need:
/project
   ... your entire website or whatever ...
   /functions/
      /send-email/
         package.json
         send-email.js
All we need the package.json file for is to yank in the Sparkpost library, so npm install sparkpost --save-dev will do the trick there.
Then the send-email.js imports that lib and uses it:
You'll want to look at their docs for error handling and whatnot. Again, we've just chosen Sparkpost out of a hat here. Any email sending service will have an API and helper code for popular languages.
Notice line 2! That's where we need the API key, and we don't need to hard-code it because Netlify Dev is so darn fancy that it will connect to Netlify and let us use the environment variable from there.
Test the function
When Netlify Dev is running, our Lamba functions have that special port they are running. We'll be able to have a URL like this to run the function:
This function is set up to run when it's hit, so we could simply visit that in a browser to run it.
Testing
Maybe you'll POST to this URL. Maybe you'll send the body of the email. Maybe you'll send the recipient's email address. It would be nice to have a testing environment for all of this.
Well, we can console.log() stuff and see it in the terminal, so that's always handy. Plus we can write our functions to return whatever, and we could look at those responses in some kind of API testing tool, like Postman or Insomnia.
Do you want to create a job board in WordPress? Job boards allow people to find jobs and companies to post their own job listings.
With the growing trend of the gig economy, starting a job board has become a popular online business idea. You can make money by accepting payments for job listings.
In this article, we will show you how to easily create a job board in WordPress and make money from it. You can also use this tutorial to add a job board to an existing WordPress site.
Getting Started with Your Job Board Website in WordPress
You will need the following items to create a job board website with WordPress.
A domain name (This will be your website’s address. Example, wpbeginner.com)
A web hosting account (This is where all your website files will be stored)
A job board extension for WordPress
Paid job listings add-on (if you want to accept payments for job listings)
Let’s start with the domain name and web hosting account.
Domain names cost around $14.99 per year and web hosting plans start from $7.99 / month (usually paid annually).
This may sound like a lot of money if you are just starting out.
Luckily, the folks at Bluehost are offering WPBeginner users a free domain name, free SSL certifcate, and discount on hosting. Basically, you can get started for $2.75 per month.
Bluehost is one of the biggest hosting companies in the world and an officially recommended WordPress hosting provider.
Once you purchase hosting, Bluehost will automatically install WordPress for you. If you need instructions, then follow our guide on how to install WordPress for detailed step by step instructions.
Now that you have WordPress ready, it is time to create a job board website with WordPress.
Upon activation, you will need to create a few pages that the plugin will use to display different sections of your job board.
On each page, you just need to enter a title and then add a shortcode.
Let’s get started. The first page we’re going to create will be for jobs. Simply create a new page and enter Jobs in the title field. In the content area, you need to add a shortcode block and paste the following shortcode inside it:
[jobs]
After adding the shortcode, click on the publish button to save your changes.
Next, you will need to repeat the process to create a ‘Submit Job Listing’ page and add the following shortcode:
[submit_job_form]
Lastly, you need to create a ‘Jobs Dashboard’ page and enter the following shortcode in the content area:
[job_dashboard]
Now that you have created all the required pages, let’s move on to plugin’s settings.
Head over to Job Listings » Settings page and click on the ‘Pages’ tab.
From here, you need to select the pages you have created earlier and then click on the save changes button to store your settings.
After that, you need to review other settings on the page. Let’s start with the ‘General’ tab first.
On the general page, you can select the date format, add Google Maps API key, or delete data when you uninstall the plugin.
Note: Google Maps API key requires you to provide billing information, and you will be charged based on your usage. If you don’t want to use Google Maps API, then you can leave this option unchecked.
After that, you can switch to the ‘Job Listings’ tab. There are a number of options on this page to control the display and features available for job listings. You need to review and adjust them to your own requirements.
Similarly, you can control the job listings submissions by switching to the ‘Job Submission’ tab. From here, you can control new account settings, submission moderation, edit controls, and more.
To protect your website against automated spam, you need to switch to the reCaptcha tab and enable it by adding the API keys. You will find a link to generate the required API keys next to each option.
WP Job Manager also sends notifications to site administrators and users. You can control them under the ‘Email Notifications’ tab.
Once you are done, don’t forget to click on the save changes button to store your settings.
Adding New Job Listings
Depending on your settings, logged-in users can submit jobs directly from Submit Jobs page you created earlier.
As an administrator, you can directly add jobs from the WordPress admin area.
Simply go to the Job Listings » Add New page and provide a title, description, and the job type for the job listing you are adding.
After entering the title, description and choosing a job type, you need to scroll down to Job Listing Data section. There you can provide more information about the job such as location, application email or URL, company information, company logo, job listing expiration date, etc.
After filling the job listing data, you can preview the job by clicking on the preview button.
After that you either add more details if you need to or simply click on Publish button to post the listing.
To manage existing job listings, you need to go to Job Listings » All Job Listings page in the WordPress admin area.
There you will be able to see all the job listing posted on your job board. You can click on the pencil icon to edit a job listing, see the filled jobs, and delete existing job listings.
Your website visitors will be able to view all job listings by visiting the jobs page you created earlier.
Logged in users will also be able to manage their job listings by visiting the jobs dashboard page you created earlier.
Adding Paid Job Listings
You may have seen several reputable sites adding a job board to generate extra revenue from their website. If your blog has a good reputation among industry peers, then companies wouldn’t mind paying a small fee to get their job posting listed on your site.
We hope this article helped you easily create a job board in WordPress. You may also want to see our list of proven ways to make money online for more ways to generate revenue from your website.
If you liked this article, then please subscribe to our YouTube Channel for WordPress video tutorials. You can also find us on Twitter and Facebook.
High-speed internet connections and the availability of powerful cloud-based apps have made it easier than ever for the average person to justify a job that involves working from home. Similarly, companies can take advantage of a global talent pool with software development outsourcing.
Branda is all about giving you fast easy control over white labeling WordPress…and quite frankly she rocks it. She just got some special new configurations for managing users, lightning fast setup, compatibility checks, and even more brand magic.
“How is that possible”, you ask? Branda 3.0 was unveiled just a month ago with an incredible new design and setup wizard. It was a big hit by the way. Thanks, everyone for the feedback.
But with Branda now sporting our signature hero interface we were able to quickly add +25 additions and feature upgrades.
So let’s dive in and explore the highlight features in Branda 3.1.
Not using Branda yet? Get a copy with a free 30-day WPMU DEV trial. No obligation. Cancel at any time and keep Branda as our gift.
Signup Codes With User Role Settings
Have an exclusive offer that requires site registration? Want to limit spam registrations? Looking to allow specific signups to access different user roles? Time to try Branda’s brand new Signup Code features.
Signup Codes make it so only people with a special code can register to your site.
Here’s what’s new:
Support for multiple codes – before you could set up just one registration code at a time. Now you can create as many unique codes as you need.
Give each code a user role – the ability to assign users a specific role based on the code they use when registering.
Allow a visitor to register as a subscriber without a code or create a special code that lets a user set up a Writer or Editor account. Not only do signup codes improve function, but it also helps eliminate unnecessary bot signups. Thank you again, Branda!
Use Signup Codes for letting users register for different user roles.
Branda Importer Enhancements
We’re continually looking for ways to simplify configuration for people managing multiple sites, from setting up new sites to site migration. The Branda import and export tool makes it easy to move your configuration options across multiple sites.
In 3.1 that includes the logo, background and favicon image files for the Admin Bar, DB Error Page, Login Screen, Site Status Pages, and Website Mode modules. Clone your look and style settings and load up your images all in a few clicks.
Import the specific modules and images you want for speedy set up.
The importer also regenerates your log DB error and site status files after an import so you get all the fresh looks without sharing the information.
Simplify SMTP Email Setting
By default, WordPress uses the PHP Mail function to send emails. That is not great, especially for sites that are scaling up. With Branda, you can use SMTP to send your messages including sending from a 3rd-party mail provider.
If your system emails keep ending up in the spam folder then you definitely need to check this feature out.
Branda lets you send system emails from your favorite 3rd-party services.
Again, this option is not new to Branda, but she did get smarter. In 3.1, Branda checks for other SMTP plugins on your site, notifies you of conflicts, and can even import SMTP settings from other popular tools.
Consolidate with Branda and she’ll take care of the set up.
WPMU DEV Hero Hider
Don’t really need to spend too much time here, but the the best white label plugin for WordPress got the WPMU DEV Hero Hider. This has become a favorite for our members. Basically, instead of displaying WPMU DEV branding and hero graphics you can replace them with your own… now including Branda.
Put Branda in stealth mode and remove WPMU DEV images or display your own logo where Branda sits in the dashboard. Groovy!
The WPMU DEV Hero Hider lets you replace all the hero branding from WPMU DEV plugins.
Get Started With Branda
Those are just the highlights. Branda 3.1 is stacked with over 25 additions, upgrades, and improvements including a bunch of cool little styling options, a custom CSS field for the author box, and the ability to hide custom menus for mobile users.
Branda is brilliant and just keeps getting better. But you don’t have to take my word for it. Start using Branda and all the WPMU DEV plugins, services and support absolutely free. Cancel anytime in the next 30-days, you won’t be charged, and we’ll let you keep Branda.
Building A Node.js Express API To Convert Markdown To HTML
Building A Node.js Express API To Convert Markdown To HTML
Sameer Borate
Markdown is a lightweight text markup language that allows the marked text to be converted to various formats. The original goal of creating Markdown was of enabling people “to write using an easy-to-read and easy-to-write plain text format” and to optionally convert it to structurally valid XHTML (or HTML). Currently, with WordPress supporting Markdown, the format has become even more widely used.
The purpose of writing the article is to show you how to use Node.js and the Express framework to create an API endpoint. The context in which we will be learning this is by building an application that converts Markdown syntax to HTML. We will also be adding an authentication mechanism to the API so as to prevent misuse of our application.
A Markdown Node.js Application
Our teeny-tiny application, which we will call ‘Markdown Convertor’, will enable us to post Markdown-styled text and retrieve an HTML version. The application will be created using the Node.js Express framework, and support authentication for conversion requests.
We will build the application in small stages — initially creating a scaffold using Express and then adding various features like authentication as we go along. So let us start with the initial stage of building the application by creating a scaffold.
Stage 1: Installing Express
Assuming you’ve already installed Node.js on your system, create a directory to hold your application (let’s call it “markdown-api”), and switch to that directory:
$ mkdir markdown-api
$ cd markdown-api
Use the npm init command to create a package.json file for your application. This command prompts you for a number of things like the name and version of your application.
For now, simply hit Enter to accept the defaults for most of them. I’ve used the default entry point file as index.js, but you could try app.js or some other depending on your preferences.
Now install Express in the markdown-api directory and save it in the dependencies list:
$ npm install express --save
Create an index.js file in the current directory (markdown-api) and add the following code to test if the Express framework is properly installed:
Now browse to the URL http://localhost:3000 to check whether the test file is working properly. If everything is in order, we will see a Hello World!’ greeting in the browser and we can proceed to build a base API to convert Markdown to HTML.
Stage 2: Building A Base API
The primary purpose of our API will be to convert text in a Markdown syntax to HTML. The API will have two endpoints:
/login
/convert
The login endpoint will allow the application to authenticate valid requests while the convert endpoint will convert (obviously) Markdown to HTML.
Below is the base API code to call the two endpoints. The login call just returns an “Authenticated” string, while the convert call returns whatever Markdown content you submitted to the application. The home method just returns a ‘Hello World!’ string.
We use the body-parser middleware to make it easy to parse incoming requests to the applications. The middleware will make all the incoming requests available to you under the req.body property. You can do without the additional middleware but adding it makes it far easier to parse various incoming request parameters.
You can install body-parser by simply using npm:
$ npm install body-parser
Now that we have our dummy stub functions in place, we will use Postman to test the same. Let’s first begin with a brief overview of Postman.
Postman Overview
Postman is an API development tool that makes it easy to build, modify and test API endpoints from within a browser or by downloading a desktop application (browser version is now deprecated). It has the ability to make various types of HTTP requests, i.e. GET, POST, PUT, PATCH. It is available for Windows, macOS, and Linux.
To query an API endpoint, you’ll need to do the following steps:
Enter the URL that you want to query in the URL bar in the top section;
Select the HTTP method on the left of the URL bar to send the request;
Click on the ‘Send’ button.
Postman will then send the request to the application, retrieve any responses and display it in the lower window. This is the basic mechanism on how to use the Postman tool. In our application, we will also have to add other parameters to the request, which will be described in the following sections.
Using Postman
Now that we have seen an overview of Postman, let’s move forward on using it for our application.
Start your markdown-api application from the command-line:
$ node index.js
To test the base API code, we make API calls to the application from Postman. Note that we use the POST method to pass the text to convert to the application.
The application at present accepts the Markdown content to convert via the content POST parameter. This we pass as a URL encoded format. The application, currently, returns the string verbatim in a JSON format — with the first field always returning the string markdown and the second field returning the converted text. Later, when we add the Markdown processing code, it will return the converted text.
Stage 3: Adding Markdown Convertor
With the application scaffold now built, we can look into the Showdown JavaScript library which we will use to convert Markdown to HTML. Showdown is a bidirectional Markdown to HTML converter written in Javascript which allows you to convert Markdown to HTML and back.
After adding the required showdown code to the scaffold, we get the following result:
const express        = require("express");
const bodyParser = require('body-parser');
const showdown   = require('showdown');

var app = express();
app.use(bodyParser.urlencoded({ extended: true }));
app.use(bodyParser.json());

converter = new showdown.Converter();

app.get('/', function(req, res){
    res.send('Hello World!');
});

app.post('/login', function(req, res) {
    res.send("Authenticated");
  },
);

app.post("/convert", function(req, res, next) {
    if(typeof req.body.content == 'undefined' || req.body.content == null) {
        res.json(["error", "No data found"]);
    } else {
        text = req.body.content;
        html = converter.makeHtml(text);
        res.json(["markdown", html]);
    }
});

app.listen(3000, function() {
 console.log("Server running on port 3000");
});
The main converter code is in the /convert endpoint as extracted and shown below. This will convert whatever Markdown text you post to an HTML version and return it as a JSON document.
...
} else {
        text = req.body.content;
        html = converter.makeHtml(text);
        res.json(["markdown", html]);
    }
The method that does the conversion is converter.makeHtml(text). We can set various options for the Markdown conversion using the setOption method with the following format:
converter.setOption('optionKey', 'value');
So, for example, we can set an option to automatically insert and link a specified URL without any markup.
As in the Postman example, if we pass a simple string (such as Google home http://www.google.com/) to the application, it will return the following string if simplifiedAutoLink is enabled:
<p>Google home <a href="http://www.google.com/">http://www.google.com/</a></p>
Without the option, we will have to add markup information to achieve the same results:
Google home <http://www.google.com/>
There are many options to modify how the Markdown is processed. A complete list can be found on the Passport.js website.
So now we have a working Markdown-to-HTML converter with a single endpoint. Let us move further and add authentication to have application.
Stage 4: Adding API Authentication Using Passport
Exposing your application API to the outside world without proper authentication will encourage users to query your API endpoint with no restrictions. This will invite unscrupulous elements to misuse your API and also will burden your server with unmoderated requests. To mitigate this, we have to add a proper authentication mechanism.
We will be using the Passport package to add authentication to our application. Just like the body-parser middleware we encountered earlier, Passport is an authentication middleware for Node.js. The reason we will be using Passport is that it has a variety of authentication mechanisms to work with (username and password, Facebook, Twitter, and so on) which gives the user the flexibility on choosing a particular mechanism. A Passport middleware can be easily dropped into any Express application without changing much code.
Install the package using npm.
$ npm install passport
We will also be using the local strategy, which will be explained later, for authentication. So install it, too.
$ npm install passport-local
You will also need to add the JWT(JSON Web Token) encode and decode module for Node.js which is used by Passport:
$ npm install jwt-simple
Strategies In Passport
Passport uses the concept of strategies to authenticate requests. Strategies are various methods that let you authenticate requests and can range from the simple case as verifying username and password credentials, authentication using OAuth (Facebook or Twitter), or using OpenID. Before authenticating requests, the strategy used by an application must be configured.
In our application, we will use a simple username and password authentication scheme, as it is simple to understand and code. Currently, Passport supports more than 300 strategies which can be found here.
Although the design of Passport may seem complicated, the implementation in code is very simple. Here is an example that shows how our /convert endpoint is decorated for authentication. As you will see, adding authentication to a method is simple enough.
app.post("/convert",
         passport.authenticate('local',{ session: false, failWithError: true }),
         function(req, res, next) {
        // If this function gets called, authentication was successful.
        // Also check if no content is sent
        if(typeof req.body.content == 'undefined' || req.body.content == null) {
            res.json(["error", "No data found"]);
        } else {
            text = req.body.content;
            html = converter.makeHtml(text);
            res.json(["markdown", html]);
        }},
        // Return a 'Unauthorized' message back if authentication failed.
        function(err, req, res, next) {
            return res.status(401).send({ success: false, message: err })
        });
Now, along with the Markdown string to be converted, we also have to send a username and password. This will be checked with our application username and password and verified. As we are using a local strategy for authentication, the credentials are stored in the code itself.
Although this may sound like a security nightmare, for demo applications this is good enough. This also makes it easier to understand the authentication process in our example. Incidentally, a common security method used is to store credentials in environment variables. Still, many people may not agree with this method, but I find this relatively secure.
The complete example with authentication is shown below.
const express = require("express");
const showdown  = require('showdown');
const bodyParser = require('body-parser');
const passport = require('passport');
const jwt = require('jwt-simple');
const LocalStrategy = require('passport-local').Strategy;


var app = express();
app.use(bodyParser.urlencoded({ extended: true }));
app.use(bodyParser.json());

converter = new showdown.Converter();

const ADMIN = 'admin';
const ADMIN_PASSWORD = 'smagazine';
const SECRET = 'secret#4456';

passport.use(new LocalStrategy(function(username, password, done) {
  if (username === ADMIN && password === ADMIN_PASSWORD) {
    done(null, jwt.encode({ username }, SECRET));
    return;
  }
  done(null, false);
}));

app.get('/', function(req, res){
    res.send('Hello World!');
});


app.post('/login', passport.authenticate('local',{ session: false }),
                function(req, res) {
                // If this function gets called, authentication was successful.
                // Send a 'Authenticated' string back.
                res.send("Authenticated");
  });


app.post("/convert",
         passport.authenticate('local',{ session: false, failWithError: true }),
         function(req, res, next) {
        // If this function gets called, authentication was successful.
        // Also check if no content is sent
        if(typeof req.body.content == 'undefined' || req.body.content == null) {
            res.json(["error", "No data found"]);
        } else {
            text = req.body.content;
            html = converter.makeHtml(text);
            res.json(["markdown", html]);
        }},
        // Return a 'Unauthorized' message back if authentication failed.
        function(err, req, res, next) {
            return res.status(401).send({ success: false, message: err })
        });


app.listen(3000, function() {
 console.log("Server running on port 3000");
});
A Postman session that shows conversion with authentication added is shown below.
Final application testing with Postman (Large preview)
Here we can see that we have got a proper HTML converted string from a Markdown syntax. Although we have only requested to convert a single line of Markdown, the API can convert a larger amount of text.
This concludes our brief foray into building an API endpoint using Node.js and Express. API building is a complex topic and there are finer nuances that you should be aware of while building one, which sadly we have no time for here but will perhaps cover in future articles.
Accessing Our API From Another Application
Now that we have built an API, we can create a small Node.js script that will show you how the API can be accessed. For our example, we will need to install the request npm package that provides a simple way to make HTTP requests. (You will Most probably already have this installed.)
$ npm install request --save
The example code to send a request to our API and get the response is given below. As you can see, the request package simplifies the matter considerably. The markdown to be converted is in the textToConvert variable.
Before running the following script, make sure that the API application we created earlier is already running. Run the following script in another command window.
Note: We are using the(back-tick)sign to span multiple JavaScript lines for thetextToConvertvariable. This is not a single-quote.
var Request = require("request");

// Start of markdown
var textToConvert = `Heading
=======
## Sub-heading

Paragraphs are separated
by a blank line.

Two spaces at the end of a line
produces a line break.

Text attributes _italic_,
**bold**, 'monospace'.
A [link](http://example.com).
Horizontal rule:`;

// End of markdown

Request.post({
    "headers": { "content-type": "application/json" },
    "url": "http://localhost:3000/convert",
    "body": JSON.stringify({
        "content": textToConvert,
        "username": "admin",
        "password": "smagazine"
    })
}, function(error, response, body){
    // If we got any connection error, bail out.
    if(error) {
        return console.log(error);
    }
    // Else display the converted text
    console.dir(JSON.parse(body));
});
When we make a POST request to our API, we provide the Markdown text to be converted along with the credentials. If we provide the wrong credentials, we will be greeted with an error message.
For a correctly authorized request, the above sample Markdown will be converted to the following:
[ 'markdown',
  `<h1 id="heading">Heading</h1>
  <h2 id="subheading">Sub-heading</h2>
  <p>Paragraphs are separated by a blank line.</p>
  <p>Two spaces at the end of a line<br />
  produces a line break.</p>
  <p>Text attributes <em>italic</em>,
  <strong>bold</strong>, 'monospace'.
  A <a href="http://example.com">link</a>.
  Horizontal rule:</p>` ]
Although we have hardcoded the Markdown here, the text can come from various other sources — file, web forms, and so on. The request process remains the same.
Note that as we are sending the request as an application/json content type; we need to encode the body using json, hence the JSON.stringify function call. As you can see, it takes a very small example to test or API application.
Conclusion
In this article, we embarked on a tutorial with the goal of learning on how to use Node,js and the Express framework to build an API endpoint. Rather than building some dummy application with no purpose, we decided to create an API that converts Markdown syntax to HTML, which anchors or learning in a useful context. Along the way, we added authentication to our API endpoint, and we also saw ways to test our application endpoint using Postman.
Do you have an amazing product, but unable to attract the right customers to buy it? Are you unsure how to approach your customers or do you have a confusing sales message? If so, you may want to learn about some strategies that can help.
Find the right price
You need to do a bit of market research on your competition to determine what price you need to charge. If you have a higher priced product, make sure you over deliver on your quality.
You can check out the Pardot pricing structure to see a good example of what types of options you should provide your clients.
2. Figure out what your unique selling proposition is
What is the unique selling proposition of the product or service you offer? This could be your competitive advantage or something that makes you totally unique from the competition.
It’s important to focus on what makes your product better than all the rest. This is what is going to help you sell more of whatever it is you have to offer.
3. Make social media and content marketing work for you
There are more ways to get your products in front of your customers than ever before. The best part of this is the fact that they are free.
You can use social media platforms, such as Twitter, Instagram, and Facebook, as well as the blog on your website to your advantage. You can use these platforms to establish relationships with your customers. This is going to help you gain access to more people than ever before.
Some of the specific benefits offered by content marketing include:
Reduced costs for acquiring customers
More channels for you to sell your service or product
More access to qualified leads
Be sure to create a presence on social media and to use your blog properly to be certain that you are connecting with your customers through every medium possible.
4. Cold calls may be necessary
You may think that cold calling is a marketing method that is dead and buried. Regardless of if you are doing this in person or by phone, you have the role to warm up a potential customer. This is especially the case if you have a new product or service. You may have to generate some interest in what you offer by conducting a few cold calls.
5. Benefits sell
One of the first things to understand is that people don’t purchase products. What they buy are the results the product can provide.
You need to begin the process by creating a list of all the benefits that your customer can enjoy if they use your service or product.
If you want to increase your sales, regardless of what type of service or product you offer, it’s imperative that you take the reins. You can’t leave things like this to chance. Using the tips and information here will help ensure you begin to see the sales and results that you are looking for.
Blogging for your business can be time-consuming, and it can often seem like there are other more important tasks to be completed, so blogging for your own company can get pushed to the bottom of the pile. However, creating quality, informative content is essential in this age for building a successful business as the higher Read More →