Do you want to organize WordPress files in the media library folders?
By default, WordPress automatically creates folders in the media library based on year and months. However, some users may want to create their own custom folders for different media files.
In this article, we’ll show you how to easily organize WordPress files in custom media library folders.

Why Organize Your Files in Media Library Folders?
Normally, WordPress stores all your images and other media files in the /wp-content/uploads/ folder. To keep it structured, all files are stored in folders organized by year and month.
https://example.com/wp-content/uploads/2020/07/
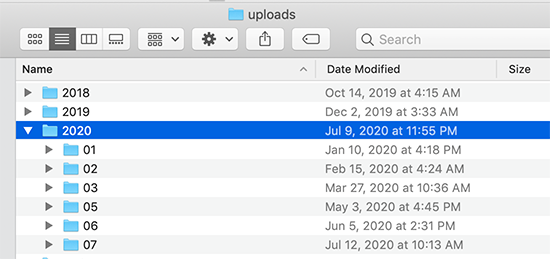
This works perfectly for most websites. However, some users may want to get better control on how WordPress stores media files.
For instance, a photography website may want to organize WordPress images by topic, location, or event folders. Similarly, a portfolio website may want to organize their media uploads by type, client, industry, and more.
This allows them to easily browse their media files. At the same time, it improves image SEO, as you can now add keywords in your image file URLs which makes URLs more meaningful.
Having said that, let’s take a look at how to easily create folders to organize your WordPress media files.
How to Organize Your WordPress Files in Media Library Folders
First, you need to install and activate the Media Library Folders plugin. For more details, see our step by step guide on how to install a WordPress plugin.
Note: The free version of the plugin only lets you create up to 10 folders. You will need to upgrade to the pro version if you want to make more.
Upon activation, the plugin will add a new menu item labeled ‘Media Library Folders’ in your WordPress admin sidebar. Clicking on it will open plugin’s folder view showing all the folders inside your WordPress upload directory.
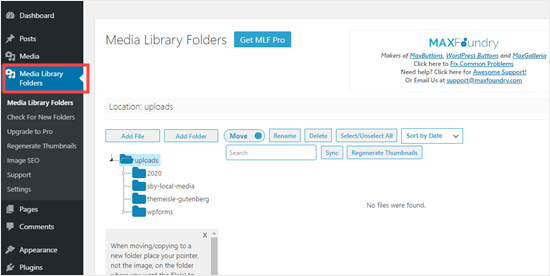
From here, you can create new folders and add files to them. You can also move, copy, rename, or delete your files.
We’re going to create some new folders and add images to them.
To create a new folder, simply click the ‘Add Folder’ button and then type in the name you want to use for that folder.
Tip: You cannot use spaces in folder names. Instead, use hyphen or underscore to separate words if needed.
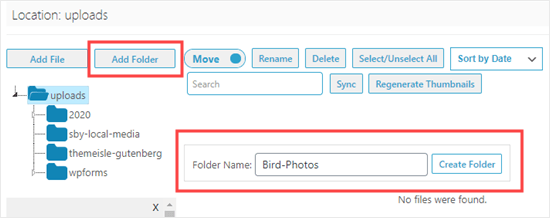
It’s also possible to make subfolders within folders, if needed. To create subfolders, simply click on the parent folder to select it, and then click on the ‘Add Folder’ button.
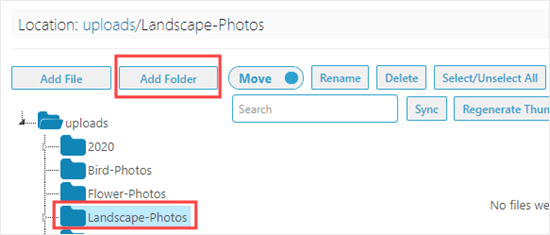
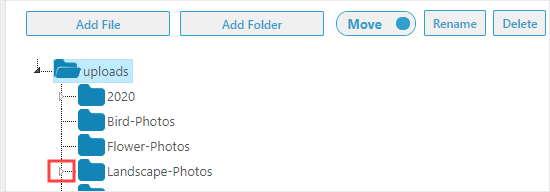
We created two subfolders for our ‘Landscape-Photos’ folder. They are ‘Forests’ and ‘Mountains’. To view a subfolder, you need to click on the small arrow to the left of the main folder:
To add files to your folders, simply click on the folder then click the ‘Add File’ button. After that, go ahead and upload as many files as you want.
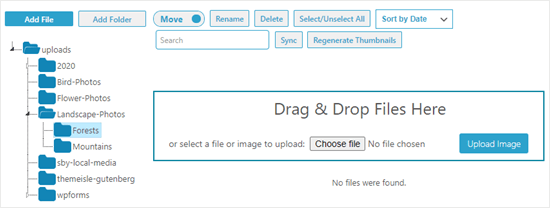
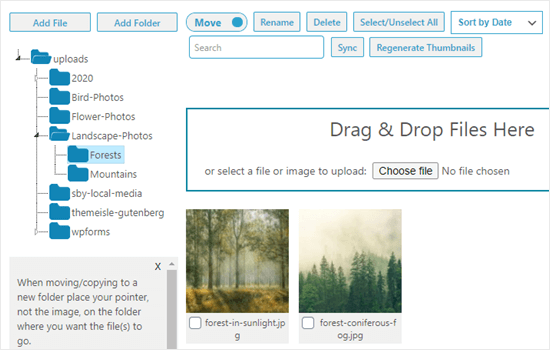
Once you’re done uploading files, you’ll see them on the screen as thumbnails with the filename below:
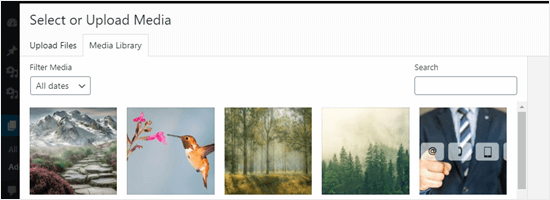
It’s easy to add your uploaded files to your posts or pages. You can add them just like any other files that you’ve uploaded to the media library:
Moving and Copying Your Files in Media Library Folders
What if you need to move a file to a different WordPress media library folder? It’s easy to move it or copy it using Media Library Folders.
Moving an Image to a New Folder in the Media Library
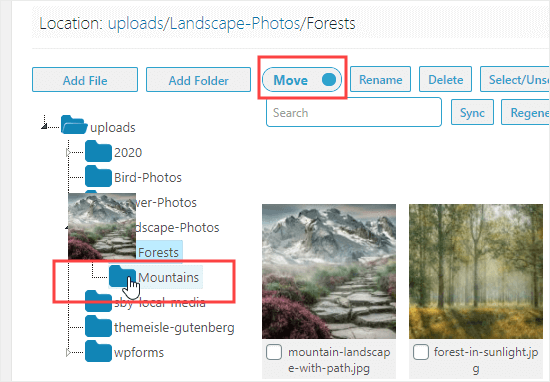
To move an image or any other file, simply check that the move/copy toggle is set to ‘Move’ and then drag the image to the correct folder.
Tip: Your mouse pointer should be on the new folder, as shown below. The small thumbnail of the image is just showing you what you’re moving, not where you’re moving it to.
In this example, a mountain image was incorrectly placed in the Forests folder. We are moving it to the Mountains folder.
Copying an Image to a Different Folder in the Media Library
To copy an image, set the move/copy toggle to ‘Copy’, then go ahead and drag the image as before. Here, we are copying an image of a bird and flower, so that it’s in both the ‘Bird-Photos’ and the ‘Flower-Photos’ folders.
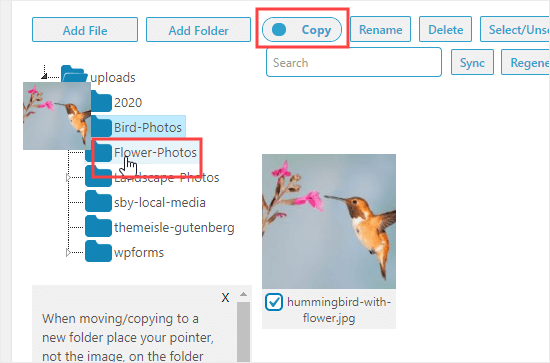
This time, your original image will stay in place. Your image will be duplicated so that it can be present in both folders.
Renaming Files and Folders in Media Library Folders
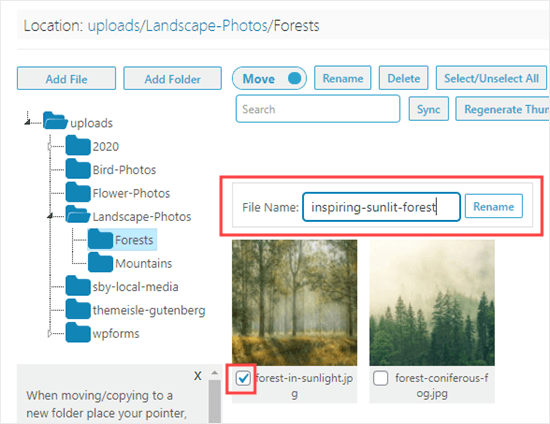
You can easily change the filename with the Media Library Folders plugin. First, find the file you want to change and click the checkbox below it. Next, click the ‘Rename’ button at the top of the screen.
After that, type in the filename you want to use. Image filenames can have a small impact on your WordPress SEO, so it’s recommended to use keywords within them. Here, we’ve changed the file name for a post on inspiring forest images:
You cannot rename or move a folder in Media Library Folders. However, it’s possible to create a new folder, move all the images into it, then delete the old folder.
To delete a folder, right click on it, and then click ‘Delete this folder?’ button. Here, we’ve moved the forest images into a new folder called Woodlands, and we’re deleting the Forests folder:
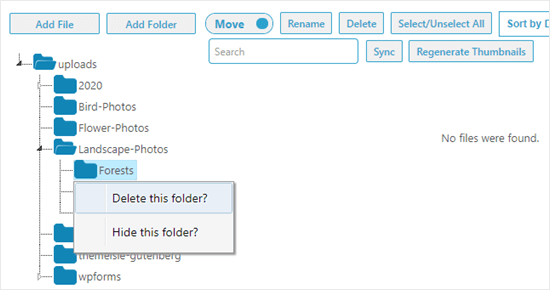
You’ll then see a message prompting you to confirm. Click ‘OK’ to continue and the folder will be deleted. You’ll no longer see it in the list:
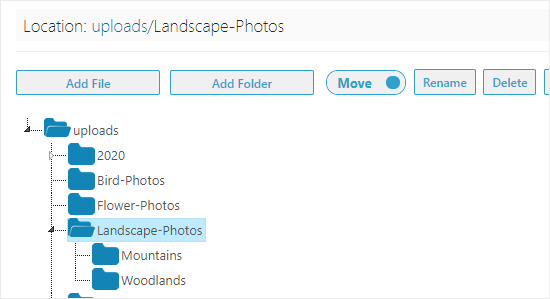
Tip: You may see the message ‘This folder is not empty and could not be deleted’ even though the folder looks empty. Simply click the ‘Sync’ button. WordPress may have created additional versions of your images that need deleting. After syncing, you’ll be able to review and delete those images.

We hope this article helped you learn how to organize WordPress files in media library folders. You might also want to check out our articles on fixing common image issues in WordPress and other must have WordPress plugins for business websites.
If you liked this article, then please subscribe to our YouTube Channel for WordPress video tutorials. You can also find us on Twitter and Facebook.
The post How to Organize WordPress Files in Media Library Folders appeared first on WPBeginner.

