22 Email Best Practices That I Live By as an Email Marketer

Featured Imgs 23

Despite my tendency to let my email inbox bloat with unanswered emails (I just got a warning from Gmail that my inbox is 90% full), I'm actually pretty well-versed in email marketing.

I used to manage the email newsletter at a TV station as a journalist, and I most recently managed the HubSpot Daily Newsletter before it morphed into the Masters in Marketing newsletter, which you should subscribe to if you haven't already.

→ Download Now: The Beginner's Guide to Email Marketing [Free Ebook]

Though the marketing landscape is constantly changing, email marketing remains an effective way for businesses to generate leads and convert more leads. That's why local TV stations use them, your favorite brand likely has one, and HubSpot has a few!

According to our 2024 State of Marketing and Trends Report, about a third of marketers (33%) use email as a channel to connect to their audience. This makes email the second most used channel behind social media.

Email marketing isn't going away soon, so you should incorporate it into your marketing strategy. Here are some best practices I live by that will help you get the most out of your email marketing strategy.

Table of Contents

3 Email Automation Best Practices

1. Implement AI wherever helpful.

You can't spell “automation” without AI. I know the use of AI has garnered as much criticism as praise, but believe me when I tell you that all email marketers should be leveraging AI in their campaigns.

AI can streamline your workflows and processes, freeing time to focus on other tasks while ensuring your audience receives timely and engaging content.

In fact, our most recent newsletter survey found that 42% of email marketers saved between 30 minutes and two hours of work each week by using AI.

If that notion alone isn't enough to convince you to implement AI, remember that while you may not be using AI, your competitors certainly are.

Our survey also found that almost a third of respondents (31%) use AI to edit newsletter content.

28% use AI to generate newsletter headlines or format content and 22% use it to get suggestions for short-form newsletter content such as headlines and preview descriptions.

So, if you want to stay competitive and efficiently generate newsletter content your audience will read, you should look into ways to leverage AI to automate certain processes, such as ideation or segmentation.

2. Look over, fact-check, and edit AI-generated content.

If you‘re using AI to draft any sort of copy for your emails, always double-check for accuracy and legibility. AI can streamline processes and boost efficiency but also make mistakes.

You also want to ensure the copy doesn’t read as being too robotic or impersonal.

3. Create automated emails for opt-ins.

Be prepared for your readers to forget they opted in.

Set up an automated email flow that reminds people they opted into your email database. The auto-responder should be sent out one day, five days, and 10 days after the person subscribes.

Each automated email should also include additional content or bonus material to reward the reader for opting into the newsletter. Otherwise, your readers might not feel they have enough incentive to actually stay on your list.

9 Email Campaign Best Practices

1. Don't purchase contact lists.

This first tip should be no surprise, but given the General Data Protection Regulation (GDPR), it bears repeating.

Email campaigns depend on a healthy open rate. If you're contacting people whose information you bought rather than earned from a previous interaction, your emails’ performance will quickly drop.

It also could turn off potential customers if they know you bought their information from another party.

For example, a couple of years ago, I made a big cross-country move and contacted a moving company for a quote on their services.

About a day after contacting them, I was bombarded with emails from other moving companies and services and added to newsletters I had never signed up for.

So, I unsubscribed and blocked many of those businesses that seemed to have received my information from the initial company I contacted. I also blocked that company.

Moral of the story? Don't buy your contacts, add people to lists without their permission, or share their information without their consent. It's one way to leave a bad impression on potential consumers.

Remember that the GDPR also requires each European recipient's consent before contacting them. Purchased email lists usually do not come with that consent.

To help reach your target audience, consider Versium Reach — a platform for B2B marketers that allows you to own data on your target audience across multiple marketing channels.

2. Avoid using ‘No-Reply’ in the sender's email address.

Have you heard of CAN-SPAM? This long-standing legislation is a popular and important guideline for all email marketers in the U.S.

One major rule in CAN-SPAM is to never use the words “no reply “ or a similar phrase as the email sender's name (for example, ”noreply@yourcompany.com”).

“No reply” in an email message prevents recipients from responding and even opting out of further emails, which CAN-SPAM protects their right to do so at any time.

Instead, have your automated emails come from a first name (jamie@mycompany.com). Your customers are much more likely to open emails if they know a human being wrote them, and this keeps you compliant with email regulations.
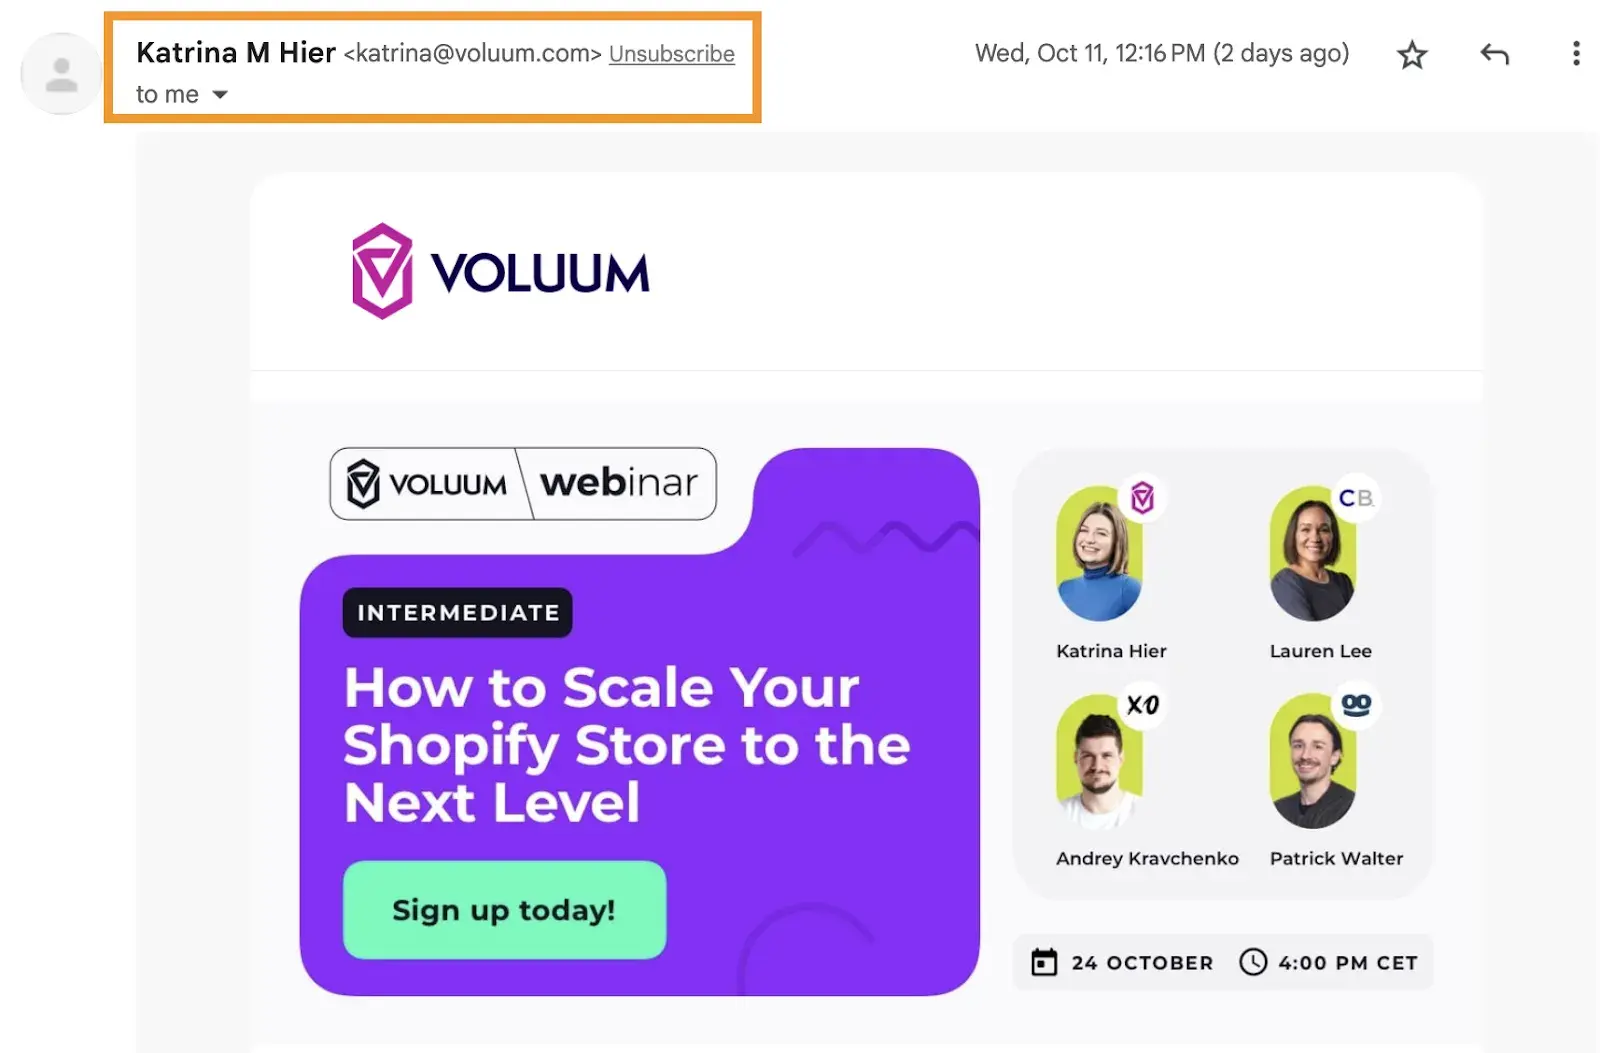
Screenshot of email sent by Voluum.com

3. Clean your mailing list regularly.

Listen, I get it. When I managed the HubSpot Daily Email, I absolutely loved seeing thousands of people on our lists who would receive our emails. However, I eventually learned that the quantity of my email list wasn't nearly as important as the quality.

Some of our email contacts may not have opted out of our email campaign but would still never open our emails. And those types of contacts simply were not helpful to our campaign goals.

People who never open emails make your campaign look worse since you‘re not analyzing the campaign’s quality against your most loyal recipients.

That's why I strongly suggest you review your list of subscribers who have not engaged with your emails over a certain period and remove them regularly.

This will give you a more accurate email open rate and keep your email campaign clean of people who are no longer interested in hearing from you.

You can also implement a workflow in which they’re gradually moved to a less frequent email list based on activity.

For instance, say you have a daily newsletter. You could implement a workflow in which subscribers who do not open your email in two consecutive weeks are moved to the weekly email.

Then, if subscribers don't open four consecutive emails, they could be moved to the monthly newsletter, and so on.

It prevents you from bombarding your subscribers with emails they’re not interested in while keeping your list clean.

4. Allow recipients to subscribe to your newsletter.

I know what you're thinking: "Wait, if they received the email, to begin with, shouldn’t they have already subscribed?"

Usually, yes. Therefore, adding a “Subscribe” button to your email doesn’t help those who’ve already agreed to receive your emails.

But great content is shareable content, and if your current subscribers are forwarding your emails to their friends and colleagues, you’ll want to help them subscribe, too.

I‘m pretty much the queen of newsletters, which is partially why my inbox is so full. I’m always forwarding newsletters to my friends when I think they might interest them. And oftentimes, they end up subscribing, too.

So, add a small but visible CTA that allows the recipient to subscribe to the newsletter if they received this email from someone else.

This email newsletter called Contentment is a great example of how to include a sign-up CTA in your email without distracting from the rest of the content:
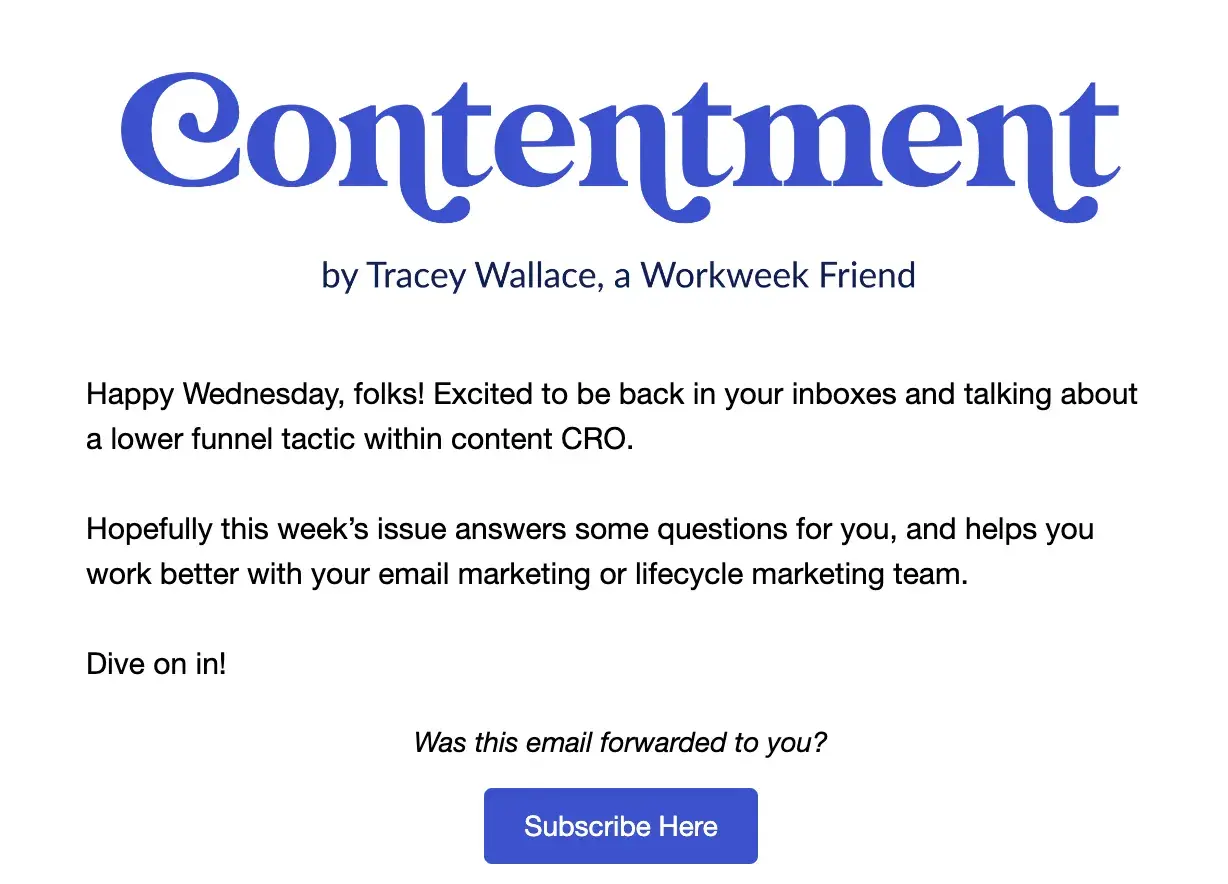
Screenshot of email sent by Contentment

Image Source

But remember, because your newsletter should already be driving another action, such as downloading an ebook or signing up for a webinar, make sure this “Subscribe” button doesn't distract or confuse users, weakening your main campaign goal in the process.

5. Include a clear CTA.

Speaking of CTAs, let‘s get into their value. I’ve never sent out a newsletter without ensuring I've included a clear CTA. Your CTA directs the receiver to make another move.

When adding a CTA, consider what you want the receiver to do next. Should they set up a call or book a demo?

I‘m subscribed to a newsletter by one of my favorite local music venues to keep current on all the artists and musicians coming through my city. The venue’s newsletter always has a CTA button directing me to Buy Tickets or use a code to get a discount or early bird special.

Do you see how the CTA is clear and simple? Sometimes, a little can go a long way for a quality CTA.

Screenshot of email with CTA button to buy tickets

6. Make it personal.

Sending an outbound email isn’t too different from sending a marketing email. You should still be personal, but even more so when you know your email is only being read by the receiver.

Start by letting them know how you know them. Have you already connected on Twitter or in a Slack group? Is this a completely cold email? As my friends like to tell me (though not about emails), “Define the relationship!”

Figure out where you stand so you can personalize the greeting and message.

7. Closely tie emails to landing pages.

If you’re promoting a specific landing page in your email, the landing page should match the email in terms of headline, copy, and content. I'll even suggest that the color schemes be the same or similar.

The look and feel of your landing page should match the email to help create consistency, which goes a long way toward earning a customer's trust. Also, make sure you‘re using tracking tools to see which emails and landing pages performed the best so you can keep sending what’s working.

8. Conduct a five-second test.

Send a copy of the email to a friend or colleague. Can they quickly tell what your CTA is? If so, you’re ready to hit send. If not, figure out how you can tweak your subject line. Or, if there’s a different landing page, you should link to it.

9. Follow up.

Follow up when necessary, but don’t bombard the receiver with a million follow-up emails.

Be aware of the typical response time from people in your industry or people you contact. Two days to one week is a reasonable amount of time between sending your first email and sending a follow-up.

10 Email Content Best Practices

1. Stick to fewer than three typefaces.

The less clutter you have in your email, the more conversions you'll get.

Don't clutter your message with more than two fonts or typefaces; this can distract readers and ruin your email’s visual appeal.

In the email example below from recruiting SaaS company Greenhouse, the company sticks to just two fonts.

This makes the email easy to read, and readers can focus on the context rather than get distracted by the styling.
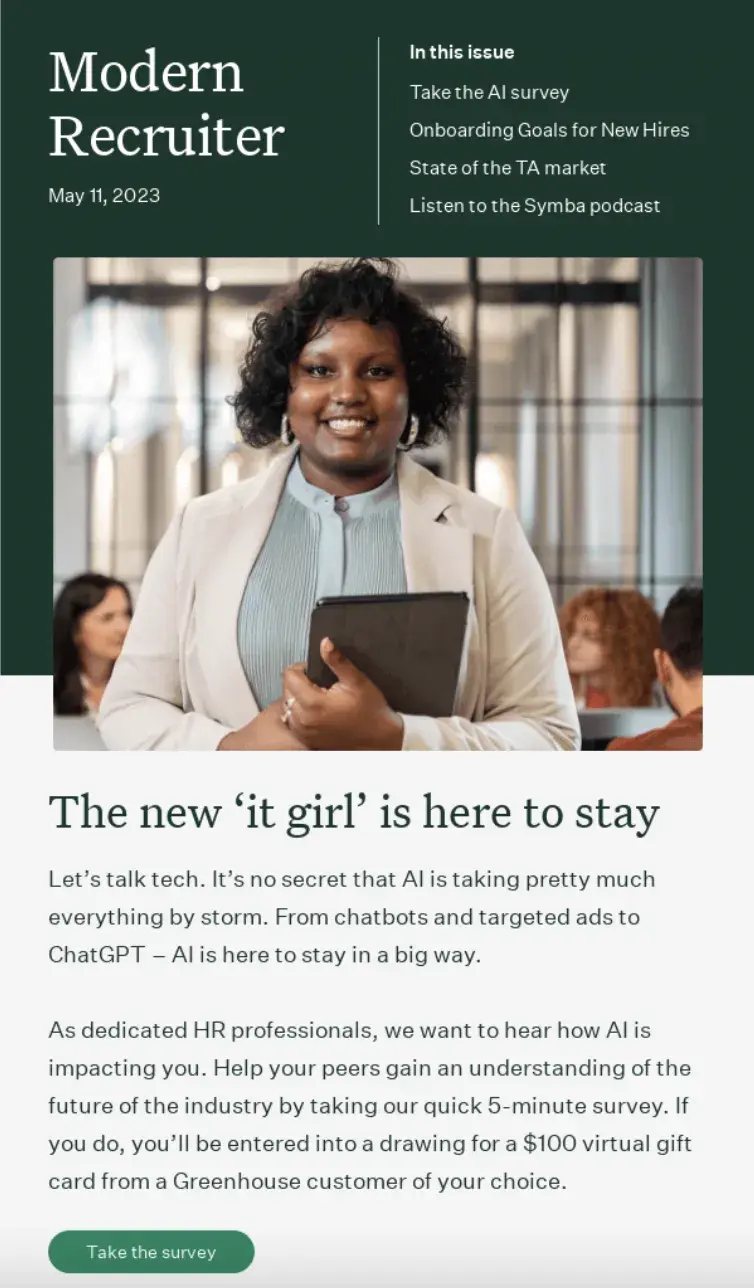
Screenshot of email sent by Modern Recruiter

Image Source

In addition, use web-safe fonts with sizes between 10 and 12 points. This ensures your email will be legible on all readers and devices.

2. Optimize the email's preview text.

You've probably seen emails like the one below with preview texts that say something like, “Email not displaying properly? Click here.”
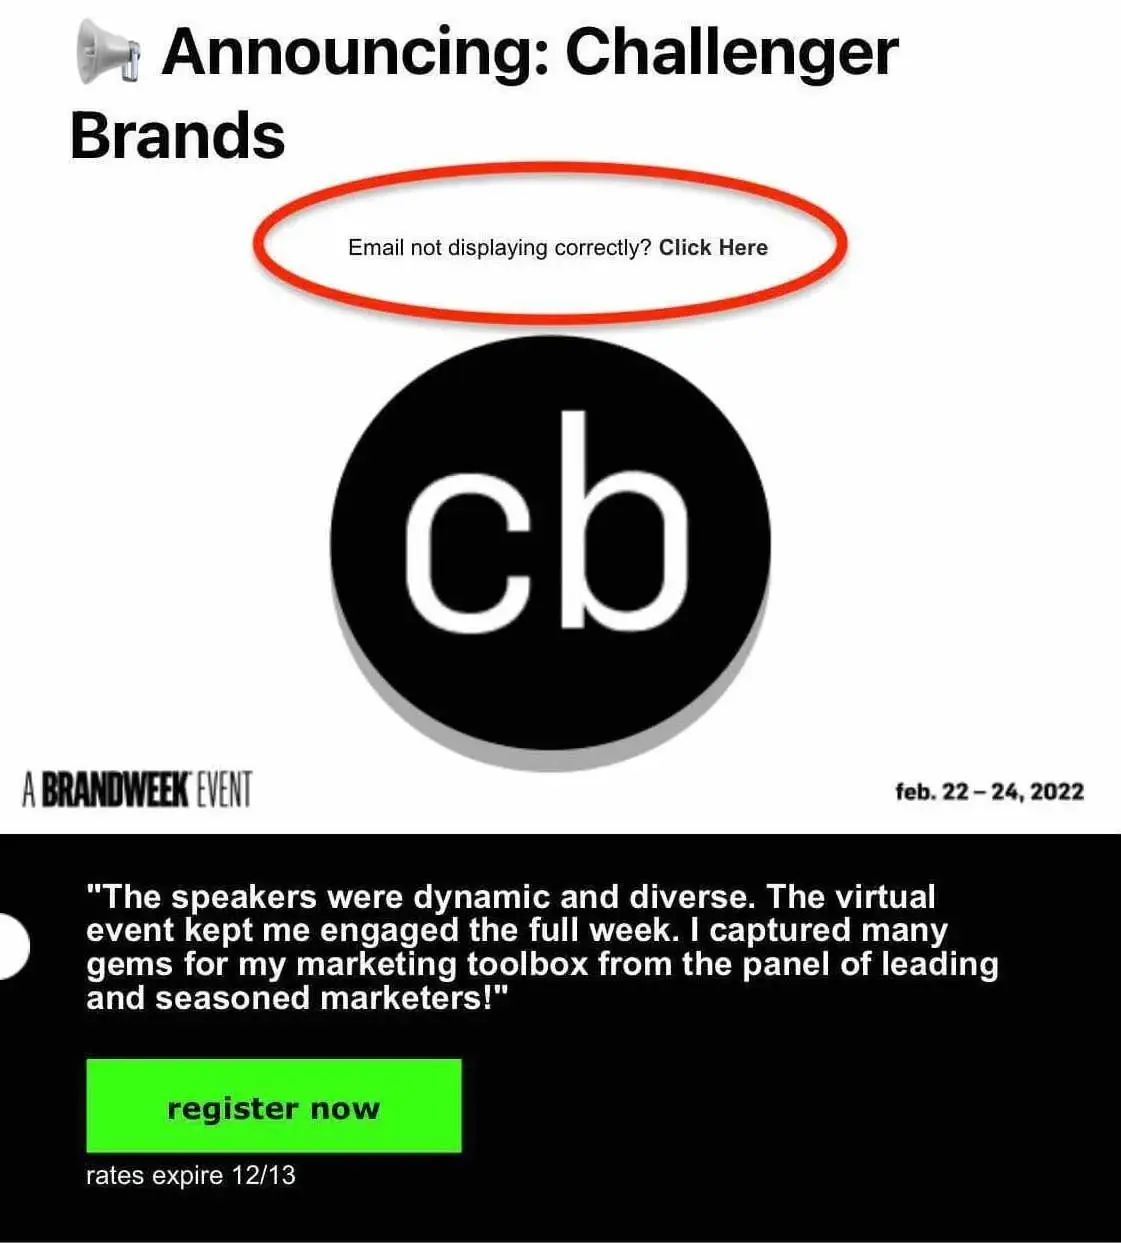
Screenshot of email sent by Bandweek

And, yeah, that‘s helpful, but I have a couple of gripes about it. For one, you should optimize your emails to display properly across various devices, but that’s a conversation for later in this post.

My other issue is that the message in the preview header doesn't tell your recipients what the email is even about. This lack of information and optimization can negatively affect your open rate.

Your preview text should supplement your subject line by adding details to capture your audience’s attention and encourage them to open. By default, preview text pulls in the first several words of the email body and displays it next to the subject line before the person opens it.

The problem is that custom email templates often include conditional statements like “Can't see images?” or “Not displaying correctly?” at the top banner, allowing the message to slip right into the preview when it goes out.

As a rule of thumb, always write a custom preheader that teases what your email will offer.

(If you're having trouble writing your preview text or emails as a whole, this video can help you harness the power of AI for the purpose of email creation.)

Pro tip: HubSpot users can fix this problem by customizing the preview text themselves in the backend of their email marketing newsletter.

3. Include an email signature.

Even if your newsletter is technically being sent to your contacts on behalf of the company rather than an individual, the email should include the signature of a specific person.

Considering that every email sent on behalf of your company is another branding opportunity, it makes sense to include a signature.

Your email signature should include a CTA, whether a link to your website, social media, or a specific landing page.

Screenshot of email signature

Image Source

Another reason you should include your email signature is because it’s a touch of personalization.

People are naturally more inclined to read an email if they know it came from a human being, not just a collective marketing team. Your email signature is your ticket to their attention.

Want a quick way to make a beautiful email signature? Use HubSpot's Email Signature Generator. We also have an Out-of-Office Email Generator to make your response to incoming messages just as delightful.

4. Keep the main message and call-to-action above the fold.

Above the fold refers to the information visible to the reader before they scroll down.

Even though recent research suggests that consumers scroll more than they used to because of social media and vertical timelines, above-the-fold content still gets the most attention, considering that people don’t have long attention spans.

According to a recent report from Litmus, people spend an average of nine seconds looking at an email.

With this in mind, place your main message and CTA above the fold. It’s the first thing your recipients will see once they open your email, increasing your conversion rate.

You can also run an A/B test first to validate the hypothesis and see if it works for your emails.

5. Personalize the email greeting.

How often do you read emails that begin with “Dear Member?”

You might segment your email audiences by their customer type (member, subscriber, user, etc.), but it shouldn't be the first thing recipients see in your company messages.

Personalizing the greeting of your emails with your contacts‘ first names grabs each reader’s attention. For HubSpot users, this is called a personalization token, and creating one looks like this:

screenshot of personalization token

Image Source

Then, the address line of your email would automatically produce the contact‘s first name by fetching this personalization token in the email’s HTML, like this: Hi, !

Don‘t worry; personalizing an email’s greeting line with 50 recipients‘ names doesn’t mean you'll have to manually write and send 50 different emails from now on.

Many email marketing tools today allow you to configure the greeting of your email campaign so that it automatically sends with the name of the people on your contact list — so everyone is getting a personal version of the same message.

6. Keep your email around 500 to 650 pixels wide.

If your email template is wider than 650 pixels, it will not show up correctly and will require users to scroll horizontally to read the full message.

This is a pain, to say the least, and will likely affect your conversion, especially when many users read emails on mobile.

One of our most recent email newsletter surveys found that the majority of newsletter subscribers (61%) read them via mobile devices.

Having your template fit within the standard format will make for easier readability, better conversions, and an overall better user experience.

7. A/B your subject lines and calls to action.

If you can‘t seem to increase your email’s open and click-through rates, a couple of things might be wrong: You‘re not emailing the right people (if you’re buying your contact list, see the first tip at the top of this blog post), or the content needs to be improved.

A/B tests can be used to improve almost any of your digital marketing content.

This test splits your recipients into two groups in an email. Group A receives the regular newsletter, while Group B receives the newsletter with a specific variation. The variation can be anything from a different subject to another CTA.

This variation tests whether your audience would be more or less likely to take action based on that element.

HubSpot Marketing Hub users can conduct email A/B tests on everything from the subject line to the call-to-action (CTA) inside the email.

For example, you might change the color of your CTA from red to green to see if your email‘s clickthrough rate increases. If it does, the test indicates that you should change all of your emails’ CTA color to green from now on.

8. Include your logo.

Logos are essential in emails. The average person receives about 121 emails daily, so it‘s easy for recipients to skip over an email, even if it’s from a newsletter they're happily subscribed to.

One of the best ways to help your email stand out and keep your brand top of mind is to include your logo. One of my favorite newsletters is Bad Brain from music and pop-culture journalist Ashley Reese.

As I said, I tend to let my emails pile up and go unread, but I always stop to read one when I see the bright orange Bad Brain font at the top of the message.

Screenshot of Bad Brain newsletter with logo

9. Name the offer in your subject line.

If you’re running a promotion, use incentive-focused subject lines like “Free shipping when you spend $25 or more” or "Receive a free iPad with a demo.”

Here's an example of an email with an enticing subject line and a warm, welcoming body copy. The subject line for this email from Elementor says, “Up to 50% off when upgrading!”
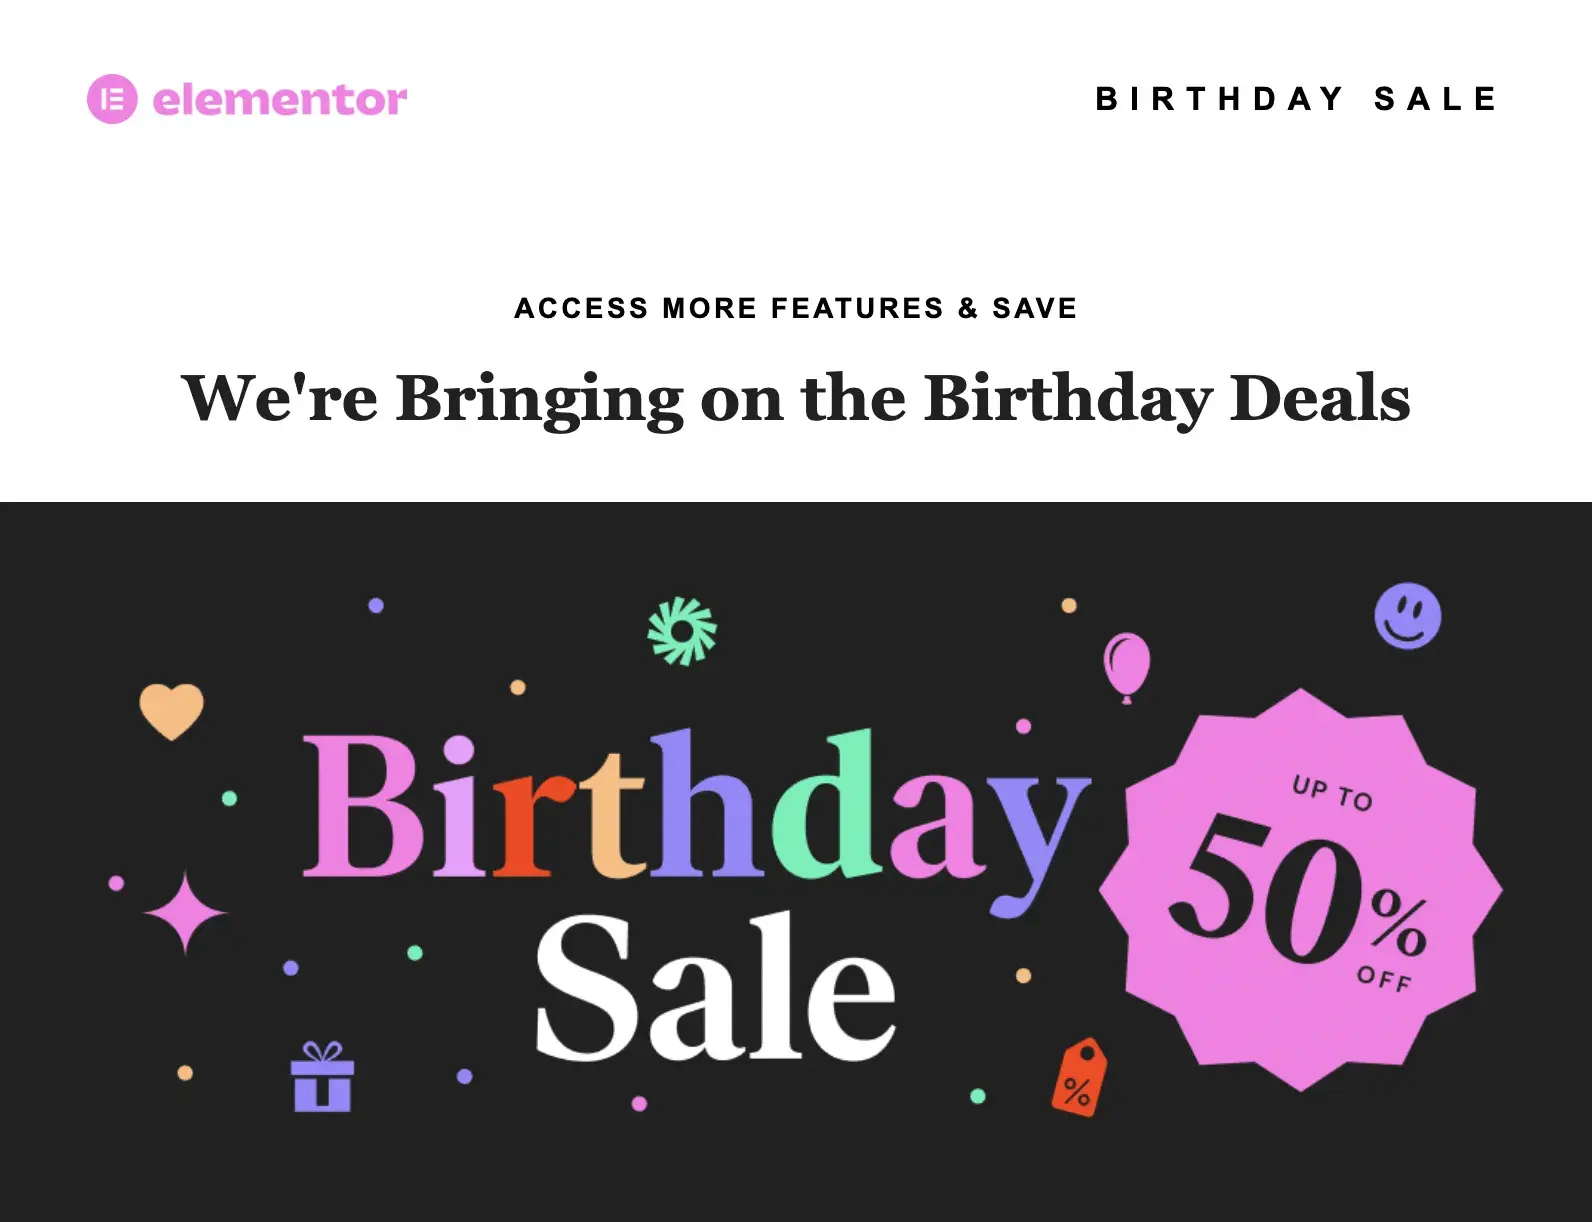
screenshot of email from elementor

However, do not overwhelm your readers with savings- or product-related emails.

Customer loyalty starts with casual industry insights — only after nurturing should you start introducing offers.

10. Write compelling (but concise) subject lines.

As I said, most email newsletter subscribers read them on mobile devices, so I suggest keeping your subject lines to fewer than 50 characters.

Your email subject line should also create a sense of urgency while giving readers some indication of what to expect once they open the email.

Notice some of the subject lines pulled from my own inbox below. Each subject line is condensed enough to display fully on my iPhone, telling me exactly why I should read more.

IMG_4458

And there you have it! 22 email best practices I live by, and that will help your email marketing campaign generate more leads. As I said earlier, email marketing is a tried and true method that isn't going anywhere any time soon. 

So, it's important to follow these best practices to set your next campaign up for success.

Editor's Note: This post was originally published in June 2019 and has been updated for comprehensiveness.

30+ Portfolio Design Trends for 2025

Featured Imgs 23

When was the last time you updated your design portfolio? (If you’re like me, it’s probably been a while.) Maintaining a fresh portfolio is a good way to show off your skills to potential clients and can be helpful when looking back on work for annual contest entries.

If you’ve fallen behind with your portfolio design, or just need a new portfolio in general, this is a great opportunity to create something using trendy techniques and visuals.

A modern portfolio using design trends can make a great impression. A portfolio is also a representation of your skills — so design wisely! Here’s a look at some of our favorite portfolio design trends.

Personal Touch

portfolio design

A portfolio is a place to show off who you are, your style, and serve as an introduction to potential clients or employers. Make it personal.

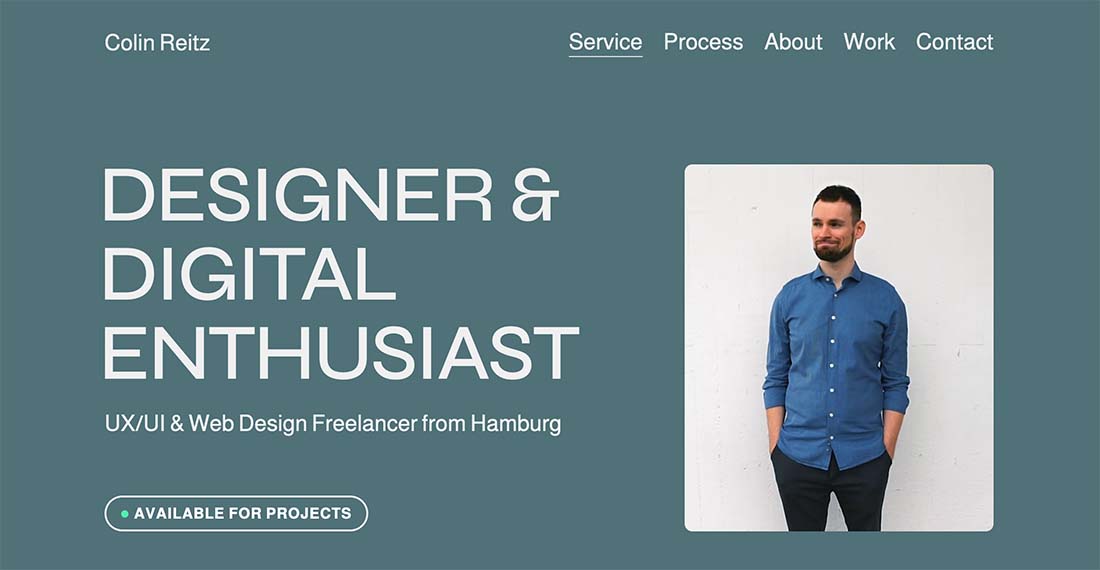
By using language and a tone that feels like you and a photo or video that shows your personality, you can start to establish a connection online with those who visit your portfolio. People who know you personally might even say they can “really see you” in the design – literally or figuratively.

In the example above, Colin Reitz uses a fun video to help show he’s a personable, friendly, enthusiastic designer. It’s an inviting option that makes him feel approachable, a good thing for a freelancer.

Brutalist Style

portfolio design

The brutalist trend that’s popped up all over website design also applies to portfolio sites as well.

The good thing about brutalism for a portfolio is that it can give images and work more room to shine without so many effects in the design. The challenge is that it could turn off some potential connections that might not appreciate the bluntness of the design.

An “almost brutal” aesthetic is the balance that most designers go with for their portfolios.

A Curated Homepage

Michael-Collins

Michael Collins is an experienced director and design strategist who likes to work at the intersection of curiosity, reasoning, and imagination to create one of a kind user experiences and future-oriented solutions.

What stands out in his portfolio website is the way the homepage has been curated. Having a clean and simple layout that does not require too much scrolling helps in providing an easy user experience.

Unexpected Visuals

portfolio design

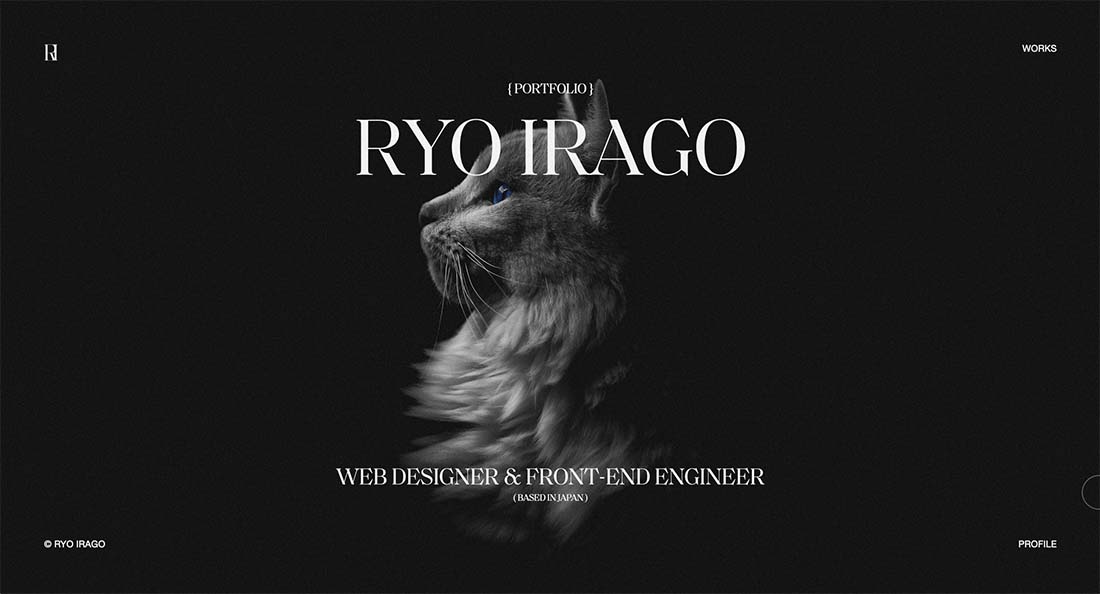
If there is a single image on the homepage of a portfolio, it tends to be of the designer or of a specific piece of work. But what if it is something completely unexpected?

That’s what designers are doing more of. They are creating interesting elements to help set their portfolios apart so that they don’t look like the sea of other portfolio sites that potentially come across hiring managers’ desks.

In the example above, Ryo Irago uses a bit of beautifully created imagery to draw you in. The design of the homepage is stunning, the image is captivating, and if nothing else you’ll likely scroll to learn more (which is exactly the intention of a portfolio design such as this).

Subtle Animation

portfolio design

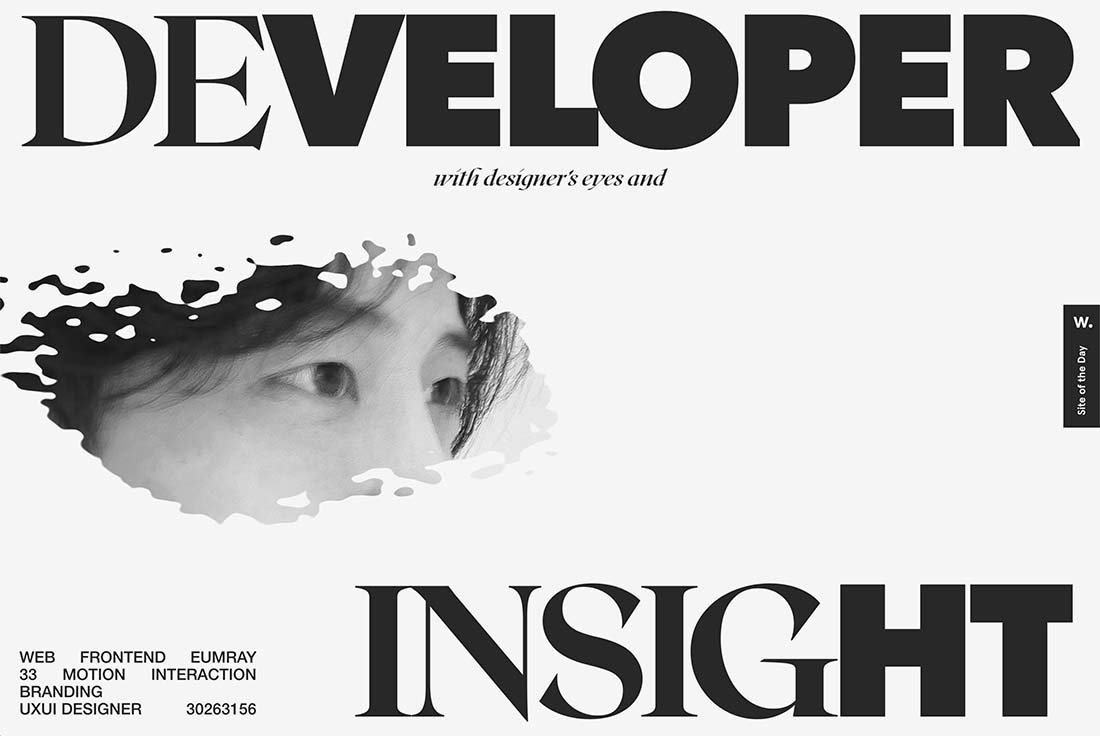
A website portfolio is a perfect place to show off some of your design skills. Use a cool technique or trendy element to create just the mood to show your design style and ability. For many designers right now, this includes using subtle animated effects – often with other bold elements – to bring attention to portfolio designs.

Eumray’s portfolio does just that with big, bold typography that explains what they do with a nifty animation with the photo. (A headshot on a portfolio website is another design trend that’s hung on for a long time.)

The use of space here and a black-and-white color scheme are also trendy elements, making this portfolio seem very in the moment. There are other subtle animations below the scroll that tie everything together beautifully as well.

Show, Don’t Tell

portfolio design

The “show, don’t tell” concept has been a big part of website design for a long time. It can work equally well for portfolio sites, by telling visitors what the design does or where to find information about their work.

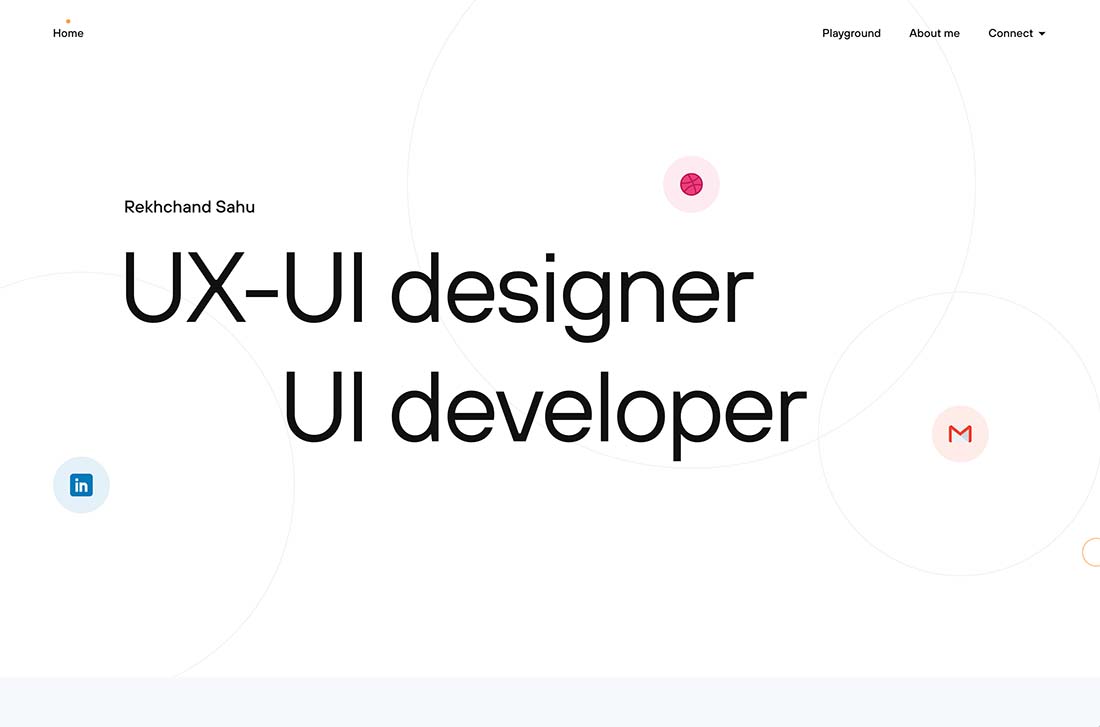
Here, Rekhchand Sahu uses bouncing icons to help take you to design elements and information. The overall aesthetic is simple and easy to understand with a clear headline/hero text area.

Click on the icons for more work or scroll for a selection of pieces. The design feels modern and shows the type of style that you’ll get from this designer/developer.

Cute Illustrations

portfolio trend - Cute Illustrations

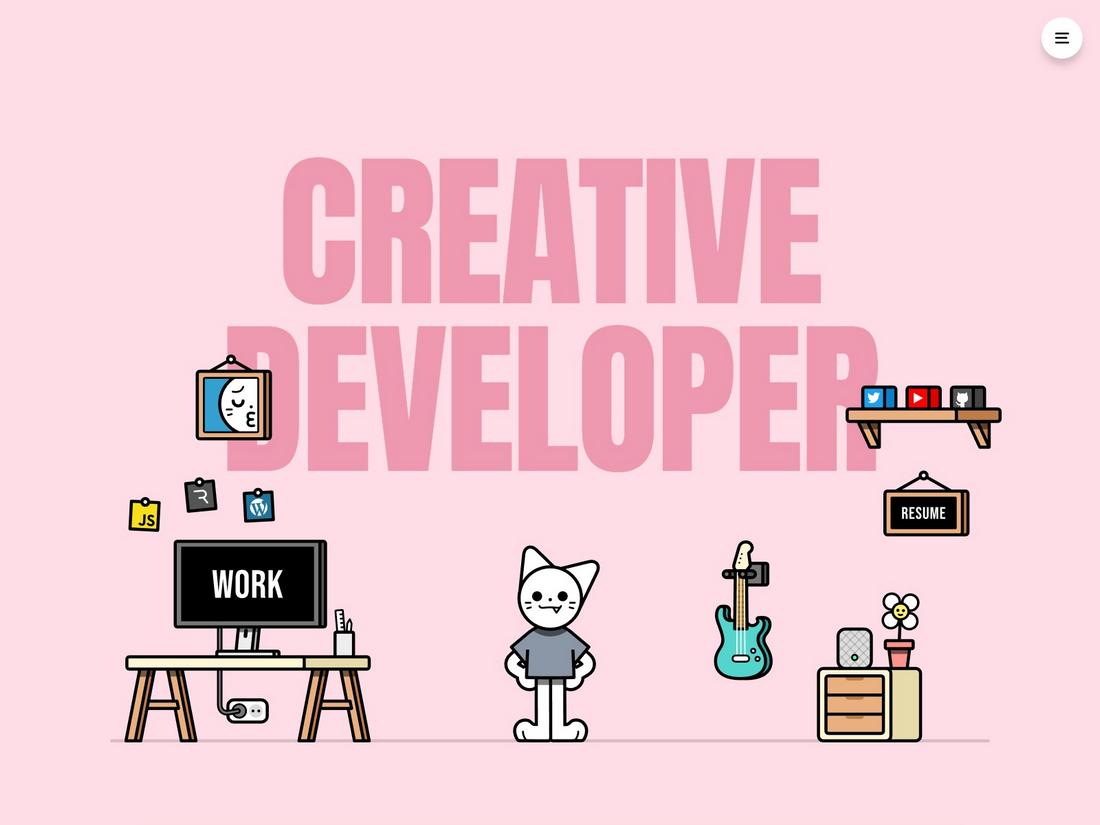
Cute illustrations are becoming increasingly popular in portfolio design as they add a touch of personality and whimsy to the presentation. These illustrations often feature playful characters, soft color palettes, and hand-drawn elements that make the design feel approachable and fun.

By incorporating charming and lighthearted illustrations, portfolio sites can establish an immediate connection with visitors, making the content more memorable. This trend works particularly well for creatives in fields like illustration, animation, or children’s media, where a friendly and engaging aesthetic can help showcase the artist’s unique style.

Incorporating cute illustrations doesn’t mean compromising on professionalism. When used thoughtfully, these elements can enhance the storytelling aspect of a portfolio, guiding users through the site with visual cues that add context and personality.

High Contrast Colors

portfolio trend - high contrast

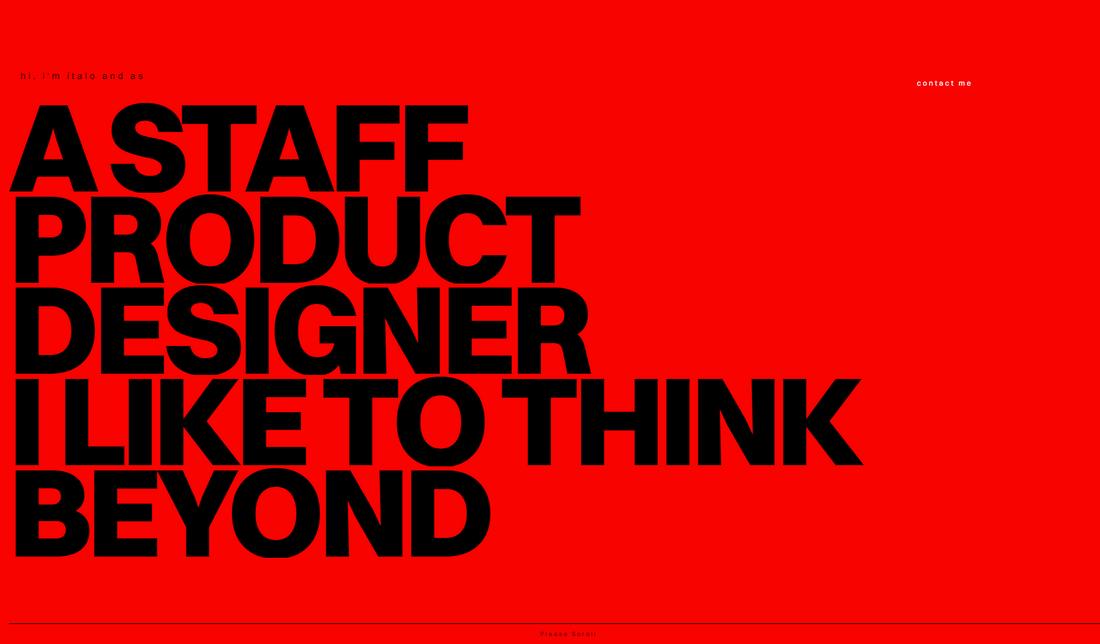
High-contrast colors make a bold statement in portfolio site design by using vivid and opposing hues to draw attention to key elements. This approach involves pairing light and dark colors, or complementary colors, to create a striking visual effect that captures the viewer’s eye. High-contrast designs are particularly effective for portfolios that want to make a memorable first impression.

Using high-contrast colors can also enhance the site’s usability by clearly differentiating sections, buttons, and calls to action. When implementing this trend, it’s important to maintain a balance to avoid overwhelming the user; choose colors that complement each other while ensuring readability is not compromised.

Text-Only Design

portfolio trend - Text-Only Design

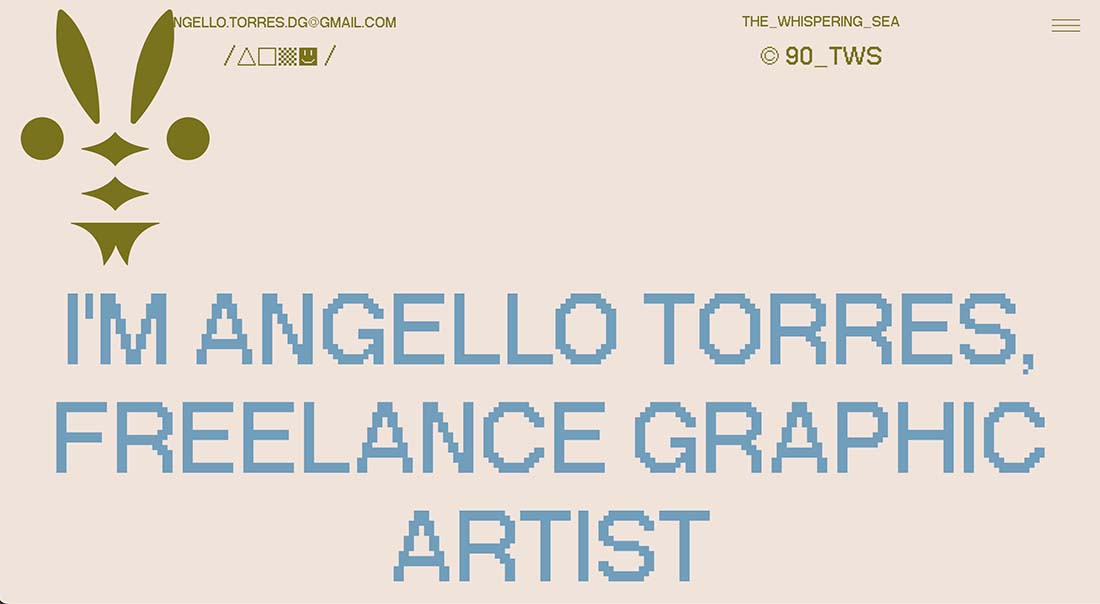
Text-only design strips away images and illustrations to focus entirely on typography as the main visual element. This minimalistic approach relies on the power of words and fonts to make a statement, using large headings, creative layouts, and varied fonts to keep the design engaging.

Text-only portfolios can create a clean and modern look that emphasizes the content and message, making them well-suited for writers, copywriters, and content creators who want their words to take center stage. By playing with font sizes, weights, and styles, text-only designs can still achieve a dynamic and visually compelling effect without relying on imagery.

The text-only trend also offers greater flexibility for designers to experiment with spacing, alignment, and motion. For instance, animated text or interactive elements can add interest and guide the user through the site in an engaging way.

Neon Accents

portfolio trend - Neon Accents

Neon accents are making a comeback in portfolio site design, adding a futuristic and energetic feel to layouts. These bright, luminous colors can be used to highlight important elements such as buttons, headings, or featured projects, drawing the eye to key areas of the site.

To make the most of neon accents without overwhelming the design, use them sparingly to add pops of color that enhance the visual hierarchy. Incorporating subtle neon effects, such as glows, gradients, or outlines, can create a sense of depth and movement, making the site feel more dynamic.

Pairing neon accents with clean layouts and neutral colors can balance the boldness, ensuring the design remains professional while still making a visual impact. Neon accents can give portfolios a cutting-edge appeal that captures attention and keeps users engaged.

Creative Layouts

portfolio trend - Creative Layouts

Creative layouts break away from traditional grid-based designs, offering more freedom and flexibility in the arrangement of content. By using asymmetrical layouts, overlapping elements, or unconventional scrolling effects, designers can create a unique and engaging user experience.

The key to successful creative layouts is maintaining a sense of balance while experimenting with the arrangement of elements. While the design may be unconventional, it should still guide the viewer’s eye naturally through the content, ensuring that important information is easily accessible.

Thoughtful use of whitespace, layering, and animation can add depth and visual interest without sacrificing usability. When executed well, creative layouts can transform a portfolio into a memorable and interactive experience that resonates with viewers.

3D Interactive

portfolio trend - 3D Interactive

The 3D Interactive trend in portfolio site design brings depth and realism to web experiences by incorporating three-dimensional elements that users can engage with. This approach involves using 3D models, animations, and effects that respond to user interactions, such as hover states, clicks, or scrolling.

It creates a sense of immersion that makes the portfolio feel more dynamic and engaging, as visitors can explore the content in a more interactive way. This trend is especially impactful for portfolios in industries like digital art, game design, or 3D modeling, where showcasing technical skills and creativity through interactive elements can leave a lasting impression.

To successfully implement 3D interactive elements, you should balance realism with usability, ensuring that animations and effects enhance the user experience rather than detract from it. Strategic placement of 3D components can guide users through the portfolio in an intuitive manner, while subtle animations can be used to draw attention to key content without overwhelming the visitor.

Over-the-Top Design

portfolio design

While minimal portfolio styles are popular, over-the-top portfolio designs are beginning to trend. (Likely because they are so disruptive in a sea of black and white, minimal designs.)

This portfolio uses a lot of trending elements together and it works. There’s the big hero headline with a gradient color treatment, liquid animated effects, and funky type elements.

As you scroll, the entire portfolio website has an almost brutalist feel to it with slab font choices and a dark outline. Although the design has a bit of harshness to it, there’s reason to scroll and get into the design and learn more about the designer.

Layered Graphic Elements

portfolio design

Cool layered effects, especially those that include nifty CSS effects such as parallax scrolling or hints of animation can make for fun layers.

This portfolio technique is gaining popularity and provides a good opportunity for designers to play with certain effects before deploying them on a client project.

This one-page portfolio by Sophie Doukhopelnikoff uses transparencies and text elements in layers that create depth and visual interest. Having letters both behind and in front of images is rather stunning and draws you into the design. Sans serif typography lends an even more classic feel to the overall design.

Subtle Color Effects

portfolio design

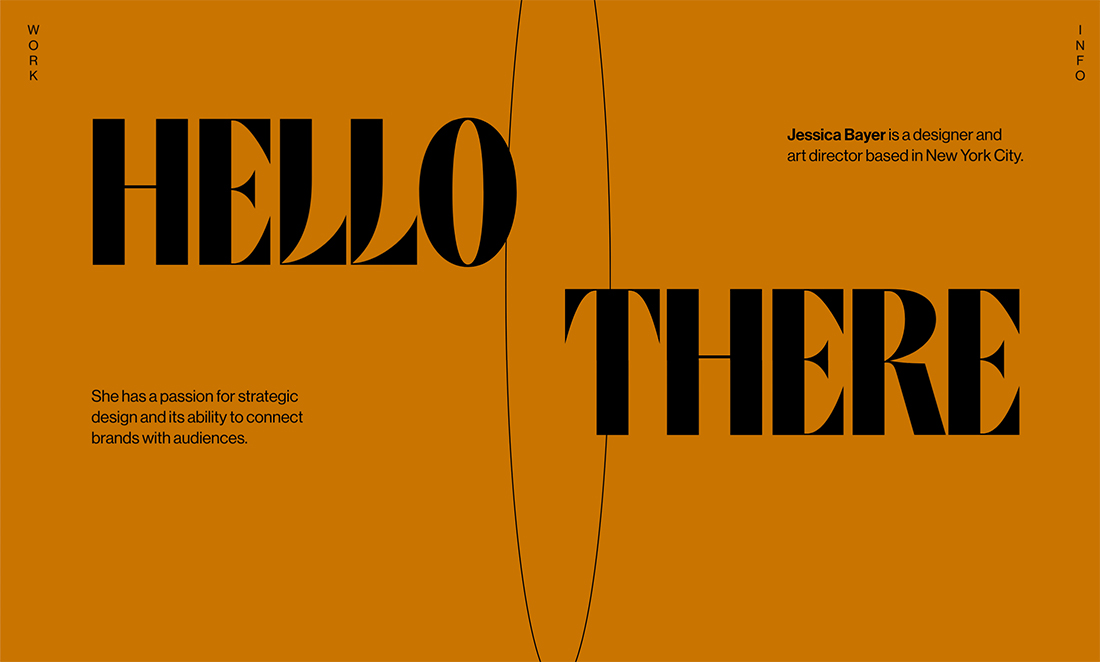
You’re going to have to click through and hang out on this portfolio website for a few minutes to get the full effect of the design.

The simple “Hello There” first expands to fill the screen with other text elements that better explain the portfolio, then the background color softly changes every few seconds for a rainbow effect. It’s simple, subtle, and very beautiful.

This is a color effect that could have a lot of applications elsewhere and speaks to the creative nature of a portfolio website itself.

Super-Simple Aesthetic

portfolio design

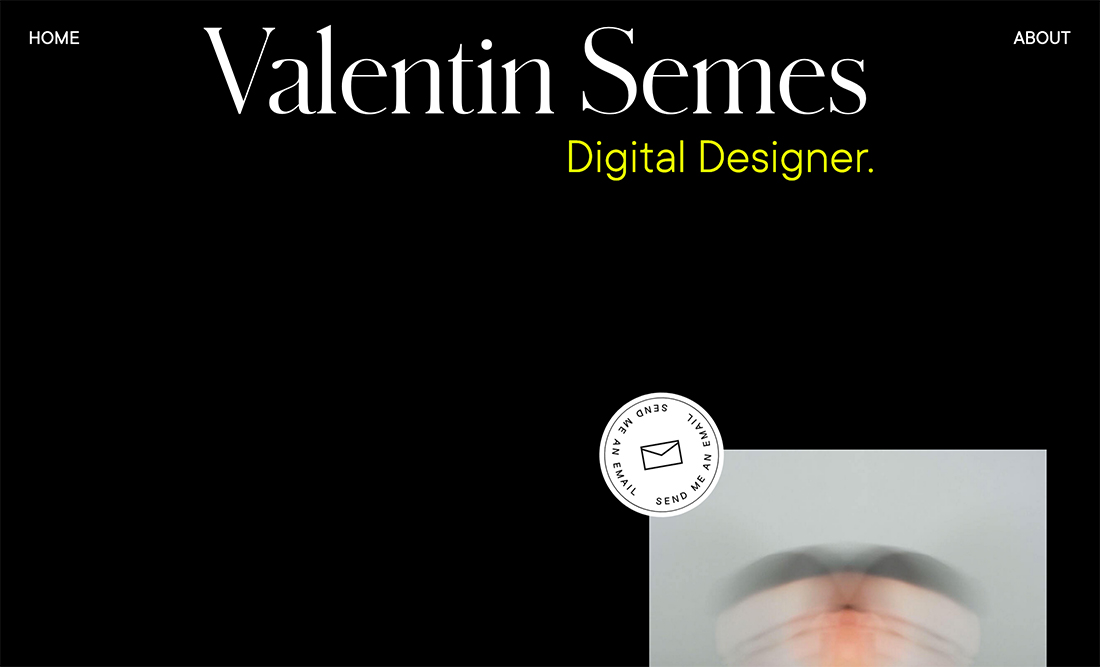
It seems like there’s a trend in portfolio design where designers don’t lead with their work. Their websites are simple and visually interesting and then lead you into their project only after a first glance.

The simple design here is sleek and intriguing. It works equally well with dark or white backgrounds and simple typography and graphic elements.

Valentin Semes makes the most of the super-simple aesthetic with neat interactive divots – pay attention to the mouse hover – to keep you moving through the design so that you see elements of the portfolio.

Magazine-Style Layouts

portfolio design

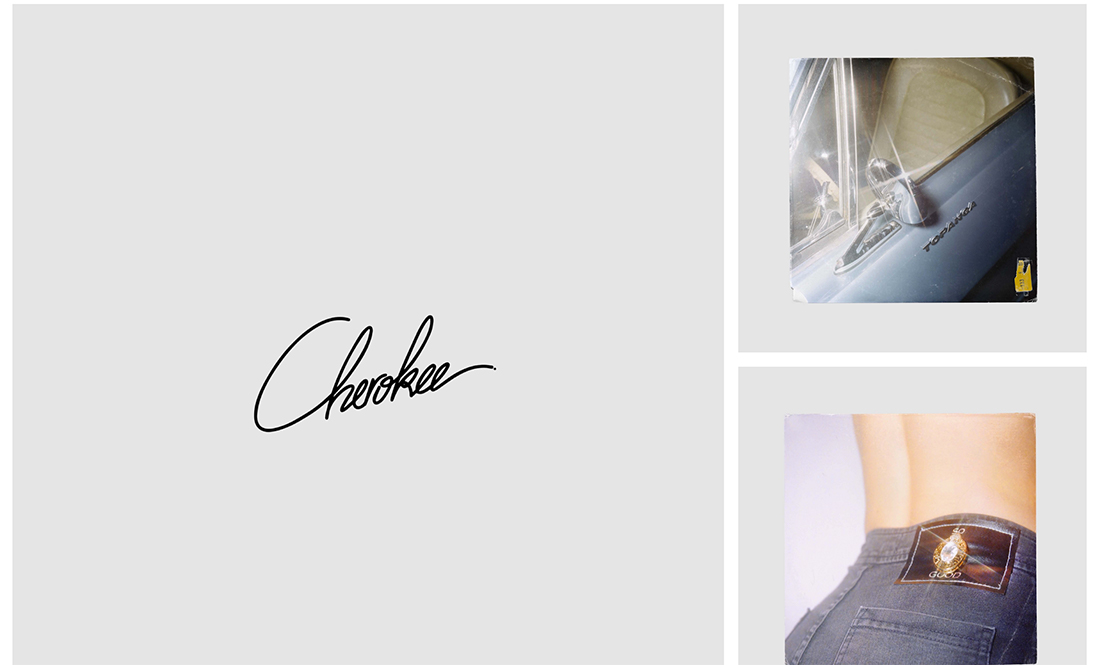
Magazine-style layouts have long been popular for blogs but can also help show off a portfolio as this trend shows.

Each block can be used to highlight a different type of work or individual project in a way that gives each design room of its own.

Antoine Barres uses this format to show a variety of creative pieces in a way that makes it easy to see each design. The gray background blocks with the white grid have an incredibly classic style that gives each design even more room to shine.

Homepage Bios

portfolio design

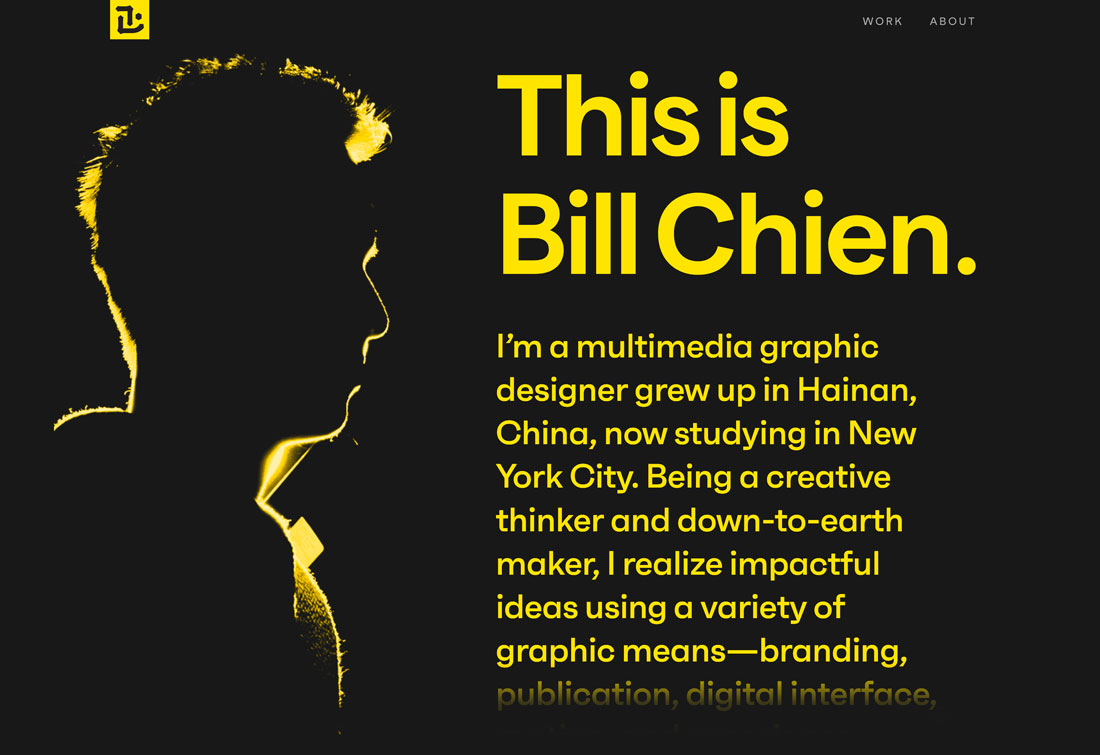
There’s no rule that your bio has to be on the About page of your portfolio website. One of the strongest trends in portfolio design is to move that bio – or at least a short version of it – to the homepage.

It’s a great way to tell people exactly what you do from the start. There will be no guessing what your portfolio is about and what type of creative you are.

It’s a place where you can create a personal statement or even highlight various projects. Bill Chien’s portfolio does this beautifully with a movie-credits-style bio that scrolls on the homepage. His bio is simple, and to the point, showing his creative mindset.

Lots of Interactivity

portfolio design

Interactive portfolios are in.

Many of these portfolio designs are visually loud, packed with movement, color, and things to click or cool changing hover states. There’s an almost limitless opportunity to use effects and design techniques.

What’s neat about a highly interactive portfolio is that it provides a place to show off some supreme UX skills.

The challenge is that sometimes the designs can get just a wee bit overwhelming. Make sure to track user behavior and engagement and if you are losing visitors, it might be worth a chance. (It can also be a good test for deploying similar techniques in other projects.)

Unusual Design Patterns

portfolio design

Portfolios that test new design patterns are also trending. Moving traditional navigation elements, obscuring text, and even experimenting with animation states are all common.

This trend might be popular because it provides an opportunity for designers to have a little playground to test techniques and effects. What’s nice about it, is that this trend pushes our idea of what is and isn’t the right way to do something.

The example above uses a few visual trends and unusual patterns at the same time. There’s outline typography that’s partially obscured, an animated hover state for the color orb, and navigation that is on the vertical edges of the screen.

The portfolio trend makes you think about design norms and how you feel about them as you dive into the work.

Black and White

portfolio design

Black and white designs, often with a color accent, are huge right now.

The biggest contributing factor might be that black-and-white design patterns make it easy to see portfolio works, which are often in color. It gives the thing you want people to see greater attention when it does appear on the screen.

Paired with this black-and-white trend is another common factor. Portfolio pieces don’t appear on the homepage; users have to click through to find them.

Trendy Typography

portfolio design

You can never go wrong with amazing typography. Whether you are using a trending type element, such as the outlines above, or simply a beautiful typeface, this trend never gets old.

Strong typography skills will help your portfolio shine and help others understand the quality of your work. This trend shows why creating a portfolio that represents the strength of your skills is important.

Potential employers and clients will often get an impression of the kind of creative you are simply by looking at your portfolio website. Almost every designer would love to be thought of as someone with strong typography skills. Using trendy typography well definitely fits the bill.

High-Performance Effects

portfolio design

Victor Costa’s portfolio is a prime example of how to create a high-performance portfolio.

Because web designers, photographers, and other creatives are using their portfolios to show off what they can do, there’s a distinct shift to more high-performance designs. (Some of which are too much for mobile displays. Make sure you have an alternative gateway if you go this route.)

These high-performance designs are packed with nifty JavaScript, animation, and effects that are designed to wow users.

Victor Costa’s portfolio is a prime example of how to create a high-performance portfolio. It opens with an option for users – standard or high-performance. The portfolio is filled with interactive elements, fades and scroll actions, and animation. These techniques match the elements he references in his bio and is not only a showcase of past work but an indicator of what else he can do for clients.

Plenty of Space

portfolio design

Something that’s been popping up in more designs across the board is making its way into portfolio design as well – plenty of space between elements and objects.

This trend seems to have roots in ensuring that items are appropriately separated on mobile devices and have plenty of tap space, but the additional space can look great on desktop screens as well. (Granted, I’ve always been a fan of white space.)

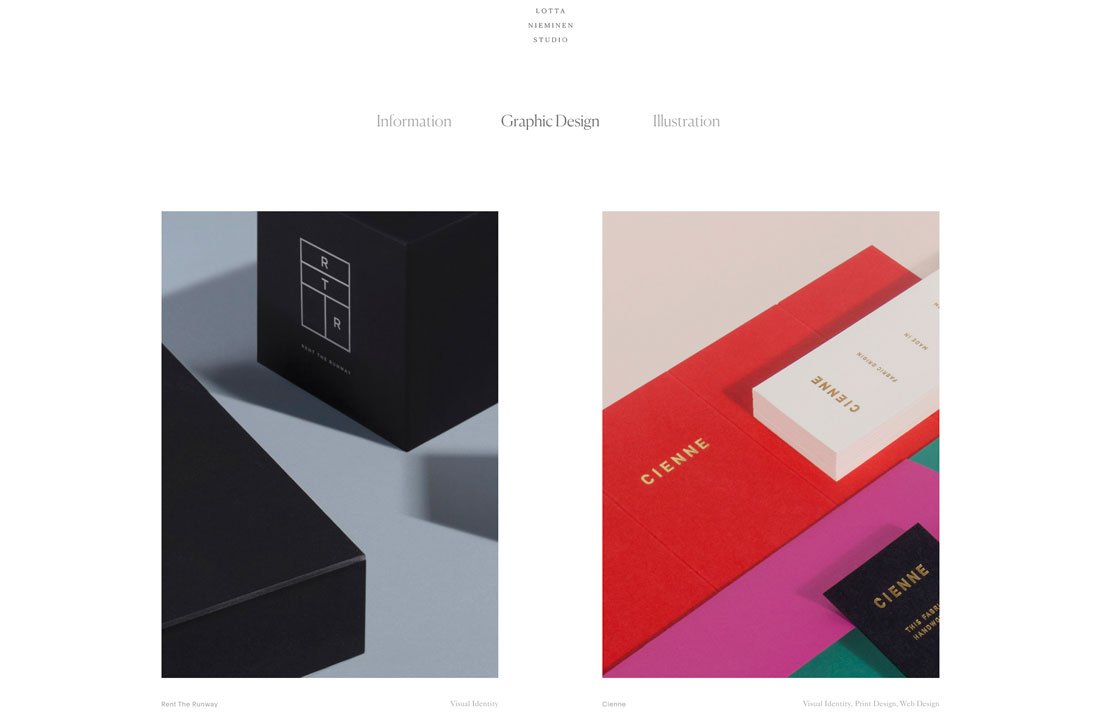
Lotta Nieminen’s portfolio is a perfect example of this design in action. The super-deep header takes up more than a third of the screen while the vertical and horizontal space between portfolio images is super wide. Each element stands on its own and the exaggerated spacing gives each project room to stand on its own, which can be particularly nice for a portfolio design with the potential for so many different types of images.

Groovy UI

portfolio design

Pairing a minimally-styled design with stylish user interface effects can create quite a stunning portfolio. This combination of visual simplicity and complex interaction can delight users and keep them looking through different screens and portfolio projects.

Click through the example above to see how each portfolio project glides onto the screen with a cool ripple effect before it stops. The cursor shifts and shapes as well, denoting click elements to take users through each project in a way that’s more than just reading about how the design came together.

This is a portfolio you could spend hours with thanks to the groovy UI.

Large Typography

portfolio

Typography and text are some of the most frequently overlooked design elements when planning a project or portfolio.

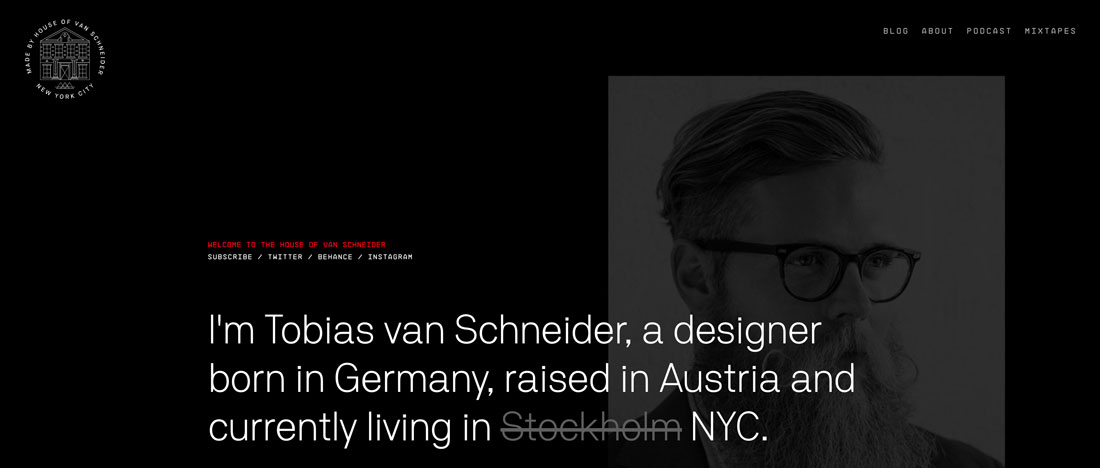
Strong typography and language can be the perfect introduction to your work (and portfolio). Most people probably know of Tobias van Schneider from his ventures as a designer or podcaster, but would you expect his portfolio home page to be mostly text?

Typography and text are some of the most frequently overlooked design elements when planning a project or portfolio. Most of us are so concerned with visuals or animation.

This example shows why so many designers are opting for portfolios that feature strong typography. It sets the right tone – you know what he does and what the site is about – before getting into the deeper visuals. (This option also highlights his strength for designs that feature a lot of text.)

Portfolios That Don’t Look Like Portfolios

…as a designer you don’t have to come up with something completely new to show off your work

One of the biggest trends in portfolio design is crafting a portfolio that looks like another type of website altogether.

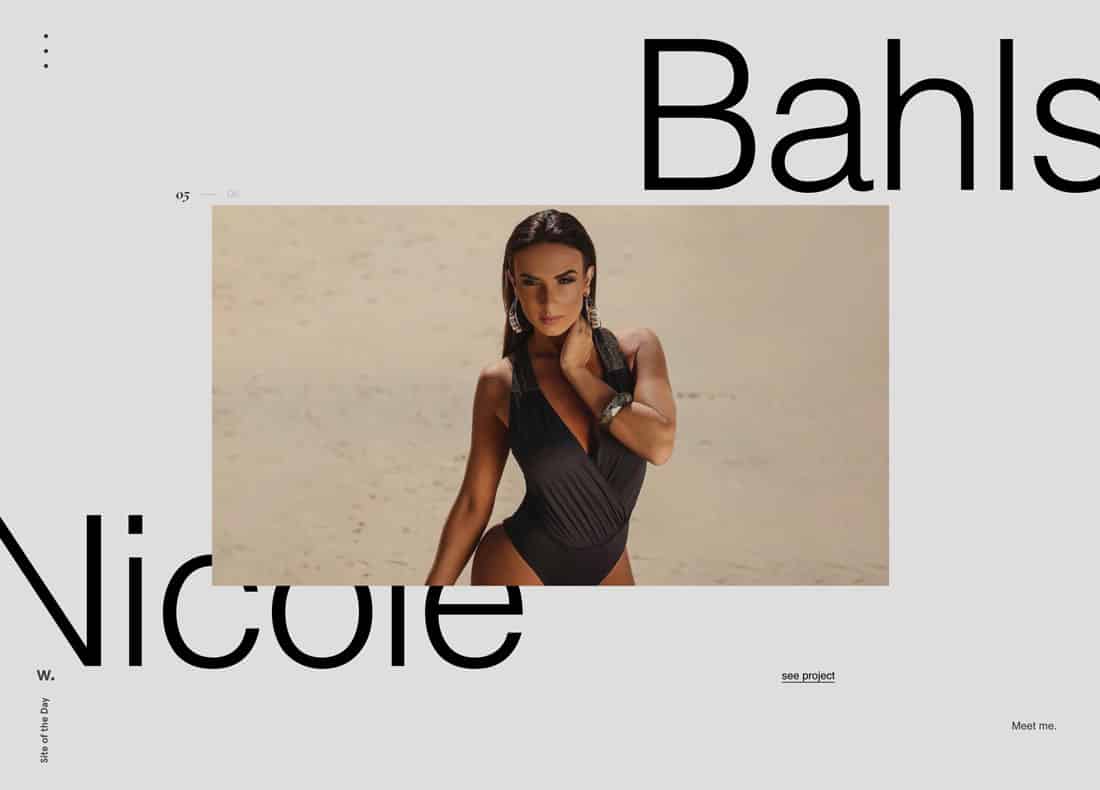
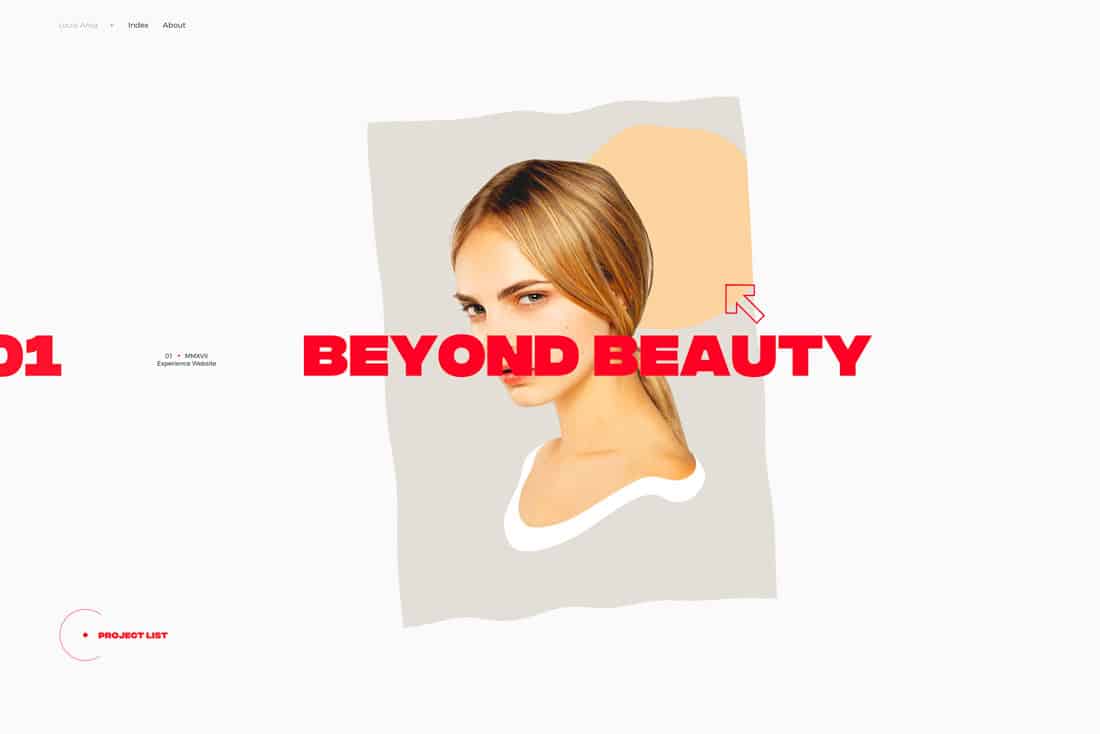
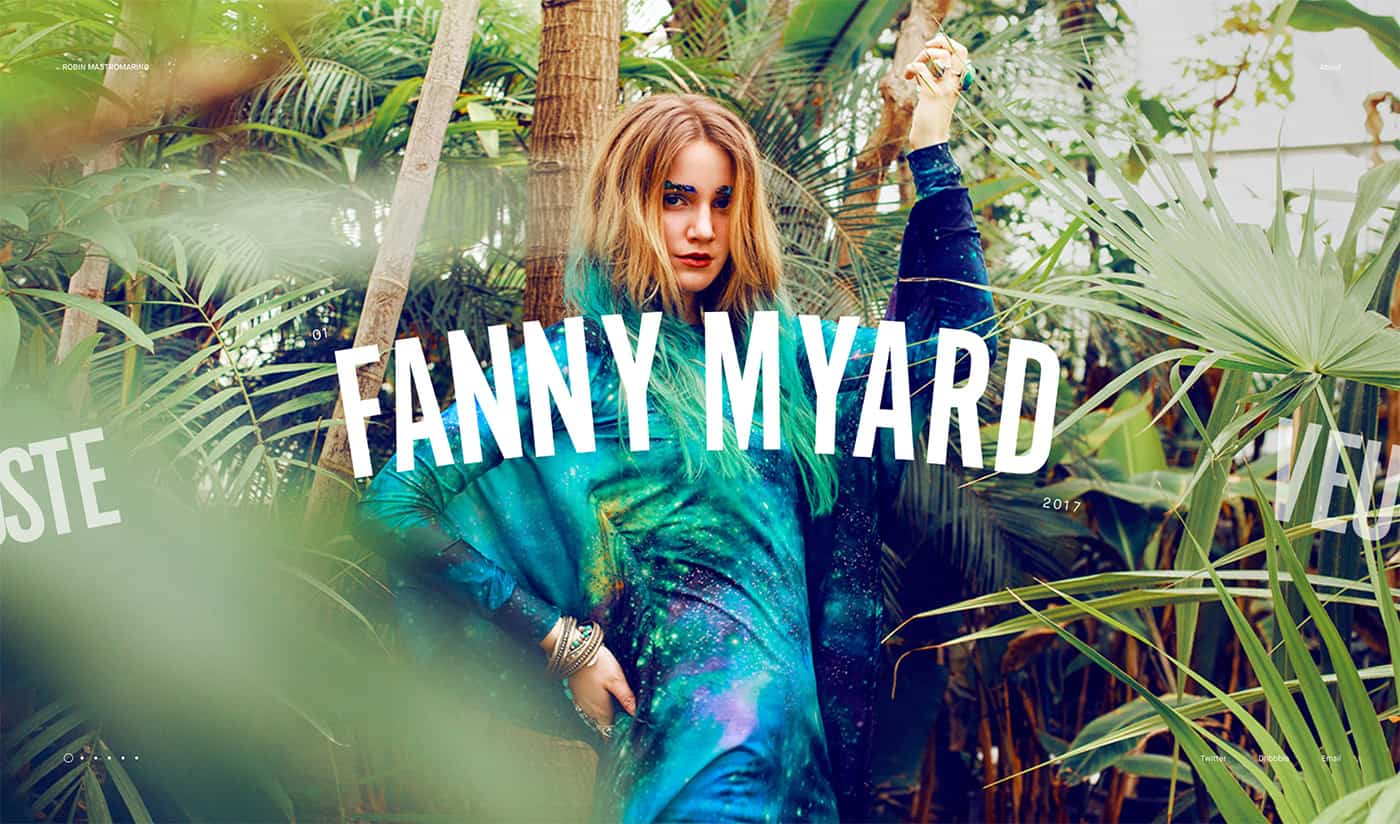
Robin Mastromarino’s portfolio looks like a website for a bar or fashion designer or professional athlete, depending on which part of the slider you view first. It’s beautiful and simple and what’s most impressive is the room each project has to shine.

Subtle cues help users understand elements of the portfolio, such as small numerals above the headline, and the date below. Plus, the slide element encourages left-to-right scrolling with partial headlines from other projects.

The other things that are so nice about this portfolio style are that as a designer you don’t have to come up with something completely new to show off your work. With big “art” for projects, completed jobs are the focus, rather than creating something completely new. (How’s that for creating something you can update quickly?)

Split-Screen Patterns

portfolio

Split-screen patterns have been trending for a while and more portfolios are using this design, even if they don’t use the functionality. It works because the pairing of elements helps drive users across the screen to take in everything in front of them.

Xavier Cusso uses a split-screen design with great parallax scrolling effects to move from project to project. The color-block screen design helps emphasize that the website is his creation, while the element in the middle is the portfolio project to examine. It puts some separation between the portfolio and project designs.

This is a nice way to handle big-name projects – note the graphic for Adidas Climaheat here – while maintaining your identity in the portfolio design. (Make sure to click through and visit individual projects here; the overall portfolio design is impressive.)

Minimalism-Inspired Design

portfolio trends

The best thing about a minimalism-inspired portfolio is that it gives the design plenty of room to shine. The design of the actual portfolio becomes relatively invisible so that all the focus is on the elements that you want people to see.

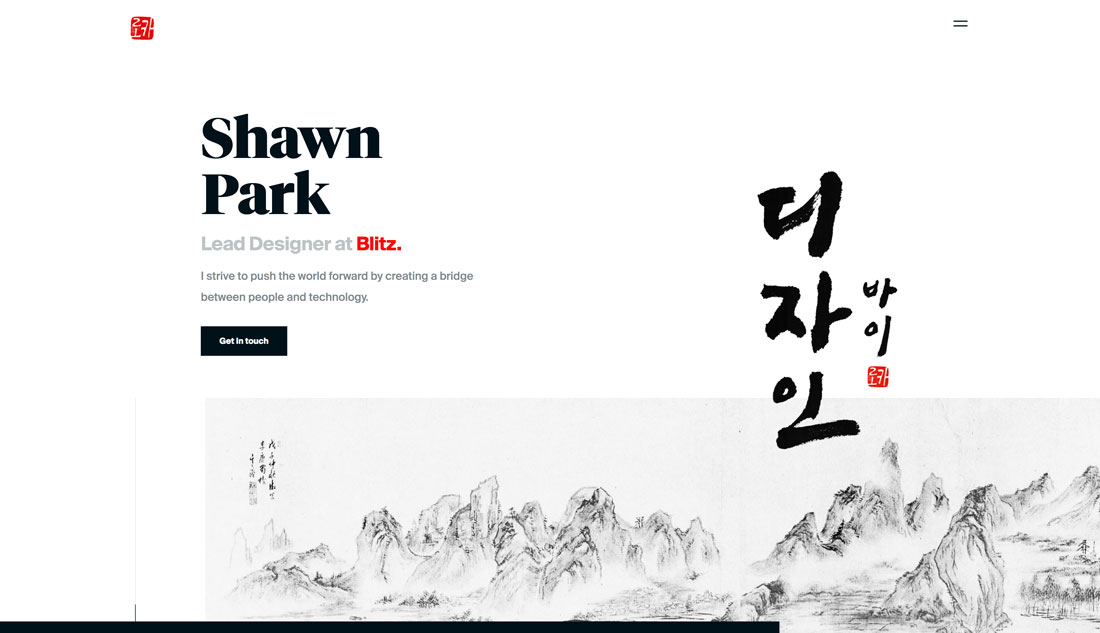
Designer Shawn Park recently wrote about how he redesigns his portfolio every year for UX Collective – I highly recommend that you go read that article here – and the current design (above) shows an evolution of design trends in itself.

Park includes iterations of his portfolio design in the post, beginning in 2013, and you can see how design trends impacted his portfolio. You can also see how this fresh minimal style makes it easier to see his work today than in previous incarnations.

Oversized Homepage Headshots

portfolio trends

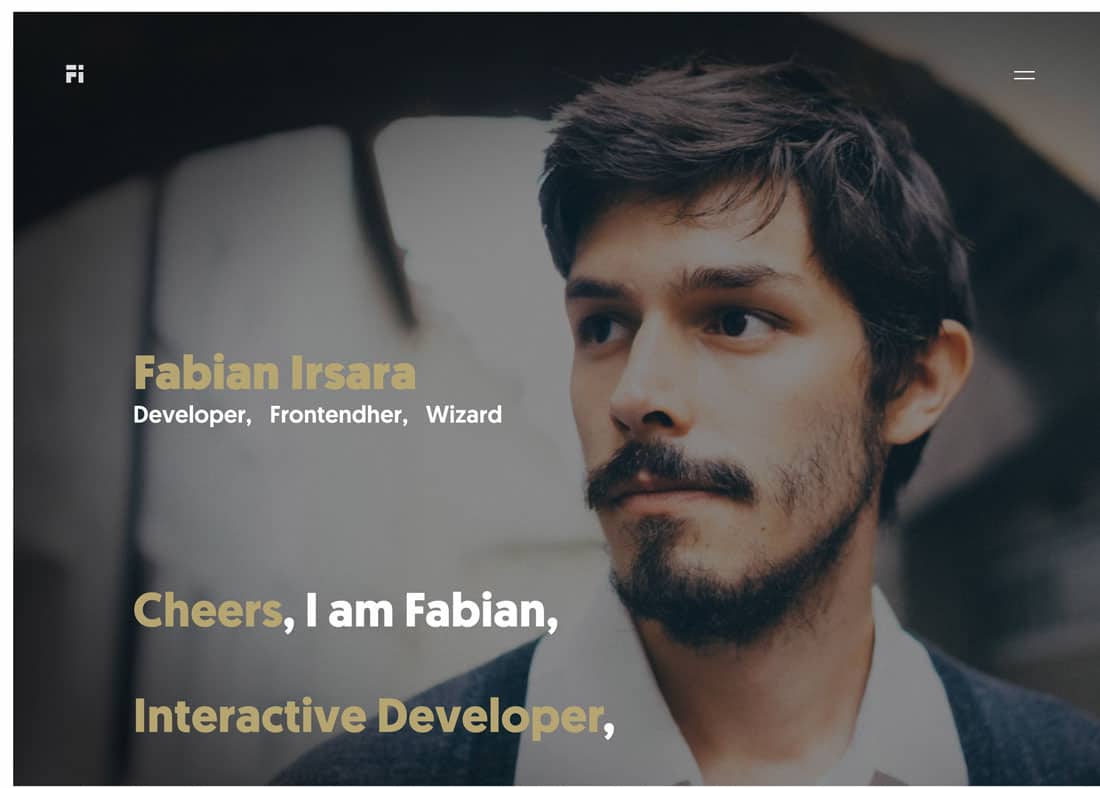
Big headshots are a big deal, particularly with developers and interaction designers.

This portfolio trend might be popular because it’s harder to visually show this work: Do you highlight code?

The trick to making this portfolio design work is a strong image. It needs to be more than a headshot; it needs to have a moodiness to it. Then pair it with strong typography to make it obvious that this is a portfolio website and what you do. Keep all of that information above the scroll for the best chance of keeping visitors moving through the design.

And a few nifty effects can’t hurt either.

Modular Grids

portfolio

One portfolio design trend that never seems to fade is the use of modular grids to show off projects. This is a great – and functional – option because you can “float” images of different projects on a single canvas.

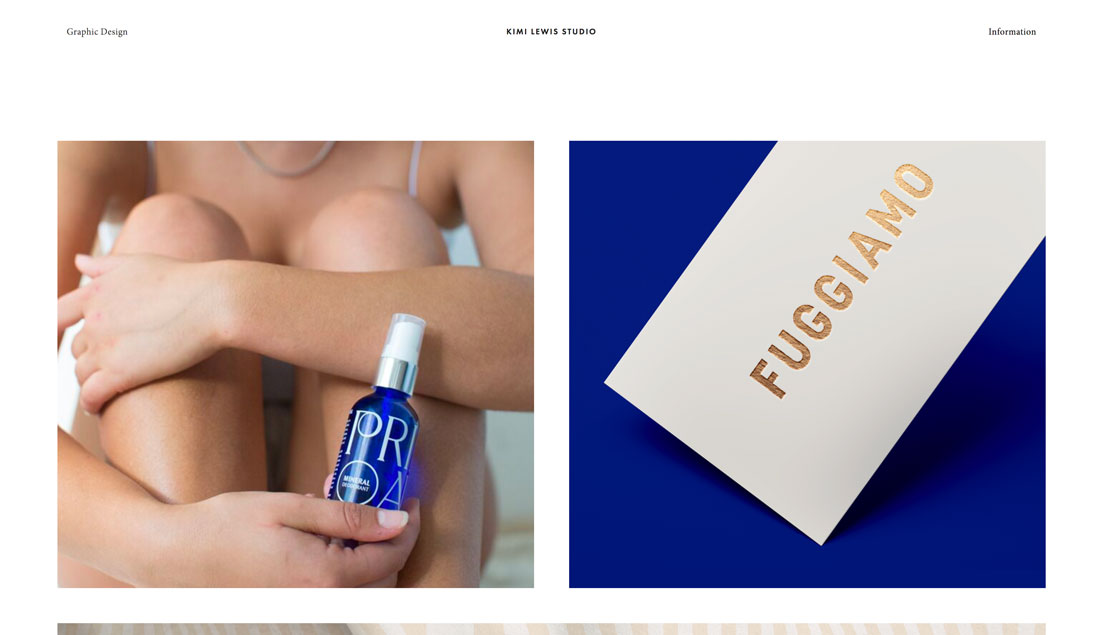
Kimi Lewis does something a little bit different with her portfolio, above. Rather than lots of small blocks to show portfolio projects, this design goes big. It mixes and matches squarer and long horizontal images in an oversized grid.

Users get a good feel for each project right from the start. Add the oversized grid images to some exaggerated spacing between elements and this portfolio might be one of the easiest to digest that I’ve seen in a while. There’s also a nifty hover animation on each image with the client name and project type to provide extra information before you click through.

Color Overlays

portfolio trends

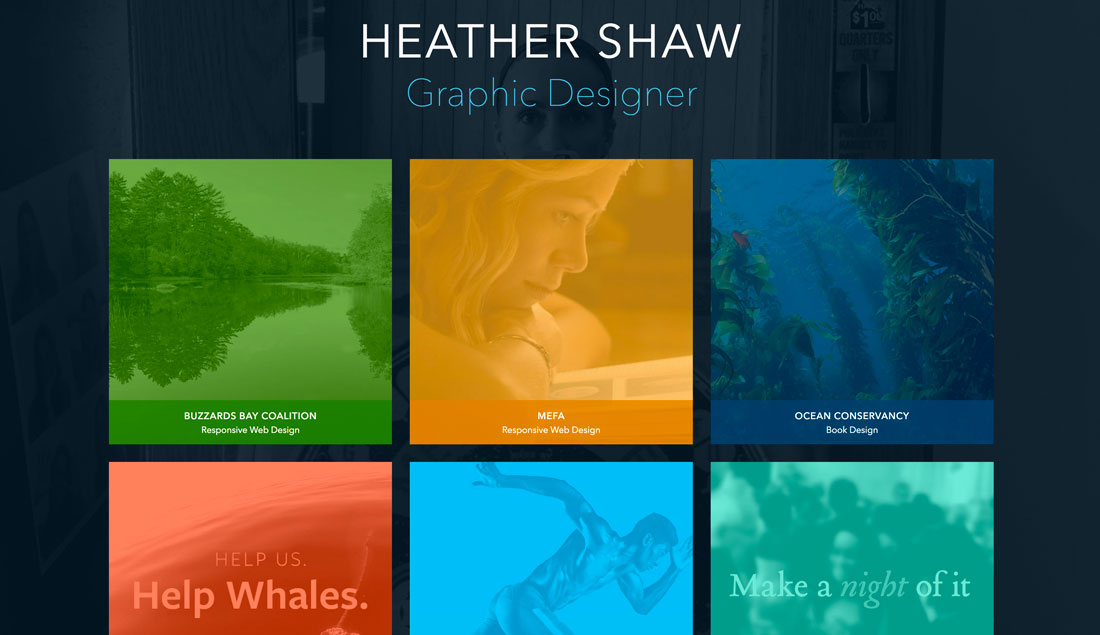
Heather Shaw’s portfolio works because each project is so different, but the color overlays give the homepage a connected feel.

One of the most challenging things about creating a portfolio is the homepage. How do you preview work or project sections in a way that will entice users to actually click through?

The answer might be to partially obscure the work. Using interesting color overlays on preview image links can be a visually engaging way to encourage clicks to individual projects. It’ll keep your homepage cleaner with a consistent look and style for different sections of the website, ensure that one page isn’t too heavy and slow to load, and provides an opportunity to highlight something about a project before the click.

Heather Shaw’s portfolio, above, works because each project is so different, but the color overlays give the homepage a connected feel. The user also knows what kind of project they are about to view thanks to labels with client names and project types right there. This is a highly navigable and easy-to-understand format that appeals visually.

Streamlined Project Showcase

mobile cards


And then there’s the opposite end of the spectrum – portfolios that have a more streamlined look and feel. There can be a benefit to only showing a handful of projects.
It ensures that users only see what you want them to focus on and not get distracted.

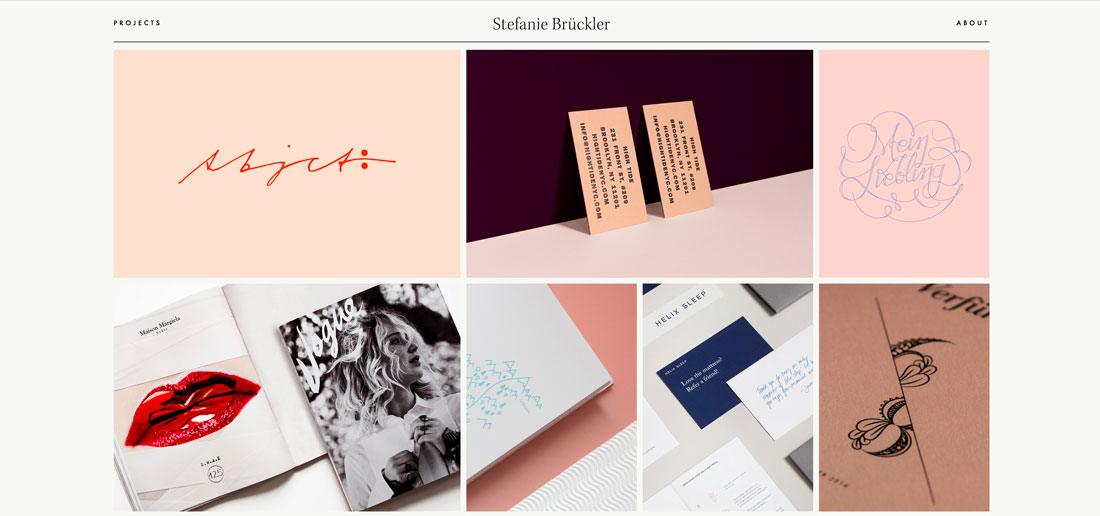
Stefanie Bruckler also uses a module grid format but with fewer items in a more contained space. Plus, it’s all below the main scroll which features a minimal business card-style design.

It has a look that’s polished and classy, setting a distinct tone for the work of this designer.

Conclusion

Still not quite ready to redesign your portfolio? While it is a creative project, this is also an investment in your business, whether you work for a company or as a freelancer.

Potential clients are looking for you before you even know they exist. A modern, trendy portfolio with your best projects can make a strong first impression.

6 marketing takeaways from Longlegs’ campaign of terror

Featured Imgs 23

Mid-June, 2024. A full page of indecipherable glyphs runs in The Seattle Times, with the only clue a typewritten-style note at the bottom: “Printed at the request of LONGLEGS.”

A week later, a user named Mr_Downstairs leaves strings of glyphs in the comments on Letterboxd.

Screencap of a Letterboxd comment with glyphs and symbols.

Image Source

Billboards pop up; a partially obscured face peers down at drivers. In large red type, there’s nothing more than a phone number and a date. 458.666.4355. 7.12.

Click Here to Subscribe to Masters in Marketing

It was all part of an eerily good marketing campaign from indie film distributor Neon, and it racked up a respectable $22 million for Longlegs’ opening weekend in July. Arguably — don’t come for me — the campaign itself was more provocative than Nicolas Cage’s madman serial killer.

I asked our spookiest HubSpot marketers: What made Neon’s campaign so effective, and what tactics can we bring to our (hopefully) less macabre marketing efforts?

1. Build a continuous journey for your audience.

“The Longlegs campaign brilliantly invited people to step into the narrative, transforming them into active participants rather than a passive audience. By threading suspense and curiosity throughout its progression, the campaign ensures a dedicated and engaged audience eager for what's to come.


“For marketers, this approach offers a clear lesson: Aim for more than just a single peak of interest — build a continuous journey that keeps your audience engaged and eagerly anticipating what's next. By nurturing ongoing interest and curiosity, you create a dynamic relationship that leads to deeper connections and greater loyalty over time.”

Carly CHILL-iams, director, media monetization


2. Build community and shared experiences.

“What's so sharp about the Longlegs campaign is that it applies pressure from two angles. People don't like unanswered questions but, on the flip side, they LOVE being a part of something.

“When the Longlegs audience tries to answer those unanswered questions, SURPRISE, they're now part of a mystery game.


“That may be harder to apply if you're marketing, say, drain plugs, but there are some lessons here that everyone can benefit from.

  • Give your audience something to answer for themselves. Maybe that‘s plugging their details into a quote creator. Maybe it’s finding a coupon code somewhere on your site. Even mundane industries can enjoy a little mystery.
  • Welcome them into being a part of something bigger. Maybe that's a social community, a Slack channel, or a product forum. Even just giving a name to your audience can be a powerful way to create that sense of ‘something bigger.’ (Think of Swifties, the Bills Mafia, or Browncoats.)”

Curt del PRINCE of DARKNESS, senior marketing manager

Longlegs movie poster.

Image Source

“I love that I immediately want to share the experience. I want to send this phone number to my sister and wait for her totally weirded-out reply. It feels so special when a marketing campaign evokes a desire to pull more people in.

“As marketers, we think a lot about how to cut through today's noisy marketplace. But sometimes we forget that creating an experience our audience wants to share with others is a great way to expand reach (and get our audience to do a bit of the heavy lifting).”

Meg PraterGEIST, managing editor, blogs


3. Cultivate suspense.

“At Los Angeles’ BeyondFest this fall, programmers spliced the trailer for the American remake of Speak No Evil into pre-show entertainment, a cinephile joke poking fun at how often the various cuts of the trailer — which gave away much of the film — appeared in movie theaters leading up to its debut.

Longlegs took an opposite tactic, reveling in minimalism. It never gave too much away in its trailers, leaving viewers to wonder when and how Nicolas Cage, its biggest star, would show up.

“Neon instead invited audiences into its mystery through a series of cryptic codes and phone numbers, building the same sense of dread and intrigue that Maika Monroe’s character — a young FBI agent — experiences in the film.

“Additionally, the marketing built an accessible, interactive alternative reality game (ARG) that could be freely enjoyed by fans everywhere, maintaining interest in the movie without spoiling it or exhausting potential customers.”

GHOUL-iet Bennett Rylah, senior writer, The Hustle

“I think the marketing was effective because it cultivated a sense of suspense by planting breadcrumbs. Neon lets its target audience fill in the rest with their imagination, which can be the most powerful tool in both horror and marketing.

“Unfortunately, I was disappointed by the actual film — as were a ton of other folks I talked to online and IRL — so the marketing built up too much anticipation for me. The more the campaign let my imagination go wild, the higher my expectations were — and the bigger the discrepancy between my expectations and my experience.

“My takeaways:

  • Know when to leave a meaningful blank. What’s left unsaid and unshown gives your audience space to imagine.
  • Plant breadcrumbs. Marketers can encourage people to actively engage in your marketing campaign without them even realizing it. Give new information with each iteration of your campaign, and you’ll have your audience yearning for more.
  • Use multisensory marketing. The phone number, audio clip, music, etc. contribute to the atmospheric success of this campaign, which the film did deliver on.
  • Repurpose your content. A two-hour movie can spin out hundreds of mini content types, whether it‘s a still image, a number, a clip, or a series of puzzle pieces. You don’t even need to create new stuff — just make a meaty product and use the product itself to create marketing assets.”

DYIN’ Zhong, senior marketing manager


4. Unite analog and digital marketing strategies.

“Neon did movie marketing, especially horror movie marketing, right.

“Movie promos are notorious for showing all the good parts, but Longlegs beautifully captured the suspense audiences would get in the movie and piqued curiosity without giving anything away.

“I love how the film’s marketing united the analog and digital worlds. People could see the billboard with its eerie imagery and move along, but if they called the phone number, they could actually experience it.

“This strategy brought them into the movie in a way, and made its value more of a reality. It’s not difficult for marketers from all backgrounds to mimic this with the use of URLs and QR codes.

“Plus, Neon’s trailers used behind-the-scenes footage and actual recordings of lead actress Maika Monroe’s heart rate the first time she saw Nic Cage as Longlegs.


“It makes the terror that much more tangible. They didn’t just tell viewers the movie was scary in their marketing, they proved it.”

Ra-MOAN-a Sukhraj, principal marketing writer


5. Lean into imagination and interactivity.

“I'm a huge horror fan, and I was really impressed at how Neon took an entirely fictitious threat (Nicolas Cage’s Longlegs) and brought it into our dimension. (The nonfiction threat of Nic Cage himself predates the movie industry.) It’s a creative and immersive way to gain fan attention and build curiosity for moviegoers.

Smile 2 did something similar, breaking the fourth wall in its marketing campaign by placing odd smiling people in random sports events or news broadcasts to draw attention to the movie.

“In that movie, the sinister smile portends a murderous threat. Bringing elements of it into our world adds legitimacy and makes the movie feel all the more plausible. That strategy also played into word-of-mouth marketing, as regular social media users would post the different smiling people they’d see on TV, igniting even more interest.

“What I take away from these frightful marketing campaigns is that the more imaginative and immersive your marketing team gets, the more you stand to gain from letting your viewers unravel the mystery or story.

“Tap into their curiosity, use enigmatic symbols or details, and provide interactive elements that encourage investigation and sharing among friends — and you can transform a paid marketing campaign into a real hot topic.”

Tristen Tay-LORD of the UNDERWORLD, Service Blog editor and marketing manager

Still of Longlegs’ star Maika Monroe with her gloved hands leaning against a window.

Image Source

“What made this campaign so effective is that people were given a lot to work with — ciphers to decode, numbers to call, backstories to explore — but none of it gave people what they really wanted: a face reveal of the titular villian. You could only get that by watching the movie, which made people eager to show up.

“My favorite element was the audio of Maika Monroe’s heart rate when she first laid eyes on Longlegs. I expected him to be so agonizingly grotesque and off-putting that I was almost relieved when he was mostly just ugly. Since he wasn’t as hideous as I expected him to be, it made the true horror of the movie (which was also hidden from the trailers) hit even harder.


Longlegs’ marketing is a lesson in the importance of interactivity. Giving your audience something to do that relates to your product or service makes them want to engage. And pre-engagement makes a product reveal, launch, etc., all the more exciting.”

GORY Needle, senior marketing manager

6. Trust your audience.

Longlegs’ minimalist drip marketing is an exercise in restraint. A few lines of glyphs here, a phone number there. It’s straight out of the scream queen playbook: The more that’s left to your imagination, the more horrifying it is.

“But for that to work, you have to trust your audience. That’s not always the easiest thing to accomplish, especially if you’ve been elbow-deep in marketing copy for days or weeks on end. But remember that your audience is made up of real human people, not numbers — the payoff can be tremendous.

Laura M. DROWNING

Click Here to Subscribe to Masters in Marketing

PHP Fatal error: Uncaught Error: Unsupported operand types error

Featured Imgs 23

I am trying to make a system for office staff and delivery drivers so the office staff book the orders in and the delivery drivers are able to see what can see what orders there are for that day and for their lorry as will be multiple lorries/drivers. I am currently working on the sell product order page but I am getting the following error

It was working before I added extra code in so the customer name and lorry name is populated from the customers and lorries db table and when a customer name is selected, there is a next textarea box next to it that is populated with the customers address

[30-Oct-2024 15:30:07 UTC] PHP Fatal error: Uncaught Error: Unsupported operand types in /home/wwwbeechwoodsolu/public_html/sites/coal-lorry-system-two/sell_product.php:23
Stack trace:
#0 {main}
thrown in /home/wwwbeechwoodsolu/public_html/sites/coal-lorry-system-two/sell_product.php on line 23

On line 23 is

$_SESSION["cart_item"][$k]["quantity"] += $_POST["quantity"];

But don't think that line is the issue as was not showing any issue with that line or the code before I added extra code in

It's bit of long file to post the whole code here so I attached it as a txt file to this post

Below is the sections of code that contains the code I put in

//Code for Checkout
if(isset($_POST['checkout'])){
    $invoiceno= mt_rand(100000000, 999999999);
    $pid=$_SESSION['productid'];
    $quantity=$_POST['quantity'];
    $lorryname=$_POST['lorryname']; // I ADDED THIS LINE IN
    $customername=$_POST['customername']; // I ADDED THIS LINE IN
    $customeraddress=$_POST['customeraddress']; // I ADDED THIS LINE IN
    $pmode=$_POST['paymentmode'];
    $value=array_combine($pid,$quantity);
    foreach($value as $pdid=> $qty){
        $query=mysqli_query($con,"insert into tblorders(ProductId,Quantity,InvoiceNumber,LorryName,CustomerName,CustomerAddress,PaymentMode) values('$pdid','$qty','$invoiceno','$lorryname','$customername','$customeraddress','$pmode')") ; // I AMENDED THIS LINE TO ADD IN LORRYNAME, CUSTOMERNAME, CUSTOMERADDRESS
    }
    echo '<script>alert("Invoice generated successfully. Invoice number is "+"'.$invoiceno.'")</script>';  
    unset($_SESSION["cart_item"]);
    $_SESSION['invoice']=$invoiceno;
    echo "<script>window.location.href='invoice.php'</script>";

}


// I ADDED THIS CODE BLOCK IN
<div class="col-md-4 mb-10">
                                                    <label for="validationLorry03">Lorry</label>
                                                    <select  name="lorryname"  class="form-control" required>
                                                        <option value="">Select Lorry</option>
                                                        <?php
                                                $sql="SELECT * from  tbllorries";
                                                $query = $dbh -> prepare($sql);
                                                $query->execute();
                                                $results=$query->fetchAll(PDO::FETCH_OBJ);
                                                if($query->rowCount() > 0)
                                                {
                                                    foreach($results as $row)
                                                    {
                                                        ?> 
                                                        <option value="<?php  echo $row->lorryname;?>"><?php echo "Lorry Name: " . $row->lorryname . " | Area: " . $row->lorryarea . " | Day: " . $row->lorryday;?></option>
                                                        <?php 
                                                    }
                                                }
                                                        ?>
                                                    </select>
                                                </div>


// I ADDED THIS CODE BLOCK IN

<div class="col-md-4 mb-10">
                                                    <label for="validationLorry03">Lorry</label>
                                                    <select  name="lorryname"  class="form-control" required>
                                                        <option value="">Select Lorry</option>
                                                        <?php
                                                $sql="SELECT * from  tbllorries";
                                                $query = $dbh -> prepare($sql);
                                                $query->execute();
                                                $results=$query->fetchAll(PDO::FETCH_OBJ);
                                                if($query->rowCount() > 0)
                                                {
                                                    foreach($results as $row)
                                                    {
                                                        ?> 
                                                        <option value="<?php  echo $row->lorryname;?>"><?php echo "Lorry Name: " . $row->lorryname . " | Area: " . $row->lorryarea . " | Day: " . $row->lorryday;?></option>
                                                        <?php 
                                                    }
                                                }
                                                        ?>
                                                    </select>
                                                </div>

                                                <div class="col-md-4 mb-10">
                                                    <label for="validationCustom03">Customer Name</label>

                                                    <script>
                                                        function myFunction(){
                                                            var index = document.getElementById("customername").selectedIndex;
                                                            //alert(index);
                                                            var add = document.getElementById("customername").options[index].getAttribute("data-add");

                                                            document.getElementsByName("customeraddress")[0].value = add;
                                                        }
                                                    </script>

                                                    <select  name="customername" id="customername" class="form-control" required onchange="myFunction();">
                                                        <option value="">Select Customer</option>
                                                        <?php
                                                $sql="SELECT * from  tblcustomers";
                                                $query = $dbh -> prepare($sql);
                                                $query->execute();
                                                $results=$query->fetchAll(PDO::FETCH_OBJ);
                                                if($query->rowCount() > 0)
                                                {
                                                    foreach($results as $row)
                                                    {
                                                        ?> 
                                                        <option value="<?php echo $row->customername;?>" data-add="<?php echo $row->customeraddress;?>"><?php echo $row->customername;?></option>
                                                        <?php 
                                                    }
                                                }
                                                        ?>
                                                    </select>
                                                </div>
                                                <div class="col-md-4 mb-10">
                                                    <label for="validationCustom03">Customer Address</label>
                                                    <textarea rows=5 cols=5 name="customeraddress" class="form-control" placeholder="Enter Customer Address" required></textarea>
                                                </div>

What’s Coming in WordPress 6.7: New Default Theme, Better Font Management, and More!

Featured Imgs 23

WordPress 6.7, slated for release on November 12, is packed with new tools designed to enhance design flexibility and streamline site management. The sleek Twenty Twenty-Five default theme leads the update, offering adaptable styling that’s perfect for any site, whether running a personal blog or a complex content hub. This release also brings an upgraded

The post What’s Coming in WordPress 6.7: New Default Theme, Better Font Management, and More! appeared first on WP Engine.

State of CSS 2024 Results

Featured Imgs 23

They’re out! Like many of you, I look forward to these coming out each year. I don’t put much stock in surveys but they can be insightful and give a snapshot of the CSS zeitgeist. There are a few little nuggets in this year’s results that I find interesting. But before I get there, you’ll want to also check out what others have already written about it.

Oh, I guess that’s it — at least it’s the most formal write-up I’ve seen. There’s a little summary by Ahmad Shadeed at the end of the survey that generally rounds things up. I’ll drop in more links as I find ’em.

In no particular order…

Demographics

Josh has way more poignant thoughts on this than I do. He rightfully calls out discrepancies in gender pay and regional pay, where men are way more compensated than women (a nonsensical and frustratingly never-ending trend) and the United States boasts more $100,000 salaries than anywhere else. The countries with the highest salaries were also the most represented in survey responses, so perhaps the results are no surprise. We’re essentially looking at a snapshot of what it’s like to be a rich, white male developer in the West.

Besides pay, my eye caught the Age Group demographics. As an aging front-ender, I often wonder what we all do when we finally get to retirement age. I officially dropped from the most represented age group (30-39, 42%) a few years ago into the third most represented tier (40-49, 21%). Long gone are my days being with the cool kids (20-29, 27%).

Bar chart with age results from the state of CSS 2024 survey.

And if the distribution is true to life, I’m riding fast into my sunset years and will be only slightly more represented than those getting into the profession. I don’t know if anyone else feels similarly anxious about aging in this industry — but if you’re one of the 484 folks who identify with the 50+ age group, I’d love to talk with you.

Before we plow ahead, I think it’s worth calling out how relatively “new” most people are to front-end development.

Bar chart with years of experience from the state of CSS 2024 survey.

Wow! Forty-freaking-four percent of respondents have less than 10 years of experience. Yes, 10 years is a high threshold, but we’re still talking about a profession that popped up in recent memory.

For perspective, someone developing for 10 years came to the field around 2014. That’s just when we were getting Flexbox, and several years after the big bang of CSS 3 and HTML 5. That’s just under half of developers who never had to deal with the headaches of table layouts, clearfix hacks, image sprites, spacer images, and rasterized rounded corners. Ethan Marcotte’s seminal article on “Responsive Web Design” predates these folks by a whopping four years!

That’s just wild. And exciting. I’m a firm believer in the next generation of front-enders but always hope that they learn from our past mistakes and become masters at the basics.

Features

I’m not entirely sure what to make of this section. When there are so many CSS features, how do you determine which are most widely used? How do you pare it down to just 50 features? Like, are filter effects really the most widely used CSS feature? So many questions, but the results are always interesting nonetheless.

What I find most interesting are the underused features. For example, hanging-punctuation comes in dead last in usage (1.57%) but is the feature that most developers (52%) have on their reading list. (If you need some reading material on it, Chris initially published the Almanac entry for hanging-punctuation back in 2013.)

I also see Anchor Positioning at the end of the long tail with reported usage at 4.8%. That’ll go up for sure now that we have at least one supporting browser engine (Chromium) but also given all of the tutorials that have sprung up in the past few months. Yes, we’ve contributed to that noise… but it’s good noise! I think Juan published what might be the most thorough and thoughtful guide on the topic yet.

I’m excited to see Cascade Layers falling smack dab in the middle of the pack at a fairly robust 18.7%. Cascade Layers are super approachable and elegantly designed that I have trouble believing anybody these days when they say that the CSS Cascade is difficult to manage. And even though @scope is currently low on the list (4.8%, same as Anchor Positioning), I’d bet the crumpled gum wrapper in my pocket that the overall sentiment of working with the Cascade will improve dramatically. We’ll still see “CSS is Awesome” memes galore, but they’ll be more like old familiar dad jokes in good time.

(Aside: Did you see the proposed designs for a new CSS logo? You can vote on them as of yesterday, but earlier versions played off the “CSS is Awesome” mean quite beautifully.)

Interestingly enough, viewport units come in at Number 11 with 44.2% usage… which lands them at Number 2 for most experience that developers have with CSS layout. Does that suggest that layout features are less widely used than CSS filters? Again, so many questions.

Frameworks

How many of you were surprised that Tailwind blew past Bootstrap as Top Dog framework in CSS Land? Nobody, right?

More interesting to me is that “No CSS framework” clocks in at Number 13 out of 21 list frameworks. Sure, its 46 votes are dwarfed by the 138 for Material UI at Number 10… but the fact that we’re seeing “no framework” as a ranking option at all would have been unimaginable just three years ago.

The same goes for CSS pre/post-processing. Sass (67%) and PostCSS (38%) are the power players, but “None” comes in third at 19%, ahead of Less, Stylus, and Lightning CSS.

It’s a real testament to the great work the CSSWG is doing to make CSS better every day. We don’t thank the CSSWG enough — thank you, team! Y’all are heroes around these parts.

CSS Usage

Josh already has a good take on the fact that only 67% of folks say they test their work on mobile phones. It should be at least tied with the 99% who test on desktops, right? Right?! Who knows, maybe some responses consider things like “Responsive Design Mode” desktop features to be the equivalent of testing on real mobile devices. I find it hard to believe that only 67% of us test mobile.

Oh, and The Great Divide is still alive and well if the results are true and 53% write more JavsScript than CSS in their day-to-day.

Missing CSS Features

This is always a fun topic to ponder. Some of the most-wanted CSS features have been lurking around 10+ years. But let’s look at the top three form this year’s survey:

  • Mixins
  • Conditional Logic
  • Masonry

We’re in luck team! There’s movement on all three of those fronts:

Resources

This is where I get to toot our own horn a bit because CSS-Tricks continues to place first among y’all when it comes to the blogs you follow for CSS happenings.

I’m also stoked to see Smashing Magazine right there as well. It was fifth in 2023 and I’d like to think that rise is due to me joining the team last year. Correlation implies causation, amirite?

But look at Kevin Powell and Josh in the Top 10. That’s just awesome. It speaks volumes about their teaching talents and the hard work they put into “helping people fall in love with CSS” as Kevin might say it. I was able to help Kevin with a couple of his videos last year (here’s one) and can tell you the guy cares a heckuva lot about making CSS approachable and fun.

Honestly, the rankings are not what we live for. Now that I’ve been given a second wind to work on CSS-Tricks, all I want is to publish things that are valuable to your everyday work as front-enders. That’s traditionally happened as a stream of daily articles but is shifting to more tutorials and resources, whether it’s guides (we’ve published four new ones this year), taking notes on interesting developments, spotlighting good work with links, or expanding the ol’ Almanac to account for things like functions, at-rules, and pseudos (we have lots of work to do).

My 2024 Pick

No one asked my opinion but I’ll say it anyway: Personal blogging. I’m seeing more of us in the front-end community getting back behind the keyboards of their personal websites and I’ve never been subscribed to more RSS feeds than I am today. Some started blogging as a “worry stone” during the 2020 lockdown. Some abandoned socials when Twitter X imploded. Some got way into the IndieWeb. Webrings and guestbooks are even gaining new life. Sure, it can be tough keeping up, but what a good problem to have! Let’s make RSS king once and for all.

That’s a wrap!

Seriously, a huge thanks to Sacha Greif and the entire Devographics team for the commitment to putting this survey together every year. It’s always fun. And the visualizations are always to die for.


State of CSS 2024 Results originally published on CSS-Tricks, which is part of the DigitalOcean family. You should get the newsletter.

developing with AR Google Spatial API with non supported region

Featured Imgs 23

Hi All,

I am Asif. I want to develop a mobile application in Android and iOS using Google AR spatial api. After running the sample applications in Google Code Labs, we are getting an error, VPS is not available in your region. Yes we know it is available mostly in USA. However my question is, how can we develop such an app in an non supported region?

Thank you.
Asif.

100+ Beautiful Script, Brush & Calligraphy Fonts 2025

Featured Imgs 23

Brush, script, and calligraphy fonts can add a touch of elegance to your design. They’re stylish, flowing, and full of character! We’ve picked some of the best examples of these typefaces to add to your collection.

Whether you’re looking for a precise and decorative script font or a bold brush typeface that needs to grab the reader’s attention, we’ll have something for you here.

Each of these fonts is beautifully crafted to add character to your next design project, perfect for logos, lettering, clothing design, posters, flyers, quotes, and so much more.

What Are Script, Brush & Calligraphy Fonts?

All these typefaces have similarities, but each of these styles is unique in a different way. Before we dive into the fonts themselves, let’s quickly outline the difference between them.

Calligraphy Fonts

Calligraphic script fonts aim to mimic the style of traditional calligraphy writing. Some have connecting letter designs, and some don’t, but they all have the type of character you’d expect from a hand-written piece of calligraphy.

Script Fonts

Script fonts are a traditional typeface choice, referencing back to formally written styling in the 17th century. They have a flowing, connected style, and most characters adjoin another with a connecting stroke. They can roughly be separated into formal script fonts and casual script fonts. The former is more traditional, and the latter mimic a more quickly written, informal style.

Brush Fonts

These often have a much heavier weight, to look similar to letterforms that have been painted with a brush. They have the same connected, flowing style as calligraphy or script fonts, but their block-style makes them more suited for uses where you need a bigger impact!

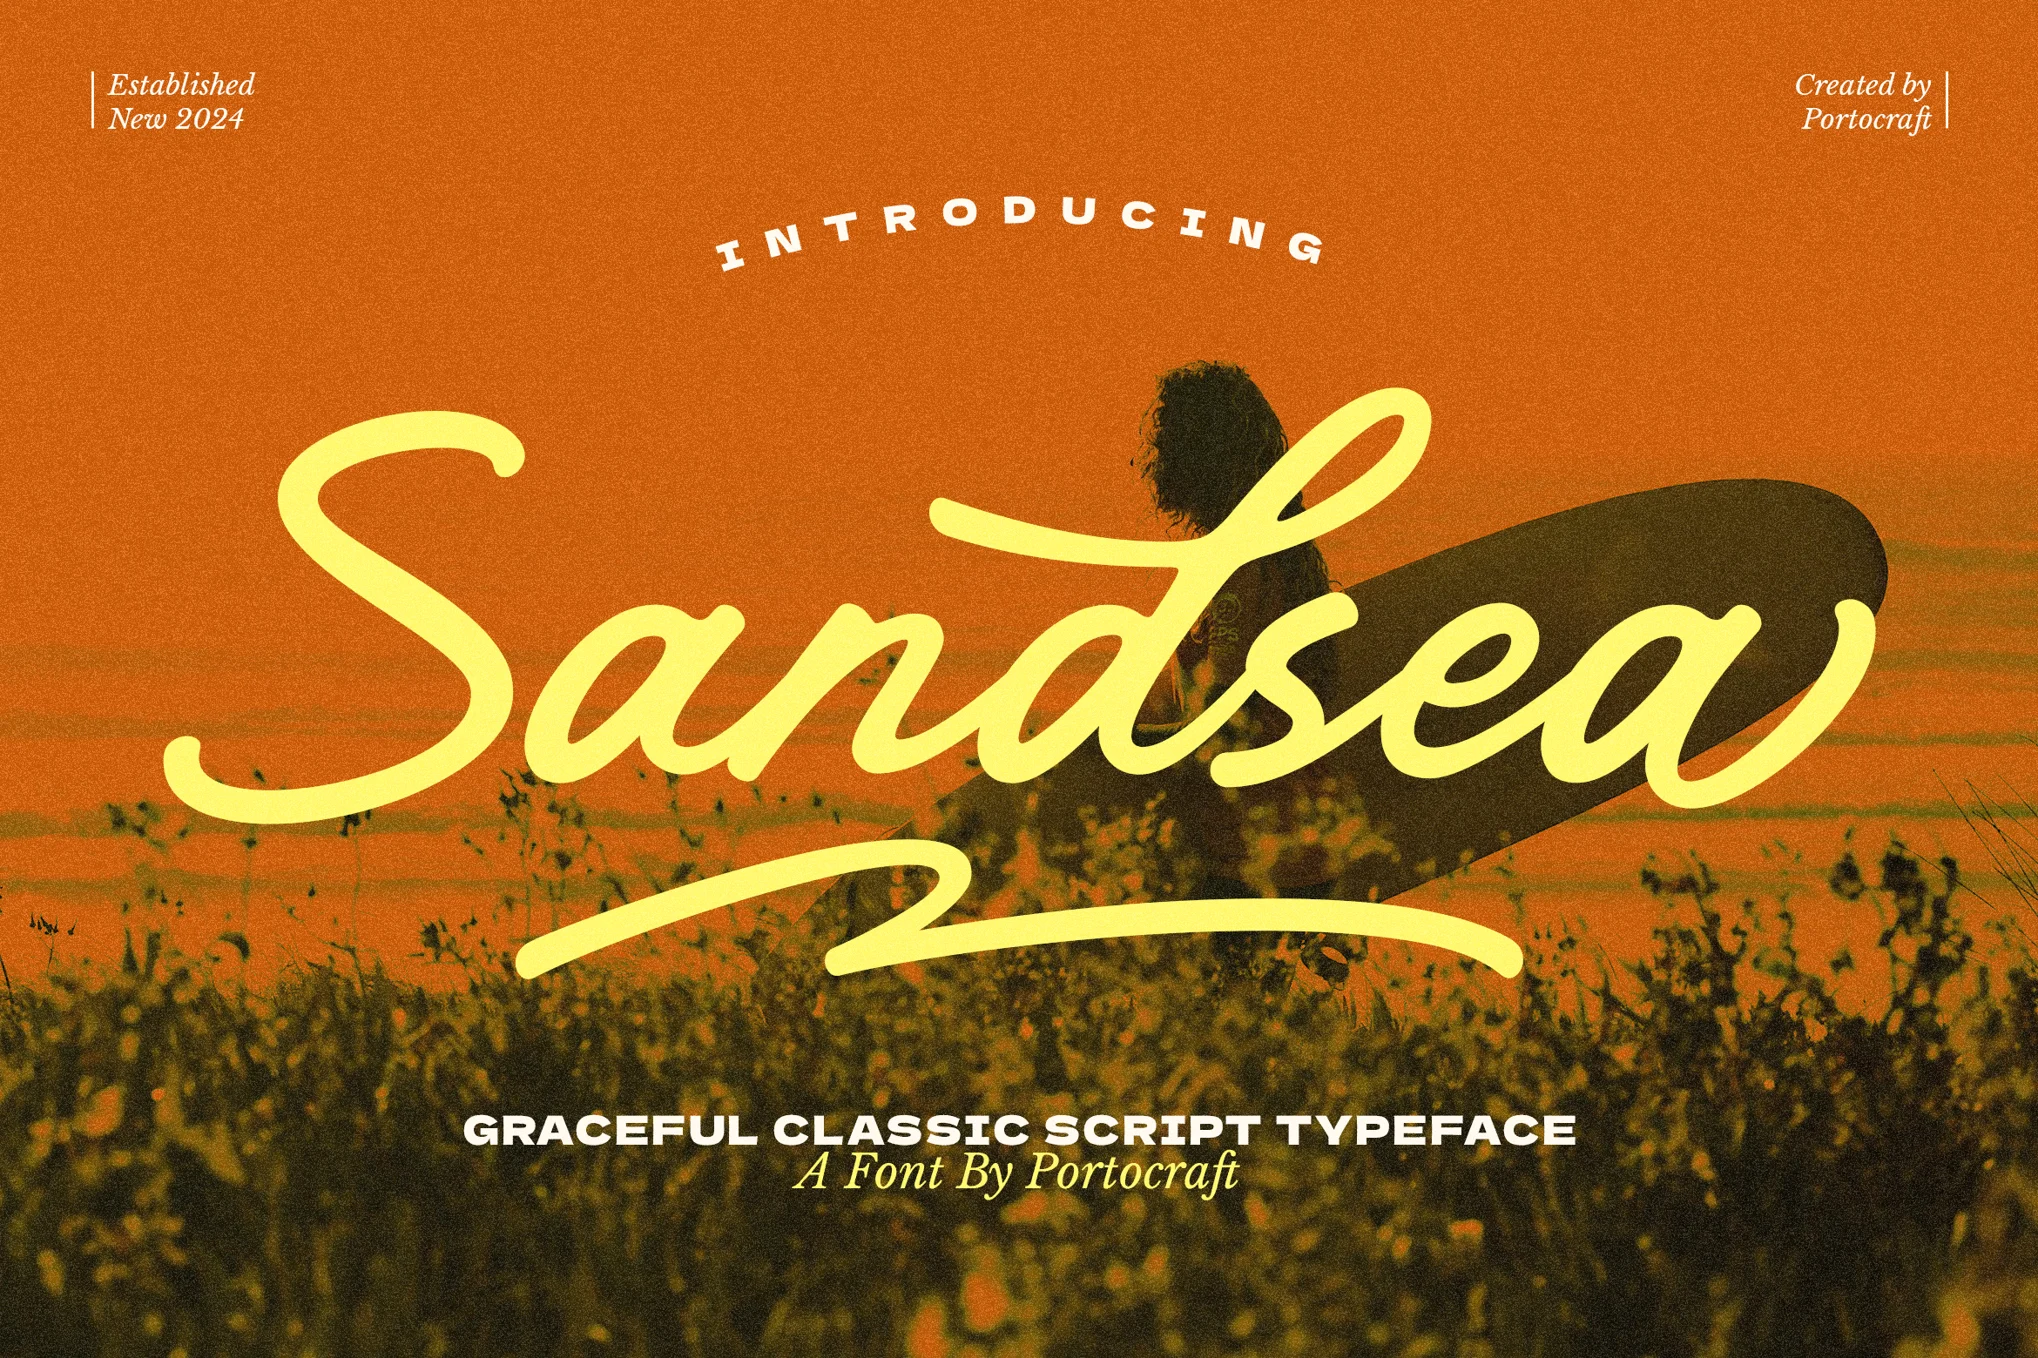
Sandsea – Graceful Script Font

Sandsea - Graceful Script Font

Sandsea is a chic-style script font offering unique letterforms in TTF, OTF, and WOFF formats. Ideal for wedding invitations, sophisticated handwritten logos and branding, social media quotes, and more.

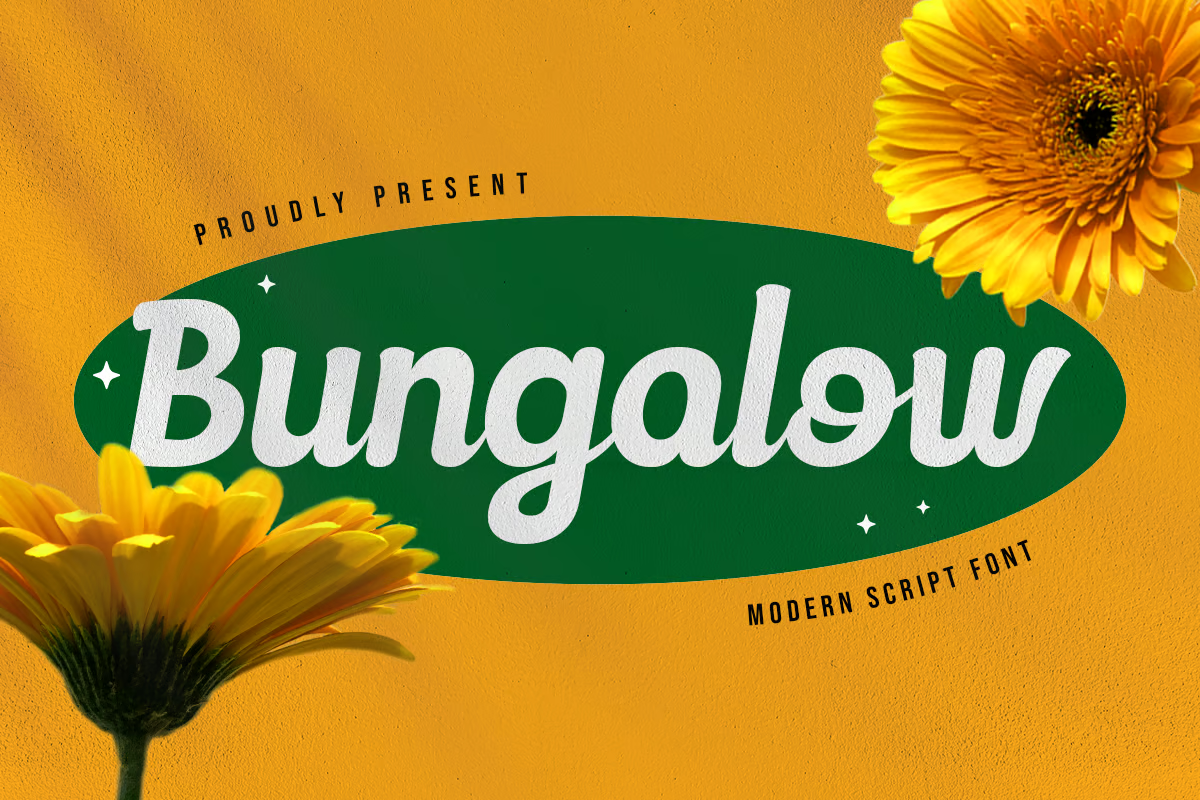
Bungalow – Modern Script Font

Bungalow - Modern Script Font

Bungalow script font brings a touch of elegance and modern sophistication to your designs. Designed with smooth strokes and artistic characters, this font is ideal for chic logos, stylish branding or elegant invitations. The beautiful calligraphy-inspired curves give a personal and refined touch to your work, making it stand out.

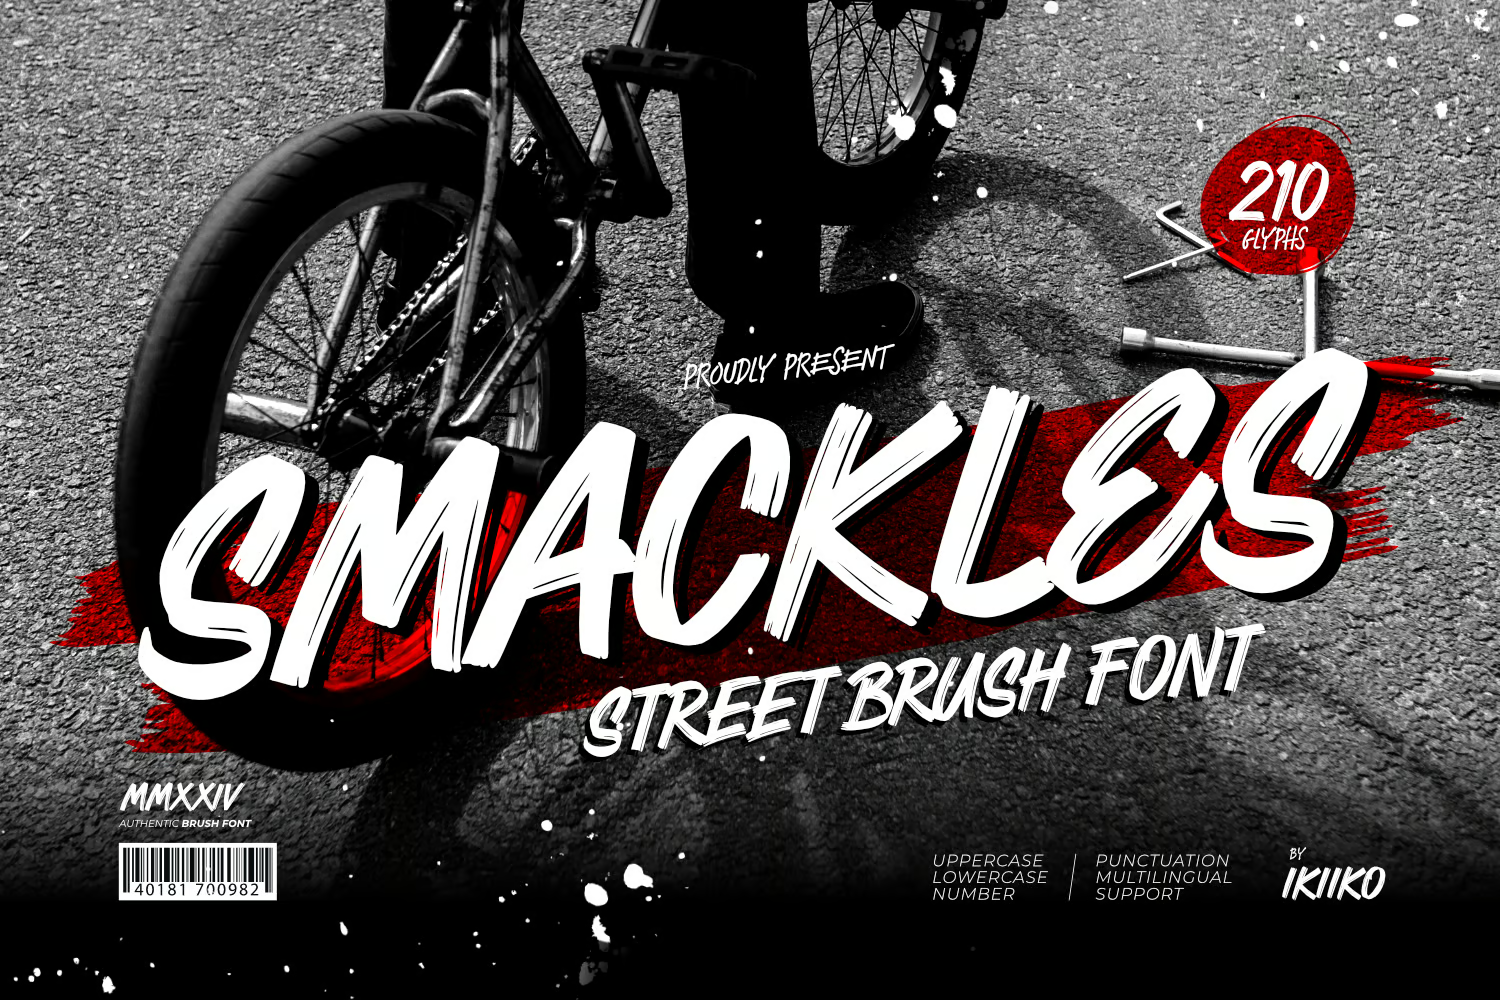
Smackles – Street Brush Font

Smackles - Street Brush Font

The Smackles brush font packs a punch with its spirited, streetwise appeal. Influenced by the raw energy of street culture, it boasts rough brush strokes for an authentically handmade feel, ideal for bold, eye-catching headlines and titles.

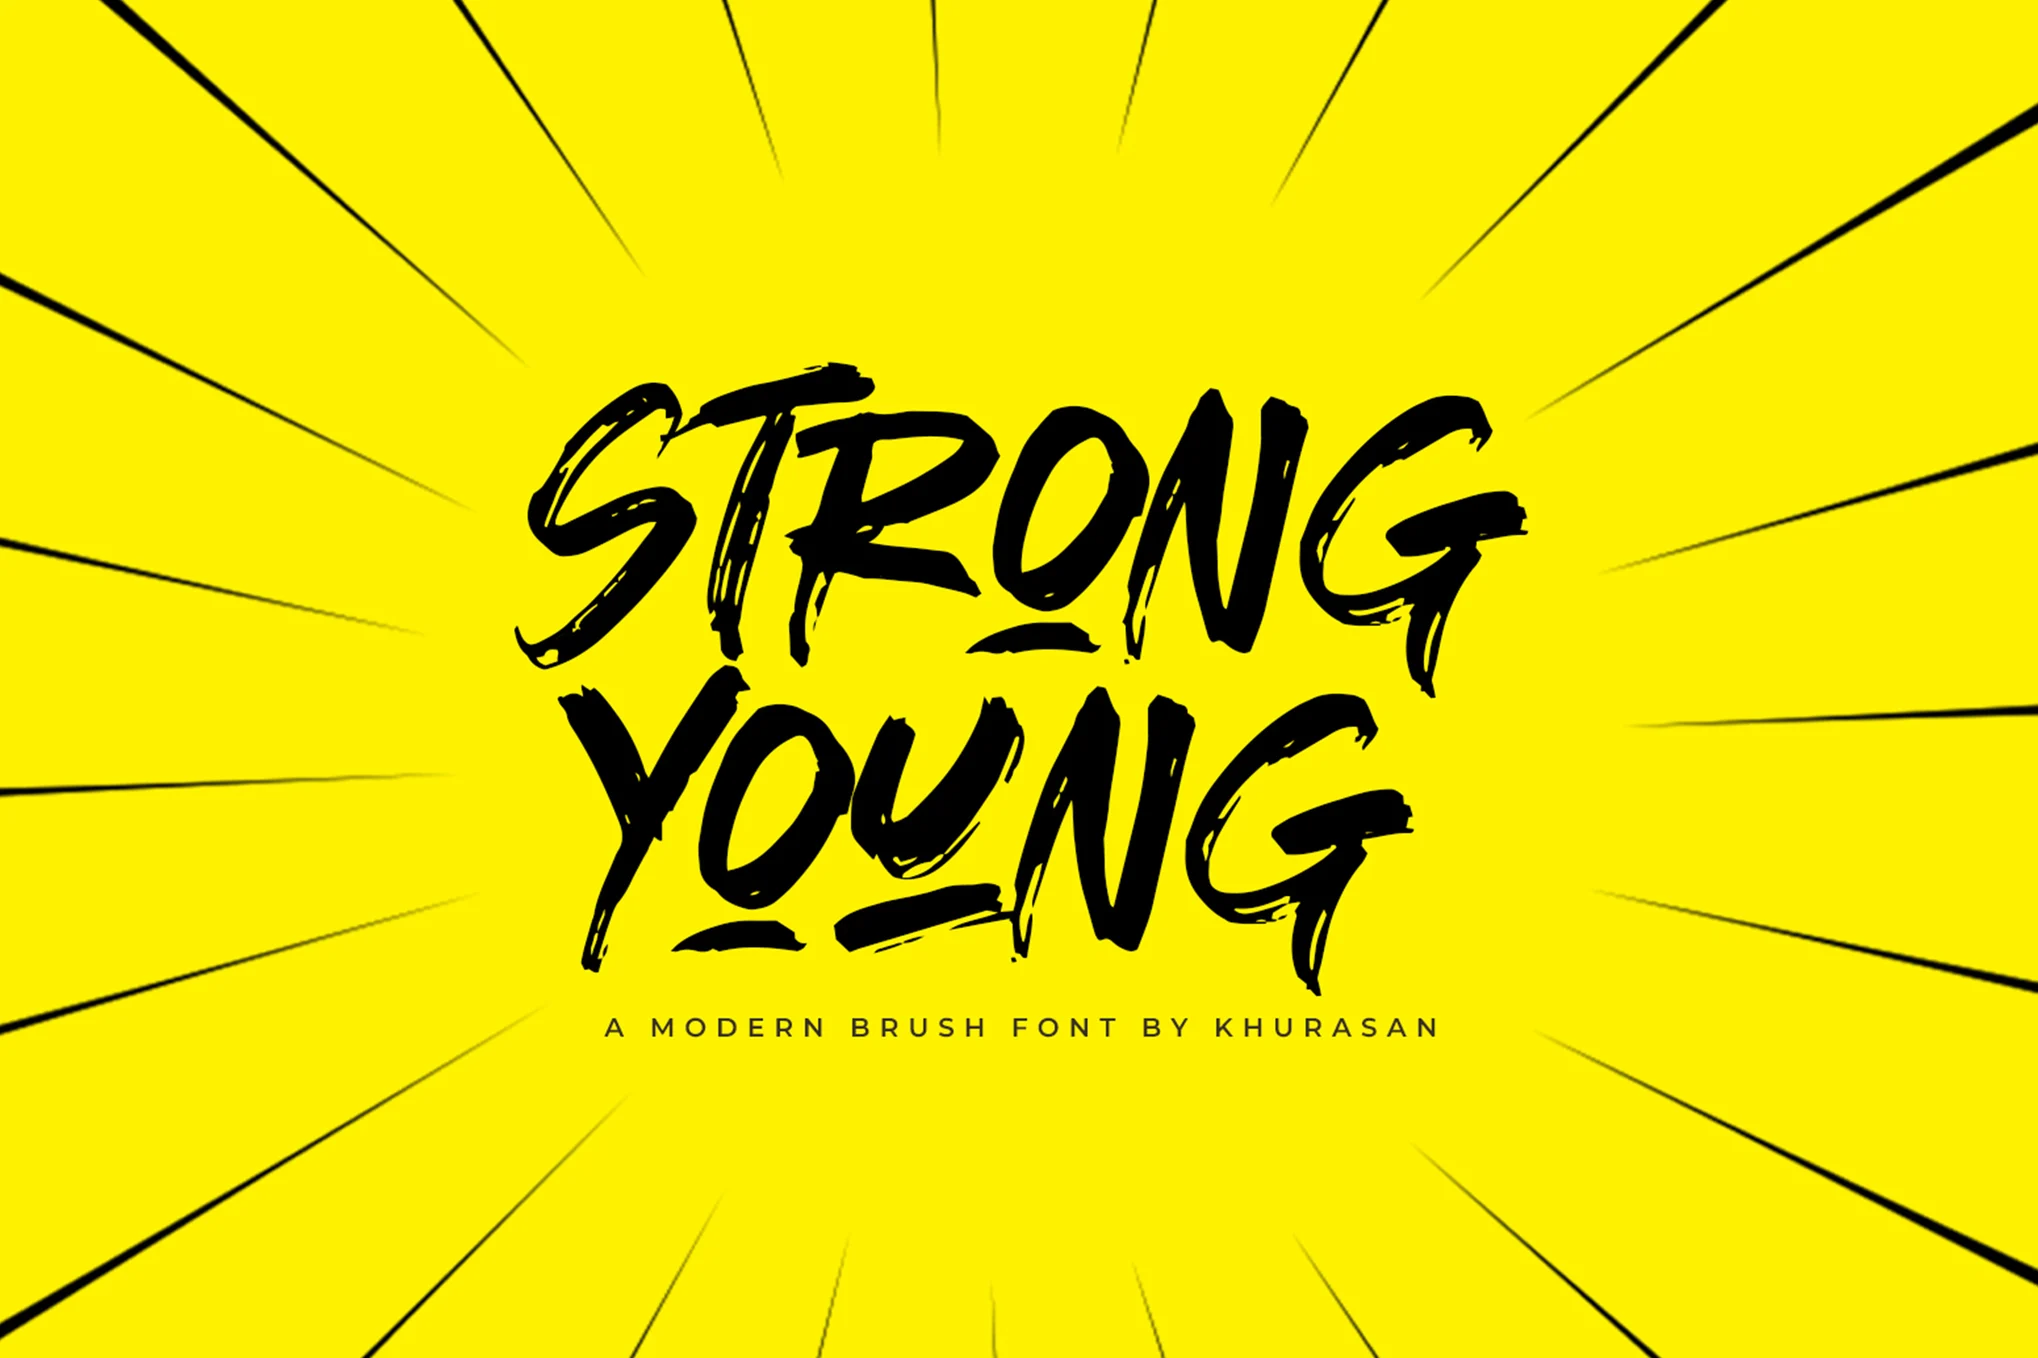
Strong Young – Modern Brush Font

Strong Young - Modern Brush Font

Strong Young is a contemporary brush font offering a sophisticated and modern feel. Its versatile character set also boasts multi-lingual support, making it well-suited for various global projects. Equipped with both TTF and OTF files, it’s a breeze to use.

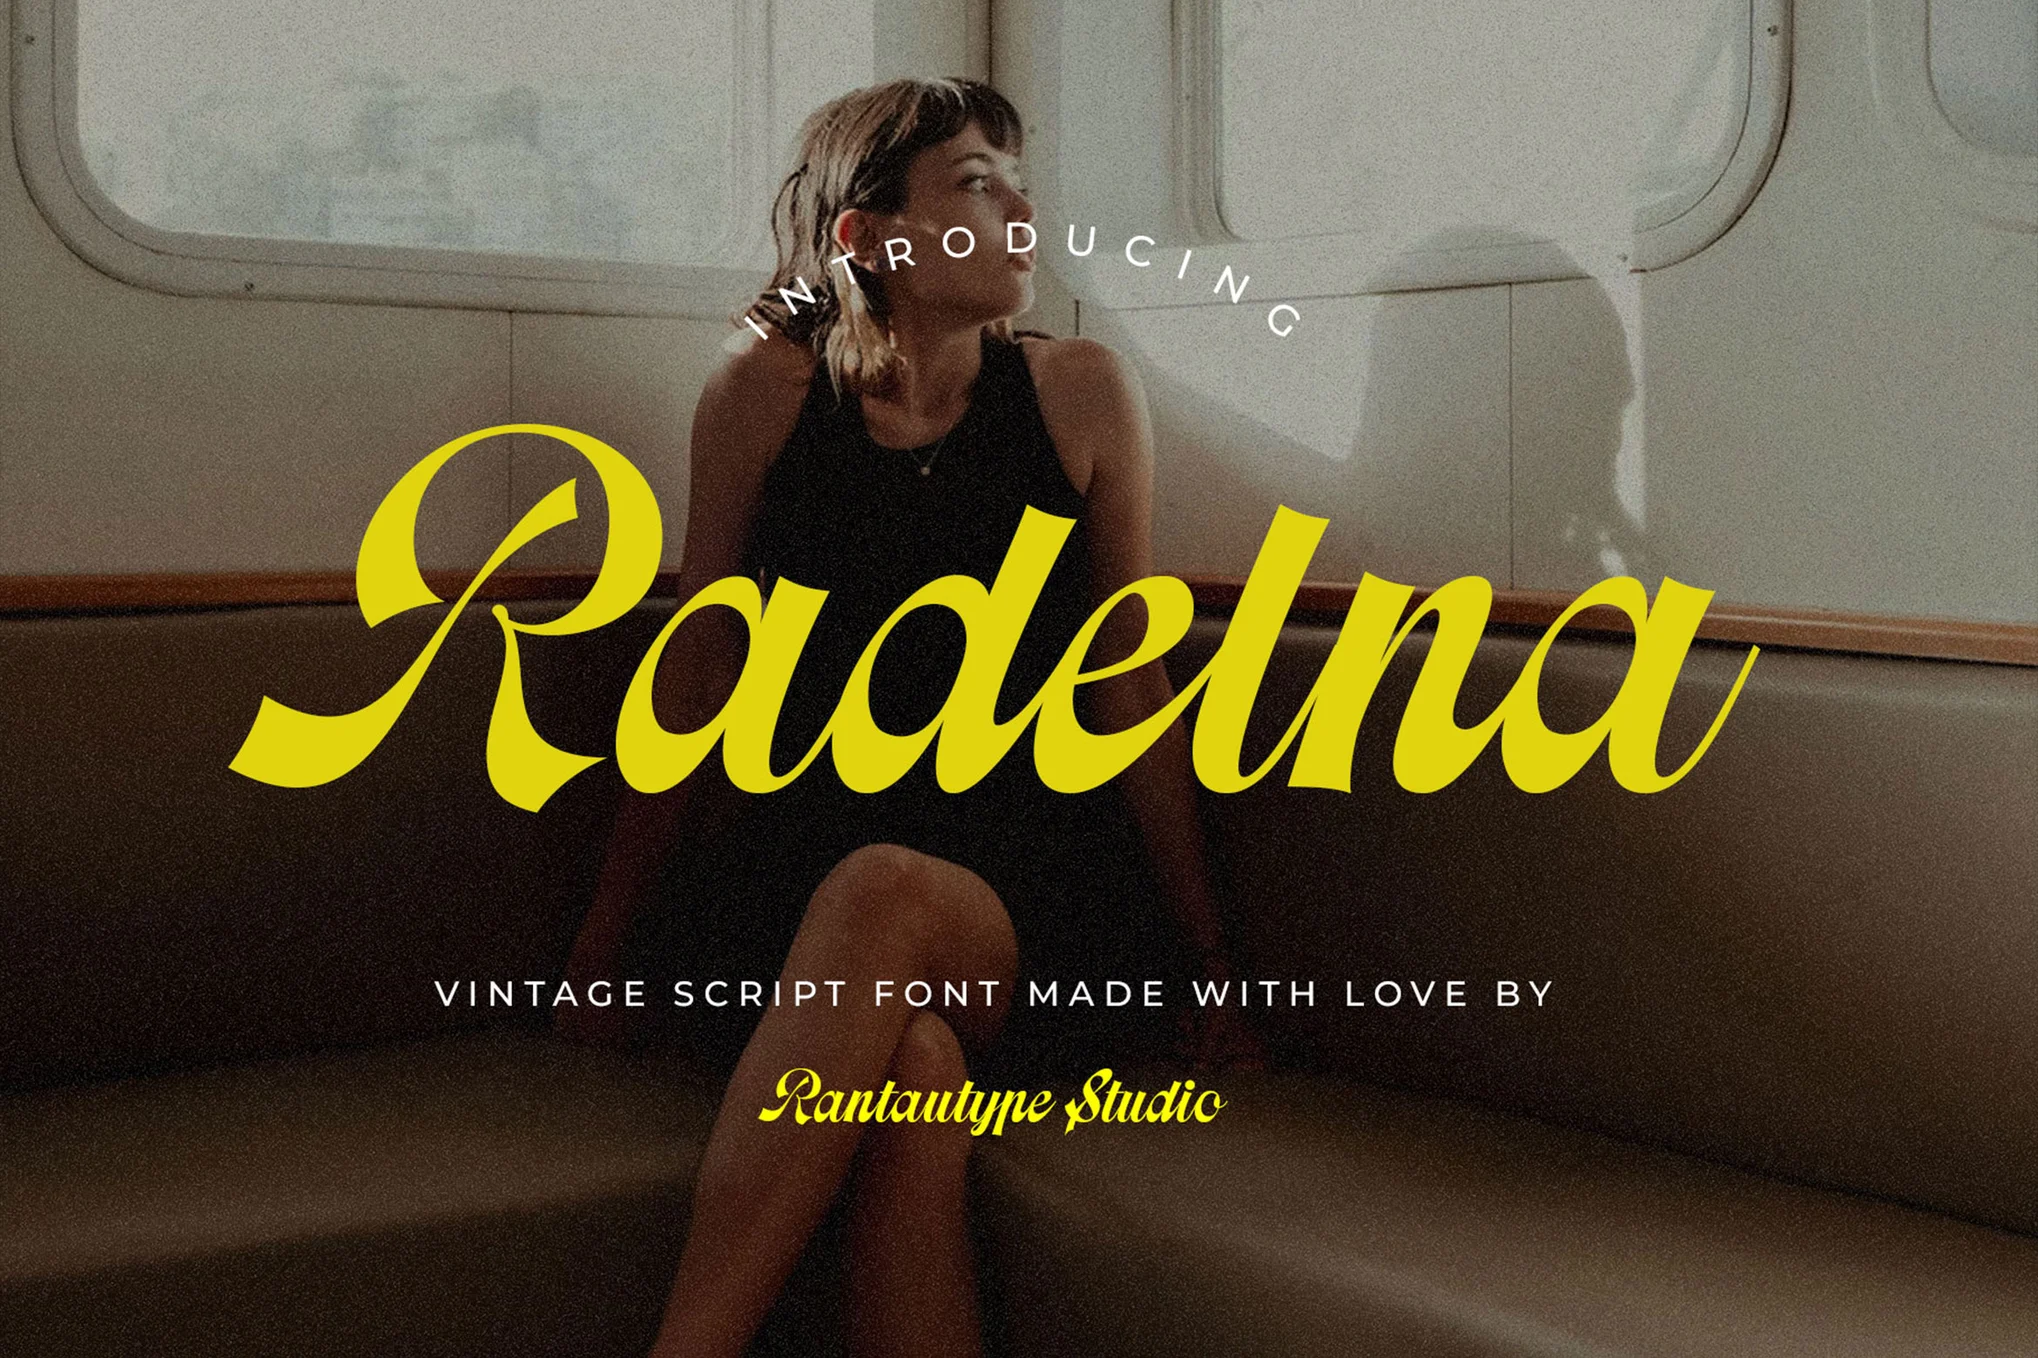
Radelna – Vintage Script Font

Radelna - Vintage Script Font

Radelna is a vintage script font inspired by classic visual design. It’s a versatile and elegant choice for a wide range of creative projects, including branding, invitations, social media posts, and product packaging. The font offers standard glyphs, numerical and functional, as well as alternates and ligatures.

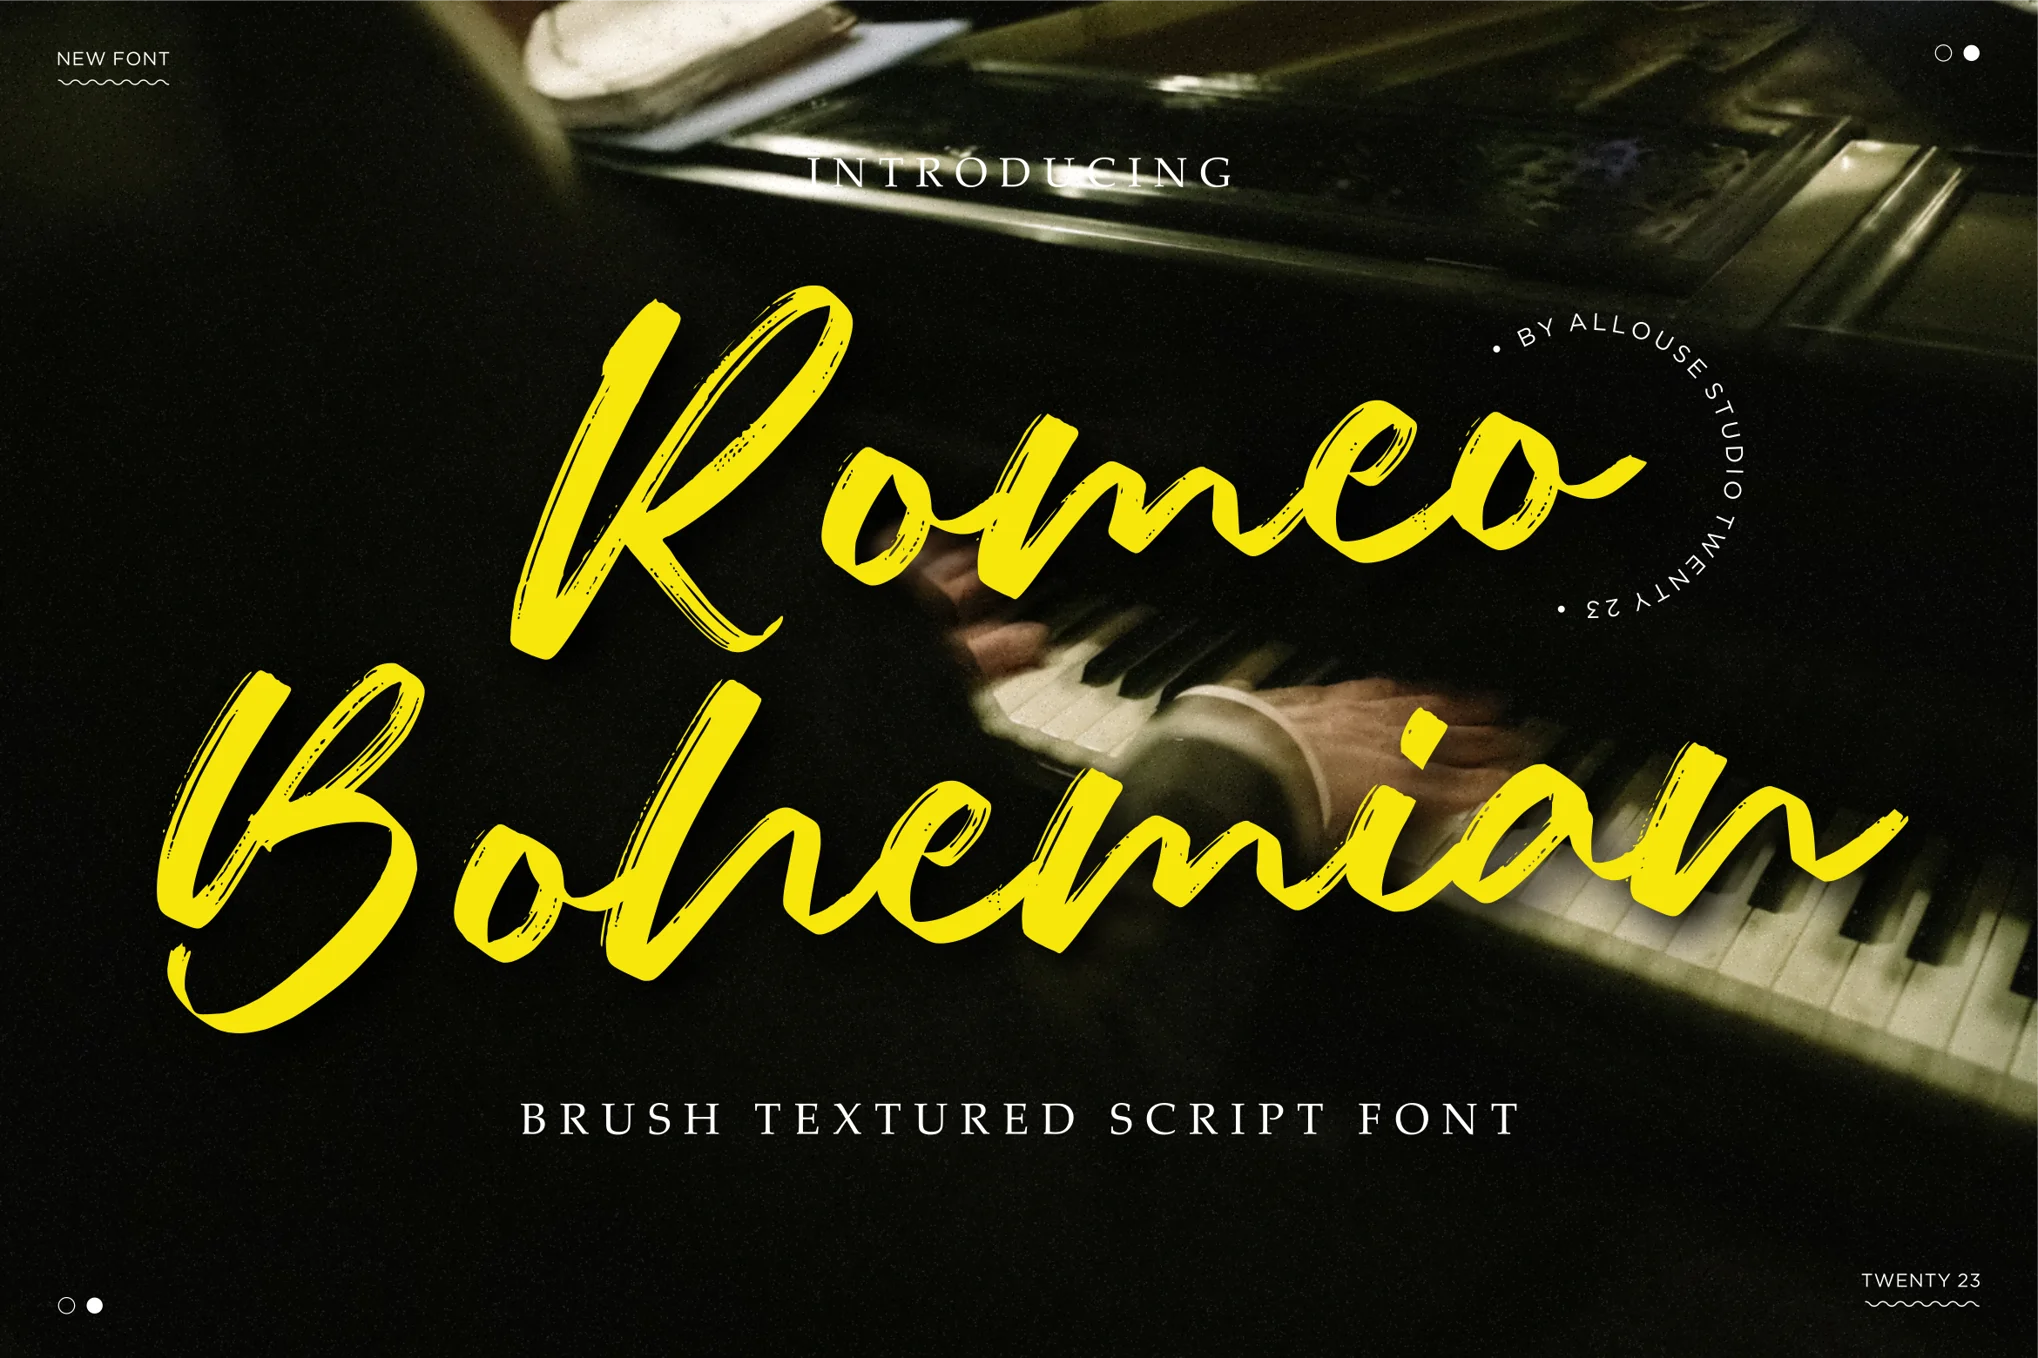
Romeo Bohemian – Brush Script Font

Romeo Bohemian - Brush Script Font

Romeo Bohemian is a textured brush script font that brims with rustic charm. Offering OTF, TTF, and WOFF formats, this versatile typography asset caters to a diverse range of projects, including branding, packaging, magazine layouts, or even social media and wedding embellishments.

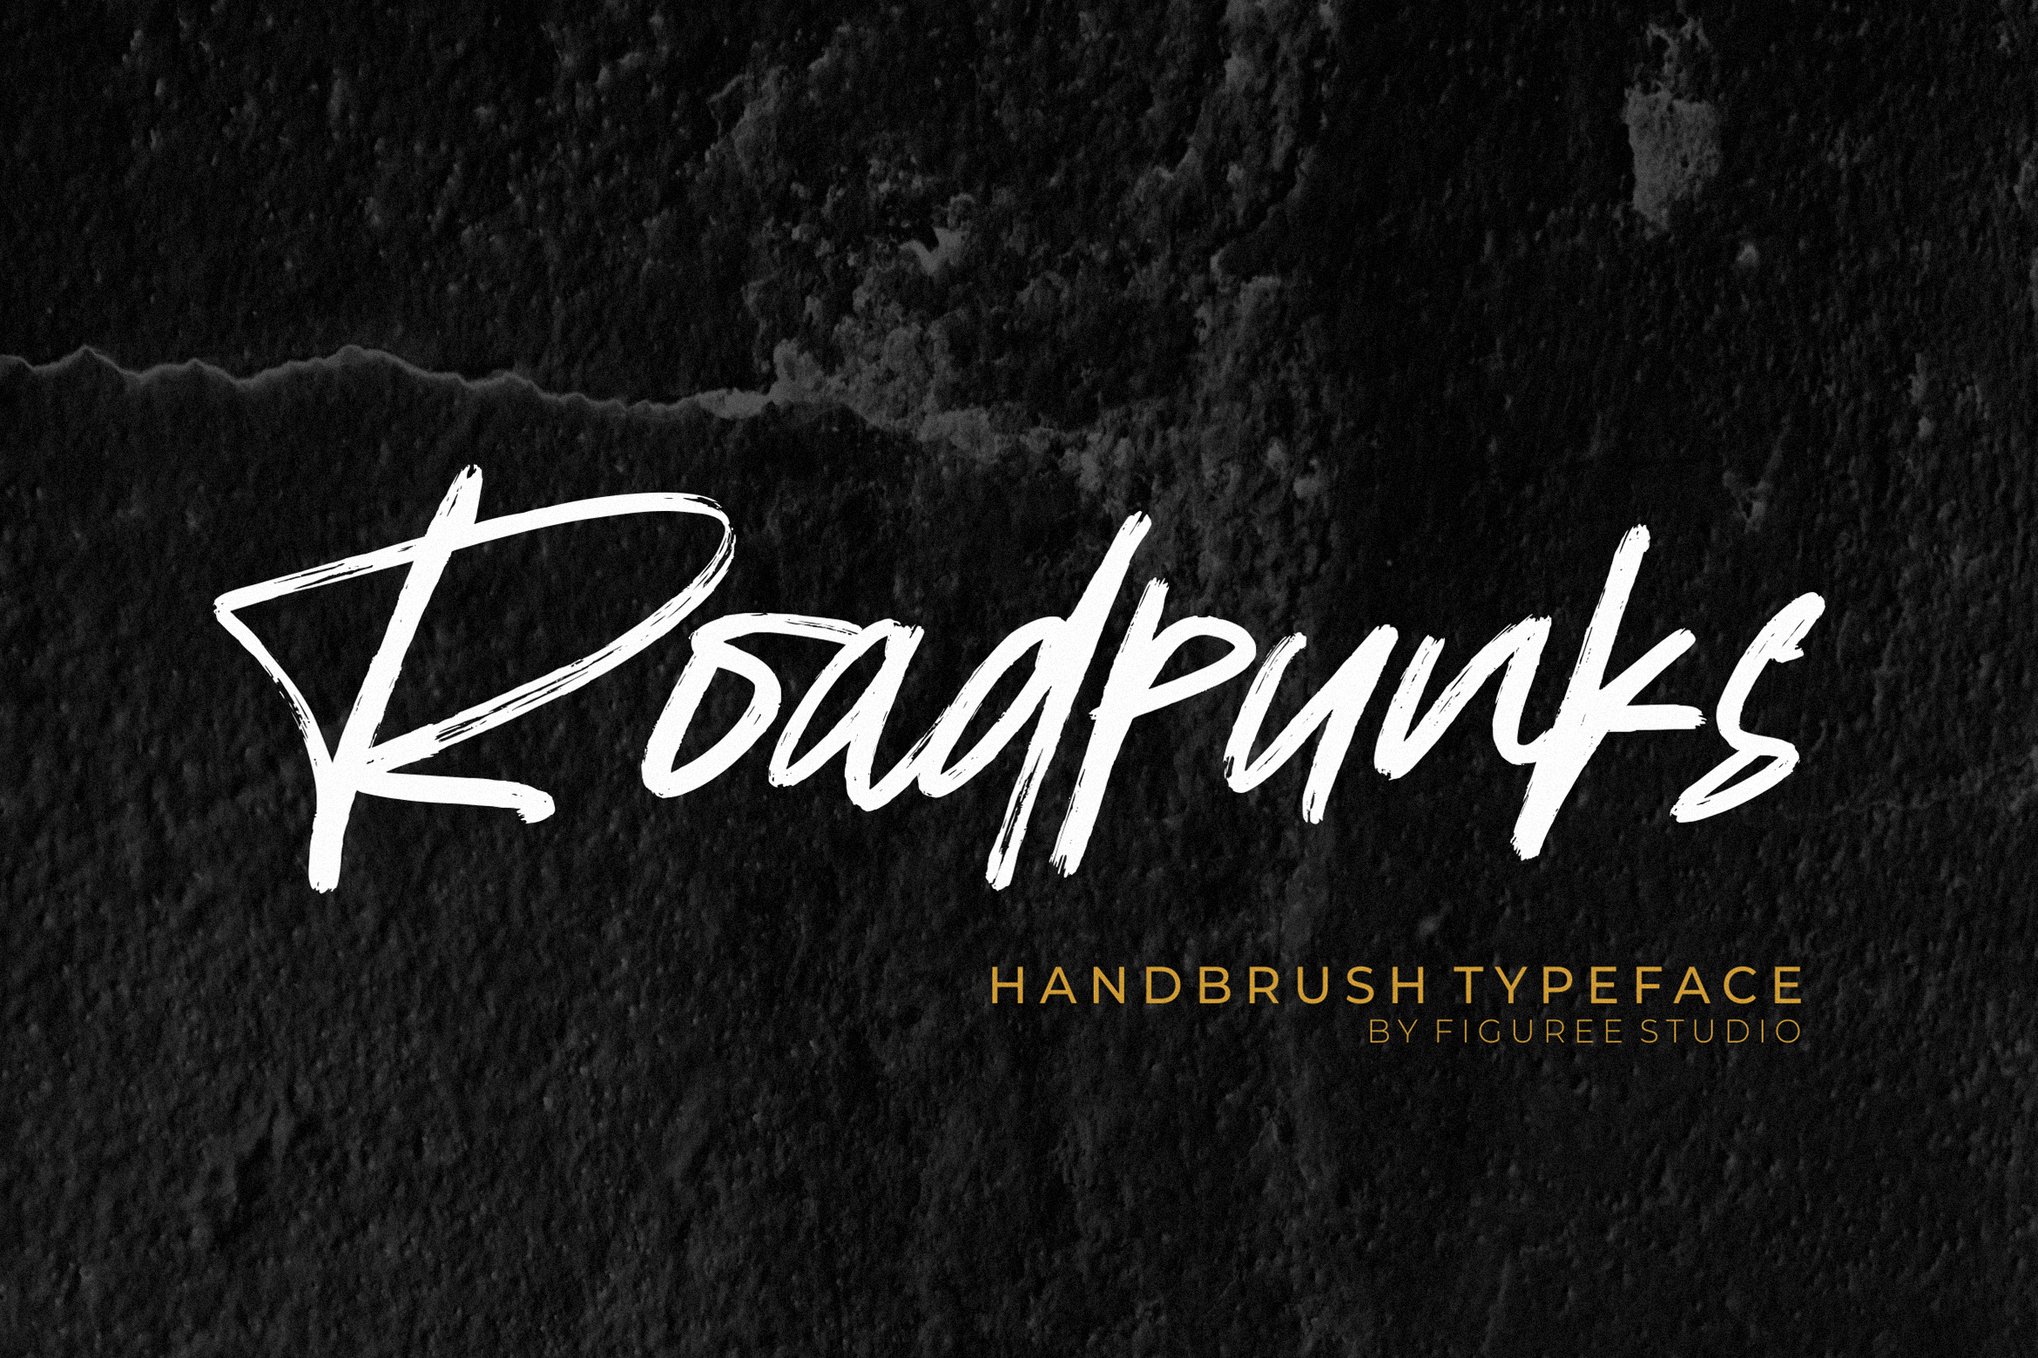
Roadpunks – Natural Handbrush Font

Roadpunks - Natural Handbrush Font

Imbue your projects with an urban, artistic flair using Roadpunks, a handbrush typeface renowned for its authentic construction and stylish appeal. Meticulously crafted to replicate natural brush strokes, this font is perfect for designs that require a personal yet rebellious touch.

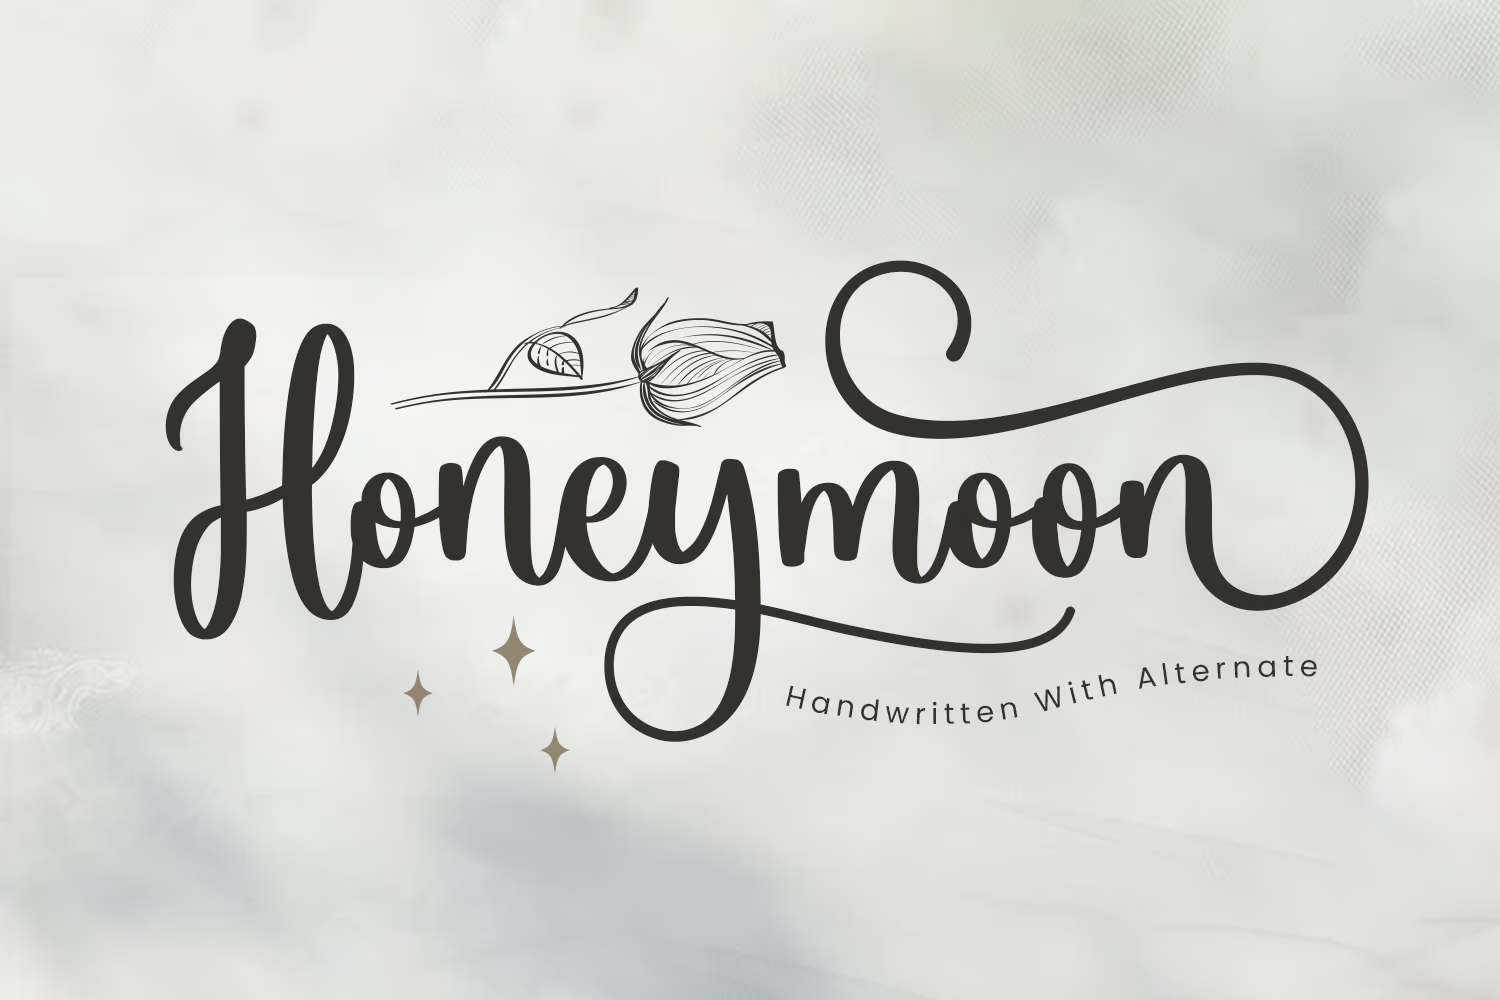
Honeymoon – Script Wedding Font

Honeymoon - Script Wedding Font

Honeymoon is a sophisticated script wedding font that adds an air of romance to your creative projects. With beautiful curves and elegant wash tails, it is perfect for crafting wedding invitations or ornate holiday decorations. Featuring alternate characters and multilingual support, Honeymoon offers flexibility and endless design possibilities.

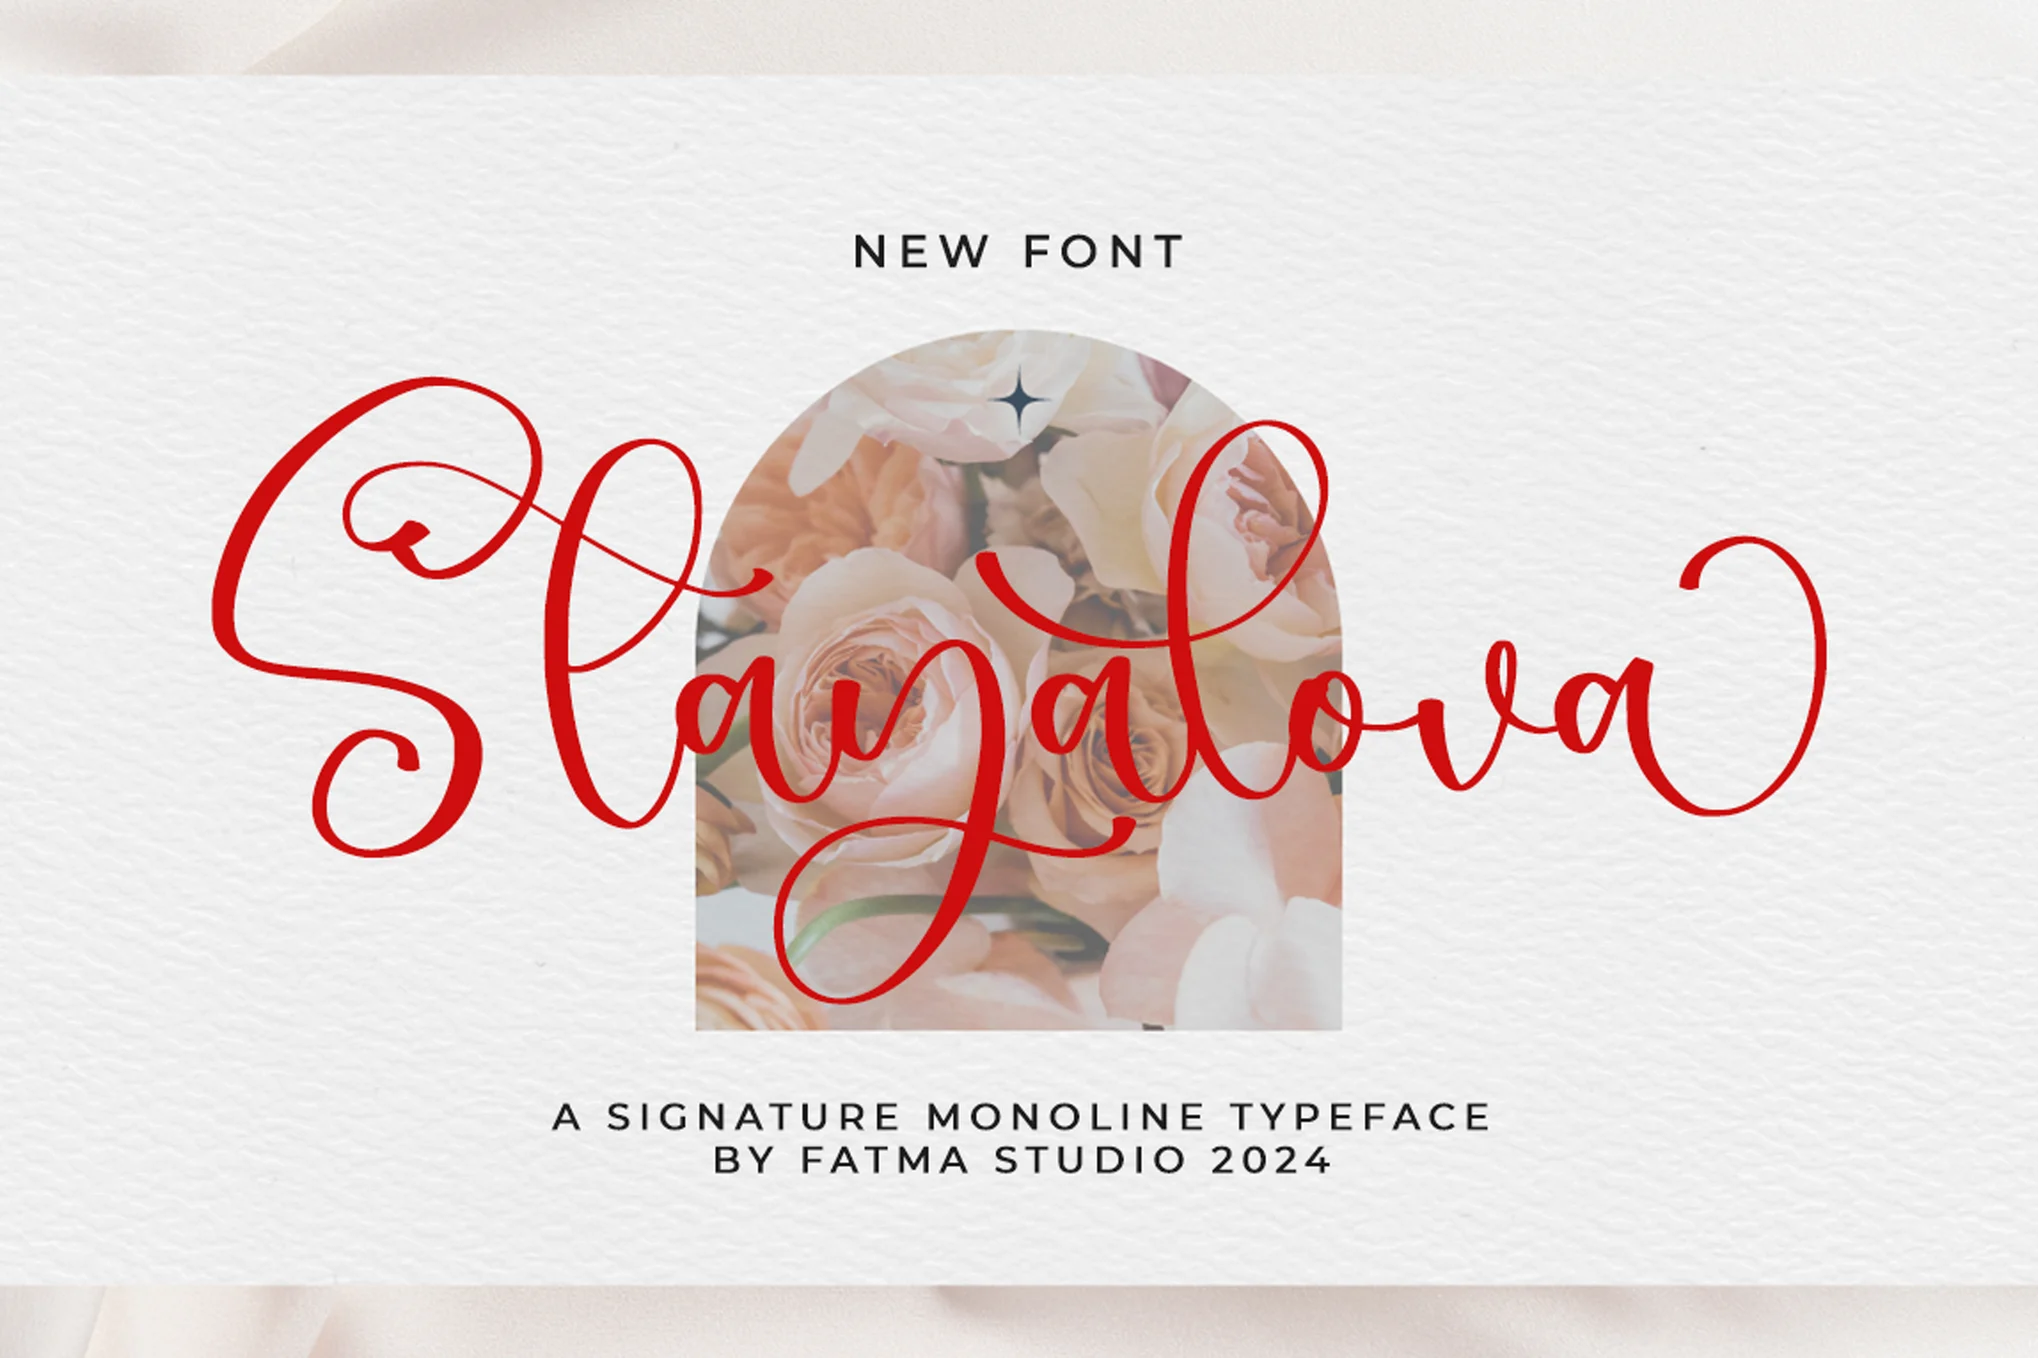
Stayalova – Monoline Script Font

Stayalova - Monoline Script Font

Stayalova is a chic and gentle monoline script font perfect for adding a touch of elegance to your designs. Handcrafted for a fresh and beautiful appeal, it comes in OTF, TTF, and WOFF formats, and includes multiple options such as ligatures, swash, and alternates.

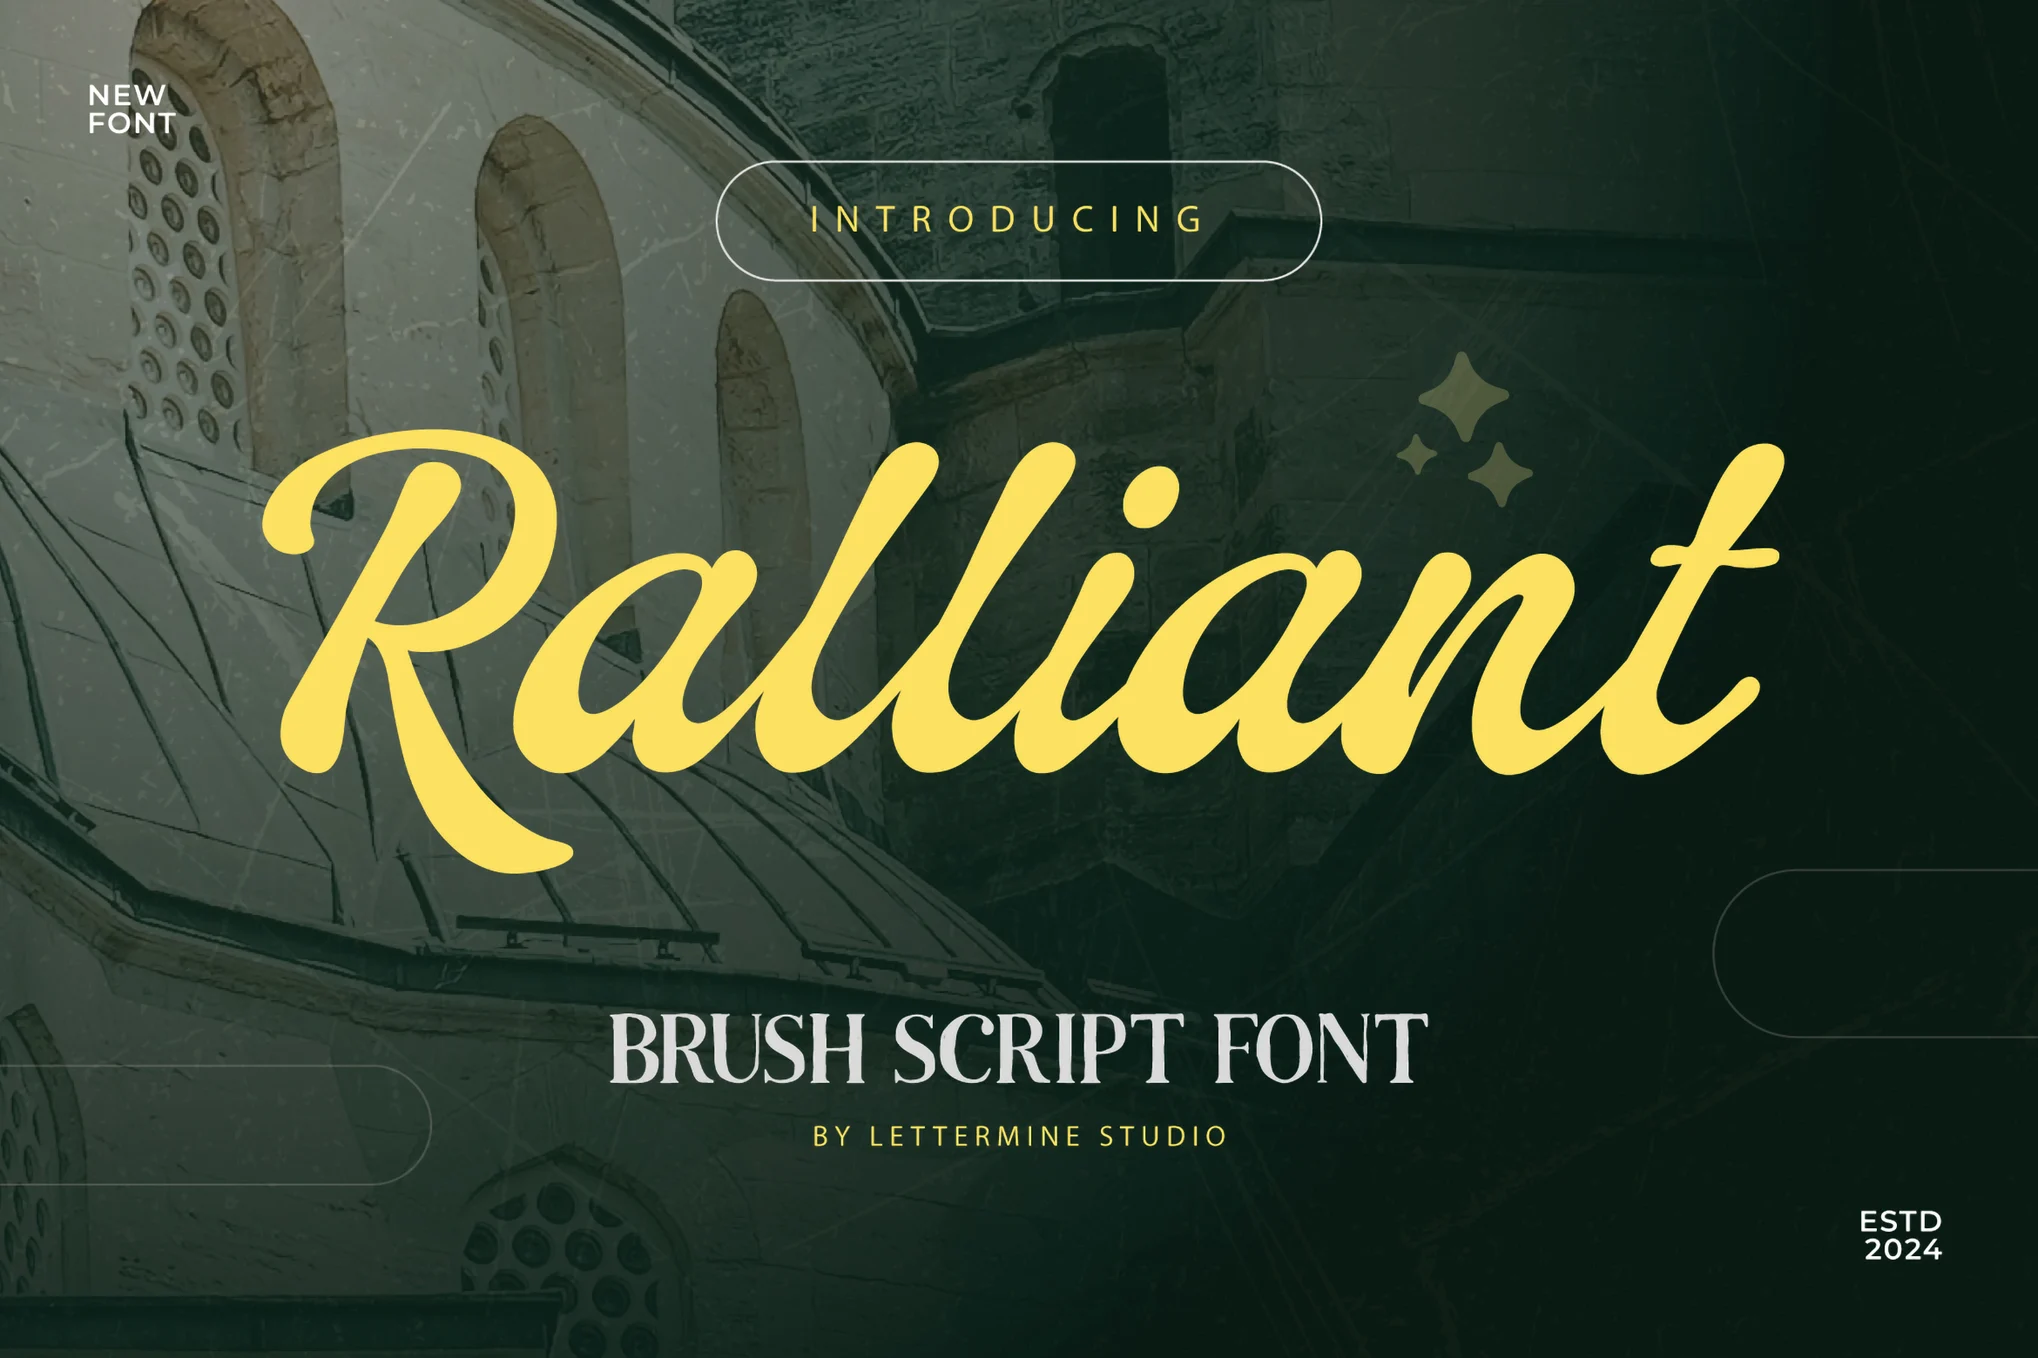
Ralliant – Script Handwritten Font

Ralliant - Script Handwritten Font

Ralliant is a script handwritten font that offers versatility with uppercase, lowercase, punctuation, ligatures, and alternates. Ideal for a range of uses, from branding and logos to social media posts, packaging design, posters, flyers, and handwritten quotes.

Saekana – Modern Script Font

Saekana - Modern Script Font

Saekana is a modern script font featuring a stylish calligraphy-style design. The bold and wavy letters of this font make it a great choice for designing logos for modern brands. It includes lots of swashes and borders for decorating your designs.

Jarvish Blurry – Stylish Brush Font

Jarvish Blurry - Stylish Brush Font

A clean and creative brush font with a sharp letter design. This font will fit in perfectly with almost all types of title and heading designs, including posters, flyers, book covers, and more. You can use it for product packaging and label designs too.

Scoutdale – Handwritten Brush Font

Scoutdale - Handwritten Brush Font

Scoutdale is a beautiful brush font featuring a set of handwritten-style characters. This font has the perfect look for crafting branding designs for feminine brands, custom T-shirts, greeting cards, and social media posts.

Pink Lemonade – Handlettering Calligraphy Font

Pink Lemonade - Handlettering Calligraphy Font

Pink Lemonade is another cute calligraphy-style font with a feminine design. It comes with uppercase and lowercase letters with a beautiful curvy character design. The font is ideal for product packaging and logo design.

The Queen – Free Calligraphy Font

The Queen - Free Calligraphy Font

This is a free calligraphy font with a modern letter design. This font has a certain elegant look that makes it much more suitable for fashion and lifestyle-themed designs. You can use it for free with personal and commercial projects.

Comica Brush – Comic-Style Brush Font

Comica Brush - Comic-Style Brush Font

Looking for a brush font with a comic book-style letter design? Then we’ve found the perfect font for you. This font has all the characteristics of a classic comic book font and it comes in solid and textured font styles as well.

Ahmedy – Rustic Brush Handwriting Script Font

Ahmedy - Rustic Brush Handwriting Script Font

Ahmedy is a beautiful brush script font featuring a rustic texture and handwriting letter design. This font is perfect for designing modern titles for posters and flyers. It’s great for social media posts as well.

Roughsweep – Handwritten Brush Font

Roughsweep - Handwritten Brush Font

Roughsweep is another creative brush font with handwritten characters. This font is most suitable for labels and product packaging designs. Just as its name suggests, it has rough textured designs for each letter of the font.

Alegarde – Vintage Early Modern Script Font

Alegarde - Vintage Early Modern Script Font

Alegarde is a modern script font with a subtle vintage look and feel. It also has decorative elements in each letter to add more style to its characters. You can use it for all kinds of branding and print designs.

Fathia – Free Monoline Script Font

Fathia - Free Monoline Script Font

This font has a classic monoline script letter design. It will make your business cards and branding designs look much more attractive. The font is free for personal and commercial use.

Historea – Modern Handlettered Brush Font

Historea - Modern Handlettered Brush Font

This unique brush font comes with a hand-lettered design that is guaranteed to add a personal touch to various types of designs, including greeting cards, website designs, social media posts, and much more.

Mahelisa – Contemporary Calligraphy Font

Suitable for all your design needs, Mahelisa is a modern and stunning calligraphy font ideal for wedding invitations, greeting cards, product packaging, and branding projects. It comes with TTF and OTF and offers multilingual support.

Hachitos – Signature Script Font

Create gorgeous artworks with Hachitos, a casual and stylish script font that stands out from the daily flood of fonts we see on our screens. It supports more than 100 languages and comes with a wide range of amazing features for you to take advantage of.

Raiden King – Horror Brush Font

Next up we have Raiden King, a distorted brush font that screams horror and fear. It’s a great choice for mystery, Halloween apparel, and other terror-themed branding projects. It works on both Mac and PC, and compatible with Adobe InDesign, Photoshop, Illustrator, and Microsoft Word.

Blink Stones – Creative Brush Font

Blink Stones - Creative Brush Font

Blink Stones is one of a kind creative and quirky brush font that is perfect for creating book covers, greeting cards, and many other creative designs. The font can also be used to create T-shirt designs and mug prints as well.

Calleraets – Signature Script Font

Cellarets Signature Script Font

Cellarets is a slanted signature script font with clean regular stroke, fun character with a bit of ligatures. To give you an extra creative work, Cellarets font support multilingual more than 100+ language.

Whisper – Dry Brush Font

Whisper -Dry Brush Font

Whisper is a stunning hand-lettered dry brush font. This typeface is very unique! It has an unique natural dry-brush feel which will outstand your project with ease! Combine it with its remarkable swashes which you can choose dozens of them!

Husein – Script Font

Husein Script Handwritten Ramadan Font

Husein is natural handwritten Ramadan themed script font, which support OpenType features and includes, numeral, punctuation ligatures, and it also supports multi-languages.

Black Sail – Artistic Brush Font

Black Sail - Artistic Brush Font

Black Sail is a modern brush script font that comes in both OpenType and TrueType formats. The font is perfect for creating luxury brand logotypes, business cards, invitations, letterheads, and much more.

Galantis Script – Brush Script Font

Galantis Script - Brush Script Font

Galantis is another brush script font that features a unique design of its own. This font also includes OpenType and TrueType formats as well as alternatives and swashes.

Shakila Script – Modern Font

Shakila Script - Modern Font

Shakila is the perfect font you can use to design modern greeting cards and wedding invitation designs. The font features a creative script design and includes the standards alphabet, numbers, and symbols.

Handoubt – Creative Script Font

Handoubt Typeface - Creative Script Font

Handoubt is a creative brush script font that features a modern and stylish design. You can use it to design unique website headers, posters, greeting cards, and various other designs.

Gladiol Haze – Elegant Script Font

Gladiol Haze - Elegant Script Font

This bundle includes 2 families of script fonts featuring script and sans serif typefaces. These fonts are ideal for all types of greeting cards, invitations, and other print designs.

Rainy Day – Unique Brush Font

Rainy Day - Unique Brush Font

Rainy Day is a creative brush font that comes with a unique design. The font is most suitable for book covers, greeting cards, logos, titles, especially related to kids and children.

Hey Insomnia – Script SVG Font

Hey Insomnia - Script SVG Font

This creative font comes with a brush design featuring transparent textures and unique ligatures. The font is available in SVG format and requires Photoshop CC or Illustrator CC to function.

Outistyle – Handwritten Script Font

Outistyle - Handwritten Script Fotn

Outistyle is a unique script font that features a handwritten design. The font is available in 2 styles, Script and Brush. You can use the fonts to craft greeting cards, posters, banners, product packaging, and more.

Gineva Script Font

Gineva is a hand lettering script font created in the style of a brush font. Which makes it the perfect font for fans of both script and brush fonts. It’s also great for designing website headers, signage, and logos as well.

Cosmodrome Monoline Script Font

Cosmodrome is a script calligraphy style font that’s most suitable for designing book covers, posters, music album covers, and much more. It also comes with a web font version for online use.

Shania Script Font

Shania is yet another calligraphy script font that features a modern design. It also includes 432 glyphs and 194 alternate characters for crafting unique logotypes, greeting cards, logotypes, and more.

Aaron Script Font

This script font features a modern retro design that makes it truly unique and ideal for designing T-shirt designs, signage, posters, and more. It also features 400 glyphs and 190 alternate characters.

Wasatsh Brush Font

A handwritten brush font that comes with a dancing baseline. The font features a design that’s ideal for luxury and fashion related branding and designs as well as wedding and other stationary works.

Story Brush Font

This brush font comes with a slightly scary design that makes it more suitable for movie posters and Halloween themed designs. It comes in regular and slanted versions of the font, which also includes 240 glyphs.

Harry’s Brush Font

Yet another brush font for crafting posters, T-shirt designs, and greeting cards. This font also includes 216 Glyphs and comes in two formats, OpenType and TrueType.

Palm Brush Font

This brush font features a bold and a natural look that makes it the best choice for designing website headers, posters, and social media posts. It comes in both sans and sans-serif versions as well.

Axwell Brush Font

Axwell is a handmade brush font that comes with a rough natural look. It’s most suitable for modern website header designs, posters, flyer designs, and other print and digital designs.

Sugar Plums Script

1 (2)

Sugar Plums is a new hand made font. Available for both personal and commercial use. Download and use Sugar Plums Script for anything and everything. Including over 400 different hand drawn characters for a range of languages and dialects. As well as an Italic version and over 60 hand drawn ornaments, including leaves & flowers, catchwords, frames, doodles and swirls.

Ageitha – Free Calligraphy Font

Check out this beautiful calligraphy font that you’ll fall in love with in no time. The design is all about class and elegance, and is suitable for a wide variety of projects from quotes and thank you notes to logos and business cards.

Brighnesy – Free Handbrush Font

Here we have a bold handbrush font that is sure to make an impression. It has a nice, modern design and contains everything you’d expect in a natural textured brush typeface. Best of all, its available for free download.

Font Bundle Calligraphy

A massive bundle of over 20 beautiful calligraphy fonts that comes in both OpenType and TrueType formats. Perfect for your logo, card, and wedding invitation designs.

Hydrangea Script – Wedding Font

1 (2)

Hydrangea Script is a Regular script font with a clean calligraphy feel for wedding invitation design, logo, cards, etc.

Brayden Family Typefaces

594693137f3f07dace99321b9c256957

Brayden Family is Family font that include 3 weight on script fonts + 1 Sans serif fonts to create the beautiful combination. This Fonts is Great for Logos, Lettering, Clothing Design, Poster, Label, Quotes, etc.

Helena Font

1 (2)

Give your designs an authentic handcrafted feel. Helena is perfectly suited to stationery, logos and much more. It’s available at $10 for 1 User License.

Fabfelt Script

c3e270e36bb83330317a8b328ca597b7

A gorgeous hand-written script font which you can use perfectly on vintage designs. Fabfelt is available for free without any license restrictions.

Dankita Script

1 (2)

Dankita is a beautiful hand painted script that comes with a set of extras. All letters have been carefully painted giving your words a wonderful flow. Dankita can be used for fashion, apparel, stationery, magazines, film, books and marketing.

Salamat Typeface

ecfedf2214c875a75fedf30713c0a05c

Salamat is an elegant and sophisticated brush script typeface created by Joluvian & Ale Paul. The strokes are mesmerizing and the font will look perfect on your next design project.

Thunder Script

1 (2)

Thunder is a beautiful hand typeface that comes with a set of Beautiful extras. Highly Suitable for a variety of media design , logo, fashion, poster and all design product

Adelina Script

164ef628590337.55c88d333bc4c

Adelina is modern calligraphy script that was painted in watercolor by soft brush. The basic principle of creation is striping of thick and thin lines. It can be used in different goals: romantic cards lettering, t-shirt design, package design and others.

Sortdecai Brush Script

1 (2)

Sortdecai Brush Script is a hand lettered modern brush script typefaces, which is combining the style of classic calligraphy with an modern style. Sortdecai Brush Script is a part of Sortdecai Family.

Streetwear Script Font

0e24e3b2e869395b4732b1e52b9ebc11

Streetwear is bold and stylish retro inspired script typeface suitable for logo, poster, branding, packaging and t-shirt design. It looks like 1960s and 70s fashion and sport related typeface, unique and fun at the same time.

Bohemienne Brush Script Font

1 (2)

Bohemienne us a fun and flirty hand-drawn brush script. It’s tousled and chic, and will add a beautiful touch of handmade love to your projects- use it for wedding invitations, posters, logos and more.

UT Nickel Script

648b2796b1da7ea9941a5ccc1a2a1bb1

UT Nickel is a geometric script font inspired by the Milwaukee Tool company logo. This complete typeface includes accents, punctuation, mathematics symbols etc. It also contains a few alternates, contextual alternates for some disturbing letters such as r,s,x,z and few ligatures too for all the problematic pairs.

Starstruck Hand-Lettered Script

1 (2)

Starstruck is a hand-lettered script with tons of characters. It’s sparkling, charming, feminine, sophistacted, and super swirly and perfect for your next design project.

Intro Rust Script

a2c0f4b7c84b23255bb851279d75cc77

Intro Rust is one of the biggest packages on the market, including 214 fonts. The font family is a rough version of the famous Intro and includes 4 sub-families – Intro Rust, Intro Script, Intro Head and Intro Goodies. You can download the sample version of 3 fonts including the script version for free.

Imperfect Calligraphy Script

1 (2)

Imperfect is a bright mischievous lovely modern calligraphy typefaces. Imperfect is good for both short texts and headlines.

Levo Typeface

a6dcdd28892527.55d750bd48d8b

Levo is a collaboration with illustrator and graphic designer Rutger Paulusse a.k.a. Gwer. It’s packed with flavour, bold characters and full of his signature straight handles on curves. There are several of lively swashes, alternates and ligatures for you to discover. Perfectly suitable for logo design, packaging and web headings.

Bodega Script Font

1 (2)

Bodega Scrip is a classic decorative copperplate script with a modern twist. It is a display font meant for vintage logos, fashion labels, badges, food packaging designs, especially wine labels.

Brenda Script

0e24e3b2e869395b4732b1e52b9ebc11

Brenda Script is a beautiful formal script, contemporary typeface with classic root and elegant touch. Can be used for various purposes.such as logos, wedding invitation, heading, t-shirt, letterhead, signage, lable, news, posters, badges etc.

Dope Script

1 (2)

Dope Script is a rough around the edges, hand-made paint brush font with bags of personality. It comes with a large range of characters including capitals, lower-case, numerals, punctuation, currency and accents.

Mulberry Script

1 (2)

Mulberry Script is a lovely handwritten calligraphy script. Mulberry is whimsical and modern with a lot of character. This typeface comes with pretty flourished alternate letters, ligatures, extras and watercolor art. Mulberry works great for stationery, letterpress, weddings, magazines and marketing.

Braxton – Free Font

0e24e3b2e869395b4732b1e52b9ebc11

Braxton is a brush flavored script free font. One style (Normal) available for direct free download.

Patronia Script

1 (2)

Patronia Script is a brush-lettering inspired script typeface that combined thick and thin lines, loose and tight kerning and unique baseline combinations for genuine hand-writing feels. Suits best for almost all of your designing project; wedding invitation, t-shirt design, fancy logotype, etc.

Austtin Type

4fa31a28495307.55c2bebc88224
Austtin type is a hand painted typeface designed to help you create the look of stunning custom hand-lettering.
It comes with upper and lowercase characters, punctuation, numerals, and swashes.

Tasty Two, Modern Script Typeface

Watch-screenshot-mock-kit

Charming Modern typeface can beautify your design. The pack includes 335 glyphs, with swashes letters and alternative characters, suitable for any design needs, modern design, branding, stationery design, blog design, modern advertising design, invitation, wedding, special events, any lettering needs and more.

Goodlife Type Family

6bf18e4d9d8d8140f3c48c0bd5779502

The Goodlife type family is a lovely handlettering collection designed by Hannes von Döhren. It contains six different hand drawn fonts with loads of features and a set of extras such as catchwords, arrows, ornaments & more. With this set and a little bit of love and care it is possible to create beautiful “handmade” graphics.

Ink Blossoms Script

Watch-screenshot-mock-kit

Introducing Ink Blossoms! Sweet Types latest hand drawn typeface. Felt-tipped characters resemble hand-lettered, hand-inked strokes. Use your imagination with this fonts fill to create watercolor, marker, or painted characters.

Wallows Typeface

40790428537925.55c4d112733a6
Wallows Typeface is a beautiful handwriting script. Suitable for wedding invitations, greeting cards, design of water-based paints, correspondence, and a variety of other purposes.

Country Chic Script

Watch-screenshot-mock-kit

Country Chic Script is a new hand crafted modern vintage style typeface. She’s chic, she’s sweet, and she’s a little shabby. This script doesn’t miss a single detail in her sweet and shabby lines. Even her ornaments are a bit worn.

Sanelma Typeface

143561

Sanelma is a brush script inspired by Hot Rod lettering and sign painting. Sanelma is a very versatile script: It includes two different styles of end swashes, swash caps, small caps, lots of alternate characters and underline option.

Portabello Script Font Trio Pack

Watch-screenshot-mock-kit

Portabello is a sophisticated hand drawn typeface in 3 styles. Hand made characters replicate hand lettered artwork. Just the right amount of messy mixed up with a stylish script, making it completely legible.

Awesome Script

166410

A simple and cleanly designed brush font family. It is designed to easily create logos, headlines and text phrases within a blink of an eye.

Natura Script Font

Watch-screenshot-mock-kit

Inspired by old nature field notebooks, Natura was born out of the passion for new modern hand-calligraphy, designed first with a flexible fountain pen and then digitalized glyph by glyph to get the natural feeling of the dry ink on smooth paper.

Wanderlove Script Font

05e4fb0d879001b263fecfff09fad267

Wanderlove is a solo dance of the brush script typeface with the interprentation from the freedomness and humble thing about the natural and beautiful sight from the traveler’s journey. It’s super fit for the design project such as wedding invitation, scrapbook, novel, notebook, gift card, or anything that you need to touch with love.

Ferrine Script Font

Watch-screenshot-mock-kit

Ferrine Script is a beautiful handwritten stylish. It’s a multi-purpose font with two alternates (different style in lowercase) lowercase and one uppercase.

Bethlehem Handmade Script Font

2bcea628863889.55d94e891792b

Bethlehem is an illustrative typeface designed to be real and natural to look like hand-lettered script. The scattered ink you seen in the preview are also included as alternative characters. So you can play with it to create a beautiful illustrative lettering.

Smitten Script Font

Watch-screenshot-mock-kit

Smitten Typeface is a hand-inked, ‘semi-script’ font with tight kerning, and a fun, imperfect baseline. It’s nice and bold, plus a little gritty – Perfect for creating organic, fluid typography on products, branding, invitations, fliers, posters and more.

Signalist Typeface

91434

Signalist is a contemporary brush script. It is condensed and tight but still legible.

Dankita Script

Watch-screenshot-mock-kit

Dankita is a beautiful hand painted script that comes with a set of extras. All letters have been carefully painted giving your words a wonderful flow. It can be used for fashion, apparel, stationery, magazines, film, books and marketing.

Deadhead Script Typeface

43fa34a45be4e1e379ca8923f5e76142

Deadhead Script is playful typeface that inspired from brush lettering. Made with high attention to the details that will bring your design to the next level. Suits best for almost all design themes; vintage, modern, gothic, dangdut pantura etc.

Hello Sunshine Script

Watch-screenshot-mock-kit

Hello Sunshine is a new bright and sunny Script. Hand Drawn letters are both elegant and funky. Contains 2 terminal ornaments to add on to any lower case letter to finish off your word or phrase with a end character swirl.

Abbie Script

cb4f2bdb1b4bb58f838685f1bd18d952

Abbie Script is a beautiful handwritten script font that has been hand drawn, scanned, and digitized for you to enjoy for free. Abbie Script is available in three different weights (Light, Regular & Bold)

Isabella Script

Watch-screenshot-mock-kit

Sabella Script is handwritten stylish copperplate calligraphy fonts, combines from copperplate to contemporary typeface with a dancing baseline, classic and elegant touch. Can be used for various purposes.such as headings, signature, logos, wedding invitation, t-shirt, letterhead, signage, lable, news, posters, badges etc.

Hollie Script Font

161903

A typeface that pays tribute to all letterers that created amazing signs in magazines, walls and windows through the brush lettering during many years, especially in the 50s and 60s. This font is 100% based on the brush traces, it has 2100 glyphs, contextual ligatures from two to four characters and alternates for each ligature.

Noteworthy Script

Watch-screenshot-mock-kit

The Noteworthy Script is a new hand scripted authentic signature style typeface. Use this decorative typeface for stationary, logos, invitations, and more! Available for both personal and commercial use.

Rissa Typeface

6e75050003916ffc23ca97615a216813

Give your designs an authentic brush handcrafted feel. “Rissa Typeface” is perfectly suited to stationery, logos and much more.

Clementine Script

Watch-screenshot-mock-kit

Clementine Script is a tangy new hand crafted typeface. Available for both personal and commercial use. This script was inspired and designed with a large chisel felt marker. Bold characters make your logo stand out. Perfect for signage, posters, logos, headlines, and more.

Sarrah And Claire Brush Land

3e32d428739535.55cfad436dda2

“Sarah and Claire” is a typeface inspired by the letters brush. It’s made in a little untidy way that brings your designs to the level of the wild yet natural look.

Selphia Script

Watch-screenshot-mock-kit

Selphia is a new script typeface designed with deliciously taste, so fruity, and milky. But you can be used for various purposes like tagline, t-shirt design, logos, quotes design etc.

Hillda Script Font

Preview-images-1-800x532

Hillda Script is bold, modern, and multi-purpose typeface that combines brush lettering with natural handwriting. It was designed as a display typeface that alternative characters to improve your design. It is suitable for logo, packaging, headline, poster, t-shirt, etc.

Dandelion Soup Script Font

Watch-screenshot-mock-kit

The Dandelion Soup Script is a new hand drawn script typeface. Available for both personal and commercial use. Download and use The Dandelion Soup Script for anything and everything.

Handsome Script Font

Watch-screenshot-mock-kit

This font is perfect for luxury products and special occasions such a weddings or parties. For added affect have it letter pressed into a beautiful cotton paper stock. It is best used as a headline, however, it more than pulls its weight as body copy.

Happy Day Script

Watch-screenshot-mock-kit

Happy Day is a bright cheerful lovely modern calligraphy typefaces. It can be used for a variety of purposes including posters, book covers, and even logo designs.

Stubborn Faith Script

Watch-screenshot-mock-kit

Stubborn Faith is a perfect, bright and wayward font. It’s highly useful for calligraphic and vinyl artwork and can be used for a variety of purposes. The urban nature of this font will be ideal for t-shirts design.

Fadli Script

Watch-screenshot-mock-kit

Fadli Script is a script font with a touch of tattoo lettering style. Highly usable to create Custom Logotype, Band Logos, Brand, clothing company, Indie Flyer/Poster or it can be anything.

Smoothy – Cursive Script & Sans

Watch-screenshot-mock-kit

This is an amazing set of 2 font family with a mono weight cursive script and a complementary subtly rounded sans-serif. Based on popular hand lettered style, give your work that stylish hand rendered look with no effort. It works great with logos, prints, quotes, magazine headers, clothing and all design mediums.

Anemone Script Font

Watch-screenshot-mock-kit

Anemone is a stunning font with 100% hand painting. It’s highly suitable for the design of logos, creation of invitations, greeting card and more.

Layla Script Mini Bundle

Watch-screenshot-mock-kit

Layla is a great font hand lettering brush, there are two different fonts, font layla brush and font layla painted, very good for your product advertising, invitation, brocure, poster, etc

Margherite Script

Watch-screenshot-mock-kit

Margherite is sweet feminine typeface, hand drawn characters dance decoratively along the baseline. Available for both personal and commercial use.

Bukhari Script Font

2883bc5dc6a2db8cb8fbca77d395d3f7
Bukhari Script is a  bold monoline cursive font. It’s very useful for various design project, for web or printing, such as a Logotype, Posters, Badges, Signage, Business Card, T-shirt Design, or it can be anything.

Alisandra Script

017e1cac0bcdadad561e81ca935fceaa
Alisandra is a smooth but with sharp edges brush typeface. With almost 500 glyphs and with the magic of OpenType, this font is well playful for an artistic typography.

Blenda Script

a595ade436bfb9ace30332a807242bfa

Blenda Script is a free experimental font inspired by lobster font, a bold vintage script. can be used for various purposes. Such as news, posters, logos, badges etc.

Variane Script Font

f5020ad18f8071bd6ee9a1c8b5b715f1

A simple and cleanly designed font that you can use for a variety of purposes. Variane is a perfect font for your next logo or poster design and is available to use for free.

Seren Script

1 (2)

Seren is a retro font that contains 430 glyph, the OpenType feature can be used to create your own custom typo and design. Very useful for t-shirts, banners, posters, etc.

Sant’Elia Script Font Family

1 (2)

Sant’Elia Script from Yellow Design Studio is a robust modern type family with regular and rough versions in six weights. Its forms are crisp and welcoming with a splash of verve. Alternate versions feature angled strokes that inject drama and energy.

Ashley Brush Script

Untitled-1

“Ashley Brush Script” was completely handwritten using watercolors and a calligraphy brush. Rough edges and imperfect lines give this brush lettered font a unique and trendy look. Perfect for wedding invitations, adding design accents, and giving your projects a coveted hand-crafted look.

Thirsty Script Fonts

Untitled-1

Thirsty Script from Yellow Design Studio is a contemporary script conceived as a marriage of elements from vintage signage scripts, Wisdom Script, Deftone Stylus, and Lobster. The result is a typeface with a ‘new meets vintage’ vibe. It’s friendly with an edge, a mixture of retro script, modern sans serif, and a shot of caffeine.

Octavia Script Font

Untitled-1

Octavia Script is another lovely modern calligraphy typefaces, which is combining the style of classic calligraphy with an modern style.

Joella Brush Script Font

Untitled-1

Joella is a bold, clear and full of character script typeface. The thickness of this font makes it great for use with fills such as gold, watercolor, glitter, etc. This font is extremely versatile and can be used for such things as beauty, make up, typographic designs for t-shirts and fashion, etc, organic products or any kind of food and drinks products. There are many possibilities where this font will work very well.

Script Bundle – 4 Handmade Fonts

Untitled-1

This Handmade Script Bundle contains 4 amazing script fonts that would be very handy for your new logotype, wedding invitation or poster. You can have your hands on this amazing set for just $22.

Featherly Wedding Font

Untitled-1

Featherly is a hand drawn, elegant, modern calligraphic font perfect for wedding design projects, invitations, greeting cards, signatures, watermarks, logos, handwriting and more.

Faith & Glory

25

Faith and Glory is a set of 2 hand-painted brush fonts, designed to perfectly combine with one another and allow you to create beautiful typography with a personal touch. It comes with upper and lowercase characters as two separate fonts, punctuation, numerals, and supports international languages. Alternates are available for key characters, you can access these by switching between upper & lower case characters within the 2 fonts.

Last Paradise Script

2-o

Last Paradise script font comes with upper and lowercase characters, punctuation, numerals, and supports international languages. It’s perfect for attention-grabbing header text, logos, clothing designs. or anything which needs a bold & loud text with a personal touch.

Fresh Script

Untitled-1

Fresh Script is hand-painted typeface designed to help you create the look of stunning custom hand-lettering. It comes with upper and lowercase characters, punctuation, numerals, and supports international languages.

Giant Bundle – 56 Fonts

Can’t decide whether you need a brush or script font? Then grab this bundle, which comes with 12 different brush and script font collections with a total of 56 vintage-style typefaces.

Wild Spirit Font

A modern and a hand-drawn script font with a natural flaw featuring a bonus set of 14 swashes and arrows. The font pack includes 3 unique styles.

Hello Sunshine Font Duo

This beautiful hand brushed typeface comes with a set of 52 bonus ornaments for adding more style to your design. The font is ideal for your invitation and greeting card designs.

Better Times Brush Font

A beautifully free-flowing handmade brush font that includes 3 different font styles. It’s great for your quotes, product packaging, and branding work. According to its creator, the font looks more amazing in all-caps.

Crystal Sky Font Set

A beautiful handwritten style font that makes your text look like a signature. It comes with additional 32 hand-drawn doodles and a separate typeface for all-caps letters.

Heritage Font Combinations

This font pack comes with both script and sans font styles featuring a vintage design. It can be used for designing various types of graphics including logos, wedding cards, clothing brand logos, and more.

Garden Grown Font Duo

A unique pack of two fonts, an all-caps font and a script font, that will make your book covers, stationery, marketing, magazines, and film designs stand out from the crowd.

Have Heart

A handmade brush font that mimics a marker pen. This font comes in 2 styles and with 12 bonus swashes. It also supports international languages.

Ball Pen Handwritten Font

Make your text look as if it’s written with a ballpoint pen using this stylish font. This font will go along nicely with your signatures, quotes, badges, labels, and many other types of designs.

BLACKHAWK Brush Font

This beautiful brush font looks simply perfect for designing a cover for a music album. It comes in 2 font styles, and with 11 swashes, and 4 paint-splatters.

Tuesday Script

A unique script font for your greeting and wedding invitation card designs. The font also includes 4 bonus standard characters and 7 swashes.

Suargie

A unique and a modern font featuring 250 glyphs. The style of this brush script font makes it more suitable for designing clothing and fashion brand logos.

The Humber Font

This font is just what you need for your logo design, badges, and poster design work. The font comes with swashes, alternative styles, symbols, and more.

Pineapple Script

A unique hand lettered dry brush script font suitable for all kinds of design work from branding to logos and even wedding and stationery designs.

Nabila

This is a multi-purpose typeface that has a mixed design of brush lettering with natural handwriting. It also features 350 glyphs and 155 alternatives characters.

Cartel Deux

A bundle of stylish script and bold style fonts that includes 5 styles. This font will definitely make your logo designs, social media posts, and badge design look phenomenal.

Northern Soul

A unique brush typeface for designing realistic hand-crafted artworks. The font comes in both desktop and web font versions.

Amberlight

This modern script font will help add a feminine touch to your design. The font comes with over 400 stylistic sets and swash characters.

Ink Bandits Font Duo

A font for designing bold logos, invitations, greeting cards, and website headers. This font pack includes both sans serif and irregular script font styles, as well as 85 catchwords and ornaments.

Lost in the ‘Twilight Zune’: Scary Tech Tales That Will Haunt You

Featured Imgs 23

Looking for some scary tales to tell around the campfire (or perhaps a circle of blinking routers) this Halloween? We've got you covered. Here are three real horror stories from the world of tech and science that will make you wish humanity had never left the stone age.

zunehounting.jpg

Dude, Where Is My Nuclear Arsenal? The Lost Atomic Bombs.

Ever had a wild night, only to realize the next day that you lost something really important? The U.S. Air Force can relate. Since the end of World War II, at least three nuclear weapons have been lost by the United States and have never been recovered. Two of them were on board a B-47 bomber that disappeared without a trace over the Mediterranean Sea in 1956. Another might be much closer to homea proud 7,600-pounder that vanished near Savannah, Georgia, in the 1958 Tybee Island accident. And yes, these bombs could still be functional.

Thats just the tip of the iceberg. At its peak, the Soviet Union stockpiled approximately 45,000 nuclear weapons. Since then, the Russians have lost track of at least 100 suitcase-sized bombs (how handy!) as well as several nuclear submarines. At least you dont have to worry about them if you dont live near the coast

But even when not lost, the worlds most annihilating weapons aren't always treated carefully and the list of accidents involving nuclear bombs that almost caused devastating harm is equally terrifying. In total, 32 broken arrow incidents (= accidents involving nuclear weapons) have been recorded by the U.S. military since the 1950s. For example, in North Carolina, two 3.8 megaton H-bombs dropped after a plane crash in 1961. One bomb's parachute deployed, the other hit the ground unchecked near Goldsboro. Only a single safety switch prevented its detonation. Oh, and then there was that time in 1983 when a malfunctioning Soviet satellite indicated an all-out nuclear attack launched by the U.S., and an automatic counterattack was only prevented by the officer on duty, who decided the warning must be a false alarm. Good call, comrade?

As for the lost bombs? We can only wonder where they are and if they will ever resurface. Whether slumbering in the depths of the oceans, frozen in eternal ice, or sitting in the back of the van of some guy whos been shopping on the dark webthey could surprise us anytime. Consider stocking up on some Potassium Iodide pills for those trick-or-treaters!

Dude, Where Is My Free Will? The Lost CIA Files.

Ever had someone spike your drink at a party? The CIA can relateexcept they were the ones doing the spiking. Between 1953 and 1973, they ran a program called MKUltra, turning thousands of unwitting Americans into guinea pigs for psychedelic experiments. Think your government would never secretly dose you with LSD? Think again!

The CIA wasnt just experimenting in hidden underground labs (though they had those too). They were running "experiments" in hospitals, universities, and even brothels across the U.S. and Canada. In one particularly wild operation, they hired prostitutes to lure men to CIA-run "safe houses" where they were dosed with LSD while agents watched through one-way mirrors, sipping martinis and taking notes. The operation was, unironically, called "Midnight Climax" (yes, really). Talk about a bad trip!

The program didnt stop at LSD either. They experimented with everything from sleep deprivation to psychological torture. At Montreal's Allan Memorial Institute, Dr. Ewen Cameron (funded by the CIA) tried to "de-pattern" his patients minds using electroshocks, drug-induced comas, and endless loops of recorded messages. Many of his victimswho had checked in for minor issues like anxiety or postpartum depressionsuffered permanent damage. Then there is the story of Frank Olson, a U.S. Army biochemist who worked for the CIA. In 1953, his colleagues secretly slipped LSD into his drink during a work retreat. Nine days later, he plunged to his death after jumping through the closed window of a New York hotelthrough drawn shade and curtains. Suicide? Accident? Murder? We might never know. The CIA Director Richard Helms ordered most MKUltra files shredded in 1973. Only a fraction of the files survived and were declassified in 2001.

How many people were unknowingly dosed, shocked, or manipulated? Well never know for sure, thanks to that convenient document-shredding. But here's a spine-chilling thought: these are just the experiments we know about. Sure, the CIA wouldn't legally be allowed to conduct such operations today, but maybe grab a drink tester while you're stocking up on those Potassium Iodide pills!

Dude, Wheres My Music? Lost in the Twilight Zune.

The scariest story I saved for the end. Kids these days, with their AirPods and Spotify, will never understand the true technological terror that was... the Microsoft Zune. Gather 'round, children, as I tell you about one of the darkest chapters in consumer tech historya tale so frightening, it makes the Meta Quest look like a fairy tale.

The year was 2006. Apples iPod was dominating the music player market when Microsoft decided to enter the ring with what looked like a brown brick that had been cursed by an ancient deity. Yes, you read that righttheir flagship color choice was brown. Not sleek white, not glossy black, but brown. Like your grandfathers 1970s kitchen appliances or, worse, the uniforms of the guys he fought against 30 years earlier. But the horror doesnt end with the aesthetics. The Zune came with its own proprietary software that made iTunes look awesome (and thats saying something). Imagine trying to sync your music, but instead of it just working, your device enters a state where your precious music collection becomes trapped in a format that only works with... you guessed it, the Zune.

Then there was the incredibly creative social feature called Zune Social, which let you "squirt" songs to other Zune users nearby. Yes, you read that right, they actually used the word "squirt" in their marketing. The catch? The received songs would self-destruct after three plays or three days, whichever came first. It was like Snapchat for music, except nobody wanted it, and nobody was around to receive your "squirts" because NOBODY ELSE HAD A ZUNE!

The horror story reached its climax on December 31, 2008, when every single Zune 30GB model in existence simultaneously crashed due to a leap year bug. Imagine thousands of people waking up on New Year's Eve to find their precious brown bricks had turned into actual bricks.
The Zune lived (or rather, stumbled around like a zombie) until 2011, when Microsoft finally put it out of its misery. Total sales? About 2 million Zunes compared to the iPods 300 million. Thats not a market sharethats a rounding error.

But perhaps the scariest part of this story is that somewhere out there, in forgotten drawers and dusty attics, thousands of Zunes still exist, waiting... Their brown cases slowly fading, their batteries quietly leaking, their proprietary software forever haunting the digital graveyard of tech history. Legend has it that on quiet nights, you can still hear the faint echo of a marketing executive whispering, "squirt me some Jonas Brothers..."

So, next time you complain about having to charge your AirPods, remember the brave souls who endured the Zune era. And if you ever find one at a garage sale, run. Run far, run fast. Some tech is better left in the past!

P.S.: If you think this was bad, wait until you hear about Windows Vista...

Essential Security Tools for Web Developers and Designers

Featured Imgs 23

Whether you’re designing a simple website or building complex web applications, security needs to be a priority from day one. Cyber threats like data breaches, cross-site scripting (XSS), and SQL injections are becoming more sophisticated, targeting every weakness they can find. 

Fortunately, various security tools exist to help developers and designers safeguard their projects and ensure users enjoy a seamless and secure experience. This article will explore essential security tools that should be part of every developer’s toolkit.

1. OWASP ZAP

OWASP ZAP

OWASP ZAP is an open-source tool that identifies vulnerabilities in web applications. It scans for security weaknesses like SQL injection, cross-site scripting (XSS), and authentication flaws. OWASP ZAP offers automated and manual testing options, making it useful throughout the development lifecycle. Developers can also integrate it into their CI/CD pipelines, catching vulnerabilities before they reach production.

By using OWASP ZAP early and often, development teams can adopt a proactive approach to security, preventing common attacks from slipping through the cracks. It also provides detailed reports that guide developers on mitigating issues, ensuring every code change aligns with security best practices.

2. Burp Suite

Burp Suite

Burp Suite is a powerful tool designed for web application security testing. It provides developers with tools to inspect HTTP requests, manipulate data, and simulate attacks. Burp Suite’s automated scanner detects vulnerabilities, while its manual tools allow security experts to perform deep-dive testing on complex issues.

The platform’s modular nature makes it easy to customize testing processes. With features like Intruder for brute-force testing and Repeater for request manipulation, Burp Suite offers flexibility for both automated and manual testing. These capabilities help developers address logic flaws, broken authentication, and access control issues that automated scanners might miss.

3. VPN

Remote work becoming the new norm, VPNs are essential for developers who need secure access to servers, platforms, and databases from various locations. A reliable VPN ensures that online activities remain encrypted and private, helping prevent data leaks and unauthorized access. By using industry-standard AES-256 encryption and specialized protocols, VPNs provide a secure option for accessing sensitive environments—even on public Wi-Fi.

VPNs can also mask IP addresses, allowing developers to test web applications from multiple regions without compromising security. With a global network of servers, VPNs offer access to geo-restricted content and tools, enabling seamless and secure workflows regardless of the developer’s location. For example, services like AstrillVPN offer features tailored for developers, enhancing both privacy and functionality across diverse use cases.

4. Nmap

Nmap is a well-known tool for network discovery and auditing. It helps developers identify open ports, running services, and network misconfigurations that attackers could exploit. Nmap’s comprehensive scans offer insights into the entire network infrastructure, making it easier for developers to secure their systems proactively.

Using Nmap during the early stages of development ensures that potential entry points are identified and secured before launch. It’s also a valuable tool for periodic security audits, keeping infrastructure resilient against evolving threats.

5. Acunetix

Acunetix is a web vulnerability scanner that fits perfectly into DevOps workflows and offers continuous security monitoring. It automates the detection of vulnerabilities like SQL injection, XSS, and broken authentication and generates detailed reports for quick remediation. Acunetix supports CI/CD integration, making it a great fit for teams practicing agile development.

This tool stands out for its speed and accuracy, which helps developers keep up with tight release schedules while ensuring robust security. Its seamless integration into development environments allows teams to detect issues without slowing their workflow.

6. Wireshark

Wireshark

Wireshark is a go-to tool for analyzing network traffic and troubleshooting security issues. It provides deep insights into how data travels between a web application and its backend systems, enabling developers to detect bottlenecks, data leaks, or malicious activities. Wireshark captures and inspects data packets in real-time, allowing teams to identify and respond to anomalies quickly.

Wireshark ensures that communication channels remain secure and efficient for developers working on complex web applications. Its robust filtering options allow users to pinpoint specific traffic flows, making it an indispensable tool for network analysis and security debugging.

7. Metasploit

Metasploit enables developers to adopt an attacker’s mindset by simulating real-world cyberattacks. It provides a library of known exploits that can be used to test applications and systems, helping teams assess how well their defenses will perform under pressure. Metasploit’s penetration testing framework is essential for anyone serious about security, as it gives developers a clear understanding of their application’s vulnerabilities before malicious actors can exploit them.

8. Web Application Firewalls (WAFs)

Web Application Firewalls

WAFs act like gatekeepers, monitoring incoming traffic and blocking anything that looks suspicious. By filtering HTTP requests, tools like AWS WAF protect against the most common web attacks, including SQL injection and XSS. For developers managing high-traffic websites or online platforms, WAFs ensure that malicious traffic never reaches the application’s backend, maintaining performance while keeping attackers at bay.

9. Secure Coding Practices and Code Reviews

Secure coding practices are the foundation of any secure web application. Developers should sanitize inputs, use parameterized queries to prevent SQL injection and apply access control mechanisms to restrict unauthorized access. Embedding security principles into the codebase from the start ensures that vulnerabilities are minimized.

Regular code reviews, both automated and manual, are essential to catch security flaws early. Developers can also use Static Application Security Testing (SAST) tools to identify vulnerabilities during development, keeping code secure throughout the project lifecycle.

10. GitGuardian

GitGuardian is a crucial tool for developers working with code repositories. It continuously scans repositories for exposed credentials, such as API keys, tokens, or passwords that may have been accidentally committed. With GitGuardian, developers can avoid the risk of attackers exploiting leaked secrets, ensuring that sensitive information stays protected. It also provides real-time alerts, enabling teams to act when potential exposures are detected immediately.

11. Snyk: Manage Open-Source Vulnerabilities

Snyk specializes in finding vulnerabilities within open-source libraries and dependencies. Modern web applications rely heavily on open-source components, so Snyk helps developers identify and patch vulnerabilities early. It integrates with DevOps tools, offering continuous monitoring to ensure dependencies remain secure throughout development cycles.

12. Security Audits and Continuous Testing: Stay One Step Ahead

Regular security audits and continuous testing play a crucial role in safeguarding digital environments. By incorporating automated testing tools alongside thorough manual audits conducted at regular intervals, organizations can swiftly identify and address emerging risks. This proactive strategy not only aids teams in adhering to established security standards but also serves as a preventive measure, ensuring that minor security concerns do not escalate into significant incidents that could jeopardize sensitive information or disrupt operations. Such diligence fosters a culture of security awareness and resilience within the organization.

13. Two-Factor Authentication (2FA)

Two-factor authentication is a simple yet powerful way to protect accounts from unauthorized access. By requiring users to provide two verification forms, like a password and a code sent to their phone, 2FA ensures that attackers can’t gain access even if passwords are compromised. Developers should implement 2FA wherever sensitive data or user information is involved, adding an extra layer of security to the application.

14. Regular Security Audits and Continuous Testing

Security isn’t something you set up once and forget, it requires continuous monitoring and improvement. Regular security audits help identify vulnerabilities introduced through updates or changes in the infrastructure. Continuous testing ensures that applications remain compliant with security standards and are ready to face new threats as they emerge. With automated scanning tools and periodic manual testing, developers can avoid potential risks and maintain a strong security posture.

In today’s digital landscape, web security is essential for developers and designers building everything from simple sites to complex applications. This article explores top security tools, including OWASP ZAP, Burp Suite, and GitGuardian, that help identify vulnerabilities, secure sensitive data, and protect against cyber threats like SQL injection and cross-site scripting. By integrating these tools into development workflows, teams can ensure a seamless, secure user experience and maintain robust defenses against evolving threats. Whether you’re a seasoned developer or just starting, these tools provide the foundation for building safer, more resilient web applications.

The post Essential Security Tools for Web Developers and Designers appeared first on CSS Author.

Designing For Gen Z: Expectations And UX Guidelines

Featured Imgs 23

Every generation is different in very unique ways, with different habits, views, standards, and expectations. So when designing for Gen Z, what do we need to keep in mind? Let’s take a closer look at Gen Z, how they use tech, and why it might be a good idea to ignore common design advice and do the opposite of what is usually recommended instead.

This article is part of our ongoing series on UX. You can find more details on design patterns and UX strategy in Smart Interface Design Patterns 🍣 — with live UX training coming up soon. Free preview.

Gen Z: Most Diverse And Most Inclusive

When we talk about Generation Z, we usually refer to people born between 1995 and 2010. Of course making universal statements about a cohort where some are adults in their late 20s and others are school students is at best ineffective and at worst wrong — yet there are some attributes that stand out compared to earlier generations.

Gen Z is the most diverse generation in terms of race, ethnicity, and identity. Research shows that young people today are caring and proactive, and far from being “slow, passive and mindless” as they are often described. In fact, they are willing to take a stand and break their habits if they deeply believe in a specific purpose and goal. Surely there are many distractions along that way, but the belief in fairness and sense of purpose has enormous value.

Their values reflect that: accessibility, inclusivity, sustainability, and work/life balance are top priorities for Gen Zs, and they value experiences, principles, and social stand over possessions.

What Gen Z Deeply Cares About

Gen Z grew up with technology, so unsurprisingly digital experiences are very familiar and understood by them. On the other hand, digital experiences are often suboptimal at best — slow, inaccessible, confusing, and frustrating. Plus, the web is filled with exaggerations and generic but fluffy statements. So it’s not a big revelation that Gen Zs are highly skeptical of brands and advertising by default (rightfully so!), and rely almost exclusively on social circles, influencers, and peers as main research channels.

They might sometimes struggle to spot what’s real and what’s not, but they are highly selective about their sources. They are always connected and used to following events live as they unfold, so unsurprisingly, Gen Z tends to have little patience.

And sure enough, Gen Z loves short-form content, but that doesn’t necessarily equate to a short attention span. Attention span is context-dependent, as documentaries and literature are among Gen Z’s favorites.

Designing For Gen Z

Most design advice on Gen Z focuses on producing “short form, snackable, bite-sized” content. That content is optimized for very short attention spans, TikTok-alike content consumption, and simplified to the core messaging. I would strongly encourage us to do the opposite.

We shouldn’t discount Gen Z as a generation with poor attention spans and urgent needs for instant gratification. Gen Zs have very strong beliefs and values, but they are also inherently curious and want to reshape the world. We can tell a damn good story. Captivate and engage. Make people think. Many Gen Zs are highly ambitious and motivated, and they want to be challenged and to succeed. So let’s support that. And to do that, we need to remain genuine and authentic.

Remain Genuine And Authentic

As Michelle Winchester noted, Gen Zs have very diverse perspectives and opinions, and they possess a discerning ability to detect disingenuous content. That’s also where mistrust towards AI comes into play, along with AI fatigue. As Nilay Patel mentioned on Ezra Klein Show, today when somebody says that something is “AI-generated”, usually it’s not a praise, but rather a testament how poor and untrustworthy it actually is.

Gen Z expects better. Hence brands that value sincerity, honesty, and authenticity are perceived as more trustworthy compared to brands that don’t have an opinion, don’t take a stand, don’t act for their beliefs and principles. For example, the “Keep Beauty Real” campaign by Dove (shown below) showcases the value of genuine human beauty, which is so often missed and so often exaggerated to extremes by AI.

Gareth Ford Williams has put together a visual language of closed captions and has kindly provided a PDF cheatsheet that is commonly used by professional captioners. There are some generally established rules about captioning, and here are some that I found quite useful when working on captioning for my own video course:

  • Divide your sentences into two relatively equal parts like a pyramid (40ch per line for the top line, a bit less for the bottom line);
  • Always keep an average of 20 to 30 characters per second;
  • A sequence should only last between 1 and 8 seconds;
  • Always keep a person’s name or title together;
  • Do not break a line after conjunction;
  • Consider aligning multi-lined captions to the left.

On YouTube, users can select a font used for subtitles and choose between monospaced and proportional serif and sans-serif, casual, cursive, and small-caps. But perhaps, in addition to stylistic details, we could provide a careful selection of fonts to help audiences with different needs. This could include a dyslexic font or a hyper-legible font, for example.

Additionally, we could display presets for various high contrast options for subtitles. This gives users a faster selection, requiring less effort to configure just the right combination of colors and transparency. Still, it would be useful to provide more sophisticated options just in case users need them.

Support Intrinsic Motivation

On the other hand, in times of instant gratification with likes, reposts, and leaderboards, people often learn that a feeling of achievement comes from extrinsic signals, like reach or attention from other people. The more important it is to support intrinsic motivation.

As Paula Gomes noted, intrinsic motivation is characterized by engaging in behaviors just for their own sake. People do something because they enjoy it. It is when they care deeply for an activity and enjoy it without needing any external rewards or pressure to do it.

Typically this requires 3 components:

  • Competence involves the need to feel capable of achieving a desired outcome.
  • Autonomy is about the need to feel in control of your own actions, behaviors, and goals.
  • Relatedness reflects the need to feel a sense of belonging and attachment to other people.

In practical terms, that means setting people up for success. Preparing the knowledge and documents and skills they need ahead of time. Building knowledge up without necessarily rewarding them with points. It also means allowing people to have a strong sense of ownership of the decisions and the work they are doing. And adding collaborative goals that would require cooperation with team members and colleagues.

Encourage Critical Thinking

The younger people are, the more difficult it is to distinguish between what’s real and what isn’t. Whenever possible, show sources or at least explain where to find specific details that back up claims that you are making. Encourage people to make up their mind, and design content to support that — with scientific papers, trustworthy reviews, vetted feedback, and diverse opinions.

And: you don’t have to shy away from technical details. Don’t make them mandatory to read and understand, but make them accessible and available in case readers or viewers are interested.

In times where there is so much fake, exaggerated, dishonest, and AI-generated content, it might be just enough to be perceived as authentic, trustworthy, and attention-worthy by the highly selective and very demanding Gen Z.

Good Design Is For Everyone

I keep repeating myself like a broken record, but better accessibility is better for everyone. As you hopefully have noticed, many attributes and expectations that we see in Gen Z are beneficial for all other generations, too. It’s just good, honest, authentic design. And that’s the very heart of good UX.

What I haven’t mentioned is that Gen Z genuinely appreciates feedback and values platforms that listen to their opinions and make changes based on their feedback. So the best thing we can do, as designers, is to actively involve Gen Z in the design process. Designing with them, rather than designing for them.

And, most importantly: with Gen Z, perhaps for the first time ever, inclusion and accessibility is becoming a default expectation for all digital products. With it comes the sense of fairness, diversity, and respect. And, personally, I strongly believe that it’s a great thing — and a testament how remarkable Gen Zs actually are.

Wrapping Up
  • Large parts of Gen Z aren’t mobile-first, but mobile-only.
  • To some, the main search engine is YouTube, not Google.
  • Some don’t know and have never heard of Internet Explorer.
  • Trust only verified customer reviews, influencers, friends.
  • Used to follow events live as they unfold → little patience.
  • Sustainability, reuse, work/life balance are top priorities.
  • Prefer social login as the fastest authentication method.
  • Typically ignore or close cookie banners, without consent.
  • Rely on social proof, honest reviews/photos, authenticity.
  • Most likely generation to provide a referral to a product.
  • Typically turn on subtitles for videos by default.
Useful Resources New: How To Measure UX And Design Impact

I’ve just launched “How To Measure UX and Design Impact” 🚀 (8h), a new practical guide for UX leads to measure UX impact on business. Use the code 🎟 IMPACT to save 20% off today. And thank you for your kind and ongoing support, everyone! Jump to details.


Gain $200 in a week
from Articles on Smashing Magazine — For Web Designers And Developers https://ift.tt/2lFfadh

How to Write a Memo: The 10 Steps I Use to Get It Right Every Time

Featured Imgs 23

Before I start writing a memo, I take some time to hype myself up. This bit of internal communication will be read by my peers, my boss, and likely my boss’s boss. Getting the language right is essential, and every word counts.

Unlike an email, memos typically go out to your entire department or everyone at the company, so knowing how to format a memo is just as important as what you write. No pressure. (Well, maybe some pressure.)

→ Download Now: 4 Free Memo Templates [Free Resource]

In this post, I’ll share my experience writing memos, tips from my HubSpot peers, and best practices for using AI throughout the process. From there, I’ll showcase stellar memo examples and a template to help you create your own.

Table of Contents

Memos are versatile. Businesses can use memos to relay information involving newly updated policies, changes in procedure, important milestones, or necessary employee actions, such as attending an upcoming meeting or convention.

On the other hand, communities can use memos to tell people within it about public safety guidelines, promote various events, and raise awareness on subjects that affect their lives.

I often find myself writing memos when there are significant changes to my program at HubSpot. Perhaps we’re implementing a new workflow, reorganizing the structure of our team, or sharing insights from a project we just completed. 

Memos denote importance, so I only write them when I have important updates to share that impact multiple stakeholders.

Types of Memos

When I do have those important updates to share, I like to consider the type of memo I’m writing before I get started. For your reference, here are four of the most common types of memos:

1. Informative Memo

Also known as announcement memos, these make up the bulk of most memos I’ve seen. The goal is to communicate new information to your audience.

Sample use cases: To state changes in policy, company news, and new processes or to welcome new staff members

2. Request Memo

Request memos are designed to make a request and get a positive response. When writing request memos, I’d focus on using persuasive language and include stats or numbers to highlight why a ‘yes’ is the right answer.

Sample use cases: To request a new purchase from your company or to authorize professional learning or volunteer opportunities

3. Confirmation Memo

I think of confirmation memos as a paper trail to make sure key stakeholders have a record of discussions. When writing confirmation memos, specificity and clarity should be your number one goal.

Sample use cases: To document conversations or clarify ambiguity to avoid misunderstanding down the road

4. Directive Memo

If I need to communicate how to do something to my audience, I’d write a directive memo offering detailed instructions that are easy to follow.

Sample use cases: To share how to implement a new process, comply with new requirements, or complete necessary tasks

The main difference between all of these memo types is the purpose behind the writing. However, regardless of purpose, every memo is usually made up of the same component parts.

Parts of a Memo

What are those parts, you ask? Here’s what I include in just about every memo I write: 

  • Heading: This section specifies who the memo is to (your audience) and from (you or your department), and it includes the date and a subject to describe what it’s about.
  • Introduction: This is your opening paragraph that highlights the purpose of the memo and provides an overview on what the memo is about.
  • Background: Here, you want to provide clear, specific context around the problem you’re aiming to solve.
  • Recommendations: This is where you’ll list the specific tasks or milestones you plan to complete in order to address the problem you’ve identified.
  • Discussion: This is the meat of your memo sandwich — it’s where you’ll justify your recommendations with supporting details that map back to your problem statement.
  • Closing: This section creates space for a call to action for your readers. What do you want them to do after reading your memo? State that here.
  • Necessary attachments: This is where you can include any supporting documents to back up your research and recommendations.

I’ll show you how I build out each of these elements in our how-to shortly. In the meantime, here's more on memos from the HubSpot marketing team:

When to Write a Memo

I default to writing a memo when I need to communicate new information in a way that's more formal than an email.

However, memo purposes stretch far and wide.

“Memos serve a variety of purposes, but generally speaking, they either pitch or propose something new, consolidate information into one place for the sake of alignment, or explain or clarify information about a project or program,” says Hesterberg.

You might write a memo in the following scenarios:

  • You have a new policy, and you need to explain it to your audience.
  • Sharing important company updates and information.
  • Announcing new staff members or promotions.
  • Confirming details of a discussion to get everyone on the same page and create a paper trail.
  • Teach or tell people how to do something.
  • Requesting something and justifying why it matters.

There are lots of possibilities out there. In a nutshell, if you have something you need to share, a memo might be the answer.

Onto the how-to.

You can put together a memo in a few short steps, and you can even use AI to help.

To give you an idea of how each step is formatted, I’ll write an example memo, break it down for each step, and include tips for incorporating AI along the way. 

My example memo will be an internal announcement for a writing training session.

how to write a memorandum or memo in ten steps

1. Start with your heading.

No matter what kind of memo I’m writing, I always include a heading. In this section, I note who the memo is to, who it’s from, the delivery date, and the subject of the memo.

I’d recommend starting off all of your memos with this formatting:

TO:

FROM:

DATE:

SUBJECT:

Your subject line should be short, attention-grabbing, and give readers a general idea of what the memo is about.

“The headings you use should be descriptive enough that your readers can infer what they'll get in each section,” suggests Kaitlin Milliken, senior program manager at HubSpot. “Cut the cute language and keep your headings very tactical.”

I always make sure the tone of my subject matches the seriousness of the subject matter and my organization’s communication style. I love a witty opener, but it won’t be right for every memo.

Testing It Out

Here’s how this would look for my example memo about a writing training session:

how to write a memo, example heading for a memo about a writing training session

Simple and to the point.

2. Write your introduction.

Remember, you want your memo to be brief and information-packed. Your introduction should be an efficient use of space. 

Here, I highlight the main issue or problem that your memo aims to resolve along with the intended solution.

"The beginning of any memo should state a clear purpose of what the memo will cover,” says Karla Hesterberg, director of content marketing at HubSpot. “Depending on the subject, this could be as simple as an overview of a statement that establishes the need for a new investment. The more simple and straightforward, the better."

This is actually a reality that I personally struggle with. As a writer, I want to include those eloquent phrases and thoughtful transitions that sound great when read aloud. 

However, I need to take a different approach to writing memos. I try to remind myself that my introduction should just summarize the purpose of the memo in two to three sentences.

Testing It Out

Using Hesterberg’s tip, here’s how I’d write the introduction for my memo:

how to write a memo, example introduction for a memo about a writing training session

You can also use generative AI tools like ChatGPT to help summarize the purpose of your memo. In fact, this is one of my favorite ways to use AI — to condense and recap information.

Here’s an example.

Prompt I used: I'm writing a memo to announce a new training session for writers on my team. The training session is on how to use AI in your writing process without losing the human touch. Write an introduction to summarize this announcement and highlight the importance of this training. Keep the summary brief, around 2-3 sentences, and keep it conversational.

Output:

how to write a memo, example introduction for a memo about a writing training session using ChatGPT

While I like my original version better, this would be helpful to use as a starting point — especially if I was in a time crunch.

3. Provide background on the issue.

Remember, memos go out to a wide group of employees. Not everyone reading your memo will have the same background that you do as the writer.

You’ll need a section to explain any necessary context that folks need to know before going forward.

So, what do you put in? I asked Basha Coleman, one of the best memo writers on my team. Coleman is a principal marketing manager on HubSpot’s audience development team.

Coleman says she includes a section at the top of her memos that cover the following:

  • The situation
  • The impact of the situation
  • Recommended solutions

“This gives stakeholders the need-to-know info right away in case they don’t have time to read the whole memo at once,” Coleman says.

Beyond that, I like to link to other important documents that provide context on a topic.

That could be a related memo from a different team with more information, a news article that you're directly responding to, or a relevant dashboard that showcases the issue.

You don’t want this section to be long. However, if folks are interested in learning more, you’ve just given them the power to do so.

Testing It Out

Based on Coleman’s recommendation, here’s how the background I’d include as context for the new training:

how to write a memo, example background section for a memo about a writing training session

Could AI help here? Alana Chinn, Marketing Blog editor at HubSpot, shared her thoughts on using AI in this section:

"Since I have the most context about the situation and impact, I probably wouldn’t use AI in the background section," she says.

"Tools like ChatGPT probably aren’t going to know which information is the most important to highlight for my audience. But if I did, I’d use AI to organize, summarize, or provide structure around my thoughts."

Bouncing off of this and following Coleman’s format, I'd suggest outlining the situation, the impact of the situation, and your recommended solutions and asking ChatGPT to summarize those details into a few short paragraphs.

4. Outline action items and timeline.

Depending on the purpose of your memo, you may have action items for employees to complete or provide a timeline of when changes will take place.

For example, they may need to complete a task or provide information by a certain deadline.

Of course, if no action is needed on the employee’s behalf, you can leave this section out. But when action is required, here’s what I’m including in this section:

  • When employees can expect changes to go into effect
  • What changes have already been made and what to expect in the future
  • Deadlines they need to adhere to

Pro tip: Whenever I’m developing a timeline, I avoid just creating a paragraph with dates interspersed throughout. It’s harder to read that way.

“Don’t be afraid to use visual cues in your memo, like tables, heading colors to display hierarchy of information, charts, and graphs. These can keep a memo brief and skimmable,” suggests Coleman.

Milliken agrees. In a recent memo on building a thought leadership program, she included tables that laid out each step her team would take, more details about what was needed, and when it would occur.

“I also included an infographic of a pipeline to show the stages of the project and how long each would take proportionally,” she says. “This makes it easier to visualize a timetable than just skimming chunks of text.”

Testing It Out

Here’s a sample table I created to demonstrate.

how to write a memo, example action items and timeline for a memo about a writing training session

In terms of using AI for this section, I’d ask my favorite generative AI robot to help me brainstorm appropriate tasks and map action items to a timeline.

Here’s an example.

Prompt I used: Give me 2-3 action items for attendees of a quarterly writing training session that highlights how to use AI tools in writing, and map them to a 6-week timeline.

Output:

how to write a memo, example action items and timeline for a memo about a writing training session from ChatGPT

I would then take this output, customize it for my team, and add any relevant details based on our internal workflow.

5. Justify your reasoning.

Whenever I have to communicate a request or anything new that could ruffle some feathers, I always try to make my case by offering a rationale as to why it’s so important.

“Think about your target audience and try to anticipate areas where they might ask questions, have concerns, or need more clarity,” says Hesterberg. “Try to re-read as someone who doesn't have all the context you have to identify areas you need to build up.”

Remember, as the memo writer, you’re an expert on the subject. You may need to ask a manager or a peer to review your memo with a skeptical eye. Where do they have questions? What needs additional justification?

From there, you can strengthen your case. For me, this often includes featuring statistics as to why it’s critical and urgent to make a change.

“Keep in mind that data is super powerful but must be presented in a way that enhances the narrative rather than confusing it,” says Amanda Sellers, a blog strategy manager at HubSpot.

For example, the phrase “58.97% met the benchmark and 10.26% far exceeded the benchmark” is clunky. Instead, Sellers suggests writing,”Our strategy is working nearly 70% of the time."

The first example is unwieldy, Sellers notes, referring to a methodology that a broader audience is less likely to care about.

Meanwhile, “the second audience demonstrates the more important thing: why that methodology was important and what you can take from it,” Sellers explains.

Testing It Out

To justify the importance of the quarterly writing training session, especially in conjunction with AI tools, I’d add this data point in my memo:

how to write a memo, example of justifying reasoning with data in a memo about a writing training session

Tools like ChatGPT can also be great for pulling external data to justify your approach or the reasoning behind your memo.

Here’s an example.

Prompt I used: Provide 2-3 data points about the importance of a quarterly writing training on AI tools.

Output:

how to write a memo, example of justifying reasoning with data in a memo about a writing training session from ChatGPT

Big time saver if you let AI do some of the digging for you.

6. Soften any blows.

Sometimes you’re making a big change that could be seen as controversial or making bold statements where people might feel slighted. In instances like these, I like to soften things with a well-placed caveat.

For example, with the rise of AI, you might be communicating a new company policy related to using AI.

You could soften the blow by sharing that it hasn't been an issue for most people, but it’s important to have a clear policy in place for handling it.

Testing It Out

Let’s say my memo took a different position regarding AI for writing. Here’s how I’d format my memo to soften the blow:

how to write a memo, example of softening concerns in a memo about a writing training session

AI can also help here if you’re not sure how to mitigate concerns about a particular issue presented in your memo.

Here’s an example.

Prompt I used: Provide language to address concerns that writers may have about using AI in their writing. Note that we have a strict AI policy in place to help guide this new process. Keep it brief, 2-3 sentences.

Output:

how to write a memo, example of softening concerns in a memo about a writing training session from ChatGPT

Not bad.

7. Communicate urgency.

Any time my memo pitches something new or timely, I make sure I explain why the change is urgent and why it’s important that we move now.

“The best way to do this is to explain what we’re at risk of losing if we don’t take action here,” says Hesterberg.

For pitch memos, Hesterberg suggests telling readers why this problem is important and why people should care. For explanatory memos, she recommends explaining what the information in the memo will be used for.

Testing It Out

Here’s how I’d add urgency to my memo about the training session:

how to write a memo, example of communicating urgency in a memo about a writing training session

This is relatively straightforward, so I won’t tap AI in for this.

8. Include a closing statement.

When crafting my closing statement I think about the information I really want to reinforce. For example, are there any specific contacts readers should reach out to for questions? If so, I’ll include them here.

“A conclusion that just reiterates your main points is boring and likely to be skipped,” Milliken says. “End on your most compelling points. You can either reassert urgency or discuss the resources you need to be successful.”

Milliken often closes on the support her team requires to find success. That could be additional financial resources, a champion within leadership, or more time to establish the change.

Testing It Out

Here’s how I’d wrap up my memo with Milliken’s suggestions in mind:

how to write a memo, example closing statement in a memo about a writing training session

And from the AI perspective, I’d recommend using a prompt similar to the one we used for the introduction to close things out.

9. Review and proofread before sending.

This step may seem like a no-brainer, but it‘s important to review your document before sending it out. Memos are meant to inform readers of upcoming changes and relay important information.

As a writer, I know I don’t want to risk causing confusion with a typo or misstatement.

“Memos often have a broad audience, so you'll want to craft a narrative that is easily understood no matter who is reading it,” says Sellers. “That means telling a persuasive story, getting to the point quickly, anticipating questions, and cutting jargon to find the simplest way of saying something.”

Testing It Out

I usually ask a coworker to review my memo or use an editing tool like Grammarly or Hemingway to review and proofread.

Here’s an example of Grammarly editing my memo and making suggestions for improvement:

[alt] how to write a memo, example review and proofread of a memo about a writing training session using Grammarly

Chinn also says, “I love using AI to proofread my work. As a writer, this is one of the use cases I tap AI for the most. Asking ChatGPT to provide a grammar or tone check, to look for spelling errors or other inconsistencies, or to simplify complex ideas are all quick and easy ways to finalize my content.”

I mean, who says you can’t use AI as your personal peer editor?

10. Create audio or video aids.

Once the memo is written, I like to give it one last pass. What would make the message even more clear? Should I work with the creative team to build an infographic? Should I amplify the document over our email channels?

Now that I’ve invested the time, I want to make sure my message is heard.

Coleman often creates a recording with a deck, highlighting the most important points in the document.

“Including video summaries of my memos with Loom is helpful for accessibility and busy stakeholders who like to listen to updates while working on other tasks,” she notes.

Testing It Out

For the sake of time, I won’t create any visuals for my fictional memo.

But another easy way to do this would be to present the memo to your team or relevant stakeholders, record that presentation via Zoom or Microsoft Teams (if remote), and circulate it as a visual learning aid for the future.

Two birds, one stone kind of deal.

Best Practices for Formatting a Memo

Now that you know what types of memos there are, what elements to include in your memo, and how to write one, I have a few overarching formatting best practices for you.

Cater to your audience.

Before you start writing your memo, consider who your audience is. Understanding who will read your memo will help you tailor your message, tone, and CTA for that audience.

Pamela Bump, head of content growth at HubSpot, suggests considering the following questions.

"Are the leaders you're writing for busy executives who want a quick one-pager focused on the most need-to-know information?” she says. “Or are the readers more inquisitive and interested in soaking in all the information they can get?”

Make it skimmable.

Milliken recalls a time when she wrote a memo that wasn’t skimmable.

"When I was asked to write my first memo, I created a document with huge walls of text,” she says.

“My manager gave me great feedback, encouraging me to use charts and graphs throughout the document. That makes total sense to me now. No one wants to read a huge string of lengthy paragraphs, but they'll definitely skim a table.”

To make your memo easier to read, use headings and separate paragraphs to break up new thoughts or talking points. You can also add tables and graphs to create a visual break when it makes sense.

Milliken adds, "Bullet points are your friend. They create breaking points throughout your document and keep information easy to digest.”

Be mindful of length.

The length of your memo depends on the type you’re writing. Generally speaking, a memo is one or two paragraphs long. But the length can vary if you’re writing an informative memo versus a request memo.

If your audience is interested in learning, an informative memo can provide more detail, while a request memo should be brief and to the point.

“If you're unsure, go for a shorter 1-2 page document, but link it to another page or dashboard with further data, context, or information that they can dig into if they choose,” Bump suggests.

Don’t shy away from AI.

Jessica Shee, tech editor & marketing manager at M3datarecovery.com says, “Memo writing can be streamlined by using AI tools like ChatGPT to help with content development, particularly for sections that are routine or involve a lot of data.”

Shee continues, “I would use it to jot down basic concepts, clarify important details, and make sure formal language is understood. AI is also useful for recommending structural changes, enhancing grammar, and proofreading.”

And I agree. AI is a great memo writing tool for time-consuming sections or simple tasks like proofreading and editing. I wouldn’t use it to write an entire memo, and Vaibhav Kamble, CEO at CloudOptimo echoes that sentiment:

“While AI can significantly enhance the efficiency and quality of memo writing, it's important to remember that human judgment is crucial for adding personal insights and ensuring the memo aligns with organizational goals and values,” Kamble says.

“The combination of AI assistance and human oversight leads to more polished and effective communications.”

Memo Examples

Different industries or situations will require slightly different memos. My memos are going to look a lot different than the memos coming out of a law office, for example.

Pro tip: Certain memos will need to be longer or shorter, others may not have a timeline, and some will have extensive background info. You should always change the format of your memo to fit the message you want your employees to receive.

I pulled together three examples of what that might look like.

Launch Delay Memo

memo examples, launch delay memo

The objective of this memo is to announce that the launch of a product will be delayed. The introduction includes the new date, so a timeline or long overview isn’t necessary.

This format of this memo could be applied to other situations where a simple, but important, change is occurring.

What I like: The launch memo provides readers with insight into product launch delays, which can alleviate some frustration that customers or employees may otherwise feel if they were not informed.

Other date changes, promotions, milestones, or product announcements could also utilize this format.

Building Update Memo

memo examples, building update memo

There are logistical aspects of a business that concern your employees but don’t necessarily involve their work. This memo depicts an example of a kitchen remodel in the office. It’s a bit of an inconvenience but not one of a large magnitude.

What I like: This memo demonstrates a business's understanding of the impact that renovations can have on employees and shows respect and consideration for their needs.

This memo format could be applied to other building updates, work-from-home days, or other widespread but minor announcements.

Community Memo

memo examples, community memo

Celebrations, events, theme days, or other fun things for your employees can also be communicated through memos.

Community memos like this example are generally shorter because they don’t require much background information or many details.

What I like: This memo has clear directions on where to find the event taking place, something which would’ve been less effective if it only included the floor number.

Memos of this nature should include a summary, date, and location at a minimum.

Business Memo Template

If you’re writing a business memo, take it from me — HubSpot's free business memo templates are a fantastic way to help you streamline your work.

The document gives you a framework that sorts your memorandum into subtopics to help employees better digest the information and understand what's expected of them after reading it.

how to write a memo with HubSpot's free business memo templates

Download This Template

And here’s another business memo template I use for times when I want to provide a quick write-up — via email, for example.

MEMORANDUM

TO:

FROM:

DATE:

SUBJECT:

I'm writing to inform you that [reason for writing the memo].

As our company continues to grow … [evidence or reason to support your opening paragraph].

Please let me know if you have any questions. In the meantime, I'd appreciate your cooperation as [official business information] takes place.

Let’s walk through the business memo format in more detail.

Business Memo Template Format

The standard business memo template format is designed to effectively communicate your message. A memo should disseminate the necessary information in a way that is easy for a mass number of employees to digest.

An accurate subject line will alert them that this memo is relevant to them specifically. And beginning with an executive summary allows recipients to understand the general message before they dive deeper into the details.

The background information offers context to the message, and the overview and timeline should answer questions that are likely to come up.

Header

In your header, you‘ll want to clearly label your content “Memorandum” so your readers know exactly what they’re receiving. As previously mentioned, you‘ll want to include “TO”, “FROM”, “DATE”, and “SUBJECT.”

This information is relevant for providing content, like who you’re addressing and why.

Paragraph One

In the first paragraph, you‘ll want to quickly and clearly state the purpose of your memo. You might begin your sentence with the phrase, “I’m writing to inform you … “ or ”I'm writing to request ... ”

A memo is meant to be short, clear, and to the point. You'll want to deliver your most critical information upfront and then use subsequent paragraphs as opportunities to dive into more detail.

Paragraph Two

In the second paragraph, you‘ll want to provide context or supporting evidence. For instance, let’s say your memo informs the company of an internal reorganization.

If this is the case, paragraph two should say something like, “As our company continues to grow, we've decided it makes more sense to separate our video production team from our content team.

This way, those teams can focus more on their individual goals.”

Paragraph Three

In the third paragraph, you‘ll want to include your specific request of each employee — if you’re planning a team outing, this is the space you'd include, “Please RSVP with dietary restrictions,” or “Please email me with questions.”

On the contrary, if you‘re informing staff of upcoming construction to the building, you might say, “I’d appreciate your cooperation during this time.”

Even if you don‘t expect any specific action from employees, it’s helpful to include how you hope they’ll handle the news and whether you expect them to do something in response to the memo.

Boom. I think I’ve hit all the memo-related points, so I’ll take us home.

Write your memos to the point.

I’d argue the main difference between a memo and just an email is not the level of complexity. It’s the size of the audience.

A memo can be simple or intricate as long as it effectively communicates your message and is relevant to the receiving group of employees. And, the message itself should be clear and concise, no matter which memo format you use.

Editor's note: This post was originally published in October 2018 and has been updated for comprehensiveness.

Running a Website Audit? I Talked to SEO Pros to Help You Make the Most of It

Featured Imgs 23

As a content marketer, a website audit is vital to my work.

An analogy I like to use is that optimizing an existing website for search engines without conducting a thorough audit is akin to steering a boat without a rudder.

It’s directionless, at the mercy of the wind and waves (or in this case, algorithm changes).

How strong is your website? Grade it using HubSpot's free Website Grader.

In this post, I’ll cover what a website audit is, the different types of audits, how to conduct an audit, and ways to use information from an audit to improve your SEO and conversions.

I’ve also spoken with some SEO consultants and specialists who’ve shared actionable tips, which you’ll find interspersed in the article.

Table of Contents

Before I dive into the things you should keep an eye out for, let me go through some of the different types of audits you can perform.

Types of Website Audits

Here are a few common audits among marketers.

1. Competitive Website Audit

A competitive website audit tracks your competitors and their online strategies to help you see what opportunities your brand could be missing out on.

Essentially, a competitive audit allows you to see what’s working for other companies in your market so that you can incorporate those tactics into your own strategy.

Start by performing a SWOT analysis on a competitor’s website. In a SWOT analysis, you track the website’s strengths, weaknesses, opportunities, and threats.

For example:

  • A strength could be that their website is easier to navigate than yours.
  • One weakness could be that their website has slower page loading times.
  • Opportunities could be items or tools missing from their website that you can add to yours to give you an edge.
  • A threat could be that their website ranks higher in search engine results pages (SERPs) than your own, resulting in your site losing leads.

During this audit, also consider the tools and software they are using to streamline their processes. This can help you discover new ways to run your site more efficiently and make it more accessible for consumers.

2. SEO Link Audit

This type of audit processes the links pointing to your website to find potential issues or opportunities in your backlink profile. By evaluating your links, this audit will help optimize your site to rank for your target keywords.

Link audits consider the URL source, domain, and anchor text to see if value and equity (called “link juice”) are being passed on to your page. This will gauge how much a link is helping or hurting your website's visibility in SERPs.

Links from well-respected websites are much more valuable than links from smaller, less well-known sites.

To perform an SEO link audit, start by gathering all of your link data. You can do this with Google Search Console by entering your domain and then clicking on “Links to Your Site” under “Search Traffic.”

From there, you can download the latest links and create a link audit spreadsheet. Afterward, you manually evaluate your links by paying attention to factors like anchor text, IP address, and page content.

You can also use tools like Ahref's backlink checker to take the guesswork out of analyzing the value of the links you gathered.

3. Lead Conversion Optimization Audit

A lead conversion optimization audit analyzes a website’s conversion issues and opportunities. In this audit, you’ll need to analyze how traffic is coming to your website and where it’s coming from.

Google Analytics is an excellent tool for this step. Knowing where your traffic is coming from will help you better understand your audience’s behavior and will help you optimize your site’s content to suit their needs.

Speaking of content, you’ll also need to analyze the content on your website. Make sure the content is helpful, informative, and up-to-date.

Is the latest information about your business uploaded to the site and easily visible? Does your content contain keywords and phrases to boost its ranking in SERPs?

Outdated or irrelevant content can hurt conversions and hurt your SERPs ranking.

Other aspects of your website you need to observe are:

  • Forms. Do your forms collect enough information to contact a lead?
  • Checkout process. If you notice a lot of shopping cart abandonment, customers are likely having issues with the checkout process on your website.
  • Design and layout. Are CTAs clear and visible? Is the copy too small and difficult to read? Is the website easy to navigate?
  • Overall user experience. Are there any sources of frustration for visitors to your site?

Pro tip: Veruska Anconitano, an international expansion consultant, recommends the following: “Use behavior flow reports in Google Analytics to find drop-off points. To identify this, look at where users exit most frequently in the flow or where they loop back to a previous page.

Once you’ve found these areas, adjust your CTAs, page design, or content to reduce friction. For example, if users often drop off from a product page, consider simplifying the checkout process or adding more trust signals like reviews or guarantees to keep them engaged.

This approach tackles both SEO and conversion by refining the user experience at critical stages.”

4. Social Media Audit

Your brand’s online performance can also be impacted by social media. If your social media presence isn’t pushing more traffic to your website, then it’s time to conduct a social media audit.

To start the audit, create a list of all your company’s social media accounts. Do some extra digging to make sure you don’t miss any you’re not aware of, such as accounts started by other departments.

From there, go through each account to determine if they’re all consistent with the company’s branding — using the same images, logo, tone of voice, etc.

Then, you’ll need to evaluate each page’s performance. What kind of content performs the highest, and which content type performs the lowest? Are these pages being updated frequently?

Finally, use information from the evaluation to better understand your audience and optimize your social media to engage them. You’ll then be able to update your social media strategy to further delight your audience, more effectively attracting them to your website.

5. SEO Website Audit

While an SEO link audit analyzes the links associated with your website, an SEO website audit evaluates all the factors that can impact your site's performance in SERPs. This includes links but also extends to other aspects such as keyword usage, content, metadata, page speed, user journey, and video optimization.

It‘s possible to conduct an SEO audit on your own, but you’ll likely get more thorough answers in less time by employing an agency.

To perform one by yourself, I would start by understanding the purpose of the audit. Next, crawl and analyze your website using software. Here are some tools to choose from when conducting an SEO site audit (you can mix and match based on your needs):

Next, assess:

Pro tip: If this is your first site audit, I recommend you start with a free tool (or a free trial of a paid tool) along with Google Search Console to get your feet wet and keep expenses low.

6. Data Privacy Audit

A data privacy audit verifies that you’re following applicable data privacy laws and ensures you’re creating a safe space for website visitors. Search engines look for privacy-related pages when determining whether a website is high-authority.

For example, Google’s primary goal is to serve the best and most trustworthy content to users from reputable sources. Sites that comply with data privacy requirements will most likely be viewed as more authoritative than those that don’t have these essential legal policies.

To conduct a data privacy audit, determine what personal information your site collects from visitors, identify the laws you must follow, list all cookies your site uses, and create and publish website policies to meet legal requirements.

Most websites need a:

  • Privacy Policy
  • Cookie Policy
  • Consent Banner
  • Terms and Conditions Agreement

While you can create these on your own, it’s much easier and more efficient to use managed solutions, like a privacy policy generator.

To take the guesswork and hassles out of privacy compliance, use a reputable generator vetted by a legal team and data privacy experts.

It should also include clauses that meet compliance requirements outlined by the most common data privacy laws.

Now that I’ve covered a few different audits you can conduct to improve your website, let’s discuss the perks of an audit.

1. You can compare your website to your competitors.

Conducting a website audit will allow you to compare your website to your competitors. You can analyze how well you’re ranking against competitors for keywords and determine potential new sources of revenue.

You can use tools, like HubSpot's Website Grader, to perform an audit on your competitor’s websites to gather more insights. You can learn how your competitors are attracting visitors and see how they’re garnering conversions.

Ultimately, this will help you brainstorm new tactics and strategies for your site.

hubspot website grader results menu

Image Source

2. You can improve your SEO.

With a website audit, you will be able to identify any missed SEO opportunities and remedy any misguided or poorly executed SEO pitfalls (e.g., keyword stuffing, exact match anchor text links, etc.) throughout the content of your website.

An audit will also allow you to refocus your SEO efforts on users first and search engines second. This will safeguard you from constantly chasing changes to search ranking algorithms, meaning you won't be applying misguided practices just to show up at the top of the SERPs.

Pro tip: One great tool that can help keep your SEO details organized is HubSpot’s free On-Page SEO Template.

hubspot seo template offer instructions

Image Source

3. You'll optimize conversion rates.

Website audits also enable you to re-evaluate the effectiveness of your website in terms of lead generation and conversion.

As a result, you’ll be able to spot any previously overlooked opportunities to convert visitors into leads by adding relevant CTAs, as well as identify deficiencies in your landing pages so you can optimize them to boost conversions.

Pro tip: Learn more about CTA selection to optimize the CTAs on your website.

4. You can optimize your website performance.

Website audits usually evaluate a site for its content and technical performance.

As a result, an audit will give you a chance to inspect the robustness of your website’s technical framework and infrastructure.

It will also evaluate how friendly your website is to search engines and determine how easy it is for users to navigate your website to find the content they are looking for.

5. You can identify issues early.

Finally, a website audit finds issues that are hurting your SEO and conversions such as broken links, hidden content, and long page load speed times. Identifying these issues will help you address problems that are diverting traffic.

Assessing both the content and technical aspects of your website will open up opportunities to drastically improve the traffic and conversions your website generates.

Now that I’ve gone over what a website audit is and why you should do one, let's look at how to conduct one.

1. Run the website URL through a site audit tool.

I’d start with a website auditing tool to help analyze how my site is performing. This can help test various important facets of a site and then provide specific recommendations.

2. Find technical errors.

Technical errors like ones related to performance, SEO, mobile, and security, can negatively impact a customers‘ experience on your website. If I notice visitors aren’t staying on a site for long, or I see a lot of abandoned shopping carts — a website audit is a great way to find out why.

3. Analyze design and UX.

How is the website design working for visitors and customers? Some software have heatmaps showing what parts of a site design draw the most attention. This type of analysis helps communicate how the overall design and user experience impact visitors.

Pro tip: Raquel González, SEO consultant and CEO/Founder at MintyConnect, recommends doing some hands-on work too: “While auditing tools are valuable, they may overlook critical UX elements. Complement their analysis by personally navigating the entire website. This hands-on approach reveals non-functional elements and user journey issues that automated tools might miss, ensuring a more thorough site evaluation.”

4. Assess website content.

An audit also helps me evaluate website content such as blogs, landing pages, product/service pages, among others.

During an audit, I’d want to know how the current pages are stacking up, identify areas of improvement, and ensure that the content targets readers at every stage of the buyer’s journey.

Going deeper, I’d also look at meta descriptions and review image alt text. Additionally, I’d ask: “Is my content ranking well in search engines?” and “Is my on-page SEO and performance aligned with my traffic numbers?”

5. Create a website audit report.

Creating a website audit report that clearly communicates the site issues found (and what to do about them) is an easy job when you have the right tools.

There are a number of choices available, and HubSpot’s Website Grader is one of the most user-friendly. It quickly and automatically generates a report after entering the web address you want to have crawled along with an email address.

For those with more technical experience, Semrsh’s Site Audit Tool is a very thorough reporting option, but getting started for free does require jumping through a few hoops.

You would need to create an account, answer some questions about yourself, and choose to skip a trial in order to create the free audit report.

Their in-depth report can look overwhelming unless you’re coming to the game with some technical chops.

Whichever reporting product you choose, it should provide a clear display of important website categories — such as SEO performance and the effectiveness of your security measures — and then list the individual issues along with recommended fixes.

Having a full website audit report in your hands enables you to start making improvements yourself or to efficiently send the information to the appropriate teams within your organization.

Pro tip: Preeti Gupta, B2B SaaS SEO consultant and founder of Packted, shares the following advice: “When presenting an audit report, I find it important to prioritize the recommendations based on the input you collected. I do this as simply as assigning priority to each task based on the resources it will take, the impact it will have, and more.”

Assessments to Make When Auditing Your Website

First, go ahead and enter your website into HubSpot's Website Grader — this will give you a general overview of your website's strengths so you can gauge your focus on each of the assessments that follow in this article.

HubSpot’s website grader, SEO audit

Check out HubSpot's Website Grader

How'd you do? Got an idea of which website audit benefits you need the most? Here we go!

1. Website Performance Assessment

In the first part of your website audit, I’d focus on how users navigate your website — from your homepage to blog posts, to landing pages, and any related content in between.

Make a list of the pages on your website and ask yourself the following questions to evaluate them for optimization opportunities:

Is your website optimized for maximum usability?

The more visitors you can attract to your website, the more opportunities you'll have to generate leads and, ultimately, customers. But only if your website performs well.

Just having a website does not guarantee results. As part of determining the overall efficiency of your website, your audit should check to make sure your site is designed with your visitors in mind.

The design and overall navigability of your website should correspond with what a person would come to the site to seek out, such as more information on a business-related topic, resources, product/pricing information, testimonials, etc. This will largely depend on your individual business.

The main goal here is to make it easy for people to get the information they‘re looking for. As a result, you’ll likely see conversion rates improve on their own.

To audit your website for usability, consider the following questions:

  • Are all the main value propositions of our business easily accessible via our main navigations/menu items?
  • Do we have a simple yet intuitive website design and page layout? Make sure pages aren't too cluttered; littered with ads, CTAs, or links; or void of internal links altogether.
  • Are your conversion paths and/or shopping cart or checkout processes intuitive? Are there a ton of distractions along the way that could be creating friction for your site visitors?

Consider doing some user testing with members of your target audience to ensure you‘re effectively surfacing the content they’re looking for and that they find it easy to navigate to the parts of your website they're interested in.

How is your website's overall speed?

Are there excessive page sizes or long page load and server response times? Does your site go down frequently? Site speed can be impacted when image files are too large or HTML and CSS needs to be cleaned up.

Ultimately, fast-loading and optimized pages will lead to higher visitor engagement, retention, and conversions. To quickly check a web page's load time, download MozBar, a toolbar by Moz that you can attach to your browser for simple page analysis every time you visit a website.

2. SEO Assessment

Optimizing the performance of your website is crucial to holding onto visitors, but the above questions aren't the only ones I’d be asking.

It’s also crucial to audit the content you‘re publishing to ensure it’s actually solving your visitors' problems.

Is your website content high quality?

As you evaluate your content for quality, think about it from your target audience’s perspective:

  • Did this information leave me satisfied?
  • Did it answer all of my questions?
  • Does it give me all the resources relevant to this topic?
  • Do I know what to do next?

Keep in mind quality content should appeal to the interests, needs, and problems of your buyer personas. Present them with interesting and well-written content. Always aim to leave the reader with immediately actionable next steps such as calls-to-action or links to resources.

Is your website search engine optimized?

Make sure all your web pages are following on-page SEO best practices. To audit your content for on-page SEO, conduct a keyword analysis in which you do the following:

  • Consult your analytics to review keyword performance. Which keywords are giving you the biggest gains in traffic and leads?
  • Assess how well you're factoring keyword performance into your content strategy. How much relevant content are you adding to your website to target those keywords?
  • Review basic on-page SEO elements like URLs, page titles, meta descriptions, and copy. Make sure keywords are included where relevant.

Pro tip: To help you conduct an on-page SEO audit of your content, check out this blog. You can also download our free On-Page SEO template.

3. Conversion Rate Assessment

While high-quality, search-engine-optimized content is a great way to boost your traffic numbers, it's what happens once those visitors are on your website that really counts.

This is where optimized calls-to-action (CTAs), marketing offers, and landing pages play a major role in the performance of your website.

Not only do they offer you opportunities to capture visitors' information so you can follow up with leads, but they also keep your visitors engaged with your content and your brand.

To audit your website for maximum conversion potential, I’d ask the following questions:

  • How many marketing offers do I have in my content arsenal to gate behind landing pages?
  • Do I have a variety of marketing offers that appeal to all my different buyer personas?
  • Do I have any landing pages/conversion forms on my website to begin with?
  • How optimized are those landing pages?
  • Do I have conversion opportunities for visitors in varying stages of the funnel?
  • Am I using CTAs effectively? Am I missing opportunities to include CTAs on various pages of my website?

Pro tip: Erica Ylimäki, growth marketer at Trustmary, recommends the following: “Check for bulk optimization options for conversions … Some examples include aiming for a simpler conversion (such as getting visitors to sign up to a newsletter instead of getting them to register to your software) or trying out a new CTA placement (exit intent popups, above the fold, below the fold). In our case, adding a hero CTA to blog posts has been especially effective.”

4. Technical Assessment

Once you‘ve addressed the three primary goals of a website audit, it’s time to loop in a developer or someone from your IT department for a technical evaluation. You could also hire an outside agency — just be sure to do your homework first.

Keep in mind that there may be some carry-over from the three assessments above — website performance, SEO, and conversion rate. The technical evaluation, however, addresses all three to maximize the user experience (UX).

Here's what I’d be looking for in the technical assessment stage of your website audit.

Is your website design responsive?

Does your website have a responsive design? Meaning, is it a mobile-friendly website?

Smartphone usage worldwide has grown exponentially, and it’s important for websites to be compatible with the rising demand.

Is your website error message free?

Are response code errors popping up all over your website where there shouldn't be any? Calling out 302-, 404-, and 500-level response codes can be useful to tell users that something's wrong.

However, having this happen is also an indication that someone isn't cleaning up broken links and, as a result, leading users to dead ends. Find those error messages and clean up your broken links.

Are your website URLs optimized?

Does your site have URLs of excessive length due to keyword stuffing? Do they contain session IDs and/or include tons of dynamic parameters? In some cases, these URLs are difficult for search engines to index, resulting in lower clickthrough rates from search results.

Does your website have too much Flash or JavaScript?

Identify areas of your navigation that are entirely Flash or JavaScript. Search engines have challenges with reading and accessing these, which could prevent your site from getting indexed.

These elements also present problems from a usability perspective. Visitors are often looking for a very specific piece of information when visiting your site. If they have to sit through a 10-second visual introduction before they can find your hours of operation, you’re going to have a pretty frustrated visitor on your hands.

Is your site structure optimized for search engines?

We already talked about site structure as it relates to accessing content and usability for users, but it's also important to make sure your site structure is optimal for search engines. If pages on your site are not internally linked to other pages on your site, those pages are less likely to be indexed.

Are you defining how your web pages are crawled and indexed by search engines?

This can be done through various methods that include everything from robots.txt files to sitemaps. These tools help you guide search engines toward your website’s most useful content.

Robots Meta Tags or robots.txt Files

The robots meta tag lets you use a granular, page-specific approach to controlling how an individual page should be indexed and served to users in search results. These tags should sit in the <head> section of a given page.

The robots.txt file, on the other hand, is a text file that allows you to specify how you would like your site to be crawled. Before crawling a website, search engine crawlers will generally request the robots.txt file from a server.

Within the robots.txt file, you can include sections for specific (or all) crawlers with instructions (“directives”) that let them know which parts should or should not be crawled.

Public and XML Sitemaps

Your website should also have public and XML sitemap files. The public sitemap is one that users can access to review the pages of your site, like the index of a book.

The XML sitemap is for search engines to review pages that get added to your site, all in one place. The usual location of a sitemap.xml file is www.domainname.com/sitemap.xml.

The XML sitemap is something every website should have. It offers an opportunity to tell Google and the other search engines which pages on your site you want to be crawled and indexed.

While search engines don’t guarantee they will abide by your sitemap, anecdotal evidence has proven time and time again that XML sitemaps help provide insurance that your pages are found, and found faster — especially if your sitemap(s) dynamically update your new web pages.

Are you defining the canonicalization of content?

The canonicalization of your website content is your final major technical consideration. To gain more control over how your URLs appear in search results — and to minimize issues related to duplicate content — you need to pick a canonical (preferred) URL as the preferred version of the page.

You can indicate your preference to Google in a number of ways. One such way is to insert the canonical tag (rel=“canonical”) in an HTTP header of a page.

Be sure to have someone check that the canonical tag is properly implemented across the site by making sure it points to the correct page, and that every page doesn't point to the homepage.

Website Auditing Checklist

Before getting started, I’d use this basic website auditing checklist to review certain necessary elements of a site’s performance.

website audit checklist, SEO audit

Website Audit Example

To pull all this together, I decided to run a website audit on one of my favorite bloggers, Christina Galbato.

Take a look at the image below. This website is performing well. SEO and mobile are scoring very high. The main areas for improvement for this site would be performance and security.

website audit report score after running blog through hubspot’s webstie grader

But, “What does this mean?” Well, let me dive in a little deeper. In each section, the website grader lets me know what I’m (or in this case Christina) is doing well and what could be improved upon.

Then, the grader gives recommendations to improve the site overall.

website audit report, SEO audit website grader site recommendations

Next, there’s a table that helps compare the current site to the recommendations.

website audit report recommendations in table form

Wrapping up the Website Audit

At the beginning of the auditing process, I asked the important questions: “How am I doing?” and “How does my website compare to those of my competitors?”

Now, as I complete the audit, I’ll know the answers to those questions — and I’ll have actionable steps to improve my website, thus making it more competitive.

Editor's note: This post was originally published in April 2018 and has been updated for comprehensiveness.

40 Best Buyer Persona Questions I’d Ask During Customer Interviews

Featured Imgs 23

Good marketing is always about the customers, period. That’s the most important lesson I’ve learned from all my wins and losses as a marketer.

To launch successful marketing campaigns, you must know every detail about your audience — their goals, aspirations, pain points, and more. And building buyer personas is a good place to start.

Download Our Free Buyer Persona Guide + Templates 

I brainstormed with the team and curated 40 buyer persona interview questions to survey your audience and create accurate personas.

Once you have the data, use our free buyer persona template to share your findings with the rest of your company.

Table of Contents

Why conduct buyer persona interviews?

A buyer persona (or user persona) is a fictionalized representation of your target customer. It essentially gives you an overview of your buyers’ preferences, pain points, motivations, and more.

But even though buyer personas are fictional, you need real-life data to base each persona on. It has to represent your actual customers’ needs and aspirations accurately. That’s where buyer persona interviews and surveys will help you collect data to design these personas.

I use buyer persona surveys and questionnaires to gauge my audience's needs.

My ideal starting point is choosing a sample group from my customer base. I’ll then share the survey with these participants to comprehensively understand their goals, challenges, jobs to be done, and more.

If you lack the resources to conduct a survey, I recommend using a market research platform like Qualtrics to conduct panels and interviews with your chosen participants.

Once you’ve decided whom you’re going to survey, you can pick specific questions to collect data related to:

  • Demographics such as their age, education, occupation, and income.
  • Psychographics such as their habits, beliefs, behaviors, and preferences (like shopping preferences).

This information can benefit businesses and brands looking to convert leads, personalize the customer experience, and improve their bottom line.

Here’s a buyer persona example to show how it works. I created this using HubSpot’s free Make My Persona tool.

buyer persona example

3 Key Benefits of User Persona Surveys & Interviews

Buyer personas eliminate guesswork from your marketing strategy. These personas tell you the exact problems and aspirations of your target audience.

As a result, you can make data-driven decisions and launch campaigns tailored to your customers’ preferences. I rely heavily on buyer persona surveys to get a pulse of my audience and design accurate personas.

Here are some benefits I’ve experienced from asking the right persona questions.

1. I captured more high-quality leads.

Knowing your customers’ typical challenges and needs helps create campaigns that truly appeal to them. By discovering your target audience’s habits and challenges through persona interviews, you can accurately tailor your sales and marketing campaigns to the users most likely to buy from you.

2. I personalized the customer experience.

Personalizing the customer experience is one of the best ways to stay top-of-mind for potential customers and win their business.

Customers will be more likely to buy from you if they feel like you’re speaking directly to them. You can know them better through persona interviews and recognize their concerns. As a result, it becomes easier to create personalized messaging and connect with them at a deeper level.

3. I improved my bottom line.

Buyer personas can significantly improve your bottom line by maximizing lead generation and driving conversions. These personas will also inform your strategy to deliver a positive and targeted customer experience.

The result? Higher customer retention and brand loyalty.

Pro tip: Build a laser-focused content marketing strategy to generate top-of-funnel interest in your brand. Check out the free content marketing training resources in the HubSpot Academy to build your content strategy today.

Download our free buyer persona template here to learn how to create buyer personas for your business.

HubSpot's free buyer persona templates

Download Now

Questions About Their Personal Background

Knowing your buyers’ backgrounds gives you crucial insights into their interests, upbringing, communication style, and other preferences.

In my experience, understanding personal background gives you some much-needed cultural context to positively influence your target buyers.

This is your opportunity to ask buyer persona interview questions related to their education and work experiences, demographics, and personal interests.

Here are some questions I include about buyers’ personal interests:

  1. What is your educational background?
  2. Share how your career path led you to your current role.
  3. Where are you located? How does that influence your work?
  4. What is your preferred style of communication?

persona interview question

Questions About Their Company

I always collect information about the company where my target buyers work.

This can include data about the company size, business goals, and challenges faced. This data gives me specific insights to tailor my communication for each buyer based on their work environment.

Besides, when you know the necessary details about your persona's company, like the number of employees, you can quickly outline the fields for your landing page forms.

Here are some questions I include about the buyers’ company:

  1. What industry does your company operate in?
  2. How big is your company in terms of revenue and number of employees?
  3. What are the primary goals your company is trying to achieve this year?
  4. What are the major challenges your company faces in the current market?

persona interview question

Questions About Their Role

The importance of your buyer persona‘s job depends on the product or service you’re selling.

If you‘re a B2C company, you may simply consider this information as another way to better understand the nuances of your persona’s life.

If you're a B2B company, this information becomes more crucial. Think about the many moving parts for a B2B buyer — are your personas working at a managerial or director level, and are they well-versed in the intricacies of this industry?

Experienced buyers will need less education than someone at an introductory level, who may need to loop in other decision-makers before making purchasing decisions.

Here are some questions I include about buyers’ roles:

  1. What is your job title, and how long have you been in this position?
  2. What are your primary responsibilities?
  3. What does a typical day look like in this role?
  4. What knowledge and tools do you use in your job?
  5. What are the biggest challenges you face in your day-to-day work?

persona interview question

Pro tip: Try to make these persona interview questions as close-ended as possible. This will bring more objectivity in your buyer personas, and you can quote specific data points about each persona’s role.

Questions About Buyer Goals

Identifying buyers’ goals and motivations is important to define specific outcomes for your messaging. I use this data to identify the key benefits to emphasize for each type of buyer.

You should know what success looks like for your buyers. Understanding their notions of success will help you position your product/service as a more relevant offering. Besides, knowing how buyers measure success will help you demonstrate the specific value they’re looking for.

Here are some questions I include about buyers’ goals:

  1. What are your main objectives when considering a product or service like ours?
  2. How does your team or company define success for purchases like this?
  3. What would make you a champion for the product internally?
  4. Are there specific KPIs you need to meet with this purchase?
  5. How do you measure success in your role specifically?

persona interview question

Questions About How Buyers Learn

If you're going to market and sell to these personas, you need to understand how they consume information.

I typically start by collecting information about their required upskilling at work. You can also explore their preferred learning formats, like detailed reports, blog posts, short videos, and podcasts. Ask relevant questions to identify their trusted learning sources, whether it’s industry experts or research platforms.

Your goal should be to understand their learning style entirely. Here are some questions I include about buyers’ buying journey:

  1. What type of content or resources do you prefer to learn more about a concept?
  2. Where do you typically find information to help you make buying decisions?
  3. What publications and thought leaders do you follow for industry insights?
  4. Do you attend any industry events or conferences for learning?
  5. Which communities and social networks do you participate in?

persona interview question

Pro tip: I recommend doing independent research to learn how your target buyers learn before framing these questions. You can identify and explore the most popular resources and communities for your buyers. This way, you can skip the obvious questions and focus on collecting more meaningful information.

Questions About Their Shopping Preferences

You should understand your buyers' evaluation process when making a purchase.

Before buying a product, you need to get a behind-the-scenes look at their analysis. Ask about the avenues they use to find information, such as online searches, review websites, network recommendations, and more.

If you can anticipate the objections your persona will have, you can be prepared for them in the sales process. You will also be able to educate them in your marketing collateral to help allay fears right away.

Here are some questions I include about buyers’ shopping preferences:

  1. Describe a recent purchase from start to finish.
  2. How do you typically find, research, and evaluate vendors or products?
  3. What factors are most important when making a purchase decision?
  4. How do you prefer to interact with potential vendors?
  5. What makes you trust a brand enough to purchase from them?

persona interview question

Questions About Values

Your buyers’ values are central to purchasing decisions. You can stand out among sellers by showcasing your commitment to the core values your buyers believe in. I’ve observed how this value alignment can also win buyers’ trust in the long term and build loyalty.

Here are some questions I include about buyers’ values:

  1. What values or ethics guide your buying decisions?
  2. What would make you loyal to a brand over time?
  3. How important is it that a company aligns with your values?
  4. Are there social or environmental issues that you prioritize when choosing products?

persona interview question

Questions About Pains and Challenges

Buyers’ pain points are a critical part of your personas. When you know their problems and challenges, you can offer specific solutions that resonate with them. It makes your pitch unique and shows you’ve done your homework.

Plus, it’s good to understand the solutions they’ve tried in the past, but they didn’t work. You can empathize with them and present your offering as a better alternative to eliminate all frustrations.

Here are some questions I include about buyers’ pain points:

  1. What are the biggest challenges or pain points you face in your role?
  2. How are these challenges affecting your ability to meet your goals?
  3. Have you tried solutions in the past that didn’t work? What were they lacking?
  4. What would solving these challenges mean for your business or role?

persona interview question

Questions About Their Environment

A buyer’s environment typically involves their work setup and the industry they operate in.

Knowing these details makes it easier to identify their priorities and fit your offering in their preferred context. For example, remote workers will focus on greater collaboration, while in-person employees may need better equipment.

I always include some of these persona interview questions to understand market trends and shifts in my buyers’ space.

Here are some questions I include about buyers’ environments:

  1. How does your work environment impact your buying decisions?
  2. How does your company adapt to shifts in the market or industry?
  3. Are there any market trends or external factors influencing your company’s strategy?
  4. What tools or technology do you currently use? Are there any limitations impacting your performance?

persona interview question

Pick the right buyer persona interview questions.

Building buyer personas can help you create a customer-first marketing strategy and tailor your messaging to their goals and aspirations. I use buyer personas to prepare the groundwork for every campaign I launch.

After creating dozens of buyer persona surveys and interviews, I’ve handpicked these buyer persona interview questions. Use these to survey a small sample of your target audience and collect crucial data to define your buyer personas.

Editor's note: This post was originally published in October 2015 and has been updated for comprehensiveness.

20+ Best Calligraphy Brushes for Procreate, Photoshop & More

Featured Imgs 23

Today, we bring you a unique collection of calligraphy brushes for Procreate and Photoshop that are ideal for everything from wedding invitations and branding to social media graphics.

Whether you’re a professional calligrapher, a designer, or someone who simply loves creating beautiful lettering, these brushes offer the perfect blend of traditional calligraphy charm and modern digital convenience.

With the right brush, you can easily craft stunning hand-lettered artwork, logos, invitations, and more, all from your iPad or computer.

This collection features a variety of calligraphy brushes designed to mimic real brushstrokes, ink, and pen textures, giving you the freedom to explore different styles—from classic script to modern lettering.

Each brush set is tailored for a seamless digital experience, allowing for precise control and smooth flow that feels just like working with traditional tools. Have a look.

Procreate Calligraphy Brushes

Twentyletter – Procreate Calligraphy Brushes

Twentyletter - Procreate Calligraphy Brushes

This Procreate calligraphy brush pack offers a range of 20 smooth, easy-to-use brushes ideal for crafting calligraphy lettering for logos, illustrations, and more. Convenient for users of all skill levels, these brushes can be seamlessly imported into your Procreate brushes panel via Files App, transforming your iPad into a versatile digital art studio.

Procreate Monoline Calligraphy Brushes

Procreate Monoline Calligraphy Brushes

This is a set of over 15 brushes specially crafted for the Procreate app. They offer a wide range of colors and neat effects like neon and rainbow in each stroke, making it the perfect tool for design, lettering, digital art, logo creation, and social media. These user-friendly brushes are compatible with Procreate 5X and earlier versions.

40+ Procreate Calligraphy & Lettering Brushes

40+ Procreate Calligraphy & Lettering Brushes

This Procreate calligraphy brush pack provides a diverse variety of styles and textures for use in the iOS app, including lettering, calligraphy, ribbon, shawl, Japanese, modern, monoline, signature, spray, fire, and shadow brushes. It is important to note that these brushes are not compatible with Photoshop or other applications.

Firstype – Procreate Lettering Brushes

Firstype - Procreate Lettering Brushes

Firstype Procreate calligraphy brush set is specifically designed for beginners using the iOS app, Procreate, and contains over 20 different types of brushes including Calligraphy, Watercolour, and Blackletter. They are great for expanding your skills in lettering, calligraphy, and typography design. The package also includes six guides for lettering.

10 Procreate Lettering & Calligraphy Brushes

10 Procreate Lettering & Calligraphy Brushes

Another versatile set of Procreate calligraphy brushes perfect for digital lettering artisans. From refined calligraphy to playful lettering, these Procreate brushes provide a broad spectrum of possibilities, allowing your creative expression to flow effortlessly.

Procreate Blackletter Calligraphy Brush

Procreate Blackletter Calligraphy Brush

This is a creative Procreate calligraphy brush set that has been carefully crafted for lettering artists seeking to merge the analog and digital realms.  The set comes with six uniquely designed brushes, enabling you to create vivid lettering designs, posters, flyers, and more with remarkable authenticity.

10 Lettering Brushes for Procreate

10 Lettering Brushes for Procreate

A useful Procreate brush pack for anyone interested in calligraphy. With ten distinct, smooth brushes, you can transform your iPad into a canvas for beautiful lettering. This means you get to enjoy the freedom and versatility of Procreate Brushes while achieving stunning lettering effects easily and efficiently.

Procreate Chalk Lettering Brushes

Procreate Chalk Lettering Brushes

This is a unique set of Procreate calligraphy brushes designed to replicate the distinct texture of chalk strokes. They offer a wide variety of chalk brushes including coarse chalk, wet chalk, dusty chalk, and chalk eraser. Ideal for lettering and blackboard-like illustrations, they’re perfect for creating educational content, cafe menus, decorations, or lettering artwork.

Procreate Blackletter Calligraphy Brush 2

Procreate Blackletter Calligraphy Brush 2

A fantastic Procreate calligraphy brush set for digital lettering enthusiasts. This versatile brush set enables users to effortlessly create analog-style artwork digitally using iPad Pro and Apple Pencil. Whether it’s calligraphic designs, posters, or flyers, these handmade, high-quality brushes offer a limitless scope for your creative expression.

Procreate Lettering Brushes

Procreate Lettering Brushes

This is a diverse set of brushes exclusively designed for Procreate. Their simplicity makes them a great choice for both beginners and professionals. Excellent for various tasks such as font creation, lettering, logo development, and even designing stationery, the pack includes textured, monoline, calligraphy, and signature brushes. Compatible with Procreate 5 and prior versions, they are ready for you to enjoy.

Dry Marker Brushes for Procreate

Dry Marker Brushes for Procreate

An exceptionally curated set of 15 high-quality, original brushes designed for diverse styles and effects. Ideal for crafting quotes, lettering, fonts, and graphics, these brushes also come with a bonus Procreate-specific calligraphy brush. The set, which requires an iPad Pro, Apple Pencil, and Procreate App to use, is designed solely for Procreate.

Photoshop Calligraphy Brushes

45 Calligraphy Photoshop Stamp Brushes

45 Calligraphy Photoshop Stamp Brushes

This calligraphy brush pack offers a unique touch to any digital project. They’re compatible with all versions of Photoshop and feature a high resolution of 2500 pixels. These versatile brushes are not simply tools, but creative assets that can bring a special charm to photos, print templates, and social media content.

Inktober – 44 Photoshop Brushes Pack

Inktober - 44 Photoshop Brushes Pack

The Inktober Photoshop brushes pack is an eclectic set of ink brushes designed for digital artists. Inside you’ll find a diverse range of brushes perfect for line art, calligraphy, painting, as well as specialized effects like spray, wet edge, and grunge. It imitates numerous painting styles, from pen drawings to Chinese art, and includes 15 bonus textures.

50 Calligraphy Photoshop Stamp Brushes

50 Calligraphy Photoshop Stamp Brushes

A versatile calligraphy brush pack perfect for a variety of projects. These high-resolution brushes (2500 pixels) can be used as clipart or decorative elements in print and web-based designs, as well as on posters and cards. Included is a selection of 50 unique brushes in .ABR format and 50 isolated .PNG images.

45 Underline Photoshop Stamp Brushes

45 Underline Photoshop Stamp Brushes

Enhance your projects with this underline Photoshop stamp brush pack, compatible with all versions of Photoshop from CS2 to CC. With a generous size of 2500 pixels, these high-resolution brushes can be a game changer in adding ornamental value to photos, print templates, and even social media content.

Illustrator Calligraphy Brushes

Illustrator Hand Lettering Brushes

Illustrator Hand Lettering Brushes

This Illustrator brush pack is perfect for those who find hand-drawn typography a tad challenging. These tools are excellent for both calligraphy and drawing. Each brush has a unique texture which mimics real-life brush strokes and can be adjusted in terms of color, thickness, and length. The set includes a whopping 74 brushes, each grouped and named for easy usage.

Japan ProBrush – Illustrator Brush Pack

Japan ProBrush - Illustrator Brush Pack

Japan ProBrush is an Illustrator brush pack ideal for creating Japanese-style calligraphy. This pack, compatible with Adobe Illustrator CS3 and above, features 39 high-quality digital, ink, and Asian calligraphy brushes. Included in the pack are 14 ProBrush Japan Brush, 14 ProBrush Japan Digital, and 11 ProBrush Watercolor REALISTIC brushes, providing professional designers, illustrators, and artists with versatility and precision in their digital creations.

Free Calligraphy Brushes

Free Valentine Calligraphy Photoshop Brushes

This is a collection of creative calligraphy-style stamp brushes you can use in Photoshop to craft romantic typography designs for Valentine’s Day greeting cards and various other designs. The brushes are free to download.

55 Free Calligraphy Photoshop Brushes

This free calligraphy brush pack for Photoshop includes 55 different brushes for crafting unique calligraphy lettering for your design projects. It’s free to use with commercial projects.

Free Unique Calligraphy Brushes for Photoshop

A collection of 15 unique calligraphy brushes for Photoshop. This bundle includes multiple styles of calligraphy designs to make your lettering designs look more authentic.

Free 26 Underline Tail PS Brushes

This is a collection of underline and tail brushes for Photoshop. You can use these to add a creative and decorative touch to your graphic designs. There are 26 different brushes included in this pack.

Free 20 Calligraphy Alphabet Set PS Brushes

This is a free calligraphy brush pack for Photoshop that includes the alphabet in calligraphy style. You can use this brush pack to craft beautiful calligraphy lettering without any prior experience in calligraphy art.

70+ Best Portrait Photoshop Actions & Effects

Featured Imgs 23

Retouching and enhancing portrait photos is a time-consuming task, and starting from scratch with every photo can be frustrating. Using a portrait Photoshop Action can save time, and give you a beautiful result with a few clicks. Let’s dive into some of the best portrait Photoshop Actions available today.

These Photoshop Actions help you save time and improve your workflow when editing a portrait photo. You can use them to instantly retouch photos, add makeup, enhance colors, add effects, adjust toning, and much more with just a single click.

Say hello to a faster, simpler workflow (and some impressive end results!). And if you’re looking for more advice and guidance on using these, our Photoshop Actions feature is a great place to start.

We’re also sharing our tips for editing portrait photos to help give you a head start.

Top Pick

Skin Retouching Photoshop Actions

Skin Retouching Photoshop Actions

Skin retouching is a complicated process. You can’t get that job done with just one Photoshop action. Which is why this pack comes bundled up with 34 retouching Photoshop actions.

It includes PS actions for everything from airbrushing to skin toning, enhancing lips, teeth whitening, and much more.

Why This Is A Top Pick

This complete bundle is a must-have for portrait photo editors as it’ll drastically improve your workflow of enhancing photos and all levels of skin retouching with simple, one-click Photoshop actions.

Shine Ring Light Effect Photo Overlays

Shine Ring Light Effect Photo Overlays

This is a distinct set of 15 high-resolution gold ring light overlays designed to add flawless shine and bokeh effects to your photos. Ideal for maternity portraits, holiday snaps, and more, these overlays are compatible with any software that supports layering, including Photoshop and Canva.

Ink Blur Paper Texture Photo Effect

Ink Blur Paper Texture Photo Effect

Ink Blur is a versatile Photoshop portrait effect perfect for graphic designers, photographers, and digital artists. It elevates your photos with a unique paper texture effect adding a unique aesthetic. This high-resolution layered PSD file, requiring nothing more than Photoshop CS6 or higher, allows for easy customization on its smart object layers.

Cartoon Halftone Portrait Photoshop Action

Cartoon Halftone Portrait Photoshop Action

A creative cartoon-style halftone portrait effect for Photoshop. It allows you to apply impressive effects to your photographs with just one click. Ideal for Photoshop CC and higher, it let’s you easily customize the effect to match different types of photos.

Grain Film Photo Effect PSD

Grain Film Photo Effect PSD

An innovative Photoshop template that transforms your portrait photos with a vivid and classic vintage look. This PSD template excellently incorporates grain film effects into your photos. It caters to diverse shots, be it fashion, lifestyle, blogging, or moody product images.

Light Leaks Effect for Portraits

Light Leaks Effect for Portraits

This is a versatile Photoshop effect meant to give images a distinctive look to your photos. It’s great for injecting energy and glamour into photos, with realistic-looking light leak effects. The template is especially effective on photos with a resolution of 1000px to 3000px and works beautifully on a variety of photo types, from fashion to blogging.

Old Memories Photo Effect PSD

Old Memories Photo Effect PSD

This is a versatile Photoshop template designed to give your photos a vintage effect. Ideal for shots ranging from 1000 px – 3000 px resolution, this effect can be easily customized as well. It’s perfect for giving your graphic designs and photos a classic and old-school look and feel.

Prism Focus Photo Effect for Photoshop

Prism Focus Photo Effect for Photoshop

The prism focus PSD effect enhances your photos with an energetic prism focus effect. This versatile feature transforms your images into a unique effect that’s perfect for fashion, lifestyle, blogging, and product photography. The effect is best used on photos between 1000 px and 3000 px.

Ghost Glitch Photo Effect PSD Template

Ghost Glitch Photo Effect PSD Template

This is a dynamic Photoshop template intended to transform photos with a ghost-like glitching effect. It’s versatile, effective for various photos ranging from fashion to moody product shots. For optimal results, use with photos of 1000 px – 3000 px resolution.

HDR Portrait Photo Effect PSD

HDR Portrait Photo Effect PSD

A dynamic Photoshop template designed to convert your pictures into vibrant, HDR photographs. It allows you to easily add an HDR-like look to your portrait to give a more professional look and feel. For best results, apply it to photos between 1000 to 3000 px resolution.

Hotspot Remover AI Photoshop Action

Hotspot Remover AI Photoshop Action

This is a handy tool for photo editing and retouching. Using AI, it quickly identifies and removes any bright spots or glare from your photos, offering flawless results. Ideal for photographers and designers, it enhances the quality and speed of your work process. The effect requires the ‘Generative Fill’ feature in Adobe Photoshop versions CC 2023 and later.

Happies – Bright Portrait Photoshop Action

Happies - Bright Portrait Photoshop Action

This collection of Photoshop actions allows you to transform your ordinary portrait photos with a bright and vibrant look. There are 10 different PS actions in this bundle especially optimized to enhance the exposure and colors of your photos with just a single click.

Fuji – Vintage Photoshop Action for Portraits

Fuji - Vintage Photoshop Action

This pack also comes with high-quality Photoshop actions especially made for portrait photos. It has 10 actions that are compatible with Photoshop CS3 and higher. These effects have subtle Fuji film-style vintage looks that are ideal for classic portraits and selfies.

Movietic Aesthetic Portrait Photoshop Action

Movietic Aesthetic Portrait Photoshop Action

If you want to add a vintage movie-style look to your photos, this Photoshop actions bundle is for you. It instantly adds a color filter that turns your photos into stills from a vintage film. These are great for Instagram selfies as well.

Republic Aesthetic Photoshop Action for Portraits

Republic Aesthetic Photoshop Action for Portraits

Add a classic aesthetic look to your selfies and portrait photos with this collection of Photoshop actions. It includes 10 actions with subtle effects that will make your photos look more professional and creative.

Film Wash – Free Portrait Photoshop Action

Film Wash - Free Portrait Photoshop Action

This free Photoshop action does exactly what its name suggests. It adds a nostalgic look to your portrait photos with a washed-out film effect. The action is most suitable for outdoor photos.

Warmer – Photoshop Action for Portraits

Warmer - Photoshop Action for Portraits

This Photoshop action features a very bright and warm effect that completely changes the way your portraits look. It seems to work surprisingly well for outdoor portraits, especially for sunny and beach-themed photos.

Color Glitch PSD Photo Effect for Portraits

Color Glitch PSD Photo Effect for Portraits

This Photoshop photo effect allows you to easily add a glitching effect to your portrait photos. It comes as a PSD template with smart object layers for easy editing. This template will help you craft amazing effects for graphic design projects.

Nostalgic – Portrait Photoshop Action

Nostalgic - Portrait Photoshop Action

The amazing vintage-style effect features in this Photoshop action are designed by a group of professional photographers. It lets you apply an instant filter to give a nostalgic look and feel to your portrait photos.

Dreamy Haze PSD Photo Effect for Portraits

Dreamy Haze PSD Photo Effect for Portraits

Another Photoshop photo effect template with a unique design. This effect features an effect that combines glitching and hazy effects to create a beautiful dreamy look for portraits. The PSD template is very easy to customize as well.

Free Warm & Airy Portrait Photoshop Actions

Free Warm & Airy Photoshop Actions

You can download this Photoshop actions pack for free to easily enhance your portraits, selfies, and Instagram photos. It includes multiple PS actions with warm and airy effects. They are ideal for optimizing outdoor photos.

Oceania – Portrait Photoshop Actions

Oceania - Portrait Photoshop Actions

Oceania is a collection of professionally crafted Photoshop actions you can use to optimize your portraits, travel, and social media photos. It includes 5 different actions with various color styles and effects. The actions work with Photoshop CS4 and higher.

Glamour Photography  – Portrait Photoshop Actions

Glamour Photography - Portrait Photoshop Actions

This is a set of 15 different Photoshop actions that are designed for improving your fashion photography and portraits. The actions create non-destructive effects that are also easily customizable to your preference.

10 Portrait Photoshop Actions

Portrait Photoshop Action

Check out this set of 10 orange and teal Photoshop actions for portrait photography that will help you create memorable pictures in just a matter of a few minutes. It’s. a great time-saving tool that deserves a spot in your Photoshop toolkit.

Digital Portrait Photoshop Action

Portrait Photoshop Action

This digital portrait Photoshop action is a must-have for every graphic designer and photographer. It will bring out your artistic side, and help you create stunning artwork. Grab it right now!

Black & White Portrait Photoshop Actions

Portrait Photoshop Action

Our next option provides you with 10 black and white Photoshop actions that will add a touch of vintage charm to your portraits. The product comes with a step-by-step instruction manual helping you make the most of the effects.

Portrait Series Photoshop Actions

Portrait Photoshop Actions

Whether you are looking to add a subtle touch or a more dramatic effect to your portraits, this collection of 10 Photoshop actions can be of great help. The actions are non-destructive and compatible with Photoshop CS4 and newer. A great collection worth having in your arsenal!

Freya – Portrait Photoshop Actions

Perfectly suited for portrait, wedding and event photography, Freya is a fully-automated set of five photoshop actions designed to improve the overall appearance and mood of your pictures. It offers gorgeous non-destructive and customizable skin tones with soft matte touch tranforming your images into stellar shots.

Master – Portrait Photoshop Action

Kickstart editing portraits with this fine-tuned and one-of-a-kind Photoshop action. It converts your photos into amazing-looking portraits in just one click and is non-destructive enabling you to get back 100% of your original photo.

Sketch Portrait Photoshop Action

Wanting to achieve a professional artistic sketch effect for your images? Look no further than our next option featuring fully customizable colors, layers and other elements. It also comes with a video tutorial to help you make the most of the pencil sketch effect.

50 Free Portrait Photoshop Actions

Give your images a beautiful finish with the collection of 50 Photoshop actions in just a couple of minutes. Its not just super easy to create stunning portrait effects but also a lot of fun to play around with all the customizable features.

Portrait Into Text Photoshop Actions

Portrait Photoshop Actions

Tranform and pin your portraits to lines of relevant wording in just a couple of seconds, thanks to this remarkably unique Portrait Photoshop action that does a great job with both black and white and colored images. A great choice for people looking to go bold, and fearless with their next visual project.

6 Free Grainy Portrait Photoshop Actions

Next up we have a fantastic set of six portrait Photoshop actions that will give a nice grainy touch to your photos. These are fast editing actions and will change the mood of your images in just a few seconds. This set of actions is compatible with Photoshop CS3 to CC.

50 High Contrast Portrait Photoshop Actions

50 High Contrast Portrait Photoshop Actions

A massive bundle full of 50 different Photoshop actions. This pack includes many types of effects that help you adjust and optimize the contrast of your photos while giving them a unique look. The actions work with RAW and JPEG images.

Infrared IR – Portrait Photoshop Actions

Infrared IR - Portrait Photoshop Actions

Another collection of unique portrait Photoshop actions that feature a stylish infrared effect. This pack comes with 12 different effects that give your photos a gothic vibe with an infrared effect.

HDR Portrait Photoshop Action

Portrait Photoshop Actions

Give your photos an HDR effect without sweating over endless hours to create the look from scratch. This Photoshop action allows you to bring nice HDR effects to your images in just a few clicks of the mouse. Plus, with a range of customization options you get at your fingertips, you’ll have a great time playing around with all the amazing features.

Duotone Portrait Photoshop Action

Portrait Photoshop Actions

Want to make your Insta feed interesting and scroll-worthy? Check out this collection of modern, and trendy duotone Photoshop actions perfectly suited for portrait, street, and closeup photography. This freebie is up for grabs on CreativeTacos.

Oil Painting – Portrait Photoshop Actions

Oil Painting - Portrait Photoshop Actions

This collection of Photoshop actions lets you turn your photos into oil paintings. It includes 10 different Photoshop actions featuring all kinds of oil painting effects for giving a comic-book look to your portrait photos.

Free Matte Film Photoshop Actions

Free Matte Film Photoshop Actions

The film look is a popular effect widely used in portrait photography. This bundle comes with a set of Photoshop actions that features a mix of both film and matte effects that create a unique look in portraits.

The pack includes 3 different Photoshop actions with various strengths of the effect. You can apply the action with just one click and customize the effect to your preference afterward as well.

High-quality free portrait Photoshop actions are hard to find. This is one of the actions that truly stand out from the crowd as it features a professional-quality effect you can download and use with both personal and commercial projects for free.

10 Free Matte Photoshop Actions

10 Free Matte Photoshop Actions

This is a bundle of free Photoshop actions featuring matte effects. It includes 10 different effects you can use to improve the tone and mood of your portraits.

Scarlet – Fantasy Photoshop Actions

Scarlet Fantasy Photoshop Action

Scarlet is a creative duo of Photoshop actions that will allow you to create a fantasy film-like effect in your portrait photos. The actions work best with outdoor photos with natural sunlight. And they are compatible with Photoshop CS4 and higher.

Nighty – Portrait Photoshop Actions

Nighty Photoshop Actions

Give your photos a dark and gritty look and feel using this set of Photoshop actions. This pack includes 9 different actions featuring various effects. They are perfect for improving all types of photography.

Wanderlust – Portrait & Lifestyle Photoshop Actions

Wanderlust - Portrait & Lifestyle Photoshop Action

Wanderlust is a set of 3 unique Photoshop actions that are designed to help enhance portraits and lifestyle photos. These actions will optimize your photos to adjust the mood and tone and make them look more professional.

Free Christmas Portait Photoshop Actions

Portrait Photoshop Actions

Brighten up your Christmas portraits, and winter photographs in just one click with the help of this carefully crafted set of Photoshop actions. The actions are high-quality, and non-destructive allowing you to retain 100% of the original photo.

Bouquet – Wedding Actions for Photoshop

Bouquet Wedding Actions for Photoshop

Bouquet is a set of Photoshop actions specially designed for wedding photography. They work well with all types of wedding photos, including outdoor landscapes and portraits. It features 6 different actions with various effects.

Free Matte Photoshop Actions

Free Matte Photoshop Actions

This is a free Photoshop action that allows you to give a stylish film-like matte look to your portrait photos. This action works with Photoshop CS3 and higher, including Photoshop CC.

Free HDR Photoshop Actions

Free HDR Photoshop Actions

A bundle of free HDR Photoshop actions that will make your portraits look as if they were shot with a high-quality DSLR camera. It includes 3 different presets you can apply with just one-click.

Watercolor – Portrait Photoshop Actions

Watercolor - Portrait Photoshop Actions

If you’re not a fan of oil painting effects, you can use this pack of Photoshop actions to make your photos look like watercolor paintings. The actions are compatible with Photoshop CS3 and higher.

Pinhole Halftone – Portrait Photoshop Actions

Pinhole Halftone - Portrait Photoshop Actions

This collection of Photoshop actions comes with 2 different versions you can use for both low and high-resolution images. The actions create an old-school pinhole halftone effect.

Duotone  – Portrait Photoshop Actions

Duotone - Portrait Photoshop Actions

The duotone effect is quite popular among all kinds of graphic designers. This pack comes with multiple duotone effects you can use to give an authentic duotone look to your photos almost instantly.

Free Moody Portrait Photoshop Actions

free portrait actions

Warm, chocolaty, and moody, these Photoshop actions will add high-contrast, and professional tones to your pictures, taking them to a new level of brilliance. The actions are non-destructive and provide you with an excellent way to perfect your everyday photos.

Free Soft Bright Portrait Photoshop Actions

free portrait actions

Here we have a set of Photoshop actions for portrait photography that will brighten up your shots, and give them a soft, dream-like glowy look. The actions can be fully customized to match your vision, and are computable with Photoshop CS3, CS4, CS5, CS6, and CC.

Tone Collection – CameraRaw Portrait Photoshop Actions

Tone Collection CameraRaw Portrait Photoshop Actions

This is a set of filters you can use to quickly adjust and optimize the toning of your portrait photos. The pack includes presets for Photoshop actions as well as Camera RAW. It’s compatible with Photoshop CS5 and higher.

Chocolate – Portrait Photoshop Actions

Chocolate - Portrait Photoshop Actions

This bundle of Photoshop actions is perfect for fashion and glamor portraits and photoshoots. It comes with a set of 10 unique Photoshop actions that create unique filter effects.

Free Tone Filter Photoshop Actions

Free Matte Tone Filter Photoshop Actions

A set of 3 unique Photoshop actions that feature high-quality toning effects. These will help you instantly improve the tone of your portraits without an effort.

Film Look Free Photoshop Action

Film Look Free Photoshop Action

With this free Photoshop action, you’ll be able to make your portrait photos look like a scene out of a movie. The action is compatible with all types of images and its customizable as well.

Cinnamon Portrait Actions

This bundle comes with a set of 6 unique toning Photoshop actions with a fantasy effect. It’s ideal to be used with portrait and fashion photos taken in outdoor natural light settings. You can the actions to adjust the photos taken in low-contrast settings, adding an atmospheric tone, and more.

Caramel Wedding Photoshop Action

Caramel is a pack of Photoshop actions especially designed for wedding portraits. It comes with 2 different actions to improve your post-processing workflow by quickly adjusting the photos taken in natural light and outdoors. The actions also generate adjustment layers for customizing the effects to your preference.

22 Soft Pastel Photoshop Actions

This bundle of Photoshop actions includes several stylish pastel effects for adding a colorful and hipster vibe to your portrait photos. It comes with 22 actions, all of which are non-destructive and fully-customizable.

Frequency Separation Photoshop Actions

Frequency separation is a technique used in Photoshop when airbrushing the skin of portrait photographs. This actions pack automate that process to get it done with just one-click. The frequency separation action is available in several different styles and versions, including 8-Bit, 16-Bit, and 32-Bit versions.

Double Light Photoshop Action

This stunning Photoshop action is perfect for adding a unique visual effect to your portrait photos and posters. The double light effect mixes two colors to give your portraits a sci-fi themed vibe. The action allows you to choose from 10 different color FX settings as well.

Hello Baby! Collection

When talking about portrait photography, baby portraits is something we can never forget. This pack of Photoshop actions is made specifically for making your baby photos extra adorable. It includes over 40 unique Photoshop actions for enhancing your baby photos, including foundation actions, retouching actions, workflow actions, artistic toning, and more.

Peony Photoshop Action

Peony is a set of 2 Photoshop actions made for outdoor and fashion portraits. It allows you to instantly adjust and enhance photos by giving them a rich toning effect. It will even give your dull photos a better color depth, especially for greens and flowers.

Bohemia Photoshop Actions

This bundle of Photoshop actions includes 5 unique actions that help you to achieve a boho-style effect for your portrait and fashion photos. It’s perfect for giving your photos a hipster look.

Suburbia Photoshop Actions

Suburbia is a collection of Photoshop actions that will help adjust the toning of your portrait and outdoor photos. It includes 6 different actions for giving rustic, soft, contrast, and other styles of effects for your photography.

Beach Vibes Photoshop Actions

If you’re a photographer or a designer who works with lots of beach photography, this bundle of Photoshop actions will come in handy. It includes 21 presets for enhancing and adding visual effects for your beach and bright light outdoor photos.

Gypsy Portrait Photoshop Actions

This collection comes with 4 different Photoshop actions for giving cinematic effects for your portrait photos. You can use the actions to give moody and cold effects as well as adjusting the tone of your photos.

Redwood Fairytale Photoshop Actions

Redwood is a set of 3 unique Photoshop actions designed to give your outdoor portrait photos a fantasy-themed effect. It includes a morning haze effect, a twilight haze effect, and an evening sunset effect.

Photo Paint Action

This is a collection of 5 Photoshop actions that allows you to turn your portrait photos into paintings. Each action in this pack will give a different style of a painting effect with various brush stroke intensity. It also includes a sharpening action and 3 noise actions as an added bonus.

Tallgrass Photoshop Action

Tallgrass comes with 2 Photoshop actions for enhancing your portrait photos, especially outdoor and travel photography. It will help enhance the color depth and tune the greens to achieve a stunning visual effect.

Charcoal Action

This Photoshop action pack includes 3 different actions for achieving the perfect black and white effect for your portrait photos. It will allow you to enhance your photos with a soft charcoal black and white effect to give them a retro and classic vibe.

Watercolor Action

Another Photoshop action that turns turn your photos into watercolor paintings. This action allows you to choose from 5 different color options to give a realistic watercolor painting effect to your portrait photos.

Bleach Action

Bleach action comes in 2 variations that allow you to instantly improve your portrait photos to bring out more detail and color. It’s specially designed for photos taken in studios and photos with low exposure.

Cinematic Photoshop Actions

This is a bundle of 25 Photoshop actions, which includes 19 cinematic effects actions and 6 toning adjustment actions. The effects in this pack have been designed inspired by movies such as the 300, Life Of Pi, Matrix, and Skyfall to help you achieve the same movie-like effects.

50 Film Noir PS Actions Bundle

A massive bundle of 50 different Photoshop actions containing different styles of cinematic and film noir effects. All of the actions in this pack are crafted to perfection by an award-winning photographer. It includes 30 cinematic color enhancing actions and 20 B&W color actions.

Retouch – Portrait Effects Photoshop Action

portrait photoshop action

Wanting an all-in-one Photoshop Action that can meet all your photo editing needs? The Retouch Bundle has you covered. With 50 Portrait Photoshop Actions, you can adjust tone, soften skin, refine details, and much more without having any prior experience with the software.

Golden – Photoshop Portrait Actions

portrait photoshop action

If you are a blogger looking for a set of Photoshop Actions that can help your everyday pictures make an impression, our next option is your best bet. This bundle of actions and presets has virtually everything you might need to achieve with your portraits. It’s compatible with both Photoshop and Lightroom.

Flowerage – Photoshop Portrait Actions

portrait photoshop action

Here we have a set of 24 portrait effects Photoshop Actions that are exclusively created for natural light portraiture, wedding, and art photography. The presets are fully customizable and compatible with both Adobe Lightroom and Photoshop.

Digital Painting – Portrait Effects Photoshop Action

portrait photoshop action

Transform your photos into digital paintings with our next Photoshop Action that contains exhaustive techniques and brushes, editable masks, canvas colors, backgrounds, and a range of other super amazing features.

3 Tips for Editing Portrait Photos

If you’re new to editing portrait photos, these tips will help you get a better understanding of how the editing process works.

1. Try to Use RAW Images

As you know, JPG is a file format that uses compression to try and reduce the size of your images while preserving the quality of the image. As a result, the JPG file format sacrifices some data and quality elements captured by the sensor of your camera in exchange for convenience.

This is why most professional photographers use the RAW file format. This format captures photos in much higher quality without affecting the quality of the image whatsoever. Even most modern smartphones now have the option to enable RAW file format.

Use it whenever you can to capture high-quality images so when you edit them in Photoshop, you’ll have a much better and uncompressed image to work with.

2. Master the Art of Toning

Toning is the process of adjusting the color balance, brightness, and contrast, and saturation levels to achieve the perfect balance in your photos. This process usually differs from one photo to another based on certain conditions like lighting conditions and camera settings. When it comes to portraits, this also applies to skin toning as well.

Whichever process you follow to set the mood with toning, always remember to use adjustment layers in Photoshop to create non-destructive adjustments. This way you’ll be able to easily edit or revert your changes however you like.

3. Don’t Overuse the Healing Brush

Healing brush is a handy tool in Photoshop that is widely used when editing portrait photos to get rid of things like pimples, freckles, and more. However, most designers make the mistake of taking it too far and using these tools to make photos look unrealistically flawless.

This is not what Photoshop is made for. Remember to preserve the natural look of the portraits while you improve the photos. Know your limits especially when using tools like healing brush and clone stamp.

The Photoshop actions in our list are designed to automate some of these basic adjustments. They are quite useful if you’re new to photo editing.

Tooltip Best Practices

Featured Imgs 23

In this article, I try to summarize the best practices mentioned by various accessibility experts and their work (like this, this, and this) into a single article that’s easy to read, understand, and apply.

Let’s begin.

What are tooltips?

Tooltips are used to provide simple text hints for UI controls. Think of them as tips for tools. They’re basically little bubbles of text content that pop up when you hover over an unnamed control (like the bell icon in Stripe).

Hovering on top of a bell icon in Stripe's navigation. Clicking the icon triggers a notification displayed underneath it.
The “Notifications” text that pops up when you hover over Stripe’s bell icon is a tooltip.

If you prefer more of a formal definition, Sarah Highley provides us with a pretty good one:

A “tooltip” is a non-modal (or non-blocking) overlay containing text-only content that provides supplemental information about an existing UI control. It is hidden by default, and becomes available on hover or focus of the control it describes.

She further goes on to say:

That definition could even be narrowed down even further by saying tooltips must provide only descriptive text.

This narrowed definition is basically (in my experience) how every accessibility expert defines tooltips:

Heydon Pickering takes things even further, saying: If you’re thinking of adding interactive content (even an ok button), you should be using dialog instead.

In his words:

You’re thinking of dialogs. Use a dialog.

Two kinds of tooltips

Tooltips are basically only used for two things:

  1. Labeling an icon
  2. Providing a contextual description of an icon

Heydon separates these cleanly into two categories, “Primary Label” and “Auxiliary description” in his Inclusive Components article on tooltips and toggletips).

Two examples of a bell icon with content displayed beneath them, one as a primary label and one as an auxiliary description.

Labeling

If your tooltip is used to label an icon — using only one or two words — you should use the aria-labelledby attribute to properly label it since it is attached to nothing else on the page that would help identify it.

<button aria-labelledby="notifications"> ... </button>
<div role="tooltip" id="notifications">Notifications</div> 

You could provide contextual information, like stating the number of notifications, by giving a space-separated list of ids to aria-labelledby.

Bell icon with a badge indicating three notifications and a tooltip displayed to the right.
<button aria-labelledby="notifications-count notifications-label">  
  <!-- bell icon here --> 
  <span id="notifications-count">3</span>
</button>  

<div role="tooltip" id="notifications-label">Notifications</div>

Providing contextual description

If your tooltip provides a contextual description of the icon, you should use aria-describedby. But, when you do this, you also need to provide an accessible name for the icon.

In this case, Heydon recommends including the label as the text content of the button. This label would be hidden visually from sighted users but read for screen readers.

Then, you can add aria-describedby to include the auxiliary description.

<button class="notifications" aria-describedby="notifications-desc">  
  <!-- icon for bell here --> 
  <span id="notifications-count">3</span> 
  <span class="visually-hidden">Notifications</span>
</button>  

<div role="tooltip" id="notifications-desc">View and manage notifications settings</div> 

Here, screen readers would say “3 notifications” first, followed by “view and manage notifications settings” after a brief pause.

Additional tooltip dos and don’ts

Here are a couple of additional points you should be aware of:

Do:

Don’t:

  • Don’t use the title attribute. Much has been said about this so I shall not repeat them.
  • Don’t use the aria-haspopup attribute with the tooltip role because aria-haspopup signifies interactive content while tooltip should contain non-interactive content.
  • Don’t include essential content inside tooltips because some screen readers may ignore aria-labelledby or aria-describedby. (It’s rare, but possible.)
Tooltip limitations and alternatives

Tooltips are inaccessible to most touch devices because:

  • users cannot hover over a button on a touch device, and
  • users cannot focus on a button on a touch device.

The best alternative is not to use tooltips, and instead, find a way to include the label or descriptive text in the design.

If the “tooltip” contains a lot of content — including interactive content — you may want to display that information with a Toggletip (or just use a <dialog> element).

Heydon explains toggletips nicely and concisely:

Toggletips exist to reveal information balloons. Often they take the form of little “i” icons.

Information icon with a message displayed to its right as a notification.

These informational icons should be wrapped within a <button> element. When opened, screen readers can announce the text contained in it through a live region with the status role.

<span class="tooltip-container"> 
  <button type="button" aria-label="more info">i</button> 
  <span role="status">This clarifies whatever needs clarifying</span>
</span>

Speaking anymore about toggletips detracts this article from tooltips so I’ll point you to Heydon’s “Tooltips and Toggletips” article if you’re interested in chasing this short rabbit hole.

That’s all you need to know about tooltips and their current best practices!

Further reading


Tooltip Best Practices originally published on CSS-Tricks, which is part of the DigitalOcean family. You should get the newsletter.


from CSS-Tricks https://ift.tt/g4QyuXm
Gain $200 in a week
via Read more