Whether you want visitors to make a purchase, sign up for a demo, or download a white paper on your website, you’ll need to create a website form for that process. The design, messaging and functionality of your web forms play a large role in whether a visitor completes the form and converts. Making these […]
AfterShip, a shipping and tracking platform for online retailers, has announced that its e-commerce shipping API, Postmen, will now be free. This offering has no limit on shipping volumes. With Postmen, users can automate and optimize shipping processes through 60 carriers around the world.
Growing a website today is ten times more difficult than it was just a few years ago. With the abundance of information online and thousands of blogs on every topic, capturing visitors’ attention has become hard. And if you’re a …
Do you want to create a custom homepage for your WordPress site?
By default, the WordPress homepage displays your blog posts, but you can edit it to show something different. For example, your homepage could be a landing page that highlights your products and services.
In this article, we’ll show you how to easily edit and customize your WordPress homepage.
What Is the WordPress Homepage?
Your homepage is the ‘front page’ of your WordPress website. It’s the first page that shows up when a user visits your domain name.
For instance, if you type in www.wpbeginner.com into your browser, the page you land on is our website’s homepage, where you can see our latest blog posts:
Why Edit the WordPress Homepage?
If you’ve decided to create a blog, then it makes perfect sense to just show your blog posts on the homepage.
But what if you’re using WordPress to build a small business website or even to run an online store? In those cases, you may prefer to highlight your products or promotions on your homepage.
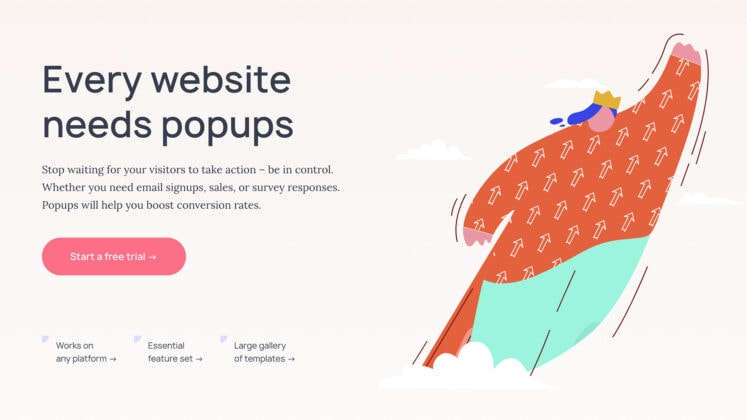
Here’s a business website homepage example from OptinMonster, the best WordPress popup plugin out there. Their site has a great blog, but that isn’t the focus of their homepage. Instead, they’ve got a really clear call to action.
If that’s the case, then you’re in the right place.
We’re going to take you step by step through setting up a homepage and customizing it to match your needs. That way, you can make a great first impression and encourage your visitors to take the actions that are most important to your site’s mission.
Some of the best WordPress themes will create a homepage design for you, and provide options so you can easily edit it.
You can find these options by visiting Appearance » Customize on the admin sidebar. This will launch the WordPress theme customizer with a live preview of your theme.
The Theme Customizer will have different options for different themes. Your preview and the available options may look different depending on the theme you are using. We’re using the free Hestia theme in this example.
To edit any part of the homepage, simply click the blue pencil icon next to it. Here, we’re editing the image, text, and button at the top of the homepage.
Note: As soon as you make edits, they’ll be shown in the preview of your site. Those changes won’t be live on your site until you publish them.
If you want to remove a section from the homepage, then you just need to click the blue eye icon in the top left corner of that section.
You can also remove sections and add them back in using the ‘Frontpage Sections’ tab.
Once you’re happy with your homepage, you need to click the ‘Publish’ button to make it live.
Here’s how our homepage looks, live on the website:
Using your theme’s built-in options is the quickest way to set up your homepage. However, some themes may not have many options, or you may not be satisfied with how your homepage looks.
Don’t worry, there are plenty of other ways for you to edit your homepage and give it the look you want.
Editing Your Homepage With the Block Editor
The WordPress block editor is a simple way to create a custom homepage, although it’s limited by your theme’s design.
To use the block editor, simply go to the Pages » All Pages screen and edit the ‘Home’ page that you created earlier.
Now you can start creating the content for your page.
In this part of the tutorial, we’ll be using a few simple blocks to create a basic homepage.
First, we’ll add a welcome message to the page. You can do this by simply clicking on the page to start typing. WordPress will automatically create a paragraph block for you.
If you want to make the text larger, then it’s easy to do that in the block settings on the right hand side. Just click on one of the preset sizes, or you can click on the ‘Set custom size’ icon and type any size you like.
You can also change the color of your text, using the ‘Color’ options for the text or background.
Next, we’ll add an image to the page. You can do this by clicking the (+) symbol and then selecting the Image block.
You’ll find it in the Media section, or you can search for it using the search bar.
You can pick an image from your media library or upload a new one.
Next, we’ve added another paragraph block, with the text ‘Check out our latest posts here’.
We’ve then added a ‘Latest Posts’ block, which we’ve set to show the post excerpt and featured images, as well as the post titles. You can find out more about the Latest Posts block in our tutorial on displaying recent posts in WordPress.
You can add as many blocks as you want to your homepage. You may also want to use a ‘full width’ or ‘no sidebars’ template for your page if your theme has one.
For example, when using the Astra theme, you can customize the layout of the page from the Astra Settings pane. Other themes may provide a section in the Document settings pane.
Once you’re happy with your homepage, you should click the ‘Update’ or ‘Publish’ button on the top right of the screen to push your changes live.
Here’s how our finished homepage looks:
What if you want to go further with your homepage? One option is to try some of these best block plugins for WordPress to add new functionality, such as a contact form, testimonials, reviews, and more.
The easiest way to edit your homepage is by using SeedProd. It’s the best WordPress theme builder plugin and can create beautiful website layouts and custom templates without writing any code.
You can use SeedProd to create a fully custom WordPress theme, including a custom homepage template.
Note: There is a free version of SeedProd, but you will need the Pro version to access the theme builder and edit the homepage template.
Upon activation, you need to enter your license key. You can find this information under your account on the SeedProd website.
After that, you can use SeedProd to easily create a WordPress theme, including a completely custom homepage from scratch.
Creating a Custom WordPress Theme
You can create a new theme in SeedProd by navigating to the SeedProd » Theme Builder page. Here, you’ll use one of SeedProd’s ready-made themes as a starting point. This will replace your existing WordPress theme with a new, custom design.
You can do that by clicking the ‘Themes’ button.
You will be shown a list of professionally designed themes that are designed for different types of websites. For example, there are templates called ‘Modern Business’, ‘Marketing Agency’, and ‘Mortgage Broker Theme’.
Take a look through the options and select one that best matches your needs by clicking the checkmark icon. For this tutorial, we’ll choose the ‘Digital Strategy’ theme.
Once you have chosen a theme, SeedProd will generate all the theme templates you need. It will include a template for your static homepage, as well as one for your blog’s index page.
Editing the Homepage Template
SeedProd makes it easy to edit any of these templates using a drag and drop page builder.
Simply click the ‘Edit Design’ link found under the ‘Homepage’ template. This will open the template in SeedProd’s visual editor.
This simple drag and drop builder will show a live preview of your page to the right and a toolbar on the left. You can add new blocks by dragging them onto the page, rearrange them by dragging them up and down with your mouse, and customize any block by clicking on it.
Notice that the template has already provided an attractive layout and added plenty of relevant content on the page. Now you just have to edit it to suit the purpose of your website.
When you hover your mouse over a block, a toolbar will appear.
If you click on the block, then you can adjust its settings in the left pane.
For example, when you click on the headline, you can edit the text, change the alignment, alter the font size, and more.
When you change a setting, you can immediately see it in the preview on the right.
For example, we’ll change the text to ‘All About WordPress’.
Once you’ve done this, you can click the ‘Blocks’ icon near the top of the settings page. This will return you to the Blocks view.
Next, we’ll edit the button text. You can click on the button labeled ‘What we do’ and edit the text to say ‘See the courses’.
Now we’ll scroll down our homepage until we come to the list of bullet points about the products and services you offer.
You can edit these in the same way, by clicking on a block and editing the text.
Your homepage should now look something like the screenshot below.
If you need to add more detail, then you can add another row of bullet points by clicking the blue ‘+’ icon at the bottom.
The SeedProd template may have included more sections than you can use. You can easily delete any blocks or sections you don’t need by simply clicking the trash icon.
For example, you can hover your mouse over the ‘Trusted By’ section of the homepage. Once the toolbar appears, you can click on the Trash icon to delete that section.
Near the bottom of the homepage there is a FAQ section. This was created using an Accordion block, which makes it simple to customize the questions and answers you want to include on your homepage.
When you click on the block, you are able to edit the text for each question and answer.
Once you have finished customizing your homepage, make sure you click the ‘Save’ button at the top of the screen. Then you can return to the list of templates by clicking the ‘X’ icon.
As you can see, SeedProd’s templates, drag and drop interface, and useful blocks make it ideal for editing your website’s homepage. For even more ideas, take a look at our guide on how to create a landing page with WordPress.
Using Method 2, you should scroll down to the section on customizing your blog page. Here you’ll learn how to add new blocks using drag and drop, and how to change the settings for each block on the page.
We’ll show you how to edit the Posts block to list your posts in multiple columns and display or hide the featured image for your posts.
There are settings for how many posts to display, and whether to show a post excerpt. You can also filter the index by post type, category, tag, or author, and change the sort order.
Enabling the SeedProd Theme
Once you have finished customizing the theme templates, you will need to publish the new custom theme. Simply toggle the ‘Enable SeedProd Theme’ setting to the ‘YES’ position.
If you haven’t already changed your WordPress Home and Blog page settings, then you’ll see a notification message. When you click the ‘OK’ button these settings will be changed for you.
You can now visit your website to view your new home page.
Editing Your Homepage With a Page Builder Plugin
Divi is a popular WordPress page builder plugin. It comes with a WordPress theme and a page builder plugin with dozens of gorgeous templates.
You can use the Divi page builder with any theme. For this tutorial, we’re going to use it with the Divi theme.
First, you’ll need to download, install, and activate the Divi theme from Elegant Themes. This includes the Divi builder, so you don’t need to install it separately. You will need to enter your username and API key under Divi » Theme Options » Updates in order to access the layout packs.
Once you’ve got the Divi theme and page builder up and running, you can set up your homepage. First, go to the Pages menu in your WordPress dashboard and then edit the homepage we created earlier.
Before you start editing your homepage, it’s a good idea to switch to the ‘Blank Page’ template under the ‘Template’ panel on the right. That way, your homepage won’t have a sidebar, title, menu, or any other default elements.
Next, you can click the ‘Use The Divi Builder’ button at the top of the screen.
Now, you’ll need to click the ‘Edit With The Divi Builder’ button in the center of the screen.
You should now see the Divi Welcome Screen. It includes a video tutorial on how to use Divi, a brief description of how to get started, and buttons to either start building your page or take a tour of Divi’s features.
We’ll click the ‘Start Building’ button at the bottom of the page.
Next, you’ll see a range of options you can use to create your page. We suggest using a premade layout as the basis for your homepage. This makes it really quick and easy to get your homepage set up.
Divi has an impressive range of different layouts to choose from. There are hundreds of different layout packs, and each of these has several different page layouts including homepages.
You can search through these by typing in a search term, or you can check the boxes to view only layouts that fit certain categories.
We’re going to use the ‘Travel Blog’ layout pack to create our homepage.
First, click on the pack that you want to use:
Next, you’ll see a description of the layout pack, plus the different page layouts that are available. You’ll probably want to use the ‘Home’ page or ‘Landing’ page for your homepage. We’re going to pick the ‘Home’ option.
Once you’ve chosen your layout, click the ‘Use This Layout’ button at the bottom of the page.
Divi will automatically import the layout for you. You’ll then see it live on your page, exactly as it’ll appear on your site. To edit any part of it, simply click on it.
Divi uses a system of rows (split into columns) and modules to create your page. With text modules, you can click on the text and type in whatever you want straight onto the screen.
Here, we’ve changed the header and the text below it:
With other modules, you can bring your mouse cursor over them and click the ‘Module Settings’ icon to edit them.
Here, we’re editing one of the number counters:
You can delete modules and rows in the same way, using the trash can icon.
You’ll likely want to use your own images on your homepage. You can change these by editing the module settings.
Note that the image at the top is set as the Background for a Fullwidth Header Module, so you’ll need to change it under Content » Background for that module:
Once you’re happy with the changes you’ve made to your page, you can click ‘Save’ at the bottom of the screen.
Sometimes the bottom row of buttons will be hidden.
If you can’t see them, then you’ll need to click the purple “…” button to open them up.
Here’s how our page looks live on the website:
Setting Your Homepage in WordPress
By default, WordPress displays your blog posts on the homepage.
That means that after creating and customizing your homepage, you’ll need to tell your WordPress site to display that page when someone visits your domain.
Let’s take a look at how to set a separate homepage and blog page in WordPress.
Pro Tip: Do you already have visitors to your site? Then you might want to put your site into maintenance mode while you’re setting up your homepage. Alternatively, you could set up a staging site where you can create your homepage before publishing it live.
First, simply go to Pages » Add New and name your new page Blog. After that, you can go ahead and publish the blank page.
Once your homepage and blog page are ready, you need to tell WordPress to start using these pages.
You can do this by going to Settings » Reading page in your WordPress admin area. You need to select ‘A static page’ option under the ‘Your homepage displays’ section. After that, go ahead and select your home and blog pages.
Don’t forget to click on the ‘Save Changes’ button to store your settings.
That’s it! You’ve created a great looking homepage in WordPress and set it up successfully.
We hope this tutorial helped you learn how to edit a WordPress homepage. You might also want to take a look at our guide on the must have WordPress plugins and our tips on how to improve WordPress SEO.
If you liked this article, then please subscribe to our YouTube Channel for WordPress video tutorials. You can also find us on Twitter and Facebook.
Smush has everything you need to optimize your images, as well as a handy repertoire of tools ready to help you smash PageSpeed Insights image-related recommendations.
It’s a simple way to speed up your site, without sacrificing your image quality.
With Smush you can:
Compress images in bulk and with one click
Automatically resize and rescale your images
Enable lazy loading so your server can concentrate on displaying content above the fold
Convert your image files to formats that are drastically smaller and much quicker to display.
Over a million installs and more than 50 billion images smushed.
There are four main recommendations when it comes to images, and Smush can answer all of them.
“I had no idea that my page load time was being dragged down by the images. The plugin nearly halved the time it took.” – karlcw
This guide will show you how Smush can help you get your PageSpeed Insights score into the green.
Defer Offscreen Images
You don‘t want to be wasting server resources and sacrificing page speed to load images that are halfway down your page, so deferring offscreen images makes sense for many sites.
When you install Smush, Lazy Load is one of the first features you should check out. Simply enabling it can fix the ‘defer offscreen images’ PageSpeed recommendation.
Smush’s Lazy Load feature comes with more than just an on and off button.
You can choose which image formats you want to include.
Maybe you want your JPEGs to Lazy Load, but not your PNGs?
As well as any post types you want to exclude.
There’s also the option to add the URL of any specific pages.
Lazy Loading is something that can easily be undone so turn it on, check your new PageSpeed Insights score, and most importantly, check the impact it has on your site.
Efficiently Encode Images
If you want a full and comprehensive guide to optimizing your images, I would recommend checking out this blog, as here, we’re purely focusing on how Smush can help you meet PageSpeed Insights audit requirements. In this section, specifically the ‘efficiently encode images’ recommendation.
Smushing your images prevents your server being clogged up with extra MBs that don’t need to be there.
You can Smush in a variety of ways, with virtually no difference in quality.
Smush on Upload
Automatic compression is on by default and is used to efficiently encode images. It’s a high impact, low-risk feature, which should be used on most sites.
You can select whether you want it to apply to all images, or exclude certain sizes.
If you don’t want Smush to automatically compress your photos, there are a few other ways you can manage this:
Bulk Smush
You can use the Bulk Smush feature to scan your site for photos which are in need of attention and smush them all at once.
Click the button and let the plugin do all the work for you.
Smush Through the Media Library
You can also head to the media library to check whether you have images available for smushing.
You can smush individually through the media library or select images to be ignored from autosmush.
Smush Other Directories
You’re not confined to just your media uploads – you can also smush non-WordPress images outside of your uploads directory.
You can easily navigate through your folders to find the images you want to Smush.
Super Smush
Super Smush is your next port of call if you want to bring your file sizes down even further.
It offers 2X the smushing power compared to the standard method, so it’s handy if you have a lot of images that are soaking up valuable resources.
Even if ensuring your images were properly encoded wasn’t one of PageSpeed Insights audit opportunities, it still makes sense to get rid of any excess bloating, as long as there is no noticeable difference to your images.
Utilize the CDN
Smush also offers a blazing-fast 45 point CDN (Pro version only) which allows you to serve your images in next-gen formats as well as ensuring they’re delivered to your browser at breakneck speed.
Make your Images Next Gen
Next-gen image formats such as WebP and JPEG 2000/XR can bring your file size down drastically.
Serving your images in one of these formats will save you server resources, as well as meet one of PageSpeed Insights requirements.
With Smush’s CDN enabled, you can serve your images in the next-gen WebP format.
As not all browsers support WebP images, Smush does a super-quick check of the browser, and if WebP images are supported, then great – that’s what’s served to your visitor. If not, Smush can simply serve up a PNG or JPEG to make sure that no one misses out.
Properly-sized Images
Forcing the browser to resize an image before it can be displayed to the user slows down your site and lowers your PageSpeed Insight score. Part of the recommendation is to refrain from serving images that are larger than the version that will be displayed on the visitor’s screen.
With Smush’s CDN, this is one of the easiest PageSpeed Insight recommendations to solve.
If you want to ensure you’re being completely thorough in the correct sizing of your images, read this blog to find out a few alternative tricks.
Smash PageSpeed Insights with Smush
While many users struggle to improve their web site optimization, Smush lets you boost your page loading speeds by making images easier and faster to load…and it does this all in just a few clicks!
Follow the above recommendations and put Smush to work for your site today. Also, keep an eye on our roadmap for all the exciting new features coming soon to Smush.
WordCamp Denver begins Friday this week and tickets are free for anyone who wants to join June 26-27. The event has been running since 2012, but like many other conferences, it is going virtual in 2020, as the pandemic continues to worsen around the globe. Attendees will have to forego the city’s extraordinary landscapes, friendly summer climate, and legendary beer scene this year, but organizers are adapting to make it a memorable event.
In previous years WordCamp Denver has attracted roughly 300 in-person attendees. Sponsor Wrangler and co-organizer Maddy Osman reports that this year the event has 1,696 people signed up and could reach 2,000 by the weekend.
“There were so many challenges that came with flipping to a virtual event — the biggest one being that the WordPress community loves to be physically together and COVID-19 shutdowns have obviously prevented that in a big way, starting with WordCamp Asia,” Osman said.
“Another big challenge for us was preserving a Colorado feel while opening the event up to people across the world. But we have quite a few surprises planned that feature local individuals and brands that I’m excited to share with attendees.”
Osman said that although the team didn’t sell as many sponsorships as last year, they had no problem attracting the necessary sponsors to make the event happen. WordCamp Central covers the livestreaming costs, which was the most expensive ticket item for hosting the event virtually.
Sponsors will still have the opportunity to connect with attendees and offer their own unique digital swag. Organizers are planning on doing a password-protected swag bag with exclusive offers for WordCamp Denver attendees.
“Even though we can’t hand out fun swag, this is the next best way to make win-win connections between attendees and sponsors,” Osman said. “Attendees who have signed up for a free ticket will be emailed access instructions prior to the event.”
The WordCamp will kick off on Friday with a yoga session hosted by Denver yogi Lauren Moon of Yogiful who will help participants leave behind the stress of the work week. The schedule features three tracks that will run simultaneously: Beginner, Marketing/Content, and Power User/Developer. Topics span the whole range of WordPress user experiences, from client relationships to creating blocks and understanding React.js.
“We have speakers from all over the US (and some international) but we prioritized speakers with diverse backgrounds and speakers who represent the local community,” Osman said.
“We tried to prioritize sessions that were super actionable and relevant to the current situation that so many businesses are facing – adapting to the COVID-19 economy. In general, when going through speaker selection, we always try to dig deeper than the surface to provide topics that people wouldn’t necessarily find elsewhere.”
The schedule for Saturday morning includes a unique session called “Brew the Perfect Cup of Coffee,” hosted by Fort Collins-based WordPress community members, David Hayes and Ann Pohl. They will discuss bean selection, grind methods, and alternatives to brewing, with a live demonstration. They will also be sharing a surprise offer from local sponsors, where attendees can redeem a free cup of coffee from one of three coffee shops in Boulder, Denver, and Fort Collins. Those attending from further away can redeem a coupon code for $10 off a bag of beans from Harbinger Coffee.
Registration for tickets to WordCamp Denver is still open. The event runs Friday (3-7pm) and Saturday (9am-1pm), June 26-27. It will be hosted on Zoom with live captioning managed by White Coat Captioning.
A security researcher, Sam Curry, recently noticed what he called "suspicious" API calls when ordering a Starbucks gift card for a friend. After learning that Starbucks runs a bug bounty program, Curry dug a little deeper. Soon thereafter, Curry found that Starbucks had potentially exposed personal records of around 100 million customers.


 Whether you want visitors to make a purchase, sign up for a demo, or download a white paper on your website, you’ll need to create a website form for that process. The design, messaging and functionality of your web forms play a large role in whether a visitor completes the form and converts. Making these […]


")