This Week In Web Design – April 23, 2021

…

Tips, Expertise, Articles and Advice from the Pro's for Your Website or Blog to Succeed

So, this is the structure.
****
***
**
*
*
**
***
****
There are some Unicode characters that some browsers just decide they are going to turn into emojis for you. I couldn’t tell you why exactly, but here’s what I see:

Those text Unicode characters (▶, ↩, and, ❤) show up as text in Chrome, then iOS Safari turns them into emojis. Notice how when they are text, I have the ability to change their color, but not when they are turned to emoji.
Those characters above might turn into emojis for you also. They look like text in my WordPress editor. Shrug.
This came up for me because I was helping someone with their website and they didn’t like the “red diamonds” that were showing up. I didn’t seen them as red until I looked on my phone.
A couple of people pointed out to me that if you use this (︎︎︎) before the character it will “request it to be rendered as text.” Here’s the spec on that. I couldn’t get it to work though. Here’s my test:
What I see on iOS:

I read in some sporatic threads that font-family: monospace would also prevent the emoji conversion, but that didn’t work for me either.
If you can select the element, even if the characters go emoji, you could force them to a color. Here’s an example from Andrew Walpolea:
Preethi Sam blogged that you can also use text-shadow to do the same:
The problem in my case was that there was no selector to use! The diamonds I was having trouble with were on hundreds of random posts in the database.
I just gave up and ran a MySQL search/replace on the whole database (via Better Search Replace) to get rid of them.

Matias Singers has more on this in “Unicode symbol as text or emoji.”
The post Text That Sometimes Turns to Emojis appeared first on CSS-Tricks.
You can support CSS-Tricks by being an MVP Supporter.

Alpaca, an API provider that specializes in stock brokerage integrations, has announced the Alpaca Broker API in an attempt to democratize financial market access. The new service is RESTful and is intended to simplify the integration of stock trading capabilities.
Do you want to change the author of a post in WordPress?
Sometimes you may need to change a post to a different author than the user who first uploaded the post. You can do this without having to copy and paste the post with a different account.
In this article, we’ll show you how to simply change the author of a post in WordPress with just a few clicks.

If you just want to show your own name on a post written by another user on your WordPress site, then you’re ready to follow the instructions in this article.
But, if you want to show a different user as the author, then you need to make sure this user exists on your WordPress site first. See our guide on how to add new users and authors in WordPress for detailed instructions.
You can view and manage all the users on your WordPress site by visiting the ‘Users’ menu item when logged in with your WordPress administrator account.

If you only want to change the way your name is displayed, then check out our guide on how to add or change your full name in WordPress.
Having said that, let’s look at how to quickly and easily change the author of a post in WordPress.
If you don’t like the video or need more instructions, then continue reading.
First you need to open the post or page where you want to change the author name.
On the post edit screen, you need to make sure ‘Post’ is selected in the right-hand sidebar.
Then, locate ‘Author’ under the ‘Status & Visibility’ section.

Next, select the new author name from the drop down menu.
You’ll see a list of available authors to choose from.

Once you’ve done that, make sure you click ‘Update’ or ‘Save Draft’ to save your changes.
That’s it, you have successfully changed the author of a post in WordPress.
Changing the author by editing a single post is easy.
However, if you want to change the author for multiple posts, then this would take a lot of time.
Luckily, there’s an easier way to quickly change the author for multiple WordPress posts at once.
To bulk update authors, click on the ‘Posts’ menu item from your WordPress admin menu. This will list all the posts on your WordPress site.
By default, WordPress shows 20 posts per page. If you want to display more posts, then you need to click on ‘Screen Options‘ and change the number of posts you want to display.

Now you need to select the posts where you want to change the author.
After selecting posts, select ‘Edit’ from ‘Bulk Actions’ dropdown menu and then click the ‘Apply’ button.

WordPress will now show you ‘Bulk Edit’ metabox.
You need to select the new author by clicking on the dropdown menu next to Author option.

Don’t forget to click on the ‘Update’ button to save your changes.
That’s it, you have successfully changed the author for multiple WordPress posts without editing them individually.
Finally, you may want to optimize your author profile pages to improve your SEO rankings.
The author profile is what appears at the bottom of blog posts published under your name.

Here you can add a brief bio, links, and even your social media profiles.
By showcasing your author bio, you can build more credibility and give your readers a chance to learn more about you and the authors on your site.
WordPress allows you to add a brief author bio, but to add social media links you’ll need to use a WordPress author bio plugin.
Aside from that, you’ll also want to improve your Author archive pages where WordPress displays a list of posts written by that author.
To optimize author pages for SEO, we recommend using All in One SEO. It’s the best SEO plugin for WordPress used by over 2 million websites.
For more details, see our guide on how to install a WordPress plugin.
Upon activation, simply navigate to Users » Profile to edit your author profile.
Next, scroll down to the ‘All in One SEO Pro’ section where you can add links to your Facebook and Twitter profiles and create an author bio.

Once you’ve made the necessary changes, make sure you click ‘Update Profile’ at the bottom of the page.
Users will now see your new author bio at the bottom of any post you publish or change to your name.
We hope this article helped you learn how to change the author of a post in WordPress. You may also want to see our expert list of the best WordPress plugins for websites, and our comparison of the best online course platforms.
If you liked this article, then please subscribe to our YouTube Channel for WordPress video tutorials. You can also find us on Twitter and Facebook.
The post How to Change the Author of a Post in WordPress appeared first on WPBeginner.

 eCommerce is a very competitive space. Brands are literally fighting it out to provide the best possible UX to their visitors in order to beat the competition. Combine that with the heightened expectations of modern consumers (50% won’t wait longer than 3 seconds before abandoning a poorly-designed e-commerce site) and you’ll understand why it’s vital […]
The post 7 Ways to Optimize WooCommerce Conversion Rates appeared first on WPExplorer.

This post is originally published on Designmodo: Email Marketing Strategy and Tips for Successful Campaigns to Use in 2021

Are you new to email marketing or wish to improve your current results? It is a huge topic indeed, but to succeed, you need to start small. With this post, you will make it easily: here we are explaining the …
For more information please contact Designmodo
Let’s say someone asks you to add a double border to some random geometric SVG shapes. For some reason, you can’t use any graphic editor — they need to be generated at runtime — so you have to solve it with CSS or within the SVG syntax.
Your first question might be: Is there anything like
Well, the answer is not yet and it’s not that easy. But I’ll attempt it anyway to see what methods I can uncover. I’ll explore the possibilities of three different basic shapes: circle, rectangle, and polygon. Pointing the ones that can keep a transparent color in the middle of the two lines.stroke-style: double in SVG?
Spoiler alert: all the results have their downsides, at least with CSS and SVG, but let me walk you through my intents.
These don’t work with all shapes, but they are the easiest of the solutions.
outline and box-shadowThe CSS properties outline and box-shadow only apply to the bounding box of the shape or SVG, and so both are great solutions only for squares and rectangles. They also allow flexible colors using custom properties.
It only takes two lines of CSS with outline, plus it keeps the background color visible through the shape.
box-shadow only needs one line of CSS, but we have to make sure that each shape has its own SVG as we can’t apply box-shadow directly to the shapes. Another thing to consider is that we have to apply the color of the background in the declaration.
SVG radial gradients only work on circles ☺️. We can directly apply the gradient on the stroke, but it’s better to use variables as we have to declare the colors many times in the code.
These will work with all shapes, but the code could become bloated or complex.
filter: drop-shadow()Finally, one solution for all shapes! We must have each shape in its own <svg> since the filter won’t apply directly to the shapes. We are using one declaration in CSS and have flexible colors using variables. The downside? The borders don’t look very smooth.
This is a very flexible solution. We can create a filter and add it to the shapes through SVG’s filter attribute. The complicated part here is the filter itself. We’ll need three paintings, one for the outside border, one for the background flood, and the last one to paint the shape on the front. The result looks better than using drop-shadow, but the borders are still pixelated.
There are a couple of possible options here.
This solution requires transforms. We place one figure over the other, where the main figure has a fill color and a stroke color, and the other figure has no fill, a red stroke, and is scaled and repositioned to the center. We defined our shapes on the <defs>. The trick is to translate half of the viewBox to the negative space so that, when we scale them, we can do it from the center of the figure.
<use>I found a clever solution in the www-svg mailing list by Doug Schepers that uses SVG <use>. Again, it requires defining the shapes once and referring to them twice using <use>. This time the main shape has a bigger stroke. The second shape has half the stroke of the main shape, no fill, and a stroke matching the background color.
Just so you have them all in one place. Let me know it you can think of other possible solutions!
| Solution | All shapes | Simple code | Smooth borders | Transparent background |
|---|---|---|---|---|
outline | 🙁 | ✅ | ✅ | ✅ |
box-shadow | 🙁 | ✅ | ✅ | 🙁 |
| SVG gradients | 🙁 | ✅ | 🙁 | 🙁 |
filter: drop-shadow() | ✅ | ✅ | 🙁 | 🙁 |
| SVG filters | ✅ | 🙁 | 🙁 | 🙁 |
| Reusing shapes: Tranforms | ✅ | 🙁 | ✅ | ✅ |
Reusing shapes:<use> | ✅ | 🙁 | ✅ | 🙁 |
The post How to Add a Double Border to SVG Shapes appeared first on CSS-Tricks.
You can support CSS-Tricks by being an MVP Supporter.
This isn’t actually a podcast actually talking about what CodePen is. Well, it kinda is. But actually it’s Stephen and Chris talking about and planning for what they would say if they only had five minutes (or so) to explain what CodePen is. So we need to hash out what the most important things are, what to lede with, and how to cover all the most vital things with clarity in such a short amount of time. We’ll have to get around to actually trying to shoot a video like this soon!
Jetpack Boost is a brand spankin’ new plugin from the Jetpack / Automattic gang. Jetpack has some very powerful performance features it offers, like giving you a global CDN for your images and core-WordPress-specific CSS and JavaScript. That particular feature is still a part of the Jetpack core plugin, but many performance-specific features are moving their way over to Jetpack Boost. Like Lazy Image loading (a huge performance win) is now in Jetpack Boost and you can turn it on with the flip of a switch. The most amazing, and brand new, feature of Jetpack Boost is that it does Critical CSS handling for you, which is also a big performance win and very difficult to do by hand.
The post #312: What is CodePen? appeared first on CodePen Blog.
Private Sub Plus_Btn_Click(sender As Object, e As EventArgs) Handles A_Plus_Btn.Click, C_Txb.Click
    Dim Txb As TextBox
    If x < MAX Then
        x += 1
    Else
        x = 5
    End If

    For i As Integer = 1 To x
        For j As Integer = 1 To x
            Txb = New TextBox
            Txb.Size = New Drawing.Size(100, 20)
            Txb.Location = New Point(10 + 100 * i, 10 + 25 * j)
            Txb.Name = "Txb" & i & "," & j

            AddHandler Txb.TextChanged, AddressOf TextBox_TextChanged
            boxes(i) = Txb
            Me.Controls.Add(Txb)
        Next
    Next
End Sub

Private Sub TextBox_TextChanged(sender As Object, e As EventArgs)
Dim box As TextBox = DirectCast(sender, TextBox)
Me.Text = box.Name & ": " & box.Text
End Sub

Private Sub Minus_Btn_Click(sender As Object, e As EventArgs) Handles A_Minus_Btn.Click, C_Txb.Click
    Dim Txb As TextBox
    If x > MIN Then
        x -= 1
    Else
        x = MIN
    End If

    For i As Integer = 1 To x
        For j As Integer = 1 To x
            Txb = New TextBox
            Txb.Size = New Drawing.Size(100, 20)
            Txb.Location = New Point(10 + 100 * i, 10 + 25 * j)
            Txb.Name = "Txb" & i & "," & j

            AddHandler Txb.TextChanged, AddressOf TextBox_TextChanged
            boxes(i) = Txb
            Me.Controls.Add(Txb)
        Next
    Next
End Sub
I want to make TextBox into array and increase/decrease with buttons.
ex) dim x=1 [+] [-]
x = 1:
[]
x = 2:
[][]
[][]
x = 3:
[][][]
[][][]
[][][]
...
But it's made with the code I wrote above, but it doesn't remove.
And it's not array system, it's hard to manage.

 You cannot run a successful business without finding leads that can be converted into prospective sales. But that is easier said than done, as studies show that 95% of people who visit a website never return. How can you beat this statistic and make sure that your website’s visitors not only return but also convert? […]
The post How to Generate More Leads with WordPress appeared first on WPExplorer.

I tried using this code(below) to change the button text when i run the code from "Button1" to "Click" but when i run the code the name still remains "Button1" and if i click the button the name then changes to "Click". I want the code to show "Click" on the button when i run it not when i click it. Please, how do i do this? And would it work for other tools like label?
Public Class Form1
Private Sub Button1_Click(sender As Object, e As EventArgs) Handles Button1.Click
    Button1.Text = "Click"

End Sub
End Class
Hi everythings,
I have a question regarding on disabling today date on datepicker, i got this code from internet and it seem like working , but then i realised its starting disable today date from 08:00 am onward and not disable from 12:00 am, seems like its has problem with time zone, i guess.
$('.datepicker').datepicker({
format: 'dd-mm-yyyy',
startDate: '+1d',
endDate: '+5m',
beforeShowDay: renderCalendarCallback
});
Does anyone can explain me why this thing happen? TQ in advance.
I simply do not understand it. For at least the better part of a decade, theme authors have asked for the tools to create more complex layouts with WordPress. They have asked for the ability to allow end-users to more easily recreate their demos. They have wanted methods to bypass the “restrictive” theme review guidelines.
Over the past couple of years, WordPress has consistently delivered features that theme authors have asked for. Yet, themes that use them are few and far between.
During my weekly perusal of the latest themes to land in the directory, a new wedding theme caught my attention last week. Of course, I downloaded, installed, and activated it only to find that I had no idea how to recreate the homepage design. There were no instructions. The theme options in the customizer seemed to make little sense. Nearly all of the decorative images were non-existent in the theme folder.
Did I need to upgrade to the pro version to get what was in the screenshot? There seems to be a plan for such a version, but it is not available yet.

I am no rookie, but I was stuck. I liked the simplicity of the design. However, I could not imagine setting up a wedding site with this theme. From a user’s standpoint, it should not take more than a few mouse clicks. After that point, it should only be a matter of customizing the content.
I recognize that there is still a sort of love/hate divide for the block editor in the inner WordPress community. However, theme authors are not doing any favors for the overall WordPress user base by not taking advantage of the tools available.
So, I recreated the Classic Wedding theme homepage from scratch. Using the block editor. With a theme that supports it.
My goal was simple. There was no demo to work from, and all I had to go on was an 800-pixel wide screenshot from the theme page on the author’s site. Like I recreated the Music Artist homepage several weeks ago, I wanted to do the same for Classic Wedding. With a couple of exceptions, which could have been handled by the theme, I was successful.
Because Classic Wedding does not support the block editor itself, I could not recreate its homepage via the block editor while using the theme. It was not happening — I tried. I knew that the Eksell WordPress theme had a “canvas” template that allowed users to edit the entire page, so it was an easy choice.
I also loaded the Kaushan Script and Lora fonts to more closely match the original theme. This was unnecessary for the experiment, but I wanted my recreation to at least look somewhat similar.
I immediately knew that I would have one hurdle to overcome. The theme used an image that overlapped both the section above and below it. This requires margin controls, particularly the ability to add negative margins. Unfortunately, this is a missing component of the block editor today. It does not mean that theme authors cannot do it with custom block styles or patterns. It simply means that end-users are unable to control it from the interface.
Because I did not want to spend my time writing the code for this, I leaned on my usual safety net, the Editor Plus plugin. While it can be a little clunky sometimes and feel like overkill, it does include those missing features like margin options.
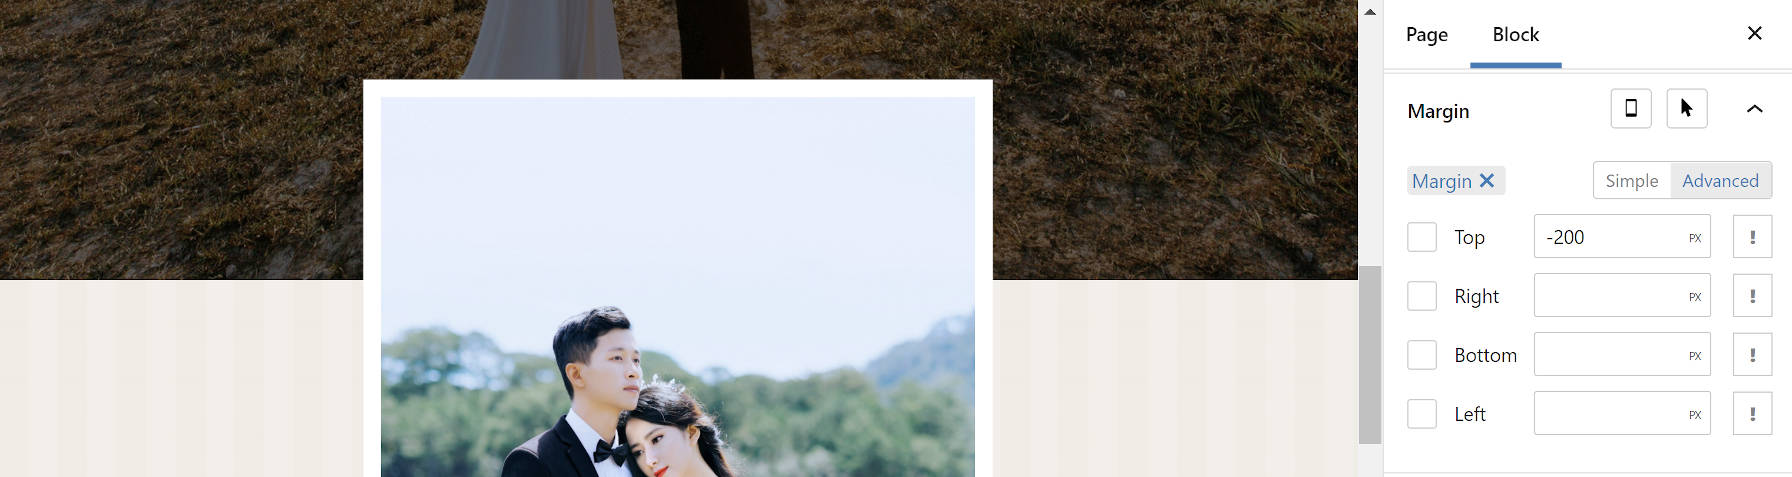
I used px units there because it was easy. In a real-world project, % or rem would have been better. But I was just doing a quick proof-of-concept.
Everything else in the content area was straightforward. I needed a Cover block with an Image, Heading, Paragraph, and Button tucked inside. I needed a Group block as a container for Image, Heading, and Paragraphs in the bottom section.
Because the theme did not package its decorative images — again, how would users recreate the homepage without them? — I opted for a simple striped SVG background instead of the flowers in the original. Since I already had Editor Plus installed, I added an SVG from Hero Icons as the main background.

My original idea was to recreate the “content” part of the homepage only. However, it was a bit boring on its own. Therefore, I transformed everything into a Columns block and added the sidebar. I recreated the primary elements using the Image, Heading, Paragraph, and Navigation blocks. Then, I added a Social Icons block for fun.

I did hit one snag with the Navigation block. WordPress does not currently offer a method of centering each link in the list when using the vertical block variation. I had to write a couple of lines of CSS to make this happen. This seems like an oversight and one area where the block editor failed to meet my expectations. Of course, this could be handled on the theme side of things.
Overall, this was a relatively simple project. However, this experiment added some complexities that were not present when I recreated the Music Artist homepage. Margin controls and vertical Navigation block alignments are must-haves. Using a third-party plugin and writing custom CSS is not ideal, and these were requirements to make this happen straight from the editor.
All of this is possible from the theme end. Each piece of this design could have been packaged as a block pattern. The overlapping image effect would have made for a neat block style. I just wish that theme authors would start utilizing the features that are being hand-fed to them.

There is no doubt that CSS plays a huge role in web performance. Milica Mihajlija puts a point on exactly why:
When there is CSS available for a page, whether it’s inline or an external stylesheet, the browser delays rendering until the CSS is parsed. This is because pages without CSS are often unusable.
The browser has to wait until the CSS is both downloaded and parsed to show us that first rendering of the page, otherwise browsing the web would be a terribly visually jerky to browse. We’d probably write JavaScript to delay page rendering on purpose if that’s how the native web worked.
So how do you improve it? The classics like caching, minification, and compression help. But also, shipping less of it, and only loading the bit you need and the rest after the first render.
It’s entirely about how and how much CSS you load, and has very little to do with the contents of the the CSS.
Direct Link to Article — Permalink
The post How to Improve CSS Performance appeared first on CSS-Tricks.
You can support CSS-Tricks by being an MVP Supporter.

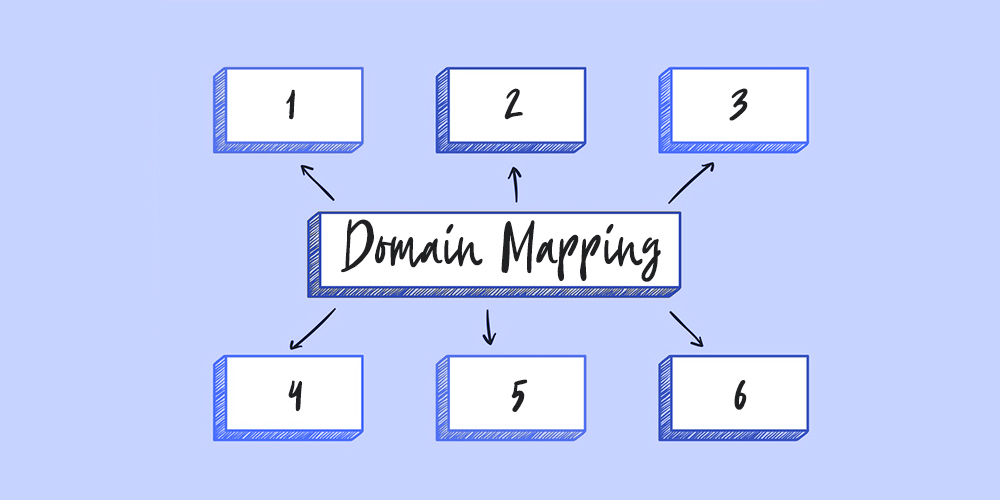 Are you trying to point multiple domains to a single WordPress installation? Do you want to display unique content for each domain and have it all easily managed in one site? Domain mapping is the solution! Many people looking for a solution like this don’t often know what to call it, so here are a […]
The post How to Map Domains in WordPress (Domain Mapping) appeared first on WPExplorer.
You may have already noticed a ‘Powered by WordPress’ footer on your WordPress website. For those wondering, the footer is …
How to Edit the Footer in WordPress in 4 Simple Steps Read More »
The post How to Edit the Footer in WordPress in 4 Simple Steps appeared first on .