An error occurring while operating a WordPress theme or site is not something unusual. However, getting them fixed and back to working can be a tedious and time-consuming task. It often eats up your working...
Looking for WordPress hosting recommendations online is a bit tough. Sure, you will find loads of reviews from various publishers – including us – but how can you know which of the hosts go beyond that initial positive impression and deliver good experience long term? That’s the kind of stuff you can only learn from actual users and website owners. This is where our WordPress hosting survey comes into play!
Do you want to create a questionnaire in WordPress to survey your visitors or collect data?
Getting feedback on your products or simply learning more about your users can help your business to succeed.
In this article, we will show you how to easily create a questionnaire in WordPress, step by step.
Why Create a Questionnaire in WordPress?
Creating a questionnaire is a great way to learn more about your audience. This lets you tailor your content to their needs. You can also use the results to create or modify the products / services that will be most helpful to your audience.
There are several survey tools that you can use outside your website, but having your questionnaire on your website itself means you have full control over how it’s displayed. Plus, it’s more familiar and reassuring for your audience.
That being said, let’s take a look at how to easily add a questionnaire to your WordPress site.
Creating a Questionnaire Form in WordPress
For this tutorial, we’ll be using WPForms to create a questionnaire.
WPForms is the best forms plugin for WordPress and allows you to easily create any kind of forms using a simple drag and drop form builder.
First, you need to install and activate the WPForms plugin on your WordPress site. For more details, see our step by step guide on how to install a WordPress plugin.
Note: You’ll need the Pro version of the plugin to get the features that we will use in this tutorial.
Upon activation, you need to visit the WPForms » Settings page in your WordPress admin area to enter your license key. You’ll find the license key under your account on the WPForms website.
Now, it’s time to move on and create your questionnaire.
Creating a Questionnaire Using WPForms’ Survey and Polls Feature
WPForms’ powerful surveys and polls addon lets you create questionnaires easily. It also produces beautiful visual graphs of the results.
First, visit the WPForms » Addons page to install the Survey and Polls addon. Use the search bar to find it, then click the Install Addon button.
Next, go to WPForms » Add New to create a new form. First, type in a name for your form at the top of the screen:
There are 4 different pre-built survey form templates to choose from. These are the Poll Form, the Survey Form, the NPS Survey Simple Form, and the NPS Survey Enhanced Form.
We are going to use the Survey Form for our questionnaire.
After you select the template, it will open up in the WPForms editor.
We recommend that you edit the questions to make them appropriate for your audience and needs. We are going to use the form to gather customer feedback on products and delivery.
To edit any field, simply click on it. The editing view will then open up on the left-hand side of your screen. Here, we are editing the Name field at the top. We changed the format to ‘Simple’ using the dropdown.
We also made it optional by unchecking the ‘Required’ box.
The ‘How can we improve?’ box only appears if the user rates their experience as 1 star or 2 stars.
We’re going to add a new feedback box that will appear if the user rates their experience as 3 or 4 stars. To do this, simply bring your mouse cursor over the ‘How can we improve?’ box then click the Copy button:
Next, WPForms will check that you want to duplicate the field. Go ahead and click the ‘OK’ button to continue:
Now, you can edit your new field on the left-hand side of the screen. We have changed the label, which appears above the box. We also changed the description, which appears below the box:
You also need to set the conditional logic for this field. To do that, click the Conditionals tab. Then, set the numbers to 3 and 4 instead of 1 and 2:
Finally, we are going to edit the ‘How satisfied are you with’ Likert scale. A Likert rating scale is a 5 or 7 point scale that is often used to measure satisfaction or attitudes.
Again, simply click on the field to edit it. Then, change the labels of the rows or columns to the text you want to use.
We are going to change the labels of the rows to make them more specific:
Go ahead and make as many changes to the form as you like. Don’t forget to click the ‘Save’ button at the top of the screen:
Setting Up Notifications for Your Questionnaire
WPForms will send each completed questionnaire to the business email address that’s set in your website settings. It’s easy to change this by going to Settings » Notifications.
Simply delete the {admin_email} in the ‘Send To Email Address’ box and enter the email address you want to use instead:
Tip: Not sure what your WordPress administration email is? Go to Settings » General and check what is listed in the ‘Administration Email Address’ box.
Don’t forget to save your questionnaire after making any changes.
Adding Your Questionnaire to Your Website
You can add your questionnaire to any post or page on your website. You can even add it to your sidebar.
To add your form to a page, edit your page or go to Pages » Add New to create a new one. Then, click the + button to add a new block. Select the ‘WPForms’ block:
Next, simply click on the dropdown and select your questionnaire form.
Now, simply preview or publish your post to see the form live on your WordPress website:
Creating a Questionnaire Using Conversational Forms
A conversational form is an interactive form that flows like a conversation. Users answer a question and it automatically shows them the next one.
It makes longer forms like a questionnaire easier to fill out and reduces form abandonment.
First, you need to go to WPForms » Addons in your WordPress admin. Then, search for and install the Conversational Forms addon:
After that, go to WPForms » Add New and create a new form using the instructions in the previous method.
If you already created your form, then simply go to WPForms » All Forms page and click on it to edit it:
Now, we are going to convert your form into a conversational form. First, go to the Settings » Conversational Forms tab. Then, simply check the ‘Enable Conversational Form Mode’ box.
You will then see a number of extra options to fill in. Conversational forms can’t be embedded in a post or page, so you need to give your form a title here. You can also write any text that you want to display above the form:
WPForms will automatically create a URL for your conversational form based on the form’s name. If you want to change this, simply type in a different URL here.
Optionally, you can also upload a header image, choose a color scheme, and change the Progress Bar style.
Once you are happy with your form’s settings, don’t forget to click the ‘Save’ button at the top of the screen:
Now, click the ‘View’ button next to the permalink for your form to see it live on your site:
The customer simply clicks the Start button to begin the form.
They can then enter their responses one question at a time. The questions that aren’t active will be faded out until the customer moves to them.
The sticky progress bar at the bottom of the screen will show how far through the form the customer is:
That’s it. You’ve successfully created your conversational questionnaire.
Viewing the Results from Your Questionnaire
Whether you created a regular survey or a conversational form, the process for viewing the results is the same.
Each questionnaire response will be emailed to the email address you set up under Settings » Notifications.
WPForms also stores all your survey results in your WordPress database. To view them, go to WPForms » Entries in your WordPress dashboard. Then, click on the name of your survey form:
You will then see some of the answers from your questionnaire. Simply click the ‘View Survey Results’ button to view all the questionnaire results.
WPForms will automatically create graphs and charts to make it easy to interpret the results:
It’s easy to export any of the graphs as a PDF or JPG. You can even print them to share with others in your organization. Just click the ‘Export’ link next to any item and choose from the dropdown menu:
You can also download all your results as a CSV file. Just click the ‘Export All (CSV)’ button near the top of the page to download all the results:
If you want to view the questionnaire answers from individual customers, then click the ‘Back to All Entries’ button at the top of the screen:
Next, scroll down to the table at the bottom of the screen. Click the ‘View’ button for the entry you want to see:
You will now see all the answers submitted by that person.
Do you want to create a custom homepage for your WordPress site?
By default, the WordPress homepage displays your blog posts, but you can edit it to show something different. For example, your homepage could be a landing page that highlights your products and services.
In this article, we’ll show you how to easily edit and customize your WordPress homepage.
What Is the WordPress Homepage?
Your homepage is the ‘front page’ of your WordPress website. It’s the first page that shows up when a user visits your domain name.
For instance, if you type in www.wpbeginner.com into your browser, the page you land on is our website’s homepage, where you can see our latest blog posts:
Why Edit the WordPress Homepage?
If you’ve decided to create a blog, then it makes perfect sense to just show your blog posts on the homepage.
But what if you’re using WordPress to build a small business website or even to run an online store? In those cases, you may prefer to highlight your products or promotions on your homepage.
Here’s a business website homepage example from OptinMonster, the best WordPress popup plugin out there. Their site has a great blog, but that isn’t the focus of their homepage. Instead, they’ve got a really clear call to action.
If that’s the case, then you’re in the right place.
We’re going to take you step by step through setting up a homepage and customizing it to match your needs. That way, you can make a great first impression and encourage your visitors to take the actions that are most important to your site’s mission.
Some of the best WordPress themes will create a homepage design for you, and provide options so you can easily edit it.
You can find these options by visiting Appearance » Customize on the admin sidebar. This will launch the WordPress theme customizer with a live preview of your theme.
The Theme Customizer will have different options for different themes. Your preview and the available options may look different depending on the theme you are using. We’re using the free Hestia theme in this example.
To edit any part of the homepage, simply click the blue pencil icon next to it. Here, we’re editing the image, text, and button at the top of the homepage.
Note: As soon as you make edits, they’ll be shown in the preview of your site. Those changes won’t be live on your site until you publish them.
If you want to remove a section from the homepage, then you just need to click the blue eye icon in the top left corner of that section.
You can also remove sections and add them back in using the ‘Frontpage Sections’ tab.
Once you’re happy with your homepage, you need to click the ‘Publish’ button to make it live.
Here’s how our homepage looks, live on the website:
Using your theme’s built-in options is the quickest way to set up your homepage. However, some themes may not have many options, or you may not be satisfied with how your homepage looks.
Don’t worry, there are plenty of other ways for you to edit your homepage and give it the look you want.
Editing Your Homepage With the Block Editor
The WordPress block editor is a simple way to create a custom homepage, although it’s limited by your theme’s design.
To use the block editor, simply go to the Pages » All Pages screen and edit the ‘Home’ page that you created earlier.
Now you can start creating the content for your page.
In this part of the tutorial, we’ll be using a few simple blocks to create a basic homepage.
First, we’ll add a welcome message to the page. You can do this by simply clicking on the page to start typing. WordPress will automatically create a paragraph block for you.
If you want to make the text larger, then it’s easy to do that in the block settings on the right hand side. Just click on one of the preset sizes, or you can click on the ‘Set custom size’ icon and type any size you like.
You can also change the color of your text, using the ‘Color’ options for the text or background.
Next, we’ll add an image to the page. You can do this by clicking the (+) symbol and then selecting the Image block.
You’ll find it in the Media section, or you can search for it using the search bar.
You can pick an image from your media library or upload a new one.
Next, we’ve added another paragraph block, with the text ‘Check out our latest posts here’.
We’ve then added a ‘Latest Posts’ block, which we’ve set to show the post excerpt and featured images, as well as the post titles. You can find out more about the Latest Posts block in our tutorial on displaying recent posts in WordPress.
You can add as many blocks as you want to your homepage. You may also want to use a ‘full width’ or ‘no sidebars’ template for your page if your theme has one.
For example, when using the Astra theme, you can customize the layout of the page from the Astra Settings pane. Other themes may provide a section in the Document settings pane.
Once you’re happy with your homepage, you should click the ‘Update’ or ‘Publish’ button on the top right of the screen to push your changes live.
Here’s how our finished homepage looks:
What if you want to go further with your homepage? One option is to try some of these best block plugins for WordPress to add new functionality, such as a contact form, testimonials, reviews, and more.
The easiest way to edit your homepage is by using SeedProd. It’s the best WordPress theme builder plugin and can create beautiful website layouts and custom templates without writing any code.
You can use SeedProd to create a fully custom WordPress theme, including a custom homepage template.
Note: There is a free version of SeedProd, but you will need the Pro version to access the theme builder and edit the homepage template.
Upon activation, you need to enter your license key. You can find this information under your account on the SeedProd website.
After that, you can use SeedProd to easily create a WordPress theme, including a completely custom homepage from scratch.
Creating a Custom WordPress Theme
You can create a new theme in SeedProd by navigating to the SeedProd » Theme Builder page. Here, you’ll use one of SeedProd’s ready-made themes as a starting point. This will replace your existing WordPress theme with a new, custom design.
You can do that by clicking the ‘Themes’ button.
You will be shown a list of professionally designed themes that are designed for different types of websites. For example, there are templates called ‘Modern Business’, ‘Marketing Agency’, and ‘Mortgage Broker Theme’.
Take a look through the options and select one that best matches your needs by clicking the checkmark icon. For this tutorial, we’ll choose the ‘Digital Strategy’ theme.
Once you have chosen a theme, SeedProd will generate all the theme templates you need. It will include a template for your static homepage, as well as one for your blog’s index page.
Editing the Homepage Template
SeedProd makes it easy to edit any of these templates using a drag and drop page builder.
Simply click the ‘Edit Design’ link found under the ‘Homepage’ template. This will open the template in SeedProd’s visual editor.
This simple drag and drop builder will show a live preview of your page to the right and a toolbar on the left. You can add new blocks by dragging them onto the page, rearrange them by dragging them up and down with your mouse, and customize any block by clicking on it.
Notice that the template has already provided an attractive layout and added plenty of relevant content on the page. Now you just have to edit it to suit the purpose of your website.
When you hover your mouse over a block, a toolbar will appear.
If you click on the block, then you can adjust its settings in the left pane.
For example, when you click on the headline, you can edit the text, change the alignment, alter the font size, and more.
When you change a setting, you can immediately see it in the preview on the right.
For example, we’ll change the text to ‘All About WordPress’.
Once you’ve done this, you can click the ‘Blocks’ icon near the top of the settings page. This will return you to the Blocks view.
Next, we’ll edit the button text. You can click on the button labeled ‘What we do’ and edit the text to say ‘See the courses’.
Now we’ll scroll down our homepage until we come to the list of bullet points about the products and services you offer.
You can edit these in the same way, by clicking on a block and editing the text.
Your homepage should now look something like the screenshot below.
If you need to add more detail, then you can add another row of bullet points by clicking the blue ‘+’ icon at the bottom.
The SeedProd template may have included more sections than you can use. You can easily delete any blocks or sections you don’t need by simply clicking the trash icon.
For example, you can hover your mouse over the ‘Trusted By’ section of the homepage. Once the toolbar appears, you can click on the Trash icon to delete that section.
Near the bottom of the homepage there is a FAQ section. This was created using an Accordion block, which makes it simple to customize the questions and answers you want to include on your homepage.
When you click on the block, you are able to edit the text for each question and answer.
Once you have finished customizing your homepage, make sure you click the ‘Save’ button at the top of the screen. Then you can return to the list of templates by clicking the ‘X’ icon.
As you can see, SeedProd’s templates, drag and drop interface, and useful blocks make it ideal for editing your website’s homepage. For even more ideas, take a look at our guide on how to create a landing page with WordPress.
Using Method 2, you should scroll down to the section on customizing your blog page. Here you’ll learn how to add new blocks using drag and drop, and how to change the settings for each block on the page.
We’ll show you how to edit the Posts block to list your posts in multiple columns and display or hide the featured image for your posts.
There are settings for how many posts to display, and whether to show a post excerpt. You can also filter the index by post type, category, tag, or author, and change the sort order.
Enabling the SeedProd Theme
Once you have finished customizing the theme templates, you will need to publish the new custom theme. Simply toggle the ‘Enable SeedProd Theme’ setting to the ‘YES’ position.
If you haven’t already changed your WordPress Home and Blog page settings, then you’ll see a notification message. When you click the ‘OK’ button these settings will be changed for you.
You can now visit your website to view your new home page.
Editing Your Homepage With a Page Builder Plugin
Divi is a popular WordPress page builder plugin. It comes with a WordPress theme and a page builder plugin with dozens of gorgeous templates.
You can use the Divi page builder with any theme. For this tutorial, we’re going to use it with the Divi theme.
First, you’ll need to download, install, and activate the Divi theme from Elegant Themes. This includes the Divi builder, so you don’t need to install it separately. You will need to enter your username and API key under Divi » Theme Options » Updates in order to access the layout packs.
Once you’ve got the Divi theme and page builder up and running, you can set up your homepage. First, go to the Pages menu in your WordPress dashboard and then edit the homepage we created earlier.
Before you start editing your homepage, it’s a good idea to switch to the ‘Blank Page’ template under the ‘Template’ panel on the right. That way, your homepage won’t have a sidebar, title, menu, or any other default elements.
Next, you can click the ‘Use The Divi Builder’ button at the top of the screen.
Now, you’ll need to click the ‘Edit With The Divi Builder’ button in the center of the screen.
You should now see the Divi Welcome Screen. It includes a video tutorial on how to use Divi, a brief description of how to get started, and buttons to either start building your page or take a tour of Divi’s features.
We’ll click the ‘Start Building’ button at the bottom of the page.
Next, you’ll see a range of options you can use to create your page. We suggest using a premade layout as the basis for your homepage. This makes it really quick and easy to get your homepage set up.
Divi has an impressive range of different layouts to choose from. There are hundreds of different layout packs, and each of these has several different page layouts including homepages.
You can search through these by typing in a search term, or you can check the boxes to view only layouts that fit certain categories.
We’re going to use the ‘Travel Blog’ layout pack to create our homepage.
First, click on the pack that you want to use:
Next, you’ll see a description of the layout pack, plus the different page layouts that are available. You’ll probably want to use the ‘Home’ page or ‘Landing’ page for your homepage. We’re going to pick the ‘Home’ option.
Once you’ve chosen your layout, click the ‘Use This Layout’ button at the bottom of the page.
Divi will automatically import the layout for you. You’ll then see it live on your page, exactly as it’ll appear on your site. To edit any part of it, simply click on it.
Divi uses a system of rows (split into columns) and modules to create your page. With text modules, you can click on the text and type in whatever you want straight onto the screen.
Here, we’ve changed the header and the text below it:
With other modules, you can bring your mouse cursor over them and click the ‘Module Settings’ icon to edit them.
Here, we’re editing one of the number counters:
You can delete modules and rows in the same way, using the trash can icon.
You’ll likely want to use your own images on your homepage. You can change these by editing the module settings.
Note that the image at the top is set as the Background for a Fullwidth Header Module, so you’ll need to change it under Content » Background for that module:
Once you’re happy with the changes you’ve made to your page, you can click ‘Save’ at the bottom of the screen.
Sometimes the bottom row of buttons will be hidden.
If you can’t see them, then you’ll need to click the purple “…” button to open them up.
Here’s how our page looks live on the website:
Setting Your Homepage in WordPress
By default, WordPress displays your blog posts on the homepage.
That means that after creating and customizing your homepage, you’ll need to tell your WordPress site to display that page when someone visits your domain.
Let’s take a look at how to set a separate homepage and blog page in WordPress.
Pro Tip: Do you already have visitors to your site? Then you might want to put your site into maintenance mode while you’re setting up your homepage. Alternatively, you could set up a staging site where you can create your homepage before publishing it live.
First, simply go to Pages » Add New and name your new page Blog. After that, you can go ahead and publish the blank page.
Once your homepage and blog page are ready, you need to tell WordPress to start using these pages.
You can do this by going to Settings » Reading page in your WordPress admin area. You need to select ‘A static page’ option under the ‘Your homepage displays’ section. After that, go ahead and select your home and blog pages.
Don’t forget to click on the ‘Save Changes’ button to store your settings.
That’s it! You’ve created a great looking homepage in WordPress and set it up successfully.
We hope this tutorial helped you learn how to edit a WordPress homepage. You might also want to take a look at our guide on the must have WordPress plugins and our tips on how to improve WordPress SEO.
If you liked this article, then please subscribe to our YouTube Channel for WordPress video tutorials. You can also find us on Twitter and Facebook.
Do you want to add Facebook Open Graph meta data to your WordPress themes?
Open Graph metadata helps Facebook and other social media websites get meta data about your posts pages. It also allows you to control how your content appears when shared on Facebook.
In this article, we will show you how to easily add Facebook open graph metadata in WordPress themes. We’ll share three different methods, so you can choose one that works best for you.
Method 1. Adding Facebook Open Graph Meta Data with All in One SEO
All in One SEO is a popular WordPress SEO plugin used by over 2 million websites. It allows you to easily optimize your website for search engines as well as social platforms like Facebook and Twitter.
Upon activation, you need to visit All in One SEO » Feature Manager page. From here you need to activate the ‘Social Meta’ feature.
Next, you need to visit All in One SEO » Social Meta page. From here, you can simply fill in the fields to enter your Facebook meta data.
You can start by providing title, image, and description for your homepage.
Below that you can set a default image to be used if an article doesn’t have an open graph image. You can also provide the width and height of the image.
Need help choosing image sizes? See our complete social media cheat sheet for ideal image sizes that you can use on all social media platforms including Facebook.
If your website is using a Facebook App or has a Facebook page, then you can provide your Facebook app ID in the next section. This allows you to get data for Facebook insights.
Optionally, you can also adjust settings for Twitter and run a scan to avoid duplicate Open Graph tags on your site.
Once you are done, don’t forget to click on the ‘Update Options’ button to store your changes.
Now that you have set site-wide open graph meta tags, the next step is to add open graph meta data for individual posts and pages.
By default, All in One SEO will use your post title and description for open graph title and description. You can also manually set the Facebook thumbnail for each page and post.
Simply edit the post or page and scroll down to the All in One SEO section below the editor. From here, switch to the Social tab and fill out open graph meta data. You can set the social media image here as well as title and description.
Method 2. Set Facebook Open Graph Meta Data using Yoast SEO
Yoast SEO is another excellent WordPress SEO plugin that you can use to add Facebook open graph meta data into any WordPress site.
Once activated, you need to go to SEO » Social and simply check the box next to Add Open Graph meta data.
You can save your settings or continue and configure other Facebook social options on the screen.
You can provide a Facebook app ID if you use one for your Facebook page and insights. You can also change your homepage Open Graph meta title, description, and image.
Lastly, you can set a default image to be used when no image is set for a post or page.
Yoast SEO also allows you to set Open Graph metadata for individual posts and pages. Simply edit a post or page and scroll down to the SEO section below the editor.
From here, you can set Facebook thumbnail for that particular post or page. If you don’t set a post title or description, then the plugin will use your SEO meta title and description.
You can now save your post or page and the plugin will store your Facebook open graph meta data.
Method 3. Manually Add Facebook Open Graph Meta Data into Your WordPress Theme
This method requires you to edit your theme files, so make sure that you back up your theme files before making any changes.
After that simply copy and paste this code in your theme’s functions.php file, or in a site-specific plugin.
//Adding the Open Graph in the Language Attributes
function add_opengraph_doctype( $output ) {
		return $output . ' xmlns:og="http://opengraphprotocol.org/schema/" xmlns:fb="http://www.facebook.com/2008/fbml"';
	}
add_filter('language_attributes', 'add_opengraph_doctype');

//Lets add Open Graph Meta Info

function insert_fb_in_head() {
	global $post;
	if ( !is_singular()) //if it is not a post or a page
		return;
        echo '<meta property="fb:app_id" content="Your Facebook App ID" />';
        echo '<meta property="og:title" content="' . get_the_title() . '"/>';
        echo '<meta property="og:type" content="article"/>';
        echo '<meta property="og:url" content="' . get_permalink() . '"/>';
        echo '<meta property="og:site_name" content="Your Site NAME Goes HERE"/>';
	if(!has_post_thumbnail( $post->ID )) { //the post does not have featured image, use a default image
		$default_image="http://example.com/image.jpg"; //replace this with a default image on your server or an image in your media library
		echo '<meta property="og:image" content="' . $default_image . '"/>';
	}
	else{
		$thumbnail_src = wp_get_attachment_image_src( get_post_thumbnail_id( $post->ID ), 'medium' );
		echo '<meta property="og:image" content="' . esc_attr( $thumbnail_src[0] ) . '"/>';
	}
	echo "
";
}
add_action( 'wp_head', 'insert_fb_in_head', 5 );
Note: Remember to change the Site Name where it says “Your Site Name Goes Here”. After that, change the default image URL with the image of yours. You also need to add your own Facebook app ID, If you don’t have a Facebook app, then you can remove the Facebook app ID line from the code.
We would recommend putting an image with your logo there, so if your post does not have a thumbnail, then it pulls your site’s logo.
That’s all you need to do. As soon as you save your functions.php file (or site-specific plugin) it will start showing Facebook open graph metadata in the WordPress header.
If you liked this article, then please subscribe to our YouTube Channel for more WordPress video tutorials. You can also find us on Twitter and Facebook.
Fastest hosting for WordPress 2021: how to find the fastest web hosting for WordPress! On the lookout for the fastest WordPress hosting services to serve up your website? Finding a fast web hosting for WordPress...
Looking for the cheapest WordPress hosting that you can afford on a tight budget? Here is our list with 10 cheap WordPress hosting services. Whether you run a personal website or a site for your...
The block editor has a special ‘Gallery’ block that lets you display images in rows and columns.
First, you’ll need to create a new post / page or edit an existing one to open the content editor. Once inside, click the (+) symbol to add a new block.
Next, you need to select the Gallery block and add it to your page. You can find the Gallery block in the Common Blocks section, or you can use the search bar to quickly locate it.
Now, you can easily add images to your gallery block, by dragging them into it or by using the Upload button. You can also select images from your WordPress media library.
As you can see, we’ve added 2 images to our Gallery block. WordPress has automatically positioned them side by side.
What if you want 3 images side by side? Here’s what happens if we add a third image. WordPress simply resizes the others to fit all 3 side by side:
If you upload a fourth image, then WordPress will place it beneath the others.
You can change the number of images WordPress should include side by side in a single column.
First, click on the Gallery block, if it’s not already selected. On the right hand side of the screen, you’ll see the Gallery’s block settings.
You can adjust the number of columns here to any number between 1 and 4. For instance, if you want two images side by side, and two more beneath them, you can set the Columns to 2.
It’s as simple as that!
If you want to change where an image is positioned in your gallery, just click on it. You’ll then see arrows that you can use to move it forward or backward in the gallery.
Here’s a finished gallery demo from our sample post:
Using a Plugin to Put Images Side by Side in WordPress
If you’re using the old classic WordPress editor, or if you want to create more complex galleries than the default Gallery block, then you will need a WordPress gallery plugin.
For the sake of this tutorial, we will be using the free version of Envira, but you may want to get the Pro version to get powerful features like albums, image slideshows, etc.
Next, you can go to Envira Gallery » Add New in your WordPress dashboard.
You’ll need to give your gallery a title. We’ve called ours ‘Example Gallery’. Next, upload the images you want to use.
You can either drag and drop them into the upload box, or you can use one of the ‘Select Files’ buttons.
Here’s how the images look once they’ve been uploaded:
You may want to give your images a title and alt text here. The title appears below your image when the user brings their mouse cursor over it.
The title also appears below the image in the lightbox popup mode, which we’ll take a look at in a moment.
To edit the title and alt text, click the Edit button on an image in the gallery.
You can then change the title for your image. It defaults to the image’s filename.
You should also enter alt text, as this is helpful for your WordPress site’s SEO. If your title describes the image, then you can simply repeat it for the alt text.
Once you’re done, please make sure you click the ‘Save Metadata’ button before clicking the X to close the window.
To add your gallery on the site, you’ll first need to publish it. Go ahead and click the Publish button on the right hand side of the screen.
Now, edit a post or page, or create a new one. Inside the content editor, click (+) to add a block to your post, and select the Envira Gallery block. You can find it in the Common Blocks section, or you can use the search bar.
You’ll then need to click on the dropdown to select your gallery.
You should see your gallery in place in your post.
You can adjust the settings on the right-hand side of the screen. For instance, you might want to change the column layout, or the size of the margin between images.
We decided to set our gallery to always display in two columns. We also added a wider margin between the images.
The user can click on an image to see the full-sized version in a lightbox. They can scroll through the images using the lightbox, too.
If you want to add more images to your gallery, then you can go back to it by visiting Envira Gallery » All Galleries in your WordPress dashboard. Simply click on the name of your gallery to edit it.
Any changes you make to your gallery will appear wherever you’ve placed it in your posts, pages, or sidebars. You don’t need to add it to these again.
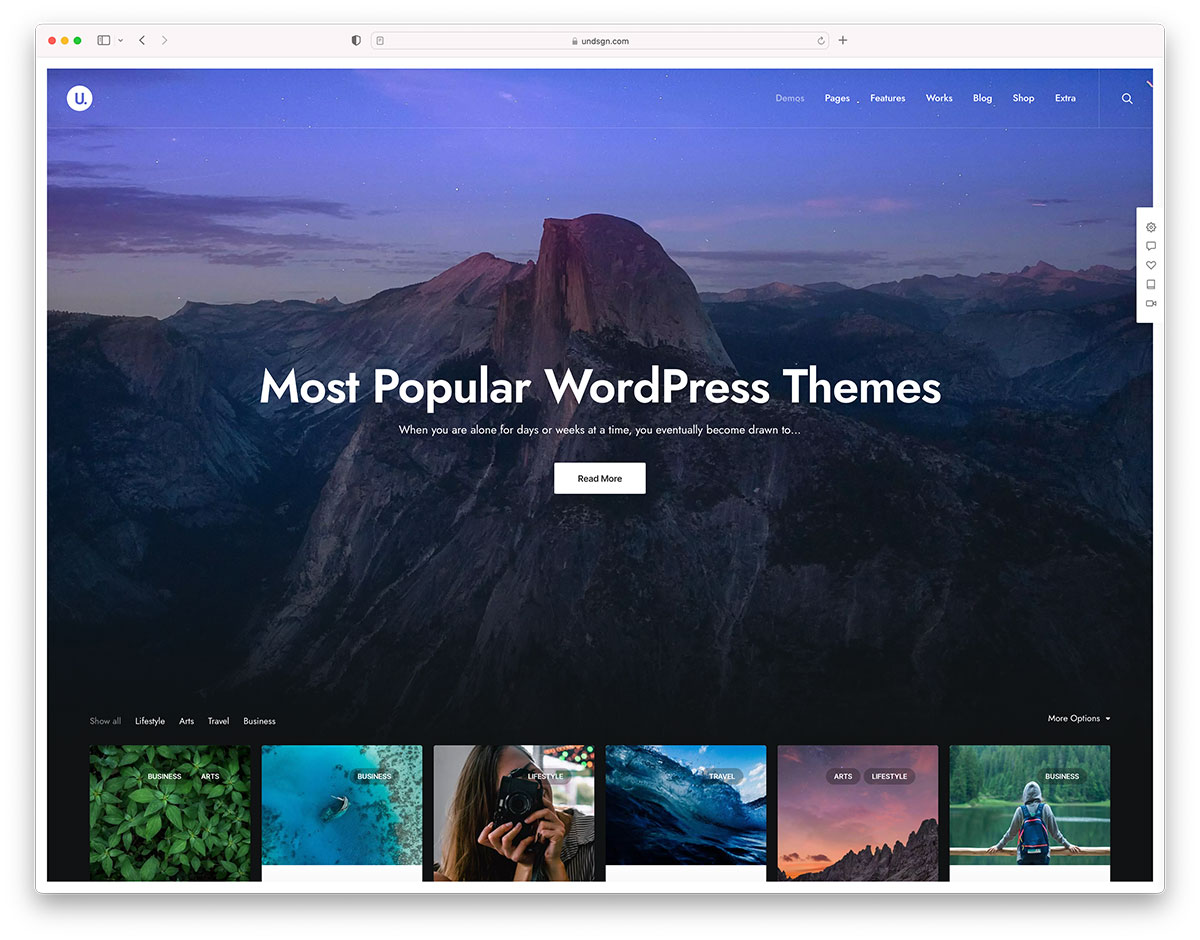
Looking for the most customizable WordPress theme? Finding the best WordPress theme that functions and looks exactly how you want can be a daunting task – if not impossible. With hundreds of free and premium...
Do you want to add a hyperlink in WordPress? Recently, one of our users asked us how to add a link in WordPress.
There are several different ways to add links in WordPress. You can add links in your posts, pages, navigation menu, sidebar widgets, footer area, and more.
In this comprehensive beginner’s guide, we will show you how to add a link in WordPress posts, pages, widgets, navigation menus, and more.
Since this is a detailed tutorial, please use the navigation below to quickly jump to the section you need:
Links are the bloodstream of the internet, which makes them really important.
Basically, most websites on the internet are connected via links, which is why the term ‘web’ or ‘World Wide Web’ was introduced in the first place.
These are the hyperlinked text, buttons, and other elements that you click to go from one page to another or from one website to another.
Imagine visiting a web page with no link for you to click on. You’ll have no option but to click on the back button in your browser.
For individual websites, links tell your users where to click to view more information.
Properly placing links on your website allows you to increase the time users spend on your website. It also helps users discover more content, make a purchase on your online store, or subscribe to your email newsletter.
That being said, let’s take a look at how to easily add links in different areas of your WordPress website.
How to Add Links in WordPress Posts and Pages
WordPress makes it really easy to add links in your blog posts and pages using the block editor.
Simply edit your post or page, or create a new one.
Next, highlight the text that you want to attach the link to. This selected text is called the anchor text for the link. Now click on the ‘Link’ button:
You’ll see a box where you can enter a URL. A URL is a web address. For instance, WPBeginner’s guide on how to start a WordPress blog has the URL https://www.wpbeginner.com/start-a-wordpress-blog.
You can simply copy and paste the URL of the post or page you want to link to, like this:
Click the Apply (Enter) button to insert the link into your post.
If you’re linking to content on your own site, then it might be quicker to search for it. Type a word or two from your content title, and WordPress will find it:
Click on the title of the page or post you want to link to, and the URL will be automatically added for you. Again, you’ll need to click the Apply button to put the link into your post.
If you want to set your link to open in a new tab, then click the arrow on the right. You can then click the toggle and set your link to open in a new tab.
Note: We recommend that you only use this option for links to third-party websites. This way your users don’t leave your website while visiting it.
Open up the post that you want to edit, or create a new one. Find the text you want to use as the link’s anchor and highlight it. Then, click the ‘Link’ button which should appear in the first row of toolbar buttons.
You can then copy and paste the URL you want to link to, or search for it, as in the block editor.
Pasting your URL directly onto the anchor text
Another, even quicker, way to add a link in both the block editor and classic editor is to simply paste the URL onto the anchor text.
First, copy the URL you want to link to. Then, highlight your chosen anchor text in your post.
Next, you can either right-click and select ‘Paste’ or simply press Ctrl+V (Windows) or Command+V (Mac) to paste the URL.
WordPress will automatically detect that you’re pasting a URL, not text, and will turn the anchor text into a link.
WordPress allows you to add widgets to your site’s non-content areas like sidebar, footer, or other widget areas.
Some of these widgets are automated and do not have many options. For example, the Recent Posts widget will automatically show links to your recent posts. You don’t need to do anything extra.
However, if you want to add some custom text with links in your sidebar, then you can use the Text Widget.
Go to the Appearance » Widgets page and then drag ‘Text’ widget into your sidebar or other widget area.
You can then type in your text and add a link just as you would when adding one to a post or page.
Make sure you click the ‘Save’ button beneath your widget after making changes.
How to Add Links in WordPress Navigation Menus
Do you want to add links to your site’s navigation menu? WordPress comes with a built-in drag and drop menu editor which allows you to create and manage navigation menus on your WordPress site.
Go to the Appearance » Menus page. If you don’t already have a menu set up, then you can create one by entering a menu name.
Next, select the pages you want to add to your menu on the left-hand side, then click the ‘Add to Menu’ button.
WordPress will automatically link to your selected posts and pages. You can move menu items and up and down to rearrange them.
You can also add any link you want to your menu. It doesn’t have to be a page or post on your site. For instance, you could enter the URL of your Twitter profile and add that to your navigation menu.
To enter a link, just click the arrow next to the ‘Custom Links’ section on the left. You can then type in the URL and the text you want to use for the link.
It’s often useful to give your links a title. This is the text that appears when someone runs their mouse cursor over the link, like this:
Adding a title often makes it clear where the link leads to. It can be helpful or even reassuring for your readers.
However, WordPress does not allow you to add title to the links with the default editor. You can still add it, and we’ll show you how to do that in a bit.
You may also want to add a nofollow tag to external links. This tells search engines not to pass your site’s SEO score to that link because you don’t own or control the content on that website.
WordPress also does not support nofollow by default either.
Method 1. Use AIOSEO plugin in Gutenberg
All in One SEO plugin (AIOSEO) for WordPress automatically adds the title, nofollow, sponsored, and UGC attributes to your links.
Method 2. Use HTML code in Gutenberg
If you’re using the Gutenberg editor, and don’t want to use AIOSEO, then you’ll need to manually edit the HTML to add title and nofollow attributes to your links.
First, add your link within your paragraph block in the usual way. Next, click on the three vertical dots and select ‘Edit as HTML’ as shown here:
You’ll now see the HTML code for your block.
You can add a title and/or a nofollow attribute to the link like this:
<p>You can find out more about our company on our <a href="https://www.examplecompany.com/about-us/" title="About Us" rel="nofollow">About Us</a> page.</p>
For the title, you can change “About Us” to be whatever you want. With the nofollow attribute, this should always be rel="nofollow". Don’t forget the double quotation marks around the title and the “nofollow” as your link won’t work correctly without them.
Do you want to add a button to your WordPress posts or pages? There are many ways you can do this. The easiest is using WordPress’s built-in Button block.
Create a new post or page, or edit an existing one. Then, click the (+) icon to create a new block. Select ‘Button’ from the ‘Layout Elements’ options, or simply search for the Button block.
You can type the text for your button by clicking in the colored area. Enter the URL that the button should go to in the ‘Link’ box.
To change the button’s alignment, or to make the text bold or italic, just use the controls at the top of the block itself.
You can make more changes to how the button looks in the block options on the right-hand side of your screen. For instance, you might want to change the color or add a wider border.
You can also change the link settings here. You can set your link to open in a new tab, and if you want, you can also add the ‘nofollow’ attribute to the link by typing it in the ‘Link rel’ box.
What if you’re still using the old WordPress classic editor? You can install the “Forget About Shortcode Buttons” plugin to easily create buttons while you’re editing a post or page.
You’ll see the ‘Insert Button’ icon in the toolbar, on the right hand side:
Click on the button, and you’ll see a popup. Here, you can customize your button, choose colors, borders, add text, add an icon, and include the link itself while seeing a live preview.
You can easily embed certain types of content in WordPress by simply inserting its URL in your post. This is sometimes called creating a “content card” in your post.
Just paste the whole URL into its own paragraph block. The whole tweet, including images, likes, timestamp, and more will be embedded like this:
The process is the same for YouTube videos. Simply find the video you want to use on YouTube and copy the URL from the top of your browser window:
Next, paste the link into your post or page. It’ll automatically embed the video:
As well as being great for Twitter posts and YouTube videos, this method also works for many other types of content. You can find out more from WordPress’s support article on ‘Embeds’.
How to Add Affiliate Links in WordPress
Do you want to increase your site’s revenue by using affiliate links? Affiliate marketing provides a steady income to many blogs and websites.
All you need to do is add special referral links to products and services that you recommend. When your visitors purchase these products after clicking your links, you get a commission.
The problem that most beginners face is that each product or website they want to recommend has a different URL. It’s tricky to keep track of these, especially if you’re recommending lots of products.
The best way to add and manage affiliate links is by using an affiliate management plugin. We recommend using either Pretty Links or Thirsty Affiliates.
Both of these plugins work by creating redirect links such as www.yoursite.com/refer/partnersitename that send people to your special affiliate link.
The plugins will add a new option to your WordPress menu where you can add your affiliate links. Here’s how that looks with ThirstyAffiliates. You simply copy and paste your special affiliate link into the ‘Destination URL’ box.
You can set specific options for your link on the right hand side, deciding whether to nofollow it, open it in a new window/tab, and more.
Once you’re done, click ‘Save Link’.
After you’ve set up your affiliate links, you can easily add them into your posts and pages. In a paragraph block, click the down arrow then select the ‘Affiliate Link’ option:
Next, type in the start of whatever you named that affiliate link. In our example, that’s “Our Affiliate Partner”.
You can then click the name and click ‘Apply’ to add the affiliate link to your post.
If you ever need to change an affiliate link (e.g. if the company you’re linking to moves to a different affiliate program) then that’s really easy to do.
You just change it once in your dashboard, under “ThirstyAffiliates” or “Pretty Links”. The redirect link stays the same as before, but it’ll now redirect to the new affiliate link everywhere it’s used.
Occasionally, you might want to add a link to your site using HTML code. This could happen if you need to use a custom HTML block or widget.
You might also need to directly edit a link in your theme file. Just make sure you always use a child theme so you don’t lose your changes when you update the parent theme.
It’s easy to create a link in HTML. To try it, add a custom HTML block to a post or page. You can find this block under ‘Formatting’ or you can search for it using the search bar.
Next, you’ll see a box where you can write HTML. Copy this code into the box:
<a href="https://www.yourlinkhere.com">Text</a>
It should look like this:
You can click the ‘Preview’ tab to see how your code will look in your post or page:
Now click back to the ‘HTML’ tag. Change the URL to the URL you want to link to. Change the word ‘Text’ to whatever word or words you want to use for your link.
To add a title to your link, you’ll need to include it in the code like this. You can change “This is the title” to anything you want.
<a href="https://www.yourlinkhere.com" title="This is the title">Text</a>
If you want your link to open in a new tab, simply add target="_blank" to the HTML code, like this:
You can include all of these at once. This is how a link with a title, that opens in a new tab and is nofollowed, would look:
<a href="https://www.yourlinkhere.com" title="This is the title" target="_blank" rel="nofollow">Text</a>
That’s how you create a link in HTML, if you ever need to.
How to Easily Add Anchor Links in WordPress
An anchor link is a type of link on the page that brings you to a specific place on that same page. It allows users to jump to the section they’re most interested in.
Take a look at the animated screenshot below:
These type of links are really helpful when writing longer tutorials or content, so your users can easily jump to the section they’re most interested in.
Want to add social share links or buttons on your site?
These links make it easy for your users to share your content on their favorite social networks. Sometimes social share links or buttons are also accompanied by total share count.
We don’t advise users to add these links manually. Instead, you should always use a social share plugin.
Do you want to add custom navigation menus in your WordPress theme?
All themes have set locations where you can display a navigation menu. However, by default, you can’t add a menu anywhere else except these pre-defined locations.
In this article, we’ll show you how to add a custom navigation menu to any area of your WordPress theme.
Why Add Custom Navigation Menus in WordPress Themes?
The exact location of your menu will vary based on your WordPress theme. Most themes have several options, so you can create different menus and show them in different places.
To see where you can display menus in your current WordPress theme, simply head over to Appearance » Menus and then take a look at the ‘Display location’ section.
The following image shows the locations that are supported by the Astra WordPress Theme.
However, sometimes you may want to show a menu in an area that isn’t listed as a ‘Display location’ in your theme.
With that in mind, let’s take a look at how to create WordPress navigation menus and then add them to your theme. Simply use the quick links below to jump to the method you prefer.
Method 1. Adding a Custom Navigation Menu in Full Site Editing
If you’re using a block theme, then you can add a custom navigation menu using Full Site Editing (FSE) and the block editor. For more details, you can see our article on the best WordPress full-site editing themes.
This method doesn’t work with every theme, and it doesn’t let you customize every part of the menu. If you want to add a completely custom menu to any WordPress theme, then we recommend using a page builder plugin.
If you are using a block-based theme, then head over to Appearance » Editor.
This will launch the full site editor with one of your active theme’s templates already selected.
If you want to add a custom navigation menu to a different template, then click on the arrow in the toolbar and select ‘Browse all templates.’
The site editor will now show all the different templates that are part of your theme.
Simply find the template that you want to edit, and give it a click.
The next step is adding a Navigation block to the area where you want to show your menu.
In the top-left corner, click on the blue ‘+’ button.
Now, go ahead and type ‘Navigation’ into the search bar.
When the ‘Navigation’ block appears, simply drag and drop it onto your layout.
Next, click to select the Navigation block.
If you’ve already created the menu that you want to display, then click ‘Select Menu’ and make your selection from the dropdown.
Another option is to click on ‘Create new menu,’ which allows you to build a navigation menu inside the full site editor.
To start with a blank menu, simply click on ‘Start empty.’
To add items to the new menu, just click on the ‘+’ icon.
This opens a popup where you add any post or page, and decide whether these links should open in a new tab.
Simply repeat these steps to add more items to the menu.
When you’re happy with how the menu looks, simply click on the ‘Save’ button. Your site will now be using the new template, and visitors can interact with your custom navigation menu.
Method 2. Creating a Custom Navigation Menu in WordPress Using SeedProd (Works With All Themes)
The full site editor is a quick and easy way to add a basic custom menu to block-based themes. However, if you want to add an advanced, fully-customizable menu to any theme, then you’ll need a page builder plugin.
SeedProd comes with over 180 professionally-designed templates that you can use as your starting point. After choosing a template, you can add a custom navigation menu to your site using simple drag and drop.
First, you need to install and activate the SeedProd plugin. For more details, see our step-by-step guide on how to install a WordPress plugin.
Note: There’s also a free version of SeedProd that allows you to create custom navigation menus without writing code. However, in this guide, we’ll be using SeedProd Pro since it has lots more templates for you to choose from.
After activating the plugin, SeedProd will ask for your license key.
Once you’ve done that, go to SeedProd » Landing Pages and click on the ‘Add New Landing Page’ button.
You can now choose a template for your custom page.
To help you find the right design, all of SeedProd’s templates are organized into different campaign types such as coming soon and lead squeeze campaigns. You can even use SeedProd’s templates to improve your 404 page.
To take a closer look at any design, simply hover your mouse over that template and then click on the magnifying glass icon.
When you find a design that you want to use, click on ‘Choose This Template.’
We’re using the ‘Black Friday Sales Page’ template in all our images, but you can use any template you want.
After choosing a template, type in a name for that custom page. SeedProd will automatically create a URL based on the page’s title, but you can change this URL to anything you want.
After entering this information, click on the ‘Save and Start Editing the Page’ button.
Most templates already contain some blocks, which are the core components of all SeedProd page layouts.
To customize a block, just click to select it in the page editor.
The left-hand toolbar will then show all the settings for that block. For example, in the image below, we’re changing the text inside a ‘Headline’ block.
You can format the text, change its alignment, add links, and more using the settings in the left-hand menu.
To add new blocks to your design, simply find any block in the left-hand menu and then drag it onto your design. If you want to delete a block, then simply click to select that block and then click on the trash can icon.
Since we want to create a custom navigation menu, drag a ‘Nav Menu’ block onto the page.
This creates a navigation menu with a single default ‘About’ item.
To customize this menu item, click to select it in the left-hand menu.
This opens some controls where you can change the text, as well as add the URL for the menu item to link to.
By default, the menu item will be a ‘dofollow’ link and open in the same browser window. To change either of these settings, simply use the checkboxes in the ‘URL Link’ section.
In the following image, we’re creating a “nofollow” link that will open in a new window.
To add more items to the menu, simply click on the ‘Add New Item’ button.
You can then customize each of these items by following the same process described above.
The left-hand menu also has settings that change the font size and text alignment.
You can even create a divider, which will appear between each item in the menu.
After that, go ahead and switch to the ‘Advanced’ tab. Here, you can change the menu’s colors, spacing, typography, and other advanced options.
As you make changes, the live preview will update automatically so you can try different settings to see what looks good in your design.
When you’re happy with how the custom menu looks, it’s time to publish it.
Simply click the dropdown arrow next to ‘Save’ and then select ‘Publish.’
Your custom navigation menu and the page will now go live on your WordPress blog.
Method 3. Creating a Custom Navigation Menu in WordPress Using Code (Advanced)
If you don’t want to set up a page builder plugin, then you can add a custom navigation menu using code. Normally, you would need to add custom code snippets to your theme’s functions.php file.
However, we don’t recommend this method for anyone but advanced users, and even then, a small mistake in your code could cause a number of common WordPress errors, or break your site completely.
That’s why we recommend using WPCode. It is the easiest and safest way to add custom code in WordPress without having to edit any core WordPress files.
This will add a new menu location to your theme, called ‘My Custom Menu.’ To use a different name, simply change the above code snippet.
If you want to add more than one new navigation menu to your theme, then simply add an extra line to your code snippet. For example, here we’re adding two new menu locations to our theme, called My Custom Menu and Extra Menu:
Below the code box, you will see insertion options. If it isn’t already selected, then choose the ‘Auto Insert’ method so the snippet will be automatically inserted and executed on your site.
After that, open the ‘Location’ dropdown and click on ‘Run Everywhere.’
Then, you’re ready to scroll to the top of the screen and click on the ‘Inactive’ toggle so it changes to ‘Active.’
Finally, go ahead and click on ‘Save’ to make this snippet live.
After that, go to Appearance » Menus and look at the ‘Display location’ area.
When you’re happy with your menu, the next step is adding it to your WordPress theme.
Adding the custom navigation menu to your WordPress theme
Most website owners show their navigation menu directly under the header section just after the site logo or title. This means the navigation menu is the first thing visitors see.
However, you can display your custom navigation menu anywhere you want by adding some code to the theme’s template file.
In your WordPress dashboard, go to Appearance » Theme File Editor.
In the right-hand menu, select the template that you want to edit. For example, if you want to show the custom navigation menu in your website’s header, then you’ll typically want to select the header.php file.
After selecting the template file, you need to add a wp_nav_menu function and specify the name of your custom menu. For example, in the following code snippet we’re adding My Custom Menu to the theme’s header:
Do you want to add a navigation menu to your WordPress site?
WordPress comes with a drag and drop menu interface that you can use to create header menus, menus with dropdown options, and more.
In this step by step guide, we will show you how to easily add a navigation menu in WordPress.
What is a Navigation Menu?
A navigation menu is a list of a links pointing to important areas of a website. They are usually presented as a horizontal bar of links at the top of every page on a website.
Navigation menus give your site structure and help visitors find what they’re looking for. Here’s how the navigation menu looks on WPBeginner:
WordPress makes it really easy to add menus and sub-menus. You can add links to your most important pages, categories or topics, blog posts, and even custom links such as your social media profile.
The exact location of your menu will depend on your WordPress theme. Most themes will have several options, so you can create different menus that can be displayed in different places.
For instance, most WordPress themes come with a primary menu that appears on the top. Some themes may include a secondary menu, a footer menu, or a mobile navigation menu as well.
Creating Your First Custom Navigation Menu
To create a navigation menu, you need to visit the Appearance » Menus page in your WordPress admin dashboard.
First, you need to provide a name for your menu, like ‘Top Navigation Menu’ and then click the ‘Create Menu’ button. This will expand the menu area, and it will look like this:
Next, you can choose the pages you want to add to the menu. You can either automatically add all new top-level pages, or you can select specific pages from the left column.
First, click the ‘View All’ tab to see all your site’s pages. After that click the box next to each of the pages you want to add to your menu, and then click on the ‘Add to Menu’ button.
Once your pages have been added, you can move them around by dragging and dropping them.
Note: All menus have their items listed in a vertical (top to bottom) list in the menu editor. When you put the menu live on your site, it’ll either display vertically or horizontally (left to right), depending on the location you select.
Most themes have several different locations where you can put menus. In this example, we’re using the default 2020 theme, which has 5 different locations.
After adding pages to the menu, select the location where you want to display the menu and click on the ‘Save Menu’ button.
Tip: If you’re not sure where each location is, try saving the menu in different places, then visiting your site to see how it looks. You probably won’t want to use all the locations, but you might want to use more than one.
Here’s our finished menu on the site:
Creating Drop-Down Menus in WordPress
Drop-down menus, sometimes called nested menus, are navigation menus with parent and child menu items. When you run your cursor over a parent item, all the child items will appear beneath it in a sub-menu.
To create a sub menu, drag an item below the parent item, and then drag it slightly to the right. We’ve done that with 3 sub-items beneath ‘Services’ in our menu:
Here’s the sub-menu live on the site:
You can even add multiple layers of dropdown, so that your sub menu can have a sub menu. This can end up looking at bit cluttered, and many themes do not support multi-layer drop-down menus.
In this example, you can see that ‘Logo Design’ (a child item of ‘Services’) has two child items of its own.
Adding Categories to WordPress Menus
If you’re using WordPress to run a blog, then you may want to add your blog categories as a drop-down in your WordPress menu. We do this on WPBeginner:
You can easily add categories to your menu by clicking the Categories tab on the left side of the Menus screen. You may also need to click the ‘View All’ tab to see all your categories.
Simply select the categories you want to add to the menu, and then click the ‘Add to Menu’ button.
The categories will appear as regular menu items at the bottom of your menu. You can drag and drop them into position. We’re going to put all of these categories under the Blog menu item.
Adding Custom Links to Your WordPress Navigation Menus
Aside from categories and pages, WordPress also makes it super easy to add custom links to your menu. You can use it to link to your social media profiles, your online store, and / or other websites that you own.
You will need to use the ‘Custom Links’ tab on the Menu screen. Simply add the link along with the text you want to use in your menu.
Editing or Removing a Menu Item in WordPress Navigation Menus
When you add pages or categories to your custom navigation menu, WordPress uses the page title or category name as the link text. You can change this if you want.
Any menu item can be edited by clicking on the downward arrow next to it.
You can change the name of the menu item here. This is also where you can click ‘Remove’ to take the link off your menu altogether.
If you’re struggling with the drag and drop interface, then you can also move the menu item around by clicking the appropriate ‘Move’ link.
Adding WordPress Menus in Sidebars and Footers
You don’t have to just stick to the display locations for your theme. You can add navigation menus in any area that uses widgets, like your sidebar or footer.
Simply go to Appearance » Widgets and add the ‘Navigation Menu’ widget to your sidebar. Next, add a title for the widget and choose the correct menu from the ‘Select Menu’ drop down list.
Here’s an example of a custom WordPress footer menu built on Syed Balkhi website.
Going Further with Navigation Menus
If you want to create a truly epic menu with loads of links, we’ve got a tutorial on how to create a mega menu in WordPress. This lets you create a drop-down with lots of items including images.
Mega menus are a great option if you have a large site, like an online store or news site. This type of menu is used by sites like Reuters, Buzzfeed, Starbucks, etc.
Do you want to add custom fonts in WordPress? Custom fonts allow you to use beautiful combination of different fonts on your website to improve typography and user experience.
Apart from looking good, custom fonts can also help you improve readability, create a brand image, and increase time users spend on your website.
In this article, we will show you how to add custom fonts in WordPress using Google Fonts, TypeKit, and CSS3 @Font-Face method.
Note: Loading too many fonts can slow down your website. We recommend choosing two fonts and use them across your website. We’ll also show you how to properly load them without slowing down your website.
Before we look at how to add custom fonts in WordPress, let’s take a look at finding custom fonts that you can use.
If you don’t know how to mix and match fonts, then try Font Pair. It helps designers pair beautiful Google fonts together.
As you are picking your fonts, remember that using too many custom fonts will slow down your website. This is why you should select two fonts and use them throughout your design. This will also bring consistency to your design.
Video Tutorial
If you don’t like the video or prefer the written guide, then please continue reading.
Adding Custom Fonts in WordPress from Google Fonts
Google Fonts is the largest, free, and most commonly used font library among website developers. There are multiple ways you can add and use Google Fonts in WordPress.
Method 1: Adding Custom Fonts Using Easy Google Fonts Plugin
If you want to add and use Google Fonts on your website, then this method is by far the easiest and recommended for beginners.
Upon activation, you can go to Appearance » Customizer page. This will open the live theme customizer interface where you’ll see the new Typography section.
Clicking on Typography will you show different sections of your website where you can apply Google Fonts. Simply click on ‘Edit Font’ below the section you want to edit.
Under the font family section, you can choose any Google Font you want to use on your website. You can also choose font style, font size, padding, margin, and more.
Depending on your theme, the number of sections here could be limited and you may not be able to directly change font selection for many different areas of your website.
To fix this, the plugin also allows you to create your own controls and use them to change fonts on your website.
First, you need to visit Settings » Google Fonts page and provide a name for your font control. Use something that helps you quickly understand where you will be using this font control.
Next, click on the ‘Create font control’ button and then you will be asked to enter CSS selectors.
You can add HTML elements you want to target (for instance, h1, h2, p, blockquote) or use CSS classes.
You can use Inspect tool in your browser to find out which CSS classes are used by the particular area you want to change.
Now click on the ‘Save font control’ button to store your settings. You can create as many font controllers as you need for different sections of your website.
To use these font controllers, you need to head over to Appearance » Customizer and click on the Typography tab.
Under Typography, you will now see a ‘Theme Typography’ Option as well. Clicking on it will show your custom font controls you created earlier. You can now just click on the edit button to select the fonts and appearance for this control.
Don’t forget to click on the save or publish button to save your changes.
Method 2: Manually Add Google Fonts in WordPress
This method requires you to add code to your WordPress theme files. If you haven’t done this before, then see our guide on how to copy and paste code in WordPress.
First, visit the Google fonts library and select a font that you want to use. Next, click on the quick use button below the font.
On the font page, you’ll see the styles available for that font. Select the styles that you want to use in your project and then click on the sidebar button at the top.
Next, you will need to switch to the ‘Embed’ tab in the sidebar to copy the embed code.
There are two ways you can add this code to your WordPress site.
First, you can simply edit your theme’s header.php file and paste the code before the <body> tag.
However, if you are unfamiliar with code editing in WordPress, then you can use a plugin to add this code.
Upon activation, go to Settings » Insert Headers and Footers page and paste the embed code in the ‘Scripts in header’ box.
Don’t forget to click on the Save button to store your changes. The plugin will now start loading the Google Font embed code on all pages of your website.
You can use this font in your theme’s stylesheet like this:
Typekit by Adobe Fonts is another free and premium resource for awesome fonts that you can use in your design projects. They have a paid subscription as well as a limited free plan that you can use.
Simply signup for an Adobe Fonts account and visit the browse fonts section. From here you need to click on the </> button to select a font and create a project.
Next, you’ll see the embed code with your project ID. It will also show you how to use the font in your theme’s CSS.
You need to copy and paste this code inside the <head> section of your website.
There are two ways you can add this code to your WordPress site.
First, you can simply edit your theme’s header.php file and paste the code before the <body> tag.
However, if you are unfamiliar with code editing in WordPress, then you can use a plugin to add this code.
Adding Custom Fonts in WordPress Using CSS3 @font-face
The most direct way of adding custom fonts in WordPress is by adding the fonts using CSS3 @font-face method. This method allows you to use any font that you like on your website.
First thing you need to do is download the font that you like in a web format. If you do not have the web format for your font, then you can convert it using the FontSquirrel Webfont generator.
Once you have the webfont files, you would need to upload it on your WordPress hosting server.
The best place to upload the fonts is inside a new “fonts” folder in your theme or child theme‘s directory.
You can use FTP or File Manager of your cPanel to upload the font.
Once you have uploaded the font, you need to load the font in your theme’s stylesheet using CSS3 @font-face rule like this:
Loading fonts directly using CSS3 @font-face is not always the best solution. If you are using a font from Google Fonts or Typekit, then it is best to serve the font directly from their server for optimal performance.
Choosing a Best Event/Conference WordPress Theme for your blog could always land you in a dilemma as the scenario is very confusing with hundreds of options available these days, although some of them are very...


 Looking for WordPress hosting recommendations online is a bit tough. Sure, you will find loads of reviews from various publishers – including us – but how can you know which of the hosts go beyond that initial positive impression and deliver good experience long term? That’s the kind of stuff you can only learn from actual users and website owners. This is where our WordPress hosting survey comes into play!


")


")
")
")