11 Typography Styles to Consider for Your Next Design

Typography Definitions Cover

When it comes to typography, there’s a seemingly infinite number of styles to choose from. But which one is the right one for your next design?

That is the ultimate question when it comes to typography. And, unfortunately, there is no one-size-fits-all answer. It all depends on the specific project you’re working on and what kind of message you’re trying to communicate.

However, we can narrow it down to a few general categories.

Here are 11 popular typography styles to consider for your next project.

UNLIMITED DOWNLOADS: 400,000+ Fonts & Design Assets

Starting at only $16.50 per month!

1. Serif

01 - times new roman-Typography Styles

Serif fonts are the ones with the little feet (serifs) on the end of each letter. They are classic and elegant, and they have been around for centuries. Think of Times New Roman or Garamond – these are both serif fonts.

Serif fonts are generally seen as being more formal and traditional than other types of fonts. They are often used for headlines, logos, and other high-impact pieces.

2. Sans Serif

02 - sans serif-Typography Styles

Sans serif fonts are the exact opposite of serif fonts. They have no little feet on the end of the letters, hence the name “sans serif.”

Sans serif fonts are generally seen as being more modern and clean than serif fonts. They are often used for body copy, menus, and other pieces where readability is key.

3. Script

03 - adelia-Typography Styles

Script fonts are designed to look like they were written by hand. They are usually very flowing and cursive, and they can be difficult to read if they are used for large blocks of text.

Script fonts are best used for small pieces, such as headlines or logos. They can also be used for body copy, but only if the design is very simple and easy to read. A good example would be the Adelia Font.

4. Display

Display fonts are any type of font that is designed to be used at large sizes. They are often very bold and eye-catching, and they can be difficult to read at smaller sizes.

Display fonts are best used for headlines, logos, and other short pieces of text. They should not be used for body copy or any other type of long-form text. A good example that shows how bold these fonts can be is Arbutus.

5. Decorative

05 - space time - Typography Styles

Decorative fonts are just what they sound like – they are designed to be used for decorative purposes only. They are often very ornate and can be difficult to read.

Decorative fonts should only be used sparingly, if at all. They can be used for headlines or logos, but they should never be used for body copy. They are a lot of fun though. Just check out the Space Time font.

6. Blackletter

06- cloister black - Typography Styles

Blackletter fonts are a type of serif font that is designed to look like it was written in the Middle Ages. They are very ornate and can be difficult to read. It also goes by the name of gothic script or Old English.

Cloister Black is a great example of a blackletter font that encapsulates this old-fashioned style.

7. Handwritten

07 - autography

Handwritten fonts are designed to look like they were written by hand. They can be either serif or sans serif, but they usually have a more organic feel than other types of fonts.

Handwritten fonts are best used for small pieces, such as headlines or logos. The Autography Font illustrates this typography style well.

8. Slab Serif

08 - rosette

Slab serif fonts are a type of serif font that is designed to be used at large sizes. They are often very bold and eye-catching, and they can be difficult to read at smaller sizes.

Slab serif fonts are ideal for headlines, logos, and titles. They should not be used for body copy or any other type of long-form text though as the line weight is too thick for the confined spaces of paragraphs. The Rosette Font has a chunky look that serves as a good example of a slab serif.

9. Geometric

09 - geometric

Geometric fonts are designed to be very clean and simple. They often have straight lines and angles and rely on a geometric construction to achieve their letter shapes.

This kind of font is best used for headlines or logos, or any other spot where just a few words are needed. They can also be used for body copy, but only if the design is very simple, large, and easy to read.

10. Grotesque

10 - grotesque

Grotesque fonts are a type of sans serif font that is designed to be used at large sizes. Historically, they’re known for looking a bit awkward and unusual.

It is advisable to only use grotesque fonts for headlines, logos, and other brief pieces of text. They are not meant to be used for paragraphs or long stretches of text. Work Sans is a great example of a neo-grotesque style.

11. Humanistic

Humanistic fonts are sans serif fonts as well that are designed to look very natural and organic. They often have curved lines and softened edges.

Humanistic fonts are most successful when used for titles, headlines, or logos. They can also be readable if used sparingly in body copy with a simple design layout. You can look to the Centaur Font as a good example of this classic font style.

Let Typography Style Options Inspire You

There you have it! These are the 11 most common types of fonts that you’ll see used in graphic design. As you can see, each one has its own unique purpose and should be used accordingly.

When it comes to choosing the right font for your project, it’s important to think about the overall style you’re going for. Do you want something clean and modern? Or are you going for a more vintage or retro feel?

Once you have a general idea of the style you’re after, you can start browsing through different font options until you find one that fits your vision. Good luck!

Easy Fluid Typography With clamp() Using Sass Functions

Typography Definitions Cover

Fluid typography is getting a lot more popular, especially since the clamp() math function is available in every evergreen browser. But if we’re honest, it’s still a lot of mathematics to achieve this. You can use tools such as utopia.fyi, which are fantastic. But in large projects, it can get messy pretty fast. I’m a big fan of readable and maintainable code and always want to see what my code is doing at a glance. I’m sure there are many more of you like that, so instead of adding a full clamp() function inside of our code, maybe we can make this a bit more readable with Sass.

Why Should We Use Fluid Typography?

Usually, when designing for different screen sizes, we use media queries to determine the font size of our typographic elements. Although this usually gives enough control for the more conventional devices, it doesn’t cover all of the screen sizes.

By using fluid typography, we can make the typography scale more logically between all sorts of different devices.

This is now possible in all evergreen browsers because of the clamp() function in CSS. It is perfect for the job and reduces our media query writing, thus saving us a bit of file size along the way.

How Exactly Does This clamp() Function Work For Typography?

In short, the clamp function looks like this:

clamp([min-bound], [value-preferred], [max-bound]);

This takes into account three numbers: a minimum bound, preferred value, and a maximum bound. By using rem values, we can increase the accessibility a bit, but it’s still not 100% foolproof, especially for external browser tools.

If you want a more in-depth explanation of the math, I suggest you read this post from Adrian Bece “Modern Fluid Typography Using CSS Clamp ”.

However, there is a bit of a problem. When you read those clamp functions inside your CSS, it’s still hard to see exactly what is happening. Just imagine a file full of font sizes that look like this:

clamp(1.44rem, 3.44vw + 0.75rem, 2.81rem)

But with a little help from the sass function, we can make these font sizes much more readable.

What Do We Want To Achieve With This Simple Sass Function?

In short, we want to do something like this: We have a minimum font size, from the moment our breakpoint is larger than 400px, we want it to scale it to our biggest font size until the maximum breakpoint is reached.

The minimum and maximum font sizes are covered quite easily. If we want a minimum font size of 16px (or 1rem) and a maximum font size of 32px (or 2rem), we already have the two parts of our clamp function:

clamp(1rem, [?], 2rem)
Creating A Basic Automated Fluid Function

This is where things get tricky, and I suggest you follow the article by Adrian Bece, who gives a great in-depth explanation of the math behind this.

In short, the equation is the following:

(maximum font-size - minimum font-size) / (maximum breakpoint - minimum breakpoint)

Let’s get ready to do some mathematics for this to happen in Sass, so let’s create our fluid-typography.scss function file and start by adding sass:math and the function with the values we’ll need:

@use "sass:math";

@function fluid($min-size, $max-size, $min-breakpoint, $max-breakpoint, $unit: vw) {

}

Now, let’s add the calculation for the slope inside of our function with some sass:math:

@function fluid($min-size, $max-size, $min-breakpoint, $max-breakpoint, $unit: vw) {
 $slope: math.div($max-size - $min-size, $max-breakpoint - $min-breakpoint);
}

To get a value we can work with, we’ll need to multiply our slope by 100:

$slope-to-unit: $slope * 100;

All that is left is for us to find our intercept to build the equation. We can do this with the following function:

$intercept: $min-size - $slope * $min-breakpoint;

And finally, return our function:

@return clamp(#{$min-size}, #{$slope-to-unit}#{$unit} + #{$intercept}, #{$max-size});

If we call the created sass function in our scss, we should now get fluid typography:

h1 {
   font-size: #{fluid(1rem, 2rem, 25rem, 62.5rem)}
}

A Note About Units

In most cases, we will be using a viewport width when it comes to fluid typography, so this makes a good default. However, there are some cases, especially when using the clamp() function for vertical spacing, where you want to use a viewport height instead of width. When this is desired, we can change the outputted unit and use a minimum and maximum breakpoint for the height:

h1 {
   font-size: #{fluid(1rem, 2rem, 25rem, 62.5rem, vh)}
}
Updating The Function To Make The Calculations Feel More Natural

We got what we need, but let’s be honest, most of the time, we are implementing a design, and it doesn’t feel natural to pass our viewports as rems. So, let’s update this function to use pixels as a viewport measurement. While we’re at it, let’s update the font sizes so we can use pixel values for everything. We will still convert them to rem units since those are better for accessibility.

First, we’ll need an extra function to calculate our rem values based on a pixel input.

Note: This won’t work if you change your base rem value.

@function px-to-rem($px) {
    $rems: math.div($px, 16px) * 1rem;
    @return $rems;
}

Now we can update our fluid function to output rem values even though it gets pixels as input. This is the updated version:

@function fluid($min-size, $max-size, $min-breakpoint, $max-breakpoint, $unit: vw) {
    $slope: math.div($max-size - $min-size, $max-breakpoint - $min-breakpoint);
    $slope-to-unit: $slope * 100;
    $intercept-rem: px-to-rem($min-size - $slope * $min-breakpoint);
    $min-size-rem: px-to-rem($min-size);
    $max-size-rem: px-to-rem($max-size);
    @return clamp(#{$min-size-rem}, #{$slope-to-unit}#{$unit} + #{$intercept-rem}, #{$max-size-rem});
}

Now we can use the following input:

font-size: #{fluid(16px, 32px, 320px, 960px)}

This will result in the following:

font-size: clamp(1rem, 2.5vw + 0.5rem, 2rem);

At first glance, this seems perfect, but mostly that’s because I’ve been using very simple values. For example, when clamping to a maximum value of 31px instead of 32px, our rem values won’t be so rounded, and our output will get a bit messy.

Input:

font-size: #{fluid(16px, 31px, 320px, 960px)}

Output:

font-size: clamp(1rem, 2.34375vw + 0.53125rem, 1.9375rem);

If you’re like me and find this a bit messy as well, we could round our values a little bit to increase readability and save some bytes in our final CSS file. Also, it might get a bit tedious if we always have to add the viewport, so why not add some defaults in our function?

Rounding Our Values And Adding Some Defaults

Let’s start by adding a rounding function to our Sass file. This will take any input and round it to a specific amount of decimals:

@function round($number, $decimals: 0) {
    $n: 1;
    @if $decimals > 0 {
        @for $i from 1 through $decimals {
            $n: $n * 10;
        }
    }
    @return math.div(math.round($number * $n), $n);
}

Now we can update our output values with rounded numbers. Update the function accordingly. I would suggest setting at least two decimals for the output values for the most consistent results:

@function fluid($min-size, $max-size, $min-breakpoint, $max-breakpoint, $unit: vw) {
    $slope: math.div($max-size - $min-size, $max-breakpoint - $min-breakpoint);
    $slope-to-unit: round($slope * 100, 2);
    $intercept-rem: round(px-to-rem($min-size - $slope * $min-breakpoint), 2);
    $min-size-rem: round(px-to-rem($min-size), 2);
    $max-size-rem: round(px-to-rem($max-size), 2);
    @return clamp(#{$min-size-rem}, #{$slope-to-unit}#{$unit} + #{$intercept-rem}, #{$max-size-rem});
}

Now the same example as before will give us a much cleaner result.

Input:

font-size: #{fluid(16px, 31px, 320px, 960px)};

Output:

font-size: clamp(1rem, 2.34vw + 0.53rem, 1.94rem);

Adding A Default Breakpoint

If you don’t feel like repeating yourself, you can always set a default breakpoint to your function. Try updating the function like this:

$default-min-bp: 320px;
$default-max-bp: 960px;

@function fluid($min-size, $max-size, $min-breakpoint: $default-min-bp, $max-breakpoint: $default-max-bp, $unit: vw) {
    // ...
}

Now, we don’t need to repeat these viewports all the time. We can still add a custom breakpoint but a simple input such as:

font-size: #{fluid(16px, 31px)};

Will still result in:

font-size: clamp(1rem, 2.34vw + 0.53rem, 1.94rem);

Here is the full function:

@use 'sass:math';

$default-min-bp: 320px;
$default-max-bp: 960px;

@function round($number, $decimals: 0) {
    $n: 1;
    @if $decimals > 0 {
        @for $i from 1 through $decimals {
            $n: $n * 10;
        }
    }
    @return math.div(math.round($number * $n), $n);
}

@function px-to-rem($px) {
    $rems: math.div($px, 16px) * 1rem;
    @return $rems;
}

@function fluid($min-size, $max-size, $min-breakpoint: $default-min-bp, $max-breakpoint: $default-max-bp, $unit: vw) {
    $slope: math.div($max-size - $min-size, $max-breakpoint - $min-breakpoint);
    $slope-to-unit: round($slope * 100, 2);
    $intercept-rem: round(px-to-rem($min-size - $slope * $min-breakpoint), 2);
    $min-size-rem: round(px-to-rem($min-size), 2);
    $max-size-rem: round(px-to-rem($max-size), 2);
    @return clamp(#{$min-size-rem}, #{$slope-to-unit}#{$unit} + #{$intercept-rem}, #{$max-size-rem});
}
A Final Note: Be A Happy Clamper For All users Out There

If you followed this little tutorial and were amazed by it, you might want to add this clamp() method for everything, but there is an important side note when it comes to accessibility.

Note: When you use vw units or limit how large text can get with clamp(), there is a chance a user may be unable to scale the text to 200% of its original size.

If that happens, it is WCAG failure. As Adrian Bece mentioned, it’s not 100% foolproof. Adrian Roselli has written some examples on this, which you might find interesting.

We can use this method today because of the great browser support. By being smart on the usage, I’m sure it can be a beautiful addition to your upcoming project or as an upgrade to a previous one.

Typography Inspiration In Web Design

Typography Definitions Cover

Looking for typography inspiration for your next or future web design projects? We’ve rounded up some of the most creative and award-winning examples of typography usage in these websites that follow. Take a look and see what ideas they bring!

Your Web Designer Toolbox
Unlimited Downloads: 500,000+ Web Templates, Icon Sets, Themes & Design Assets


Font Roundup

Typography Inspiration In Web Design - font roundup

Likely Story

Typography Inspiration In Web Design - Likely Story

VJ Type

Typography Inspiration In Web Design - VJ Type

Arthur Simonini

Typography Inspiration In Web Design - Arthur Simonini

Martine Syms

Typography Inspiration In Web Design - Martine Syms

Mama Joyce Peppa Sauce

Typography Inspiration In Web Design - Mama Joyce Peppa Sauce

Slava Kirilenko

Typography Inspiration In Web Design - Slava Kirilenko

DAD Agency

Typography Inspiration In Web Design - DAD Agency

Pact Media

Typography Inspiration In Web Design - Pact Media

Dante

Typography Inspiration In Web Design - Dante

Custo

Typography Inspiration In Web Design - Custo

Houseplant

Houseplant

Santa Teresa Fest

Santa Teresa Fest

Kim Kneipp

Kim Kneipp

Panic Studio

Panic Studio

372: Trends

Typography Definitions Cover

This week Marie and Chris get together to chat about what’s been hot hot hot on CodePen lately. We’ve discovered there is a really taking to the creamy cardstock look, for one thing. Typography is always great, but we’re seeing more typographic trickery often including variable fonts. While not new, there are still loads of really wonderfully creative Pens using Three.js and p5.js. Neon-on-dark is a fresh look. We get into those and more, a bit sneakily as we can take an internal look at what the Top 100 might look like this year, but we can’t share those details too early!

Time Jumps

  • 00:24 Trending episode
  • 01:34 The web3 aesthetic
  • 03:33 Pen and ink on cardstock
  • 06:44 Variable fonts
  • 10:18 Ask the database what’s popping?
  • 11:42 Celebrating follower number
  • 12:49 ThreeJS and P5 processing
  • 20:08 Public documentation on what it takes to get picked
  • 26:33 CodePen Challenges

The post 372: Trends appeared first on CodePen Blog.

New Video Explores Site Building Progress From WordPress 5.0 to 6.0

Typography Definitions Cover

Do you remember what it was like to use WordPress 5.0? Three years and ten major releases have radically changed the site building experience, but it’s not always easy to see recognize when focused on some of the smaller, iterative changes that slowly add up. Anne McCarthy, WordPress product liaison at Automattic and co-release coordinator for 6.0, has created a short 13-minute video that shows the immense amount of progress contributors have made on site building features.

McCarthy takes viewers back in time to WordPress 5.0, released in December 2018, which introduced the block editor and the Twenty Nineteen default theme through the work of 400+ contributors. She demonstrates using the Customizer with the default theme. These were simpler days and it’s clear now how limited the Customizer was for implementing the most basic changes.

The video contrasts that experience with the upcoming 6.0 release, which features the work of 500+ contributors on features that didn’t exist three years ago.

McCarthy quickly demonstrates the 6.0 site editing experience, swapping out template parts, and showcasing the breadth of the customization available for images, colors, typography, controlling the posts that are displayed, style variations, and the impressive array of design tools available.

Ten major versions later, nearly every Aspect of a WordPress site is customizable through the site editor. For those who have not yet made the leap into full-site editing – it’s essentially like the old Customizer but with super powers, better instant previews, and the interface is a panel on the right. At this point, I don’t think the usability is at a level where someone can just get in there and immediately know what they are doing. It takes a little bit of exploring, but it’s moving in the right direction.

Videos like this one show what is possible and just how far WordPress has come since it first introduced the block editor. It also indirectly answers Joost de Valk’s recent claims that the full-site editing project not being done yet is partially to blame for WordPress’ recent decline in market share.

While WordPress remains the uncontested market leader among CMS’s, some say this small percentage of a decline is inconsequential. Matt Mullenweg has stated in previous interviews that he views market share stats as a “trailing indicator” in the quest to create the best possible experience for users and developers. A growing market share, in that sense, is a signal of user satisfaction.

WordPress jumped into the block paradigm at the right time, just as many other apps began adopting the concept of composable blocks for creating content and designs. Full-site editing is the extension of that vision but it takes time to make it something polished and delightful to use. McCarthy’s video is a good reminder of the limitations that users previously labored under while trying to edit their sites, and the “why” behind all the effort going into FSE.

“As someone who’s currently on the WordPress 6.0 Release Team, I can attest that the project needs more contributors,” WordPress contributor Nick Diego said in response to the recent market share discussion. “The fact that FSE has taken so long is not a lack of effort. There are many contributors pouring their hearts and souls into the project. We just need more help.”

8 Interesting Typography Links for January 2022

Typography Definitions Cover

Every now and then, I find that I’ve accumulated a bunch of links about various things I find interesting. Typography is one of those things! Here’s a list of typography links to other articles that I’ve been saving up and think are worth sharing.

A specimen of the Retail typeface, once of the typography links in the list.
An awesome new font from OH no Type Company

Do you have any interesting typography links from the past month worth sharing? Drop ’em in the comments!


8 Interesting Typography Links for January 2022 originally published on CSS-Tricks. You should get the newsletter and become a supporter.

Some Typography Links VII

Typography Definitions Cover

The post Some Typography Links VII appeared first on CSS-Tricks. You can support CSS-Tricks by being an MVP Supporter.

Some Typography Blog Posts I’ve Bookmarked and Read Lately

Typography Definitions Cover
  • Font-size: An Unexpectedly Complex CSS Property — From Manish Goregaokar in 2017. Of many oddities, I found the one where font: medium monospace renders at 13px where font: medium sans-serif renders at 16px particularly weird.
  • The good line-height — Since CSS supports unitless line-height, you probably shouldn’t be setting a hard number anyway.
  • Time to Say Goodbye to Google Fonts — Simon Wicki doesn’t mean don’t use them, they mean self-host them. Browsers are starting to isolate cache on a per-domain basis so that old argument that you buy speed because “users probably already have it cached” doesn’t hold up. I expected to hear about stuff like having more control over font loading, but this is just about the cache.
  • My Favorite Typefaces of 2020 — John Boardley’s picks for the past year. Have you seen these “color fonts”? They are so cool. Check out LiebeHeide, it looks like real pen-on-paper.
  • How to avoid layout shifts caused by web fonts — We’ve got CLS (Cumulative Layout Shift) now and it’s such an important performance metric that will soon start affecting SEO. And because we have CSS control over font loading via font-display, that means if we set things up such that font loading shifts the page, that’s bad. I like Simon Hearne’s suggestion that we tweak both our custom font and fallback font to match perfectly. I think perfect fallback fonts are one of the best CSS tricks.
  • How to pick a Typeface for User Interface and App Design? — Oliver Schöndorfer makes the case for “functional text” which is everything that isn’t body text (e.g. paragraphs of text) or display text (e.g. headers). “Clarity is key.”


The post Some Typography Blog Posts I’ve Bookmarked and Read Lately appeared first on CSS-Tricks.

You can support CSS-Tricks by being an MVP Supporter.

Gutenberg 9.4 Introduces Button Width Selector and Typography Controls for List Block

Typography Definitions Cover

Gutenberg 9.4.0 was released this week with many small improvements to existing features, while work on full site editing continues. This release will not be included in the upcoming WordPress 5.6 release but those who are using the Gutenberg plugin will have access to the improvements right away.

The button block now has a width selector, which allows the user to set the button to 25%, 50%, 75%, or 100% of the parent container. By default, a button’s width is determined by the size of its content. If you like bigger buttons, this update will give you more flexibility. Button margins are also included in the width calculations, so users can create multiple buttons in a row, or a grid of buttons, and have them properly fit together and aligned.

Making a button is easier than it has ever been before. Gone are the days of using shortcodes or hunting for the correct CSS class to apply in order to match the theme. Button creation used to be so needlessly difficult with a fragmented, unfriendly workflow, but the block editor continues to chip away at the complexity with each new release.

Version 9.4 also introduces typography controls for the list block. Gutenberg contributors have been discussing adding color and text size customizations to all text-based blocks since 2018, and the list block is finally getting some font size controls.

Social icons can also be resized now. Users can select from several preset sizes, including small, normal, large, and huge.

The 9.4 update adds support for <kbd> tags with a new button in the overflow rich text menu. These tags are useful for displaying content in the browser’s default monospace font, which helps when writing documentation or articles with inline code.

This release lays the groundwork for handling block variation transformations. Block variations are essentially the same block with registered variations that appear as a separate block in the block inserter. For example, the navigation block has horizontal and vertical variations. The editor now introduces a transform option for the scope field in block variations, so developers can control how to handle these transformations.

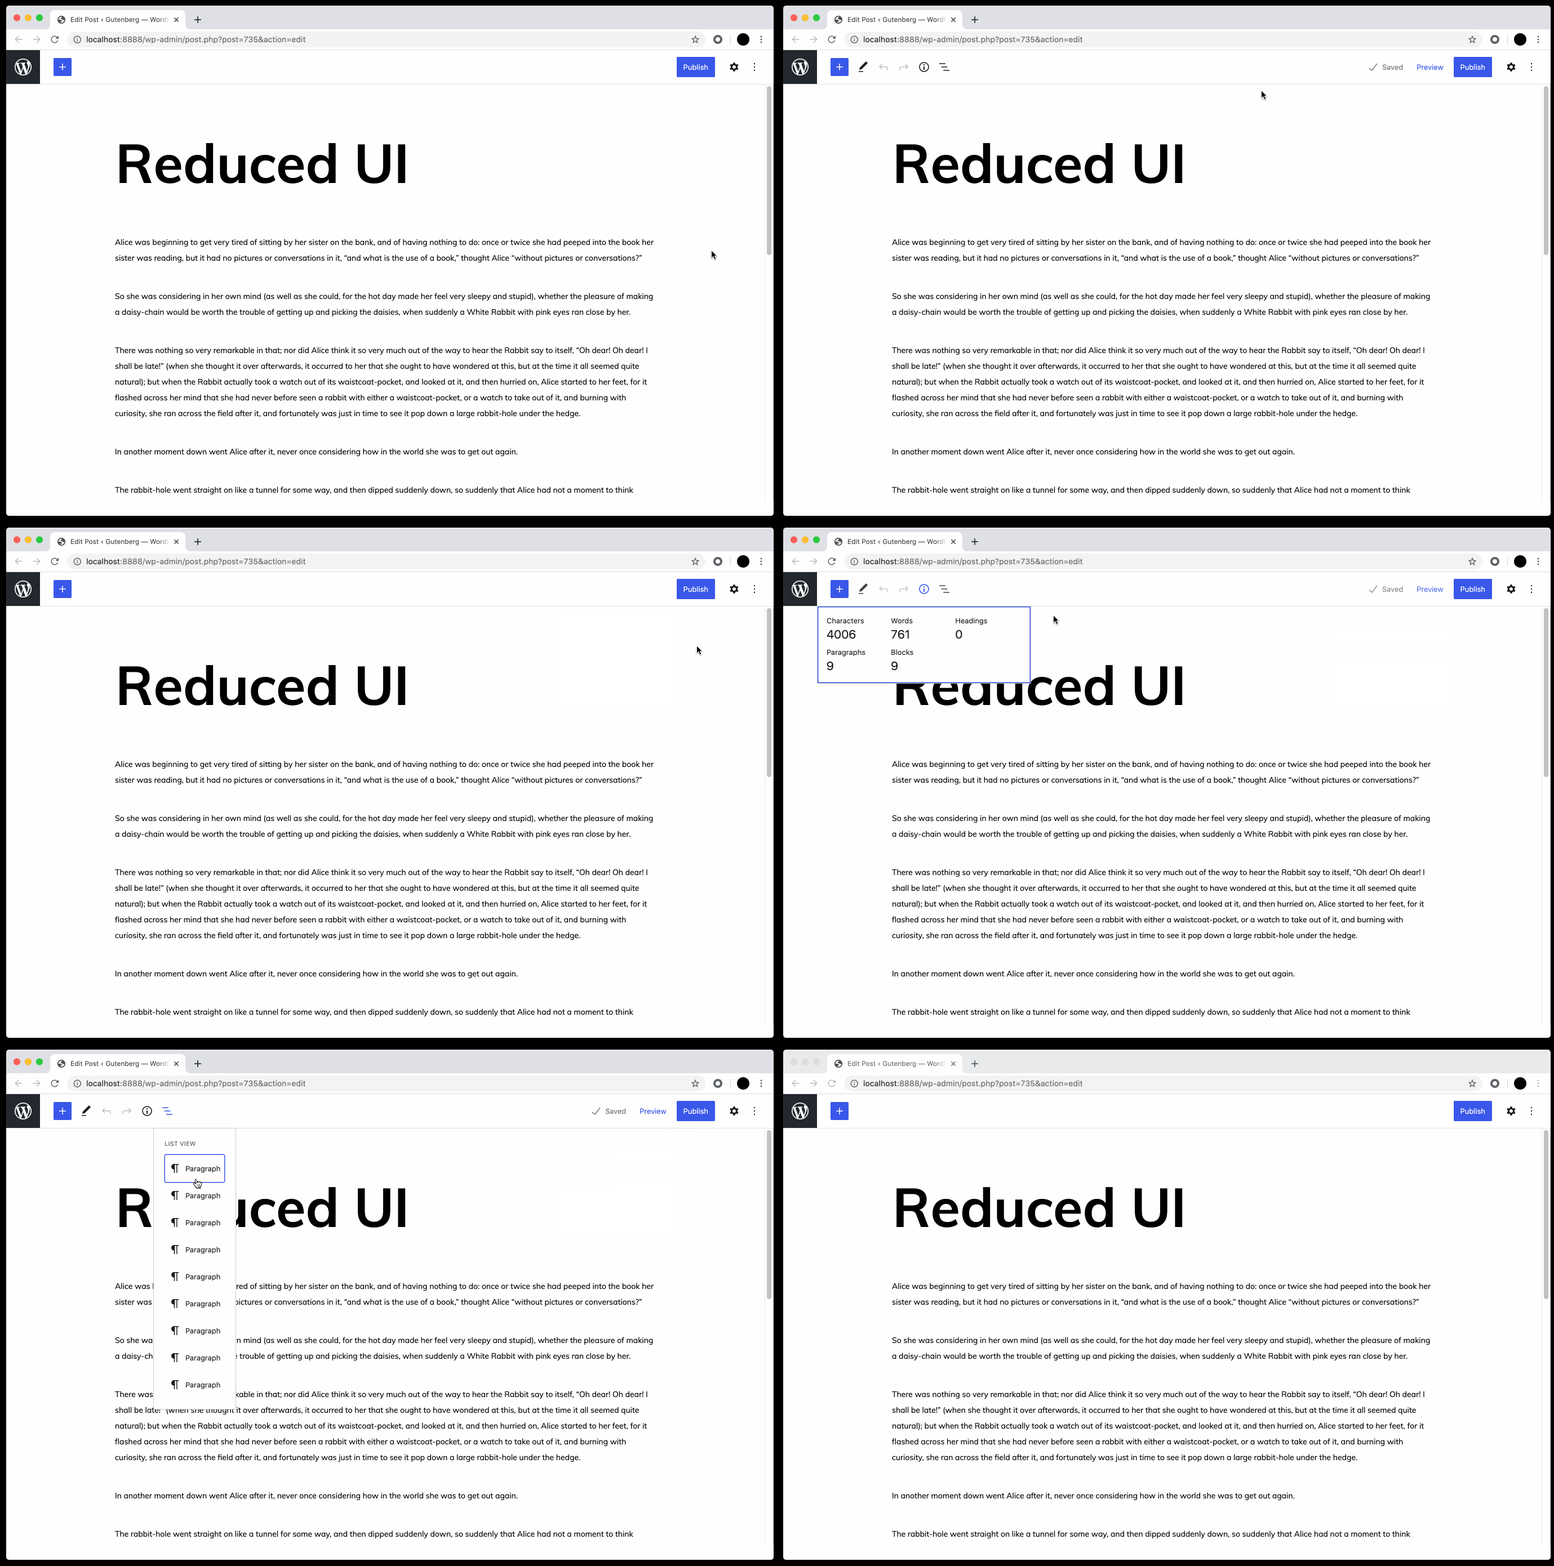
Enhancements in this release add polish to many Aspects of the UI, including the inserter search, custom select menu styles, the link interface, Search block styling, shortcode block styling, and reduces the UI on hover (an optional setting in preferences).

One handy new feature for writing is that users can now add a header by typing /h1 to /h6 followed by enter/return. While I like the idea of this, it seems unintuitive to have to use enter/return to change the block to a header. This feature would be easier to remember if it mimicked the existing feature that allows users to add a header by typing ### followed by a space. Changing the trigger action to a space instead of a return would make more sense here.

Version 9.4 also includes a great deal of progress behind the scenes on experiments, including the full site editing framework, FSE blocks, the site editor, and global styles. Check out the changelog for a full list of bug fixes and enhancements.