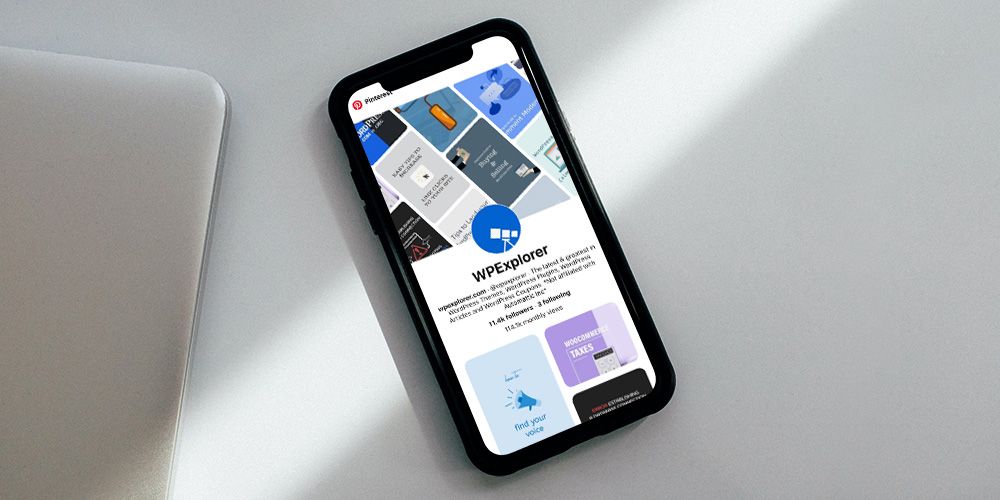
Do you want to learn how to hide a Pinterest image in WordPress?
Pinterest can be a great way to drive traffic to your blog, but displaying a Pinterest image in your post can make your content harder to read.
In this article, we’ll show you how to easily hide a Pinterest image in blog posts while still letting readers pin a custom Pinterest image when they share your content on Pinterest.

Why Hide Pinterest Images on WordPress Posts?
Using Pinterest can be a great way to increase blog traffic.
But, the Pinterest recommended image sizes don’t always look good when added to blog posts. That’s because the Pinterest image dimensions are long and narrow (3:2) which doesn’t fit most blog layouts.
Not to mention, these large images have the potential to slow down your website.
So you might be wondering why do bloggers use longer Pinterest images?
- They stand out in the Pinterest pin feed and search results
- They allow you to repin your content with new fresh images
- They get more traffic than traditional image sizes
By hiding the Pinterest images, you can improve the appearance of your blog posts and make your site faster. All while reaping the benefits of letting readers pin a high-quality image.
Does Hiding Images Interfere with Pinterest Terms of Service?
You might have heard that hiding Pinterest images on your WordPress blog goes against the Pinterest Terms of Service (TOS).
But, this isn’t true.
Hiding a Pinterest image on your website is allowed, as long as you meet the following requirements:
- The Pinterest image matches the content of your post
- The Pin description matches the content or title of your post
Essentially, you can hide images on your WordPress blog as long as the image you’re hiding is relevant to your page.
Does Hidden Pinterest Images impact Google Ranking?
For Google to properly rank your site it needs to be able to index your content. This means the search engines crawl your website to see what pages and media your website contains.
Google isn’t necessarily a big fan of hidden images or hidden content. Especially, since hidden content can be associated with spam websites.
However for legitimate use-cases like this one, it’s completely ok for you to hide Pinterest images without impacting your Google ranking.
How to Hide Pinterest Images in WordPress
There are several WordPress plugins that makes it easy to hide Pinterest images in WordPress. There are premium sharing plugins like WPTasty or Grow by Mediavine (formerly Social Pug).
However, we recommend using the free Shared Counts plugin, and their free Shared Counts – Pinterest Image addon.
These plugins are extremely well coded and will not impact your WordPress website speed. Not to mention, they’re 100% free.
This is the plugin that we’re using on WPBeginner to add our social share buttons.
The first thing you’ll need to do is install the Shared Counts plugin. For detailed instructions, please read our step-by-step guide on how to install a WordPress plugin.
The plugin settings are fairly straight forward, but we do have a detailed tutorial on adding social sharing buttons to WordPress that you can use as a guide to get started.
Once the Shared Counts plugin is fully set up, you’ll need to install and activate the Shared Counts – Pinterest Image addon to your site.
There are no unique settings to configure for this plugin.
It automatically adds a custom Pinterest image box to your blog posts.
Instead of having users pin random images from your blog post, you can create a higher-quality image that’ll perform better on Pinterest.
When your website visitors click on your Pinterest share button, Pinterest will pop up with the perfect image you’ve created for your post.
To add your custom Pinterest image for your blog posts, simply go to Posts » All Posts in your WordPress dashboard and open up the post you want to edit.
In the WordPress content editor, you’ll see a meta box labeled ‘Pinterest Sharing Image’ in bottom right-hand corner.

You need click on the ‘Select Image’ button and upload a new image or choose an existing image from your media library.
When you’ve found the image you’d like to use, you can add the ‘Title’ and ‘Alt Text’, then click the ‘Use Image’ button.

Next, click ‘Publish’ to publish your new post with the Pinterest sharing image, or ‘Update’ if the post is already live.
Now, when your visitors click the Pinterest share button there will be a pop-up that has your Pinterest image with the proper dimensions.

One of the best parts about using this plugin is that it automatically hides the Pinterest image for you.
Once you add your Pinterest featured image to your blog post, the plugin will add it to the bottom of your post, and apply the “display:none;” element automatically. This makes it completely hidden from view.
There is no need to add the image to your post and manually hide it or make any additional changes.
You might have seen other methods online, like using CSS to hide your Pinterest images, or adding HTML code with the “display:none;” element, but you don’t need to worry about any of that.
The plugin addon takes care of everything for you, which is why we recommend this option above all else.
Finally, it’s important you optimize your images before uploading them to WordPress. This plugin hides the image from view, but it still loads on your post. So, if it’s not properly optimized, then it could slow down your website.
We hope this article helped you learn how to hide Pinterest images on your WordPress blog posts. You may also want to learn how to verify your site on Pinterest for added functionality, and our expert pick of the 40 useful tools to manage and grow your blog.
If you liked this article, then please subscribe to our YouTube Channel for WordPress video tutorials. You can also find us on Twitter and Facebook.
The post How to Hide Pinterest Images in Your WordPress Blog Posts appeared first on WPBeginner.


 As a WordPress user, you’ve likely heard talk of Pinterest and the almost other-worldly power it possesses to drive FREE traffic to your website. And if you haven’t heard yet, please check out this epic post discussing how you can boost traffic to your WordPress site with Pinterest. There’s a reason why bloggers and WordPress […]
 When creating a blog, much of your focus will (rightfully) be on the content itself. However, how you’re presenting your content to the world matters, too. And we’re not just talking about the appearance or design here. The actual layout of how your content is presented can be instrumental in how site visitors interact with […]
 When starting a new blog, it’s a good idea to put some thought into who you’ll be speaking to. Your target audience will play a vital role in the type of content you produce, of course. But it also plays a role in the tone or voice you use throughout your writing. How you address […]
 Whether you’re just starting a new blog or you’re working on your regular weekly content, it’s important to have a clear understanding of who your target audience is. So yes, even if you’ve been writing blog posts up until this point without an audience in mind, there’s no time like the present to figure it […]
 A core goal for any type of marketing is to build one’s brand authority. In a vastly competitive arena with no limit to the marketing messages audiences are subjected to consuming each day, they often turn to tried-and-tested products and services. Consumers are more loyal to brands they can trust—and so the more trust an […]

