X (formerly Twitter) Marketing in 2024: The Ultimate Guide

Featured Imgs 23

Twitter, now rebranded as X, stands out from all other social media platforms. At least, that’s what my experience of helping dozens of brands with their social media strategy tells me.

Download Now: How to Use Twitter for Business [Free Kit]

At its core, X marketing requires conveying ideas in the fewest words, publishing multiple times a day, and actively engaging your audience.

As you grow, more dimensions are added to this equation. It gets more challenging and complicated. That’s why I’ve created this guide to help you crack the code for X marketing.

What is an X (formerly Twitter) marketing strategy?

An X marketing strategy is a plan centered around creating, publishing, and distributing content for your buyer personas, audience, and followers through X.

The goal of this type of strategy is to attract new followers and leads, boost conversions, improve brand recognition, and increase sales.

Creating an X marketing strategy will require you to follow the same steps you would if you were creating any other social media marketing strategy:

  1. Research your buyer personas and audience.
  2. Create unique and engaging content.
  3. Organize a schedule for your posts.
  4. Analyze your impact and results.

So, you might be wondering what makes X unique. Why would you want to actually invest the time in creating a profile and content for the platform? I’ll answer that below.

What makes X unique?

X is a great marketing tool for a number of reasons.

The platform:

  • Is free to use.
  • Expands your reach.
  • Lets you provide quick customer service and support.
  • Allows you to share and promote branded content in seconds
  • Works as a search engine tool for you to search for your competitors.
  • Can be used as a search engine tool for prospects to find and learn about your company.
  • Allows you to converse with your followers, share the latest updates about your company, and address your audience.

Now that I’ve reviewed what an X marketing strategy is and what makes the platform unique, let’s cover the ways in which you can use X for your business.

These tips will help you boost conversions, create lasting relationships with your followers, and improve your brand awareness.

As you begin using X for your business, there are some steps you’ll want to take to ensure you reach your target audience.

Depending on your goals, company size, and industry, you may or may not choose to work through each of the following steps (or you may have already completed some of them), so tailor them to your needs.

Let’s learn how to use X for business to better share, engage, and market on the platform.

1. Customize and brand your profile.

When someone looks at your company’s X profile, you want them to automatically know it’s yours.

You should customize and brand your X profile with your logo, colors, and other recognizable and memorable details you want to incorporate.

Here are a few ways to customize your profile:

  • Handle. Your X handle is your username (for example, our handle is @hubspot) — this should include your company’s name so your followers, customers, and fans can easily search and find you on the platform. You create your X handle when you sign up for an account.
  • Header. The header on your X profile is your background image. You might choose to create a unique image for your header, use your logo, or another branded image.
  • Profile picture. Your X profile picture represents your company’s every move, interaction, and post on the platform. It’s the image that sits above your bio and might include a picture of your logo, company’s initials, or CEO.
  • Bio. An X bio provides everyone who visits your profile with a brief synopsis of what they’re about to see in 160 characters or less. It might include your mission statement, a blurb about what your company does, or something humorous and engaging.
  • Website URL. Beneath your profile picture and bio, there’s a location where you can include your URL to direct traffic straight to your website.
  • Birthday. In the same location as your URL, you can insert your company’s birthday — or the day when the company was founded — so your audience gets to know your business on a more personal level.

HubSpot’s X page with logo, handle, and bio

Image Source

2. Create X Lists.

An X List — which any user has the ability to create and view — is an organized group of X accounts you’ve selected and put together in specific categories.

For example, at HubSpot, lists include Leadership Experts, Top Marketing Experts, Top Business Podcasters, and more. When you open an X List, you only see posts by the accounts on the list.

X Lists are great if you want to follow only specific accounts. You might segment your lists into groups such as business inspiration, competitors, and target audience so you’re able to easily review their posts, interactions, and content.

Here are a few lists available on HubSpot’s X profile:

HubSpot’s X list

3. Host an X Chat.

You can schedule and host an X chat to:

  • Discuss a topic.
  • Engage your followers.
  • Create a sense of community.
  • Ask your audience for their opinions.
  • Get feedback on something you’re working on.

To host an X Chat (previously TweetChat), you’ll need to choose a topic, set a time and date for the chat to occur, and create a hashtag for the chat. Share this information with your followers in a post, on your website, in your X bio, and wherever else you choose.

Here’s an example by The SAS Collective. The post mentions what this chat is about, who will be participating, and a hashtag to track all conversations.

X TweetChat announcement post from the SAS collective

Image Source

Everyone who wants to participate in the chat should be able to view all responses, questions, and comments regarding your topic by searching this unique hashtag.

Plus, they can share their comments and thoughts by adding this hashtag to their posts.

4. Advertise on X.

Advertising through X is a great way to reach your audience. This will make your posts easily discoverable by thousands of people, helping you increase your influence and following. You can do this through Promoted Ads or X Ads.

Promoted Ads (formerly Promoted Tweets)

Promoted ads or tweets make your regular posts appear in the X streams or search results of specific users.

This is a great option for anyone looking to increase the number of people on a specific webpage. Your business will pay a monthly fee if you promote a post.

X will use your promoted posts in a daily campaign targeting the type of audience you want to reach, as previously indicated in your settings. All X users can interact and engage with promoted posts like your organic content.

Here’s a glimpse at a promoted posts:

X sponsored post example from Oracle including markup on “Promoted” tag

Image Source

X Ads

X Ads is a great option if you’re using different types of tweets/posts to achieve one goal for your business. It’s ideal if you’re looking to grow your base of followers and brand awareness significantly through the platform.

Your business can decide between different objectives regarding your X ads, including app installs, video views, website conversions, and audience targeting for your campaigns. This decision will impact the price you’ll need to pay to run your ad.

Here’s an X Ad by the car manufacturer Kia:

X ads example from Kia India with “ad” marked in post

Image Source

5. Drive traffic to your website.

X can help you direct traffic to your website. There are several ways to include your website’s URL on your profile and add links to your web pages and blogs in your posts.

Here are some ways to use the platform to direct traffic to your website and increase conversions:

  • Incorporate links to your website in your posts.
  • Embed posts on your website with an X Timeline.
  • Add your website URL beneath your bio on your X profile.
  • Repost any content that includes links to your website and blogs others have shared.

6. Buy a premium subscription to get verified.

Depending on the size of your company and industry, you might choose to get your X profile verified.

Previously, businesses and public figures applied for a verified blue checkmark, but now you can get a similar checkmark by subscribing to X Premium.

Anyone can get an X subscription, but X will double-check your account to ensure you meet the eligibility criteria.

Once the platform verifies your profile, a badge with a checkmark will appear next to your handle. This symbolizes an authentic account.

Hubspot’s X premium verified account with gold check mark

Image Source

Being verified prevents your audience members from following and being confused by impersonator accounts or accounts with similar content, usernames, and handles to yours. A verified account also makes your business look more legitimate and trustworthy.

7. Focus on building your follower count.

Needless to say, the more X followers you have, the more people there are looking at and interacting with your content. You’ll have a better chance to improve brand awareness and direct more traffic to your website when you build your follower count on X.

There are a number of ways you can increase your follower count on X — here are some to get you started:

  • Ensure your content is shareable.
  • Create engaging content (giveaways, contests, questions, surveys).
  • Enlist the help of social media influencers.
  • Include links to your X profile on your website.
  • Interact with your current followers and repost their content so they’re more likely to do the same for you.

Now that we’ve reviewed how to use X for business, let’s cover some tips and tricks you can apply to your profile to improve your marketing efforts on the platform.

The following X marketing tips are universal, meaning they’re applicable to any type of business, in every industry.

1. Use keyword targeting in X Ads.

Keyword targeting on X is a critical component of X Ads.

Keyword targeting allows you to engage X users through the different words and phrases you've included in your content and they’ve searched for on the platform.

This means you’re able to reach your target audience at the exact time your business, content, and services are most relevant to them.

On X, there are two types of keyword targeting you can use including search and timeline.

Search Keyword Targeting

Search keyword targeting allows you to make your posts show up for users who are searching for the topics that you determined relate to your business.

For example, if you sell gluten-free cookies, you can target users searching for content about baking, cookies, gluten intolerance, or Celiac Disease.

Timeline Keyword Targeting

Timeline keyword targeting allows you to act on users’ specific feelings, thoughts, actions, and emotions they’ve posted about.

For example, if you’re a running gear company, you might target keywords and phrases users post about such as, “running a race,” “race day tips,” or “training for a marathon.”

2. Implement hashtags.

Posts (previously Tweets) with hashtags generate more engagement than ones without them.

Adding hashtags to your posts is a great way to expand your influence on X. However, there are some guidelines you’ll want to stick to when using hashtags to ensure that you reach the largest number of people possible.

  • Create a hashtag unique to your business so your followers and target audience can easily find you and your content.
  • Make relevant and memorable hashtags for other groups of posts, such as those related to a specific campaign you’re running.
  • Use X Analytics to review your most successful hashtags so you can ensure their use in future posts.
  • Don’t overuse hashtags. This may feel and look spammy to your audience (not to mention it isn’t aesthetically pleasing).

3. Design a content publishing schedule.

As you grow your base of followers, you’ll need to post on a regular basis to ensure they stay engaged with your business and content.

Not only do you want to post regularly, but you also want to post at the right times of the day.

Here are some details about the best times (on average) for businesses to share their X content:

  • Between 8–10 AM and 6–9 PM (in correlation with commuter schedules) on weekdays.
  • Around noon or between 5–6 PM on any day of the week.
  • For B2C companies, the best days to post are weekends.
  • For B2B companies, the best days to post are weekdays.

Here’s an X content calendar template I use to plan my posts:

X (formerly twitter) marketing tool, schedule for planning content

Image Source

You can review X Analytics to examine your engagement on the days you post more or less content to determine what’s working well for your specific audience.

Once you’ve determined when and how often you’ll post your content, you can use a social media management tool. This will allow you to both create your posts and schedule them in advance so you can focus on other tasks you have to complete.

HubSpot’s social media management tool lets you:

  • Schedule posts in advance.
  • Connect directly with your audience.
  • Understand how your X interactions help your brand.

HubSpot’s social media marketing tool

4. Create an X campaign.

Social media marketing campaigns of any kind are a great way to reach your audience, drive sales, and increase your website traffic.

You can create a social media marketing campaign specifically for X to target users, increase your base of followers, and raise your brand awareness through the platform.

To create an X marketing campaign, you’ll want to follow the same steps you would with any type of social media marketing campaign:

  • Research your competition.
  • Determine how you’ll appeal to your target audience.
  • Choose the type of content you’ll create.
  • Share and promote your content.
  • Analyze your results.

5. Write a strong profile bio.

Writing a strong and memorable bio for your X profile is crucial.

This is because your X bio is the first thing a profile visitor will read about your company — it’s your written introduction and should briefly explain what visitors can expect from your page and content.

You only have 160 characters to do this, so choose your words wisely to ensure your bio successfully represents your brand and reflects who you are as a company.

Here’s a great example of an X bio by beauty brand Rare Beauty.

X marketing bio from rare beauty

Image Source

6. Use images and videos.

When possible, try to include quality videos and photos in your posts. It’s been proven that posts with images outperform posts strictly made of text.

Photos and images provide an eye-catching and engaging element in your content as X users scroll through their feeds.

Videos are proven to outperform posts with images as well. In fact, posts with videos are likely to get an average of six times the amount of engagement than posts without them.

Videos and images are a great way to show your audience your product line or how to use an item you sell as well as make your content feel more personal.

Plus, images and videos in posts are proven to help you increase your engagement — and who wouldn’t want that?

7. Interact with your followers.

Remembering to engage with your followers as your business grows and X follower count increases is crucial.

This will help you create experiences for your followers and audience members that feel personal and keep them coming back to your profile all while fostering a sense of brand loyalty.

For example, if someone reposts your post or comments on your posts, you can “Like” that person’s interaction or even reply back to them.

In some cases, you might have a ton of ghost followers who follow your account, but never interact with your content. If your interaction rates are low, it may make sense to use unfollow tools to clean your followers list from ghost followers.

8. Share media mentions.

If your business is mentioned in the media, share the article, video, URL, or image on X.

This will make your business feel more legitimate to anyone checking out your profile and show prospective followers how many other people already know about your company and are enjoying your products and services.

This is an exciting way to broadcast your success to your audience.

Take a look at how Scribe posts all media mentions of the brand and its founders.

X marketing tips, example of company promotion

Image Source

It also provides you with a way to incorporate backlinks in your posts which, when clicked, take your audience members to the original source of the mention.

Meaning you’ll also drive traffic to the website of the media outlet that mentioned you, likely boosting their follower count and/ or brand recognition.

This could potentially help you become mentioned, shared, or featured in one of their pieces of content again in the future.

9. Keep an eye on your competitors’ X accounts.

X is a great way to keep an eye on your competitors’ marketing efforts. You can follow them or simply search them to see what they’re posting.

You can also view basic details about their engagement such as their number of reposts, comments, and responses.

This is a simple way to see some of the X marketing strategies your competitors are implementing and whether or not they’re working.

10. Focus on followers’ interests when creating content.

If you want to reach your audience members and ensure your content resonates with them, you’ll need to focus on their interests and needs — whether that’s in relation to the way you share content, what you share, or how you present it.

When you meet the needs of your target audience and buyer personas, they’ll be more likely to continue to follow and interact with your company. You can build buyer personas with HubSpot’s free tool, Make My Persona.

buyer personas tool from HubSpot you can use for X marketing

Image Source

As you study your buyer personas and target audience, you’ll be able to determine the type of content they’re likely looking for you to share.

Additionally, you can always post questions, send out surveys, ask for feedback, or even create an X Chat to get more ideas about the type of content your audience is looking for from your business and X profile.

11. Promote your events.

X is a great way to promote your business’ events.

Similar to the way you might for an X campaign, you can create a unique hashtag for various events (such as launch parties, giveaways, and contests) or schedule a variety of posts (using one of your social media management tools) to promote any special occasion your company is hosting.

This way, audience members — whether or not they’re your followers — will have the opportunity to learn about your event and get all of the details they need to sign up, be in attendance, or participate.

12. Check your direct messages regularly.

Like other social media platforms, X provides users with a Direct Message inbox where they can contact you in a private message regarding any questions, concerns, or comments they have.

So, be sure to check your inbox regularly as this can contribute to the type of customer service and support your business is known for, as well as the type of care you provide your followers and customers.

X direct messages interface

Image Source

13. Keep track of your analytics.

With all of the work you’re putting into your business’ X marketing, you’ll want to ensure your efforts are successful in reaching your goals, whether they’re related to directing more traffic to your website, increasing conversions, or improving brand awareness.

You can determine your X marketing success in these areas (and many more) by analyzing your work. To do this, you’ll want to consider which metrics matter to you and then determine how you’re going to track them.

Which Metrics to Track on X

Due to every business being unique and having different goals, you might not be interested in tracking all of the following X metrics (or you might be looking to track additional metrics).

However, we’ve compiled the following list of possible metrics for you to consider to get you started.

  • Engagement. Look at the number of reposts, follows, replies, favorites, and click-throughs your posts get (including all hashtags and links they include).
  • Impressions. Review the number of times your posts appeared on one of your audience members’ timelines (whether or not they’re actually following you).
  • Hashtags. Look at which of your hashtags are being used most frequently by your audience and followers.
  • Top posts. Review your posts with the most engagement.
  • Contributors. Keep up with the level of success each of your contributors — the people you give admin access to on your account — are having with their posts so you can implement some of their tactics more regularly or remove them completely.

How to Track X Analytics

You’ll find several social media management tools with analytics features that are automatically built in. This is convenient for those of you who were already planning on choosing a management tool to assist with scheduling your posts.

However, one of the most common analytics tools for X is the one created specifically for the platform: X Analytics.

X Analytics

X Analytics helps you understand how your content impacts your audience and the ways in which your activity on the platform can help you grow your business. The tool is free, accessible to all users, and shares information about:

  • Engagement rate.
  • Post activity.
  • Impressions.
  • Followers.

X analytics dashboard exmaple

Image Source

Depending on your business’ needs, you have the ability to incorporate X Ads (if you pay for the option) data in X Analytics as well.

Lastly, there are a number of other third-party resources and apps you can download and use along with X Analytics to take a deeper look at specific types of data such as detailed hashtag performance information or how other X handles in your industry are doing.

4 X (formerly Twitter) Marketing Tools to Level Up Your Strategy

Ready to make the best out of X? Here are my top four X marketing tools to drive results for your business.

1. Hypefury: Best for scheduling and managing posts.

X (formerly twitter) marketing tools, Hypefury

Hypefury lets you automate your X posting schedule and plan posts in advance. The tool is purpose-built for creators and marketers looking to build consistency on X and grow their audience.

One of Hypefury’s standout features is the ability to schedule threads. Create a sequence of posts to share long-form content through an X thread with an automated posting schedule.

X (formerly twitter) marketing tools, creating a content thread with Hypefury

Hypefury also reposts some of your most popular posts at optimal times when you don’t have any posts scheduled. You can enable the option to share evergreen posts, and the tool will take care of the rest.

Besides, the tool can even automate product promotion. If you sell a product/service, Hypefury will add a post promoting your business under your best-performing posts.

What I Like

  • Advanced automation saves time and effort in managing a posting schedule.
  • Allows cross-posting content across multiple platforms like Instagram, LinkedIn, etc.
  • Shares suggestions and writing prompts to inspire new posts when you’re out of ideas.

Pricing

7-day free trial. Paid plans start at $29/month. Check pricing here.

2. Audiense: Best for understanding your audience.

X (formerly twitter) marketing tools, Audiense

Audiense, a customer intelligence platform, collects real-time insights from multiple sources to help you understand the target audience.

You can create highly targeted audience segments based on demographics, psychographics, and behavioral data. The tool will use this segmentation to share specific information about each group for tailored X marketing campaigns.

X (formerly twitter) marketing tools, Audiense showing segment distribution

You can also use Audiense to find the influencers your audience follows. This will help you connect with the right people and opinion leads to amplify your brand and grow your followers.

What I Like

  • Built-in social listening tool to track brand mentions, conversations, and trends.
  • In-depth reports on audience behavior to understand preferences and expectations.
  • Updated data about audience segments with the latest insights to strategize your approach.

Pricing

Free forever plan. Paid plans start at £23/month. Check pricing here.

3. Tweet Hunter: Best for creating content and engaging with posts.

X (formerly twitter) marketing tools, Tweet Hunter view of scheduled posts

Tweet Hunter is an AI-powered content creation and publishing tool for X.

You’ll find personalized content ideas based on trending topics and your preferences. Use these suggestions to write new posts and predict their performance with TweetPredict. This feature analyzes a post in real-time and assesses how it will perform once published.

You can also automate the process of liking, commenting, and reposting. The tool puts engagement on auto-pilot and makes it easy to connect with your followers.

What I Like

  • Easily ideate new content and schedule posts beforehand in a calendar.
  • User-friendly interface with a minimal learning curve to get started.
  • Integrates with your CRM tool to optimize X outreach.

Pricing

Paid plans start at $23/month. Check pricing here.

4. Circleboom: Best for accessing analytics and follower insights.

X (formerly twitter) marketing tools, Circleboom analytics dashboard

Circlebloom is an X management tool to manage your post archives and perform bulk actions like deleting posts. It also offers options for content scheduling and automation to post on X and other platforms.

What makes Circleboom a must-have X marketing tool is its advanced analytics.

You can get a pulse of your audience and understand exactly who you are targeting.

X (formerly twitter) marketing tools, Circleboom follower analytics dashboard view

You can also discover articles and content ideas that resonate with your audience. These curated ideas help build a repository of new posts to maintain consistency.

What I Like

  • Multi-platform management to integrate your X marketing efforts.
  • Get detailed insights on follower activity and engagement like active/inactive followers.
  • Access advanced search to find users via their bio and identify influencers in your niche.

Pricing

Free forever plan. Paid plans start at $9.99/month. Check pricing here.

Kickstart X Marketing Effortlessly

X is a powerful marketing tool and social media platform any business can take advantage of.

I’ve leveraged the platform to gain website traffic, boost brand awareness, and engage my target audience. I believe the key to succeeding on X is in building a data-informed strategy keeping your customers at the core.

Bookmark this guide to get a strong start with X marketing.

Editor's note: This post was originally published in March 2013 and has been updated for comprehensiveness.

Halloween Graphic Design: 15 Spooky Tips & Ideas for 2024

Featured Imgs 23

Witches, goblins, and ghouls can make for some pretty amazing design projects. While Halloween might not be top of mind when it comes to design, it’s an opportunity to do something a little different with projects.

Halloween graphic design centers around something that will be around for a short time. It might be different than the typical vibe of a brand or project and often has a theme that’s fun and friendly.

Adding a spooky element to a design can delight users and show that the design is new and timely. It gives users reasons to come back to your projects because they know that it will change again after the holiday. You can use holiday-themed graphic design as a trick to keep users coming back!

1. Create a Themed Design

Create a Themed Design

Using a theme for the overall look of your design is one of the best ways to make it more relatable. For example, you can take inspiration from a popular horror movie to create a themed Halloween graphic design.

They don’t have to be scary, not at all. You can easily create cute, fun graphic designs using those scary movies as inspiration. The above illustration is a good example of that. If you want to go a step further, use urban legends to create a spooky vibe for your designs that your local audiences can relate to.

Using a theme for your Halloween graphics will help create consistency across all your seasonal designs. All your posters, flyers, banners, and even the online promo graphics will look more familiar, attractive, and memorable.

2. Zombies vs Monsters

Zombies vs Monsters

When in doubt, go with a zombie or monster theme! These two iconic Halloween themes never fail to impress. Whether it’s a flyer design for a Halloween party or a fun greeting card for children, a zombie or monster theme is always acceptable.

Frankenstein’s monster, Count Dracula, the Grim Reaper, as well as witches, and mummies are just a few of the monsters loved by children and adults alike. And as always, everyone loves a fun slow-walking, brain-eating zombie design.

If you’re struggling to find a theme or an approach for your graphic design, a zombie or monster theme is the safest and most widely recognized trend to use.

3. Use Grungy Textures

Use Grungy Textures

Creating a spooky, old, and scary vibe for a graphic design takes a lot of work. One of the most important elements of such a design is textures.

Adding a subtle distressed and grunge-style texture is often the perfect way to create a weird and ghostly look for your design. They will simply transform your designs with a haunted feel.

You can also use other similar textures like dust and scratches to create more eerie-looking backgrounds and designs.

4. Add Overlay Effects

Add Overlay Effects

Overlay effects are one of the easiest ways to instantly transform your photos and graphics into all kinds of unique creations. You can also use them to give a Halloween look to your designs as well.

Whether you want to cover your images with a spooky spider web or add a horror-themed border, there are many different types of overlays you can use to achieve a supernatural look for your graphics.

5. Make Use of Text Effects

Make Use of Text Effects

Crafting a spooky-looking title for your design can be a challenge. It will take you a good amount of time to design a creative title with a Halloween-themed effect. A great way to skip this process is to use a pre-made text effect.

You can find loads of Halloween and horror-themed text effects on the web. These text effect templates are super easy to use and allow you to transform your text with just a few clicks.

6. Use Halloween Patterns

Use Halloween Patterns

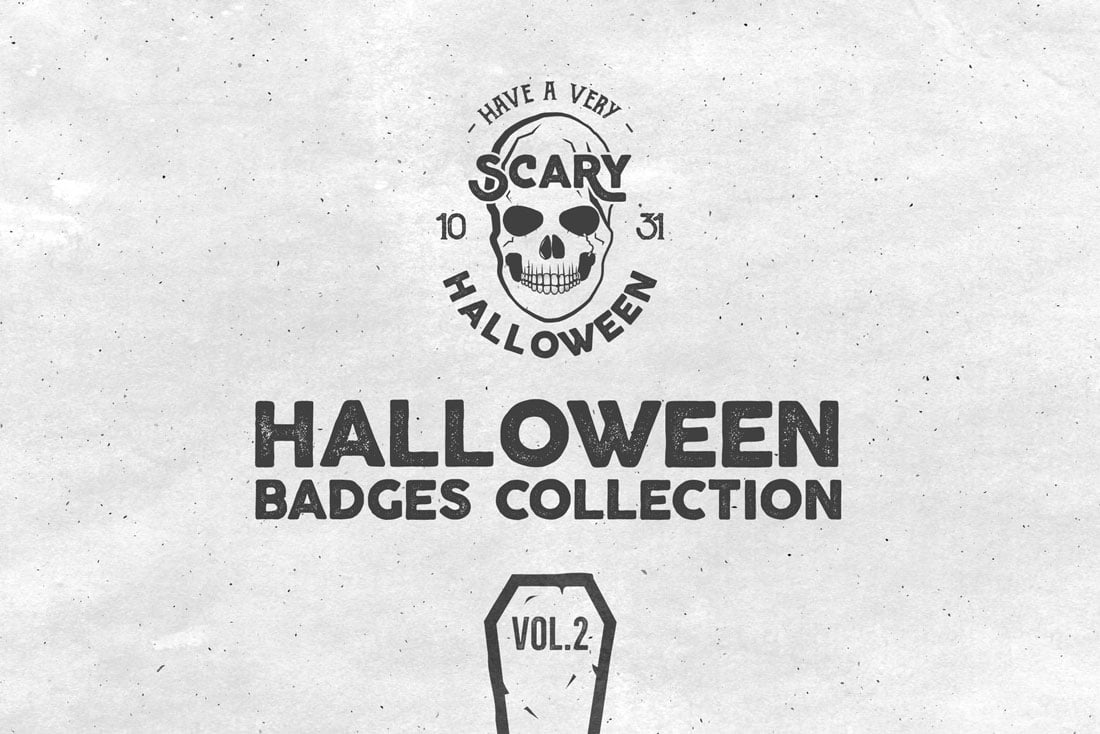
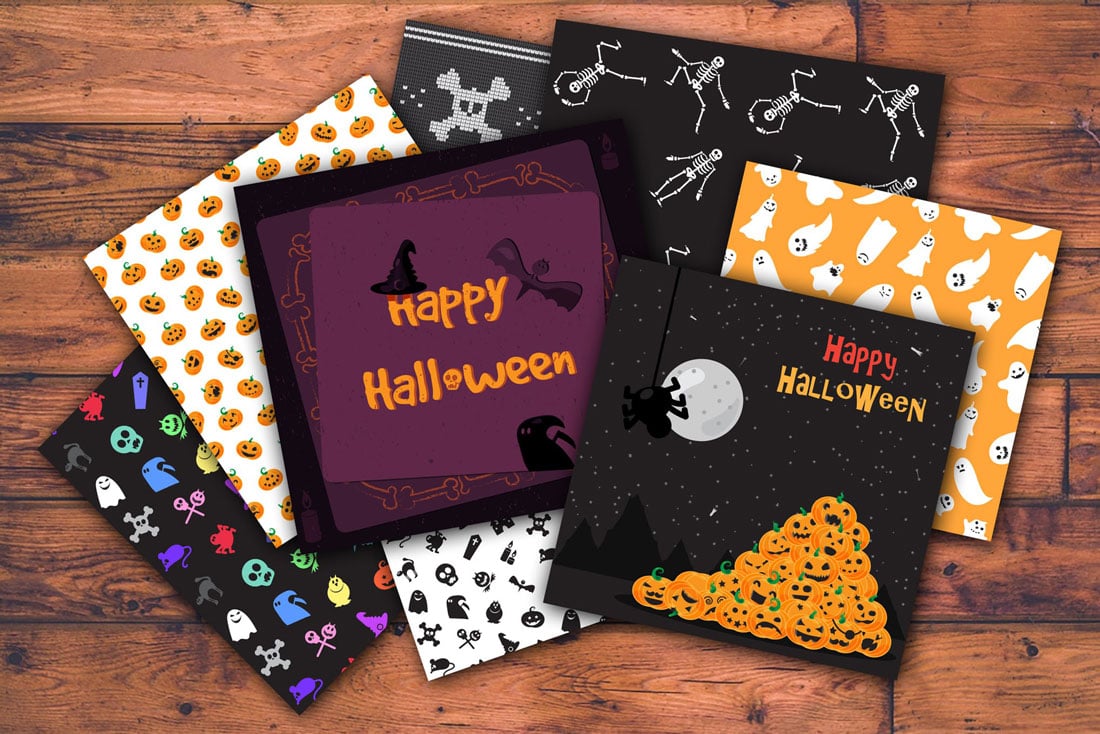
A Halloween-themed pattern is a great choice for designing a cool background for all your Halloween graphic designs, especially for packaging designs, posters, and social media posts.

Patterns filled with spooky pumpkins, friendly ghosts, and cute witches will always grab the attention of kids and audiences of all ages.

7. Create Halloween-themed Characters

Create Halloween-themed Characters

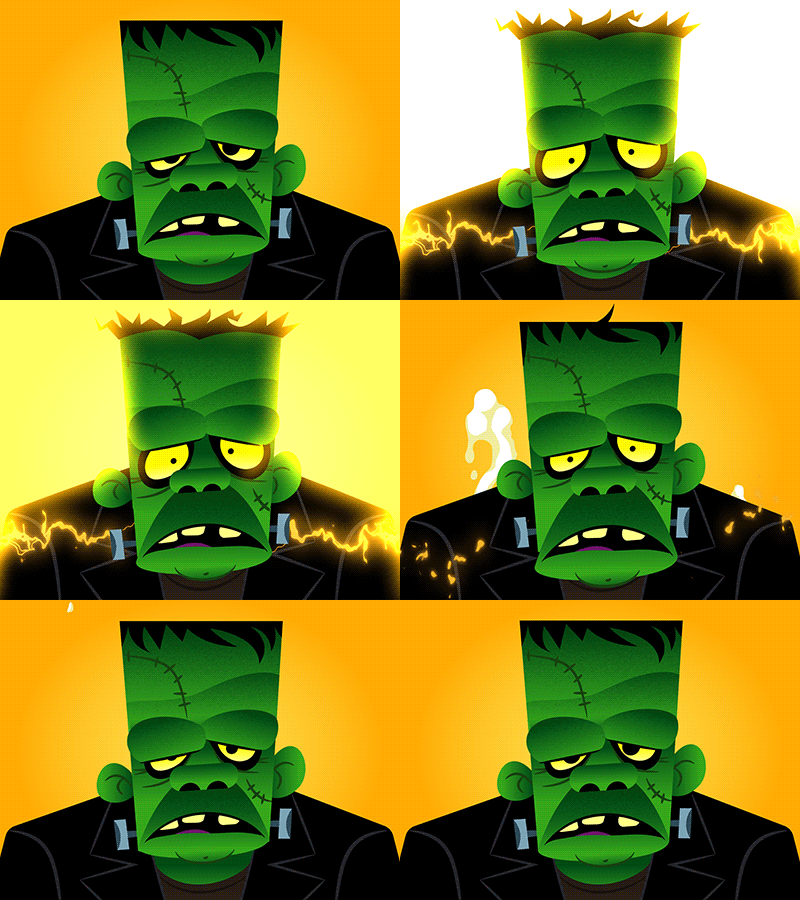
A fun way to give a personality to your graphics is to use a Halloween-themed character across all your designs. If your business has a mascot, give it a Halloween-themed spooky makeover. Or use a character from a Horror movie and give them a cute and funny cartoon look.

When designed with bright colors and cartoon effects, these characters will fit right in with your invitations, greeting cards, and even promo campaigns for your brand.

8. Add Halloween Imagery

halloween design

The easiest way to create a Halloween graphic design is to substitute some of your typical imagery for something with a holiday feel.

  • Add images of people in costumes
  • Create a Halloween scene for the homepage
  • Design a special animation
  • Promote a product or service with a spooky special that you can show

9. Switch to a Seasonal Font

halloween design

halloween design

halloween design

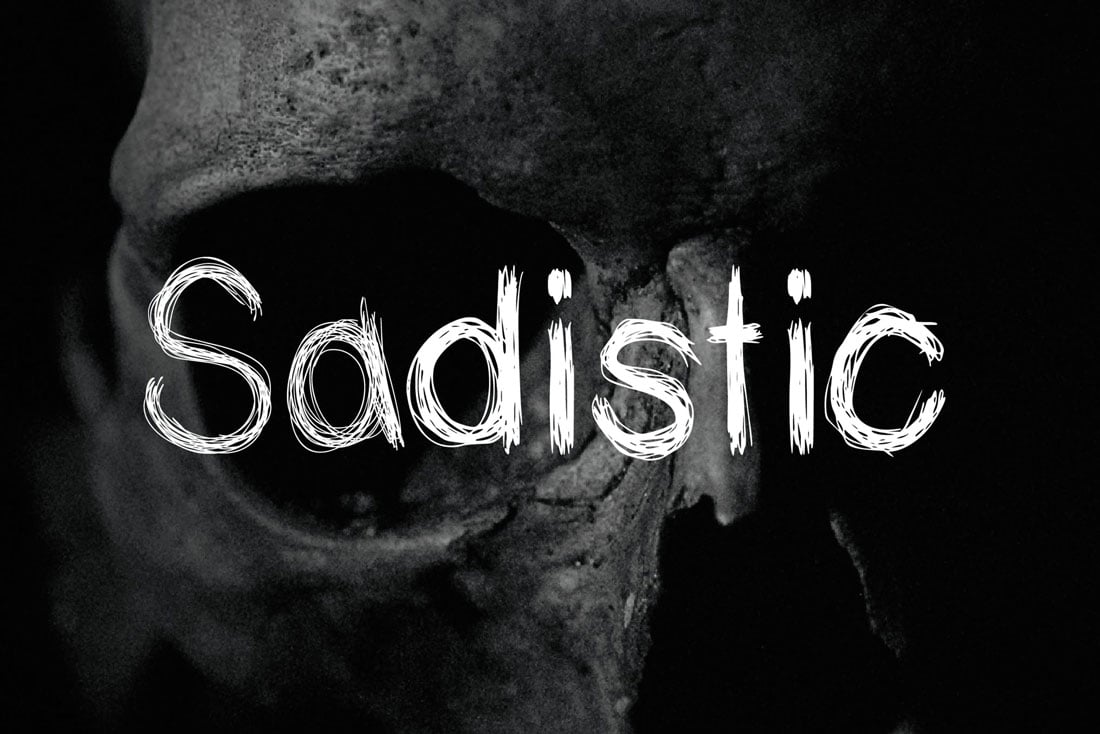
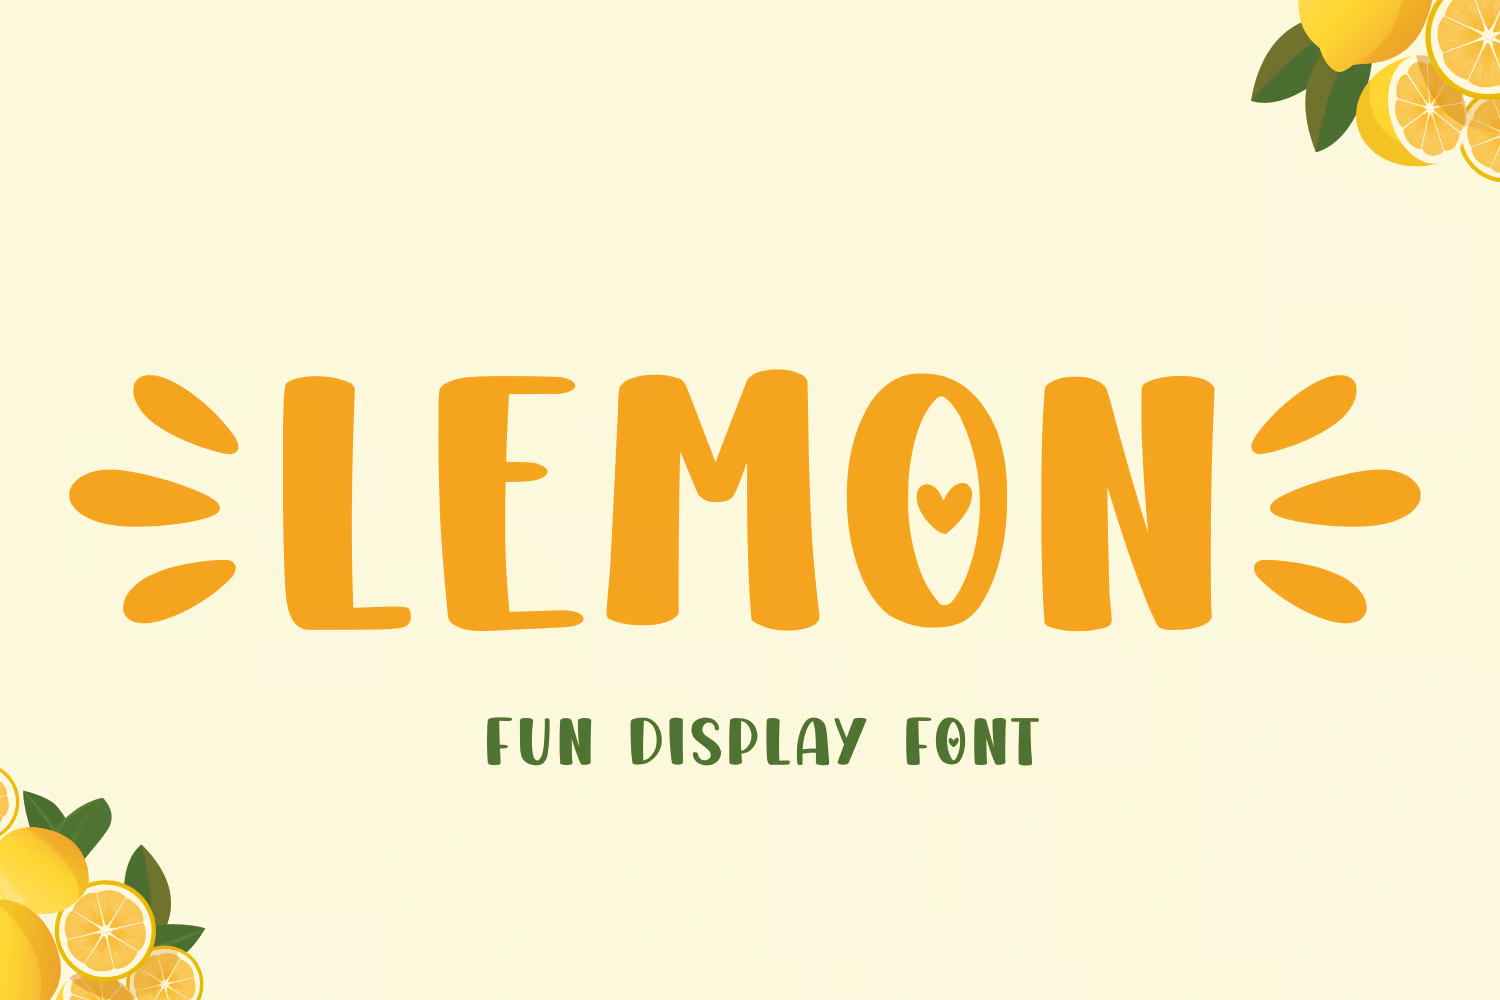
Halloween is the perfect time to use one of those crazy novelty fonts that you just can’t find another excuse for. From scratchy hand-drawn typefaces to lettering that looks like it could be ripped from a horror movie poster, a spooky font option is a less obvious way to create a Halloween scene.

If you are really feeling like tricks and treats, use matching language to create a fun and unique holiday complication.

Here are three Halloween fonts that are a good starting point.

10. Mix Up Your Color Palette

halloween design

Halloween provides a great opportunity to switch up a color palette for warmer, deeper hues with more jewel tones and dark schemes.

While most people jump right to a bright orange, you don’t have to use a pumpkin-colored palette. Consider deeper oranges and sage greens. Purples, navy and black are equally popular. Don’t discount a deep maroon or brighter blues or greens either.

When in doubt, opt for something that has roots in nature – fall leaves, the night sky, and full moon or even a green-eyed black cat.

11. Substitute Fun Icons or Hover States

halloween design

Trade some of your more common design elements for icons with a seasonal theme.

When it comes to making tweaks to your design theme for Halloween, consider adjustments to some of the smallest website elements or divots in print projects.

Starting in October, switch the icons to something with a more Halloween look. Add a witch hat to the cart icon or a pumpkin to the phone button. The nice thing is that you don’t have to change every icon in the design to achieve this look. Just subbing a few small elements can create the right amount of charm.

Or surprise users with a simple hover state: Don’t change the icon itself, just adjust the hover action so that that cart magically pops into a bat or ghoul.

The same idea can work on printed materials as well – just make sure not to give them out post-holiday. Trade some of your more common design elements for icons with a seasonal theme.

12. Include a Spooky CTA

halloween design

Even the smallest bits of a design can be traded for Halloween elements. Adjust the micro-copy in your call to action button to include a spooky message.

Another idea? A simple pop-up that says “BOO!” and leads website visitors to complete an action.

Sometimes the smallest and simplest changes can be the most effective.

13. Add a Fall Theme

halloween design

So here’s the biggest issue with a Halloween graphic design theme – it’s short-lived. Most designers don’t want to switch over to holiday elements until October. (And I don’t blame you.)
So do you really want to go through all this fuss for a design change that only lasts 30 days?

Rather than an all-out light-up jack o lanterns theme, try a more fall aesthetic instead. Lump Halloween, the season change and even Thanksgiving into one design cluster. You’ll get a lot more bang for your buck and can switch it now and leave it until the end of November without feeling silly.

14. Have Fun with About Pages

halloween design

Here’s my go-to Halloween graphic design trick. Have staff (or pets) dress in costumes and change their photos on the About Us page of your website.
Include a promo or social media campaign to drive users to this seasonal content that’s fun and interesting.

Simple, right? Now schedule that staff dress up day!

15. Add an Animation

It might seem old-school but a simple “Happy Halloween” banner or animation can be just the right element to create a holiday theme. Not every project is designed in a way that an all-out change can work effectively.

A simple animation won’t take over the design and can set a nice tone without overwhelming users.

Another option is to incorporate a Halloween message or image into your homepage slider if that’s the type of website design you have. This is another easy change that won’t take a lot of time or planning but can still provide a timely holiday element.

16. Create a Holiday Hero

halloween design

If you can go all out on your website homepage or for a printed project, do it. Use photos, video or illustration to create a Halloween-theme hero header.

This is a pretty large and possibly elaborate use of space so scale back on any other Halloween themed ideas that you might have. Remember one big trick in the design is enough; any type of special imagery or themed design element counts as that trick.

17. Skip the Gore

Finally, Halloween graphic design should be fun and a bit spooky. But avoid gory scenes.

Too much gore or horror-themed elements can turn off some users. (If you know your audience well, there might be a case for using this type of imagery, but those cases are pretty rare.)

When planning for Halloween elements, opt for more friendly characters, skip the horror movie soundtrack or blood and guts and create something that holiday appropriate for the entire audience.

Conclusion

Have you considered swapping out elements for a Halloween graphic design? From small elements like icons or a hover state to full-scale spookiness, this is an opportunity to have fun with the project.

Hopefully, these tricks (and treats) will help jumpstart your imagination. Happy Halloween!
Fine-tuning OpenAI Vision Models for Visual Question-Answering

Featured Imgs 23

In my previous article, I explained how to fine-tune OpenAI GPT-4o model for natural language processing tasks.

In OpenAI DevDay, held on October 1, 2024, OpenAI announced that users can now fine-tune OpenAI vision and multimodal models such as GPT-4o and GPT-4o mini. The best part is that fine-tuning vision models are free until October 31.

In this article, you will see an example of how to vision fine-tune the GPT-4o model on your custom visual question-answering dataset. So, let's begin without ado.

Importing and Installing Required Libraries

You will need to install the OpenAI Python library.

!pip install openai

In this article, we will be using the following Python libraries. Run the following script to import them into your Python application.


from openai import OpenAI
import pandas as pd
import json
import os
from sklearn.utils import shuffle
from sklearn.metrics import accuracy_score
Importing and Preprocessing the Dataset

We will fine-tune the GPT-4o model on a visual question-answering dataset you can download from Kaggle.

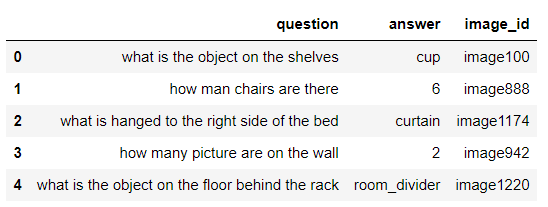
The following script imports the CSV file containing the question, the image ID, and the corresponding answer to the question.

#Data download link
#https://www.kaggle.com/datasets/bhavikardeshna/visual-question-answering-computer-vision-nlp

dataset = pd.read_csv(r"D:\Datasets\dataset\data_train.csv")
dataset.head()
Output:

img1.png

Here is the image with the id image100. You can see cups on the shelves.

image100.png

For vision fine-tuning, you must pass image URLs to the OpenAI API. Hence, we will upload our images to a cloud service (Github for this article). The dataset consists of over 1500 images. However, I only uploaded the first 495 images to GitHub. You can upload more images if you want.

We will fine-tune the GPT-4o model on 300 images and will test the model on 100 images.

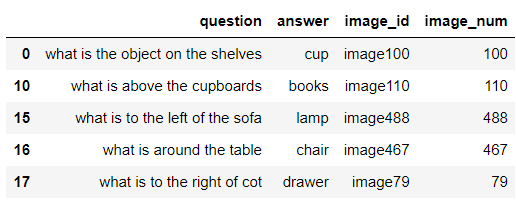
The following script extracts the digit part from the image_id column of the dataset and filters the images with IDs less than 495, as I uploaded only the first 495 images to GitHub.


dataset['image_num'] = dataset['image_id'].str.extract('(\d+)').astype(int)
filtered_data = dataset[dataset['image_num'] < 495]

filtered_data.head()

Output:

img2.png

You must convert your dataset into the following JSON format for vision fine-tuning OpenAI models.


{
  "messages": [
    { "role": "system", "content": "You are an assistant that identifies uncommon cheeses." },
    { "role": "user", "content": "What is this cheese?" },
    { "role": "user", "content": [
        {
          "type": "image_url",
          "image_url": {
            "url": "https://upload.wikimedia.org/wikipedia/commons/3/36/Danbo_Cheese.jpg"
          }
        }
      ]
    },
    { "role": "assistant", "content": "Danbo" }
  ]
}

We will convert our CSV file into the above JSON format. First, we will divide the dataset into training and test files with 300 and 100 records, respectively.

Next, we will iterate through all the rows in the training set and set the system role, which instructs the model on how to respond to model queries.

Subsequently, we will set the first user role content with the value from the question column and the second with the image URL. Note that we concatenate the base GitHub URL with the image ID to generate the full URL.

Finally, we set the assistant role content with the value from the answer column.

We will perform the above tasks for all the training set records and create our training JSON file.

We will use the test data later for model evaluation.


# Base URL for the images
base_url = "https://raw.githubusercontent.com/usmanmalik57/daniweb-articles/refs/heads/main/vqa_images/"

# Shuffle the dataset
shuffled_dataset = shuffle(filtered_data)

# Split the dataset: first 300 for training, next 100 for testing
training_data = shuffled_dataset[:300]
test_data = shuffled_dataset[300:400]

# Create the JSONL structure for training data and save each entry on a single line
training_output_file = r'D:\Datasets\dataset\training_data.jsonl'

with open(training_output_file, 'w') as f:
    for index, row in training_data.iterrows():
        # Update image URL
        image_url = f"{base_url}image{row['image_num']}.png"
        entry = {
            "messages": [
                {"role": "system", "content": "You are an assistant that answers questions related to images."},
                {"role": "user", "content": row['question']},
                {"role": "user", "content": [
                    {"type": "image_url", "image_url": {"url": image_url}}
                ]},
                {"role": "assistant", "content": row['answer']}
            ]
        }
        # Write each entry as a single line in the JSONL file
        f.write(json.dumps(entry) + '\n')

print(f"Training JSONL file saved as {training_output_file}")

Output:


Training JSONL file saved as D:\Datasets\dataset\training_data.jsonl

We are now ready to fine-tune the GPT-4o model.

Vision Fine-tuning OpenAI GPT-4o Mini

The vision fine-tuning process remains the same as text fine-tuning as I have explained in a previous article. The only difference lies in the training file which contains image URLs for vision fine-tuning.

Let's quickly walk through the fine-tuning process.

First, create a client object for the OpenAI class and pass it your OpenAI API key.

Next, you need to upload the training file to the OpenAI server. You can do so using the files.create() method of the OpenAI client object. This method returns the training file data, including the training file ID.

client = OpenAI(
    # This is the default and can be omitted
    api_key = os.environ.get('OPENAI_API_KEY'),
)

training_file = client.files.create(
  file=open(training_output_file, "rb"),
  purpose="fine-tune"
)

To start fine-tuning, call the fine_tuning.jobs.create() method and pass it the ID of the training file you just uploaded to the OpenAI server.

fine_tuning_job_gpt4o = client.fine_tuning.jobs.create(
  training_file=training_file.id,
  model="gpt-4o-2024-08-06"
)

The training process will start in the background. Using the fine_tuning.jobs.list_events() method, you can see various training events.

# List up to 10 events from a fine-tuning job
print(client.fine_tuning.jobs.list_events(fine_tuning_job_id = fine_tuning_job_gpt4o.id,
                                    limit=10))

Once the fine-tuning is completed, you will receive an email containing the model ID of your fine-tuned model. Alternatively, you can retrieve the model ID using your fine-tuning job ID, as the following script shows.

ft_model_id = client.fine_tuning.jobs.retrieve(fine_tuning_job_gpt4o.id).fine_tuned_model

Let's now evaluate the model on the test data.

Evaluating Fine-Tuned Vision Model

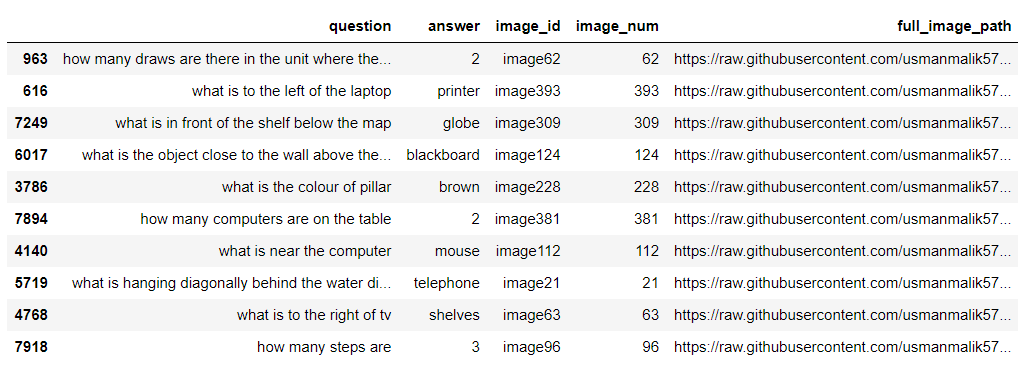
We will add the full_image_path column to the test data, which contains image URLs from the GitHub repository of images.


test_data['full_image_path'] = test_data['image_num'].apply(lambda x: f"{base_url}image{x}.png")
test_data.head(10)

Output:

img3.png

Next, we will define the get_single_prediction() function, which accepts as parameters the query (question), the full image path, the OpenAI model ID, and the system role and returns the answer to the user's query.


def get_single_prediction(query, image_path, model_id, system_role):

    try:
        # Make the API call to get the response from the model
        response = client.chat.completions.create(
          model= model_id,
          temperature = 0,
          messages=[
                {"role": "system", "content": system_role},
                {"role": "user", "content": [
                    {"type": "text", "text": query},
                    {"type": "image_url", "image_url": {"url": image_path}
                    }
                ]}
          ]
        )


        # Extract the prediction from the API response
        prediction = response.choices[0].message.content.strip().lower()
        return prediction
    except Exception as e:
        print(f"Error making prediction: {e}")
        return None  # In case of failure

Let's first make a prediction using the default GPT-4o model.


image_path = test_data["full_image_path"].iloc[1]
query = test_data["question"].iloc[1]
system_role = "You are an assistant that answers questions related to images."
model_id = "gpt-4o-2024-08-06"
response = get_single_prediction(query, image_path, model_id, system_role)

print(f"Image path: {image_path}")
print(f"User Query: {query}")
print(f"Model Response: {response}")

Output:

img4.png

The above output shows that the default GPT-4o model correctly predicts the answer. However, the output is not a single word as it was in our dataset.

Let's now make a prediction for the same image using our fine-tuned model.


image_path = test_data["full_image_path"].iloc[1]
query = test_data["question"].iloc[1]
system_role = "You are an assistant that answers questions related to images."
model_id = ft_model_id
response = get_single_prediction(query, image_path, model_id, system_role)

print(f"Image path: {image_path}")
print(f"User Query: {query}")
print(f"Model Response: {response}")

Output:

img5.png

The model response contains the single word printer, which shows that the fine-tuned model has learned the patterns from the dataset.

We will define the make_predictions() function, which predicts all the records in the test data. The function accepts the dataset, the model ID, and the system role as parameter values.

The function iterates through each record in the dataset and uses the get_single_prediction() function to predict the response. The function then appends the response to the predicted_answers[] list. Finally, the actual_answers list containing the actual answers is compared with the predicted_answers list to calculate the model's accuracy.


def make_predictions(dataframe, model_id, system_role):
    actual_answers = []
    predicted_answers = []

    # Initialize a counter to track record numbers
    record_number = 1

    # Iterate through each row in the dataframe
    for _, row in dataframe.iterrows():
        image_path = row['full_image_path']
        query = row['question']
        actual_answer = row['answer'].lower()

        # Get the predicted answer from the API
        predicted_answer = get_single_prediction(query, image_path, model_id, system_role)

        if predicted_answer:
            # Append actual and predicted answers for accuracy calculation
            actual_answers.append(actual_answer)
            predicted_answers.append(predicted_answer)
        else:
            print(f"Skipping record #{record_number} due to prediction error.")
            record_number += 1
            continue

        # Print the status indicating the record number processed and the response
        print(f"Record #{record_number} processed. Response: {predicted_answer}")

        # Increment the record number for the next iteration
        record_number += 1

    # Calculate accuracy using sklearn's accuracy_score
    accuracy = accuracy_score(actual_answers, predicted_answers) * 100
    print(f"Accuracy: {accuracy:.2f}%")

    return accuracy, predicted_answers
Results Using Default GPT-4o Model

Let's first calculate the default model accuracy on the test data. Notice that the following system prompt contains more details than the fine-tuning prompt since we want the default model to generate predictions similar to those in our dataset's answers column.


model_id = "gpt-4o-2024-08-06"
system_role = """
You are an assistant that answers questions related to images.
Return your response in a single word without period at the end.
For digits you should return digit number and not word. "
"""
gpt_4o_predictions = make_predictions(test_data, model_id, system_role)

Output:

Accuracy: 29.00%

The above output shows that the model achieves 29% accuracy for precisely predicting the answers to questions related to images in our dataset.

Results Using Fine-tuned GPT-4o Model

Let's now make predictions using our fine-tuned model. Here we will use the same system prompt we used for fine-tuning the model.


model_id = ft_model_id
system_role = "You are an assistant that answers questions related to images."
gpt_4o_fine_tuned_predictions = make_predictions(test_data, model_id, system_role)

Output:

Accuracy: 36.00%

The above output shows that the model achieves 36% accuracy, which is much better than the default model.

Note: These results may seem poor, with very low accuracy values. However, here, the accuracy is calculated based on exact string matching, which is difficult to get right. Furthermore, the accuracy for this dataset is in the range of 15-25% on Kaggle with the default neural networks, which shows that our fine-tuned model performed quite well.
You can further increase the model performance by fine-tuning on the complete dataset.

Comparing Default vs Fine-Tuned GPT-4o Model

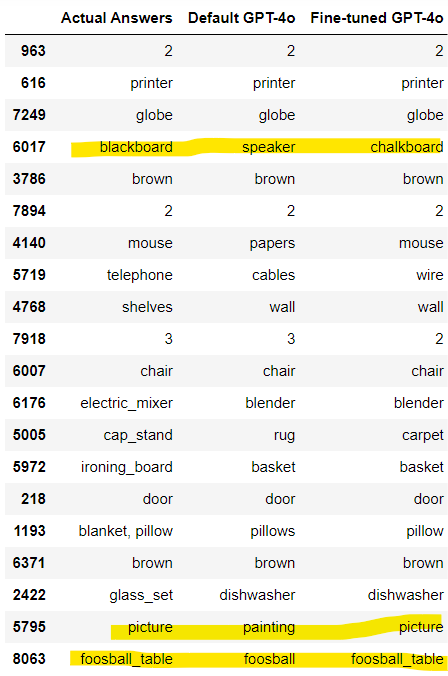
Let's plot actual answers, the default and fine-tuned mo,del predictions side by side to further understand the.


comparis furtheron_df = pd.DataFrame({
    'Actual Answers': test_data['answer'],
    'Default GPT-4o': gpt_4o_predictions[1],
    'Fine-tuned GPT-4o': gpt_4o_fine_tuned_predictions[1]
})

# Display the new DataFrame
comparison_df.head(20)

Output:

img6.png

The above output shows that the default and fine-tuned models sometimes predicted the correct answer but in different words. For example, our fine-tuned model predicted chalkboard for blackboard, which are semantically similar.

To overcome this problem, we will ask the GPT-4o model to return True if two predictions are semantically similar. This will give us a better picture of the model's performance.

The following script defines the compare_answer function that takes the actual answer and the prediction as inputs and returns True if the two are semantically similar.


def compare_answer(answer, prediction):

    content = f"""
    Compare the actual answer and prediction and check if the actual answer and prediction have the same meaning.
    They dont have to be the exact match but the meaning must be similarl.
    Actual answer {answer}.
    Prediction: {prediction}.
    Return True if the have same meaning, else return False. Do not return anything else.

    """
    response = client.chat.completions.create(
        model= "gpt-4o-2024-08-06",
        temperature=0,
        max_tokens=10,
        messages=[
            {"role": "user", "content": content}
        ]
    )

    response = response.choices[0].message.content.strip().lower() == 'true'
    print(f"{answer} -> {prediction} -> {response}")
    return response

Next, we will define the count_matching_answers() function which takes two lists as inputs and returns the count of semantically similar values in corresponding items of the two lists.


def count_matching_answers(answers, predictions):
    count = 0
    # Iterate through both lists together using zip
    for answer, prediction in zip(answers, predictions):
        # Call the compare_answer function and increment count if True
        if compare_answer(answer, prediction):
            count += 1
    return count

Let's first check the count of semantically similar outputs for the default GPT-4o model.

matching_count = count_matching_answers(test_data['answer'], gpt_4o_predictions[1])
print(f"Number of matching answers: {matching_count}")

Output:

Number of matching answers: 36

The model shows an accuracy of 36%, better than the 29% achieved previously.

Similarly, the script below calculates the accuracy for the fine-tuned GPT-4o model.

matching_count = count_matching_answers(test_data['answer'], gpt_4o_fine_tuned_predictions[1])
print(f"Number of matching answers: {matching_count}")

Output:

Number of matching answers: 40

The accuracy now reaches 40% for our fine-tuned model.

Conclusion

OpenAI recently released a much-awaited feature: vision fine-tuning of the OpenAI models. In this article, you saw how to fine-tune the OpenAI GPT-4o model for visual question-answering. Try fine-tuning the GPT-4o model on your custom dataset and see if you get improved results. The fine-tuning is free until October 31, 2024, so trying wouldn't cost a dime anyway ;)

LNK2005 unsigned short

Featured Imgs 23

Hi DW, I'm having an issue here, I have 3 forms namely start.h,home,Form1 in their order of execution, the problem starts when I include Form 1 to any of these forms then I get LNK2005 'unsigned short MyprojectName::m_hservice' (?m_hservice@MyprojectName@@$$Q3GA) Already defined in home.obj

NB these forms are completely different, the first one which is start.h only let the user to click a button then show home which home is a password form when a user keys the correct credentials then it should now show Form1 but when I #include 'Form1.h' to home.hI get this error but hoeme.h doesn't have m_hservice at all being defined by myself so I don't know where it's taking it from because I never did that and it's not there as well.

Anyone who knows how I can solve this problem?

55+ Best Photoshop Cartoon Effects (Photo to Cartoon Actions & Plugins)

Featured Imgs 23

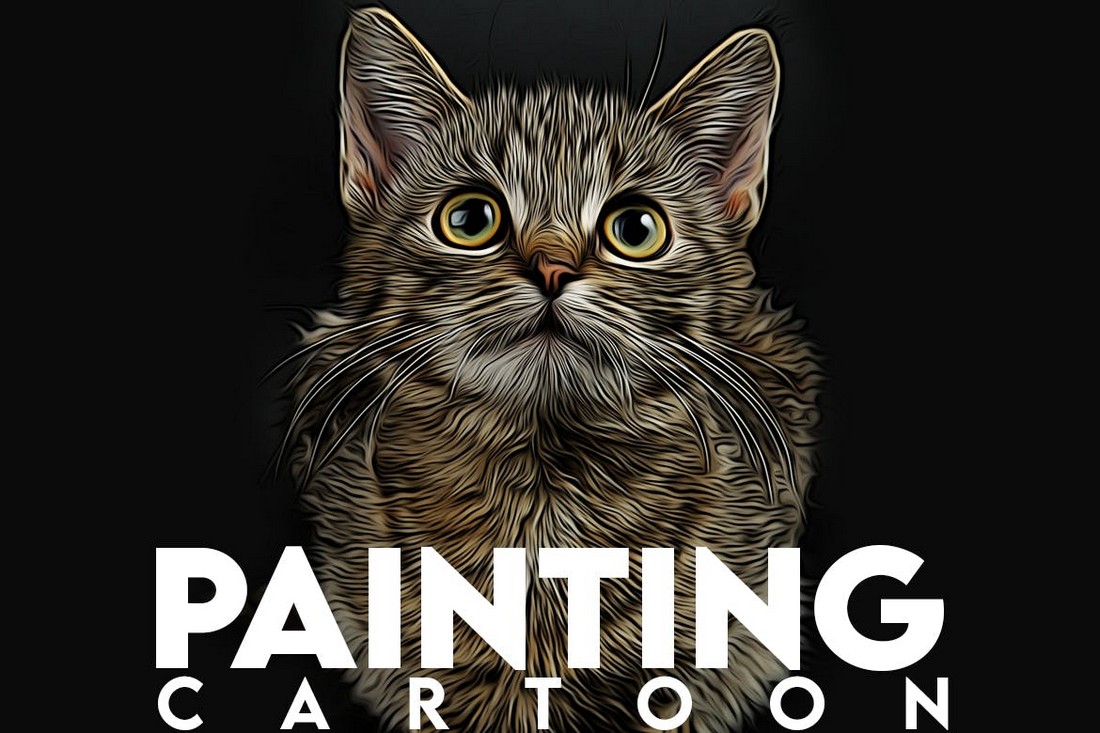
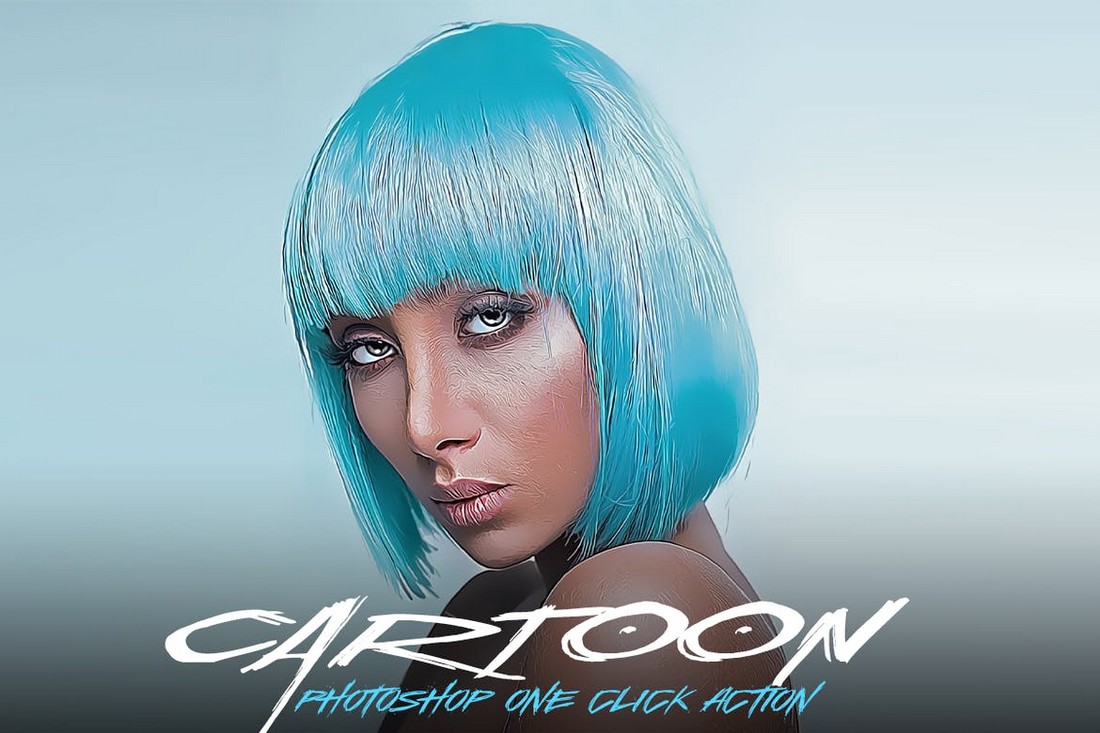
Photoshop offers many amazing tools for creating visual effects. For example, Photoshop actions let you transform your photos into paintings or cartoon drawings with just a single mouse click.

While these effects are fun to play with, they are also quite useful in creating attractive graphics for various designs like posters and flyers. That’s why it’s always a good idea to keep a few Photoshop actions and effects in your library to help create such graphics in an instant.

In this collection, we showcase different types of Photoshop cartoon actions, effects, and filters you can use to turn photos into cartoons as well as create unique designs. Have a look and add them all to your personal collection.

Retro Comic Photo Effect for Photoshop

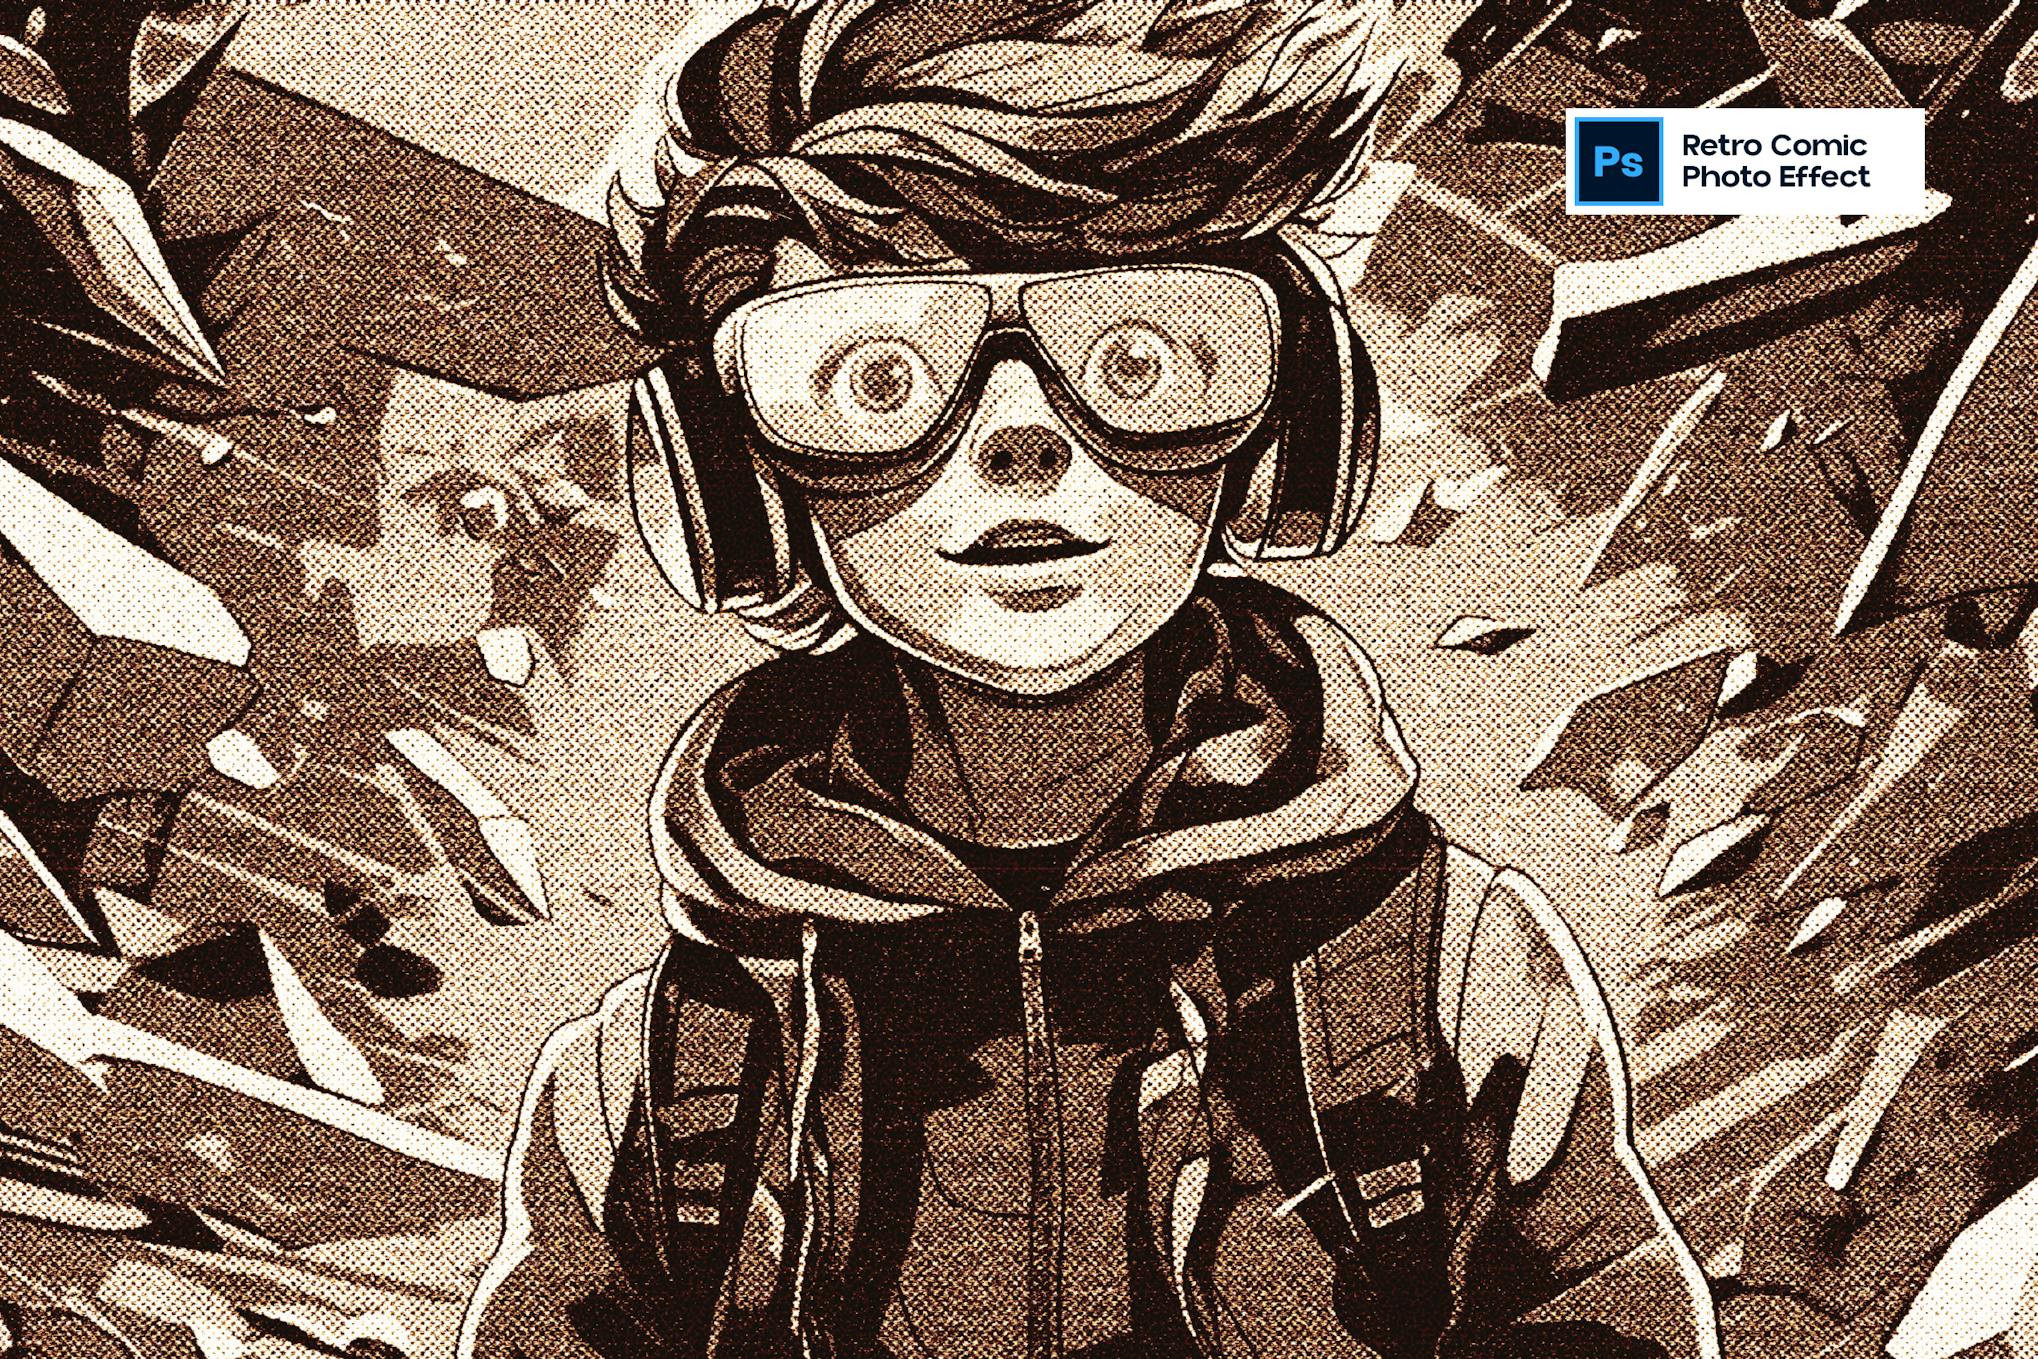
Retro Comic Photo Effect for Photoshop

This is a uniquely crafted Photoshop template that adds a comic cartoon effect to your images. This easy-to-use template, equipped with meticulous details, allows you to transform your images and graphics with a cartoon effect instantly. It’s fully editable, compatible with 300DPI projects, perfect for print, and features well-organized layers.

Comic Photo Effect PSD Template

Comic Photo Effect PSD Template

A dynamic Photoshop template designed to apply a comic or caricature-inspired transformation to your images. Ideal for pictures with resolutions between 1000px to 3000px, this template applies a vibrant, energetic, and oily effect for a variety of visuals, whether fashion-focused, lifestyle-themed, or product-based.

Cartoonize Photo Effect PSD

Cartoonize Photo Effect PSD

This is a dynamic Photoshop template designed to convert your images into lively cartoon effects. It’s ideal for a range of pictures, like fashion, lifestyle, and even product shots. The template is most effective on photos with a resolution between 1000px to 3000px.

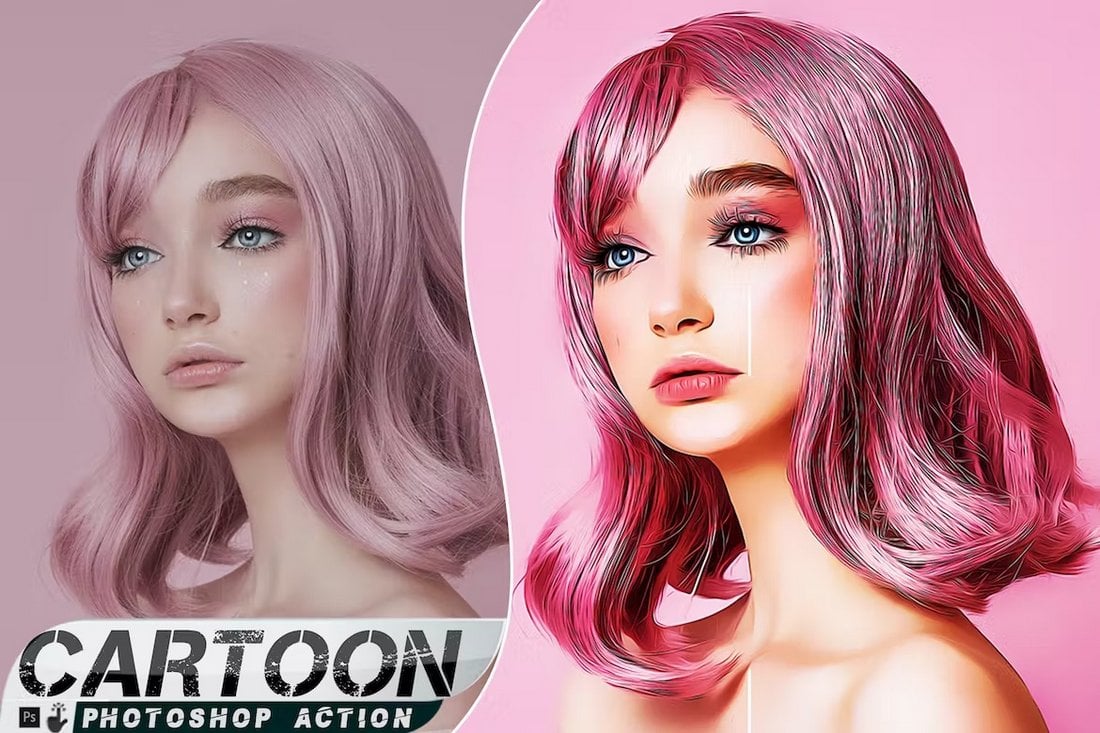
Cartoon Painting Photoshop Action

Cartoon Painting Photoshop Action

This is a professional-grade Photoshop action, ideal for photographers and designers looking to cartoonize their images. It provides striking effects that work beautifully on a wide range of images, even transforming them with just a single click. Adjustments can be made to suit individual photos.

Cartoonize Photo Effect for Photoshop

Cartoonize Photo Effect for Photoshop

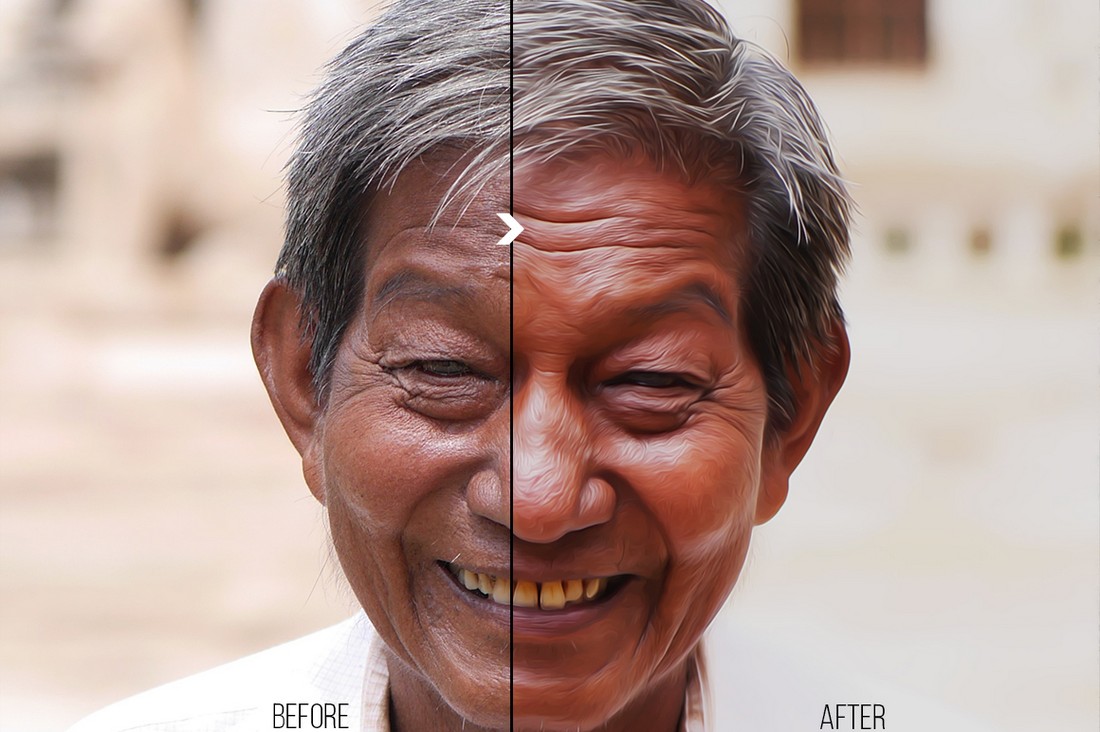
Another dynamic Photoshop template designed to convert your regular images into vibrant and energetic caricature-style pictures. This versatile asset offers various effects including, but not limited to, oily paint, glamour oil, portrait oil, oil retouch, and cartoon effects.

Retro Cartoon Photoshop Action

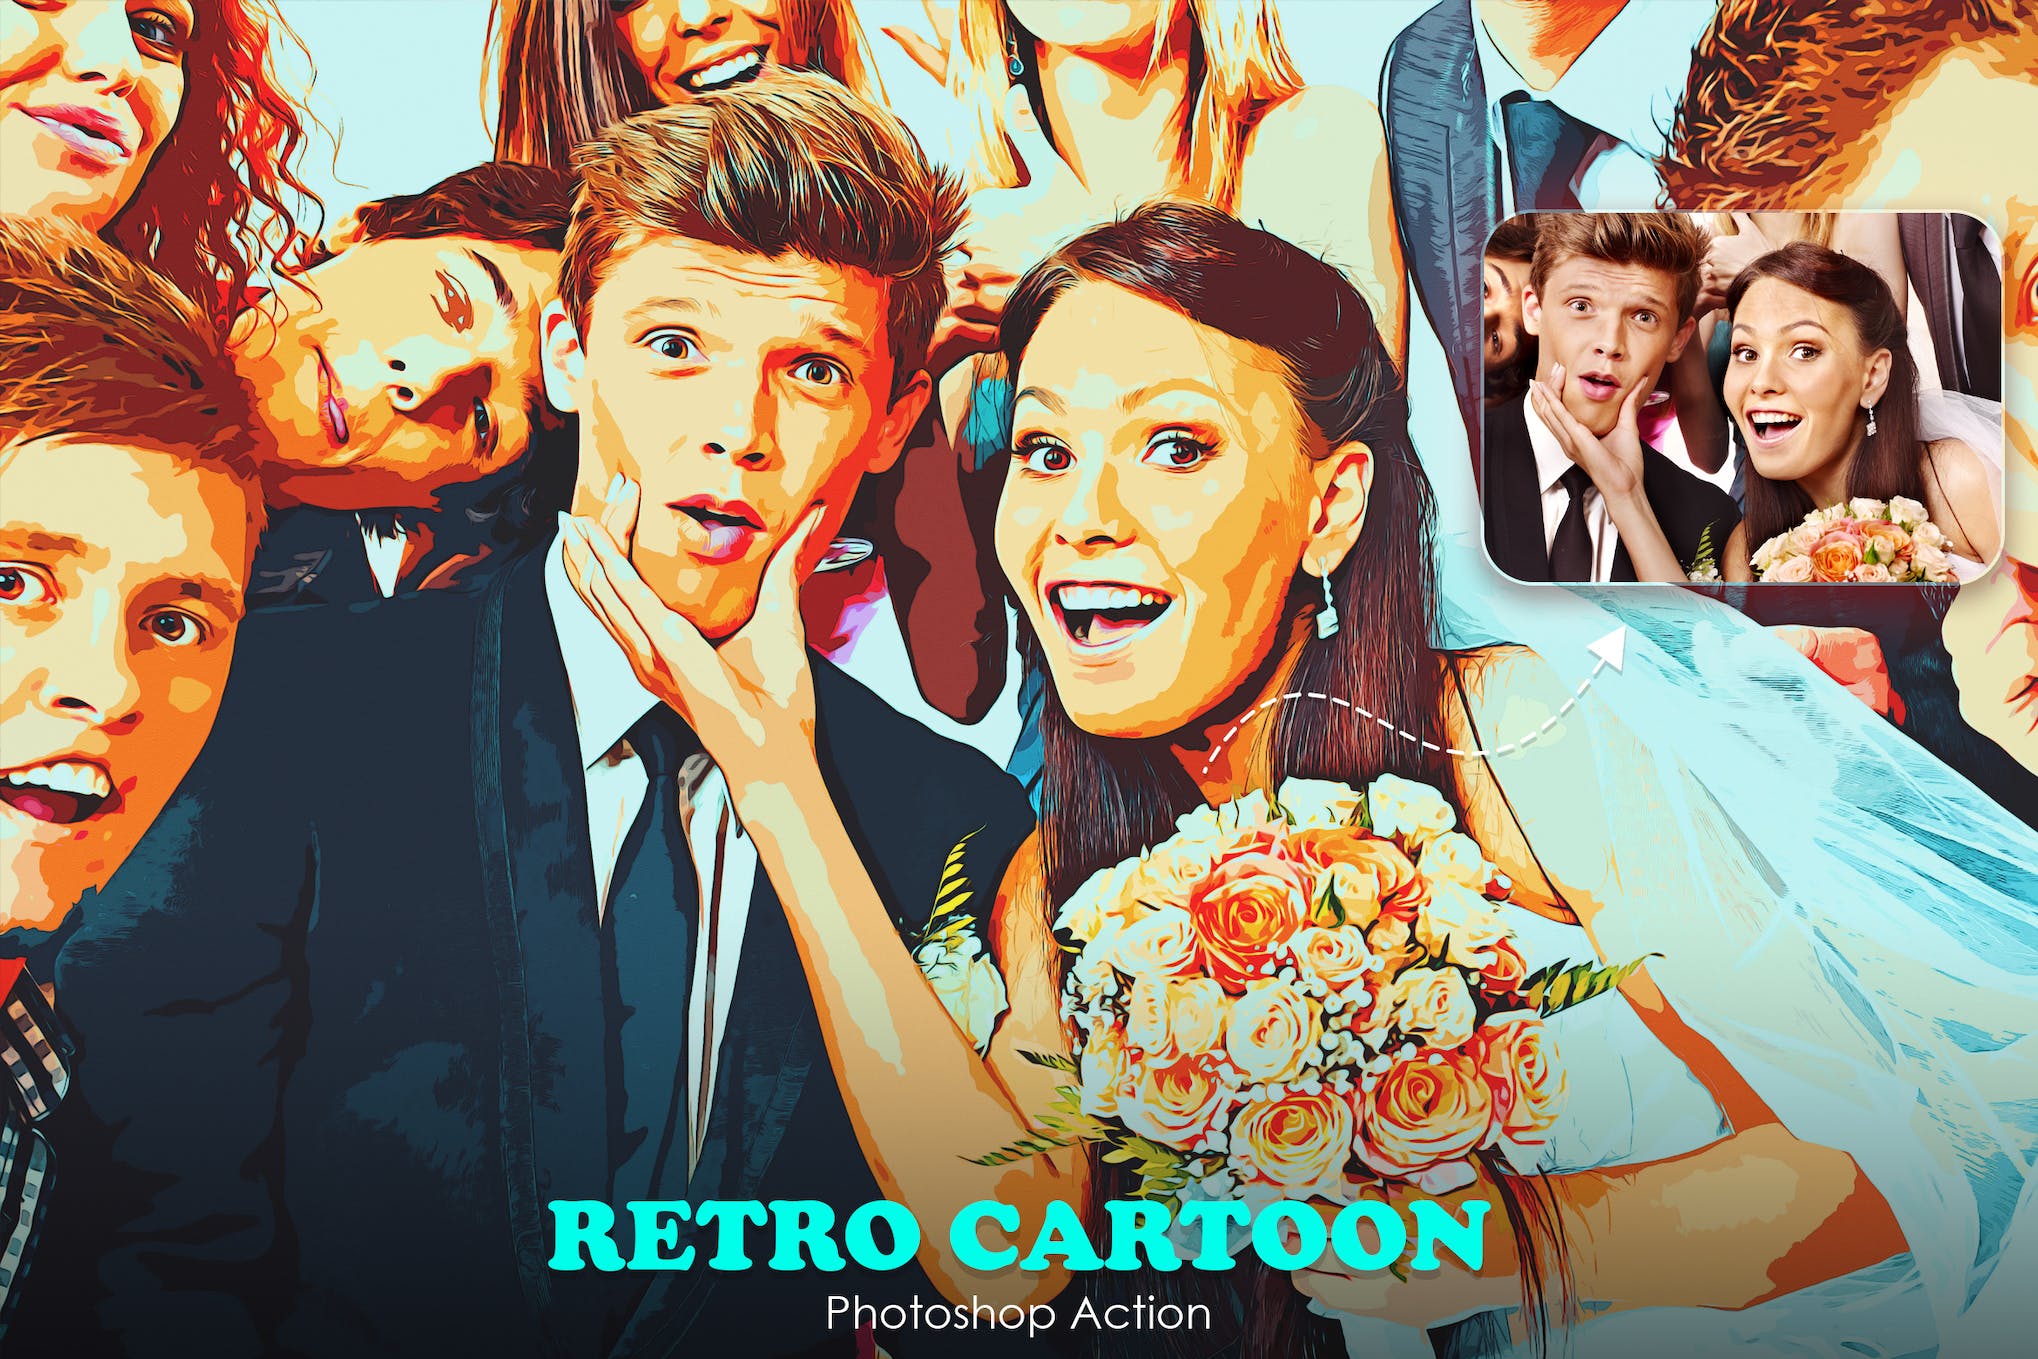
Retro Cartoon Photoshop Action

The Retro Cartoon Photoshop action is a fun and creative preset designed for photographers and graphic designers. This easy-to-use PS action can be used to instantly transform your photos into cartoon graphics and illustrations. The action is compatible with newer versions of Photoshop, from CS5 and above.

Cartoon Effect Converter PS Action

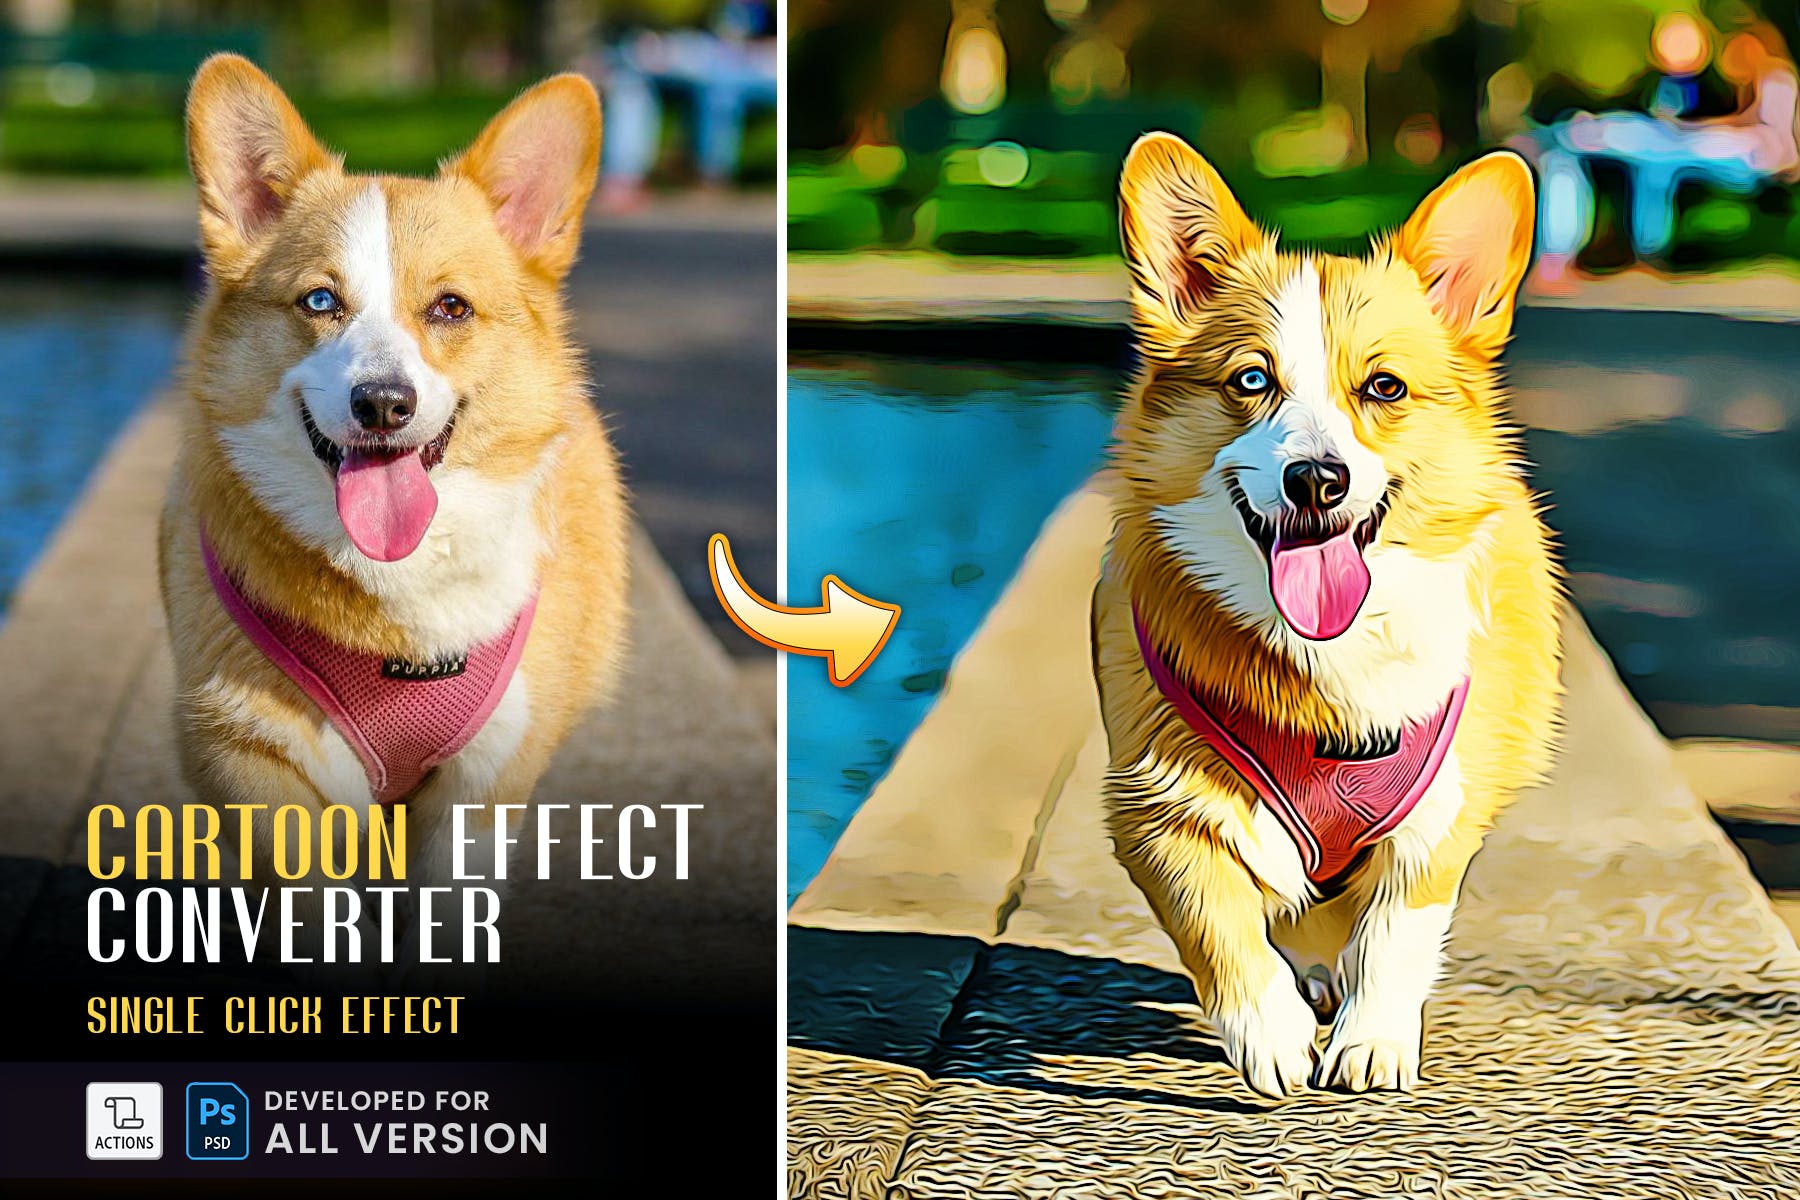
Cartoon Effect Converter PS Action

This PS Action is a quick, easy-to-use tool that can easily convert your photos into stunning painted artwork. It requires no specific skill set and offers customizable features to meet your unique requirements. Suitable for all versions of Photoshop CS4 and beyond.

Cartoon Artistic Photoshop Action

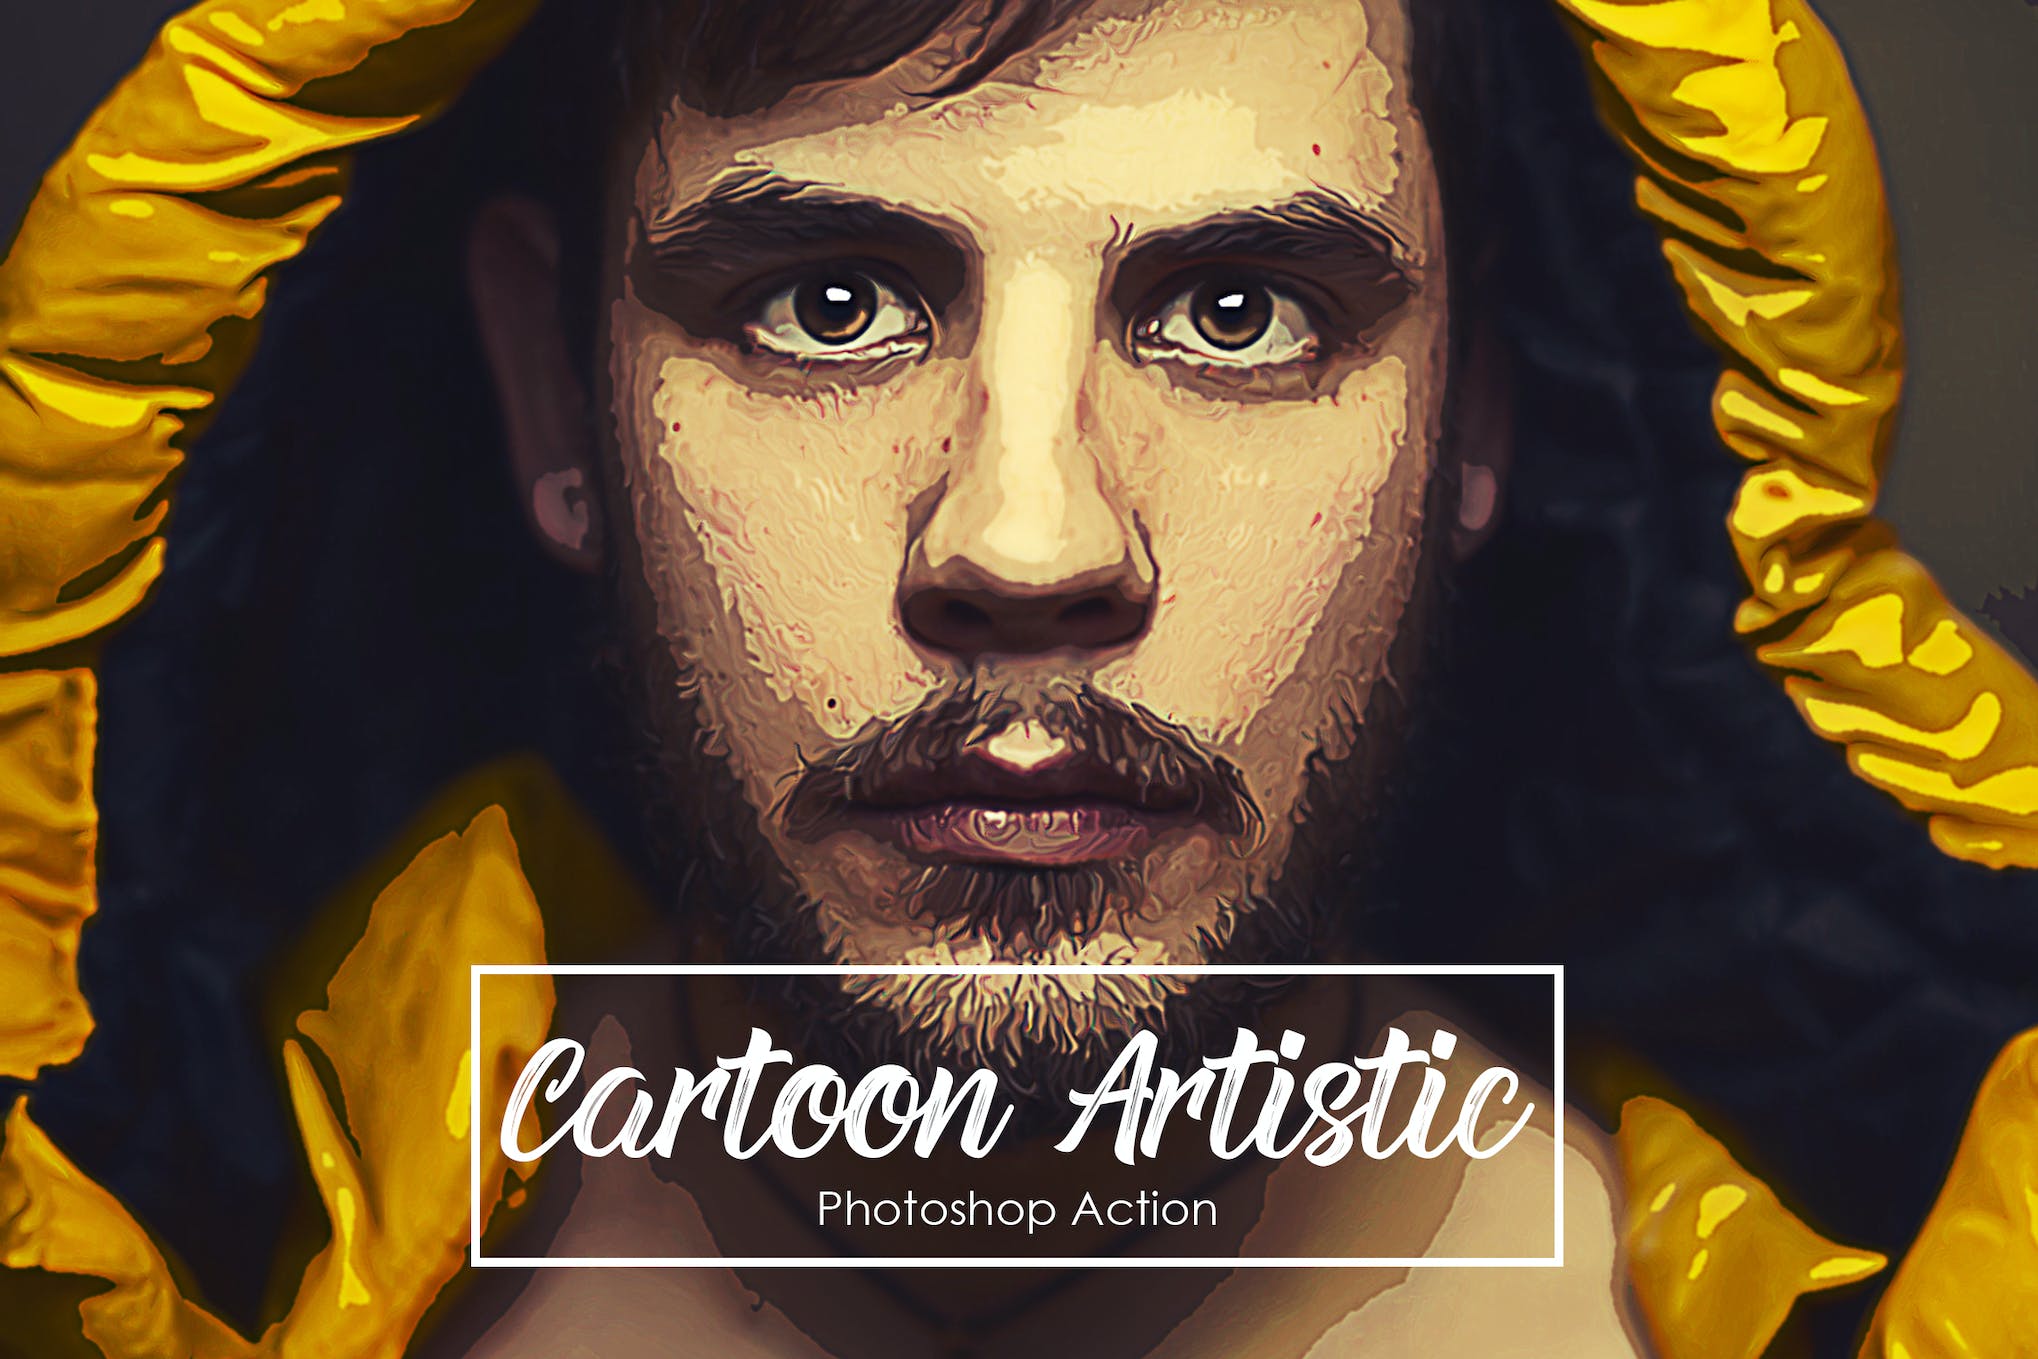
Cartoon Artistic Photoshop Action

With easy setup, this Photoshop action quickly transforms images into cartoony artwork and it’s most suitable for graphic designs. The package includes a detailed help file and a YouTube tutorial to assist with language settings, making it accessible for anyone desiring fun and unique image edits.

Cartoon Painting Photoshop Action

Cartoon Painting Photoshop Action

This PS Action provides an array of striking effects, including the Portrait Oil Painting Effect, dramatic oil, oily, painting oil, glamour oil, portrait oil and oil retouch. The package includes one-click actions, an ATN file, and a helpful guide to facilitate easy installations.

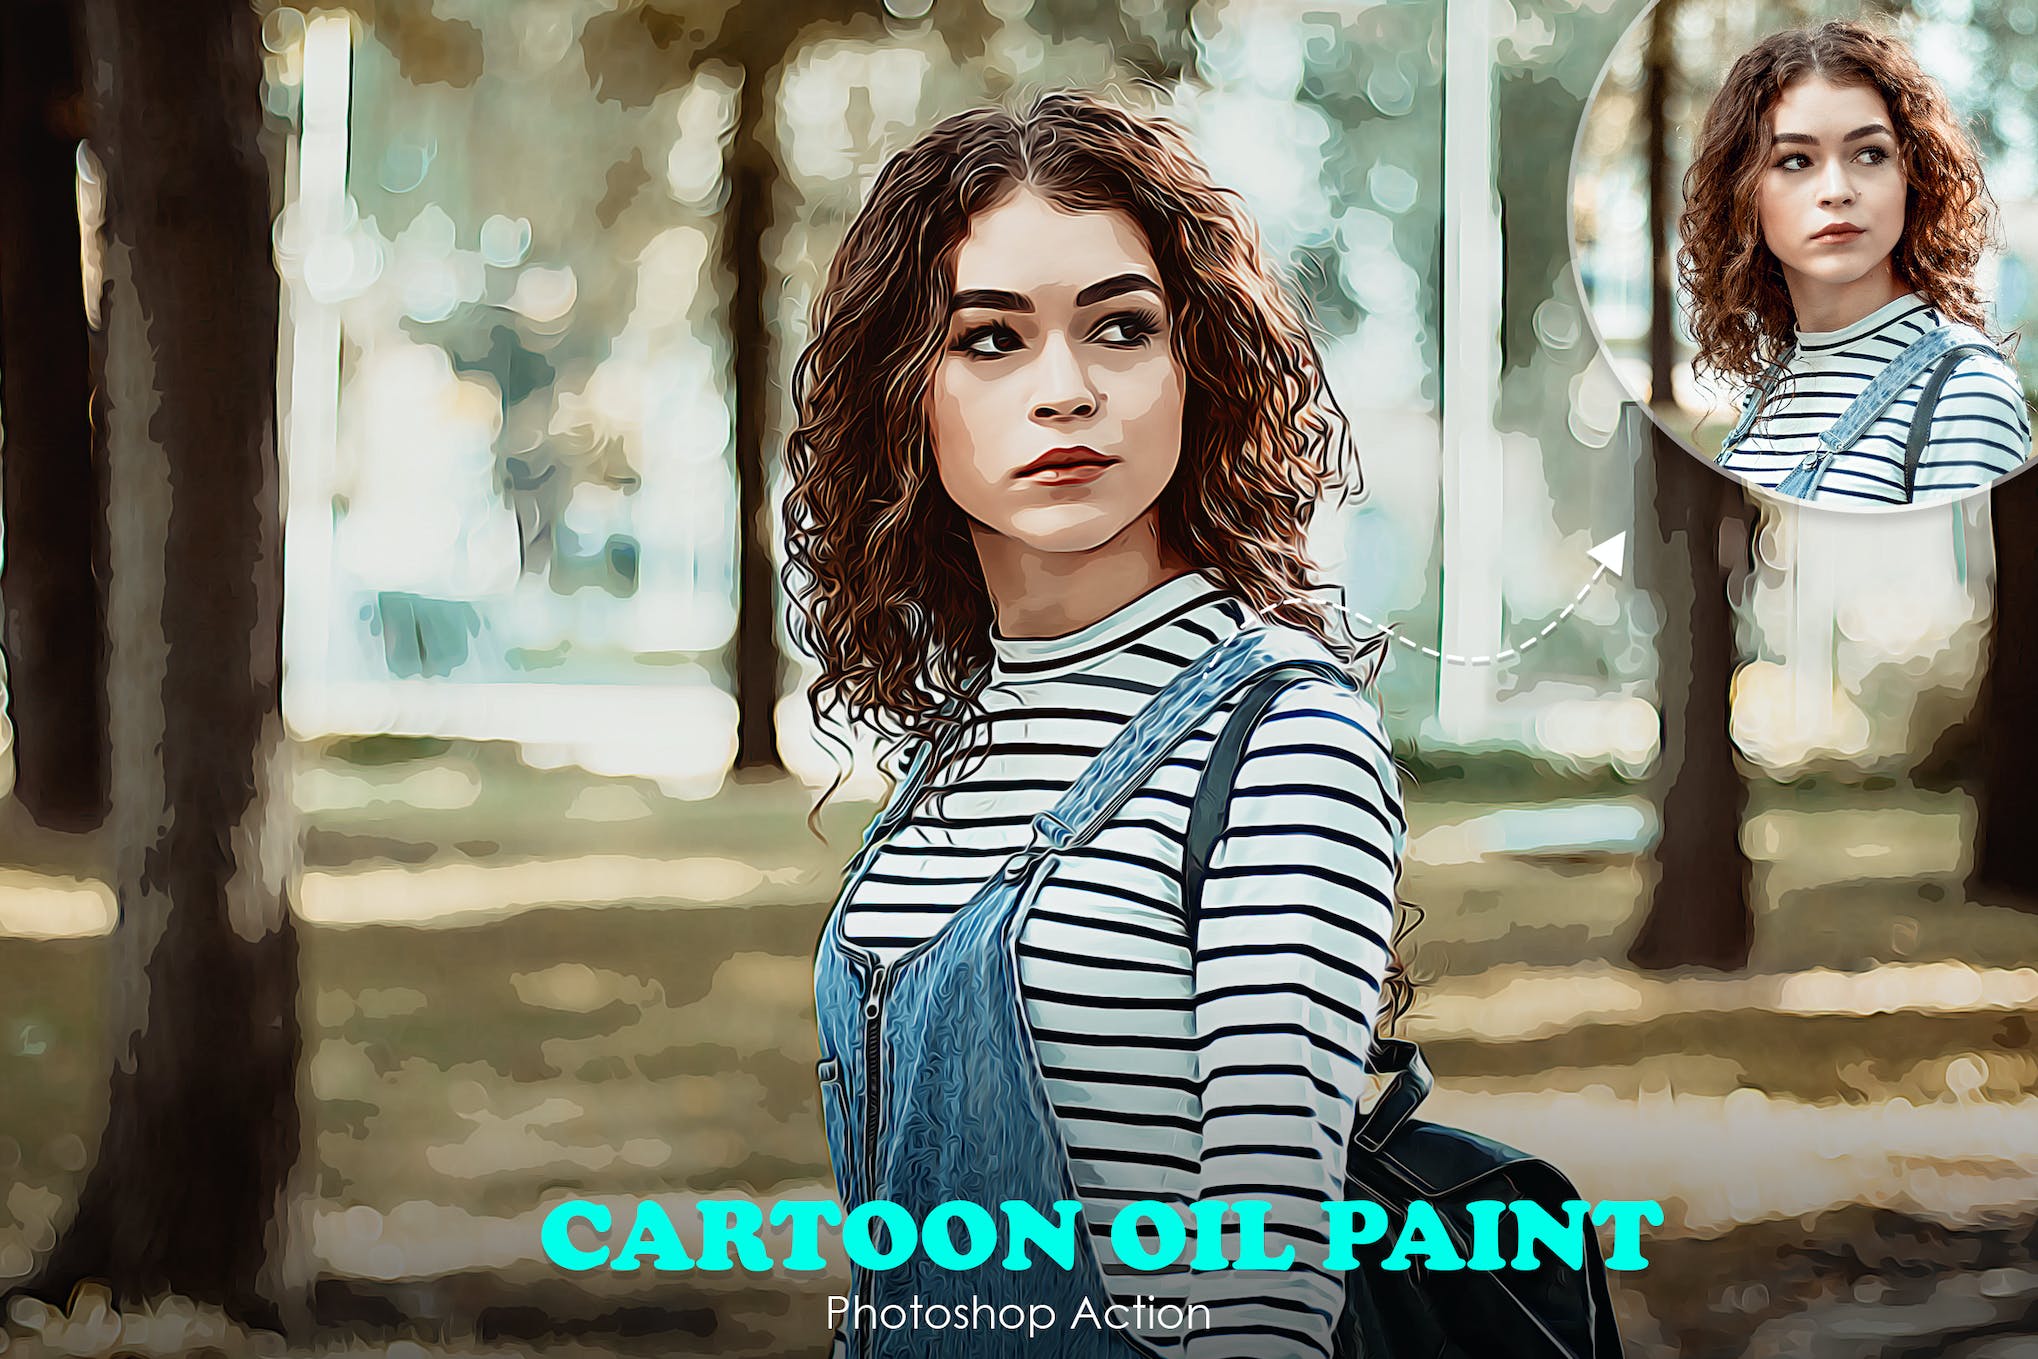
Cartoon Oil Paint Photoshop Action

Cartoon Oil Paint Photoshop Action

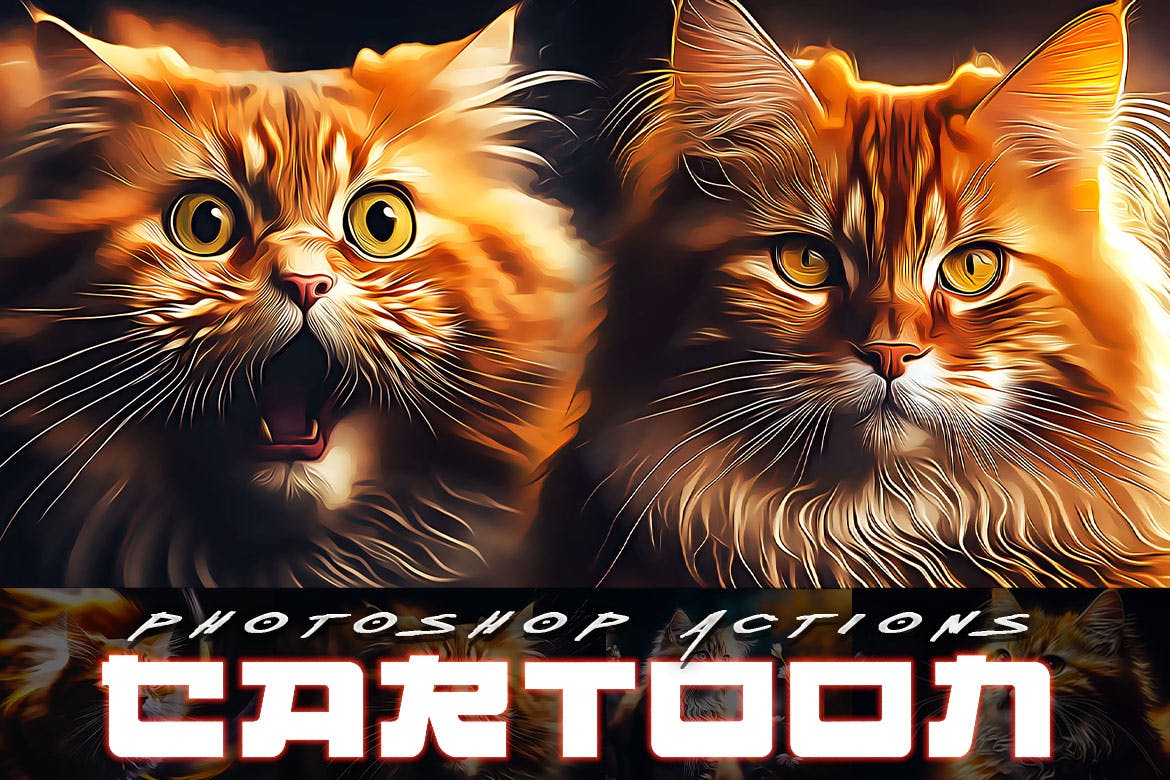
This PS action features a creative cartoon-style oil painting effect. It works with various Photoshop versions, from CS5 to CC. This action set stands out for its simplicity – you just load actions, choose your action, and then hit play.

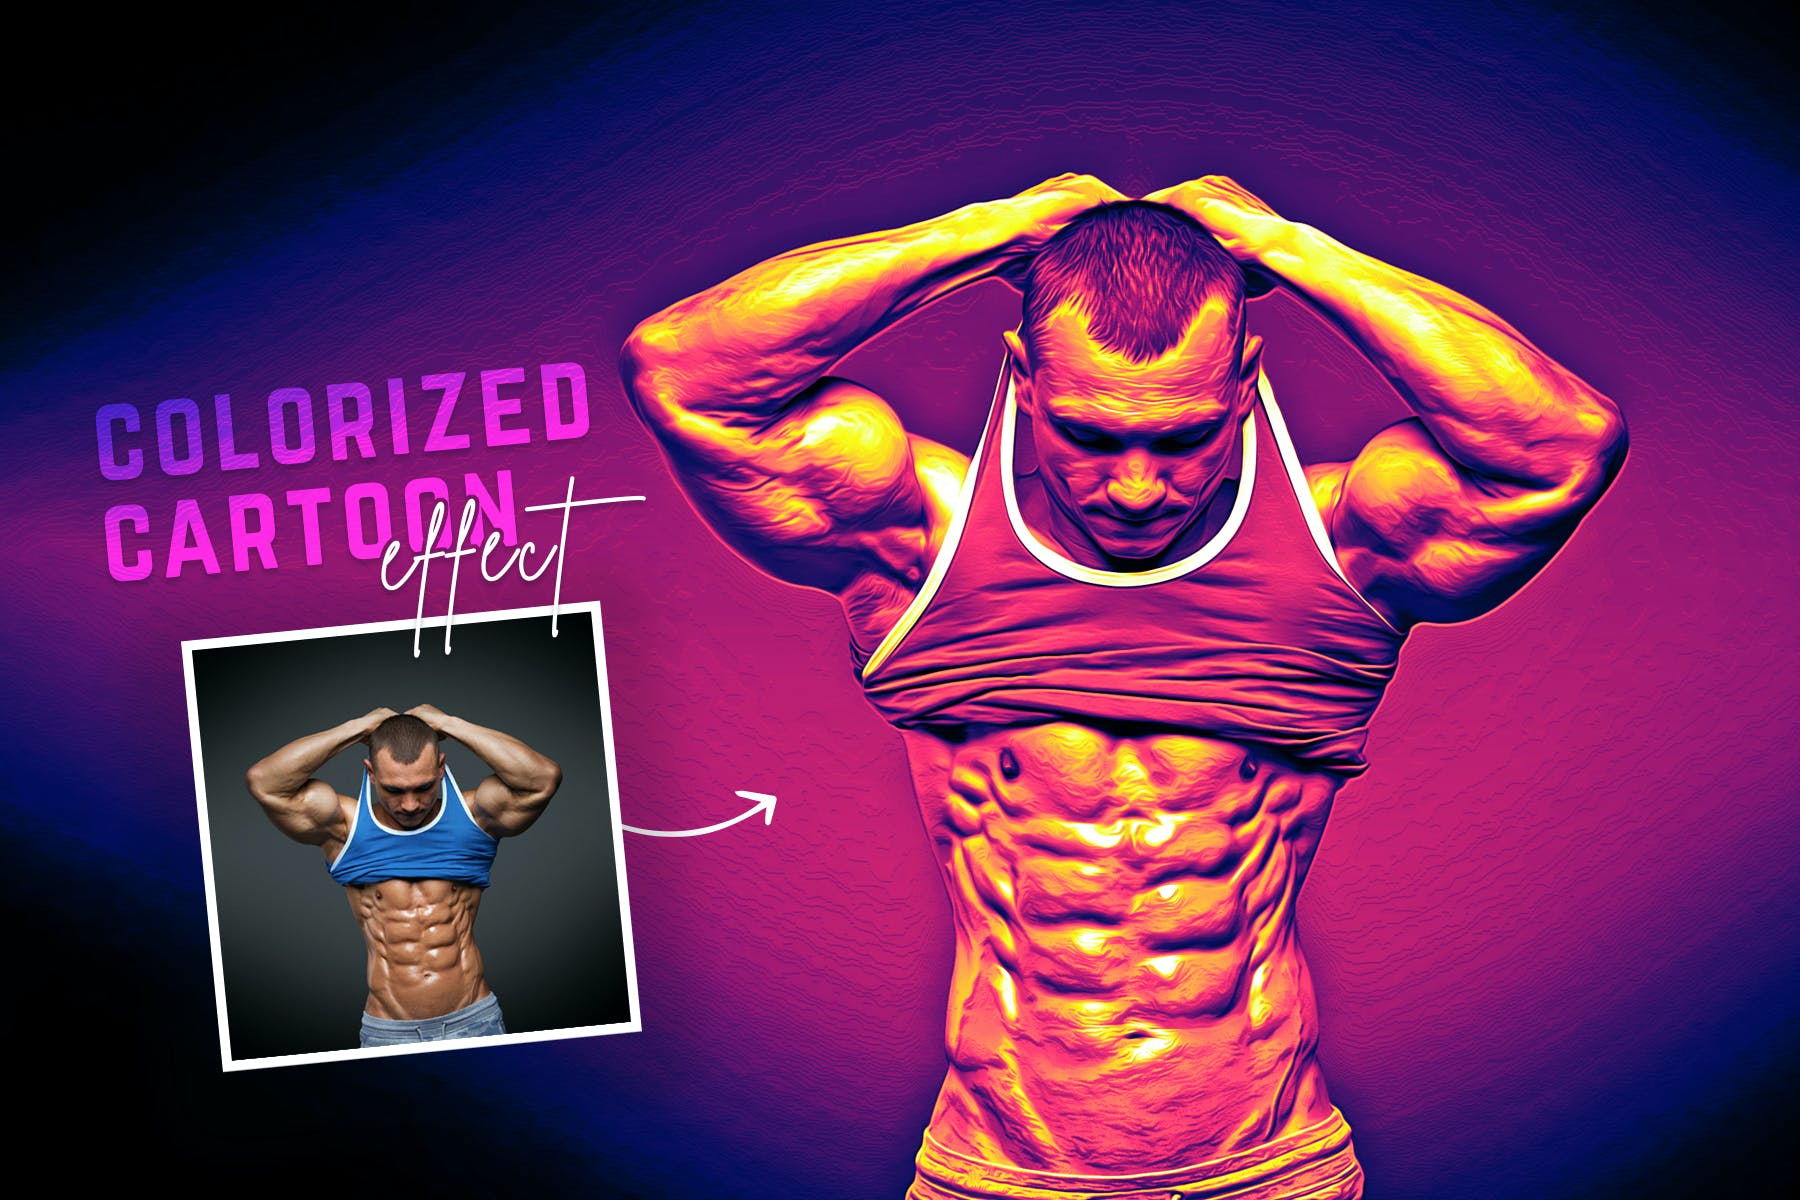
Colorized Cartoon Effect Photoshop Action

Colorized Cartoon Effect Photoshop Action

This is a quick and simple PS Action that transforms your images into vibrant paintings within seconds, with a simple click. It’s user-friendly, doesn’t require any extensive Photoshop skills and provides room for personal customization to suit your needs. Compatible with Photoshop CS4 and higher.

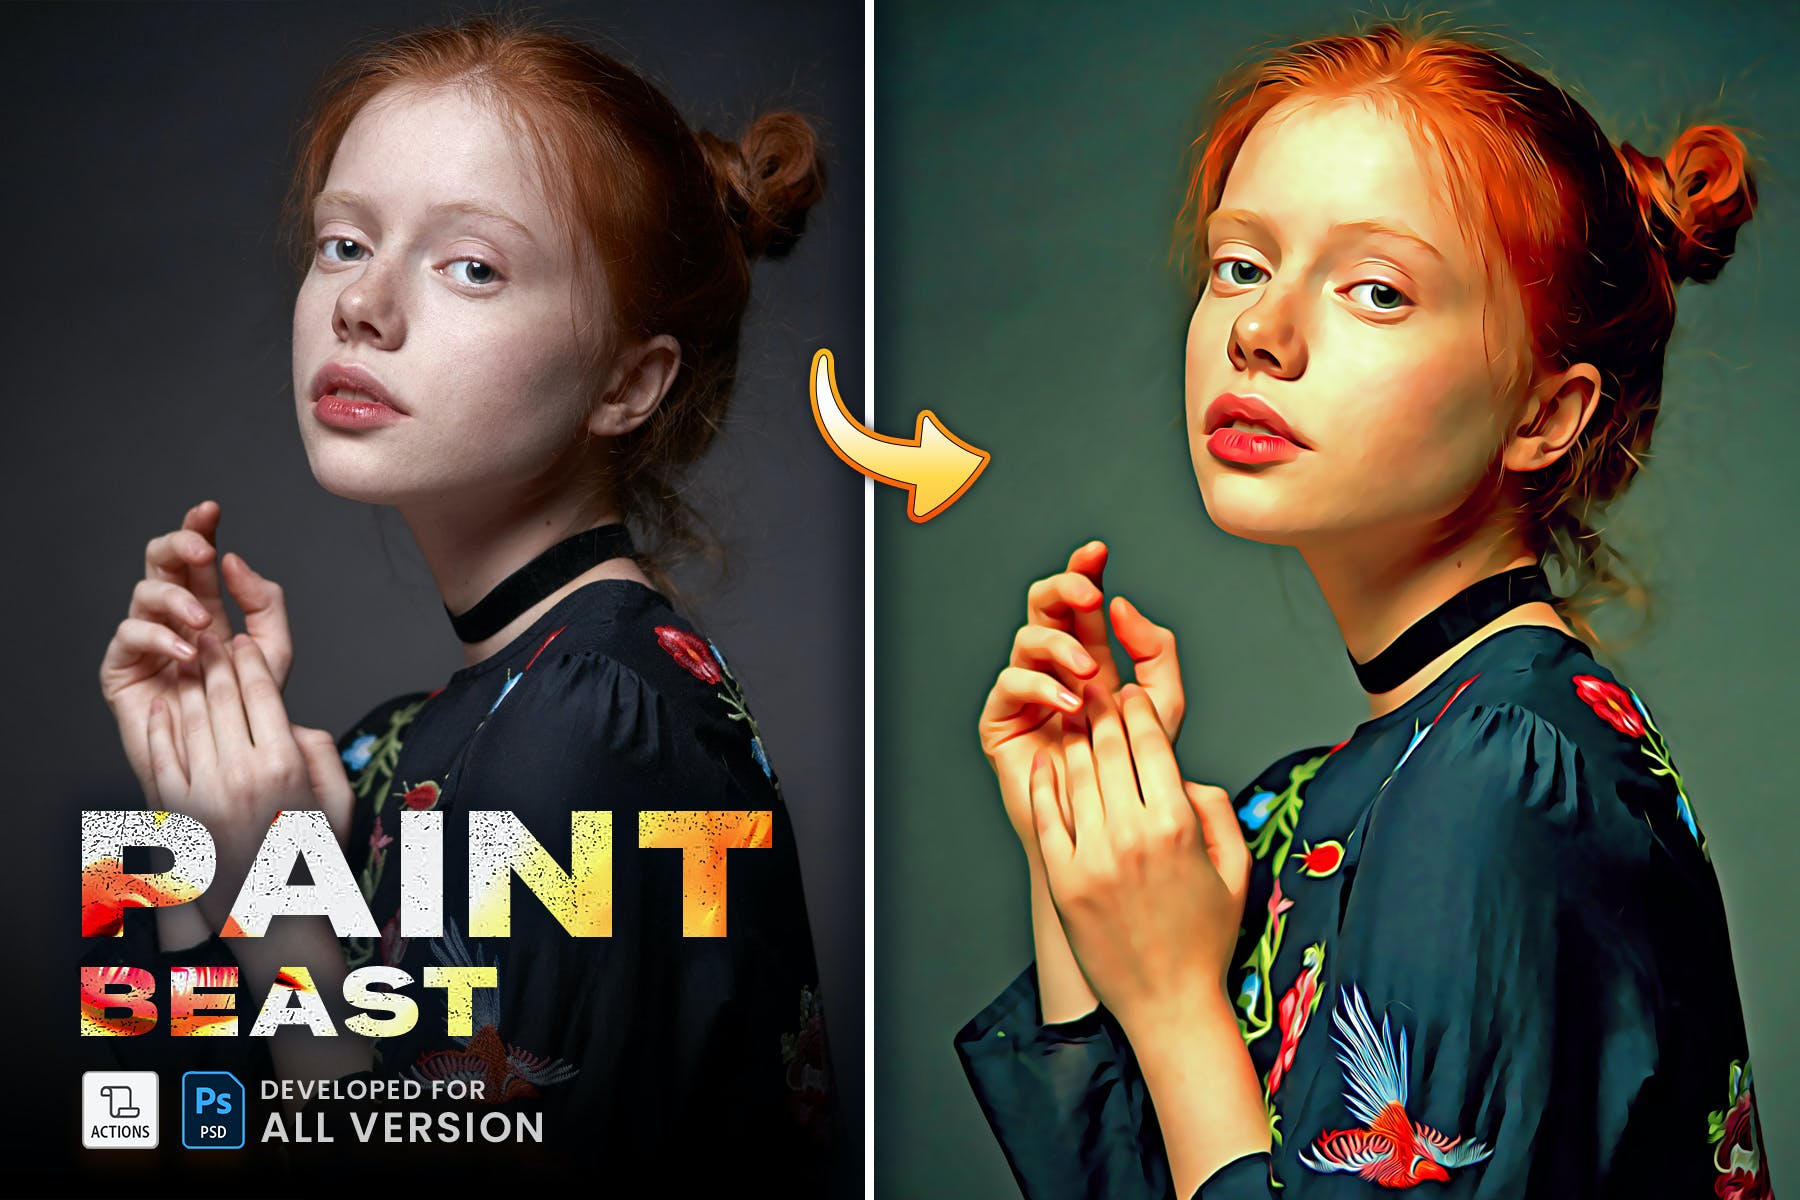
Paint Beast Photoshop FX PS Action

Paint Beast Photoshop FX PS Action

Offering intense customization possibilities, this PS action works seamlessly with Photoshop CS4 and all advanced versions. It’s ideal for professional graphic designers to add a unique touch to your various projects.

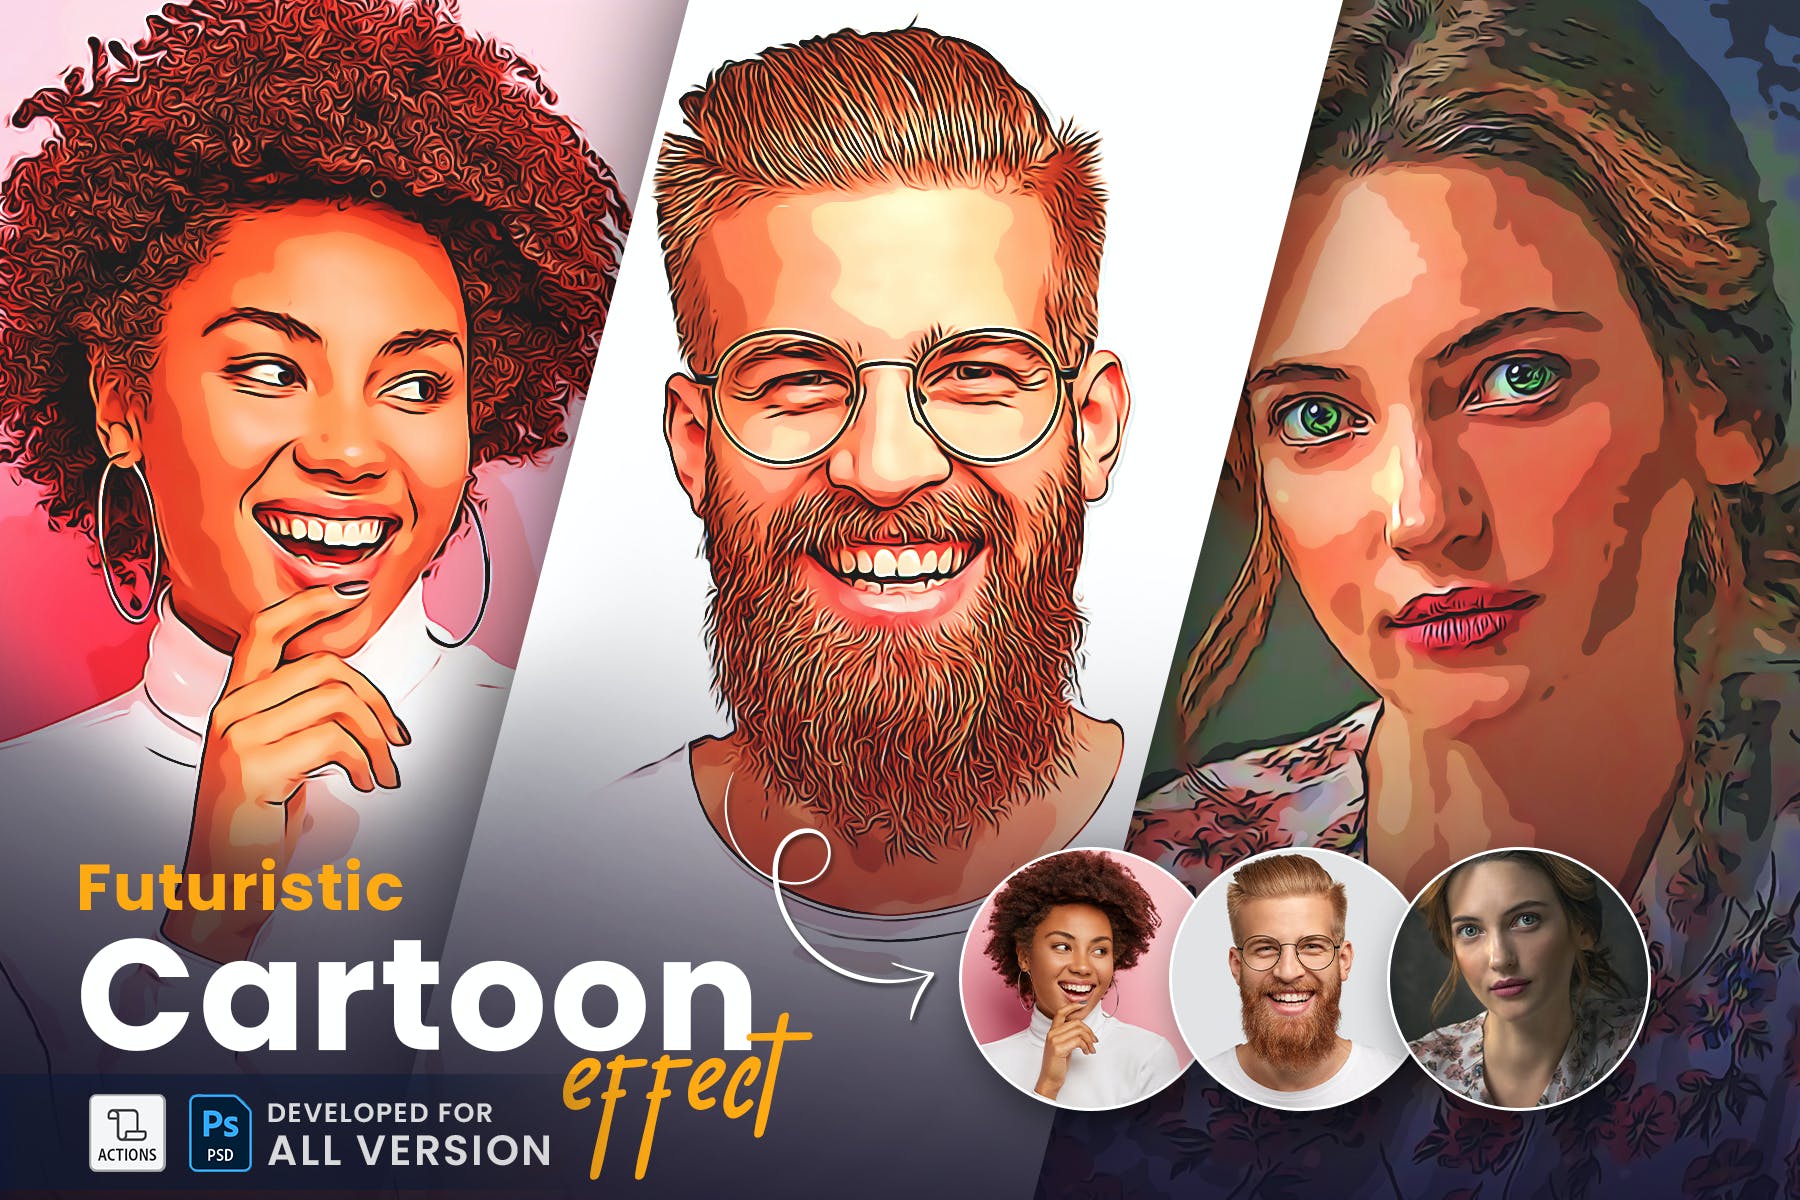
Futuristic Cartoon Effect Photoshop Action

Futuristic Cartoon Effect Photoshop Action

This is a fantastic tool that transforms your images into stunning paintings in seconds with just one click. Very easy to use, all it requires is to load and play the actions. You can heavily customize the end results to suit your needs. It’s compatible with all versions of Photoshop CS4 and higher.

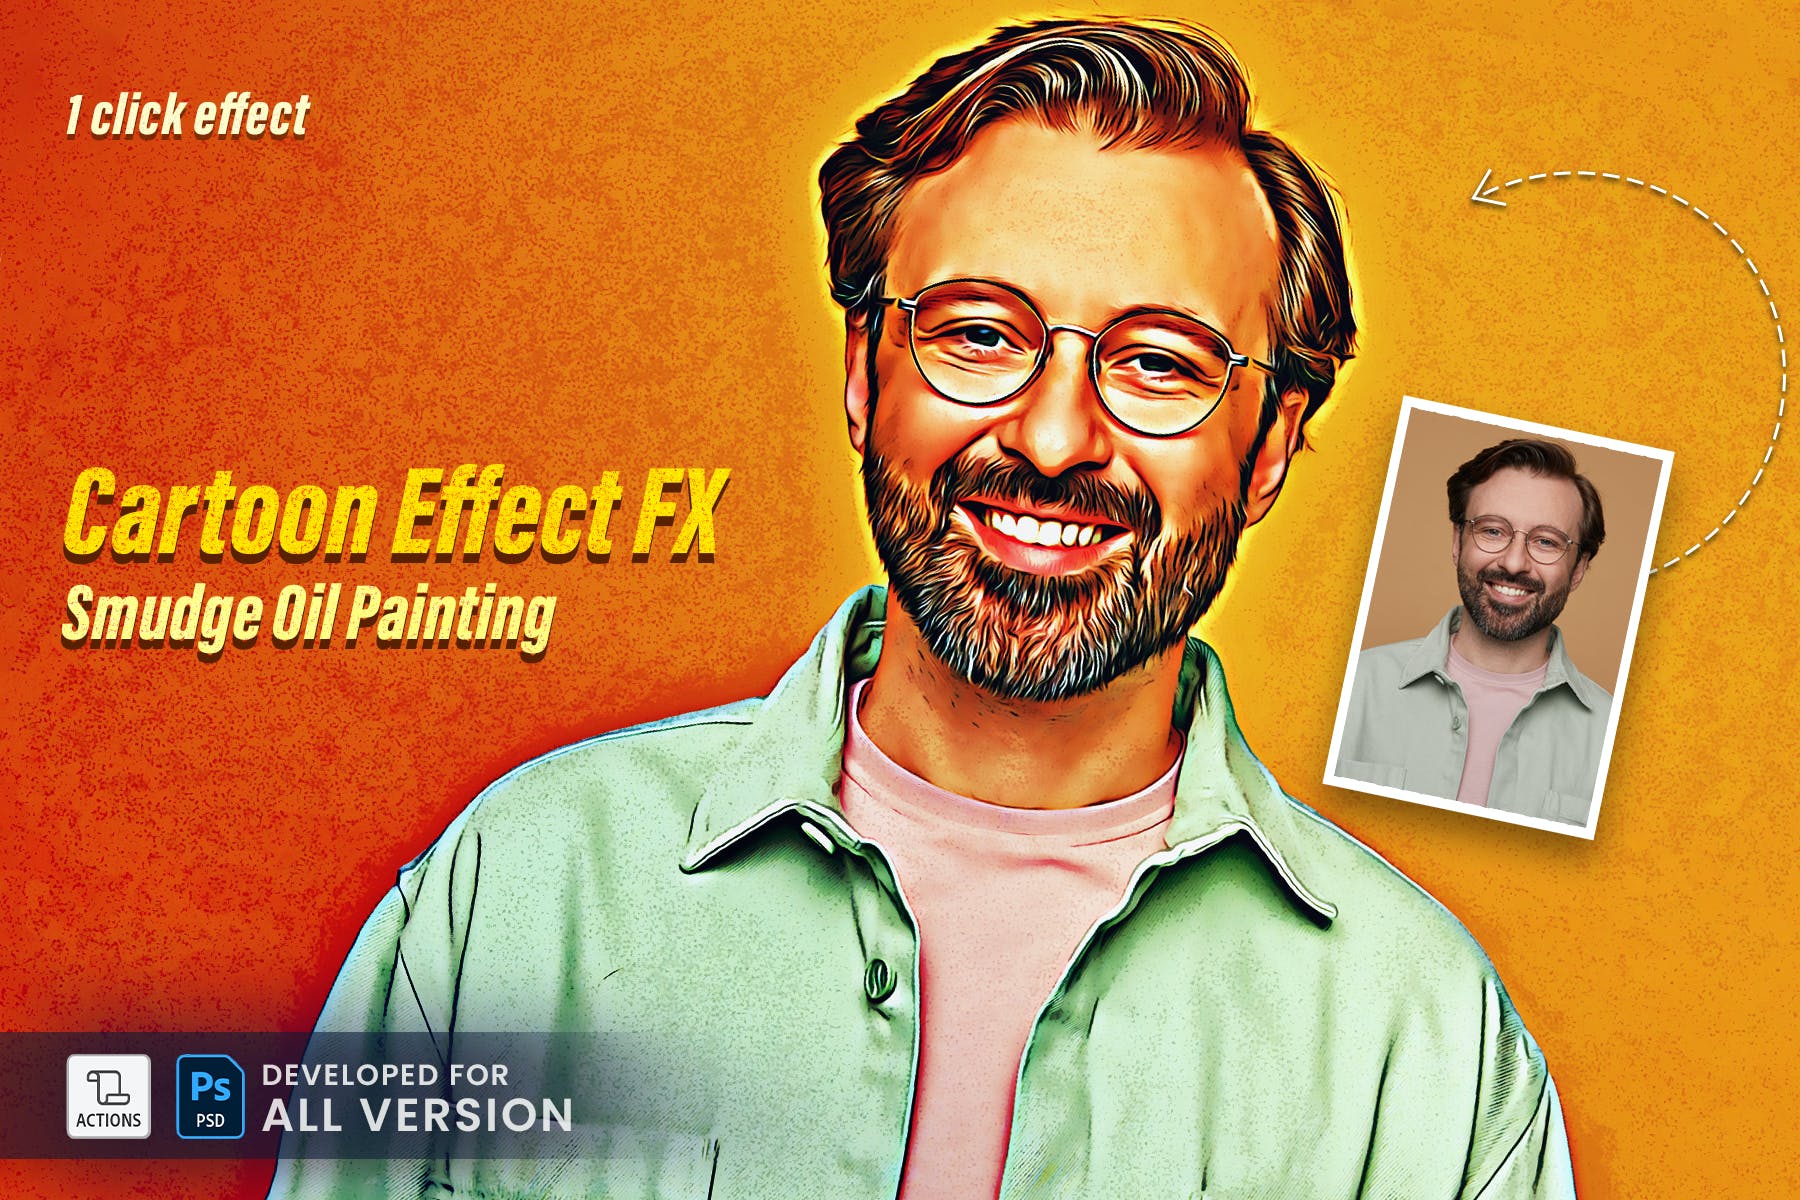
Cartoon Effect FX Photoshop Action

Cartoon Effect FX Photoshop Action

This Photoshop action also offers extensive customization options and it comes with a creative cartoon-style effect, ideal for portrait photos. Compatible with Photoshop CS4 and all later versions.

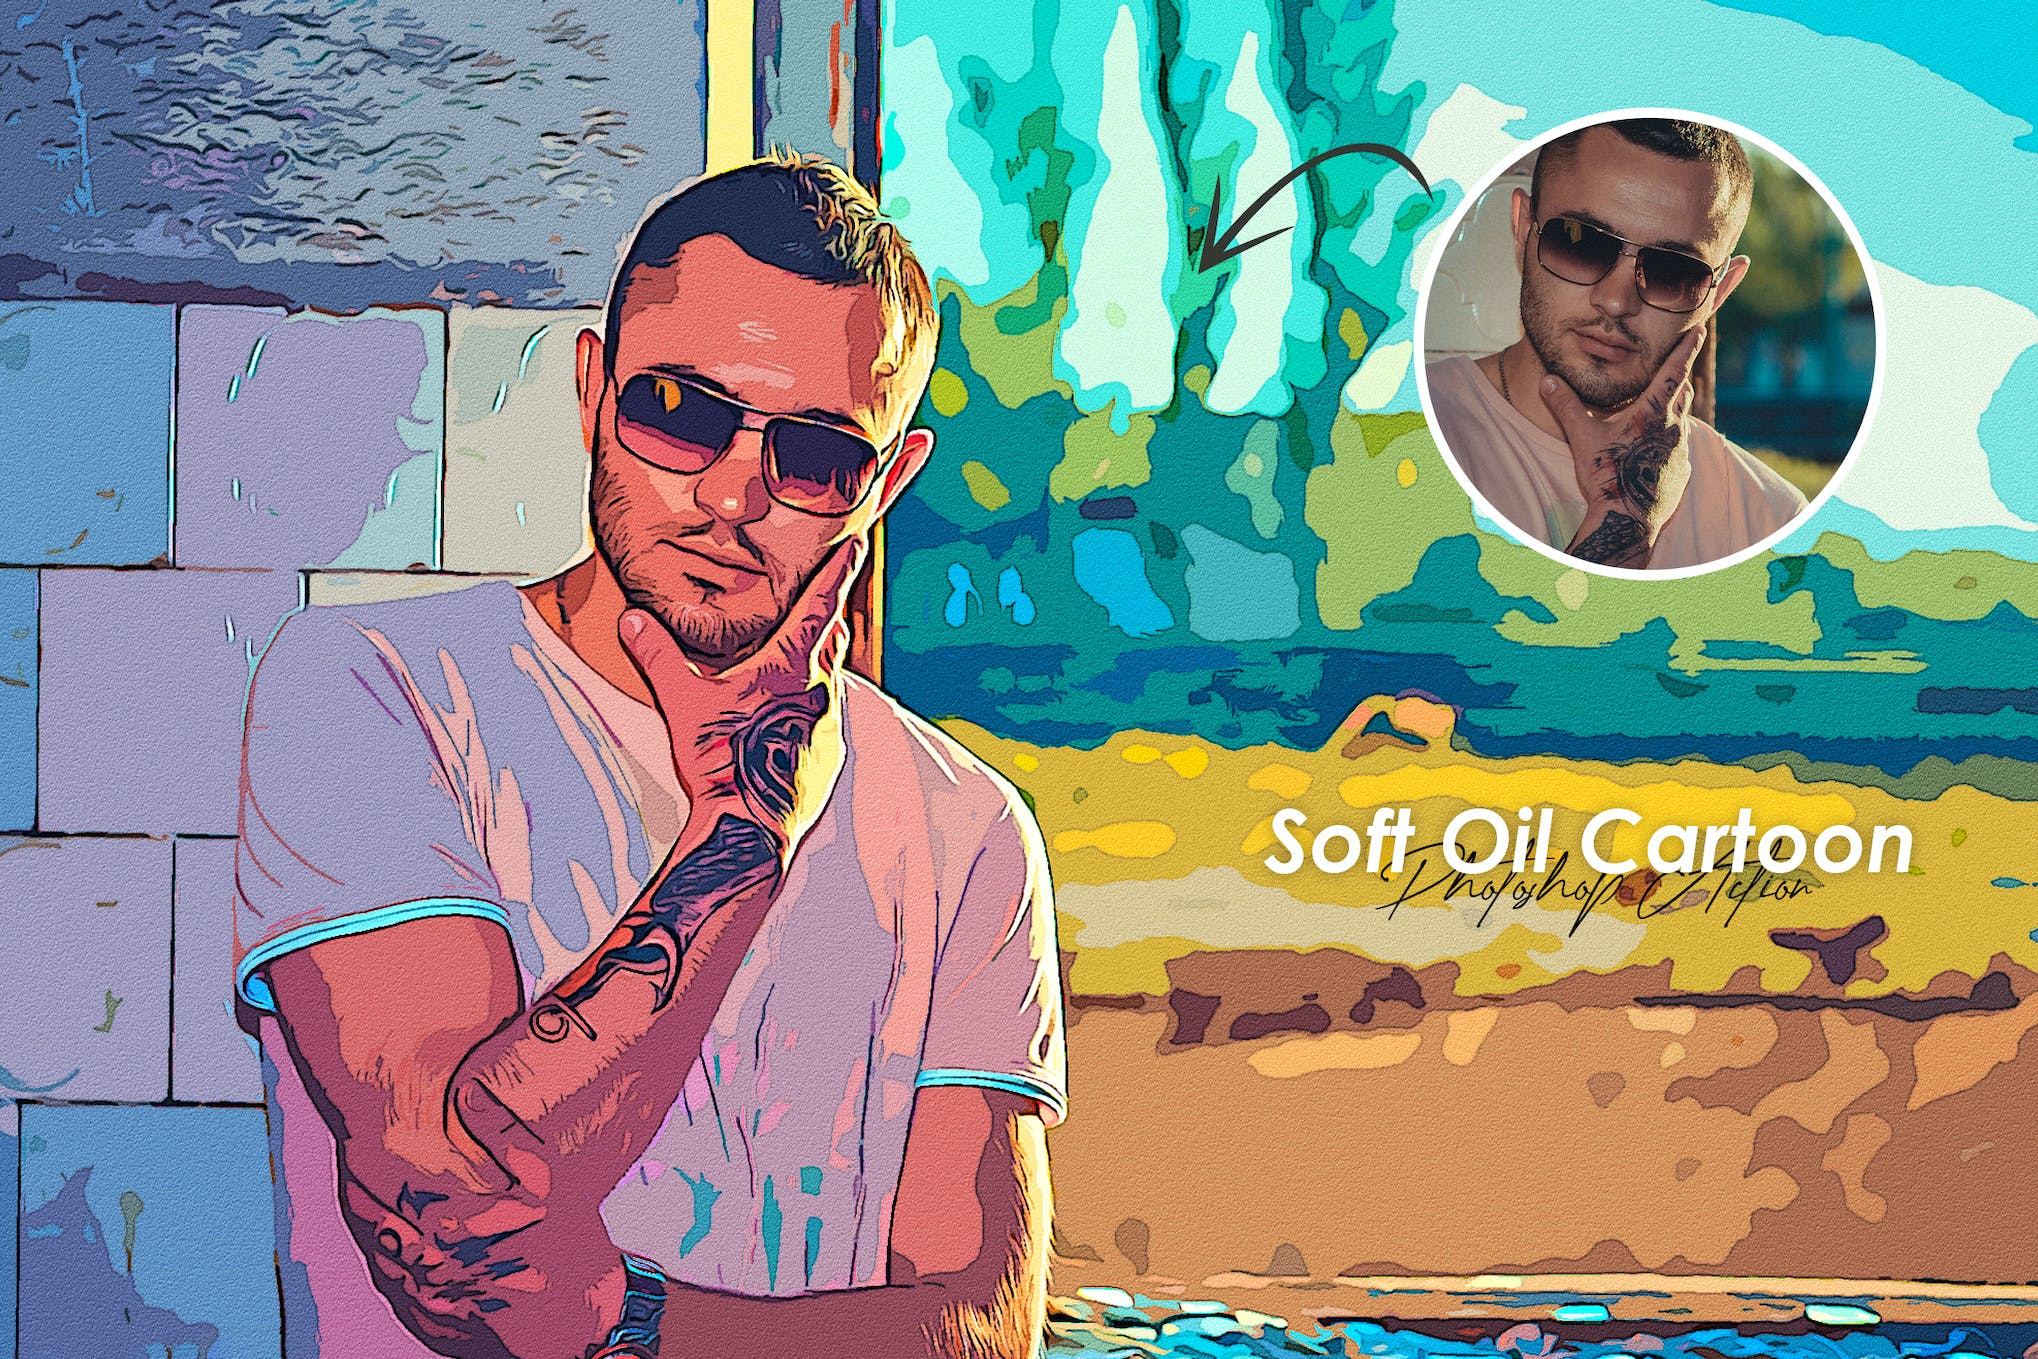
Soft Oil Cartoon Photoshop Action

Soft Oil Cartoon Photoshop Action

This Photoshop action is ideal for photographers and graphic designers. The final result offers a soft, oil-cartoon aesthetic. The asset includes an ATN file and helpful instructions. It’s especially perfect for generating art for posters and flyers.

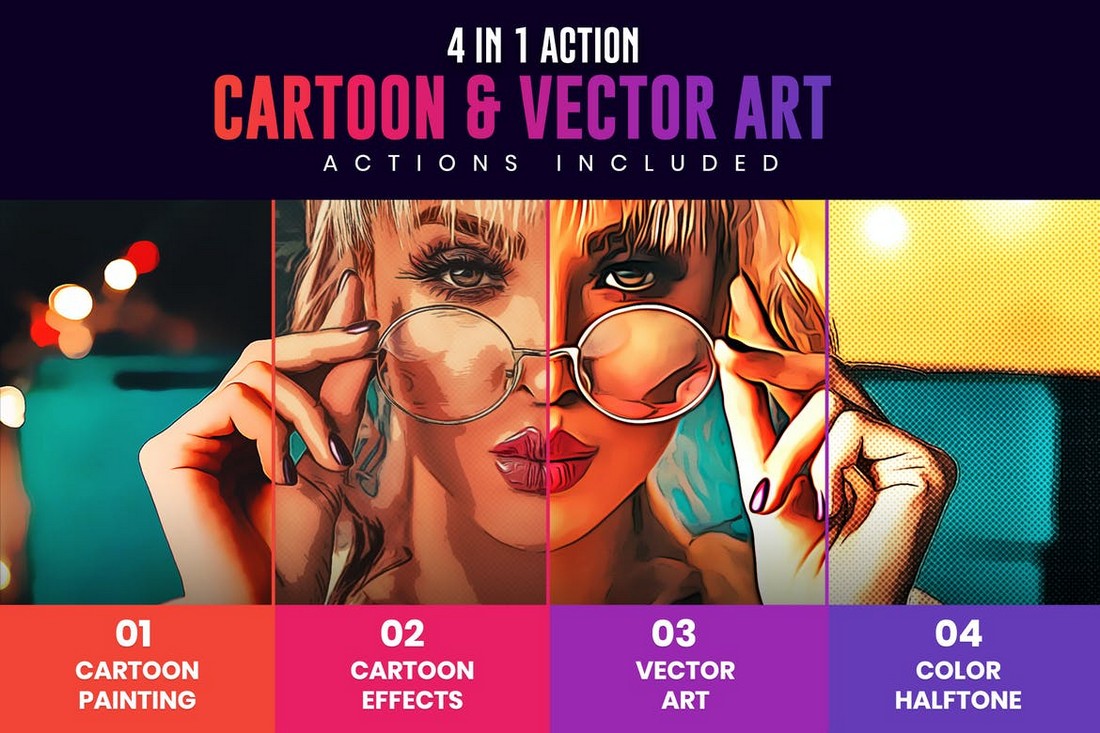
4 in 1 Cartoon & Vector Art Photoshop Actions

4 in 1 Cartoon & Vector Art Photoshop Actions

This is a bundle of Photoshop actions that includes 4 different cartoon effects. It has effects for converting photos into cartoon drawings, vector art, and paintings. Each action creates effects with organized layers so you can easily adjust the effect to your preference. You can apply them with just one click as well.

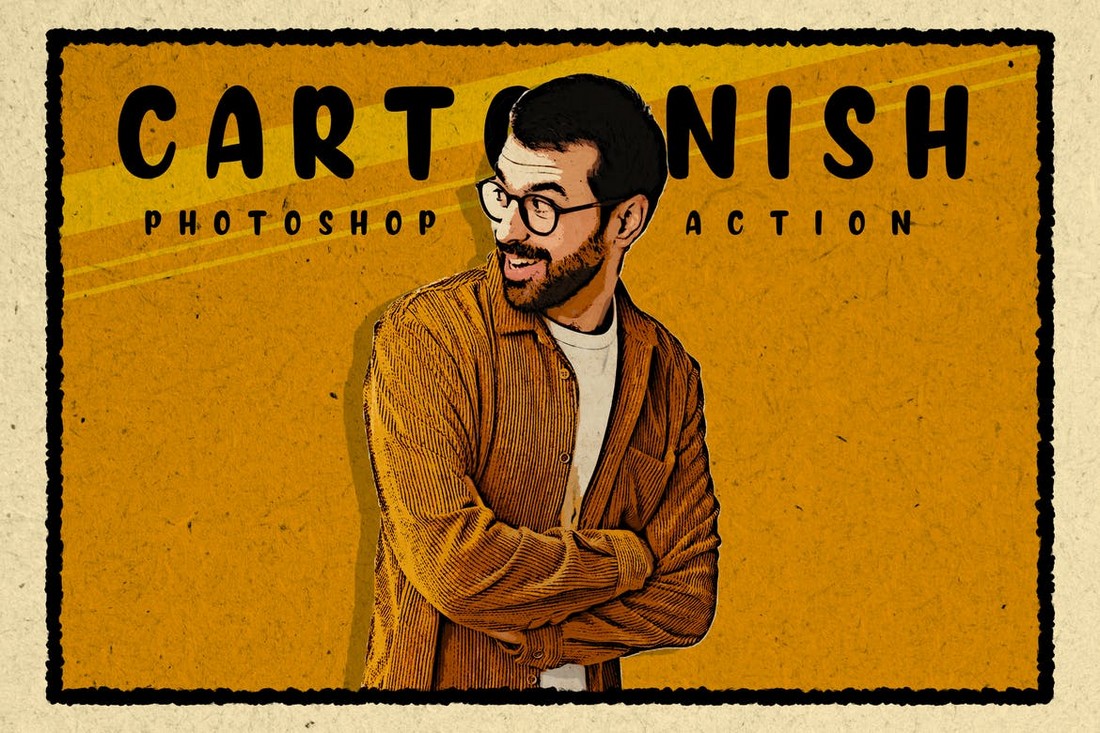
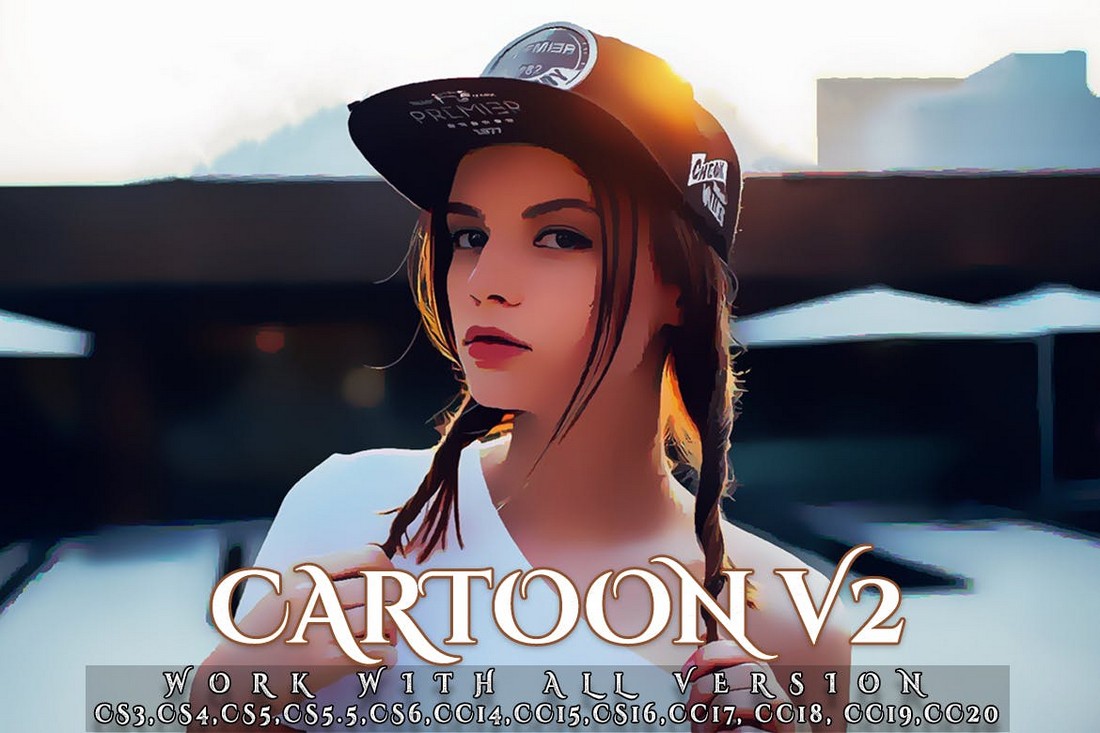
Cartoonish – Modern Cartoon Photoshop Action

Cartoonish - Modern Cartoon Photoshop Action

This Photoshop action will allow you to transform portrait photos into cartoon drawings without effort. It features 10 different colorful effects that add a modern cartoon look to photos. The actions work with Photoshop CS4 and higher.

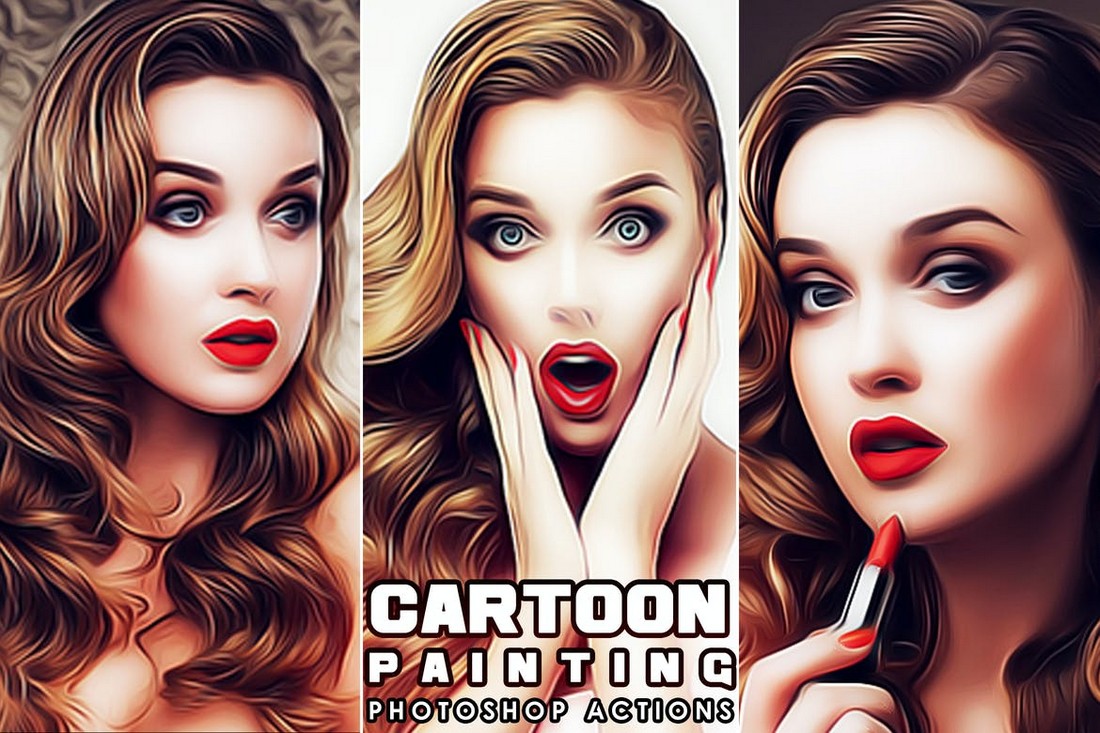
Cartoon Painting Photoshop Actions

Cartoon Painting Photoshop Actions

If you’re an Instagram influencer or a blogger, this Photoshop cartoon action will definitely come in handy. It allows you to add a unique cartoon effect to your photos to make them look like a scene out of a cartoon film. It’s great for making your Instagram photos stand out from the crowd.

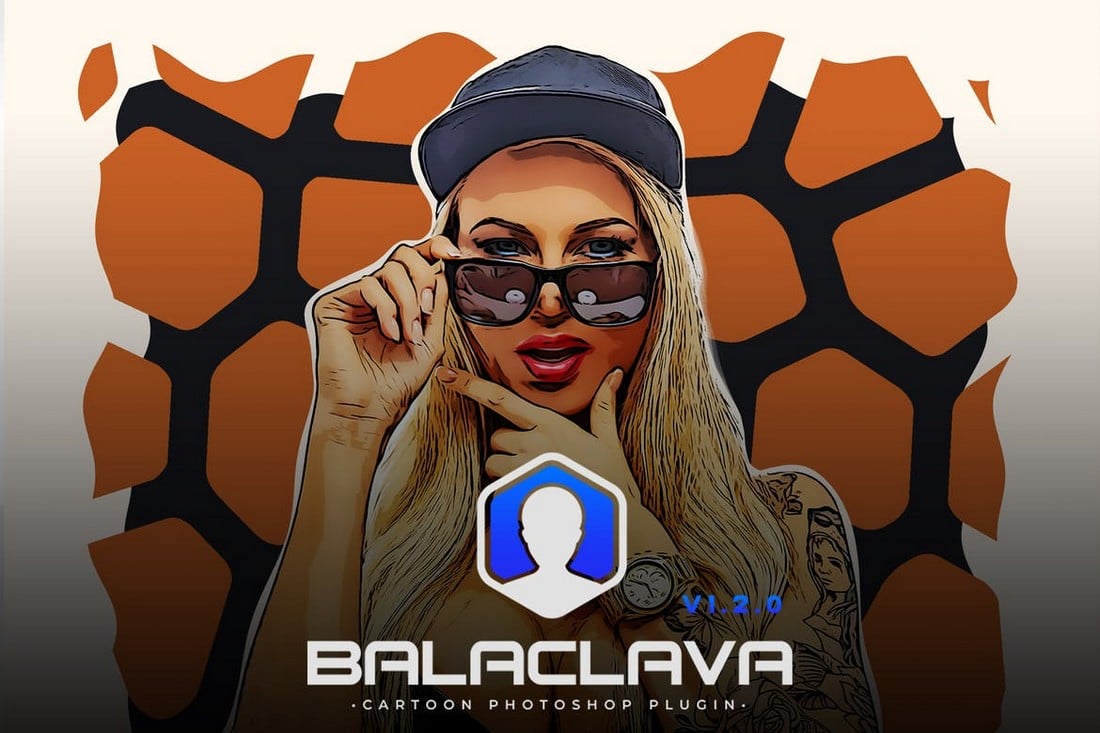
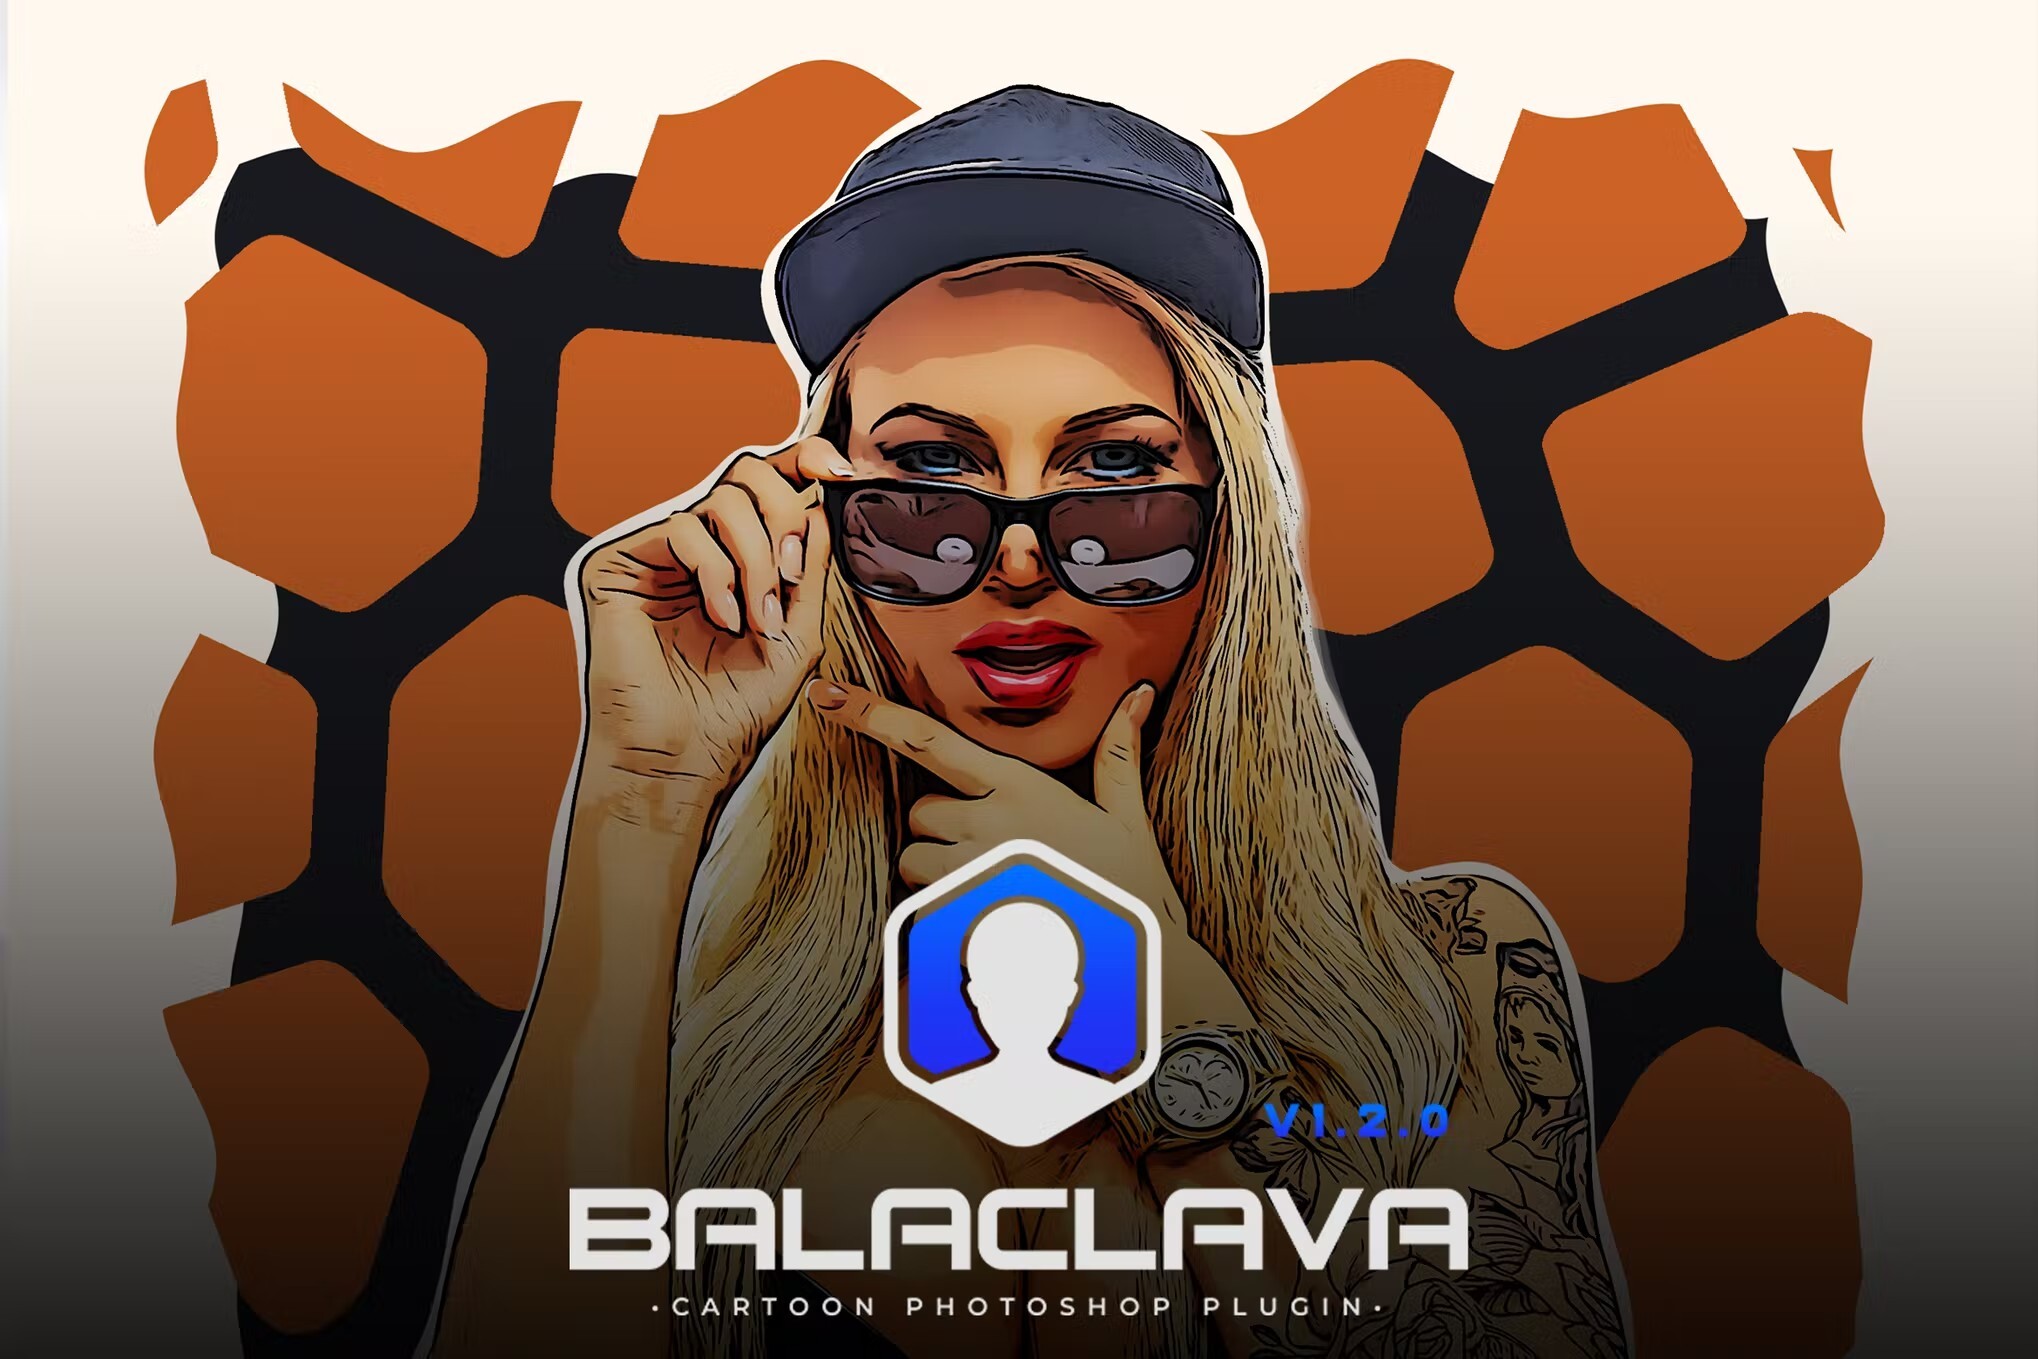
Balaclava – Photoshop Cartoon Plugin

Balaclava - Photoshop Cartoon Plugin

If you want to create more complex and advanced cartoon effects, you’ll need a Photoshop plugin. This Photoshop plugin allows you to create more realistic cartoon effects using some of the built-in features of Photoshop CC. It will completely transform your portraits with face styles, backgrounds, and color effects.

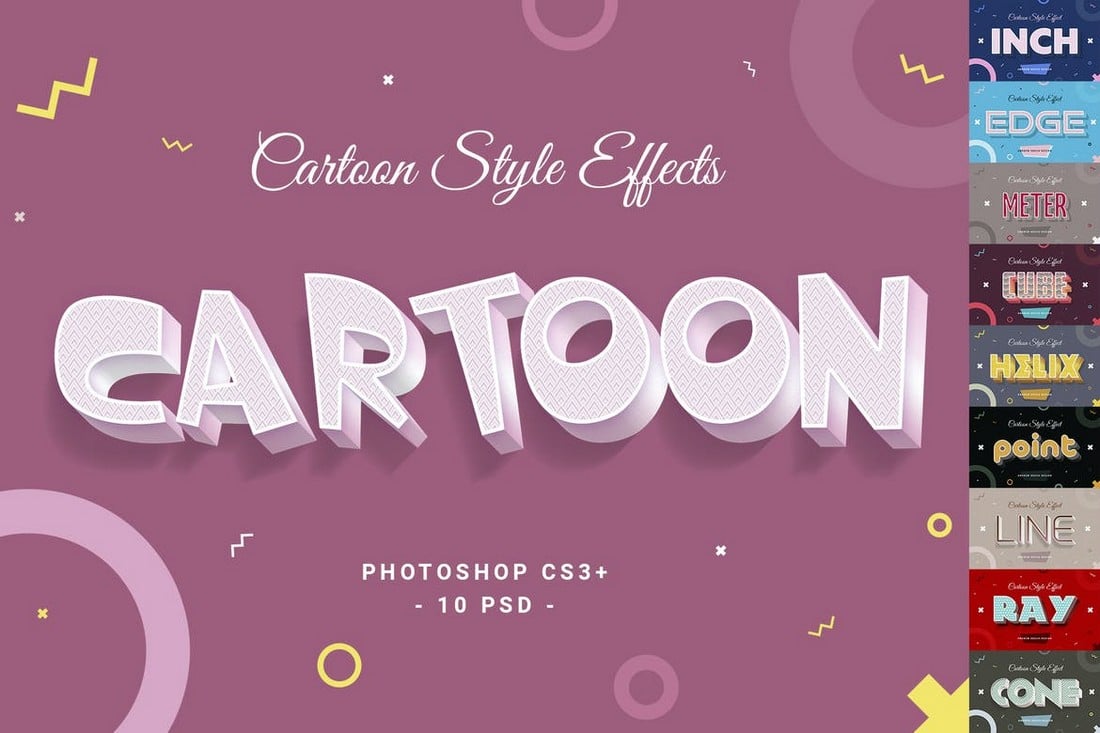
Cartoon Style Photoshop Text Effects

Cartoon Style Photoshop Text Effects

Want to create titles and headings with cartoon designs? Then you’ll need this Photoshop text effects bundle. It includes editable PSD files with ASL files you can easily customize to create fun and quirky titles with cartoon designs.

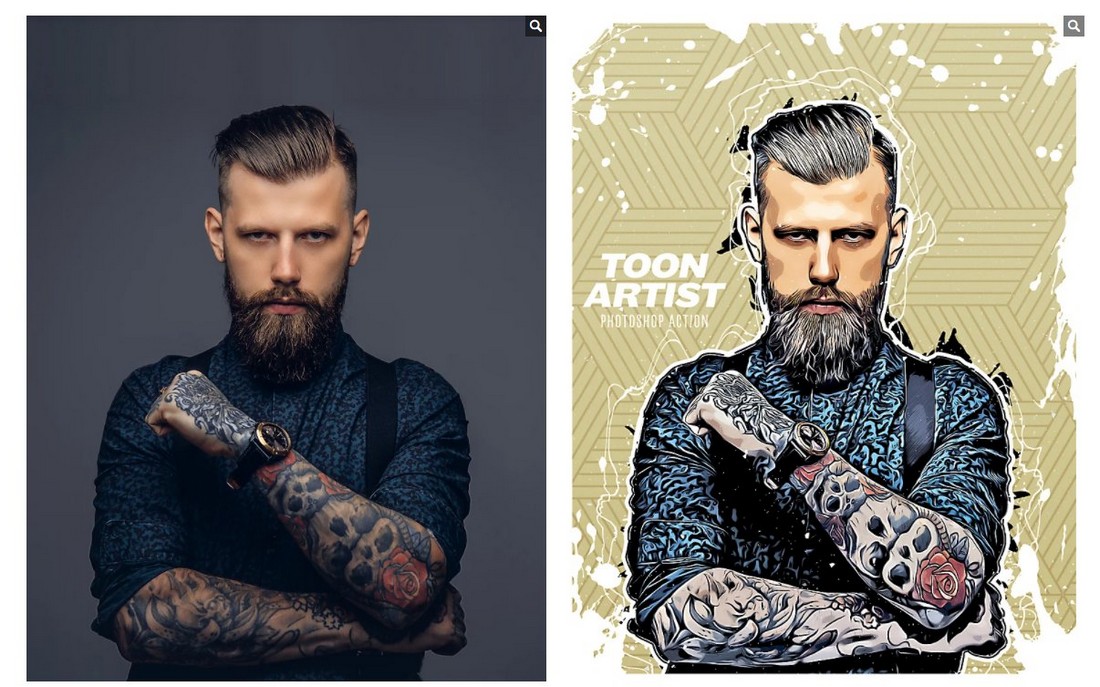
Toon Artist – Free Photoshop Cartoon Plugin

Toon Artist - Free Photoshop Cartoon Plugin

A high-quality Photoshop effect crafted by a professional designer. This action allows you to create an amazing cartoon effect with your photos with just a few clicks. The action is free to download and use.

Comic Vintage Vector Tracing Cartoon PS Action

Comic Vintage Vector Tracing Cartoon PS Action

This is a must-have Photoshop action for graphic designs. With this action, you can create a vintage vector design look using photos. The textured cartoon look will turn your photos into a page from a comic book.

Cartoonica – Creative Photoshop Action

Cartoonica - Creative Photoshop Action

This Photoshop action also creates very creative cartoon-like designs from photos. It works well with portraits and photos with objects. The end result will look a lot like a cartoon drawing.

Cartoon Painting Photoshop Action

Cartoon Painting Photoshop Action

Another creative cartoon Photoshop action for transforming portrait photos. This action is very easy to use and customize. And it seems to work perfectly for selfies and portrait photos. It’s especially great for Instagram.

Realistic Vector Cartoon Photoshop Action

Realisitc Vector Cartoon Photoshop Action

This Photoshop action allows you to easily change the look of your photos with a vector cartoon effect. It’s great for graphic designs, posters, flyers, and even website designs. The action works with Photoshop CS4 and higher.

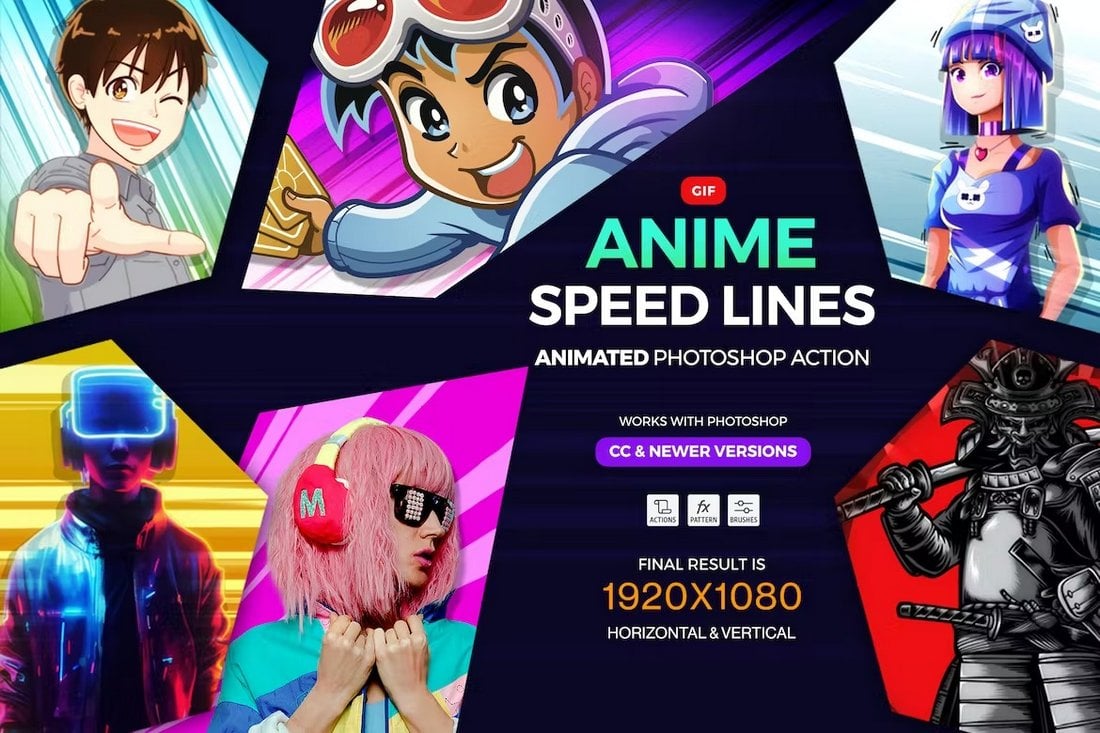
Anime Speed Lines Photoshop Action

Anime Speed Lines Photoshop Action

You can use this Photoshop action to quickly generate cool anime-style backgrounds for your graphic designs. There are 15 different actions in this bundle featuring all kinds of anime speed lines background effects.

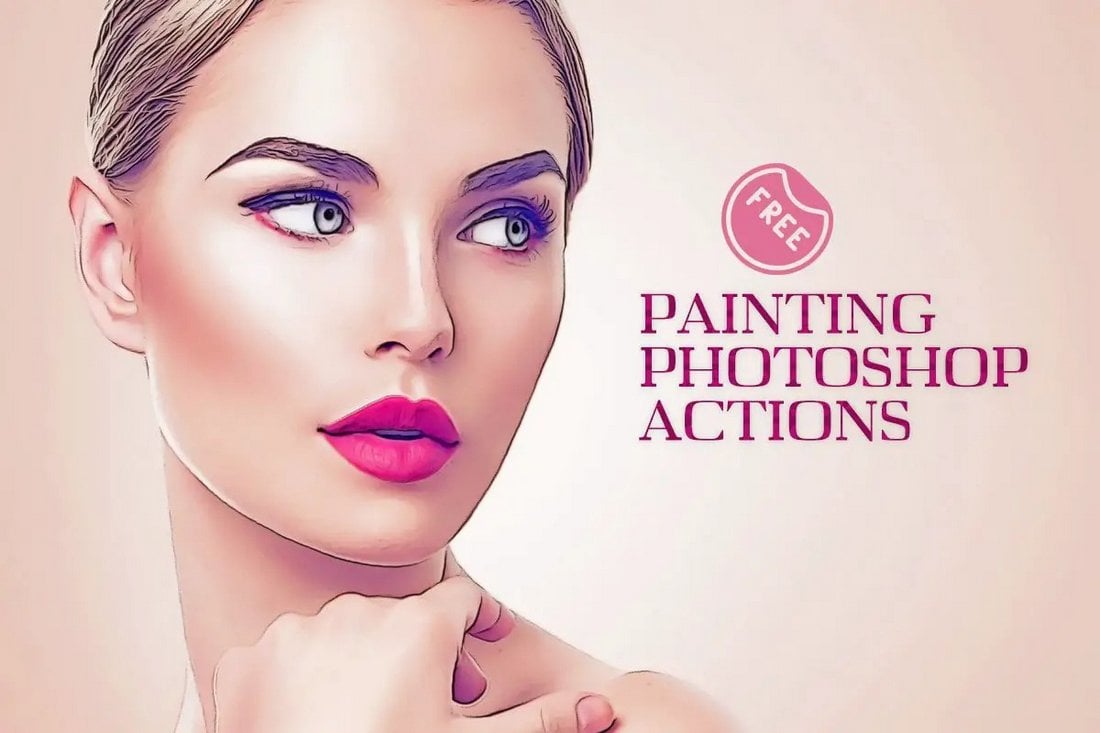
Free Oil Painting Cartoon Photoshop Actions

Free Oil Painting Cartoon Photoshop Actions

A free Photoshop action featuring an oil painting effect. This action will instantly turn your portrait photos into cartoon-like designs. You can apply the effect with just one click. And it works with Photoshop CS3.

Cartoonizer – Photoshop Cartoon Action

cartoon effects photoshop

Convert your photo to cartoon in Photoshop with the help of Cartoonizer, a high-quality action that will help you achieve the desired results with minimal effort. It’s a versatile Photoshop cartoon filter that can be used for a range of professional and creative applications.

Cartoon Effects Photoshop Text Plugin

cartoon effects photoshop

Here we have a Halloween-themed Photoshop cartoon plugin that gives your text a cartoonish touch in just a few easy clicks. It’s a great choice for kids’ projects, Halloween party posters, flyers, and invitation cards.

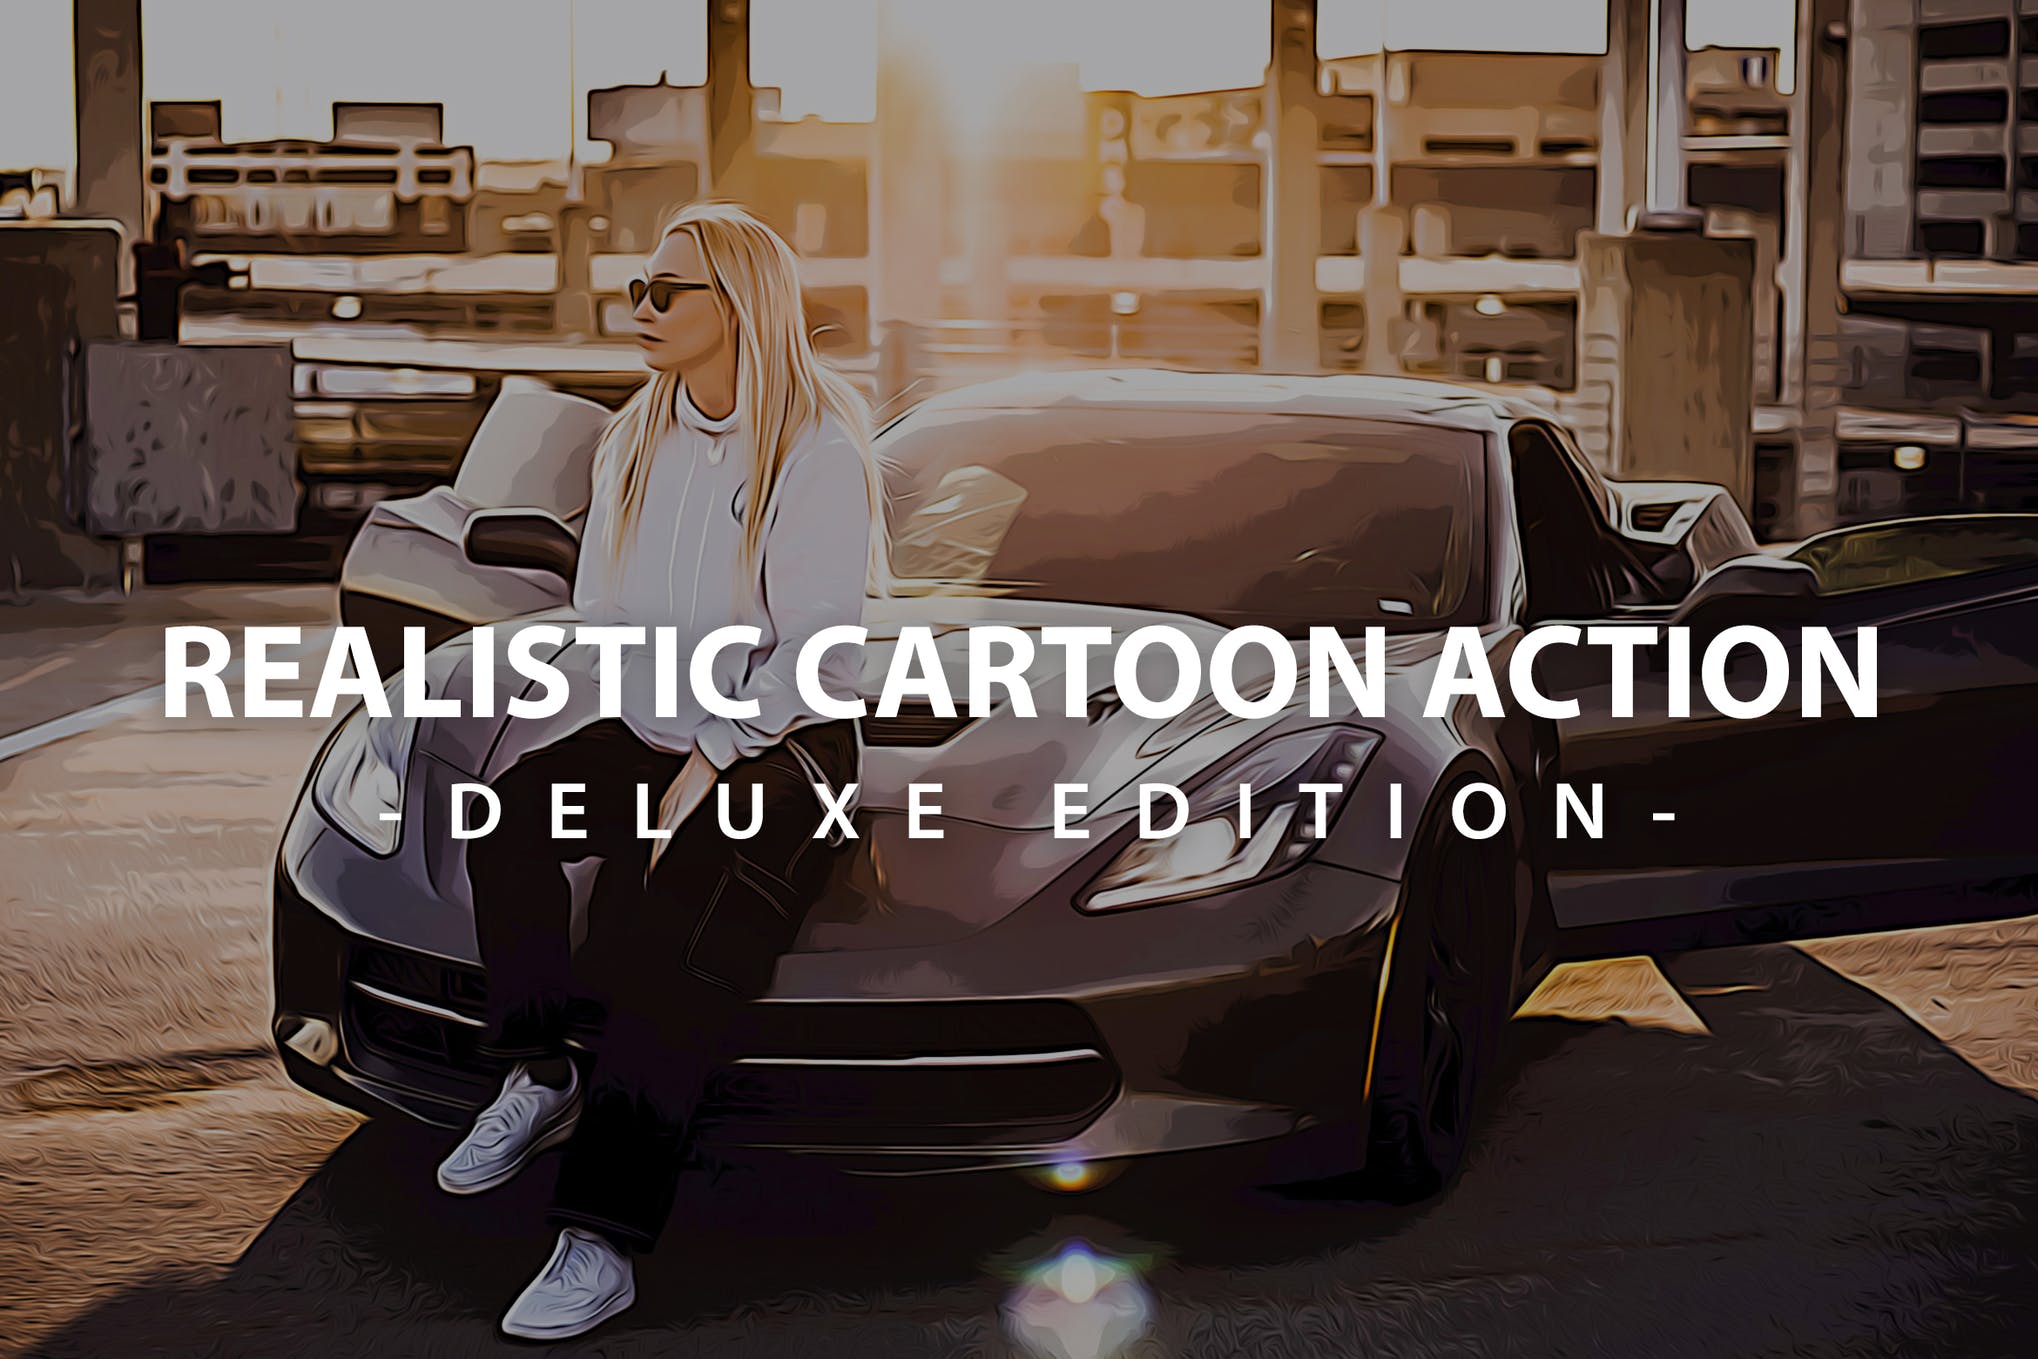
Realistic Photoshop Cartoon Effect

cartoon effects photoshop

Give your pictures a realistic cartoon look with the help of this amazing Photoshop action that works well with almost any sort of photography. You also get a video tutorial that helps you make the most of this cartoon effect Photoshop plugin.

Netta – Free Photoshop Cartoon Plugin

cartoon effects photoshop

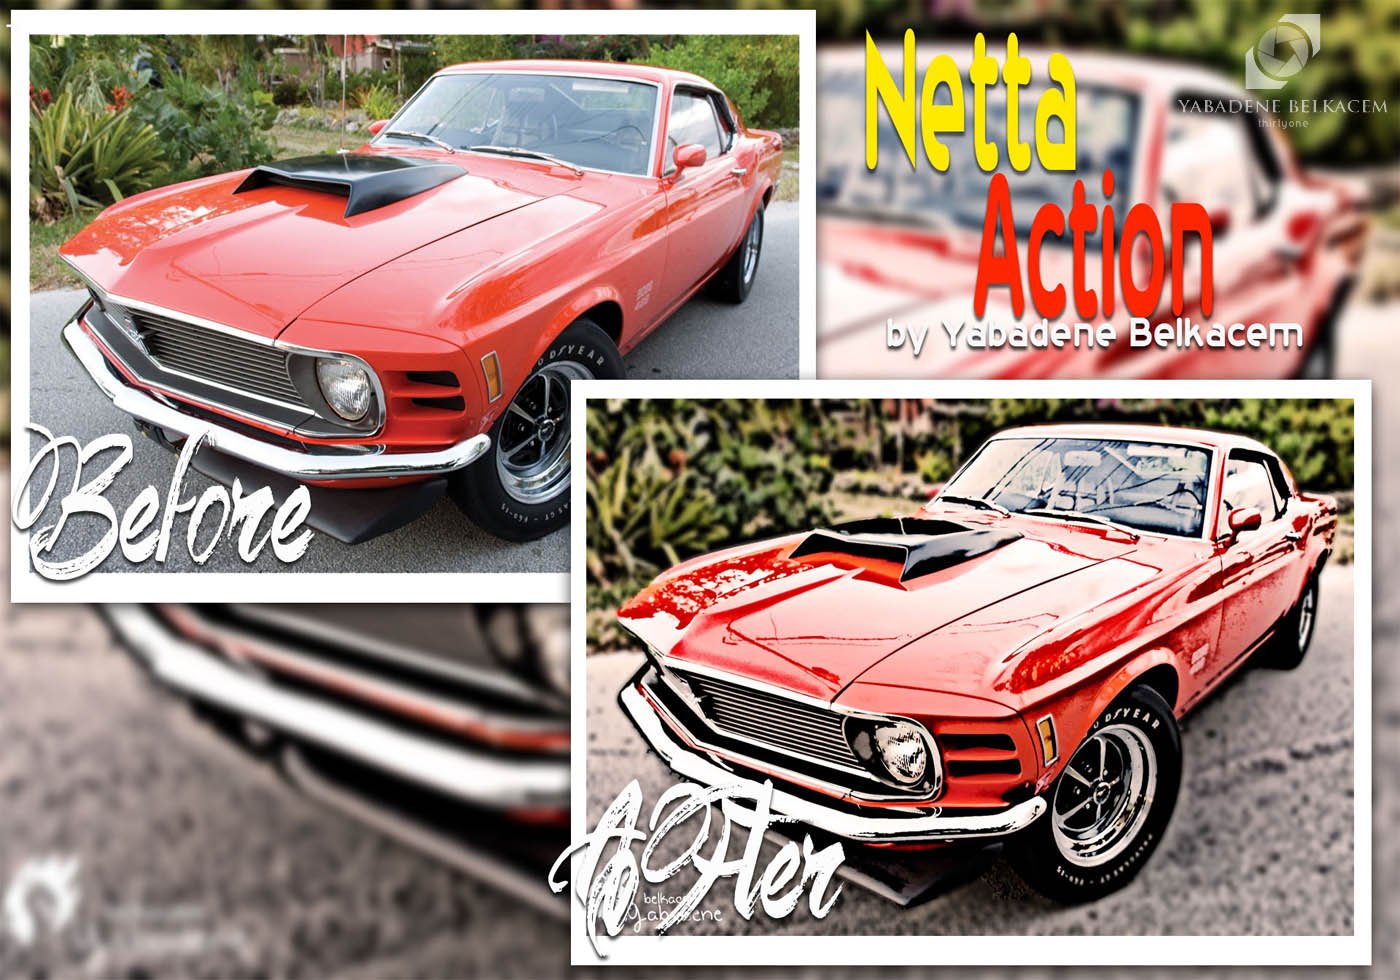
Searching for the easiest way to transform your pictures into anime scenes? Look no further than Netta, a free Photoshop cartoon filter that will put all your worries about how to make cartoon in Photoshop to rest.

Free Cartoon Painting Photoshop Action

Free Cartoon Painting Photoshop Action

This free Photoshop action lets you add a realistic painting effect to your portrait photos. It will also make photos look like a still from a cartoon film.

Zombie Grime Art Photoshop Cartoon Effect

Zombie Grime Art Photoshop Cartoon Effect

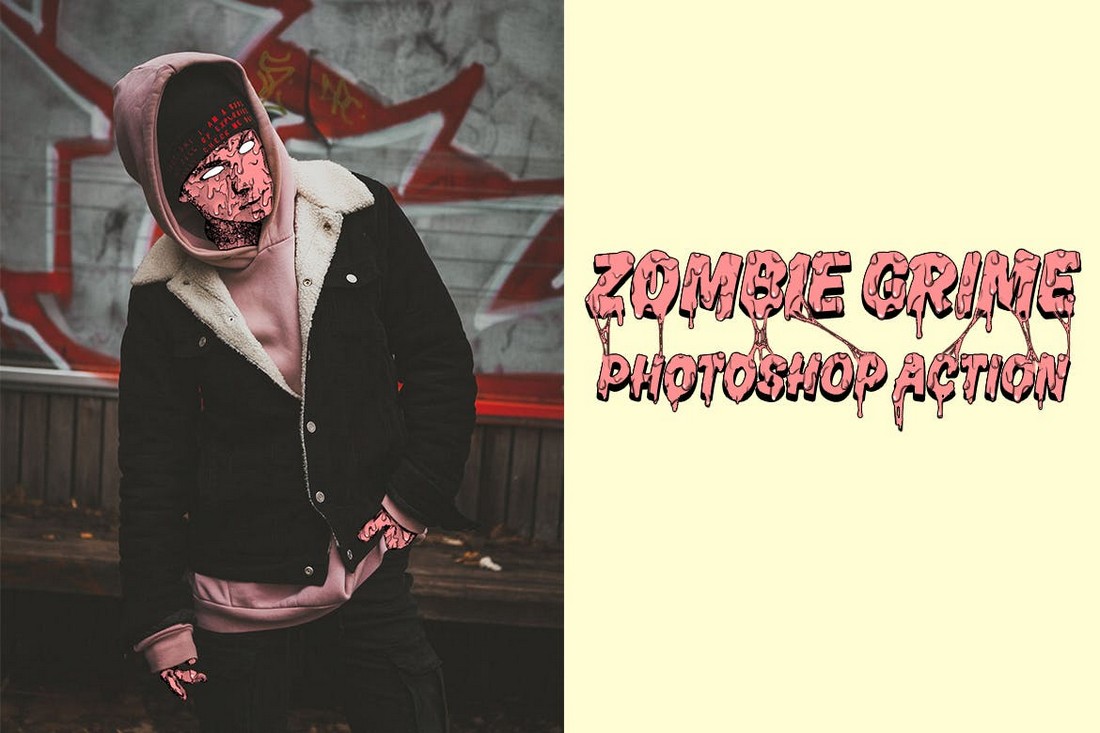
A very unique Photoshop action that creates a different style of a cartoon effect by combining cartoon style with real-life images, also known as Grime art. Using the PS action, you can make yourself look like a cartoon zombie in portrait photos. The effect requires a few additional steps to apply but the included video tutorial will help you learn how it’s done.

Cartoonize – Photoshop Cartoon Action

Cartoonize - Photoshop Cartoon Action

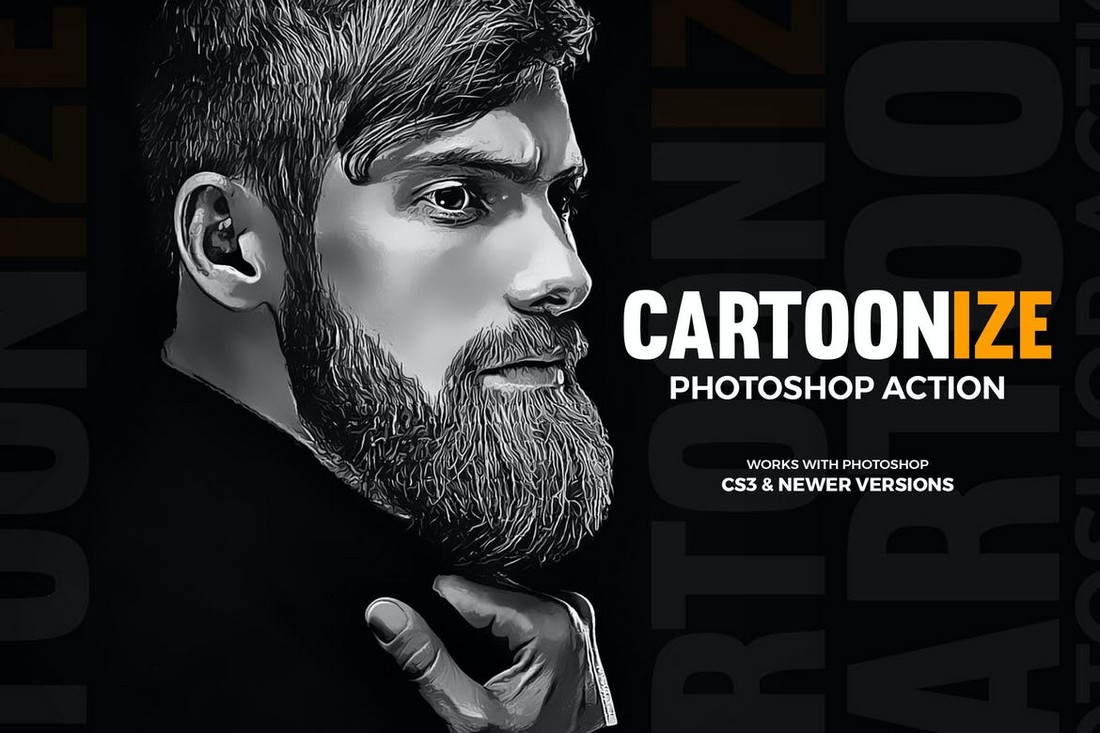
With this Photoshop action, you can create a realistic cartoon effect mixed with an oil painting look and feel. It creates a non-destructive effect that you can easily adjust to your preference. And it’s compatible with Photoshop CS3 and higher.

Cartoon Vector Painting Photoshop Action

Cartoon Vector Painting Photoshop Action

This Photoshop action is perfect for giving a cartoon drawing look to your portrait photos. It’s especially perfect for making your selfies look more creative for Instagram and Facebook. The best part is this PS action even works with older versions of Photoshop, starting with CS3.

Free Photoshop Cartoon Action

cartoon effects photoshop

Take your everyday pictures to a whole new level with this Photoshop cartoon plugin that’s not just easy to install, but also fun to play around with all the customization options. Drop everything, and grab it right now.

Vector Converter – Cartoon Avatar Photoshop Plugin

Vector Converter - Cartoon Avatar Photoshop Plugin

Another advanced Photoshop plugins you can use to create cartoon avatars using portrait photos. It will basically turn your ordinary photos into vector cartoon drawings. The plugin requires the Oil Paint filter to function so it’s only compatible with Photoshop CC 2015 and higher.

Photo To Cartoon Photoshop Actions

Photo To Cartoon Photoshop Actions

Use this simple one-click Photoshop action to instantly turn your photos into cartoon drawings. It’s ideal for Instagram selfies and social media graphics. The effect can also be easily customized to your preference to change its strength.

Free Cartoon Art Photoshop Action

Free Cartoon Art Photoshop Action

Another free Photoshop action you can use to apply a cartoon effect with just a few clicks. This action works well with portrait photos and lets you create a non-destructive cartoon filter.

Free Comic Poster Photoshop Actions

Free Comic Poster Photoshop Actions

Use this free Photoshop action to add a comic book-like cartoon effect to your photos. This action works with Photoshop CS3 and higher. The effect is fully customizable to your preference.

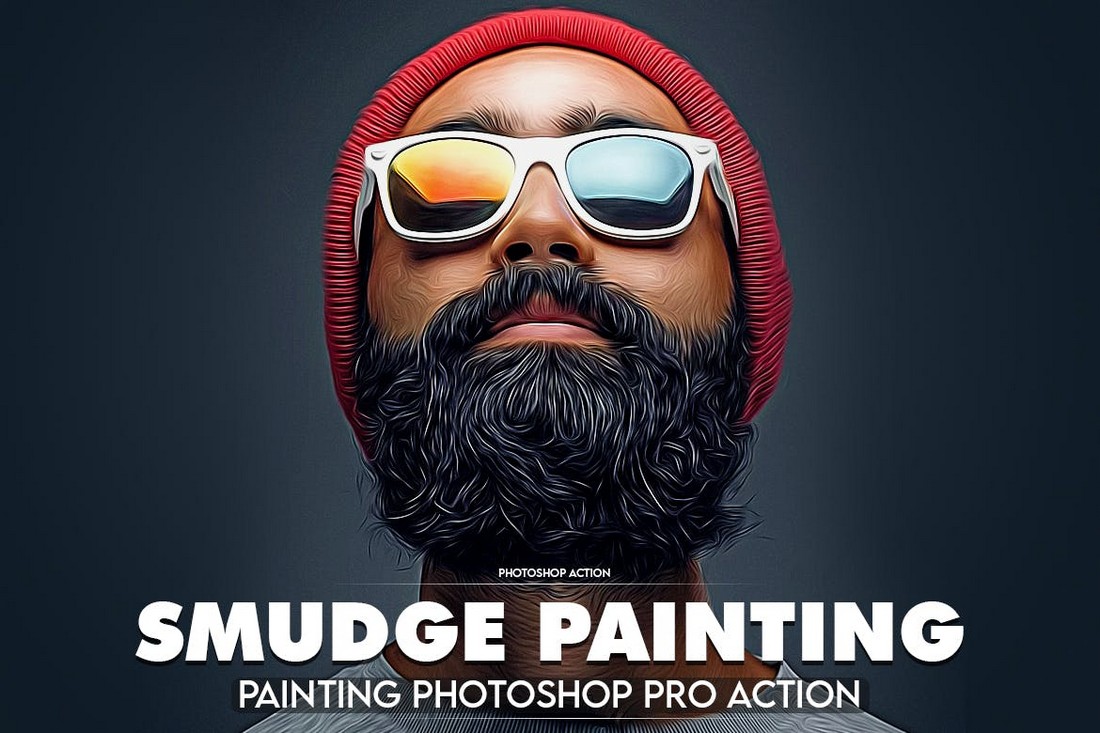
Smudge Painting Photoshop Action

Smudge Painting Photoshop Action

With this Photoshop action, you can create a cartoon painting-like effect in just a few clicks. It’s a high-quality action that will allow you to create professional results. And, of course, you’ll be able to customize the effect to match different portrait photos as well.

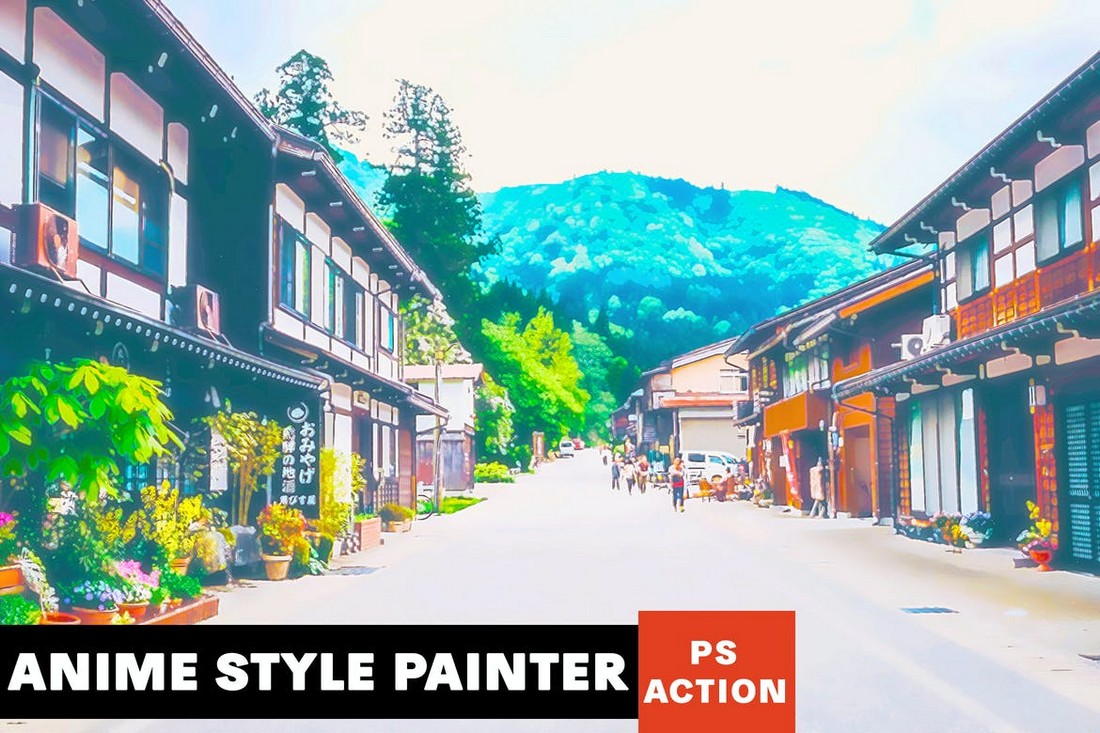
Anime Style Cartoon Photoshop Action

Anime Style Cartoon Photoshop Action

After featuring so many cartoon effects for portraits, we finally have one for outdoor photos. This Photoshop action allows you to apply a subtle anime cartoon effect to your outdoor and nature photos. It creates a fully editable effect with layers and elements.

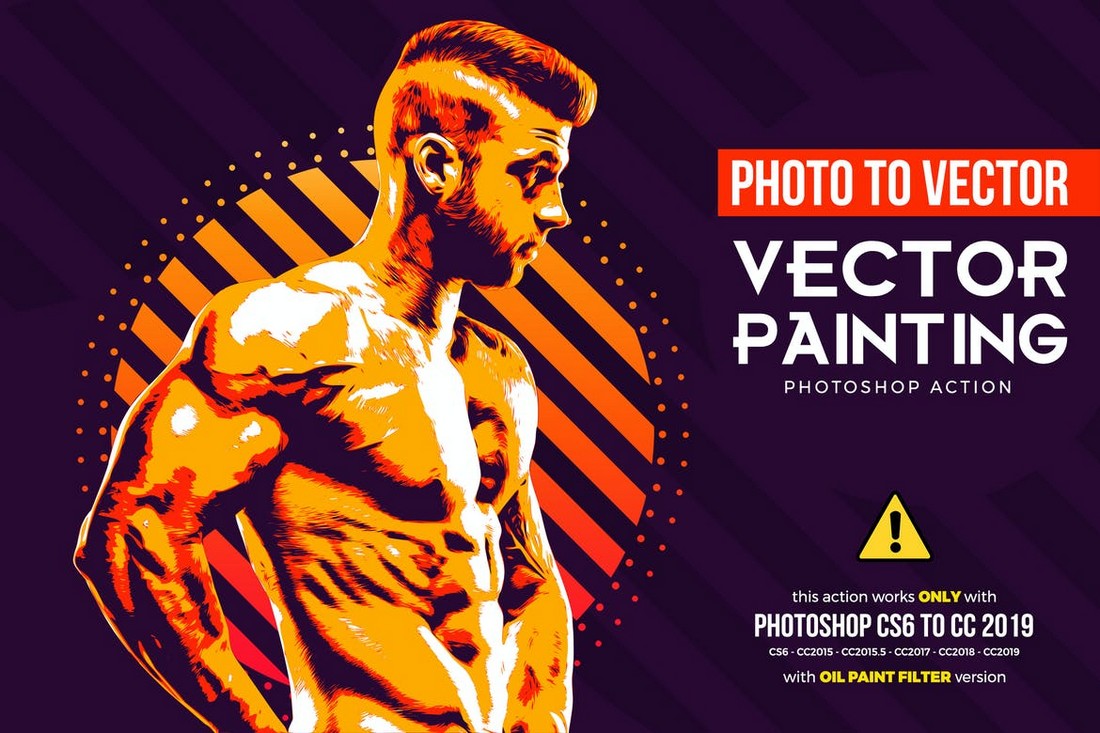
Photo to Vector Cartoon Photoshop Action

Photo to Vector Cartoon Photoshop Action

Create vector paintings and cartoons with your photos using this advanced Photoshop action. It creates a non-destructive cartoon effect with your portraits to turn them into cartoon drawings. The effect is compatible with Photoshop CS6 and higher.

Kartoon Painting Photoshop Action

Kartoon Painting Photoshop Action

Another simple yet effective effect for adding a cartoon look to your selfies, portrait photos, and even pet photos. The PS action works with just a few clicks and allows you to customize the effect afterward. It works with Photoshop CS6.

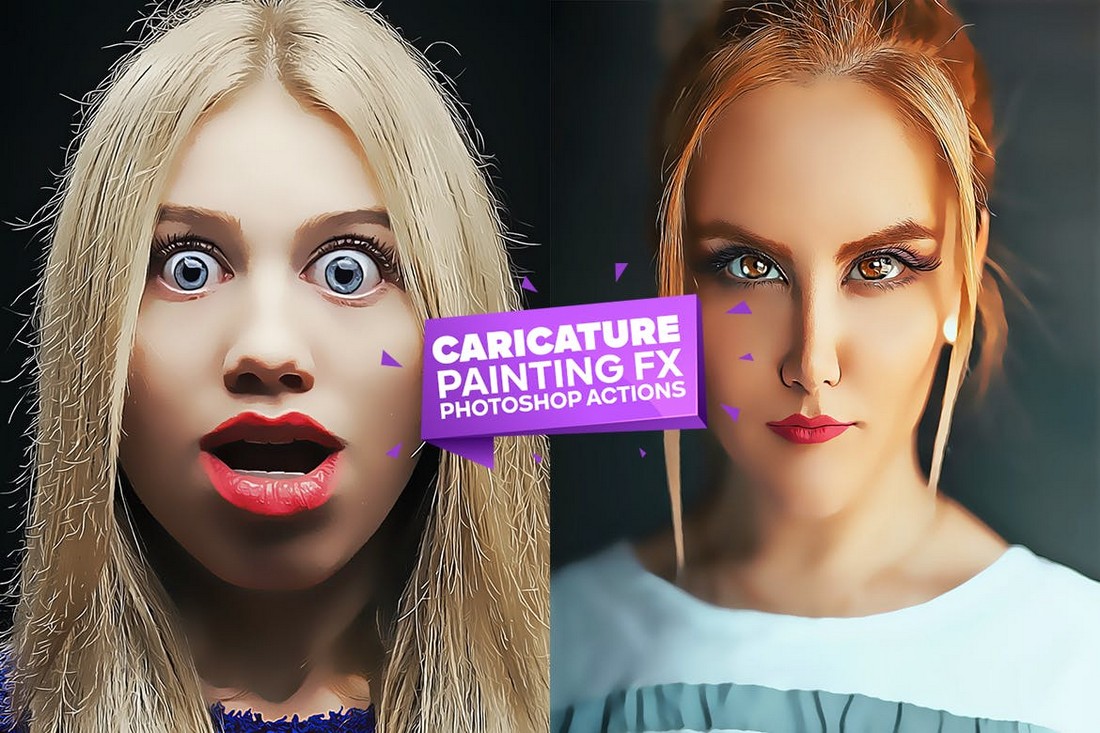
Caricature – Fun Cartoon Photoshop Action

Caricature - Fun Cartoon Photoshop Action

Want to give a fun and quirky cartoon look to your photos? Then this Photoshop action is perfect for you. It comes with a weird cartoon effect that gives a funny distorted look to your portrait photos. Perfect for making people laugh.

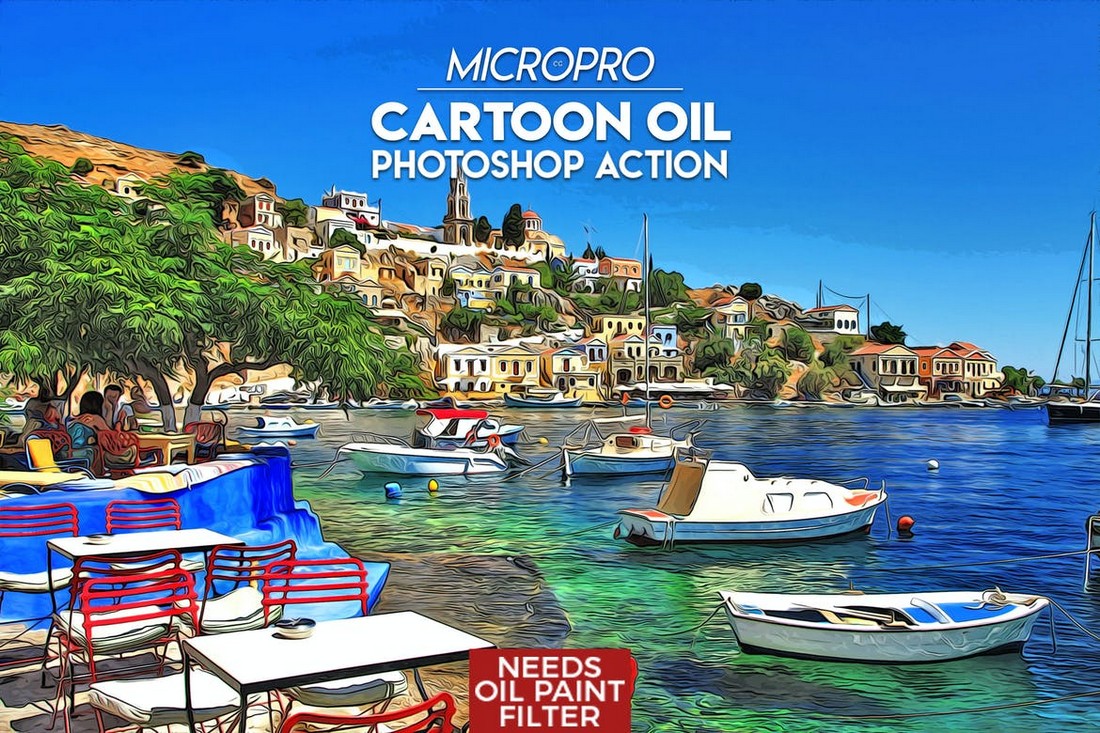
MicroPro – Cartoon Oil Photoshop Action

MicroPro - Cartoon Oil Photoshop Action

Another cartoon Photoshop action for outdoor landscape photos. This action lets you apply a cartoon oil painting look to your outdoor photos. It also works quite well with cityscape, nature, and food photos as well. The action is compatible with Photoshop CS1 and higher.

Free Modern Art Cartoon Photoshop Action

Free Modern Art Cartoon Photoshop Action

While this free Photoshop action is made for giving a modern art look to your photos, it can also be used to create a cartoon look with just a few tweaks and adjustments. There’s a tutorial on how to use the action as well.

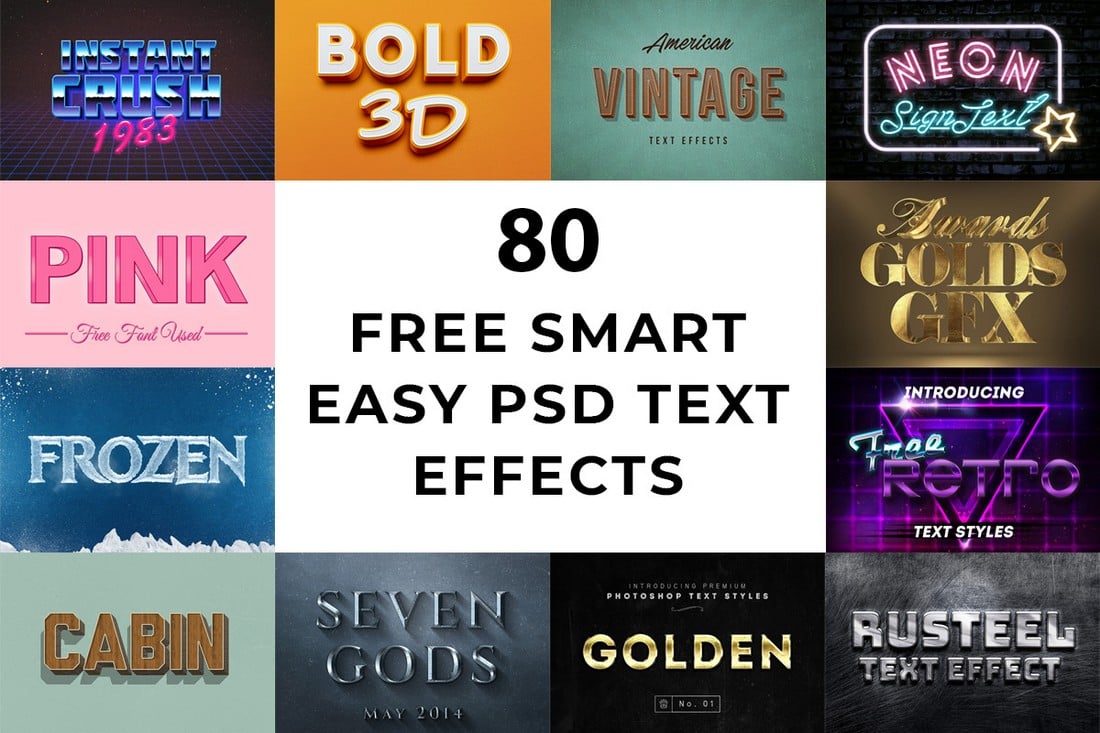
80 Free Smart Easy PSD Text Effects

80 Free Smart Easy PSD Text Effects

This is a big bundle of text effects for Photoshop. All text effects are available as PSD files that you can customize to paste your own text. You’ll find a few text effects with cartoon designs in the bundle.

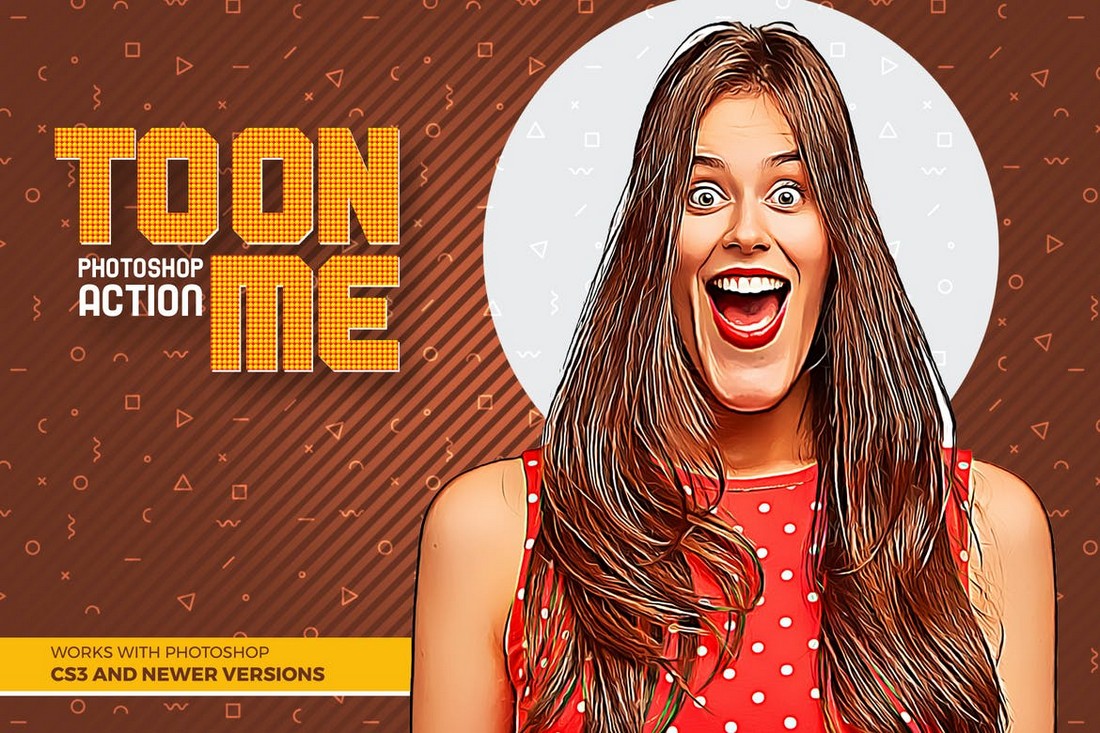
Toon-Me – Photoshop Cartoon Action

Toon-Me - Photoshop Cartoon Action

With this Photoshop action, you can give a truly cartoonish look to your photos. It adds several effects to portrait photos to make them fun and more cartoon-like. The effect is compatible with Photoshop CS3 and higher.

Cartoon Filter Photoshop Action

Cartoon Filter Photoshop Action

This Photoshop action is designed to make photos look like paintings. And it adds a subtle cartoon effect to photos at the same time. It’s perfect for giving an artistic look to your portraits.

GTA Style Cartoon Photoshop Action

GTA Style Cartoon Photoshop Action

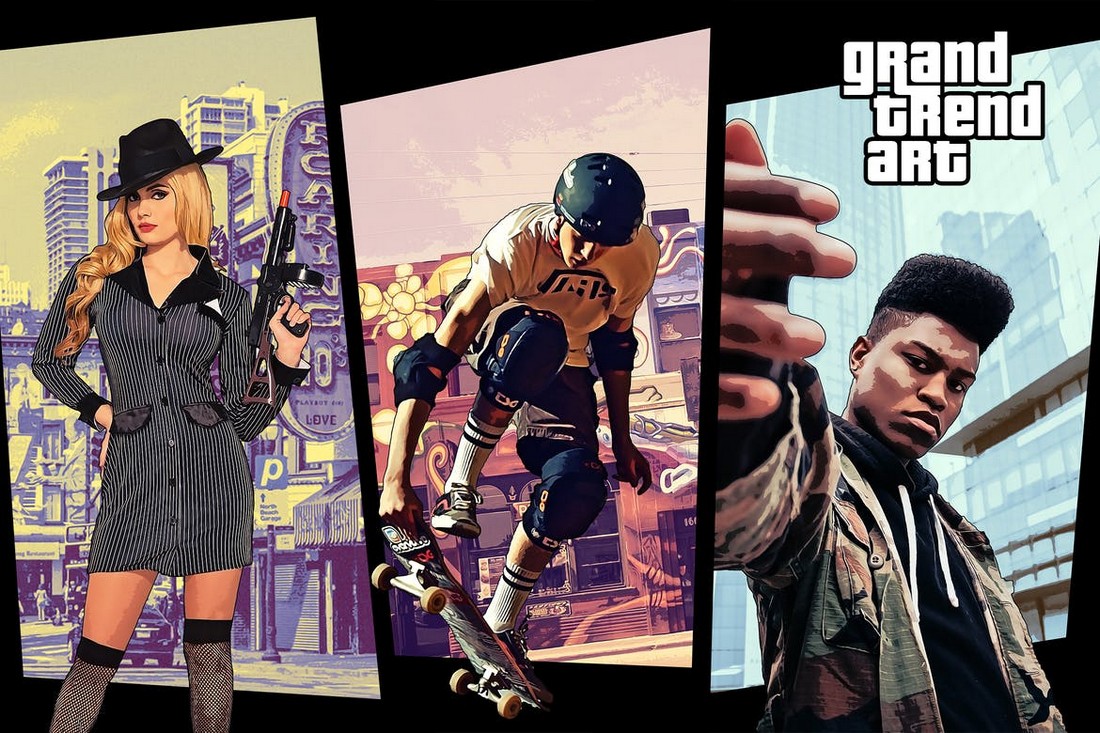
Gamers will surely find this Photoshop action useful as it allows you to make your photos look like the loading screen art from Grand Theft Auto games. This bundle comes with Photoshop actions, 5 frame templates, 5 collage templates, and more.

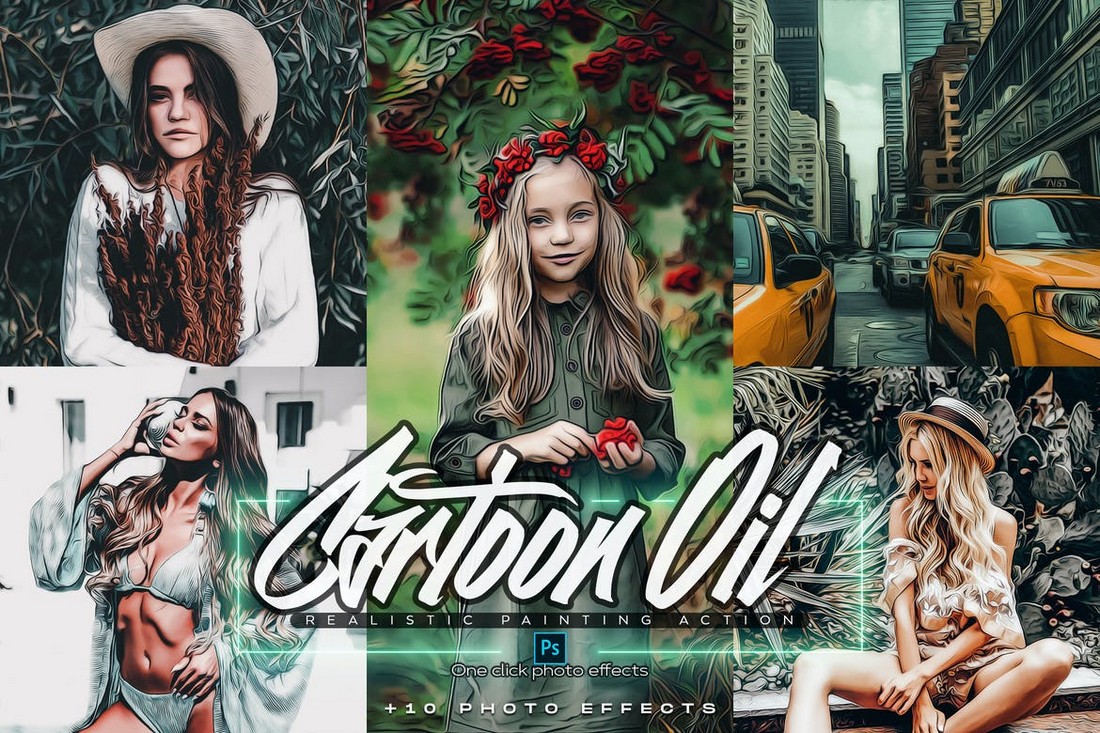
Cartoon Oil Action – 10 Effects

Cartoon Oil Action - 10 Effects

You can use this collection of Photoshop actions to add a creative cartoon oil painting look to your portrait photos. It includes 10 variations of the effect that can be customized to your preference.

Cartoon Photoshop Photo Effect

Cartoon Photoshop Photo Effect

If you want to add a subtle cartoon look to your photos, this action is the best choice for you. It features a simple effect that only adds a light cartoon effect to portrait photos.

Paint Cartoon Photoshop Action

cartoon photoshop action

For another ultra-realistic and modern-looking paint effect that will help you cartoonize any photo, this fun cartoon filter for Photoshop promises high-quality results using versions CS3 and higher and includes full supporting documentation to get you editing straight away.

Smudge Cartoon Photoshop Action

cartoon photoshop action

The Smudge Photoshop cartoon plugin will help you cartoonize a photo with a sleek and realistic painted effect that features sharp edges and vibrant colors and is compatible with Photoshop versions CS3 and above. It’s a great choice if you’re after a fun and professional cartoon painting look.

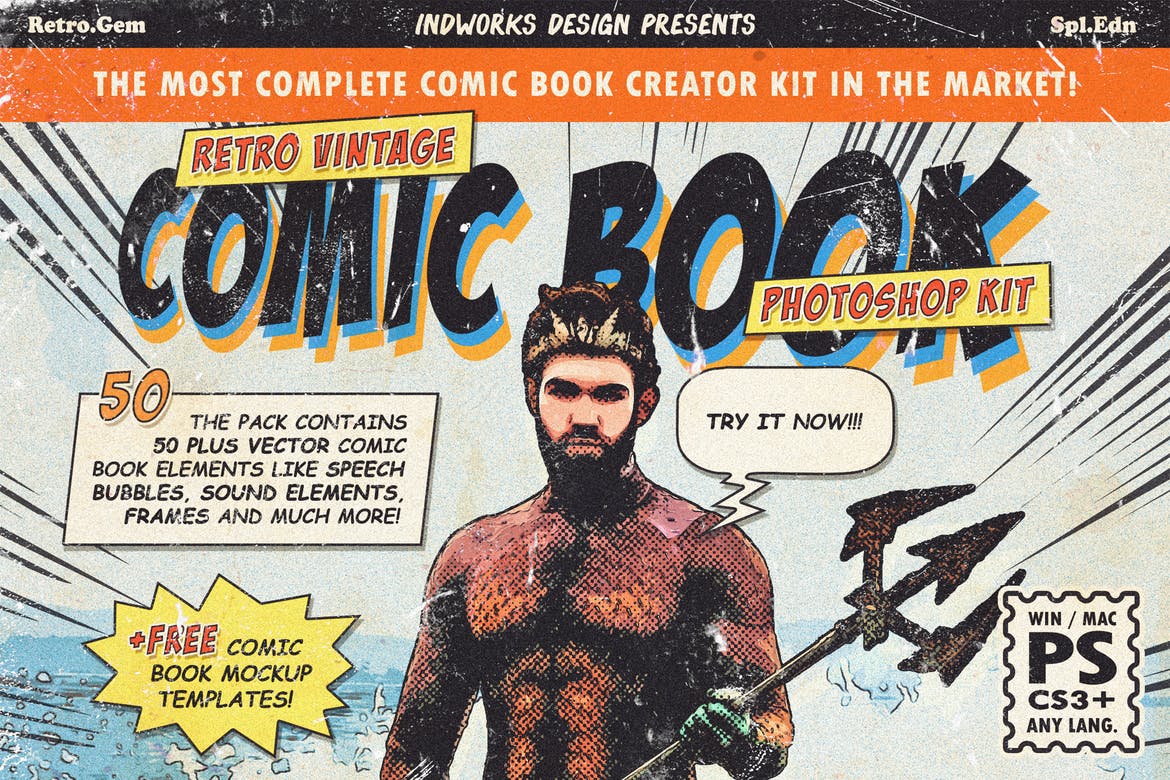
Retro Comic Book Photoshop Cartoon Action Kit

cartoon photoshop action

Next, we have a retro-inspired action kit that allows you to cartoonize a photo in an authentic, hand-drawn comic book style. It works best with images that offer a resolution between 72 and 300 DPI, and all comic elements are vector graphics which enables you to scale and tweak the effects as much as you want.

Oil Vector Art Photoshop Cartoon Action

cartoon photoshop action

This cartoon filter for Photoshop adds a vector art look to your images that’s inspired by the texture and color profile of a real-life oil painting, and can be applied with amazing results in just a few clicks. You can create up to 40 different color effects, and adjust each layer to your preference.

Balaclava – Photoshop Cartoon Plugin

cartoon photoshop action

Balaclava is a Photoshop cartoon plugin containing tools and techniques that help you achieve the most modern, professional, and eye-catching cartoon effects in just a few clicks. The cartoon effect Photoshop Action offers 4 editable Photoshop cartooning styles, 5 face styles, 8 backgrounds, and more than 20 color variations.

Looking for more? Then be sure to check out our best Photoshop actions collection.

How A Bottom-Up Design Approach Enhances Site Accessibility

Featured Imgs 23

Accessibility is key in modern web design. A site that doesn’t consider how its user experience may differ for various audiences — especially those with disabilities — will fail to engage and serve everyone equally. One of the best ways to prevent this is to approach your site from a bottom-up perspective.

Understanding Bottom-Up Design

Conventional, top-down design approaches start with the big picture before breaking these goals and concepts into smaller details. Bottom-up philosophies, by contrast, consider the minute details first, eventually achieving the broader goal piece by piece.

This alternative way of thinking is important for accessibility in general because it reflects how neurodivergent people commonly think. While non-autistic people tend to think from a top-down perspective, those with autism often employ a bottom-up way of thinking.

Of course, there is considerable variation, and researchers have identified at least three specialist thinking types within the autism spectrum:

  • Visual thinkers who think in images;
  • Pattern thinkers who think of concepts in terms of patterns and relationships;
  • Verbal thinkers who think only in word detail.

Still, research shows that people with autism and ADHD show a bias toward bottom-up thinking rather than the top-down approach you often see in neurotypical users. Consequently, a top-down strategy means you may miss details your audience may notice, and your site may not feel easily usable for all users.

As a real-world example, consider the task of writing an essay. Many students are instructed to start an essay assignment by thinking about the main point they want to convey and then create an outline with points that support the main argument. This is top-down thinking — starting with the big picture of the topic and then gradually breaking down the topic into points and then later into words that articulate these points.

In contrast, someone who uses a bottom-up thinking approach might start an essay with no outline but rather just by freely jotting down every idea that comes to mind as it comes to mind — perhaps starting with one particular idea or example that the writer finds interesting and wants to explore further and branching off from there. Then, once all the ideas have been written out, the writer goes back to group related ideas together and arrange them into a logical outline. This writer starts with the small details of the essay and then works these details into the big picture of the final form.

In web design, in particular, a bottom-up approach means starting with the specifics of the user experience instead of the desired effect. You may determine a readable layout for a single blog post, then ask how that page relates to others and slowly build on these decisions until you have several well-organized website categories.

You may even get more granular. Say you start your site design by placing a menu at the bottom of a mobile site to make it easier to tap with one hand, improving ease of use. Then, you build a drop-down menu around that choice — placing the most popular or needed options at the bottom instead of the top for easy tapping. From there, you may have to rethink larger-scale layouts to work around those interactive elements being lower on the screen, slowly addressing larger categories until you have a finished site design.

In either case, the idea of bottom-up design is to begin with the most specific problems someone might have. You then address them in sequence instead of determining the big picture first.

Benefits Of A Bottom-Up Approach For Accessible Design

While neither bottom-up nor top-down approaches dominate the industry, some web engineers prefer the bottom-up approach due to the various accessibility benefits this process provides. This strategy has several accessibility benefits.

Putting User Needs First

The biggest benefit of bottom-up methods is that they prioritize the user’s needs.

Top-down approaches seem organized, but they often result in a site that reflects the designer’s choices and beliefs more than it serves your audience.

Consider some of the complaints that social media users have made over the years related to usability and accessibility for the everyday user. For example, many users complain that their Facebook feed will randomly refresh as they scroll for the sake of providing users with the most up-to-date content. However, the feature makes it virtually impossible to get back to a post a user viewed that they didn’t think to save. Likewise, TikTok’s watch history feature has come and gone over the years and still today is difficult for many users to find without viewing an outside tutorial on the subject.

This is a common problem: 95.9% of the largest one million homepages have Web Content Accessibility Guidelines (WCAG) errors. While a bottom-up alternative doesn’t mean you won’t make any mistakes, it may make them less likely, as bottom-up thinking often improves your awareness of new stimuli so you can catch things you’d otherwise overlook. It’s easier to meet user’s needs when you build your entire site around their experience instead of looking at UX as an afterthought.

Consider this example from Berkshire Hathaway, a multi-billion-dollar holding company. The overall design philosophy is understandable: It’s simple and direct, choosing to focus on information instead of fancy aesthetics that may not suit the company image. However, you could argue it loses itself in this big picture.

While it is simple, the lack of menus or color contrast and the small font make it harder to read and a little overwhelming. This confusion can counteract any accessibility benefits of its simplicity.

Alternatively, even a simple website redesign could include intuitive menus, additional contrast, and accessible font for easy navigation across the site.

The homepage for U.K. charity Scope offers a better example of web design centered around users’ needs. Concise, clear menus line the top of the page to aid quicker, easier navigation. The color scheme is simple enough to avoid confusion but provides enough contrast to make everything easy to read — something the sans-serif font further helps.

Ensuring Accessibility From The Start

A top-down method also makes catering to a diverse audience difficult because you may need to shoehorn features into an existing design.

For example, say, a local government agency creates a website focused on providing information and services to a general audience of residents. The site originally featured high-resolution images, bright colors, and interactive charts.

However, they realize the images are not accessible to people navigating the site with screen readers, while multiple layers of submenus are difficult for keyboard-only users. Further, the bright colors make it hard for visually impaired users to read the site’s information.

The agency, realizing these accessibility concerns, adds captions to each image. However, the captions disrupt the originally intended visual aesthetics and user flow. Further, adjusting the bright colors would involve completely rethinking the site’s entire color palette. If these considerations had been made before the site was built, the site build could have specifically accommodated these elements while still creating an aesthetically pleasing and user-friendly result.

Alternatively, a site initially built with high contrast, a calm color scheme, clear typography, simple menus, and reduced imagery would make this site much more accessible to a wide user base from the get-go.

As a real-world example, consider the Awwwards website. There are plenty of menus to condense information and ease navigation without overloading the screen — a solid accessibility choice. However, there does not seem to be consistent thought in these menus’ placement or organization.

There are far too many menus; some are at the top while others are at the bottom, and a scrolling top bar adds further distractions. It seems like Awwwards may have added additional menus as an afterthought to improve navigation. This leads to inconsistencies and crowding because they did not begin with this thought.

In contrast,

Bottom-up alternatives address usability issues from the beginning, which results in a more functional, accessible website.

Redesigning a system to address a usability issue it didn’t originally make room for is challenging. It can lead to errors like broken links and other unintended consequences that may hinder access for other visitors. Some sites have even claimed to lose 90% of their traffic after a redesign. While bottom-up approaches won’t eliminate those possibilities, they make them less likely by centering everything around usage from the start.

The website for the Vasa Museum in Stockholm, Sweden, showcases a more cohesive approach to ensuring accessibility. Like Awwwards, it uses menus to aid navigation and organization, but there seems to be more forethought into these features. All menus are at the top, and there are fewer of them, resulting in less clutter and a faster way to find what you’re looking for. The overall design complements this by keeping things simple and neat so that the menus stand out.

Increasing Awareness

Similarly, bottom-up design ensures you don’t miss as many accessibility concerns. When you start at the top, before determining what details fit within it, you may not consider all the factors that influence it. Beginning with the specifics instead makes it easier to spot and address problems you would’ve missed otherwise.

This awareness is particularly important for serving a diverse population. An estimated 16% of the global population — 1.6 billion people — have a significant disability. That means there’s a huge range of varying needs to account for, but most people lack firsthand experience living with these conditions. Consequently, it’s easy to miss things impacting others’ UX. You can overcome that knowledge gap by asking how everyone can use your site first.

Bottom-Up vs. Top-Down: Which Is Best for You?

As these benefits show, a bottom-up design philosophy can be helpful when building an accessible site. Still, top-down methods can be advantageous at times, too. Which is best depends on your situation.

Top-down approaches are a good way to ensure a consistent brand image, as you start with the overall idea and base future decisions on this concept. It also makes it easier to create a design hierarchy to facilitate decision-making within your team. When anyone has a question, they can turn to whoever is above them or refer to the broader goals. Such organization can also mean faster design processes.

Bottom-up methods, by contrast, are better when accessibility for a diverse audience is your main concern. It may be harder to keep everyone on the same overall design philosophy page, but it usually produces a more functional website. You can catch and solve problems early and pay great attention to detail. However, this can mean longer design cycles, which can incur extra costs.

It may come down to what your team is most comfortable with. People think and work differently, with some preferring a top-down approach while others find bottom-up more natural. Combining the two — starting with a top-down model before tackling updates from a bottom-up perspective — can be beneficial, too.

Strategies For Implementing A Bottom-Up Design Model

Should you decide a bottom-up design method is best for your goals, here are some ways you can embrace this philosophy.

Talk To Your Existing User Base

One of the most important factors in bottom-up web design is to center everything around your users. As a result, your existing user base — whether from a separate part of your business or another site you run — is the perfect place to start.

Survey customers and web visitors about their experience on your sites and others. Ask what pain points they have and what features they’d appreciate. Any commonalities between responses deserve attention. You can also turn to WCAG standards for inspiration on accessible functionality, but first-hand user feedback should form the core of your mission.

Look To Past Projects For Accessibility Gaps

Past sites and business projects can also reveal what specifics you should start with. Look for any accessibility gaps by combing through old customer feedback and update histories and using these sites yourself to find issues. Take note of any barriers or usability concerns to address in your next website.

Remember to document everything you find as you go. Up to 90% of organizations’ data is unstructured, making it difficult to analyze later. Reversing that trend by organizing your findings and recording your accessible design process will streamline future accessibility optimization efforts.

Divide Tasks But Communicate Often

Keep in mind that a bottom-up strategy can be time-consuming. One of the reasons why top-down alternatives are popular is because they’re efficient. You can overcome this gap by splitting tasks between smaller teams. However, these groups must communicate frequently to ensure separate design considerations work as a cohesive whole.

A DevOps approach is helpful here. DevOps has helped 49% of its adopters achieve a faster time to market, and 61% report higher-quality deliverables. It also includes space for both detailed work and team-wide meetings to keep everyone on track. Such benefits ensure you can remain productive in a bottom-up strategy.

Accessible Websites Need A Bottom-Up Design Approach

You can’t overstate the importance of accessible website design. By the same token, bottom-up philosophies are crucial in modern site-building. A detail-oriented approach makes it easier to serve a more diverse audience along several fronts. Making the most of this opportunity will both extend your reach to new niches and make the web a more equitable place.

The Web Accessibility Initiative’s WCAG standards are a good place to start. While these guidelines don’t necessarily describe how to apply a bottom-up approach, they do outline critical user needs and accessibility concerns your design should consider. The site also offers a free and comprehensive Digital Accessibility Foundations course for designers and developers.

Familiarizing yourself with these standards and best practices will make it easier to understand your audience before you begin designing your site. You can then build a more accessible platform from the ground up.

Additionally, the following are some valuable related reads that can act as inspiration in accessibility-centered and user-centric design.

By employing bottom-up thinking as well as resources like these in your design approach, you can create websites that not only meet current accessibility standards but actively encourage site use among users of all backgrounds and abilities.

Further Reading On SmashingMag

30+ Typography Trends for 2025

Featured Imgs 23

Want to give your design a quick facelift? Using new and interesting typography trends might be the answer. Designers are using bold colors, cutouts, gradients, and even customizations to create lettering that stands out.

Changing typefaces or recreating an image or header in a trending style can give a design a fresh look without a full-scale overhaul. Not sure where to start? This list features typography trends with examples to use as inspiration for how to use them.

Here’s a look at the top typography trends this year.

1. Brutalism Typography

Brutalism Typography trend

Brutalism design is one of the few and rare design trends that survived many decades. This trend dates back to the 1950s. It started out as a design trend in architecture and later inspired many print and digital designs, including graphic design, web design, and even typography.

Brutalist typography is simple and straightforward. There are no fancy typography elements or decorative shapes necessary to convey the idea. It’s simply text with clean, clear-cut letterforms and it gets the job done.

More designers are adopting this design trend to create striking typography for various designs ranging from posters to website headers. It especially works well for bold, raw, and Monochromatic-style designs.

2. Liquid Text

Liquid Text trend

Giving a melting or liquid look to your typography is nothing new. You’ve probably seen it used by food and drink brands. However, there’s a new variant of this trend sweeping across the digital design world.

This new variant of liquid text design only liquefies parts of the letters to create a unique hybrid look. Designers are using this trend in various ways by combining it with other design trends like outline text and retro fonts.

The unique look this trend creates fits perfectly for trendy brands and timely marketing campaigns, especially for fashion and lifestyle branding designs.

3. Ink Traps

ink traps trend

Ink trap is a popular technique used in print design when printing in small sizes where corners get removed from letters to trap the ink. So when it gets printed, the ink spreads to those removed areas, preventing the ink from spreading outward.

Ironically, this inspired a new trend in modern digital typography. We are now seeing new fonts being created inspired by ink traps featuring letterforms with deep corners, mimicking the ink trap-style design.

It certainly adds a very unique look to typography and gives a distinctive vibe to titles and headings.

4. Bubbly Text

Bubbly typography trend

Bubble fonts and typography are making a comeback. Inspired by typography designs from the groovy 1970s, this bubble text trend can now be seen everywhere.

The fun, creative, and playful look it adds to the text is unmatched. It’s one of the many reasons why designers choose this style to create titles and text for brands with playful vibes.

The bubbly text trend also comes in many different styles and variations, including ones with balloon-style letterforms as well as urban graffiti-style letters.

5. Big, Chunky Titles

Big, Chunky Titles trend

When it comes to creating titles that instantly grab attention, nothing beats a good old-fashioned big, chunky letter design. That’s part of why this typography trend has survived many decades and is still relevant today.

Designing titles and headings with big, chunky letterforms is the most effective way to craft typography that stands out. This trend also has diverse use cases across various genres. With a slightly playful font, you can make it fit in with a lifestyle brand. Or with a clean-cut letter design, you can use it for a luxury brand.

6. Art Deco Typography

Art Deco Typography

The beautiful symmetrical lines and sharp edges of the Art Deco style completely transform the look and feel of typography. The blend of elegance and sophistication it brings is unmatched by any other design trend. It’s no wonder why this typography trend has survived longer than a century.

Over the past few months, we saw many brands and marketers use the Art Deco trend to their advantage to create typography that evokes a sense of nostalgia and takes people back to a time when things were simpler.

Art Deco typography is also often used in visual storytelling, especially on websites, posters, and packaging designs. Clearly, it’s a trend that will evolve and stay relevant for many more years ahead.

7. Psychedelic Fonts

Psychedelic Fonts

The psychedelic design trend has been a popular choice among designers who seek to break free from the traditional and common ways. And it has now made its way over to typography as well.

The bold shapes, curves, and distorted letters of the psychedelic fonts give logos, titles, and badges a unique look inspired by the aesthetics of the 1960s and the hippy culture. The psychedelic typography trend does a great job of bringing out a chill and relaxing feeling while also mixing a sense of a rebellious vibe.

8. Urban Graffiti Titles

Urban Graffiti Titles

Lately, we’ve been seeing less and less graffiti art out on the streets. Graffiti art is one the purest forms of creative expression, especially the graffiti typography is something that always catches your eye. So we’re glad to see this art form transform into the digital world.

Designers have been using graffiti-style typography with various types of graphic designs over the past few years and it seems to be growing in demand. The main reason for the popularity of this typography trend is its ability to create a bold, urban vibe with a gritty aesthetic. The raw, real-world look of the graffiti typography is quite unmatched.

9. Retro Disco Text

Retro Disco Text

The disco era is a time period that everyone longs for regardless of age. The current revival and popularity of disco-style music among modern musicians prove that even the younger generations are enjoying this trend.

As a result of this newfound desire for the disco era, disco-style retro typography is also making a comeback. Nothing beats this typography trend when it comes to creating titles and text that exude fun and energetic vibes.

The blend of retro rainbow colors, sparking elements, and classic weathered textures make this trend one of the best for designing typography for everything from posters to brand logos and much more.

10. Elegant Royal Fonts

Elegant Royal Fonts

This growing typography trend is the go-to choice among many luxury and high-end brands that seek to convey a sense of authority and class. The way it creates a sophisticated and regal look often adds a Royalty-like vibe to any logo, badge, label, or packaging design.

Often used in combination with gold colors, royal-like ornaments, and stylishly curved letterforms, the royal typography trend often succeeds in enhancing the luxurious feel of various types of designs.

Elegant royal-style fonts are also a great choice for adding an authentic and traditional look to create a timeless feel for any digital and print design.

11. Neo-Futuristic Techno Vibes

Futuristic Techno Vibes

When talking about futuristic techno-style designs your mind often goes to neon colors and Cyberpunk-style designs. But that’s not what this new trend is all about. Neo-futuristic techno typography offers a much more gritty and bold vibe for creating a strong futuristic industrial look.

This trend is often seen on modern websites and poster designs as it helps create better visibility for your text and titles. The fonts designed in this style often have sharp letterforms with monospaced characters. It also uses strong contrasting colors to make your text pop with a clean, minimal, and stylish look.

12. 3D Text

3d text trend

The 3D typography trend is evolving beyond just blocky, extruded text into more creative styles with perspective views and unique letterform designs.

With easier access to 3D modeling tools like Blender and new 3D tools in Adobe Illustrator, crafting these unique 3D typography designs is now much easier than ever.

Especially when designing with a retro-futuristic style, the 3D text and typography fit perfectly for creating a more immersive look and feel. This trend will likely evolve beyond this year and last for many more years ahead.

13. Variable Fonts

Variable Fonts typography trend

Variable fonts are slowly gaining in popularity as more designers are choosing the new format for their design projects. There are many benefits to using a variable font in your designs and having flexibility is one of them.

When using variable fonts, you have the flexibility to create unique typography with different styles of letterforms, weights, and features without having to use multiple fonts. Variable fonts come with multiple styles packed into one font.

Designers are now finding unique ways to take advantage of this technology to create incredible typefaces with inventive designs.

14. Rounded Typography

Rounded Typography trend

The rounded typography trend has been around for several years. However, designers are now taking this trend to new heights by leveraging the new tools available in design software such as Photoshop and Illustrator.

These new rounded typography designs feature more geometric-style rounded letterforms with a soft and aesthetically pleasing look for big titles and headings. Today, the trend is often used in branding designs and packaging designs.

15. Vertical Text

Vertical Text

Usually, we don’t recommend throwing readability out the window but it appears to be the latest trend to take over the design world, especially website designs. This trend will have you tilting your head sideways, literally.

Actually, it’s a clever way to grab attention and engage with the website visitors. It arouses your curiosity and makes you tilt your to read the text.

Designing text and titles sideways in a vertical alignment will also work for banners and posters. You should use large and bold fonts with a clean letter design for this strategy to work more effectively.

16. Unaligned Text

Unaligned Text

Oftentimes, when designers defy the rules and guidelines, things don’t go well. This new trend is a rare exception where we can disregard the guidelines to make unique typography creations.

Keeping text aligned is an important part of designing typography. This guideline is quite important when designing websites as well as other mediums of digital and print designs. However, breaking this rule seems to be one of the most popular typography trends these days.

We’ve been seeing this unaligned text trend everywhere from websites to posters, album covers, social media posts, and everything in between. Without a doubt, we’ll be seeing it throughout this year too.

17. Mixed Typefaces

Mixed Typefaces

Surely, you must’ve thought about this once or twice while designing fun title designs for projects. Mixing multiple typefaces to design a title sounds fun but we are often afraid to go there. Well, now you have permission to try it out thanks to this new trend.

The BMW Motorrad website uses clever animation to infuse this mixed typeface design in a subtle way. However, you don’t have to go to such extreme levels. You can start by blending a few outline and condensed fonts with your regular typography designs.

Admittedly, we haven’t seen this trend a lot but we hope it will catch on this year.

18. Stretched-Out Titles

Stretched-Out Titles

We’ve seen ultra-condensed title designs, tall and narrow typography designs, but this new trend combines them together to spawn a new way to craft titles by simply stretching them out as much as you can.

It doesn’t matter which way you stretch it. You can stretch it vertically or horizontally. You could also stretch just a couple of letters while the rest of the letters stay the same. The result will always be something pretty wild.

The good news is you don’t always have to go into free transform mode to stretch your text. There are now fonts out there with stretched-out letter designs made for this new trend.

19. Fullscreen Titles

Fullscreen Titles

The title is arguably the most important element of most graphic and web designs. You often try different trends and strategies to try and bring more attention to it. So, why not make it as big as the entire canvas and be done with it?

Well, that’s exactly what this new trend is all about. Basically, you just make the title as big as the screen or the design canvas. You can use tall and bold fonts to grab extra attention as well.

It’s a very simple and easy way to make your typography designs stand out, especially for making bold statements.

20. Pixelated Fonts

pixelated fonts

Pixelated style of text and typography designs is quite popular among tech brands and startups. It adds a subtle tech-savvy look to any design that’s also relatable and familiar to many people who grew up playing pixel-art video games.

Intentionally adding a pixelated look to text is now much easier with many pixelated fonts to choose from. These fonts come in various styles ranging from the classic 8-bit style to modern pixel art designs.

Whether it’s to add a bit of nostalgia to your designs or to make titles look more playful, this is a typography trend that’s worth keeping an eye out for this year.

21. Neon Outline

neon outline

This isn’t exactly a new trend but it is something that we are likely to see growing this year. Inspired by the bright neon signs from the 80s and the 90s, this typography design gives a classic retro look to your titles with neon glowing outline letters.

Adopting this trend is also much easier than most other trends on our list. All you have to do is find an outline font and apply a neon glowing effect.

You can add more style and appeal to it with animations. In the above example, the website uses a subtle flickering effect to make the text look more like a glitching neon sign.

22. Thin and Condensed

typography trends

The next two trends have a very yin and yang feel to them. Here, thin and condensed lettering is gaining popularity. Once taboo, a predominance of high-resolution screens has made this style of typography more readable and easier to work with.

Again, this trend needs just the right words and typeface to be effective and works best when you aren’t delving into exceptionally long blocks of text.

In the example above, thin and condensed lettering perfectly fits the style of the overall design and is complemented on the scroll with a monospaced, highly readable option.

23. Slabs

typography trends

On the other end of the spectrum from thin typefaces is the use of slabs.

While bold headline options have always been rather popular, many designers have shied away from going all-in with slabs because, like caps, they can seem to scream at users. The trick is to combine spacing, short phrasing, and readable typefaces so that usage is an asset, not a challenge.

What we love about the example above is the use of a smaller slab headline at the bottom of the homepage, with super friendly and soft imagery to balance the weight of the font itself. It highlights the importance of the words in an approachable way.

24. Outline Fonts

typography trends

Outline fonts are a big deal.

You’ll find this trend mostly in the hero area of web pages for the main copy. While uses vary somewhat there are a few elements that you’ll find almost every time:

  • Sans serif typeface
  • All caps text for outline letters
  • Paired with filled lettering
  • Oversized text elements

Outline font options can be a lot of fun to use. You just have to be cautious when it comes to readability. Letters can get lost in background images and videos quickly. So take care with color, contrast, and placement.

And don’t overdo it. An outline font works best for a point of emphasis, not to create your entire message.

25. “Unreadable” Layers

typography trends

The next two typography trends and somewhat similar and both break an unexpected rule: They are a bit unreadable. But that’s ok because the rest of the design fills in the blanks and keeps the site interactive.

In this example of the trend, oversized text elements are in a layer behind a foreground element. Every other type element on the screen is highly readable to provide plenty of support for the element that isn’t.

The foreground object also, in the example above, fades in and out over the text so that you can read it back and forth.

The final element that helps pull it all together is the idea that the word isn’t vital to the design. It’s the brand name, which you might know from the logotype, but is less important than what the company/website does.

26. Text That Goes Off the Screen

typography trends

Following the trend of “unreadable” layers are text elements that lose readability because they animate on and off the screen. This typography effect is all over the place and often paired with an oversized font and just a couple of words that scroll toward the left side of the screen.

This typography trend works best when there’s not a lot of other motion on the screen and the words are readable with just a few seconds of watching. If the text is too complicated, you risk users never figuring out what the words say.

As with the previous example, make sure the supporting text elements provide plenty of information so that people know exactly what the design is about.

27. Experimental Typefaces

mobile cards

Experimental typefaces are all the rage with expressive and interesting styles that add plenty of personality to design projects. Experimental typefaces come in a lot of different forms – they may include funky shapes or strokes, color, or animation.

The best part about these type-styles is that they can inject a unique, and very specific, vibe into a project.

You can find experimental typefaces from several different foundries or independent type designers. If you want to take a peek at some new experimental options, head over to Typelab.

28. Short, Fat Fonts (Low X-Heights)

mobile cards

Another type style that is trending in a major way is typefaces that have short stature and wide stance. Many of these typefaces feature all-caps character sets, but when they feature lowercase letters, can be identified by a low x-height.

This type style tends to work best when there’s not a lot competing with it on the canvas. It’s also best suited for shorter words or phrases, due to readability.

These short, fat fonts also work best for designs that have a super-modern feel. They are almost futuristic in scope and design in many instances.

29. Handwriting Styles

mobile cards

The Sharpie marker style is quite popular among website designers when it comes to display typefaces. And there are plenty of handwriting typefaces to choose from so that you get just the right look and feel.

Much of the current handwriting typeface trend is focused on printed letters with upper and lowercase characters with thicker strokes and a bit of roughness to them.

Typefaces might also include little extra embellishments that make certain characters feel even more special. When it comes to handwriting styles with more cursive or script-type designs, you are likely to find long tails and elaborate swashes.

30. Subtle Gradients

typography trends

Designers just can’t seem to get enough of gradients. (I’ll admit to being one of them!)

Subtle gradients as an accent in typography are the next evolution of this trend.

What’s nice about the trend is that gradients are so subtle that you might not even see them at first. There’s just a slight variance in the color that helps pull the eye across the lettering.

Gradients are best used with thicker typefaces and to accent specific words or phrases.

Be careful not to overdo it too much. A good text gradient maintains consistent contrast across the word so that it’s not jarring to read and so that it stands apart from the background.

31. Animated Typography

typography trends

One of the biggest overall trends in design is animation. And there’s no reason this can’t apply to typography as well.

More designs are using lettering that moves, shifts, or is impacted by a hover state (such as the example above). All of these techniques can lead to a more interactive, richer user experience.

When animating text, it’s important to consider how and where users will be reading the information (some animated elements such as video don’t work well on all mobile devices yet). Make accommodations so that even if the animation doesn’t work properly, there’s still a worthwhile user experience where messaging is clear.

In that regard, the best text animations often start with lettering that is clear and easy to see. Animation comes into play after a delay or as part of user interaction. This can delight and surprise users (maybe even resulting in more time on-site).

Consider speed carefully with typography animations – if the text moves too fast, users will miss the message completely; if the text moves too slowly, users might click away before reading all of the content. It must be just right. (User testing can help you find an ideal speed.)

32. Stacked Text Blocks

typography trends

While typography is trending toward being somewhat smaller in size, it still carries just as much weight. Designers are stacking multiple lines of text, particularly in hero headers, for a weighted message with more words.

The trend is important to note because it shows a shift in trying to communicate a little more fully with users and less of an expectation that one word will be enough to entice someone to engage with a design. More information presented in a visually engaging way can be a better solution that leads to more user engagement.

The key considerations when it comes to stacking multiple lines of text are to find a typeface that is readable when used with more letters (or even when used in all caps, which is a popular option), has adequate linespacing so that lines are easy to distinguish and that breaks in the copy are logical. When stacking text, there should be a distinct flow from line to line that’s both obvious in how to read the words and that users should move to the next line of copy before any other part of the design.

Because of challenges with line breaks and ease of reading, text stacks are often on one side of the screen so that the designer has more control. This structure can also create harmony between a text element and another visual on the screen for an asymmetrical balance that’s appealing to look at.

33. Color Fonts and Type

2019 typography trends
While there was a lot of black and white text in more minimalist styles, colors are roaring back.

Color fonts are a class of type of their own and have popped up all over the place. They’re more popular than many originally expected and have fun applications in design projects.

You can read all about color fonts here in our beginner’s guide. The concept of color fonts has opened up more projects to color in typography overall as well.

While there was a lot of black and white text in more minimalist styles, colors are roaring back. Many designers are using bright color typography with minimal styles, such as the Tilted Chair, above. Color can add extra visual interest and emphasis on the words in color.

Bright options, such as the red in the example, help draw the eye and serve as a great springboard for messaging, building brand identity, and drawing users into the design.

34. Cutouts and Overlays


2019 typography trends


Both of these techniques have a lot of visual interest and can be fun to create.

Layered effects are a great way to make a design look a lot less flat. Doing it with typography can be a nice option.

Cutouts and overlays refer to text elements that have no color fill. A cutout allows whatever is in the background layer to show through the type design, such as the animated sports imagery in the example above. An overlay is often transparent lettering over a background so that you can see the background through letters while still reading them.

Both of these techniques have a lot of visual interest and can be fun to create. They work best with large lettering, not many words, and a display typeface.

Overlays work great with photos, textures, or even video backgrounds. Just make sure to avoid a lot of other design effects when using this technique. (You don’t want to overwhelm the user.)

35. Layering with Other Elements


2019 typography trends


In most projects, text elements and other elements are kept fairly separate. But that idea has changed quite a bit and designers aren’t shying away from allowing text and other elements to overlap. The end result can be pretty cool and actually help users focus on the words on the screen a little more.

While the most common uses of the typography trend in practice are text elements that overlap boxed images or color, MJND kicks it up a notch. This design merges the person in the image with typography so that it is cut out around him (like the person is walking into the words).

This is a technique that comes from print design where it is more popular – and quite honestly easier to execute – and can create a stunning display. The trick is having the right image and maintaining the readability of every single letter. (Be careful not to create unintended words because of missing character strokes or parts.)

36. “Overdone” Effects

2019 typography trends
No effect is off the table.

It’s not often that “overdone” is used favorably when talking about any design technique. But when it comes to the overdone typography trend, it can work.

This type trend has a retro feel and is characterized by text and text effects that are so over the top that you must read the words. There are outlines and shadows and bevels and fades and crazy colors. No effect is off the table.

And the more effects you pile on, the more users might look. This style works best with a simple design scheme, such as Schnitzel Love, above.

Conclusion

When using these trends in your designs, remember to carefully analyze your brand style and target audience to ensure they match the message your designs are conveying.

Be sure to bookmark and follow our Trends category to stay on top of all kinds of design trends.

Comparing Cloud Giants: Firebase, AWS, and Azure for Your 2024 Projects

Featured Imgs 23

As the cloud computing landscape continues to evolve, choosing the right platform for your project can be challenging. Firebase, AWS, and Azure are three leading cloud providers, each offering a range of services tailored to different needs. Whether you’re building a web app, a mobile app, or a complex enterprise solution, understanding the strengths and …

The post Comparing Cloud Giants: Firebase, AWS, and Azure for Your 2024 Projects first appeared on Lucid Softech.

Looking for AI app developers

Featured Imgs 23

Hi all,
My team and I is making an open-source library for running AI models on the phone. We are planning to create a very simple SDK which will allow you to download a model and use it on your phone. We plan to release an initial version in a month. Our library is based on llama.cpp and whisper.cpp.

We are looking for app developers who want to build mobile apps with this functionality in order to understand their needs better. Have in mind that models will be running slower on the phone than they can run on a laptop. We want to understand what uses this library could have.
If anyone is planning to build a mobile AI app, please let me know.

How Go-to-Market Teams Can Grow With AI, According to HubSpot’s Head of Product

Featured Imgs 23

Easy, fast, and unified. We’ve talked to a lot of customers about what they need from their tools to grow, and it always comes back to these three words. So why does go-to-market feel so hard, slow, and disconnected? Two words: legacy CRM.

The concept of customer relationship management (CRM) has existed for decades, and there are more tools than ever for understanding and engaging with customers.

The problem is, legacy CRMs have never fully delivered on the promise of being the source of truth about your customer. They are too hard to use and adopt and, even in the base case scenario, they struggle to capture engagement data about your customer.

We now have many great tools to help fill in the gaps, but they’re disconnected, often creating more work and a worse experience for your team.

AI has the promise to change the way we work and engage with customers, but runs the risk of becoming a disconnected burden. The only way to grow is with a unified customer platform, with AI that has access to your customer data and powers your engagement tools. Everything is easy to use with fast time to value, so you can truly grow.

But I want to talk about one of those attributes in particular: easy.

Download Now: The Annual State of Artificial Intelligence in 2024 [Free Report]

Today, the average company switches between 15 separate apps just to manage their customer interactions. Let’s contrast this with the fact that 82% of customers expect immediate problem resolution from brands, while 78% want personalized interactions. When it’s hard to even manage the tools you’re using to interact with customers, it’s even harder to meet their expectations.

This is where AI comes in. It’s not just the topic du jour, we’re already seeing real value from customers when their AI is easy to use. Early adopters of our AI features are not just accelerating their productivity, but their growth.

Our customer Sandler used our AI tools for creating content and personalizing outreach. They cut their sales cycles by half — from 90 days to between 30 to 45 days. Another customer in the manufacturing space, Aerotech, is now winning one in every four deals because they use our AI to qualify leads and guide seller actions.

We want to make it easy for everyone to grow with AI, which is why we recently launched Breeze, our AI that powers the entire customer platform. We’ve made it easier than ever to use AI everywhere you work, and to get value fast.

4 Ways AI Can Help Teams' Go-to-Market Strategies

Most GTM teams have spent 2024 trying to fit AI into their strategies. When AI is a breeze, it’s easy to implement and teams can see value fast. Here are my four tips for using AI in your GTM:

go to market strategies

1. Start with Data Enrichment

Who it helps: Marketing, Sales, RevOps, Customer Service, Customer Success

How It Improves the Strategy

Your AI is only as good as the data that powers it. The problem is, data about your customers is all over the place. It’s scattered across the internet like puzzle pieces, and unless you can put it all together, you aren’t getting the full picture.

While the data in your CRM that captures your interactions with customers is great, just this data alone is no longer enough. You need to know what signals your customers are giving you based on their behavior on the internet, and you need to have a unified view of that behavior in your CRM.

Now, with Breeze Intelligence, you can get the most unified view of your customer yet. Breeze Intelligence includes a data set of over 200 million company profiles and buyer intent signals, and unifies that with data you have in your Smart CRM.

This complete customer picture just became the context that feeds Breeze, and your AI tools are now working with the most holistic and up-to-date information on your customers.

2. Analyze Customer Signals

Who it helps: Marketing, Sales

How It Improves the Strategy

As a sales rep, you want to spend your time talking to prospects who are most likely to close a deal. AI can analyze buyer intent signals like viewing a pricing page. Automated lead scoring helps sales reps understand who to focus on.

Lead scoring isn’t just for sales. AI can take dozens of data points about your lead’s behavior — what I like to call their digital body language — to assign them an engagement score and a fit score. With these signals, you can send segmented marketing content to nudge prospects to buy, re-engage, or buy again.

3. Create and Remix Content at Scale

Who it helps: Marketing

How It Improves the Strategy

Marketers tell us that finding ideas for new content is the number one challenge they face. Not anymore. AI tools can brainstorm, write, and illustrate relevant content. They can even create videos.

Embedding AI into your content strategy is more than just a volume play. It helps you reach different audiences.

Ask five customers for their favorite marketing channel, and you’ll get five different answers. AI can remix and reformat content for every channel where your customers spend time. You can turn a single video into a full AI campaign with clips, ads, audio for podcasts, and social posts.

ai content remix

Image Source

The marketing strategies that got you where you are won’t get you where you’re going. Producing more of the same posts or videos isn’t the end goal. AI-assisted content means you can adapt and react quickly to whatever comes next.

4. Put Agents to Work

Who it helps: The entire Go-To-Market and your Customers

How It Improves the Strategy

Nowhere is the promise of AI as great as Agents. Simply put, Agents are software that uses AI and tools to accomplish goals with multiple steps. They work for your business. You can think of it like automation 2.0, but instead of configuring a workflow, you simply ask the agent to do a task for you and it completes it from start to finish.

We just launched four new agents in Breeze: Content Agent, Social Media Agent, Prospecting Agent, and Customer Agent. Businesses can use these Agents to transform their growth. For example:

  • Content Agent generates blogs, landing pages, podcasts, and case studies.
  • Social Agent analyzes social performance, company details, audience, industry, and best practices to create social media content for multiple channels.
  • Prospecting Agent engages leads by researching them, personalizing communication, and automating the outreach process.
  • Customer Agent is the 24/7 service team member that responds directly to customer inquiries.

With these team members at the ready to help you automate the mundane work, you will free up time for the critical human touch in the most strategic areas of your GTM — and your growth will skyrocket.

How HubSpot Can Help

So, let’s return to our three essential growth ingredients: easy, fast, and unified. That's where HubSpot comes in.

Instead of disconnected tools, we give you a total customer platform. Every feature is easy to use and works together, including over 1,700 apps in our ecosystem. We deliver value fast, so you can see results in days, not months.

Finally, we obsess over unifying the customer platform. Everything works in harmony together, and you always get a complete customer picture.

Whether you’re a marketer, a sales rep, or a customer success leader, remember this: You hold the key to growth in your business.

The only way to grow is with a platform that’s easy, fast, and unified. Period. We’re as obsessed with your growth as you are, and that’s why we promise to keep prioritizing these three things.

The Proliferation and Problem of the ✨ Sparkles ✨ Icon

Featured Imgs 23

Kate Kaplan hits on something over at Nielsen Norman Group’s blog that’s been bugging me:

The challenge with this icon is sparkle ambiguity: Participants in our recent research study generally agreed that it represented something a little special. But, what was that something? And why was it special? That was less obvious. We encountered widely and wildly varied interpretations.

Man, I hate those sparkles. Correction: I loathe it as an icon but I use the heck out the ✨ emoji. I may even go so far as to say that my favorite thing about Dave Rupert’s introduction to web components is that it is littered with emoji every time the word “superpower” is evoked.

(Correction for the correction: I love everything about Dave’s introduction to web components. Take the full course!)

Sparkles get closer to becoming the unofficial AI icon every time a new one makes its way into some new app’s UI — the same way some menus became hamburgers and others became kebabs.

It’s ambiguous, right? I will say that I was stoked to see Notion roll out a fresh new icon for their AI feature just this week:

A face is interesting! I find human heads less compelling, especially when they’re realistic. Same deal with robot heads, which is another theme you can spot in the wild. But a face, particularly one that’s on the whimsical side as a line drawing, looks like it could work in this context that’s specific to Notion. I imagine another company or app having a tough time pulling off the same icon because this one is so closely tied to Notion’s overall branding:

Showing two rows of four black-and-white line-drawn icons used on the Notion website, including the newer AI icon on the first row.
See how nice it is next to the rest of Notion’s icons?

I also like how Notion has several versions of the icon for use in different situations.

Four variations of Notion's AI icon displaying different facial expressions.

And, yes, it animates as well:

It’s the button that persists in the bottom-right corner.

I’m not saying Notion’s landed on a silver bullet. What I am saying is that they’re doing a great job transitioning from an ambiguous one to a more meaningful one, something that Kate articulates extremely well:

[S]parkles are used frequently to represent not only AI features and capabilities but also completely unrelated features and content, such as visual effects, deals or rewards, personalized ads, and new content.

I get worked up about this because I own a pessimistic and assumptive view that the proliferation of sparkles icons reeks of marketing. There’s no way for me to know this, of course, but I’ll unabashedly don my tinfoil hat for this one.

Anyway, Kate’s article is a much more thorough investigation that’s worth the deep dive — it’s a selection pulled from an entire book on the topic of successful icon design. I’ll leave you with a sobering quote:

Finally, I also predict that the icon’s association with AI-driven features will get stronger in the immediate future. So, for the time being, using it to indicate AI-driven features (or even simply new features) may be useful. Over time, as AI-driven features become more common or even expected across interfaces, there will be less of a need to call them out. It won’t matter that the features are AI-driven; it will matter only that they are present and meet user needs.


The Proliferation and Problem of the ✨ Sparkles ✨ Icon originally published on CSS-Tricks, which is part of the DigitalOcean family. You should get the newsletter.


from CSS-Tricks https://ift.tt/BajEMGX
Gain $200 in a week
via Read more

80+ Best Lightroom Presets for Portraits (Free & Pro) 2024

Featured Imgs 23

You don’t have to be a pro photographer or a graphic designer to optimize and enhance your portrait photos. With the right Adobe Lightroom preset for portraits, you can apply stunning effects, all by yourself.

In this collection, we feature the best Lightroom presets available for quickly optimizing your portrait photos, selfies, wedding photos, and family photos.

Using these Lightroom presets for portraits, you can enhance your photos like a pro by applying effects instantly (and even customize them to your preference with ease). And don’t forget to read through our tips for using presets on portrait photos for helpful advice on how to integrate them into your workflow!

Top Pick

14 Lightroom Presets for Portraits

14 Lightroom Presets for Portraits

This is a bundle of 14 unique Lightroom presets featuring optimizations and effects specifically made for improving portrait photos. Each preset works with different types of portraits including family, newborn, wedding portraits and more. The presets are non-destructive and work with Lightroom 4 and higher as well as the mobile version.

Why This Is A Top Pick

It’s a way to quickly get a pack of versatile presets that work for a whole range of different portrait situations and styles.

Heliodor – Lightroom Presets for Portraits

Heliodor - Lightroom Presets for Portraits

Make your portraits shine bright with more colors and beautiful tones using this Lightroom presets pack. It comes with 13 different presets for you to experiment with. Each effect can be easily adjusted to match your photos. And they work with just one click.

Blue Topaz – Cool Tone Lightroom Presets

Blue Topaz - Cool Tone Lightroom Presets

This Lightroom preset pack will make your photos look cooler than ever with its stylish blue color tone. The preset features an easily editable effect with a non-destructive workflow. You can use the effect on smartphone photos as well.

Simple Way – Elegant Lightroom Presets for Portraits

Simple Way - Elegant Lightroom Presets for Portraits

This bundle includes a collection of professional presets that create a very elegant look for portrait photos. It includes a subtle moody color tone that transforms your portraits into picks from a fashion magazine photoshoot.

Lemon – Color Tone Portrait Presets for Lightroom

Lemon - Color Tone Portrait Presets for Lightroom

If you want to make your portrait photos stand out from the crowd, this Lightroom preset is a must-have for you. It features a unique yellow color-themed effect that gives a pop art-style look to your photos. There are 4 presets in this bundle.

Escape – Free Lightroom Preset for Portraits

Escape - Free Lightroom Preset for Portraits

This is a free Lightroom preset you can use to enhance your portrait photos with a warm and vibrant color tone. It works perfectly for outdoor photos, especially for photos taken in natural light.

10 Rustic Earthy Lightroom Presets

10 Rustic Earthy Lightroom Presets

This pack includes high-quality Lightroom presets designed to enhance your photos with rustic, earthy effects. Ideal for travel, lifestyle, and fashion bloggers, these presets can help you achieve a consistent, beautiful aesthetic for your Instagram feed, blog, or portfolio. Supported formats include DNG, TIFF, and JPEG.

15 Pastel Dreams Lightroom Presets

15 Pastel Dreams Lightroom Presets

A remarkable collection of Lightroom presets that makes taking your photo aesthetics to the next level effortless. With just one click, these clean, professional presets transform digital portraits into captivating visuals.

Cinematic Lightroom Portrait Presets

Cinematic Lightroom Portrait Presets

Explore the artistic potential of your photographs with this Lightroom preset pack. Containing 15 unique premium presets, you can effortlessly transform your portraits to render a dramatic, movie-like quality.

Soft Warm Lightroom Presets for Portraits

Soft Warm Lightroom Presets for Portraits

A collection of Lightroom presets perfect for enhancing bloggers, travel, lifestyle, and portrait photography. This package includes seven high-quality professional presets in both DNG and XMP formats, with these warm, soft effects.

Portrait LUTs And Presets for Lightroom

Portrait LUTs And Presets for Lightroom

This collection is perfect for travel vloggers, bloggers, and influencers aiming to enhance their images. The package includes LUTs compatible with various editing software, DNG preset files for the Lightroom mobile app, and XMP preset files for Lightroom Desktop and Photoshop CC.

Fitness Portrait Lightroom Presets

Fitness Portrait Lightroom Presets

These Lightroom presets are ideal for enhancing fitness portrait photos. Crafted for versatility, these presets can significantly improve your images with just a single click, though adjustments can still be made for individual photos. The pack includes 10 different effects.

20 Stay Gold Lightroom Presets and LUTs

20 Stay Gold Lightroom Presets and LUTs

Recommended for travel bloggers and lifestyle influencers, these Lightroom presets provide a golden finish to your photos. They are ideal for defining a luxurious and indulgent visual aesthetic. There are 20 different effects included in this pack.

10 Rose Gold Lightroom Presets

10 Rose Gold Lightroom Presets

This presets pack is perfect for enhancing the quality of various types of photos, including travel, fashion, or lifestyle. Ideal for creating a cohesive aesthetic Instagram feed, blog, or portfolio, these presets are high quality, professional, and versatile.

10 VSCO Film Lightroom Presets

10 VSCO Film Lightroom Presets

A quick and easy way to add professional quality edits to your photos, these Lightroom presets are perfect for enhancing travel, lifestyle, and fashion images. They provide an array of modern colors and unique styles to instantly lift your portrait photography.

Warmhy Lite Lightroom Presets for Portraits

Warmhy Lite Lightroom Presets for Portraits

Add subtle effects to enhance your digital photography with these Lightroom presets. Ideal for bloggers, travel, lifestyle, and portrait images, this high-quality package includes 7 professional presets in both DNG and XMP formats.

Tanzanite – Bright Color Lightroom Presets for Portraits

Tanzanite - Bright Color Lightroom Presets for Portraits

Your portraits and selfies will look more professional when you enhance them with this Lightroom presets pack. There are 13 presets in this bundle that are compatible with Lightroom desktop, mobile, and CameraRAW.

Asian Cinema – Lightroom Presets & PS Actions

Asian Cinema - Lightroom Presets & PS Actions

If you’ve ever wanted to make your photos look like a scene from an Asian film, this Lightroom presets pack is for you. It includes 5 beautiful cinematic effects that are available in both Lightoom and Photoshop action formats.

New Tone – Lightroom Presets for Portraits

New Tone - Lightroom Presets for Portraits

The subtle and natural effects used in these Lightroom presets will help make your photos look more professional. There are 4 presets included in this pack that are ideal for modern lifestyle and fashion photography.

Just Love – Portrait Photo Presets for Lightroom

Just Love - Portrait Photo Presets for Lightroom

Turn your romantic portrait photos into classic masterpieces with this Lightroom presets pack. It includes multiple presets that allow you to give a classic nostalgic vibe to your photos.

Fuji 100 – Free Lightroom Preset for Portraits

Fuji 100 - Free Lightroom Preset for Portraits

Grab this free preset to make your portrait photos look more colorful and vibrant. It beautify photos with its bright tone inspired by classic film cameras, specifically the Fuji 100 camera.

Badalona – Portrait Lightroom Presets

Badalona - Portrait Lightroom Presets

If you’re looking for a moody effect to turn your portrait photos into professional works of art, this preset pack is perfect for you. It includes 10 different Lightroom presets for giving your portrait photos a dark and moody look.

Sweet Tones Portrait Lightroom Presets

Portrait Lightroom Preset

Add a beautiful and sweet pink color tone to your portraits to make them look more stylish with this pack of Lightroom presets. These work with both desktop and mobile versions of Lightroom. Even if you have the mobile app on your phone, you can use theme presets with ease. The pack comes with 11 different presets.

Light & Airy Portrait Lightroom Presets

Portrait Lightroom Preset

Make your photos look brighter and more natural using these Lightroom presets. Light and airy presets are designed to optimize the lighting conditions of portrait photos and add a more natural look and feel. This bundle comes with 30 different presets you can use with various portrait photos, especially for outdoor photos.

Dark & Moody Portrait Lightroom Presets

Portrait Lightroom Preset

Not a fan of bright and light photos? Then these presets are perfect for you. The bundle includes 32 unique Lightroom presets that allow you to add a dark color tone and adjust the brightness to create a moody look in your photos. These presets are compatible with Lightroom 4 and higher as well as Classic and mobile versions.

Vibrant Portrait Lightroom Presets

Portrait Lightroom Preset

If you want to make your photos and selfies look more vibrant with bright colors, this pack of Lightroom presets will come in handy. It includes 11 presets designed to intensify colors and make your photos more beautiful than they ever were. The presets work with Lightroom desktop and mobile apps.

Free Portrait Lightroom Presets

Portrait Lightroom Preset

With this free Lightroom preset, you can add a dark and gritty look and feel to your portrait photos. The preset can be easily customized to your preference and it works with Lightroom 4 and all the way up to Lightroom CC.

Calvia – Luxury Lightroom Presets for Portraits

Calvia - Luxury Lightroom Presets for Portraits

With this Lightroom preset pack, you can add a high-end look to your photos that you normally see in fashion magazines and photoshoots. The effects work with just one click and you can adjust them to your preference to fit different styles of portraits.

Cyberpunk Lightroom Presets for Portraits

Cyberpunk Lightroom Presets for Portrait

Want to give your photos a futuristic look and feel? Then be sure to download this preset. There are 10 different Lightroom presets in this pack featuring cyberpunk-themed effects and filters. They are perfect for enhancing photos for magazines and posters.

Rikutona – Elegant Mobile & Desktop Lightroom Presets

Rikutona - Elegant Mobile & Desktop Lightroom Presets

This collection of Lightroom presets is ideal for improving fashion photoshoots as well as optimizing your portraits for social media. It comes with 10 presets that are compatible with both Lightroom desktop and mobile apps.

Sandstorm – Free Lightroom Portrait Preset

Sandstorm - Free Lightroom Portrait Preset

A brilliant free Lightroom preset for applying a subtly enhancing effect to your photos. This preset will allow you to add a moody filter to make your portraits look more attractive and memorable.

Modern Portrait Lightroom Presets

Modern Portrait Lightroom Presets

This is a bundle of Lightroom presets for improving portrait photos while giving them a brighter and modern look. They are designed for enhancing both selfies and professional photos. It includes 15 different presets that are compatible with Lightroom and Photoshop Camera Raw.

8 Classic Ports Film Look Lightroom Presets

8 Classic Ports Film Look Lightroom Presets

Want to give your photos a classic film-like look and feel? Then this collection of Lightroom presets are perfect for you. The pack comes with 8 unique Lightroom presets featuring effects inspired by Fujifilm stocks. You can easily customize the effect to fit your own photos as well.

7 Fashion Vibe Lightroom Presets for Portraits

7 Fashion Vibe Lightroom Presets

With this collection of Lightroom presets you’ll be able to give a professional look to your portrait photos that makes them look like a page out of a fashion magazine. These presets are designed to optimized fashion photography. It includes 7 presets for both mobile and desktop versions of the app.

Influencers Lightroom Portrait Presets

Influencers Lightroom Portrait Presets

If you’re improving portrait photos for social media influencers, this collection of Lightroom presets is a must-have. This bundle features 15 different presets designed for enhancing portraits shot in outdoor lighting conditions. The presets can be customized to your preference as well.

Color Pop – Free Lightroom Preset for Portraits

Color Pop - Free Lightroom Preset for Portraits

This is a free Lightroom preset you can use to enhance your portrait photos by optimizing the colors. It’s perfect for improving photos shot in outdoor and low-light conditions.

20 Lifestyle Lightroom LUTs Pack

20 Lifestyle Lightroom LUTs Pack

This bundle comes with 20 different color grading LUTs you can use in Lightroom to instantly enhance your lifestyle portrait photos. These LUTs will work with many other photo editing and video editing apps as well.

20 Victorian Lightroom Presets & LUTs

20 Victorian Lightroom Presets & LUTs

Give your portrait photos a classic Victorian-era look and feel with these Lightroom presets. This bundle comes with 20 different presets inspired by different genres and styles including Dickens, Grisette, Royal, and Gleaner.

50 Cinematic Film Lightroom LUTs Pack

50 Cinematic Film LUTs Pack

With this massive bundle of Lightroom LUTs, you can instantly enhance all kinds of portrait photos to look amazing. You can easily adjust and customize the effects to your preference as well.

6 Gorgeous Look Lightroom Presets + Mobile

6 Gorgeous Look Lightroom Presets + Mobile

Give your smartphone selfies and portraits a professional look and feel using this set of premium Lightroom presets. It features 6 unique presets crafted by a professional and with adjustable settings. You can use them in Lightroom desktop and mobile apps.

Essential Portraits Lightroom Presets

Essential Portraits Lightroom Presets

This collection of Lightroom presets is designed as a starter kit for photographers. It features 20 different presets you can use to enhance different aspects of your portrait photography. The presets are compatible with PSD, RAW, JPG, and many other file formats.

6 Catchy Portrait Lightroom Presets

6 Catchy Portrait Lightroom Presets

Another great set of Lightroom presets for adding a special touch to your portrait photos. This pack includes 6 presets with various effects. They are ideal for making your selfies stand out from the crowd on social media platforms.

39 Sports HDR Portrait Lightroom Presets

39 Sports HDR Portrait Lightroom Presets

Add a gritty look to your sports and gym portrait photos using this collection of Lightroom presets. This pack includes 39 different presets that allow you to add an HDR look to your sports photos.

Free Bold Black & White Lightroom Preset

Free Bold Black & White Lightroom Preset

This beautiful and free Lightroom preset allows you to create an authentic black and white effect to give a classic look to your portraits. The preset is easy to use and you can customize the effect as well.

10 Glamour Pro Lightroom Presets

10 Glamour Pro Lightroom Presets

The presets in this pack are most suitable for enhancing lifestyle and fashion portrait photos. They are designed to make your photos look like they were taken from a magazine photoshoot. The presets can be applied with just one click and customize to your preference.

12 Pro Matte VSCO Lightroom Presets

12 Pro Matte VSCO Lightroom Presets

If you’re looking for a preset to improve your photos for Instagram and social media, this bundle will come in handy. It features 12 different presets made inspired by the popular photography app, VSCO. The presets feature matte-style effects with various faded looks.

50 Sweet Pink Lightroom Presets

50 Sweet Pink Lightroom Presets

Add a stylish feminine pink look to your portrait photos using this big bundle of Lightroom presets. It includes 50 different effects that feature sweet pink and pastel color effects that are perfect for enhancing selfies and portraits for social media.

Portrait Fashion Lightroom Presets

Check out this modern collection of 16 high-quality Lightroom presets purpose-built for fashion, beauty, and lifestyle pictures. A great option if you are looking to make your Instagram feed scroll-worthy!

50+ Lightroom Presets

If you are wanting an extensive collection of Lightroom presets that work well with virtually any kind of picture, you just can’t go wrong with this bundle of 80 plus presets for you to enjoy. It has everything you need to enhance your shots.

Aurum – Portrait Lightroom Presets

Give subtle, warm toning to your images with the help of Aurum, a collection of Lightroom presets consisting of gold tones to liven up your photography. Undoubtedly, one of the best portrait Lightroom presets collection on our list!

50 Sweet Pink Lightroom Presets

Wanting to get your photos noticed and appreciated? This collection of 10 amazing Lightroom presets will help you. The best part is that this bundle is available for free on Creative Tacos. Get your hands on it now!

30 Free Portrait Lightroom Presets

portrait lightroom presets

Great on all types of portraits, these Lightroom presets work on correcting the colors, softening the tones, sharpening the details, and enhancing the overall shot. Give a flawless finish to your pictures using this collection of 30 free portrait Lightroom presets!

Natural Beauty – Free Lightroom Preset

Natural Beauty - Free Lightroom Preset

This is a free Lightroom preset that features a vintage-style effect. It also helps enhance your portraits with color balancing and adjusting tones as well. You can apply it to your photos with just one click.

Faded HDR Effect LightRoom Preset

Faded HDR Effect LightRoom Preset

Enhancing your portrait photos to make them stand out takes a lot of work and time. With this professional Lightroom preset you can easily add a creative faded HDR effect to your photos with just a few clicks. It’ll make your wedding and lifestyle photography look even more amazing.

Indoor Fashion Mobile & Desktop Lightroom Preset

Indoor Fashion Mobile & Desktop Lightroom Preset

Easily make your indoor portrait and smartphone selfies look more professional with this bundle of Lightroom presets. It comes with 11 different presets that allows you to instantly optimize photos and add various effects with just a single click.

Stylish Portrait Pro Lightroom Preset

Stylish Portrait Pro Lightroom Preset

This portrait Lightroom preset is specially crafted to enhance the tone and mood of portrait photos and make them look more professional. The preset is easily customizable and it works great with both outdoor and indoor photos.

Selfie Filters Mobile & Desktop Lightroom Presets

Selfie Filters Mobile & Desktop Lightroom Presets

If you’re looking for a set of filters to optimize your smartphone selfies to achieve the perfect look, this Lightroom preset is perfect for you. It includes multiple filters and effects for optimizing your selfies to get more Likes and comments on social media.

Free Lightroom Presets for Portraits

Free Lightroom Presets for Portraits

This is a bundle of 10 unique Lightroom presets made for optimizing portrait photos. The presets are easily customizable and they work with JPG and RAW image formats. The pack includes various effects for achieving different looks as well.

FREE Portrait Photography Lightroom Preset

FREE Portrait Photography Lightroom Preset

Another free and professional Lightroom preset that’s perfect for improving your portrait photos. This preset features adjustments for improving exposure and filters for adding tone and mood to your photos.

Pastel Colors Mobile & Desktop Lightroom Presets

Pastel Colors Mobile & Desktop Lightroom Presets

Adding a beautiful pastel color filter can make many different kinds of photos look even more beautiful. Especially when improving wedding and newborn photos, pastel color filters are a must-have. This pack of Lightroom presets is made specifically for that job.

Natural Light Portrait – Lightroom Presets

Natural Light Portrait - Lightroom Presets

The photos you take in natural light always needs proper enhancements as they often look different from each other due to changes in contrast and lighting. This collection of Lightroom presets aims to help you fix those photos with easy adjustment and toning effects.

Film Effect Lightroom Presets For Portraits

Film Effect Lightroom Presets

Want to make your portraits look like a scene from a Hollywood film? Then grab this set of Lightroom presets that features various effects and filters inspired by the cinema. It includes 11 presets that works with Photoshop and Lightroom.

Instagram Portrait Lightroom Presets

Instagram Portrait Lightroom Presets

This bundle of Lightroom presets comes with a set of effects inspired by Instagram filters. You can use these to enhance your portrait photos before you upload them to social media sites.

Free Retouching Mobile & Desktop Lightroom Preset

Free Retouching Mobile & Desktop Lightroom Preset

This is a set of free Lightroom presets specially crafted for retouching portrait photos. These presets will help you do quick adjustments to your portraits to enhance color, tone, and brightness without an effort.

Free Studio Mobile & Desktop Lightroom Preset

Free Studio Mobile & Desktop Lightroom Preset

Want to make your portrait photos look like they were shot in a professional studio? Then use these Lightroom presets to give them that perfect studio look and feel. They are free to download and use.

Minimalist Mobile & Desktop Lightroom Presets

Minimalist Mobile & Desktop Lightroom Presets

Another collection of modern Lightroom presets featuring a unique effect that gives your photos a minimalist look and feel. It includes multiple presets that comes with a low-contrast toning effect that adds a unique look to portraits.

California Mobile & Desktop Lightroom Presets

California Mobile & Desktop Lightroom Presets

Featuring 11 different effects, this bundle of Lightroom presets will let you add beautiful summer-like warm color enhancements to your portrait photos. These presets will work better with outdoor portrait photos.

Vogue Lifestyle Lightroom Presets Pack

Vogue Lifestyle Lightroom Presets Pack

Want to make your lifestyle photos look like photos from a Vogue cover shoot? This set of high-quality Lightroom presets will help you achieve that goal. It includes 11 presets that can be applied with a single click.

Fashion Magazine Lightroom Presets

Fashion Magazine Lightroom Presets

Another collection of creative Lightroom presets made specifically for enhancing fashion photoshoots. The bundle includes many different presets that works with both Lightroom desktop and mobile apps.

UltraFaded – Portrait Lightroom Presets

UltraFaded Lightroom Presets

This is a collection of Lightroom presets for portraits that are designed to optimize photos by bringing out the shadow details in photos to give them a faded vintage look. This bundle includes 30 different presets you can use with different types of portrait photos.

Instant Hipster – Portrait Lightroom Presets

Instant Hipster Lightroom Presets

Give your photos a colorful hipster-style look with just a few clicks using these Lightroom presets. This bundle comes with 40 retro-themed fadeable presets for giving a modern-vintage look to your portrait photos. All of the presets are easily adjustable as well.

Free Fantasy Mobile & Desktop Lightroom Preset

Free Fantasy Mobile & Desktop Lightroom Preset

This free Lightroom preset will allow you to add a colorful fantasy vibe to your portrait photos. It’s most suitable for improving portraits shot in outdoor environments.

Free Nostalgia Effect Mobile Lightroom Preset

Free Nostalgia Effect Mobile Lightroom Preset

Add a stylish nostalgic effect to your portraits using this great free Lightroom preset. It’s ideal for enhancing photos for social media. The preset works with both RAW and JPG image file formats as well.

The Film – Portrait Lightroom Presets

The Film Lightroom Presets

The presets in this pack are specially optimized to enhance your portrait photos by giving them a retro film look. It comes with 10 different presets that works with Lightroom 4 or higher. The presets works with both JPEG and RAW file formats.

Sunflower – Portrait Lightroom Presets

Sunflower Lightroom Presets

If you take a lot of outdoor portrait photos, this bundle of Lightroom presets will come in handy. It includes 6 unique presets made for improving your portrait photos by adding a little bit of sunshine and adjusting tone.

Prestalgia – 25 Retro Lightroom Presets

Prestalgia – 25 Retro Lightroom Presets

This is a collection of retro-themed Lightroom presets that will allow you to add a unique nostalgic effect to your wedding portraits and outdoor portraits. It includes 25 fadeable color grading presets that are also fully customizable to your preference.

Wedding Pro – Portrait Lightroom Presets

Wedding Pro Lightroom Presets

This bundle comes with 10 premium quality Lightroom presets crafted by professionals. These presets are specially made for enhancing wedding portraits and outdoor photos. The effects are easily customizable as well.

Moody – Portrait Lightroom Presets

Moody Lightroom Presets

The Lightroom presets in this bundle are designed for improving your outdoor portrait photos. It comes with 18 presets that will add a warm moody effect to your photos while also improving colors and adjusting tone.

Vintage Film – Portrait Lightroom Presets

Vintage Film Lightroom Preset

Give your photos a vintage film look using this collection of Lightroom presets. This bundle includes a total of 64 presets that have been divided into Agfacolor and Kodachrome presets. Each group contains effects inspired by 40s, 50s, and 60s films.

Cinematic – Portrait Lightroom Presets

Cinematic Lightroom Presets

The gorgeous Lightroom presets in this bundle comes with a set of unique effects that are made to give stylish effects to your portrait photos to make them look like scenes out of movies. It includes 20 different presets.

121 Duotone Lightroom Profiles

121 Duotone Lightroom Profiles

This is a massive collection of Lightroom profile presets that allows you to give a stylish duotone effect to your photos with just a couple of clicks. It includes 121 different presets that works with Lightroom CC, including iOS and Android versions of the app.

Summer Lightroom Presets

Give all your portrait photos that warm summer look using this bundle of Lightroom presets. This collection includes 30 unique presets for instantly adjusting the tone and contrast of your portraits while giving them a vibrant summer feel. These presets are perfect for natural light, beach, and outdoor photography.

14 Pink Lightroom Presets and LUTs

This is a must-have bundle of Lightroom presets for Instagram users and bloggers. This pack comes with 14 different pink-themed presets in 5 variations making a total of 70 presets. They are perfect for giving an extra feminine and attractive look to your portrait photos before posting them on social media.

Deeptone Lightroom Presets

Adjust the toning of your portraits using various styles with this set of Lightroom presets. It includes 8 different presets for adjusting the toning of portrait photos based on cold, matte, moss, natural, and a few other toning styles.

UltraPOP Lightroom Presets

If you’re a fan of fun and vibrant colors, this set of Lightroom presets are for you. This bundle comes with 20 different presets that will help you bring out the true colors of your portraits and street photos to make the colors POP.

90 Basic Adjustments Lightroom Presets

With the help of the Lightroom presets in this bundle, you’ll be able to make basic adjustments to your portrait photos in just a few seconds. It includes more than 90 different presets for adjusting everything from color, contrast, tone, enhancing detail, and much more. This bundle will help you save hours of your valuable time otherwise spent on making photo adjustments one by one.

Modern Portrait Lightroom Presets

Optimizing portrait photos with color adjustments, applying filters before uploading photos to social media, and even adding an extra bit of professionalism to your photography will be easy with this bundle of Lightroom presets. It comes with 30 different non-destructible Lightroom presets that you can use with both RAW and JPG images.

Flowerage Portrait Presets for Lightroom & ACR

This is a collection of Lightroom presets specially designed for outdoor and natural light portrait photos. It comes with a set of presets for adding more color to bring out the beauty in your portrait photos, especially the ones with lots of green grass and flowers. It includes 24 different presets that are also fully customizable to your preference.

Retouch Pro Lightroom Presets

Retouching and enhancing your portrait photos will be so much easier when you have this bundle of Lightroom presets. It comes with 15 professional presets for easily retouching portraits to properly optimize them in an instant. These presets work with both JPEGs and RAW images and are compatible with Lightroom 4 and above.

20 Monochromatic Lightroom Presets

If you’re struggling to achieve the perfect monochrome effect to give a unique look to your portrait photos, this bundle of Lightroom presets will come in handy. This set includes 20 unique Lightroom presets for achieving different styles of monochrome effects, including matte B&W, toned B&W, high contrast B&W, and more.

Lilac Toning Lightroom Presets

Tone your portraits like a pro using this bundle of Lightroom presets. It includes 7 base presets and 15 variations of the presets for using them with different types of portrait photos. These presets will work with all types of portraits, including outdoor, fashion, street, and more.

Portochrome Lightroom Presets

This bundle comes with a set of unique Lightroom presets for giving your photos a classic chromatic effect with a film tone, like the ones you see in old photographs. It includes 5  base presets and 33 different preset variations for easily achieving the perfect look for your portrait photos.

Fashion Lightroom Presets

This is a pack of Lightroom presets made for fashion photography. Yet they will also work well with your other portraits to give them a professional look. It includes 23 non-destructive Lightroom presets for instantly enhancing your portrait photos.

100 Premium Lightroom Presets

A massive bundle of 100 different Lightroom presets. With this pack, you can do everything from enhancing photos to making simple adjustments, fixing color, toning, and much more with just a few clicks. This is a must-have bundle for professional photographers, bloggers, and for social media users.

Porcelain B&W Lightroom Presets

This bundle comes with 8 premium Lightroom presets that allows you to give your portraits a smooth porcelain-like effect. These presets are ideal for studio photography and natural light portrait photos.

Aurum Portrait Lightroom Presets

This is a collection of Lightroom presets you can use to optimize your portraits, fashion photos, and fine art-style photos. The presets will work well with studio photos and natural light photos. It comes with 4 unique presets and 9 different variations of those effects.

Night Photo Lightroom Presets

Taking great portrait photos during night time and low-light is one of the most difficult parts of photography. This bundle of presets will offer a solution to that problem. This collection includes 20 different Lightroom presets for quickly enhancing nighttime portrait photos and street photography with just one-click.

Tangerine Portrait Presets for Lightroom & ACR

Give your photos a unique tangerine and gold look using these Lightroom presets. This set includes 20 different presets for adjusting the tone of your photos and give them a stylish tangerine matte feel. The pack also comes with Photoshop action presets as well.

Folklore Lightroom Presets

A set of toning Lightroom presets inspired by folk-themed colors and effects. These presets will help you achieve a unique and attractive look in your portrait photos, especially outdoor photos. It includes 7 different presets you can use with different types of portraits.

Blacktone Black & White Lightroom Presets

Create the perfect black and white effect using this bundle of Lightroom presets. This pack includes 10 premium presets you can use to instantly create a professional black and white effect and make your portrait photos stand out from the crowd. They will work well with both studio and outdoor photography.

Colour Matte Lightroom Presets Vol. 1

This is a collection of Lightroom presets made for photographers and graphic designers. It includes a set of 16 presets for quickly retouching photos and adjusting the toning to give your portraits a unique matte feel.

Color Mix Lightroom Presets Vol. 2

The presets in this pack will help you to highlight specific colors in your portrait photos to create uncommon effects. It comes with 22 Lightroom presets with different styles and effects to use with various types of photos.

I’m Blogger – 50 Lightroom Presets

This is a special bundle of Lightroom presets made for graphic designers, bloggers, and social media users. It comes with 50 different Lightroom presets for making quick adjustments to your fashion, outdoor, travel, portrait, and many other types of photos with just a few clicks.

4 Tips for Using Presets on Portrait Photos

Whether you’re editing photos from a photoshoot or enhancing photos for social media, using Lightroom presets can greatly speed up your workflow. Follow these tips to use presets more efficiently.

1. Use the Right Preset

There are many different kinds of Lightroom presets you can use to apply different effects, filters, and enhancements. For example, there are presets especially optimized for retouching skin and then there presets with filters for photos shot in outdoor lighting conditions.

The key to enhancing portrait photos using Lightroom presets is to pick the right preset for your photos and what you want to achieve. Don’t make the mistake of downloading a single preset pack and applying it to every portrait photo you have. Experiment with different presets.

2. Adjust to Perfection

A great thing about using Lightroom presets is that they are fully customizable. This means you can easily edit any preset you use to adjust the effect to match the photograph.

If a preset adds too much brightness to your photos, you can use the adjustments panel to tone it down. If you need to change the colors of a filter you can do that using adjustment tools as well.

3. Enhance Photos with Exposure

When taking photos in different lighting conditions it’s common to end up with photos that look underexposed and dark. Lightroom’s exposure tool makes it super easy to fix these photos and brighten them up. However, it takes a little bit of work to achieve the perfect look.

There are also presets especially made for fixing these lighting issues in photos. Find a few of those presets and add them to your collection.

4. Save Your Personalized Presets

If you managed to come up with a sweet new effect while using presets and experimenting with the adjustment tools, you can save it as a preset and use it on other photos later.

All you have to do to save your adjustments as a preset is to go to the Presets panel in Lightroom and click on the Plus icon (+) and select Create Preset. Then select all the adjustments you want to save in the preset, give your new preset a name, and click on the Create button.

Looking for more? Then check out our best Lightroom wedding presets and newborn baby preset collections for more great add-ons.

Brand Tracking: How to Streamline This Process With AI

Featured Imgs 23

The future of brand tracking is here — and it’s powered by AI.

Brand tracking is an essential marketing strategy for measuring brand performance, customer loyalty, and market positioning.

Free Kit: How to Build a Brand [Download Now]

Traditionally, companies rely on surveys, panels, and market research to gather this data. But these methods can be slow, often taking weeks or months to deliver insights, which makes it hard for businesses to adapt to market changes in real time. Brand tracking can also be expensive and time-consuming, putting it out of reach for smaller teams with limited budgets.

AI is a potential solution, offering more accessible, faster, and cost-effective results. But what practical marketing applications does AI have for brand tracking — and how accurate is it?

In a recent Marketing Against the Grain episode, Kieran and I used HubSpot as a test case to explore how generative AI tools like ChatGPT and Claude could streamline brand tracking. By comparing the AI-powered insights with our own internal company data, we also assessed how closely AI can match up to traditional tracking methods and its potential for broader use.

AI-Powered Brand Tracking Opportunities

AI offers a more efficient way to track and evaluate brand performance, providing faster insights faster, with more flexibility. Here, Kieran and I explore three practical applications.

Understand why customers choose your brand over competitors.

AI isn’t just about quantitative analysis; it also helps marketers understand the qualitative ‘why’ behind customer decisions by analyzing online customer feedback, reviews, and discussion forums.

When we prompted AI to analyze why customers choose HubSpot, it identified core themes like ease of use, integration capabilities, and customer support. These findings closely matched our internal data, showcasing AI’s ability to quickly extract accurate insights from public platforms.

This offers a valuable window into customer behavior, enabling marketers to improve brand messaging and shape acquisition strategies around the attributes that resonate most with their audience.

Estimate your NPS score.

Net Promoter Score (NPS) is a key indicator of customer loyalty and brand satisfaction — but it’s often expensive and time-consuming to measure.

While AI isn’t a complete replacement for NPS surveys (yet), it can give quick, informal estimates by aggregating online feedback and analyzing customer sentiment. This helps marketing teams regularly monitor customer satisfaction and make timely adjustments between formal NPS assessments.

In our experiment, we asked AI to estimate HubSpot’s NPS using online data. The AI produced a score range that was surprisingly close to our actual figures, along with a detailed rationale, demonstrating AI’s potential as an effective proxy for traditional NPS tracking.

Measure aided brand awareness.

Aided awareness, or how familiar consumers are with a brand when prompted with its name or logo, is a key metric for evaluating brand visibility and competitive positioning in the market.

Traditionally, this involves hiring research firms to build and run extensive surveys, but AI again offers a faster, more accessible alternative by analyzing publicly available data and consumer sentiment.

In our experiment, we used AI to estimate HubSpot’s aided awareness within a target market segment — companies with 200 to 2,000 employees. Interestingly, the two models produced slightly different results, with Claude offering a more accurate estimation compared to ChatGPT-4.

This discrepancy highlights the value of consulting multiple AI models for a more well-rounded picture of your company’s brand awareness.

Tactical Tips for Optimizing AI for Brand Tracking

AI is great — but it’s not perfect. Being thoughtful about how you implement and manage your AI marketing tools maximizes the value AI brings to your brand tracking strategy.

Here are five actionable tips to ensure you're getting the best results.

1. Craft precise prompts for accurate AI results.

The quality of AI output is directly tied to how well you structure your request. Clearly define your target audience, goals, and context to help AI generate more focused and actionable insights.

2. Monitor for outliers and know when to validate.

Set your AI agents to flag outliers and notify you when results deviate from expectations. This helps determine when you should invest in resources like manual analysis or additional surveys to validate findings.

3. Integrate AI with your existing tools and internal data.

Improve contextual accuracy by integrating your AI marketing tools with internal data — like sales calls, social media interactions, and website analytics—to capture more personalized AI insights that reflect your brand’s unique context and positioning.

4. Regularly evaluate and update your AI toolkit.

AI models are constantly evolving, so it’s essential to confirm you’re always using the most up-to-date version. Regularly check and update your AI tools to make sure they align with your marketing team and business goals, giving you the most effective results over time.

5. Build your marketing AI ecosystem now.

“AI is going to be exponentially better in 12, 18, 24 months,” says Kieran. Therefore, the time to build your marketing AI infrastructure is now, so you'll be well-positioned and agile enough to integrate future AI improvements as soon as they are available.

Adopting AI in brand tracking empowers your team to react faster to market shifts and customer behaviors, while also future-proofing your AI marketing strategy. To learn more about AI for brand tracking, check out the full episode of Marketing Against the Grain below:

This blog series is in partnership with Marketing Against the Grain, the video podcast. It digs deeper into ideas shared by marketing leaders Kipp Bodnar (HubSpot’s CMO) and Kieran Flanagan (SVP, Marketing at HubSpot) as they unpack growth strategies and learn from standout founders and peers.

41 Brand Style Guide Examples I Love (for Visual Inspiration)

Featured Imgs 23

Developing a consistent brand starts with creating a brand style guide. These branding rule books help graphic designers, marketers, web developers, community managers, and even product packaging departments present a unified vision of the brand to the public.

The best brands stick in our brains because their presence is defined by the repetition of the same logo, fonts, colors, and images. Once we see them enough, they become instantly recognizable. All of this is possible when each member of your team adheres to a cohesive brand style guide.

Free Download: How to Create a Style Guide [+ Free Templates]

So, what is a brand style guide? In this article, I'll go over the elements of a style guide and share some amazing examples of them in action to help inspire your next branding project or website redesign.

Table of Contents

Picture the most recognizable brands you can think of.

Chances are, you've learned to recognize them due to one of the following reasons:

  • There's a written or visual consistency across the messaging.
  • The same brand colors are reflected across every asset.
  • The language sounds familiar.
  • It‘s all very organized, and while not rigid, it’s cohesive.

But before you sit down to create your branding guidelines, I'd recommend taking a step back and defining your brand’s mission statement and buyer personas. These strategic elements will help you dive into the tactical components of your brand style guide later.

Brand Guidelines Mission Statement

Your brand guidelines mission statement ensures that all your content is working toward the same goal and connecting with your audience. It can also guide your blog and paid content, ad copy, visual media, and slogan.

Brand Guidelines Buyer Persona

Your brand guidelines buyer persona guides your blog content, ad copy, and visual media, which can attract valuable leads and customers to your business. You can create one quickly with our free persona tool.

The Elements of a Brand Style Guide

A brand style guide encompasses much more than just a logo (although that’s important, too). It visually encompasses everything your brand is about — down to your business' purpose.

Here are some key elements that I believe make or break a brand style guide, with links to in-depth articles if you need more guidance or info:

  • Logo. Logos are a powerful way to determine how your brand is perceived. We’ve got a nine-step guide to walk you through it.
  • Color palette. Your brand color palette affects every aspect of your design, especially visual impact and user experience. We’ve got 50 unforgettable palettes to inspire you.
  • Typography. Typography plays a critical role on any website by ensuring we can comfortably read and process all its text-based content. If a website’s typography works, we won’t notice. If it fails, chances are we’ll bounce off the page.
  • Imagery and iconography. Ensure the best possible user experience with these icon best practices.
  • Brand voice. Build your best brand voice using our free brand-building guide.

1. City of Chicago

See the full City of Chicago brand guide.

Six-point red star.

Image Source

What I like: Chicago’s brand guidelines rest on the beauty and simplicity of the city’s flag, both in terms of color and design. Plus, the tone of the guide is fun and casual — like its acknowledgement of how popular Chicago stars are in tattoo designs.

Brand basics for the city of Chicago.

Image Source

A fun detail: The custom font, Big Shoulders, comes from the Carl Sandburg poem “Chicago,” which gave the city its nickname “City of Big Shoulders.”

2. Olympic Games

See the full Olympic Games brand guide.

Cover of Olympic Brand Guidelines, with large stripes of blue, white, yellow, black, green, and red.

Thumbnails of 10 pages from the Olympic Brand Guidelines.

Image Source

What I like: The Olympic Games still use the logo and colors from 1913, but the brand was refreshed in 2022 by Ben Hulse (whose work shows up a few times in this list). The bold interpretation of the Olympic colors embody the brand characteristics: hopeful, universal, inclusive, vibrant, and progressive.

3. Amnesty International UK

See the full Amnesty International UK brand guide.

Cover of Amnesty International UK’s brand guide. The background is bright pink, and bright yellow and blue stripes read “Bright. Bold. Positive.”

Image Source

What I like: Amnesty International UK spells it all out on the cover: bright, bold, and positive. The pink, yellow, and blue brand colors are cheerful, optimistic, and bold. This guide also does a particularly nice job of illustrating do’s, don’ts, and exceptions.

Color combinations for logo text and background for Amnesty International UK.

Image Source

4. Sonic the Hedgehog

See the full Sonic the Hedgehog brand guide.

Phrases associated with six Sonic the Hedgehog characters.

Image Source

What I like: Even cartoons need a style guide. Sonic the Hedgehog’s include phrases for each character, which is a fun and novel way to ensure brand consistency.

5. Burger King

See the full Burger King brand guide.

“Make our brand and our food even more craveable.”

“Big & Bold. Confident and direct: We play with scale using macro photography and a focus on details. Colors are unapologetically full and rich.”

Image Source

What I like: Burger King says that everything it does should make the food “even more craveable” — including the shape of the font, which is custom-designed to evoke the shapes of food.

6. Eurovision Song Contest

See the full Eurovision Song Contest brand guide.

Typography and spacing of the Eurovision Song Contest logo.

What I like: The font is so customized that no other characters exist other than the ones in the word “Eurovision.” That gives the brand an unmatched distinctiveness.

7. OpenAI

See the full OpenAI brand guide.

“Our primary color palette is pure black and white. Black and white are preferred for most scenarios and sufficiently communicates our brand value that OpenAI is an empty vessel that adapts to its content.”

Bright red, green, and blue color samples.

Image Source

What I like: OpenAI has put a lot of thought into the symbolism behind all its color choices. For instance, it uses a lot of black and white in its branding to signify that “OpenAI is an empty vessel that adapts to its content.”

8. DC Comics 1982

See excerpts from the DC Comics 1982 brand guide.

Superheroes and their corresponding color palettes.

Page from the DC Comics style guide in red font, introducing Superman.

Image Source

What I like: What’s not to like? Even MCU apologists can appreciate the storytelling that went into DC Comics’ 1982 style guide. Superheroes are grouped by color palette, and each character includes a written introduction with catchphrases, mythology, and other details.

9. Reporters San Frontières

See the full Reporters San Frontières brand guide.

Vertical stripes of pinkish-red, black, and white, with percentages that indicate how to balance the colors. Red 20%, black 20%, white 80%.

Typography for RSF. In large print: “FIGHT FOR FACTS.”

Image Source

What I like: One of RSF’s slogans, “Fight for facts,” is simple but powerful, which is reflected in RSF’s three colors: black, white, and a vibrant pinkish-red. The guide specifies how to use accent colors — red or black should only make up 20% of a design, with white using the other 80%. That reinforces RSF’s spare but muscular branding.

10. Major League Soccer

See the full Major League Soccer brand guide.

Twenty examples of the MLS crest in team colors.

What I like: Major League Soccer’s style guide has to include color combinations for 20 teams. To ensure brand cohesiveness, MLS has a single logo mark, the crest, with no design variations. It also includes specific guidance on applying color layers to images.

Instructions for applying color layers to photographs.

Image Source

11. Czech Railway

See the full Czech Railway brand guide.

Cover of Czech Railway brand guide. Dark blue background and a large, bright orange logo mark.

Color palette for Czech Railway. Blues, oranges, grays, and blacks.

Image Source

What I like: The Czech Railway’s beautiful color palette is centered around a dark blue and deep orange, and the logo mark evokes railway tracks.

12. Coronation 2023

See the full Coronation 2023 brand guide.

Three pages from the Coronation 2023 style guide. The first page shows the emblem; the second page shows the dark red and dark blue color samples; the third page shows the emblem on bunting.

Image Source

What I like: This 23-page guide covers one thing and one thing only: The emblem used for the coronation of Great Britain’s King Charles in 2023. As such, it’s a fascinating case study in detail. The guide includes half a dozen examples of how to use the emblem on royal swag, and it’s exceedingly specific in its do’s and don’ts.

13. EPA (1977)

See excerpts from the EPA brand guide.

Full rainbow spectrum of brand colors and EPA logo marks.

Different black-and-white patterns indicating noise, toxic substances, radiation, technology transfer, and water.

Image Source

What I like: The U.S. Environmental Protection Agency’s 1977 brand guide is a favorite of graphic designers for good reason. Check out the patterns designated as program identifiers, like “toxic substances,” “noise,” and “radiation.”

The EPA’s jewel-toned rainbow of brand colors includes a muddy green called “Pesticides Green” and a color called, ahem, “Solid Waste Brown.” The EPA must have been a fun place to work in the 1970s.

14. Docusign

See the full Docusign brand guide.

Docusign’s brand palette of purples and coral.

Ratios of how to use Docusign’s brand colors.

Image Source

What I like: Docusign includes a page of colored pie charts to demonstrate the correct color ratios. Docusign also stands out with a zinger of an accent color — a bright coral that beautifully contrasts with the purples in the brand palette.

15. Zagreb Airport

See the full Zagreb Airport brand guide.

Cover of Zagreb Airport style guide, made up of tiny white triangles on a dark blue background.

Tiny triangles are stacked to look like castles.

Image Source

What I like: Zagreb Airport in Croatia uses a simple triangle as a building block for complex iconography that references Croatian heritage and culture.

16. Oxford Student Union

See the full Oxford Student Union brand guide.

Acceptable color combinations for Oxford Student Union.

What I like: The addition of colo(u)r combinations is a nice touch here. I’m one of those people who can take a perfectly lovely color palette and make a muddy mess of it, so this is something I’d love to see in more style guides.

17. Fiat 2019

See the full Fiat 2019 brand guide.

Cover of Fiat 2019 style guide. Off-white background with red diagonal lines of varying lengths.

Two pages from Fiat style guide showing the four diagonal lines.

Image Source

What I like: The four diagonal lines in Fiat’s logo are mesmerizing. Fiat has incorporated those simple four lines across its branding in playful, creative ways, like changing the length of half the lines, as it’s done on the cover (above).

18. Team Canada

See excerpts from the Team Canada brand guide.

Four pages of Team Canada’s brand guide, featuring bright colors, geometric shapes, and a maple leaf.

Image Source

What I like: Even though only a few excerpts are available from the full 88-page brand guide, I’m including this because it’s simply gorgeous. Canada’s red maple leaf could have been a tired symbol, but the designers reimagined it with complex geometric patterns and bold colors.

19. Hulu

See the full Hulu brand guide.

Bright green background and huge black font that reads, “BIG GREEN GUIDE.”

A whimsical drawing of a person with an accent of the Hulu green on their shoulders.

Image Source

What I like: Hulu does a lot with a relatively limited palette, mixing it up with bold typefaces and whimsical illustrations. I also like this shade of green — despite being a common color, Hulu has landed on a standout hue.

20. Brasil Governo Federal

See the full Brasil Governo Federal brand guide.

Style guide cover with large shapes in bright yellow, red, blue, and green.

BRASIL is drawn in a large geometric font in bright yellow, red, blue, and green.

Image Source

What I like: Brasil Governo Federal’s bold style and brash colors are eye-catching, to say the least. The style guide includes information on how to use the logo in video, which in my experience is a brand question that often goes unanswered.

21. IBM

See the full IBM brand guide.

IBM’s typeface features: ligatures, fractions, arrows, alternate glyphs, and global currency symbols.

Overview of data visualization guidelines.

Image Source

What I like: IBM’s brand guide is an incredible interactive experience with videos and custom typeface previews. It’s also among the most comprehensive of this entire list, since it includes support for non-Latin scripts like Arabic and fonts that support alternate glyphs and even ligatures. There’s even an entire section dedicated to data visualization.

22. American Airlines

See the full American Airlines brand guide.

Visual elements for American Airlines’ Labor Day sales ads.

Screencap from American Airlines’ style guide showing how to use photos of its fleet.

Image Source

What I like: American Airlines’ style guide has a ton of examples, including specifics like what part of the airplane can be shown in a photo. Considering how many different types of ads the airline runs, it’s useful to have so many specific details to help avoid human error and inconsistencies.

23. British Rail

See the full British Rail corporate identity manual.

Six black-and-white versions of “British Rail” with logo mark, from April 1965.

What I like: British Rail’s corporate identity manual collects several decades of brand changes — it’s worth a look just to trace the subtle differences over time.

24. Elizabeth Line, Transport for London

See the full Elizabeth Line brand guide.

Purple Elizabeth line branding.

Screencap of The Elizabeth Line Design Vision.

Image Source

What I like: TfL, London’s transport authority, created a brand guide for its newest addition, the Elizabeth line. It even includes a section on “design idiom flexibility,” which provides guidance on how much Elizabeth line branding to use on a scale of “localness” to “Elizabeth line-ness.”

25. Medium

See the full Medium brand guide.

Medium logo.

Incorrect usages of Medium logo.

Image Source

What I like: Medium‘s simple brand style guide emphasizes usage of its logo, wordmark, and symbol. Medium’s logo is the brand's primary graphic element and was created to feel “confident, premium, timeless, and modern.”

26. Walmart

See the full Walmart brand guide.

How to use the Walmart logo mark.

ADA compliance for the Walmart color palette.

Image Source

What I like: The guide includes the brand‘s logo, photography, typography, illustrations, iconography, voice, editorial style, and more. Walmart’s color palette is so integral to its brand identity that its primary color is called “Walmart Blue.”

27. Asana

See the full Asana brand guide.

Horizontally and vertically aligned Asana logos.

Image Source

What I like: Asana‘s simple style guide highlights its logo and color palette. It also explains how to properly use the brand’s assets.

28. Spotify

See the full Spotify brand guide.

White Spotify logo on light green background.

Image Source

What I like: Spotify‘s color palette includes three color codes, while the rest of the company’s branding guidelines focus on logo variation and album artwork. The style guide even allows you to download an icon version of its logo, making it easier to represent the company without manually recreating it.

29. Starbucks

See the full Starbucks brand guide.

Starbucks’ Siren logo.

What I like: Starbucks' interactive brand style guide includes details about how to use its core elements such as the iconic Siren logo and green color palette. Plus, the guide features a visual spectrum of how their creative assets can be used across different channels.

Three ways of using the Sodo Sans typeface in Starbucks marketing.

Image Source

30. Paris 2024

See the full Paris 2024 brand guide.

Two versions of the Paris 2024 Olympics logo.

What I like: Paris 2024's brand identity pays homage to the 1924 Olympic Games through Art Deco-inspired design. Best of all, designers applied eco-branding methods to reduce the amount of ink and paper needed for physical materials as well as limit the power and data consumption on digital elements.

Two pages of typography from the Paris 2024 brand guide.

Image Source

This brand guide also reinvents all 62 pictograms from the Olympic and Paralympic Games as “coat of arms that serve as rallying cries for sports fans.” Each pictogram is designed on an axis of symmetry that reinforces the coats of arms iconography. Go straight to the pictogram guidelines to take a look. The ones below represent surfing, swimming, table tennis, and taekwondo.

Four pictograms that represent surfing, swimming, table tennis, and taekwondo.

Image Source

31. Urban Outfitters

See the full Urban Outfitters brand guide.

Screencap of Urban Outfitters style guide.

Six different logos that Urban Outfitters has used in the past.

Image Source

What I like: Photography, color, and even tone of voice appear in Urban Outfitters‘ California-inspired brand guidelines. Plus, the company includes information about its ideal consumer and what the brand believes in.

32. Love to Ride

See the full Love to Ride brand guide.

Love to Ride’s color palette.

Examples of Love to Ride ads.

Image Source

What I like: Love to Ride, a cycling company, is all about color variety in its visually pleasing style guide. The company's brand guidelines include nine color codes and tons of detail about its secondary logos and imagery.

33. Barbican

See the full Barbican brand guide.

Barbican wordmark in yellow, orange, and purple.

Barbican font: Futura SH.

Image Source

What I like: Barbican, an art and learning center in the United Kingdom, sports a loud yet simple style guide focusing heavily on its logo and supporting typefaces.

34. I Love New York

See the full I Love New York brand guide.

I heart NY logo.

I heart NY fonts: Astoria, Williamsburg, Albany, and Hudson.

Image Source

What I like: Despite its famously simple T-shirts, I Love New York has a brand style guide. The company begins its guidelines with a thorough explanation of its mission, vision, story, target audience, and tone of voice. Only then does the style guide delve into its logo positioning on various merchandise.

35. TikTok

See the full TikTok brand guide.

TikTok style guide: “Bringing our brand to life.”

Image Source

What I like: TikTok‘s style guide isn’t just a guide — it's an interactive brand book. First, it provides an in-depth look into how it brings its brand to life through design. Then, it gives an overview of its logo, co-branding, color, and typography.

36. University of the Arts Helsinki

See the full University of the Arts Helsinki brand guide.

A man applies “University of the Arts Helsinki” to a van in the snow.

What I like: The style guide of the University of the Arts Helsinki is more of a creative branding album than a traditional marketing guide. It shows you dozens of contexts in which you‘d see this school’s provocative logo, including animations.

Animated logo with the words “University of the Arts Helsinki.”

Image Source

37. Western Athletic Conference

See the full Western Athletic Conference brand guide.

WAC logo mark.

Image Source

What I like: The Western Athletic Conference's brand style guide includes extensive information about its history, mission, and vision. It also highlights its member universities and athletic championships and awards it is involved with.

38. Discord

See the full Discord brand guide.

Discord’s logo mark.

Image Source

What I like: Discord‘s brand guide is as colorful and playful as the communities it serves. The brand’s motion elements are based on the dot, which represents the Discord user interacting with others in the communities it belongs to.

39. Netflix

See the full Netflix brand guide.

Netflix wordmark in red, against a black background.

Red “N” and “Netflix” with three shades of red indicated for use.

Image Source

What I like: As far as its public brand assets are concerned, Netflix is focused primarily on the treatment of its logo. The company offers a simple set of rules governing the size, spacing, and placement of its famous capitalized typeface.

40. NASA

See the full NASA brand guide.

Page of repeating NASA logos.

Page of color samples all labeled “NASA red.”

Image Source

What I like: NASA‘s “Graphics Standards Manual” is as official and complex as you think it is. At 220 pages, the guide describes countless logo placements, color uses, and supporting designs. And yes, NASA’s space shuttles have their own branding rules.

41. New York City Transit Authority

See the full New York City Transit Authority brand guide.

Page of black circles with white numbers or letters indicating the train.

Page from NYCTA style guide. A pencil-drawn arrow points right.

What I like: Like NASA, the NYCTA has its own Graphics Standards Manual, and it includes some fascinating typography rules for the numbers, arrows, and public transit symbols the average commuter takes for granted every day.

Branding Guidelines Tips

If you want to take your branding style guide to the next level, let HubSpot's Brand Kit Generator do some of the heavy lifting for you.

I'd also recommend following the best practices below, which the HubSpot Creative team has used to disseminate branding information to the rest of the HubSpot Marketing team.

This has not only made my job as a blogger easier, but also makes our branding feel well thought-out and cohesive.

1. Make your guidelines a branded document.

Whether you’re publishing your branding guidelines online or creating an internal presentation, consider making the guidelines themselves a branded document.

Ensure the published document follows your established brand voice, uses the symbols and imagery you’ve created, and employs the colors and typography that makes your brand feel like you.

Insights from HubSpot's Creative Team

When our Creative team rolled out a visual identity refresh for the HubSpot brand, we all received access to a branded playbook that summarized all the changes and described how we should represent HubSpot online moving forward.

Not only was I a huge fan of the refresh, but also of the way it was presented to our team in a branded document.

You can do the same, regardless of your budget. Our Creative team actually used a free tool, Google Slides — so it’s totally doable for a small or freelance brand!

2. Name your brand's colors.

You’ve already chosen your color palette — why not go as far as naming the colors?

Giving your colors unique names (aside from “blue” or “orange”) can help you tie the tactical elements of your branding into an overall theme or ethos.

Not to mention that it’s awesome to be able to refer to company colors by a unique name. Imagine if we called Solaris, HubSpot’s primary brand color, “HubSpot Orange” — that simply doesn’t have the same ring.

HubSpot orange color palette.

Insights from HubSpot's Creative Team

In our visual identity refresh, our Creative team brightened and intensified our color palette, then renamed the individual hues.

They wrote, “Every color, tint, and shade is based on central themes. [...] Whether it’s a subway line in Paris, or a flower-lined street in Japan, the secondary color names are a veritable tour of important cultural and geographical touchstones from HubSpotters all over the world.”

Think about what makes your brand unique, and why you chose the colors that you did. For instance, if you work at a law firm that specializes in car accident cases, you might choose red as one of the brand colors and call it “Stop Light.”

3. Create easy-to-use branded templates.

Alongside your branding guidelines should be templates to empower your team to easily design branded assets, even if they’re not designers.

Five different HubSpot templates.

Insights from HubSpot's Creative Team

At HubSpot, we keep all of our templates in our team’s Canva account. There, anyone (myself included) can edit pre-made designs for any number of use cases.

As a writer on the HubSpot blog, I have to create graphics to supplement the information I’m sharing.

The branded templates made by our Creative team have made my work a great deal easier, and I can imagine that it’s the same for our Social Media team.

Not everyone is a designer, but with templates, you can ensure your brand looks professional no matter who creates an asset.

4. Ensure your branding is optimized for all channels.

Your branding guidelines should include different specifications for different channels.

Or, alternatively, you should have assets and designs that can be adjusted for various channels and mediums. Not only for sizing purposes, but for accessibility purposes, too.

“Welcome to the Brand Web Guidelines.”

Image Source

For instance, if you primarily market your brand over Instagram and on your website, then your branding should have web accessible colors, as well as Instagram-friendly designs and sizes.

However, you don’t want to significantly change your branding from channel to channel. It should work relatively well no matter where you’re marketing your brand.

Build a Memorable Style Guide of Your Own

Once you build your unique brand style guide, customers will recognize your brand and associate it with all the visual cues you want them to.

I hope you were inspired by our list of amazing brand style guides and wish you luck in creating a timeless style of your own.

Editor's note: This post was originally published in January 2017 and has been updated for comprehensiveness.

CSS Anchor Positioning Guide

Featured Imgs 23

Not long ago, if we wanted a tooltip or popover positioned on top of another element, we would have to set our tooltip’s position to something other than static and use its inset/transform properties to place it exactly where we want. This works, but the element’s position is susceptible to user scrolls, zooming, or animations since the tooltip could overflow off of the screen or wind up in an awkward position. The only way to solve this was using JavaScript to check whenever the tooltip goes out of bounds so we can correct it… again in JavaScript.

CSS Anchor Positioning gives us a simple interface to attach elements next to others just by saying which sides to connect — directly in CSS. It also lets us set a fallback position so that we can avoid the overflow issues we just described. For example, we might set a tooltip element above its anchor but allow it to fold underneath the anchor when it runs out of room to show it above.

Anchor positioning is different from a lot of other features as far as how quickly it’s gained browser support: its first draft was published on June 2023 and, just a year later, it was released on Chrome 125. To put it into perspective, the first draft specification for CSS variables was published in 2012, but it took four years for them to gain wide browser support.

So, let’s dig in and learn about things like attaching target elements to anchor elements and positioning and sizing them.

Quick reference

/* Define an anchor element */
.anchor {
  anchor-name: --my-anchor;
}
/* Anchor a target element */
.target {
  position: absolute;
  position-anchor: --my-anchor;
}
/* Position a target element */
.target { 
  position-area: start end;
}

Basics and terminology

At its most basic, CSS Anchor Positioning introduces a completely new way of placing elements on the page relative to one another. To make our lives easier, we’re going to use specific names to clarify which element is connecting to which:

  • Anchor: This is the element used as a reference for positioning other elements, hence the anchor name.
  • Target: This is an absolutely positioned element placed relative to one or more anchors. The target is the name we will use from now on, but you will often find it as just an “absolutely positioned element” in the spec.

For the following code examples and demos, you can think of these as just two <div> elements next to one another.

<div class="anchor">anchor</div>
<div class="target">target</div>

CSS Anchor Positioning is all about elements with absolute positioning (i.e., display: absolute), so there are also some concepts we have to review before diving in.

  • Containing Block: This is the box that contains the elements. For an absolute element, the containing block is the viewport the closest ancestor with a position other than static or certain values in properties like contain or filter.
  • Inset-Modified Containing Block (IMCB): For an absolute element, inset properties (top, right, bottom, left, etc.) reduce the size of the containing block into which it is sized and positioned, resulting in a new box called the inset-modified containing block, or IMCB for short. This is a vital concept to know since properties we’re covering in this guide — like position-area and position-try-order — rely on this concept.

Attaching targets to anchors

We’ll first look at the two properties that establish anchor positioning. The first, anchor-name, establishes the anchor element, while the second, position-anchor, attaches a target element to the anchor element.

Square labeled as "anchor"

anchor-name

A normal element isn’t an anchor by default — we have to explicitly make an element an anchor. The most common way is by giving it a name, which we can do with the anchor-name property.

anchor-name: none | <dashed-ident>#

The name must be a <dashed-ident>, that is, a custom name prefixed with two dashes (--), like --my-anchor or --MyAnchor.

.anchor {
  anchor-name: --my-anchor;
}

This gives us an anchor element. All it needs is something anchored to it. That’s what we call the “target” element which is set with the position-anchor property.

Square labeled as "target"

position-anchor

The target element is an element with an absolute position linked to an anchor element matching what’s declared on the anchor-name property. This attaches the target element to the anchor element.

position-anchor: auto | <anchor-element>

It takes a valid <anchor-element>. So, if we establish another element as the “anchor” we can set the target with the position-anchor property:

.target {
  position: absolute;
  position-anchor: --my-anchor;
}

Normally, if a valid anchor element isn’t found, then other anchor properties and functions will be ignored.

Positioning targets

Now that we know how to establish an anchor-target relationship, we can work on positioning the target element in relation to the anchor element. The following two properties are used to set which side of the anchor element the target is positioned on (position-area) and conditions for hiding the target element when it runs out of room (position-visibility).

Anchor element with target elements spanning around it.

position-area

The next step is positioning our target relative to its anchor. The easiest way is to use the position-area property, which creates an imaginary 3×3 grid around the anchor element and lets us place the target in one or more regions of the grid.

position-area: auto | <position-area>

It works by setting the row and column of the grid using logical values like start and end (dependent on the writing mode); physical values like topleftrightbottom and the center shared value, then it will shrink the target’s IMCB into the region of the grid we chose.

.target {
  position-area: top right;
  /* or */
  position-area: start end;
}

Logical values refer to the containing block’s writing mode, but if we want to position our target relative to its writing mode we would prefix it with the self value.

.target {
  position-area: self-start self-end;
}

There is also the center value that can be used in every axis.

.target {
  position-area: center right;
  /* or */
  position-area: start center;
}

To place a target across two adjacent grid regions, we can use the prefix span- on any value (that isn’t center) a row or column at a time.

.target {
  position-area: span-top left;
  /* or */
  position-area: span-start start;
}

Finally, we can span a target across three adjacent grid regions using the span-all value.

.target {
  position-area: bottom span-all;
  /* or */
  position-area: end span-all;
}

You may have noticed that the position-area property doesn’t have a strict order for physical values; writing position-area: top left is the same as position-area: left top, but the order is important for logical value since position-area: start end is completely opposite to position-area: end start.

We can make logical values interchangeable by prefixing them with the desired axis using y-, x-, inline- or block-.

.target {
  position-area: inline-end block-start;
  /* or */
  position-area: y-start x-end;
}
Examples on each position-visibility value: always showing the target, anchors-visible hiding it when the anchor goes out of screen and no-overflow hiding it when the target overflows

position-visibility

It provides certain conditions to hide the target from the viewport.

position-visibility: always | anchors-visible | no-overflow
  • always: The target is always displayed without regard for its anchors or its overflowing status.
  • no-overflow: If even after applying the position fallbacks, the target element is still overflowing its containing block, then it is strongly hidden.
  • anchors-visible: If the anchor (not the target) has completely overflowed its containing block or is completely covered by other elements, then the target is strongly hidden.
position-visibility: always | anchors-visible | no-overflow

Setting fallback positions

Once the target element is positioned against its anchor, we can give the target additional instructions that tell it what to do if it runs out of space. We’ve already looked at the position-visibility property as one way of doing that — we simply tell the element to hide. The following two properties, however, give us more control to re-position the target by trying other sides of the anchor (position-try-fallbacks) and the order in which it attempts to re-position itself (position-try-order).

The two properties can be declared together with the position-try shorthand property — we’ll touch on that after we look at the two constituent properties.

Examples on each try-tactic: flip-block flipping the target from the top to the bottom, flip-inline from left to right and flip-start from left to top (single value) and top right to left bottom (two values)

position-try-fallbacks

This property accepts a list of comma-separated position fallbacks that are tried whenever the target overflows out of space in its containing block. The property attempts to reposition itself using each fallback value until it finds a fit or runs out of options.

position-try-fallbacks: none | [ [<dashed-ident> || <try-tactic>] | <'inset-area'>  ]#
  • none: Leaves the target’s position options list empty.
  • <dashed-ident>: Adds to the options list a custom @position-try fallback with the given name. If there isn’t a matching @position-try, the value is ignored.
  • <try-tactic>: Creates an option list by flipping the target’s current position on one of three axes, each defined by a distinct keyword. They can also be combined to add up their effects.
    • The flip-block keyword swaps the values in the block axis.
    • The flip-inline keyword swaps the values in the inline axis.
    • The flip-start keyword swaps the values diagonally.
  • <dashed-ident> || <try-tactic>: Combines a custom @try-option and a <try-tactic> to create a single-position fallback. The <try-tactic> keywords can also be combined to sum up their effects.
  • <"position-area"> Uses the position-area syntax to move the anchor to a new position.
.target {
  position-try-fallbacks:
    --my-custom-position,
    --my-custom-position flip-inline,
    bottom left;
}
two targets sorrounding an anchor, positioned where the IMCB is the largest.

position-try-order

This property chooses a new position from the fallback values defined in the position-try-fallbacks property based on which position gives the target the most space. The rest of the options are reordered with the largest available space coming first.

position-try-order: normal | most-width | most-height | most-block-size | most-inline-size

What exactly does “more space” mean? For each position fallback, it finds the IMCB size for the target. Then it chooses the value that gives the IMCB the widest or tallest size, depending on which option is selected:

  • most-width
  • most-height
  • most-block-size
  • most-inline-size
.target {
  position-try-fallbacks: --custom-position, flip-start;
  position-try-order: most-width;
}

position-try

This is a shorthand property that combines the position-try-fallbacks and position-try-order properties into a single declaration. It accepts first the order and then the list of possible position fallbacks.

position-try: < "position-try-order" >? < "position-try-fallbacks" >;

So, we can combine both properties into a single style rule:

.target {
  position-try: most-width --my-custom-position, flip-inline, bottom left;
}

Custom position and size fallbacks

@position-try

This at-rule defines a custom position fallback for the position-try-fallbacks property.

@position-try <dashed-ident> {
  <declaration-list>
}

It takes various properties for changing a target element’s position and size and grouping them as a new position fallback for the element to try.

Imagine a scenario where you’ve established an anchor-target relationship. You want to position the target element against the anchor’s top-right edge, which is easy enough using the position-area property we saw earlier:

.target {
  position: absolute;
  position-area: top right;
  width: 100px;
}

See how the .target is sized at 100px? Maybe it runs out of room on some screens and is no longer able to be displayed at anchor’s the top-right edge. We can supply the .target with the fallbacks we looked at earlier so that it attempts to re-position itself on an edge with more space:

.target {
  position: absolute;
  position-area: top right;
  position-try-fallbacks: top left;
  position-try-order: most-width;
  width: 100px;
}

And since we’re being good CSSer’s who strive for clean code, we may as well combine those two properties with the position-try shorthand property:

.target {
  position: absolute;
  position-area: top right;
  position-try: most-width, flip-inline, bottom left;
  width: 100px;
}

So far, so good. We have an anchored target element that starts at the top-right corner of the anchor at 100px. If it runs out of space there, it will look at the position-try property and decide whether to reposition the target to the anchor’s top-left corner (declared as flip-inline) or the anchor’s bottom-left corner — whichever offers the most width.

But what if we want to simulataneously re-size the target element when it is re-positioned? Maybe the target is simply too dang big to display at 100px at either fallback position and we need it to be 50px instead. We can use the @position-try to do exactly that:

@position-try --my-custom-position {
  position-area: top left;
  width: 50px;
}

With that done, we now have a custom property called --my-custom-position that we can use on the position-try shorthand property. In this case, @position-try can replace the flip-inline value since it is the equivalent of top left:

@position-try --my-custom-position {
  position-area: top left;
  width: 50px;
}

.target {
  position: absolute;
  position-area: top right;
  position-try: most-width, --my-custom-position, bottom left;
  width: 100px;
}

This way, the .target element’s width is re-sized from 100px to 50px when it attempts to re-position itself to the anchor’s top-right edge. That’s a nice bit of flexibility that gives us a better chance to make things fit together in any layout.

Anchor functions

anchor()

You might think of the CSS anchor() function as a shortcut for attaching a target element to an anchor element — specify the anchor, the side we want to attach to, and how large we want the target to be in one fell swoop. But, as we’ll see, the function also opens up the possibility of attaching one target element to multiple anchor elements.

This is the function’s formal syntax, which takes up to three arguments:

anchor( <anchor-element>? && <anchor-side>, <length-percentage>? )

So, we’re identifying an anchor element, saying which side we want the target to be positioned on, and how big we want it to be. It’s worth noting that anchor() can only be declared on inset-related properties (e.g. top, left, inset-block-end, etc.)

.target {
  top: anchor(--my-anchor bottom);
  left: anchor(--my-anchor end, 50%);
}

Let’s break down the function’s arguments.

<anchor-element>

This argument specifies which anchor element we want to attach the target to. We can supply it with either the anchor’s name (see “Attaching targets to anchors”).

We also have the choice of not supplying an anchor at all. In that case, the target element uses an implicit anchor element defined in position-anchor. If there isn’t an implicit anchor, the function resolves to its fallback. Otherwise, it is invalid and ignored.

<anchor-side>

This argument sets which side of the anchor we want to position the target element to, e.g. the anchor’s top, left, bottom, right, etc.

But we have more options than that, including logical side keywords (inside, outside), logical direction arguments relative to the user’s writing mode (start, end, self-start, self-end) and, of course, center.

  • <anchor-side>: Resolves to the <length> of the corresponding side of the anchor element. It has physical arguments (top, left, bottom right), logical side arguments (inside, outside), logical direction arguments relative to the user’s writing mode (start, end, self-start, self-end) and the center argument.
  • <percentage>: Refers to the position between the start (0%) and end (100%). Values below 0% and above 100% are allowed.
<length-percentage>

This argument is totally optional, so you can leave it out if you’d like. Otherwise, use it as a way of re-sizing the target elemenrt whenever it doesn’t have a valid anchor or position. It positions the target to a fixed <length> or <percentage> relative to its containing block.

Let’s look at examples using different types of arguments because they all do something a little different.

Using physical arguments
targets sorrounding the anchor. each with a different position

Physical arguments (top, right, bottom, left) can be used to position the target regardless of the user’s writing mode. For example, we can position the right and bottom inset properties of the target at the anchor(top) and anchor(left) sides of the anchor, effectively positioning the target at the anchor’s top-left corner:

.target {
  bottom: anchor(top);
  right: anchor(left);
}

Using logical side keywords
targets sorrounding the anchor. each with a different position

Logical side arguments (i.e., insideoutside), are dependent on the inset property they are in. The inside argument will choose the same side as its inset property, while the outside argument will choose the opposite. For example:

.target {
  left: anchor(outside);
  /* is the same as */
  left: anchor(right);

  top: anchor(inside);
  /* is the same as */
  top: anchor(top);
}

Using logical directions

targets sorrounding the anchor. each with a different position

Logical direction arguments are dependent on two factors:

  1. The user’s writing mode: they can follow the writing mode of the containing block (start, end) or the target’s own writing mode (self-start, self-end).
  2. The inset property they are used in: they will choose the same axis of their inset property.

So for example, using physical inset properties in a left-to-right horizontal writing would look like this:

.target {
  left: anchor(start);
  /* is the same as */
  left: anchor(left);

  top: anchor(end);
  /* is the same as */
  top: anchor(bottom);
}

In a right-to-left writing mode, we’d do this:

.target {
  left: anchor(start);
  /* is the same as */
  left: anchor(right);

  top: anchor(end);
  /* is the same as */
  top: anchor(bottom);
}

That can quickly get confusing, so we should also use logical arguments with logical inset properties so the writing mode is respected in the first place:

.target {
  inset-inline-start: anchor(end);
  inset-block-start: anchor(end);
}

Using percentage values
targets sorrounding the anchor. each with a different position

Percentages can be used to position the target from any point between the start (0%) and end (100% ) sides. Since percentages are relative to the user writing mode, is preferable to use them with logical inset properties.

.target {
  inset-inline-start: anchor(100%);
  /* is the same as */
  inset-inline-start: anchor(end);

  inset-block-end: anchor(0%);
  /* is the same as */
  inset-block-end: anchor(start);
}

Values smaller than 0% and bigger than 100% are accepted, so -100% will move the target towards the start and 200% towards the end.

.target {
  inset-inline-start: anchor(200%);
  inset-block-end: anchor(-100%);
}

Using the center keyword
targets sorrounding the anchor. each with a different position

The center argument is equivalent to 50%. You could say that it’s “immune” to direction, so there is no problem if we use it with physical or logical inset properties.

.target {
  position: absolute;
  position-anchor: --my-anchor;

  left: anchor(center);
  bottom: anchor(top);
}

anchor-size()

The anchor-size() function is unique in that it sizes the target element relative to the size of the anchor element. This can be super useful for ensuring a target scales in size with its anchor, particularly in responsive designs where elements tend to get shifted, re-sized, or obscured from overflowing a container.

The function takes an anchor’s side and resolves to its <length>, essentially returning the anchor’s width, height, inline-size or block-size.

anchor-size( [ <anchor-element> || <anchor-size> ]? , <length-percentage>? )
anchor with an anchor-size() function on each side

Here are the arguments that can be used in the anchor-size() function:

  • <anchor-size>: Refers to the side of the anchor element.
  • <length-percentage>: This optional argument can be used as a fallback whenever the target doesn’t have a valid anchor or size. It returns a fixed <length> or <percentage> relative to its containing block.

And we can declare the function on the target element’s width and height properties to size it with the anchor — or both at the same time!

.target {
  width: anchor-size(width, 20%); /* uses default anchor */`
  height: anchor-size(--other-anchor inline-size, 100px);
}

Multiple anchors

We learned about the anchor() function in the last section. One of the function’s quirks is that we can only declare it on inset-based properties, and all of the examples we saw show that. That might sound like a constraint of working with the function, but it’s actually what gives anchor() a superpower that anchor positioning properties don’t: we can declare it on more than one inset-based property at a time. As a result, we can set the function multiple anchors on the same target element!

Here’s one of the first examples of the anchor() function we looked at in the last section:

.target {
  top: anchor(--my-anchor bottom);
  left: anchor(--my-anchor end, 50%);
}

We’re declaring the same anchor element named --my-anchor on both the top and left inset properties. That doesn’t have to be the case. Instead, we can attach the target element to multiple anchor elements.

.anchor-1 { anchor-name: --anchor-1; }
.anchor-2 { anchor-name: --anchor-2; }
.anchor-3 { anchor-name: --anchor-3; }
.anchor-4 { anchor-name: --anchor-4; }

.target {
  position: absolute;
  inset-block-start: anchor(--anchor-1);
  inset-inline-end: anchor(--anchor-2);
  inset-block-end: anchor(--anchor-3);
  inset-inline-start: anchor(--anchor-4);
}

Or, perhaps more succintly:

.anchor-1 { anchor-name: --anchor-1; }
.anchor-2 { anchor-name: --anchor-2; }
.anchor-3 { anchor-name: --anchor-3; }
.anchor-4 { anchor-name: --anchor-4; }

.target {
  position: absolute;
  inset: anchor(--anchor-1) anchor(--anchor-2) anchor(--anchor-3) anchor(--anchor-4);
}

The following demo shows a target element attached to two <textarea> elements that are registered anchors. A <textarea> allows you to click and drag it to change its dimensions. The two of them are absolutely positioned in opposite corners of the page. If we attach the target to each anchor, we can create an effect where resizing the anchors stretches the target all over the place almost like a tug-o-war between the two anchors.

The demo is only supported in Chrome at the time we’re writing this guide, so let’s drop in a video so you can see how it works.

Accessibility

The most straightforward use case for anchor positioning is for making tooltips, info boxes, and popovers, but it can also be used for decorative stuff. That means anchor positioning doesn’t have to establish a semantic relationship between the anchor and target elements. You can probably spot the issue right away: non-visual devices, like screen readers, are left in the dark about how to interpret two seemingly unrelated elements.

As an example, let’s say we have an element called .tooltip that we’ve set up as a target element anchored to another element called .anchor.

<div class="anchor">anchor</div>
<div class="toolip">toolip</div>
.anchor {
  anchor-name: --my-anchor;
}

.toolip {
  position: absolute;
  position-anchor: --my-anchor;
  position-area: top;
}

We need to set up a connection between the two elements in the DOM so that they share a context that assistive technologies can interpret and understand. The general rule of thumb for using ARIA attributes to describe elements is generally: don’t do it. Or at least avoid doing it unless you have no other semantic way of doing it.

This is one of those cases where it makes sense to reach for ARIA atributes. Before we do anything else, a screen reader currently sees the two elements next to one another without any remarking relationship. That’s a bummer for accessibility, but we can easily fix it using the corresponding ARIA attribute:

<div class="anchor" aria-describedby="tooltipInfo">anchor</div>
<div class="toolip" role="tooltip" id="tooltipInfo">toolip</div>

And now they are both visually and semantically linked together! If you’re new to ARIA attributes, you ought to check out Adam Silver’s “Why, How, and When to Use Semantic HTML and ARIA” for a great introduction.

Browser support

This browser support data is from Caniuse, which has more detail. A number indicates that browser supports the feature at that version and up.

Desktop

ChromeFirefoxIEEdgeSafari
125NoNo125No

Mobile / Tablet

Android ChromeAndroid FirefoxAndroidiOS Safari
129No129No

Spec changes

CSS Anchor Positioning has undergone several changes since it was introduced as an Editor’s Draft. The Chrome browser team was quick to hop on board and implement anchor positioning even though the feature was still being defined. That’s caused confusion because Chromium-based browsers implemented some pieces of anchor positioning while the specification was being actively edited.

We are going to outline specific cases for you where browsers had to update their implementations in response to spec changes. It’s a bit confusing, but as of Chrome 129+, this is the stuff that was shipped but changed:

position-area

The inset-area property was renamed to position-area (#10209), but it will be supported until Chrome 131.

.target {
  /* from */
  inset-area: top right;

  /* to */
  position-area: top right;
}

position-try-fallbacks

The position-try-options was renamed to position-try-fallbacks (#10395).

.target {
  /* from */
  position-try-options: flip-block, --smaller-target;

  /* to */
  position-try-fallbacks: flip-block, --smaller-target;
}

inset-area()

The inset-area() wrapper function doesn’t exist anymore for the position-try-fallbacks (#10320), you can just write the values without the wrapper:

.target {
  /* from */
  position-try-options: inset-area(top left);

  /* to */
  position-try-fallbacks: top left;
}

anchor(center)

In the beginning, if we wanted to center a target from the center, we would have to write this convoluted syntax:

.target {
  --center: anchor(--x 50%);
  --half-distance: min(abs(0% - var(--center)), abs(100% - var(--center)));

  left: calc(var(--center) - var(--half-distance));
  right: calc(var(--center) - var(--half-distance));
}

The CWSSG working group resolved (#8979) to add the anchor(center) argument to prevent us from having to do all that mental juggling:

.target {
  left: anchor(center);
}

Known bugs

Yes, there are some bugs with CSS Anchor Positioning, at least at the time this guide is being written. For example, the specification says that if an element doesn’t have a default anchor element, then the position-area does nothing. This is a known issue (#10500), but it’s still possible to replicate.

So, the following code…

.container {
  position: relative;
}

.element {
  position: absolute;
  position-area: center;
  margin: auto;
}

…will center the .element inside its container, at least in Chrome:

Credit to Afif13 for that great demo!

Another example involves the position-visibility property. If your anchor element is out of sight or off-screen, you typically want the target element to be hidden as well. The specification says that property’s the default value is anchors-visible, but browsers default to always instead.

The current implemenation in Chrome isn’t reflecting the spec; it indeed is using always as the initial value. But the spec is intentional: if your anchor is off-screen or otherwise scrolled off, you usually want it to hide. (#10425)

Almanac references

Anchor position properties

Anchor position functions

Anchor position at-rules

Further reading


CSS Anchor Positioning Guide originally published on CSS-Tricks, which is part of the DigitalOcean family. You should get the newsletter.

30+ Best Fall & Thanksgiving Fonts for Seasonal Designs

Featured Imgs 23

With Thanksgiving just around the corner, it’s time to prepare for the delicious Thanksgiving dinners and big bellies. And of course, it’s also time to bring out your fall and Thanksgiving fonts for all the banners, flyers, posters, and greeting card designs.

In this roundup, you’ll find a blend of free and premium fonts ready for your festive designs. Whether you’re working on a Thanksgiving dinner invitation, an autumn-themed blog post, or a fall sale advertisement, these fall and Thanksgiving fonts will add a seasonal touch to your projects, helping your designs stand out with a seasonal vibe.

From elegant serifs to playful scripts, each Thanksgiving font selection has been crafted to give your designs a stunning aesthetic appeal, enhance readability, and engage your audience. So dive in, and let’s get ready to transform your autumn and Thanksgiving design projects with these beautiful and versatile fall fonts.

Gratefully – Slab Serif Thanksgiving Font

Gratefully - Slab Serif Thanksgiving Font

Gratefully is an exciting slab serif font with a unique ‘fall’ theme, ideal for creative Thanksgiving projects. Its bouncy, handmade letters deliver a fun and unique result, perfect for cutting, printing, greeting cards, and merchandise. Offering standard uppercase, lowercase, numerals, symbols, and select ligatures, it fits various software formats including otf, ttf, and woff (Web Font).

Thankful Sunday – Thanksgiving Font Duo

Thankful Sunday - Thanksgiving Font Duo

Thankful Sunday is a unique, hand-written font duo, perfect for your Thanksgiving-themed designs. It includes a primary font and an additional doodle font packed with charming illustrations. Available in otf, ttf, and woff file types, this third-party design tool is excellent for adding a personal and festive touch to your projects.

Fall Pies – Modern Handwritten Fall Font

Fall Pies - Modern Handwritten Fall Font

Fall Pies is a modern, handwritten font that is perfect for a variety of uses. Whether you’re designing greeting cards, invitations, posters, or logos, Fall Pies adds a charming, autumnal touch to your work. The font, provided in .otf and .ttf formats, includes both uppercase and lowercase varieties. Try it out for a fresh, seasonal look.

Hello Thankies – Thanksgiving Themed Font

Hello Thankies - Thanksgiving Themed Font

Check out Hello Thankies, a delightful Thanksgiving-themed font duo that’s designed to infuse warm, festive vibes into any project. This unique collection includes two fonts, along with an exclusive ‘Thankies Doodle’ for an added touch of creativity. Whether it’s for branding, posters, clothing, or for that special Thanksgiving decoration, Hello Thankies is a charming solution.

Autumn Brush – Thanksgiving Font

Autumn Brush - Thanksgiving Font

Autumn Brush is a colorful, handcrafted font that brings an energetic and realistic touch to your design projects. With its lively, textured character set, it’s ideal for logos, posters, invites and anything requiring a dash of creativity and warmth.

Holifall Autumn – Tropical Fall Font

Holifall Autumn - Tropical Fall Font

Holifall Autumn is a unique and authentic display font perfect for diverse needs. Offering a variety of themes and font styles, it comes in regular OTF, TTF, and WOFF formats. This font is perfect for giving a simple and creative fall vibe to your various seasonal design projects.

Golden Harvest – Fall Font

Golden Harvest - Fall Font

Golden Harvest is a contemporary, handwritten style font that provides a captivating touch to your designs. It includes upper and lower case letters, numerals, and standard punctuations. It also showcases accents, stunning ligatures, and stylistic sets.

Happy Thanksgiving – Handwritten Script Font

Happy Thanksgiving - Handwritten Script Font

Happy Thanksgiving is a charming handwritten script font that seamlessly melds the warm, festive ambiance of numerous holidays. Beautifully encapsulating the essence of autumn and the cheer of the holiday season, this versatile font adds a touch of artful creativity to your projects.

Beauty Autumn – Simple Handwritten Font

Beauty Autumn - Simple Handwritten Font

Beauty Autumn is a versatile font perfect for sprucing up your digital and printed materials. Its handwritten style brings an intimate, personal touch to your projects, whether it’s for branding, posters, or social media posts. With included OTF, WOFF, and TTF files, it meets diverse design needs effortlessly.

Autumn Silent – Modern Handwritten Script Font

Autumn Silent - Modern Handwritten Script Font

Autumn Silent, a modern handwritten script font, is an elegant addition to your digital and printed creations. With its stylistic appeal, it’s an incredible choice for enhancing posters, social media posts, branding, and personal projects. It is conveniently offered in OTF, WOFF, TTF and italic versions.

Retro Fall – Cute Fall Font

Retro Fall - Cute Fall Font

Retro Fall is a groovy, vintage-inspired font well-suited for various creative ventures. Its playful and authentic vibe makes it ideal for blog posts, logos, greeting cards, branding, or even planners and photo albums. The zip file includes both OTF and TTF files, allowing diverse usage for this unique typeface guaranteed to enhance your designs with a touch of nostalgia.

Lemon – Fall Thanksgiving Font

Lemon - Fall Thanksgiving Font

Lemon Font is a fun, refreshing blend of display and cute styles that add a burst of lively color to your creations. Ideal for seasonal and fun occasions, this whimsical font is perfect for projects that radiate positivity. Lemon Font brings the vibrant spirit of changing seasons to your crafting, decor, and embroidery projects.

Wonderland – Christmas & Thanksgiving Font

Wonderland - Christmas & Thanksgiving Font

Wonderland is an elegantly designed, handwritten font that adds a touch of warmth and sophistication to various projects. Ideally suited for special occasions and festive themes, its graceful style enhances creations from wedding invitations and greeting cards to embroidery designs and unique crafts.

Thanksgiving Joy – Playful Font

Thanksgiving Joy - Playful Font

Thanksgiving Joy is a cheerful, playful font that’s perfect for celebrating the festive season. The font comes with nine decorative options, all inspired by classic Thanksgiving motifs. Easy to install and use, it’s great for designing invitations, decorations, or logos for the holiday season.

Orange Leafy – Autumn Themed Font

Orange Leafy - Autumn Themed Font

Orange Leafy is a captivating Autumn-themed font. Its playful and vibrant style is great for Autumn branding, logos, invitations, stationery, social media posts, product packaging, merchandise, and more. Offering otf and ttf formats, ligatures, and multilingual support.

Falling Dried – Modern Fall Sans Serif Font

Falling Dried - Modern Fall Sans Serif Font

Falling Dried is a beautifully modern sans serif font exuding warmth and recalling the natural splendor of autumn. Its clean and minimal design gives letters a tranquil, soft look, making it perfect for projects that capture the season’s charm. The font, which comes in several formats including otf and ttf, works well for invitations, posters and more.

Fall Season – Handwritten Font

Fall Season - Handwritten Font

Fall Season is a somewhat wistful, handwritten font with a relaxed vibe that gives each design a unique and captivating touch. It’s perfect for logos, branding, and quotes, offering uppercase, lowercase, symbols, numerals, ligatures, alternates, and multilingual support. The font comes in OTF, TTF, WOFF, and WOFF2 files, making it versatile for various projects.

Gobbie Gobble – Fun Thanksgiving Font

Gobbie Gobble - Fun Thanksgiving Font

The Gobbie Gobble font evokes the playful spirit of Thanksgiving with its endearing handwritten style. Available in uppercase and lowercase, along with numerics and symbols, it offers versatility for your creative designs. Alongside, it includes 26 unique Thanksgiving-themed doodles accessible by typing A-Z, enhancing your artwork further. File formats include otf, ttf, and woff for the font and doodles.

Thanks Autumn – Handwritten Fall Font

Thanks Autumn - Handwritten Fall Font

Thanks Autumn handwritten font is an appealing, artistically crafted font that embodies the heart and warmth of the fall season. Displayed entirely in caps, it includes two different heights, numbers, symbols, and multilingual support. The asset provides OTF, TTF, WOFF files to suit your project needs. Perfect for any charming autumn-inspired project.

Barthley – Handlettering Fall Font

Barthley - Handlettering Fall Font

Barthley is an appealing handwritten font with a unique, natural style. Its versatility makes it ideal for a wide variety of designs. The font is user-friendly, easy to install on both PC & Mac and works seamlessly with popular software like Adobe Illustrator, Photoshop, Microsoft Word, and more. It’s PUA encoded which allows for easy access to all its glyphs and swashes.

Gratefully – Slab Serif Thanksgiving Font

Gratefully - Slab Serif Thanksgiving Font

Gratefully is a playful, fall-themed slab serif font with a unique, handmade feel. Its bouncy and scribbled characteristics make it perfect for a range of creative projects like Thanksgiving invitations, greeting cards, and posters. Offering a variety of features, including standard uppercase, lowercase, numerals, symbols, and some ligatures, this font is compatible with most software platforms and comes in .otf, .ttf, and web font formats.

Savor Fall – Modern Fall Font

Savor Fall - Modern Fall Font

Savor Fall is a modern display typeface that captures the spirit of fall through its distinctive style that instills a warm sense of nostalgia. With delicate lines and gentle curves, the font lends softness and tranquility to your designs. Ideal for invitations, greeting cards, or posters, it infuses every project with an irresistibly natural touch. Available in both otf and ttf formats, with uppercase and lowercase options.

Maple Memories – Fall & Thanksgiving Font

Maple Memories - Fall & Thanksgiving Font

Maple Memories is a beautifully intricate handwritten font that enhances any design with its versatile style. Offered in three formats (.otf, .ttf, .woff) and featuring multilingual support, from English to Zulu, it’s perfect for beginners and experts alike. The additional beginning and ending swash augment its elegance. Designed by Attype Studio, this creative asset is sure to bring your Fall and Thanksgiving projects to life!

Autumn Atmosphere – Creative Fall Font

Autumn Atmosphere - Creative Fall Font

Autumn Atmosphere is a distinctive and genuine display font, perfect for various branding projects like logos, seasonal decorations, greeting cards, and beyond. Its bold and adaptive style stands out in numerous contexts. The package includes OTF, TTF, and WOFF formats.

Happy Fall – Modern Handwritten Font

Happy Fall - Modern Handwritten Font

Step into Autumn with the Happy Fall handwritten font. Perfect for projects that want to carry the enchanting essence of fall, like invitations, greeting cards, or posters. This charming font features uppercase and lowercase versions along with multilingual support. It will sprinkle a natural and captivating touch on your design, wrapping it in a cozy autumn ambiance. Available in otf and ttf formats.

Turning Leaf – Fall Themed Font

Turning Leaf - Fall Themed Font

The Turning Leaf is a charming fall-themed creative font. Its delicate lines and gentle curves evoke nostalgia for changing leaves and autumn tranquility, adding a dimension of softness to any design. This font, available in both uppercase and lowercase, is perfect for any project needing a warm, natural touch. It works beautifully on invitations, greeting cards, and posters, and supports multiple languages.

Warm Autumn – Fall & Thanksgiving Font

Warm Autumn - Fall & Thanksgiving Font

Warm Autumn is a distinctive, genuine display font with bold characters. It’s versatile enough for a variety of branding tasks, such as creating logos, greeting cards, and other projects that embrace the spirit of Autumn or summer. Available in OTF, TTF, and WOFF formats, Warm Autumn is a standout choice for a broad set of scenarios.

Lord de Ayodilla – Thanksgiving Style Font

Lord de Ayodilla - Thanksgiving Style Font

The Lord de Ayodilla is a delightful font for livening up your holiday or spring-themed projects. Its dazzling serif-script style uniquely compliments any cheerful occasion. Perfect for creating engaging social media posts or holiday greeting cards, it even includes foreign language glyphs for added versatility. This font is available in .OTF and .TTF formats.

Autumn Orange – Fall Themed Font

Autumn Orange - Fall Themed Font

Autumn Orange is a standout, genuine display font that lends a bold finish to various branding projects, including logos, greeting cards, and seasonal-themed graphics. Its versatility is unmatched as it stands out in myriad contexts. Available in OTF, TTF, and WOFF formats, Autumn Orange is perfect for injecting vibrant, fall-inspired creativity into your designs.

Happy Today – Fall & Thanksgiving Font

Happy Today - Fall & Thanksgiving Font

The Happy Today font is a versatile, bold display font. Great for branding projects such as logos or greeting cards and perfect for seasonal Autumn and Summer themes, it stands out in various contexts. It comes in OTF, TTF, and WOFF formats, offering practicality for multiple use cases.

Best Free Thanksgiving Fonts

Free Thanksgiving Font

Free Thanksgiving Font

This free font is designed with Thanksgiving-themed projects in mind. It features a beautiful script-style letter design that will add a more modern and more festive look to your typography designs. It’s free to use with personal projects.

Free Script Fall Font

Free Script Fall Font

Another free script font. This font is made for fall-themed design projects. It comes with a set of creative characters suitable for greeting cards, logos, and social media posts. The font is free for personal use only.

With Farmhouse – Free Fall Font

With Farmhouse - Free Fall Font

You can use this font to craft beautiful greeting cards and packaging designs for your fall-themed projects. It’s free to download and use with your personal projects.

Sweet November – Free Fall Themed Font

Sweet November - Free Fall Themed Font

This font has a sweet romantic vibe with a mix of fall-season looks. It’s perfect for designing titles for greeting cards as well as for flyers and posters. The font is free for personal use.

Blushing – Free Fall Font

Blushing - Free Fall Font

Blushing is a free fall-themed font that comes with a handwritten-style letter design. The font is ideal for custom prints such as t-shirts, mugs, and greeting cards. It’s free to use with personal projects.

Interview With Björn Ottosson, Creator Of The Oklab Color Space

Featured Imgs 23

Oklab is a new perceptual color space supported in all major browsers created by the Swedish engineer Björn Ottosson. In this interview, Philip Jägenstedt explores how and why Björn created Oklab and how it spread across the ecosystem.

Note: The original interview was conducted in Swedish and is available to watch.

About Björn

Philip Jägenstedt: Tell me a little about yourself, Björn.

Björn Ottosson: I worked for many years in the game industry on game engines and games like FIFA, Battlefield, and Need for Speed. I've always been interested in technology and its interaction with the arts. I’m an engineer, but I’ve always held both of these interests.

On Working With Color

Philip: For someone who hasn’t dug into colors much, what’s so hard about working with them?

Björn: Intuitively, colors can seem quite simple. A color can be lighter or darker, it can be more blue or more green, and so on. Everyone with typical color vision has a fairly similar experience of color, and this can be modeled.

However, the way we manipulate colors in software usually doesn’t align with human perception of colors. The most common color space is sRGB. There’s also HSL, which is common for choosing colors, but it’s also based on sRGB.

One problem with sRGB is that in a gradient between blue and white, it becomes a bit purple in the middle of the transition. That’s because sRGB really isn’t created to mimic how the eye sees colors; rather, it is based on how CRT monitors work. That means it works with certain frequencies of red, green, and blue, and also the non-linear coding called gamma. It’s a miracle it works as well as it does, but it’s not connected to color perception. When using those tools, you sometimes get surprising results, like purple in the gradient.

On Color Perception

Philip: How do humans perceive color?

Björn: When light enters the eye and hits the retina, it’s processed in many layers of neurons and creates a mental impression. It’s unlikely that the process would be simple and linear, and it’s not. But incredibly enough, most people still perceive colors similarly.

People have been trying to understand colors and have created color wheels and similar visualizations for hundreds of years. During the 20th century, a lot of research and modeling went into color vision. For example, the CIE XYZ model is based on how sensitive our photoreceptor cells are to different frequencies of light. CIE XYZ is still a foundational color space on which all other color spaces are based.

There were also attempts to create simple models matching human perception based on XYZ, but as it turned out, it’s not possible to model all color vision that way. Perception of color is incredibly complex and depends, among other things, on whether it is dark or light in the room and the background color it is against. When you look at a photograph, it also depends on what you think the color of the light source is. The dress is a typical example of color vision being very context-dependent. It is almost impossible to model this perfectly.

Models that try to take all of this complexity into account are called color appearance models. Although they have many applications, they’re not that useful if you don’t know if the viewer is in a light or bright room or other viewing conditions.

The odd thing is that there’s a gap between the tools we typically use — such as sRGB and HSL — and the findings of this much older research. To an extent, this makes sense because when HSL was developed in the 1970s, we didn’t have much computing power, so it’s a fairly simple translation of RGB. However, not much has changed since then.

We have a lot more processing power now, but we’ve settled for fairly simple tools for handling colors in software.

Display technology has also improved. Many displays now have different RGB primaries, i.e., a redder red, greener green, or bluer blue. sRGB cannot reach all colors available on these displays. The new P3 color space can, but it's very similar to sRGB, just a little wider.

On Creating Oklab

Philip: What, then, is Oklab, and how did you create it?

Björn: When working in the game industry, sometimes I wanted to do simple color manipulations like making a color darker or changing the hue. I researched existing color spaces and how good they are at these simple tasks and concluded that all of them are problematic in some way.

Many people know about CIE Lab. It’s quite close to human perception of color, but the handling of hue is not great. For example, a gradient between blue and white turns out purple in CIE Lab, similar to in sRGB. Some color spaces handle hue well but have other issues to consider.

When I left my job in gaming to pursue education and consulting, I had a bit of time to tackle this problem. Oklab is my attempt to find a better balance, something Lab-like but “okay”.

I based Oklab on two other color spaces, CIECAM16 and IPT. I used the lightness and saturation prediction from CIECAM16, which is a color appearance model, as a target. I actually wanted to use the datasets used to create CIECAM16, but I couldn’t find them.

IPT was designed to have better hue uniformity. In experiments, they asked people to match light and dark colors, saturated and unsaturated colors, which resulted in a dataset for which colors, subjectively, have the same hue. IPT has a few other issues but is the basis for hue in Oklab.

Using these three datasets, I set out to create a simple color space that would be “okay”. I used an approach quite similar to IPT but combined it with the lightness and saturation estimates from CIECAM16. The resulting Oklab still has good hue uniformity but also handles lightness and saturation well.

Philip: How about the name Oklab? Why is it just okay?

Björn: This is a bit tongue-in-cheek and some amount of humility.

For the tasks I had in mind, existing color spaces weren’t okay, and my goal was to make one that is. At the same time, it is possible to delve deeper. If a university had worked on this, they could have run studies with many participants. For a color space intended mainly for use on computer and phone screens, you could run studies in typical environments where they are used. It’s possible to go deeper.

Nevertheless, I took the datasets I could find and made the best of what I had. The objective was to make a very simple model that’s okay to use. And I think it is okay, and I couldn’t come up with anything better. I didn’t want to call it Björn Ottosson Lab or something like that, so I went with Oklab.

Philip: Does the name follow a tradition of calling things okay? I know there’s also a Quite OK Image format.

Björn: No, I didn’t follow any tradition here. Oklab was just the name I came up with.

On Oklab Adoption

Philip: I discovered Oklab when it suddenly appeared in all browsers. Things often move slowly on the web, but in this case, things moved very quickly. How did it happen?

Björn: I was surprised, too! I wrote a blog post and shared it on Twitter.

I have a lot of contacts in the gaming industry and some contacts in the Visual Effects (VFX) industry. I expected that people working with shaders or visual effects might try this out, and maybe it would be used in some games, perhaps as an effect for a smooth color transition.

But the blog post was spread much more widely than I thought. It was on Hacker News, and many people read it.

The code for Oklab is only 10 lines long, so many open-source libraries have adopted it. This all happened very quickly.

Chris Lilley from the W3C got in touch and asked me some questions about Oklab. We discussed it a bit, and I explained how it works and why I created it. He gave a presentation at a conference about it, and then he pushed for it to be added to CSS.

Photoshop also changed its gradients to use Oklab. All of this happened organically without me having to cheer it on.

On Okhsl

Philip: In another blog post, you introduced two other color spaces, Okhsv and Okhsl. You’ve already talked about HSL, so what is Okhsl?

Björn: When picking colors, HSL has a big advantage, which is that the parameter space is simple. Any value 0-360 for hue (H) together with any values 0-1 for saturation (S) and lightness (L) are valid combinations and result in different colors on screen. The geometry of HSL is a cylinder, and there’s no way to end up outside that cylinder accidentally.

By contrast, Oklab contains all physically possible colors, but there are combinations of values that don’t work where you reach colors that don’t exist. For example, starting from light and saturated yellow in Oklab and rotating the hue to blue, that blue color does not exist in sRGB; there are only darker and less saturated blues. That’s because sRGB in Oklab has a strange shape, so it’s easy to end up going outside it. This makes it difficult to select and manipulate colors with Oklab or Oklch.

Okhsl was an attempt at compromise. It maintains Oklab’s behavior for colors that are not very saturated, close to gray, and beyond that, stretches out to a cylinder that contains all of sRGB. Another way to put it is that the strange shape of sRGB in Oklab has been stretched into a cylinder with reasonably smooth transitions.

The result is similar to HSL, where all parameters can be changed independently without ending up outside sRGB. It also makes Okhsl more complicated than Oklab. There are unavoidable compromises to get something with the characteristics that HSL has.

Everything with color is about compromises. Color vision is so complex that it's about making practical compromises.

This is an area where I wish there were more research. If I have a white background and want to pick some nice colors to put on it, then you can make a lot of assumptions. Okhsl solves many things, but is it possible to do even better?

On Color Compromises

Philip: Some people who have tried Oklab say there are too many dark shades. You changed that in Okhsl with a new lightness estimate.

Björn: This is because Oklab is exposure invariant and doesn’t account for viewing conditions, such as the background color. On the web, there’s usually a white background, which makes it harder to see the difference between black and other dark colors. But if you look at the same gradient on a black background, the difference is more apparent.

CIE Lab handles this, and I tried to handle it in Okhsl, too. So, gradients in Okhsl look better on a white background, but there will be other issues on a black background. It’s always a compromise.

And, Finally…

Philip: Final question: What’s your favorite color?

Björn: I would have to say Burgundy. Burgundy, dark greens, and navy blues are favorites.

Philip: Thank you for your time, Björn. I hope our readers have learned something, and I’ll remind them of your excellent blog, where you go into more depth about Oklab and Okhsl.

Björn: Thank you!


Gain $200 in a week
from Articles on Smashing Magazine — For Web Designers And Developers https://ift.tt/p0n1ylf