How to Make a “Scroll to Select” Form Control

Featured Imgs 23

The <select> element is a fairly straightforward concept: focus on it to reveal a set of <option>s that can be selected as the input’s value. That’s a great pattern and I’m not suggesting we change it. That said, I do enjoy poking at things and found an interesting way to turn a <select> into a dial of sorts — where options are selected by scrolling them into position, not totally unlike a combination lock or iOS date pickers. Anyone who’s expanded a <select> for selecting a country knows how painfully long lists can be and this could be one way to prevent that.

Here’s what I’m talking about:

It’s fairly common knowledge that styling <select> in CSS is not the easiest thing in the world. But here’s the trick: we’re not working with <select> at all. No, we’re not going to do anything like building our own <select> by jamming a bunch of JavaScript into a <div>. We’re still working with semantic form controls, only it’s radio buttons.

<section class=scroll-container>
  <label for="madrid" class="scroll-item">
      Madrid 
      <abbr>MAD</abbr>
      <input id="madrid" type="radio" name="items">
  </label>
  <label for="malta" class="scroll-item">
      Malta 
      <abbr>MLA</abbr>
      <input id="malta" type="radio" name="items">
  </label>
  <!-- etc. -->
</section>

What we need is to style the list of selectable controls where we are capable of managing their sizes and spacing in CSS. I’ve gone with a group of labels with nested radio boxes as far as the markup goes. The exact styling is totally up to you, of course, but you can use these base styles I wrote up if you want a starting point.

.scroll-container {
  /* SIZING & LAYOUT */
  --itemHeight: 60px;
  --itemGap: 10px;
  --containerHeight: calc((var(--itemHeight) * 7) + (var(--itemGap) * 6));

  width: 400px; 
  height: var(--containerHeight);
  align-items: center;
  row-gap: var(--itemGap);
  border-radius: 4px;

  /* PAINT */
  --topBit: calc((var(--containerHeight) - var(--itemHeight))/2);
  --footBit: calc((var(--containerHeight) + var(--itemHeight))/2);

  background: linear-gradient(
    rgb(254 251 240), 
    rgb(254 251 240) var(--topBit), 
    rgb(229 50 34 / .5) var(--topBit), 
    rgb(229 50 34 / .5) var(--footBit), 
    rgb(254 251 240) 
    var(--footBit));
  box-shadow: 0 0 10px #eee;
}

A couple of details on this:

  • --itemHeight is the height of each item in the list.
  • --itemGap is meant to be the space between two items.
  • The --containerHeight variable is the .scroll-container’s height. It’s the sum of the item sizes and the gaps between them, ensuring that we display, at maximum, seven items at once. (An odd number of items gives us a nice balance where the selected item is directly in the vertical center of the list). 
  • The background is a striped gradient that highlights the middle area, i.e., the location of the currently selected item. 
  •  The --topBit and –-footBit variables are color stops that visually paint in the middle area (which is orange in the demo) to represent the currently selected item.

I’ll arrange the controls in a vertical column with flexbox declared on the .scroll-container:

.scroll-container {
  display: flex; 
  flex-direction: column;
  /* rest of styles */
}

With layout work done, we can focus on the scrolling part of this. If you haven’t worked with CSS Scroll Snapping before, it’s a convenient way to direct a container’s scrolling behavior. For example, we can tell the .scroll-container that we want to enable scrolling in the vertical direction. That way, it’s possible to scroll to the rest of the items that are not in view.

.scroll-container {
  overflow-y: scroll;
  /* rest of styles */
}

Next, we reach for the scroll-snap-style property that can be used to tell the .scroll-container that we want scrolling to stop on an item — not near an item, but directly on it.

.scroll-container {
  overflow-y: scroll;
  scroll-snap-type: y mandatory;
  /* rest of styles */
}

Now items “snap” onto an item instead of allowing a scroll to end wherever it wants. One more little detail I like to include is overscroll-behavior, specifically along the y-axis as far as this demo goes:

.scroll-container {
  overflow-y: scroll;
  scroll-snap-type: y mandatory;
  overscroll-behavior-y: none;
  /* rest of styles */
}

overscroll-behavior-y: none isn’t required to make this work, but when someone scrolls through the .scroll-container (along the y-axis), scrolling stops once the boundary is reached, and any further continued scrolling action will not trigger scrolling in any nearby scroll containers. Just a form of defensive CSS.

Time to move to the items inside the scroll container. But before we go there, here are some base styles for the items themselves that you can use as a starting point:

.scroll-item {
  /* SIZING & LAYOUT */
  width: 90%;
  box-sizing: border-box;
  padding-inline: 20px;
  border-radius: inherit; 

  /* PAINT & FONT */
  background: linear-gradient(to right, rgb(242 194 66), rgb(235 122 51));
  box-shadow: 0 0 4px rgb(235 122 51);
  font: 16pt/var(--itemHeight) system-ui;
  color: #fff;

  input { appearance: none; } 
  abbr { float: right; } /* The airport code */
}

As I mentioned earlier, the --itemHeight variable is setting as the size of each item and we’re declaring it on the flex property — flex: 0 0 var(--itemHeight). Margin is added before and after the first and last items, respectively, so that every item can reach the middle of the container through scrolling. 

The scroll-snap-align property is there to give the .scroll-container a snap point for the items. A center alignment, for instance, snaps an item’s center (vertical center, in this case) with the .scroll-container‘s center (vertical center as well). Since the items are meant to be selected through scrolling alone pointer-events: none is added to prevent selection from clicks.

One last little styling detail is to set a new background on an item when it is in a :checked state:

.scroll-item {
  /* Same styles as before */

  /* If input="radio" is :checked */
  &:has(:checked) {
    background: rgb(229 50 34);
  }
}

But wait! You’re probably wondering how in the world an item can be :checked when we’re removing pointer-events. Good question! We’re all finished with styling, so let’s move on to figuring some way to “select” an item purely through scrolling. In other words, whatever item scrolls into view and “snaps” into the container’s vertical center needs to behave like a typical form control selection. Yes, we’ll need JavaScript for that. 

let observer = new IntersectionObserver(entries => { 
  entries.forEach(entry => {
    with(entry) if(isIntersecting) target.children[1].checked = true;
  });
}, { 
  root: document.querySelector(`.scroll-container`), rootMargin: `-51% 0px -49% 0px`
});

document.querySelectorAll(`.scroll-item`).forEach(item => observer.observe(item));

The IntersectionObserver object is used to monitor (or “observe”) if and when an element (called a target) crosses through (or “intersects”) another element. That other element could be the viewport itself, but in this case, we’re observing the .scroll-container for when a .scroll-item intersects it. We’ve established the observed boundary with rootMargin:"-51% 0px -49% 0px".  

A callback function is executed when that happens, and we can use that to apply changes to the target element, which is the currently selected .scroll-item. In our case, we want to select a .scroll-item that is at the halfway mark in the .scroll-containertarget.children[1].checked = true.

That completes the code. Now, as we scroll through the items, whichever one snaps into the center position is the selected item. Here’s a look at the final demo again:

Let’s say that, instead of selecting an item that snaps into the .scroll-container‘s vertical center, the selection point we need to watch is the top of the container. No worries! All we do is update the scroll-snap-align property value from center to start in the CSS and remove the :first-of-type‘s top margin. From there, it’s only a matter of updating the scroll container’s background gradient so that the color stops highlight the top instead of the center. Like this:

And if one of the items has to be pre-selected when the page loads, we can get its position in JavaScript (getBoundingClientRect()) and use the scrollTo() method to scroll the container to where that specific item’s position is at the point of selection (which we’ll say is the center in keeping with our original demo). We’ll append a .selected class on that .scroll-item

<section class="scroll-container">
  <!-- more items -->
  <label class="scroll-items selected">
    2024
    <input type=radio name=items />
  </label>

  <!-- more items -->
</section>

Let’s select the .selected class, get its dimensions, and automatically scroll to it on page load:

let selected_item = (document.querySelector(".selected")).getBoundingClientRect();
let scroll_container = document.querySelector(".scroll-container");
scroll_container.scrollTo(0, selected_item.top - scroll_container.offsetHeight - selected_item.height);

It’s a little tough to demo this in a typical CodePen embed, so here’s a live demo in a GitHub Page (source code). I’ll drop a video in as well:

That’s it! You can build up this control or use it as a starting point to experiment with different layouts, styles, animations, and such. It’s important the UX clearly conveys to the users how the selection is done and which item is currently selected. And if I was doing this in a production environment, I’d want to make sure there’s a good fallback experience for when JavaScript might be unavailable and that my markup performs well on a screen reader.

References and further reading


How to Make a “Scroll to Select” Form Control originally published on CSS-Tricks, which is part of the DigitalOcean family. You should get the newsletter.


from CSS-Tricks https://ift.tt/K3FcfRl
Gain $200 in a week
via Read more

100+ Best Lightroom Presets of 2025

Featured Imgs 23

If you’re looking to supercharge your design workflow this year, updating your Lightroom presets with a new, powerful collection is a good idea! Lightroom presets let you instantly fix, improve, and enhance your photos with a single click. And we’ve found the perfect set of presets just for you.

Having the right set of Lightroom presets can be a huge time-saver for designers. Everything from retouching portrait photos, to adding stunning visual effects, enhancing interior photos, optimizing HDR photos, adding retro effects, and much more is possible with the Lightroom presets we’ve included in this list.

We’re also answering the most common Lightroom preset FAQs, to help you learn more about presets, use them on desktop or mobile, and more.

What Is A Lightroom Preset?

For beginners, photo editors without a lot of time, or designers that want to create a consistent visual style for imagery, a Lightroom Preset can be a great alternative to manual editing.

A preset is a free (or paid) add-on that comes with pre-determined settings for some of the different features in Lightroom. A preset has all the settings ready to create a certain type of visual with just one click. They can save photographers, editors, and designers a lot of time while helping maintain a consistent visual style.

Need a hand getting started? Our guide on how to install and apply a Lightroom preset is a great place to begin.

Modern Wedding Lightroom Presets

Modern Wedding Lightroom Presets

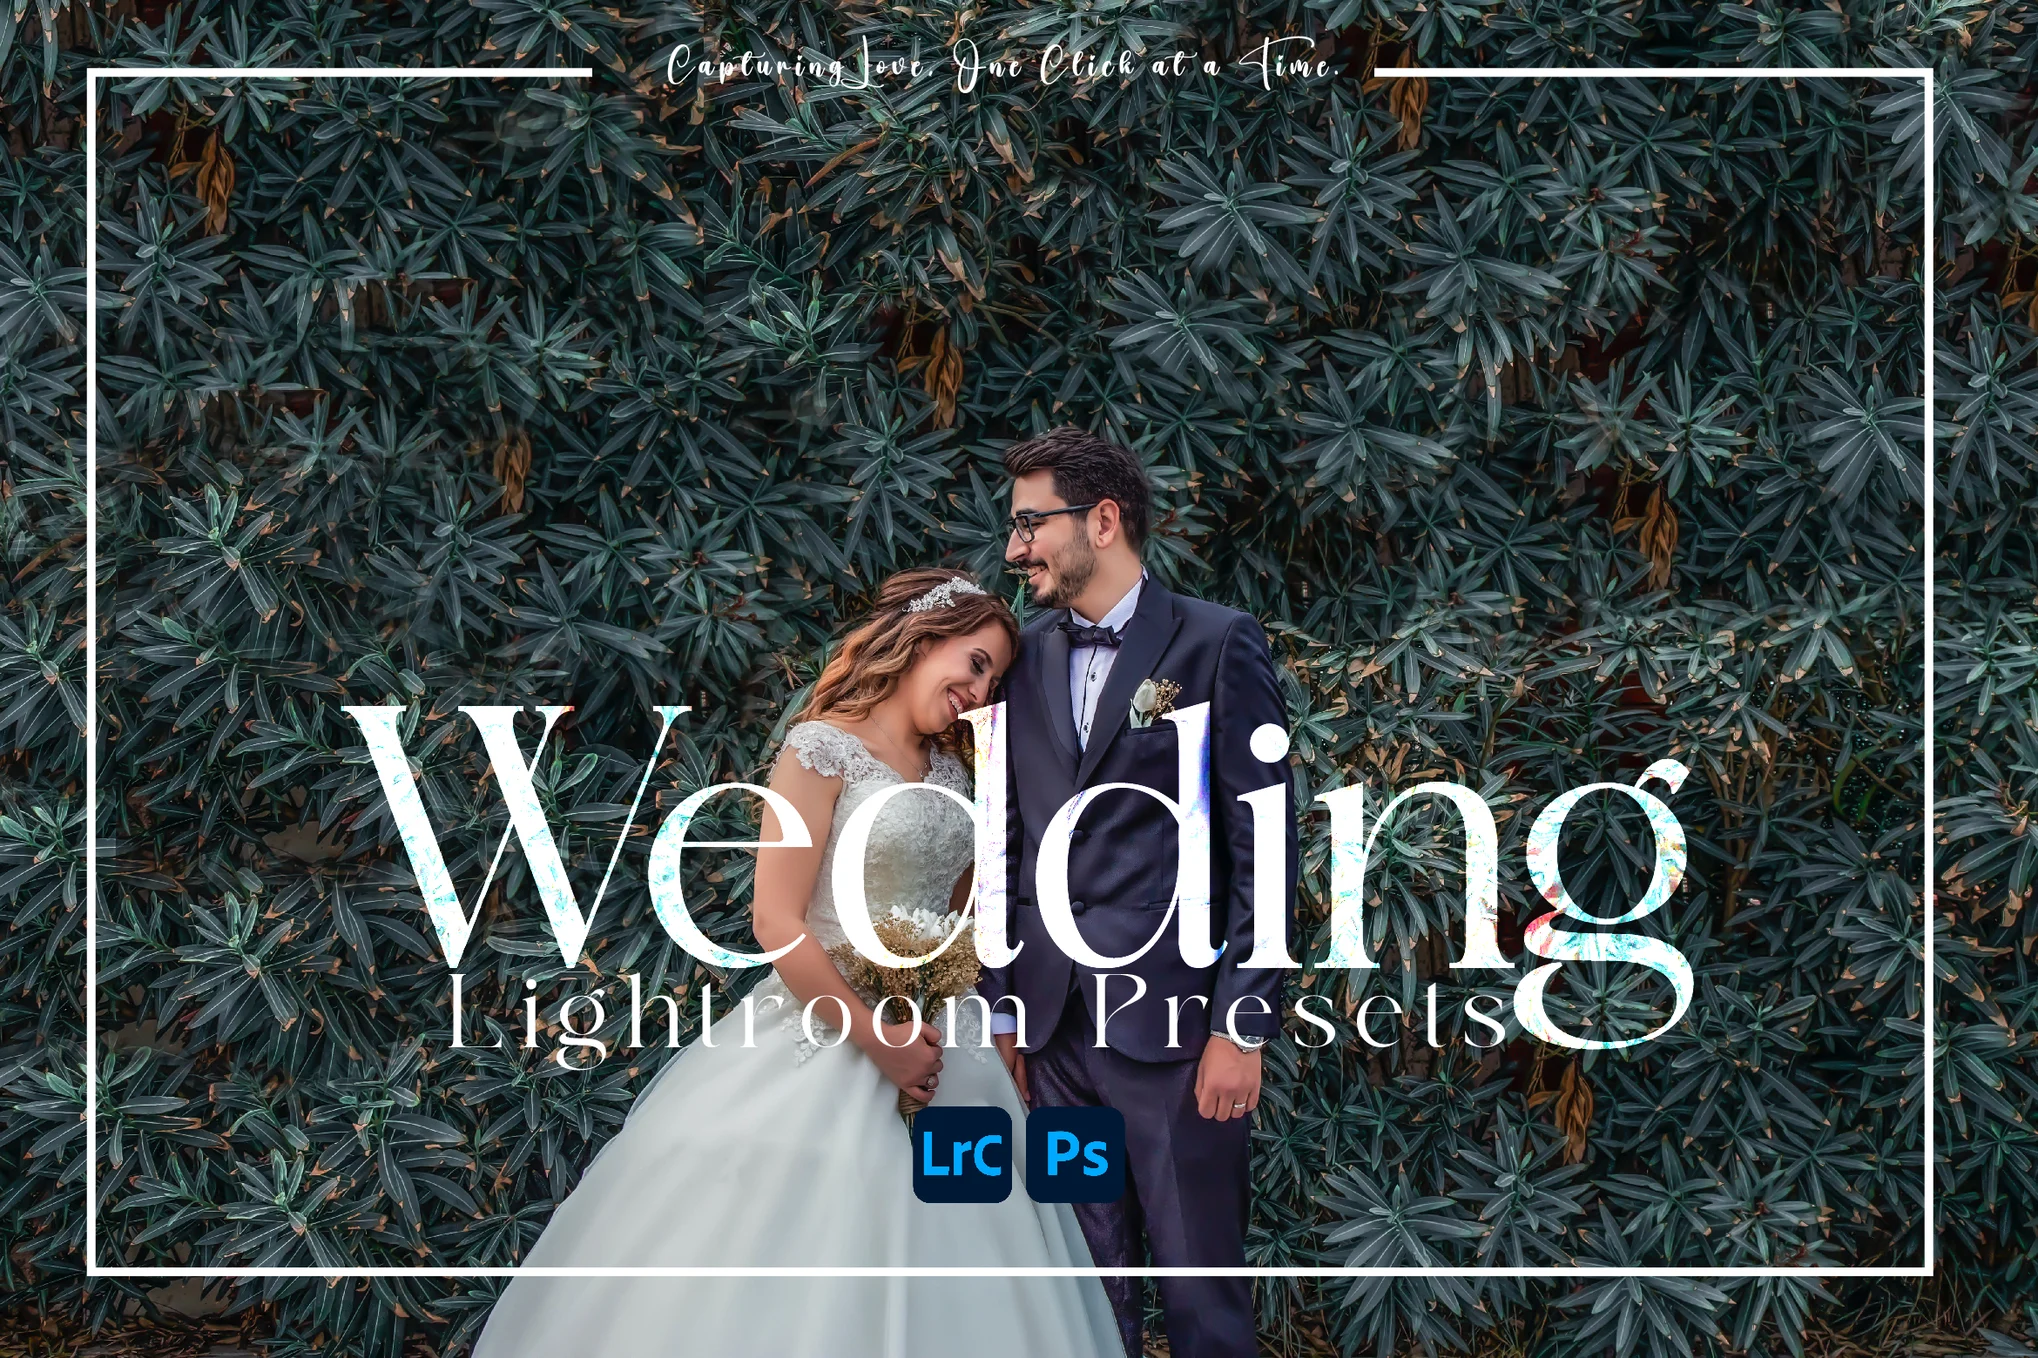
This collection of Lightroom presets is carefully designed to transform your wedding photos into meaningful narratives of your love story. Perfect for adding an authentic touch to your special day, these presets elevate your photos with warmth and elegance. The package includes 10 fully adjustable presets compatible with Adobe Lightroom 4-7, Classic, and CC.

Retro Film Presets for Lightroom

Retro Film Presets for Lightroom

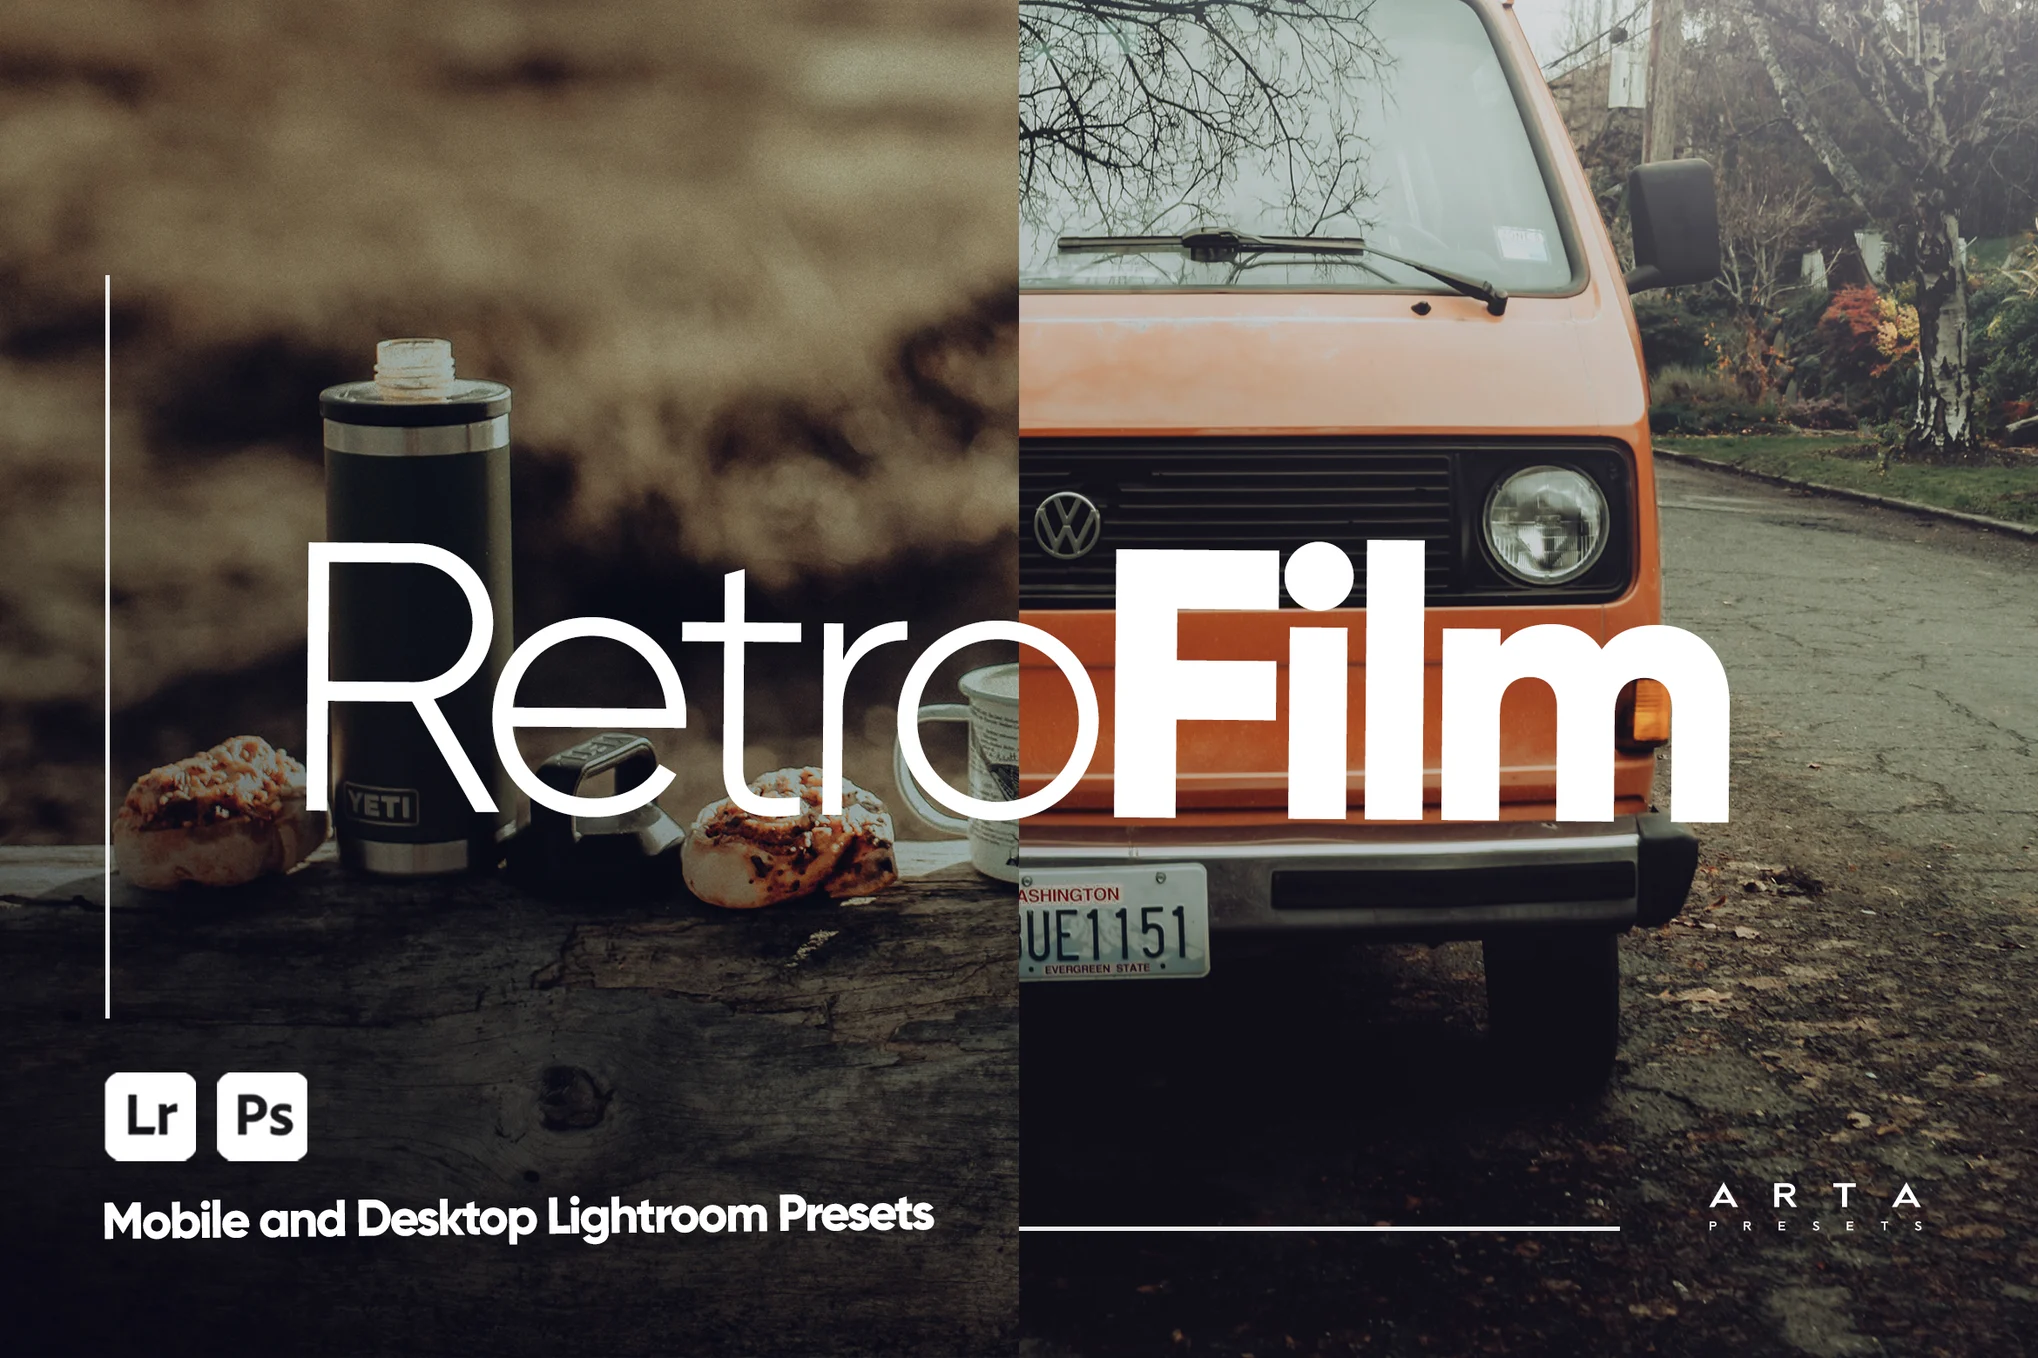
This pack of Lightroom presets is ideal for enhancing photography, fashion, or lifestyle-based content. Perfect for consistent Instagram styling and enhancing image quality, they are compatible with both mobile and desktop versions of the free Lightroom app and work with a variety of phones and professional DSLR cameras.

French Romance Lightroom Presets and LUTs

French Romance Lightroom Presets and LUTs

These Lightroom presets offer an uncomplicated approach to creating an artistic, film-like aesthetic in your photography and video editing. With a touch of French romanticism and fine grain detail, these presets are ideal for portraits, editorial photography, and social media content. Compatible with various software, including Lightroom, Photoshop, and DaVinci Resolve, and more.

Ultra HDR – Lightroom Presets

Ultra HDR - Lightroom Presets

Ultra HDR is a collection of expertly developed Lightroom presets provided by seasoned photographers and designers. Perfect for improving a variety of photography styles including portrait, lifestyle, travel, and fashion, these presets are compatible with various Lightroom and Photoshop Camera Raw versions.

Cinematic – Lightroom Presets

Cinematic - Lightroom Presets

This collection of presets is designed to give your photos a filmic quality. Inspired by the movie industry, these user-friendly presets easily add emotion and relevance to your images, creating a distinctive and engaging look. The presets offers both simplicity and flexibility, making the post-processing of your photographs an effortless task.

Retro Vibes – Lightroom Desktop & Mobile Presets

Retro Vibes - Lightroom Desktop & Mobile Presets

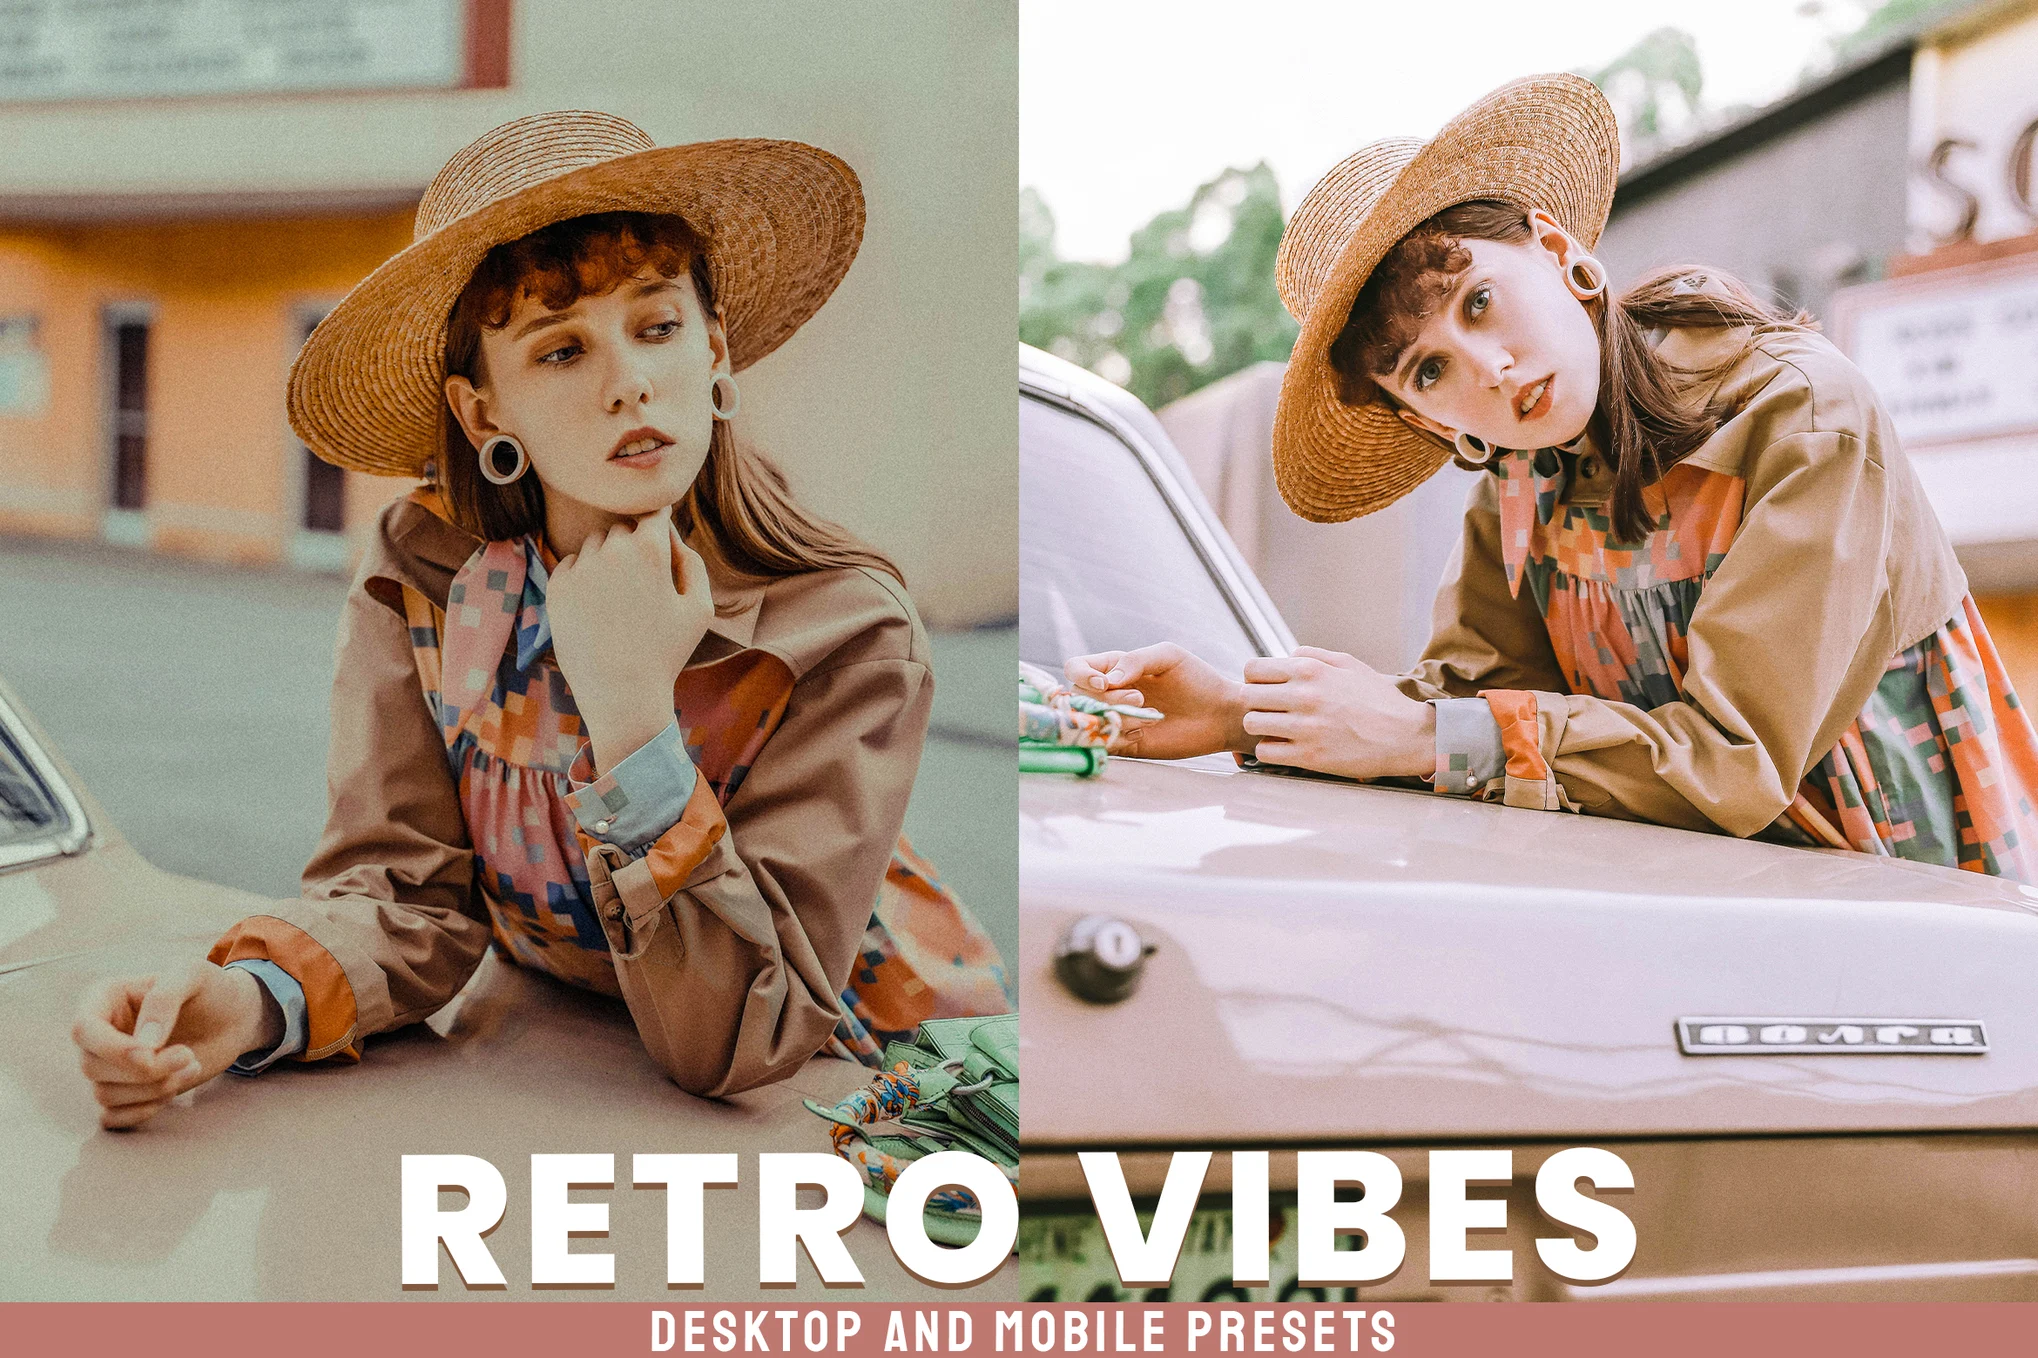
Retro Vibes Lightroom presets are designed to enhance your photos, whether they’re portraits, lifestyle, travel, or fashion images, giving them a stylish, vintage appeal reminiscent of popular Instagram aesthetics. The package comes with 30 presets compatible with different versions of Adobe Lightroom.

25 Warm and Moody Lightroom Presets

25 Warm and Moody Lightroom Presets

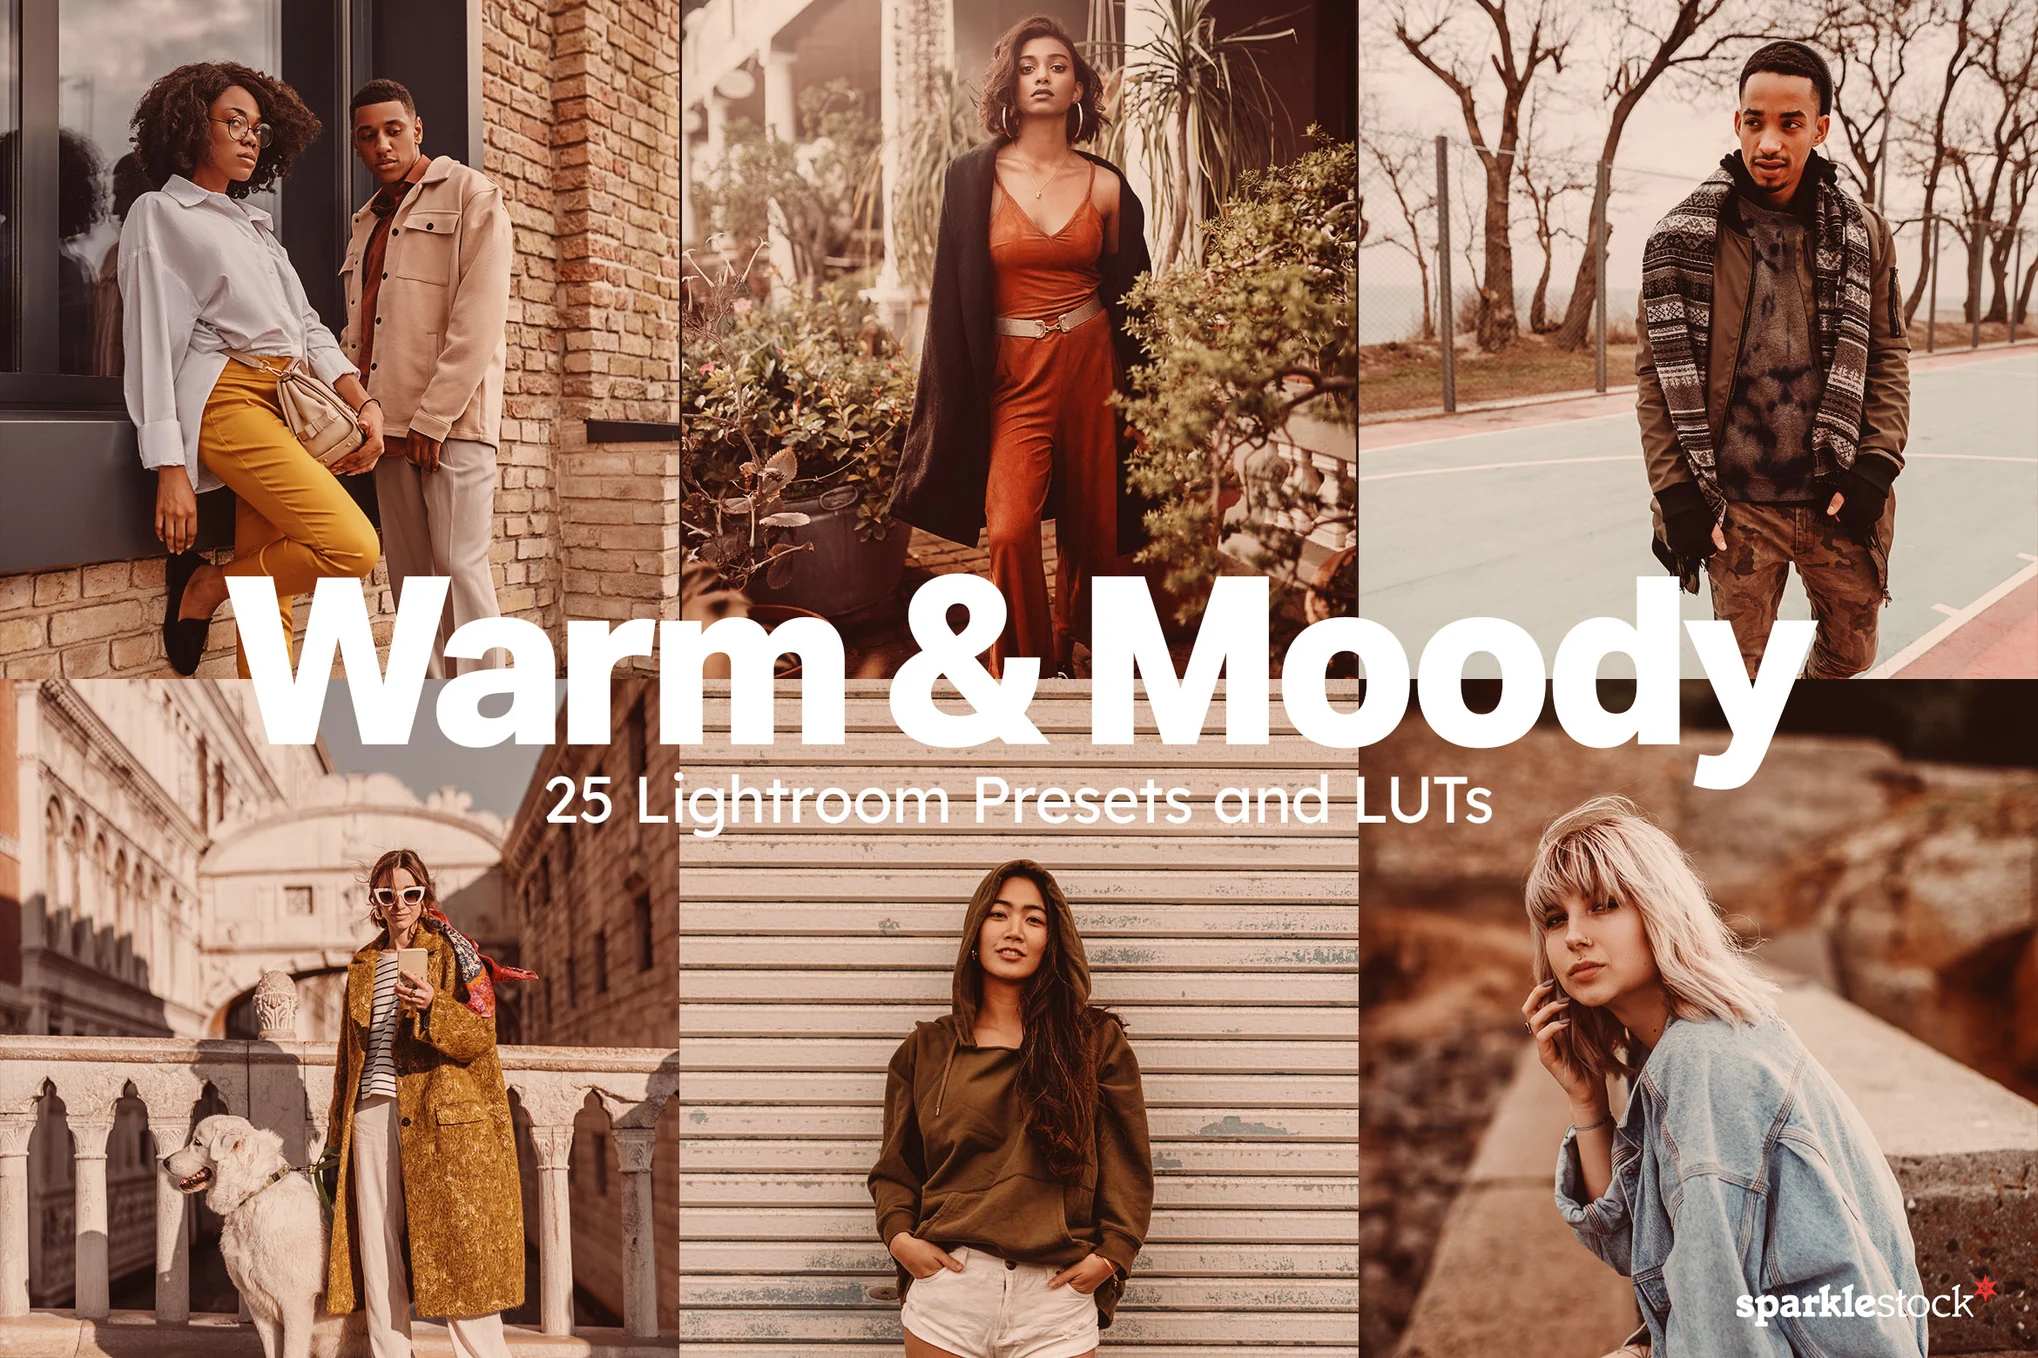
This is an essential bundle of Lightroom presets for photographers seeking to add depth to their images with warm, moody tones. These presets, available for both desktop and mobile, safeguard skin tones for natural-looking portraits. Additionally, they come with 25 LUTs (with various file types included).

Pure Essence Presets for Lightroom

Pure Essence Lightroom presets pack is deal for lifestyle bloggers, photographers, and fashion enthusiasts, these presets provide modern, stylish colors to elevate your Instagram feed. They’re compatible with both mobile and desktop versions of Lightroom and come with a helpful text-based tutorial for easy setup.

Classic Touch Presets for Lightroom

Classic Touch Presets for Lightroom

This Lightroom presets collection is perfect for enhancing your photos, regardless of whether you’re a travel, fashion, lifestyle blogger or just someone aiming for high-quality photos. Compatible with both mobile and desktop Lightroom versions, these presets are tested across different devices, from phones to DSLRs.

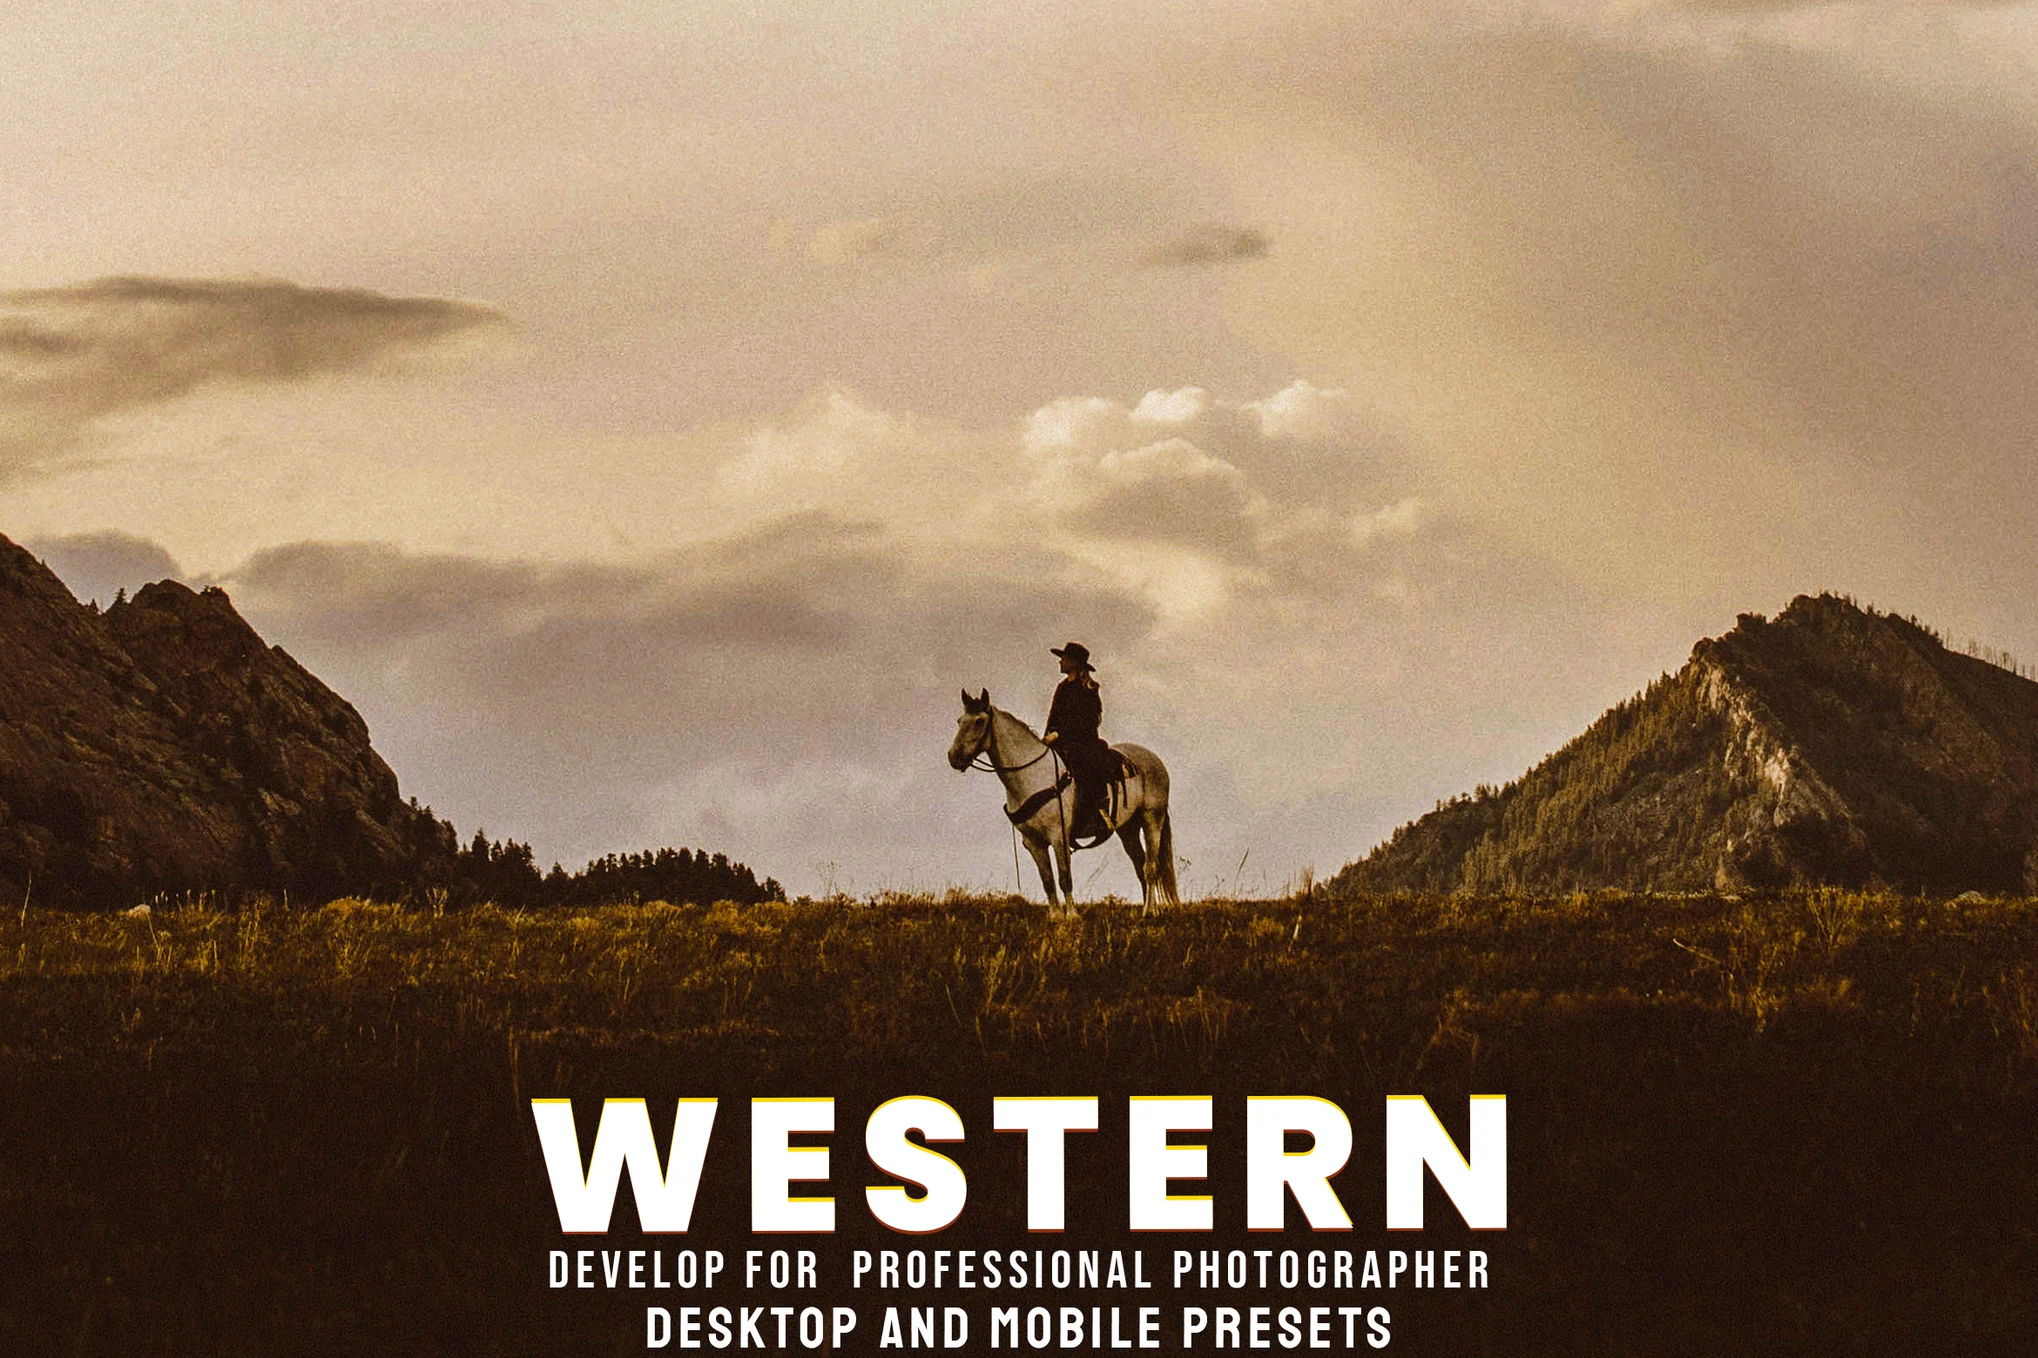
Western – Lightroom Desktop & Mobile Presets

Western - Lightroom Desktop & Mobile Presets

This is a creative Lightroom preset collection that can significantly enhance your photos. Developed by professional photographers and designers, these presets are ideal for a range of genres including portrait, lifestyle, and travel photography. Included in the package are 10 presets.

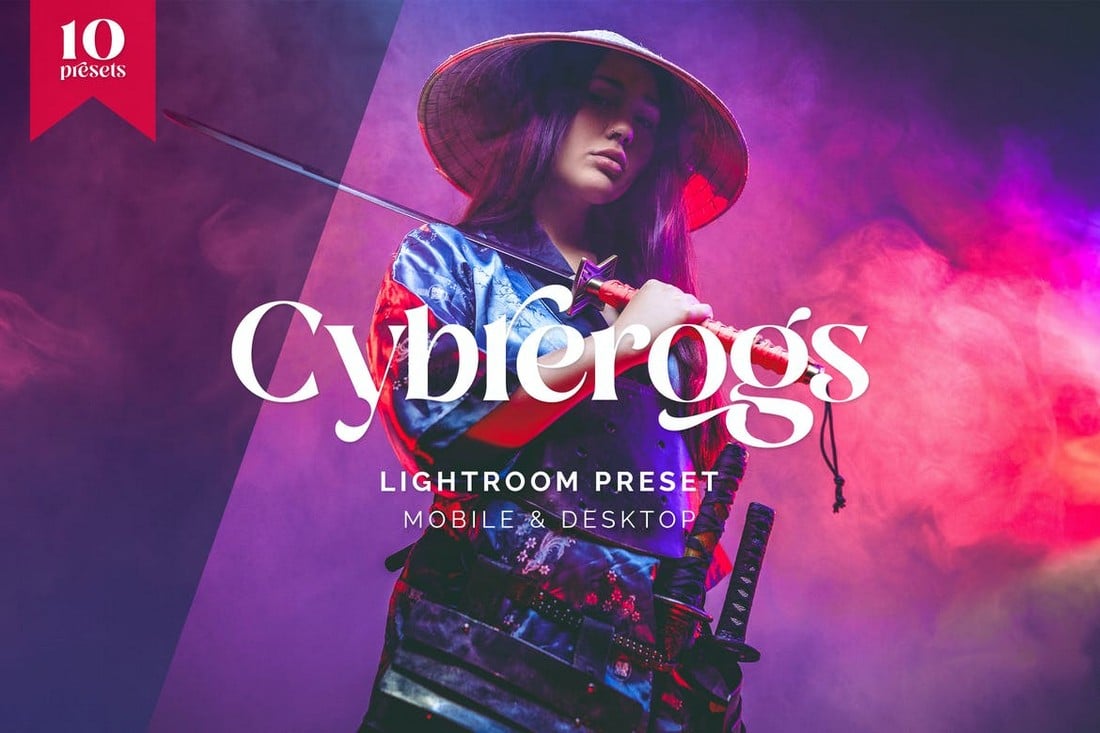
Cybrerogs – Cyberpunk-Style Lightroom Presets

Cybrerogs - Cyberpunk-Style Lightroom Presets

Are you looking for a way to give a Cyberpunk-style neon-colored look to your photos and graphics? Then this Lightroom preset is made just for you. It features a colorful cyberpunk effect that will completely transform your photos. You can also choose from 10 different variations of the effect.

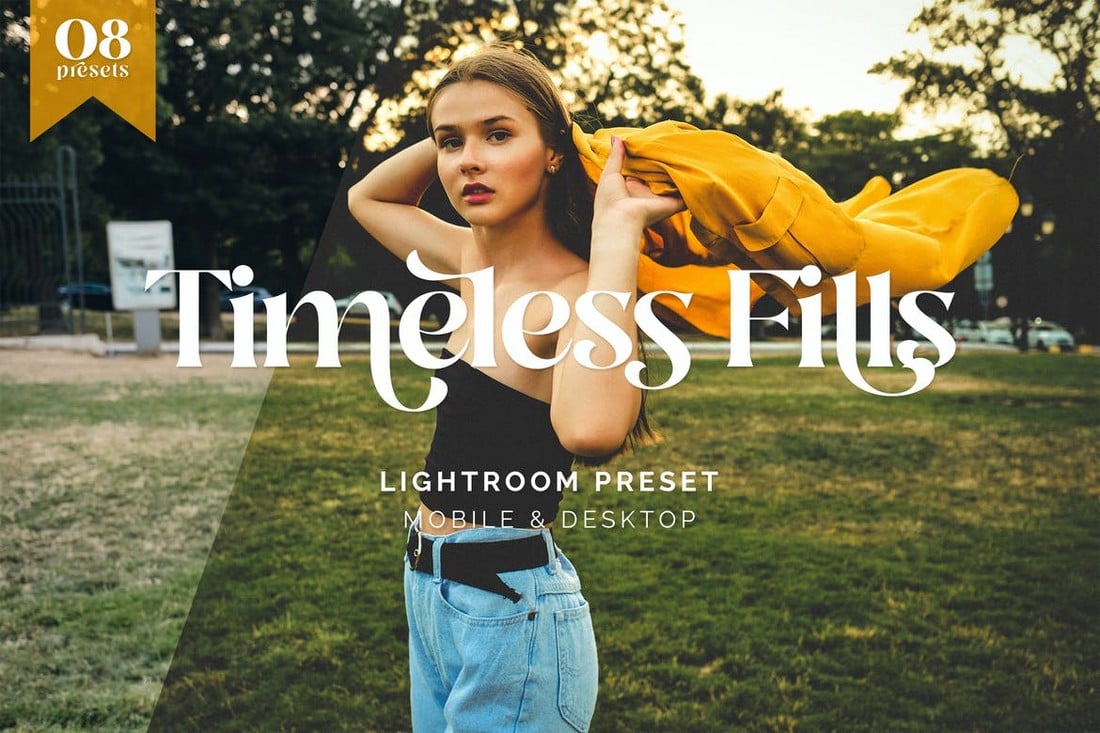
Timeless Fills – Retro Tone Lightroom Presets

Timeless Fills - Retro Tone Lightroom Presets

You can use this Lightroom preset to make your portrait photos look more professional and add a bit of elegance. It includes 8 different effects that you can use in both Lightroom desktop and mobile apps.

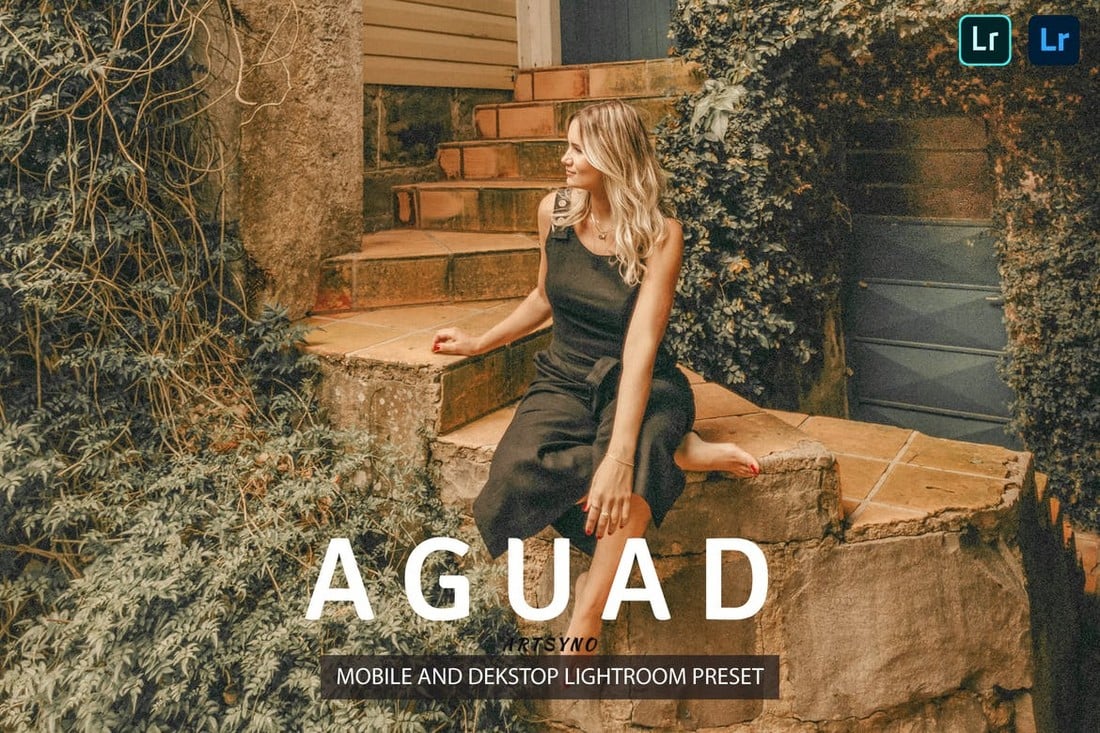
Aguad – Lightroom Presets for Portraits

Aguad - Lightroom Presets for Portraits

If you’re a fan of Instagram filters, you’ll instantly fall in love with this set of Lightroom presets. It features 10 presets with various styles of effects that add beautiful Instagram-style filters to your photos. You can also customize and optimize the effects to your preference.

Urbanus – Desktop & Mobile Lightroom Presets

Urbanus - Desktop & Mobile Lightroom Presets

With this Lightroom presets kit, you can add a dark and moody look to your outdoor photography. There are 10 Lightroom presets in this pack featuring different variations of the effect that works well for both portrait and landscape photos.

Free Warm Cinematic Lightroom Preset

Free Warm Cinematic Lightroom Preset

This is a free Lightroom presets that has a very professional effect. It lets you add a cinematic look and feel to your photos. It’s especially suitable for outdoor photos as it creates a subtle warm toning effect.

Matte Film Presets for Lightroom

Matte Film Presets for Lightroom

Adding a gloomy matte film look is sometimes the perfect way to bring out the right tone in your photography. This collection of Lightroom presets will help you achieve that goal. It includes 4 unique matte film presets.

Warm Cine Presets for Lightroom

Warm Cine Presets for Lightroom

Add bright and warm tones to your outdoor photography with this beautiful Lightroom presets collection. There are 4 different presets in this pack for both Lightroom desktop and mobile apps.

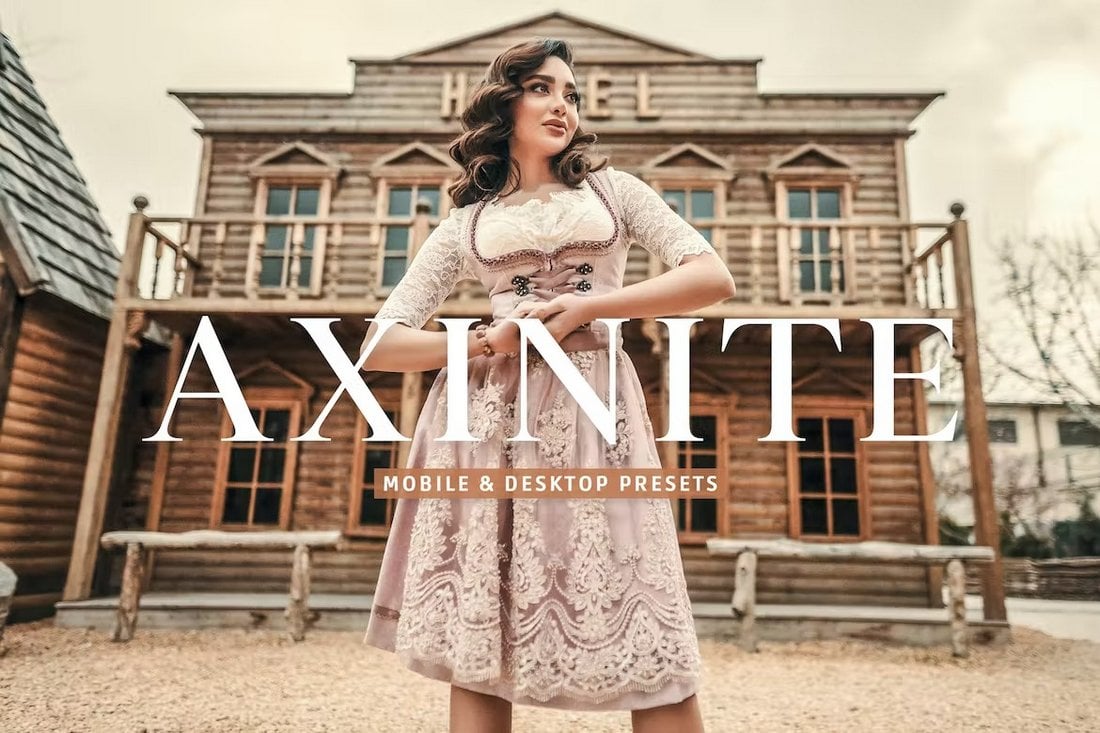
Axinite – Mobile & Desktop Lightroom Presets

Axinite Mobile & Desktop Lightroom Presets

Bring out the colors in your photos to make them more vibrant with the help of this Lightroom presets collection. It features 13 creative effects for enhancing photos taken in various conditions, including nighttime photography.

Earthy Tones – Creative Lightroom Presets

Earthy Tones - Creative Lightroom Presets

The beautiful earthy tones in this Lightroom presets collection will transform your photos with an elegant and romantic feel. It’s ideal for wedding photography as well as for romantic couple photos. There are 6 different Lightroom presets in this bundle.

Home Light – Clean Lightroom Presets

Home Light - Clean Lightroom Presets

This Lightroom preset pack includes 6 clean and simple filters that are ideal for enhancing your indoor photography. They will simply make your indoor photos look just as good as a stock photo. The presets are compatible with both desktop and mobile versions of Lightroom.

Film Grain Pack – Lightroom Presets

Film Grain Pack - Lightroom Presets

A unique Lightroom preset that adds a classic grainy film look to make your photos look more nostalgic. It’s ideal for enhancing photos for magazines as well as for Instagram. There are 2 different presets in this pack.

Matte Blogger- Moody Lightroom Presets

Matte Blogger- Moody Lightroom Presets

Matte Blogger is a collection of Lightroom presets specially designed for Instagram bloggers. It has 10 different presets featuring matte-style filters for instantly enhancing your photos. It works with Lightroom desktop and mobile apps.

Tundra – 20 Lightroom Presets and LUTs

Tundra - 20 Lightroom Presets and LUTs

If you want to enhance your outdoor photography to make them look more professional, make sure to grab this Lightroom presets bundle. It comes with 20 different presets that are most suitable for improving outdoor, nature, and landscape photography with muted colors and desaturated looks.

Free Cinematic Lightroom Preset For Instagram

Free Cinematic Lightroom Preset For Instagram

You can download this Lightroom preset for free to enhance your portraits and selfies before posting on Instagram. It features a cinematic filter with an orange and teal-style colorful design.

Ammolite – Creative Lightroom Presets

Ammolite - Creative Lightroom Presets

This Lightroom presets collection is all about vibrant colors. It includes multiple presets for making your portrait and outdoor photos look more colorful. The effects are non-destructive and fully customizable as well.

Dark Desire – Free Lightroom Preset

Dark Desire - Free Lightroom Preset

This is a free Lightroom preset you can use to add a dark and moody look to your photos. It’s ideal for both portrait photos and various graphic designs. It’s designed to enhance the reds while muting other colors.

Dark Coral – Bold Lightroom Presets

Dark Coral - Bold Lightroom Presets

Dark Coral is a collection of beautiful Lightroom presets that feature bright pastel color effects. These are ideal for enhancing your selfies and outdoor photos. There are presets in this pack for both Lightroom desktop and mobile apps.

Coral Pink – Colorful Lightroom Presets

Coral Pink - Colorful Lightroom Presets

You can make your fashion and lifestyle photos look much prettier with these Lightroom presets. They have pink color effects with bright highlights that are perfect for Instagram selfies, fashion photoshoots, and trendy promos.

Keep On – Lifestyle Presets for Lightroom

Keep On - Lifestyle Presets for Lightroom

The Lightroom presets in this bundle are designed for adding a bold and dark look to your photos. It includes 4 unique presets for improving your outdoor and travel photography. The presets are compatible with Lightroom mobile app as well.

Mineral – Moody Lightroom Presets

Mineral - Moody Lightroom Presets

This Lightroom presets pack includes a set of unique effects for adding a moody look to your portrait photos. It works especially well with outdoor photos too. There are 13 presets in the collection with mobile and desktop versions.

Warm Vintage – Free Lightroom Preset

Warm Vintage - Free Lightroom Preset

You can download this vintage-themed Lightroom preset for free. It features a warm color tone for adding a nostalgic look to your photography. The preset is easily customizable as well.

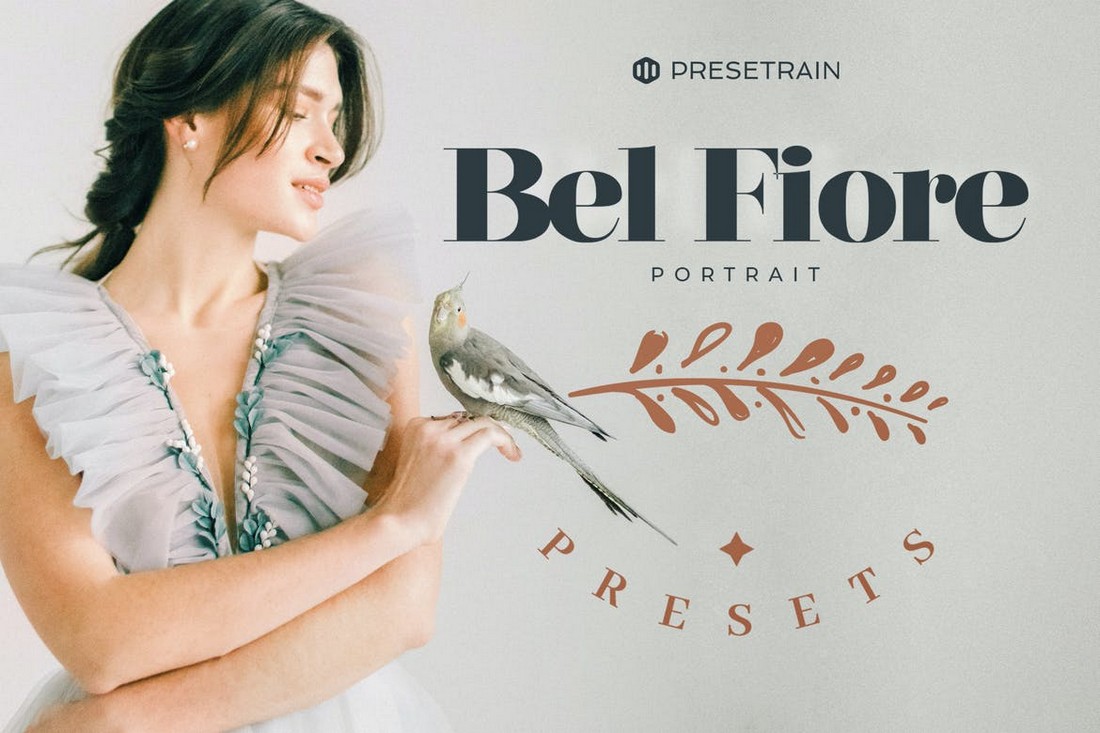
Bel Fiore – Light & Airy Lightroom Portrait Presets

Bel Fiore - Light & Airy Lightroom Portrait Presets

This is a collection of Lightroom presets specifically designed for improving portrait photos. The pack includes 14 different presets featuring subtle and airy effects that transform the look of your photos. Each preset is fully adjustable as well.

20 Vintage Film Lightroom LUTs Pack

20 Vintage Film Lightroom LUTs Pack

Give your photos a cinematic vintage film look using this bundle of Lightroom presets. It comes with 20 different presets that work well with both portrait and landscape photos for adding a stylish vintage look and feel.

Traveler Kit – Mobile & Desktop Lightroom Presets

Traveler Kit - Mobile & Desktop Lightroom Presets

If you’re a travel photographer, this bundle of Lightroom presets will surely come in handy. It includes 5 unique presets that are designed for enhancing landscape photos. The presets are available in both Lightroom desktop and mobile versions.

20 Cinematic Lightroom Presets & LUTs

20 Cinematic Lightroom Presets & LUTs

Add a gritty cinematic look to your portrait and landscape photos using this bundle of Lightroom presets. It includes 20 different presets in 4 different categories. It also comes with LUTs for improving your color grading process.

Elite Lightroom Desktop & Mobile Presets

Elite Lightroom Desktop & Mobile Presets

Inspired by Instagram filters, this collection of Lightroom presets feature a unique effect that makes your photos stand out from the crowd. It’s ideal for adding a subtle moody vibe to your portrait and landscape photos. The presets are compatible with Lightroom mobile and desktop apps.

Cool Vibe – Free Lightroom Preset

Cool Vibe - Free Lightroom Preset

This is a free Lightroom preset you can use to optimize your outdoor portrait photos. It features a light balancing effect that gives your photos a bright and airy look and feel.

20 Nostalgic Lightroom Presets & LUTs

20 Nostalgic Lightroom Presets & LUTs

Looking for a Lightroom preset to add a vintage nostalgic look to your photos? Then grab this presets bundle. It includes 20 unique Lightroom presets featuring customizable filters. As well as LUTs for color grading.

Fruit Punch – Mobile & Desktop Lightroom Presets

Fruit Punch - Mobile & Desktop Lightroom Presets

This collection of Lightroom presets are perfect for enhancing the colors of your photos to make them truly pop. It includes 13 presets you can use with both Lightroom desktop and mobile apps. There are Photoshop CameraRaw XMP files as well.

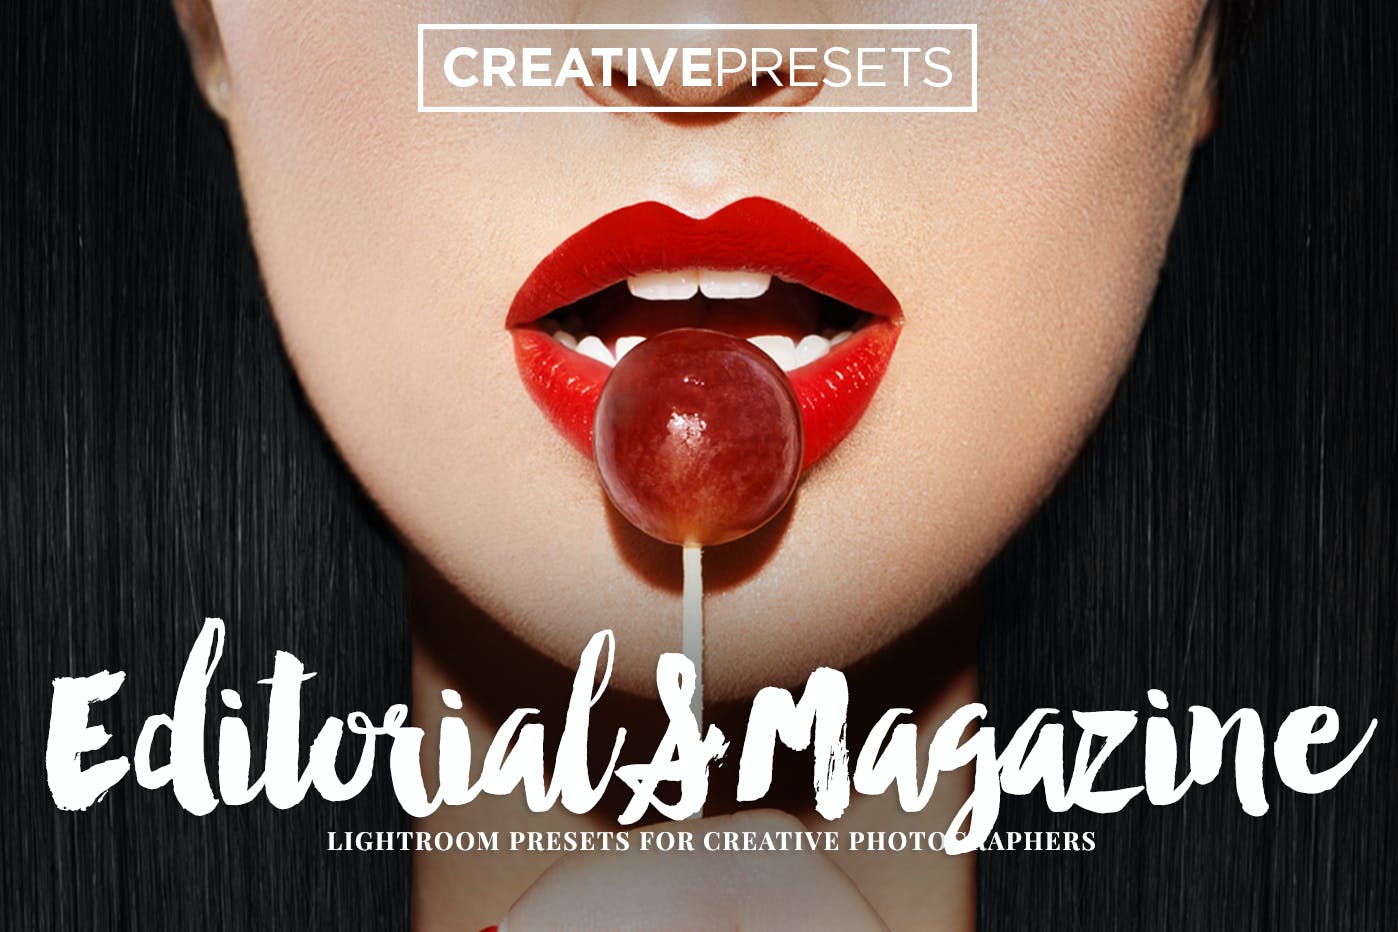
Editorial Magazine Lightroom Presets

lightroom presets

Achieve a professional editorial magazine-style look in a couple of minutes with this set of 30 Lightroom presets carefully crafted for photographers and graphic designers. The presets are non-destructive helping you retain 100% of the original images.

Light Leak Lightroom Presets

lightroom presets

If you are wanting to bring a stunning light effect to your vintage pictures, this collection of 25 light leak Lightroom presets will help you do just that. Each preset has been lovingly designed to make sure your photos become Instagram-worthy in just a few clicks.

Beauty Bride Lightroom Presets

lightroom presets

Make the pictures of your special day look all the more special with Beauty Bride, a bundle of Lightroom presets that will transform the look and feel of your wedding day photographs. The presets are versatile and can also be used for lifestyle, food, travel, newborn, and fashion photography.

Free Aurora Lightroom Presets

lightroom presets

Bring vibrant, dreamy, and aesthetic tones to the page with this collection of Aurora Lightroom presets, a great choice for virtually any kind of photo. The best part is that it’s available for free download. Get your hands on it now!

Free Gothic Lightroom Presets

lightroom presets

Needing to achieve a dark, gloomy, desaturated, black, or moody look? Check out this collection of gothic Lightroom presets that help transform your pictures into magical fantasy artworks. One of the best Lightroom presets on our list!

Winter Pack – 12 Professional Lightroom Presets

Winter - 12 Professional Lightroom Presets

Grab this bundle of Lightroom presets ahead of the holiday season to prepare for all the snowy and Christmassy photos. It includes 12 presets that are made for improving outdoor portrait photos.

Iconic HD – Free Lightroom Preset

Iconic HD - Free Lightroom Preset

This free Lightroom preset can completely transform your ordinary photos to give them an HDR-like vibe. The effect fully optimizes the color and exposure to enhance even the low-light photos.

Faded Effect – Lightroom Presets

Faded Effect - Lightroom Presets

Sometimes the best way to make your photos look better is to add a subtle effect that creates a beautiful and natural look. This bundle of Lightroom presets are made for doing just that. It includes 20 different presets for adding a faded look to your outdoor and landscape photos to balance colors and contrast. The presets are easily adjustable as well.

50 Cinematic Lightroom Presets and LUTs

50 Cinematic Lightroom Presets and LUTs

This is a massive bundle of Lightroom presets and LUTs that lets you make your photos look like a screengrab from a Hollywood film. It includes 50 different presets, each featuring a different style of a cinematic look. The presets are available in 5 different categories and they work with both Lightroom desktop and mobile apps.

Orange and Teal Effect Lightroom Presets

Orange and Teal Effect Lightroom Presets

Just as the name suggests, this Lightroom preset comes with a few different versions of the popular orange and teal effect that adds a colorful filter to your photos. The bundle includes 8 different styles of the effect to match both outdoor and portrait photos. They work with Lightroom mobile version as well.

50 Newborn Baby Lightroom Presets

50 Newborn Baby Lightroom Presets

Want to make your baby photos look more adorable? Then grab this bundle of newborn Lightroom presets. It includes 50 different presets featuring various styles of tones and filters to make baby photos even cuter than they ever were. All the presets are customizable and works with mobile and desktop versions of Lightroom.

Insta Look – Free Lightroom Preset

Insta Look - Free Lightroom Preset

This is a free Lightroom presets that optimizes and improves your selfies and portrait photos, especially for social media platforms like Instagram and Facebook. The preset does wonders for correcting lighting and colors of your everyday life photos.

Sahara – 50 Photography Lightroom Presets

Sahara - 50 Photography Lightroom Presets

This bundle of Lightroom presets include lots of desert-themed filters and effects as well as lots of other filters for various types of photos. The pack comes with 50 different effects divided into 5 categories with light and airy, orange and teal, vintage, and many other styles of effects.

15 Premium Moody Lightroom Presets

15 Premium Moody Lightroom Presets

You can use the presets in this pack to create a moody and a gritty look and feel for your photos. It includes 15 different presets featuring various effects and tones. The filters are easily customizable and work with mobile and desktop versions of Lightroom app.

50 Sweet Pink Lightroom Presets & LUTs

50 Sweet Pink Lightroom Presets & LUTs

Add a sweet pink color filter to your selfies and portrait photos to add an attractive tone. This bundle includes 50 different presets you can choose from to quickly adjust and optimize your photos with just a few clicks. The presets are compatible with Lightroom CC 2019 and higher.

50 Lifestyle Blogger Lightroom Presets

50 Lifestyle Blogger Lightroom Presets

This is a must-have bundle of Lightroom presets featuring 50 different effects and filters for lifestyle bloggers and Instagram users. With these filters, you can optimize and add more style to your lifestyle photos and selfies. You can easily customize the effects to adjust their settings as well.

Memories – Free Lightroom Preset

Memories - Free Lightroom Preset

Another beautiful free Lightroom filter that adds a nostalgic look and feel to your photos. This Lightroom preset is perfect for optimizing landscape and outdoor photography by adding a realistic retro-vintage look. The effect is fully customizable as well.

50 Iridescent Pastel Lightroom Presets

50 Iridescent Pastel Lightroom Presets

This bundle of Lightroom presets comes with 50 different effects featuring pastel color filters. These are ideal for enhancing your photos for social media. Each preset is compatible with Lightroom desktop and mobile apps.

11 Lifestyler Lightroom Presets

11 Lifestyler Lightroom Presets

If you do a lot of lifestyles and outdoor photography, this Lightroom presets pack will come in handy. It includes 11 different presets made just for optimizing lifestyle photos to give them a moody effect and feeling.

20 Pro Clean & Minimal Lightroom Presets

20 Pro Clean & Minimal Lightroom Presets

These clean and minimal Lightroom presets are made just for professional photographers and designers. They are fully optimized for enhancing the depth and the lighting of your photos. All 20 presets are easily customizable as well.

40 Bright Interior Lightroom Presets

40 Bright Interior Lightroom Presets

The Lightroom presets in this pack are most suitable for improving photos taken indoors. It’s especially great for interior design photography. The bundle includes 40 different presets that are compatible with both mobile and desktop versions of Lightroom.

Free Moody Presets For Lightroom

Free Moody Preset For Lightroom

This is a free Lightroom preset you can use to add a stylish and moody effect to your portrait photos and selfies. The filter comes in desktop and mobile versions as well.

Caramel Wedding Mobile & Desktop Lightroom Presets

This is a must-have pack of Lightroom presets for processing wedding photos. The bundle comes with multiple presets designed to add a moody effect to wedding photography. The presets are compatible with Lightroom 4 and higher as well as Lightroom mobile app.

12 HQ Landscape Lightroom Presets

12 HQ Landscape Lightroom Presets

A collection of high-quality Lightroom presets made for optimizing outdoor landscape photos. If you’re a photographer or a designer who works with nature photos this bundle of presets will come in handy.

Neon Tokyo – 32 Lightroom Presets

Neon Tokyo - 32 Lightroom Presets

Neon Tokyo is a pack of Lightroom presets designed for adding more color and highlights to nighttime photography. The pack includes 32 different effects that are compatible with both Lightroom Classic and CC.

50 Hypebeast Lightroom Presets

50 Hypebeast Lightroom Presets

Featuring a wide variety of effects, filters, and adjustments, this massive bundle of Lightroom presets will help you optimize and enhance all kinds of portrait and landscape photos with ease. They are compatible with Lightroom mobile as well.

12 HQ Tilt-Shift & Color Lightroom Presets

12 HQ Tilt-Shift & Color Lightroom Presets

Add the popular tilt-shift effect to your own photos with just a single click using this pack of Lightroom presets. It includes 12 different presets featuring tilt-shift and color enhancing effects.

Indoor Fashion Mobile & Desktop Lightroom Presets

Indoor Fashion Mobile & Desktop Lightroom Presets

This bundle of Lightroom presets includes 11 unique presets designed to help improve photos taken under indoor lighting. These presets are perfect for easily enhancing your everyday smartphone and digital camera photos.

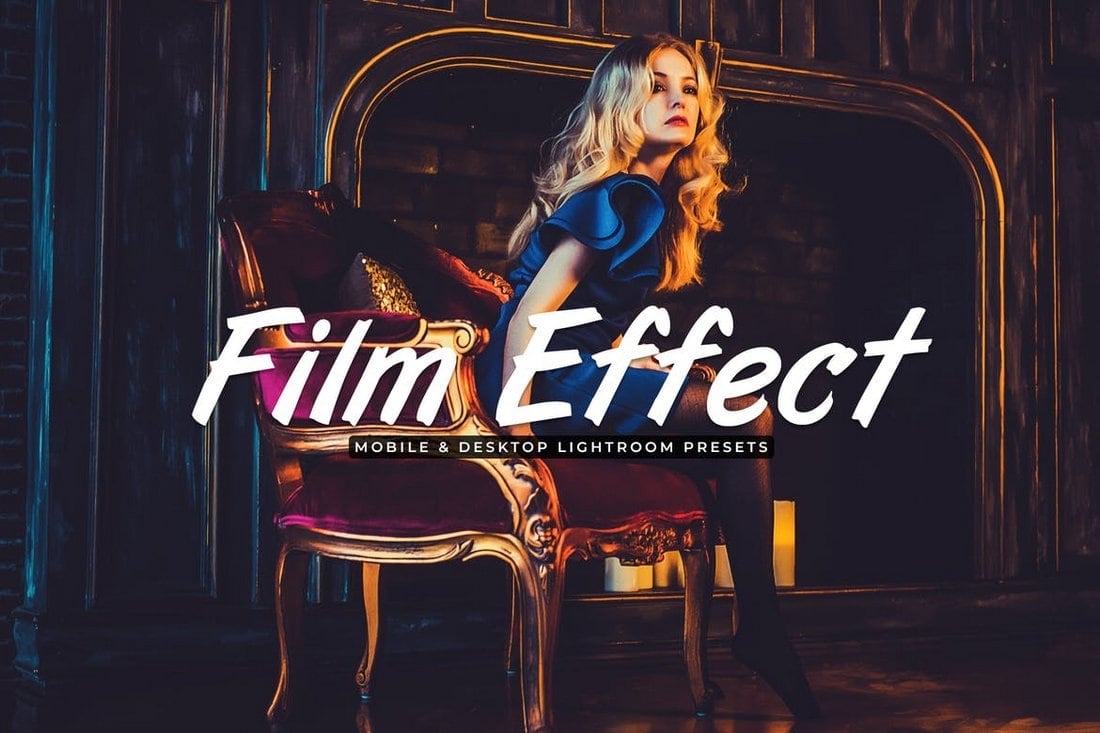
Film Effect Mobile & Desktop Lightroom Presets

Film Effect Mobile & Desktop Lightroom Presets

Film effect is a popular filter used in modern photography that add cinematic looks to ordinary photos. This collection of Lightroom presets is designed to recreate that same filter effect with just one-click. It comes with 11 presets that work with Lightroom 4 and higher.

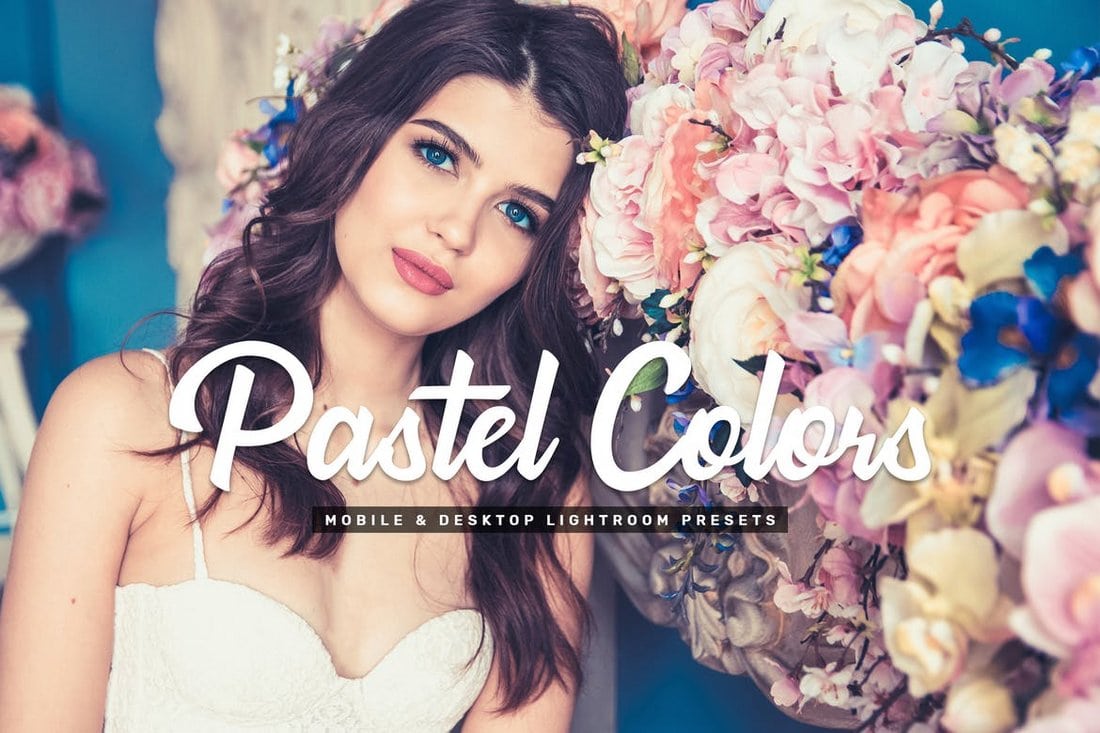
Pastel Colors Stylish Lightroom Presets

Pastel Colors Stylish Lightroom Presets

Adding a pastel color effect can greatly improve newborn, fashion, and wedding photography. Use the presets in this pack to add stylish pastel color filters to your own photos and make them look more attractive. The prests in this pack create non-destructive effects and can be easily customized to your preference.

Faded HDR Effect Lightroom Presets

Faded HDR Effect LightRoom Presets

This Lightroom preset is a professional filter that not only improves your photos by applying a subtle HDR effect but also enhances photos with toning and adjustments. The preset is easily customizable and can be applied with one-click as well.

Atacama – Free Mobile & Desktop Lightroom Preset

Atacama Mobile & Desktop Lightroom Presets

A free high-quality Lightroom preset designed for enhancing outdoor photos. You can easily edit the effect to change the strength and it works well with lifestyle and fashion photos.

Wonderland – Free Portrait Lightroom Preset

Wonderland - Free Mobile Desktop Lightroom Presets

Wonderland is another professional Lightroom preset that’s ideal for improving portrait photos. This preset is free to use and it’s most suitable for natural light and outdoor portraits.

Pro HDR Collection Lightroom Presets

Pro HDR Collection Lightroom Presets

This is a collection of professional Lightroom presets that allows you to give your photos an authentic HDR look and feel without much effort. The presets in this bundle are also compatible with both the mobile and desktop versions of Lightroom app.

Cool Blue Lightroom Presets

Cool Blue Lightroom Presets

This bundle comes with 10 different Lightroom presets featuring cool blue toning effects. These effects will help give your natural light and portrait photos an attractive look and feel.

Moscow Travel Mobile & Desktop Lightroom Presets

Moscow Travel Mobile & Desktop Lightroom Presets

Moscow Travel is a collection of Lightroom presets designed specifically for improving your travel photos. The pack includes 9 different presets featuring various styles of Instagram-like filters.

Bright & Airy Wedding Lightroom Presets

Bright & Airy Mobile & Desktop Lightroom Presets

Another bundle of Lightroom presets you can use to optimize and improve wedding photos and outdoor photos. The bundle includes 11 Lightroom presets and Photoshop action versions of the presets as well.

Free Studio Mobile & Desktop Lightroom Preset

Free Studio Mobile & Desktop Lightroom Presets

Designed for enhancing fashion, wedding, and couple photos, this free preset works with both desktop and mobile versions of Lightroom. You can apply the effect with just one-click as well.

Free Vibrant Mobile & Desktop Lightroom Preset

Free Vibrant Mobile & Desktop Lightroom Presets

If you want to make your photos look more vibrant and make the colors pop, this free Lightroom preset will come in handy. It lets you apply a dramatic and moody effect to your photos without an effort.

Monochrome Lightroom Presets

Monochrome Lightroom Presets

Create an authentic monochrome effect to enhance your portrait photos using this bundle of Lightroom presets. It comes with 11 presets compatible with Lightroom 4 and higher.

Warm & Airy Mobile and Desktop Lightroom Presets

Warm & Airy Mobile and Desktop Lightroom Presets

Warm and Airy is a collection of Lightroom presets you can use to instantly enhance your portrait and outdoor photos. The pack includes 11 presets that are compatible with both mobile and desktop versions of the app.

Retouching Mobile & Desktop Lightroom Presets Pack

Retouching Mobile & Desktop Lightroom Presets Pack

The Lightroom presets in this pack are designed to improve your workflow by helping you automate the basic retouching process. With these presets you’ll be able to retouch portraits with just a few clicks.

Golden Hour Creative Lightroom Presets

Golden Hour Creative Lightroom Presets

Golden Hour is a collection of 11 unique Lightroom presets features various styles of filters for enhancing your photos. The presets are most suitable for outdoor and landscape photos.

Lomography Lightroom Presets

Lomography Lightroom Presets

This collection comes with mobile and desktop Lightroom presets for enhancing your portrait and landscape photos by adding a beautiful Lomography effect. It includes 11 non-destructive effects.

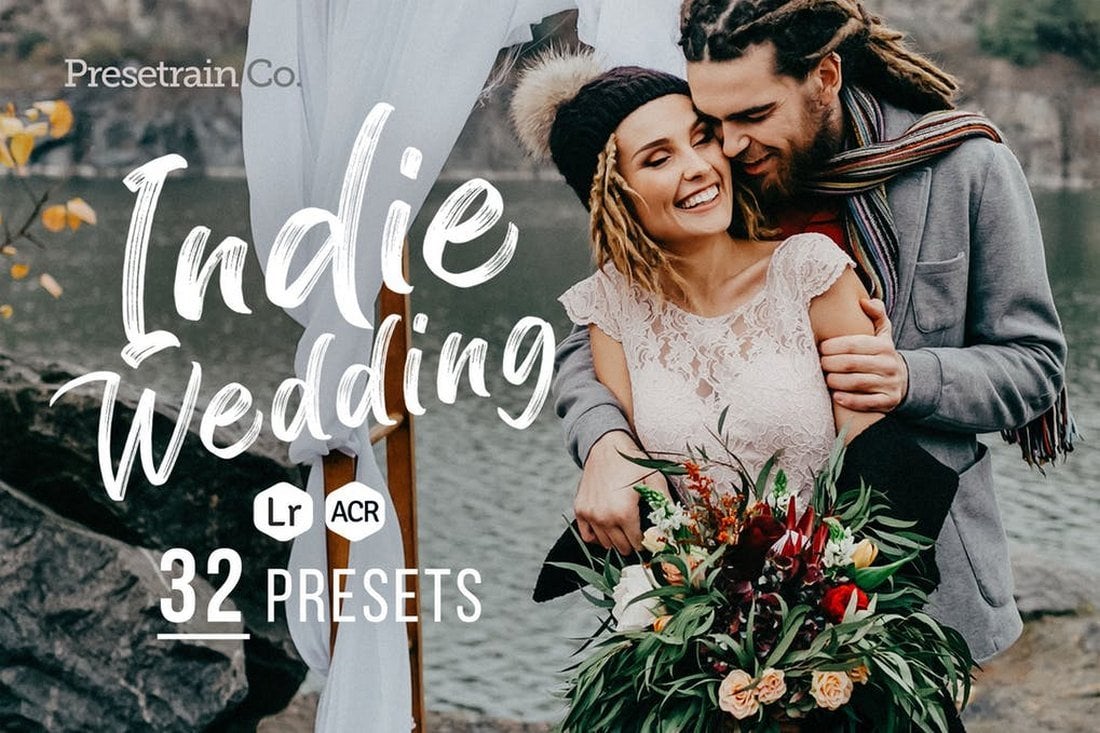
Indie Wedding – Lightroom Presets

Indie Wedding - Lightroom Preset

Indie Wedding is a collection of Lightroom presets created for optimizing wedding themed photography. The pack comes with 32 unique presets that allows you to optimized both outdoor and indoor photos. It also comes with Photoshop Camera Raw versions of the presets as well.

100 Black White Free Lightroom Presets

100 Black White Free Lightroom Presets

A massive bundle of 100 unique black and white Lightroom presets. The bundle is free to download and include presets with various adjustments that work with many different types of photos.

Free Film Effect Mobile and Desktop Lightroom Preset

Free Film Effect Mobile and Desktop Lightroom Presets

This is a free and professional Lightroom preset that features a creative film effect that transforms your photos into works of art. The filter is most suitable for portrait photos.

Urban Desaturated Lightroom Presets

Urban Desaturated Lightroom Presets

This pack includes 20 unique Lightroom presets made specifically for enhancing and optimizing outdoor photography in urban areas. These presets will allow you to add creative color effects to your urban photography.

Bohemian Film Lightroom Presets

Bohemian - Film Lightroom Presets

The Lightroom presets in this bundle are designed inspired by the popular Bohemian Film effect. It includes 30 high-quality effects that not only optimize the photos but also enhances skin color and tone.

Analogue Film Lightroom Presets

Analogue Film Lightroom Presets

With this collection of Lightroom presets, you’ll be able to create a unique effect to give an authentic vintage feel to your photos. The bundle comes with 20 unique presets that works with RAW, JPEG, TIFF, DNG, and PSD.

Halloween Lightroom Presets Pack

Halloween Lightroom Presets Pack

This is truly one of a kind collection of Lightroom presets that comes with 20 unique effects. These will come in handy when creating suspense feel for your photos, especially for different themes of photoshoots.

40 Traveller Lightroom Profiles and LUTs

40 Traveller Lightroom Profiles and LUTs

If you’re an Instagram user and travel a lot, this bundle of Lightroom profiles is a must have. It includes 40 unique Lightroom profiles that allow you to instantly enhance your photos taken in different lighting conditions and environments.

Artisan – Food Presets for Lightroom & ACR

Artisan - Food Presets for Lightroom & ACR

Artisan is a collection of beautiful Lightroom presets you can use to enhance your food photography. It comes with 50 different presets in both Lightroom template and Photoshop Camera Raw versions.

Faded Lightroom Presets

Faded Lightroom Presets

You can easily change the mood of your photos using this bundle of Lightroom presets, which includes 30 high-quality faded effects. The effects work with PSD, DNG, RAW, and most other file formats.

Moody Lightroom Presets

Moody Lightroom Presets

Just as the name describes, Moody is a collection of Lightroom presets that allows you to change and enhance the tone and mood of your photos. It includes 10 unique presets that works with Lightroom 4 and higher.

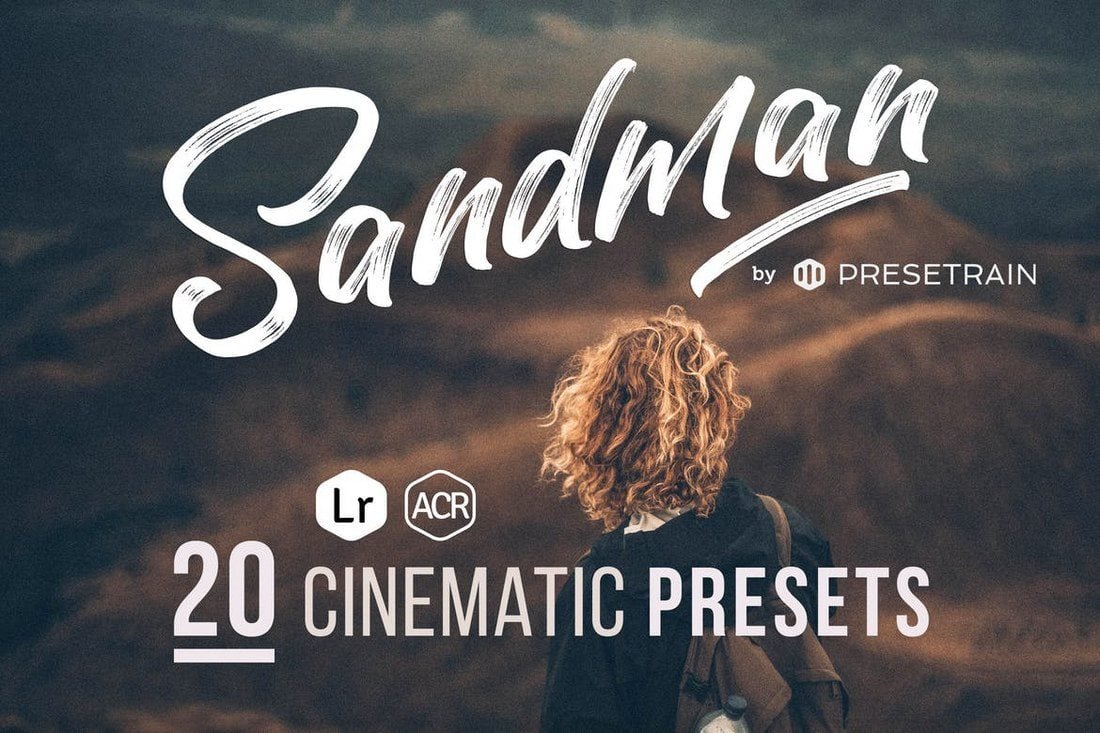
Sandman Cinematic ACR & Lightroom Presets

This is a bundle of 20 high-quality Lightroom presets designed for adding color effects and improving your travel and portrait photos. The presets are also available in ACR format for Photoshop and they work with Lightroom 5 or better.

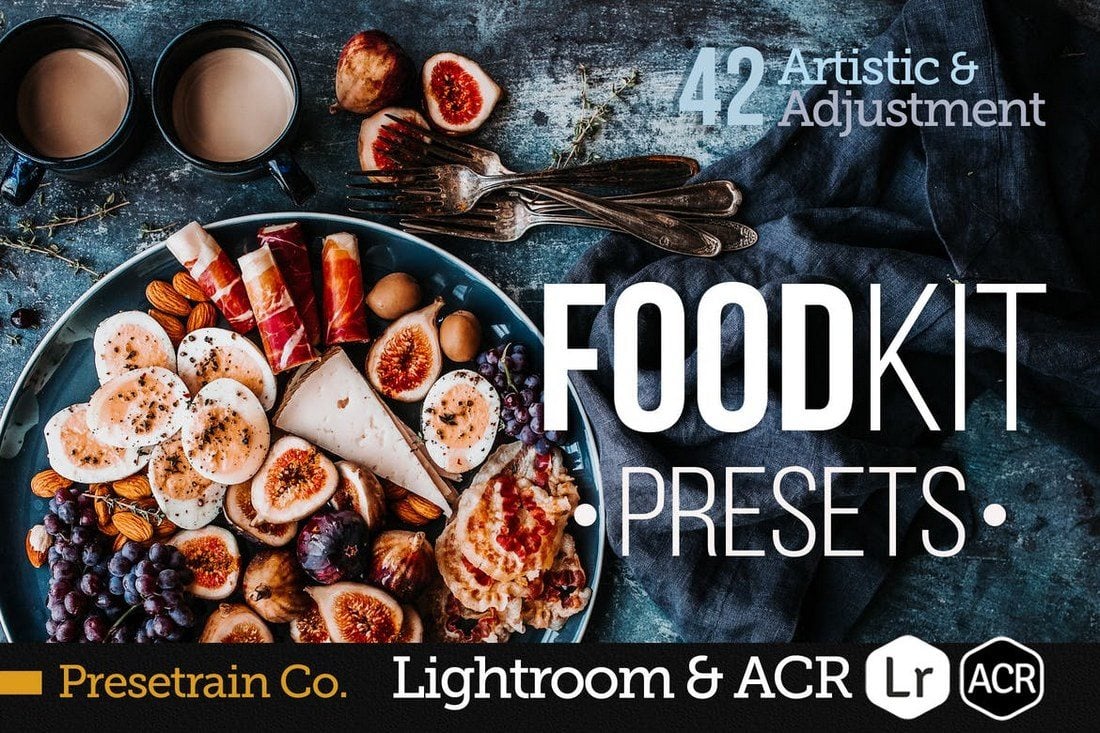
FoodKit – Food Presets for Lightroom & ACR

This pack comes with 42 professional Lightroom presets to help improve your post-processing workflow. The pack includes various presets that are perfect for enhancing food photography, wedding photos, and for food bloggers as well.

Auto Exposure Lightroom

As the title suggests, this is a set of 15 Lightroom presets that are made for enhancing the brightness and contrast of your photos to achieve high-quality blacks. Except these presets enhance the photo exposure automatically. The presets works with Lightroom 4 and above.

Artistic Lightroom Presets vol. 2

The Lightroom presets in this bundle are all highly creative effects that give your photos an artistic look. It will come in handy for both photographers and graphic designers. The pack includes 50 Lightroom presets which are compatible with Lightroom 4 or better.

Fashion Lightroom Presets

If you’re a photographer or a designer who works with fashion, beauty, or lifestyle photography, this bundle of Lightroom presets are for you. It includes 23 presets for quickly enhancing your photos with professional calibration adjustments. The effects are also completely non-destructive.

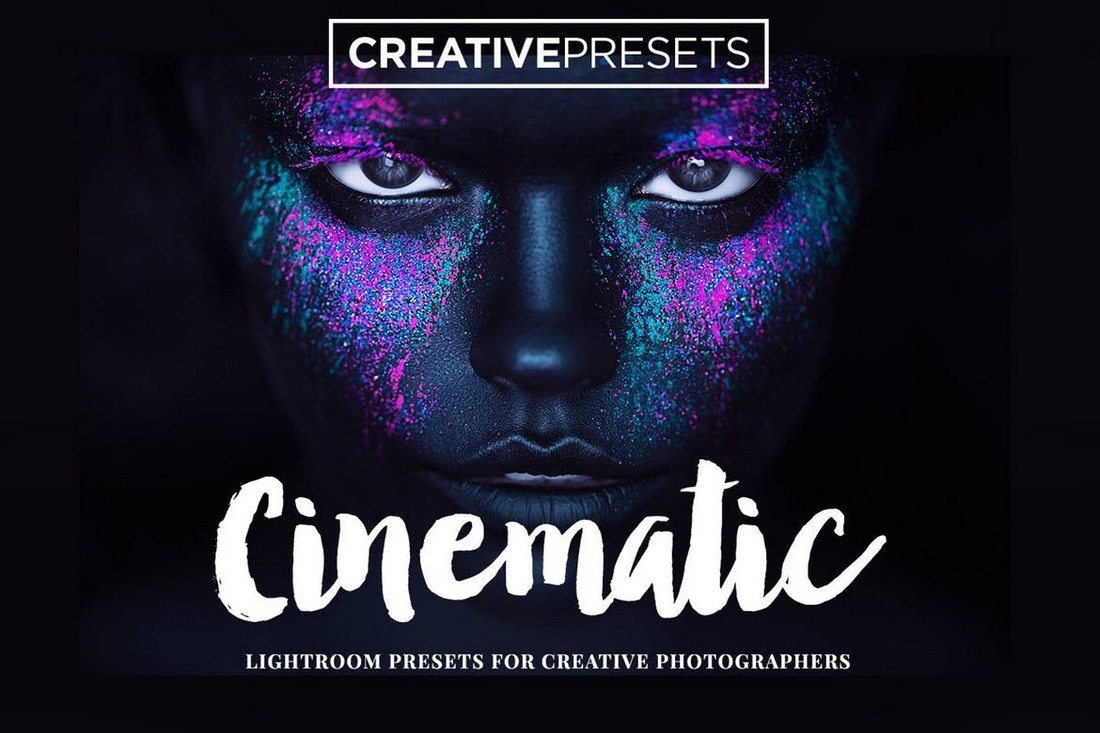
Cinematic Lightroom Presets

This bundle features over 20 amazing presets with effects inspired by popular movies for giving your photos a cinematic look. If you like adding unique visual effects to your photos, these presets are perfect for you.

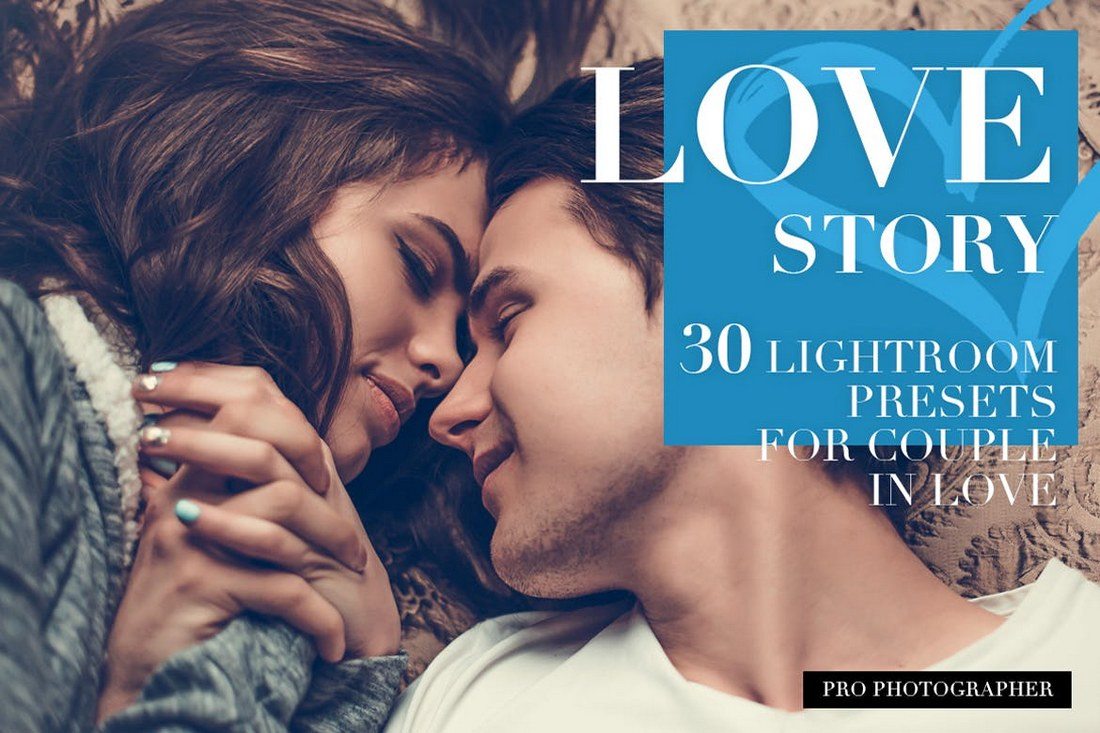
Love Story Lightroom Presets

The Lightroom presets in this pack are made specifically for enhancing and improving couple photos by giving them a summer vibe. It includes 30 different presets, including BW effects, retro, matte, selfie, and more.

Scarlet Fantasy Lightroom Presets

This bundle includes 15 Lightroom presets, including 5 toning presets and 11 variations. Each preset is designed to improve the natural lighting of portrait and fashion photography to give them a fantasy look and feel.

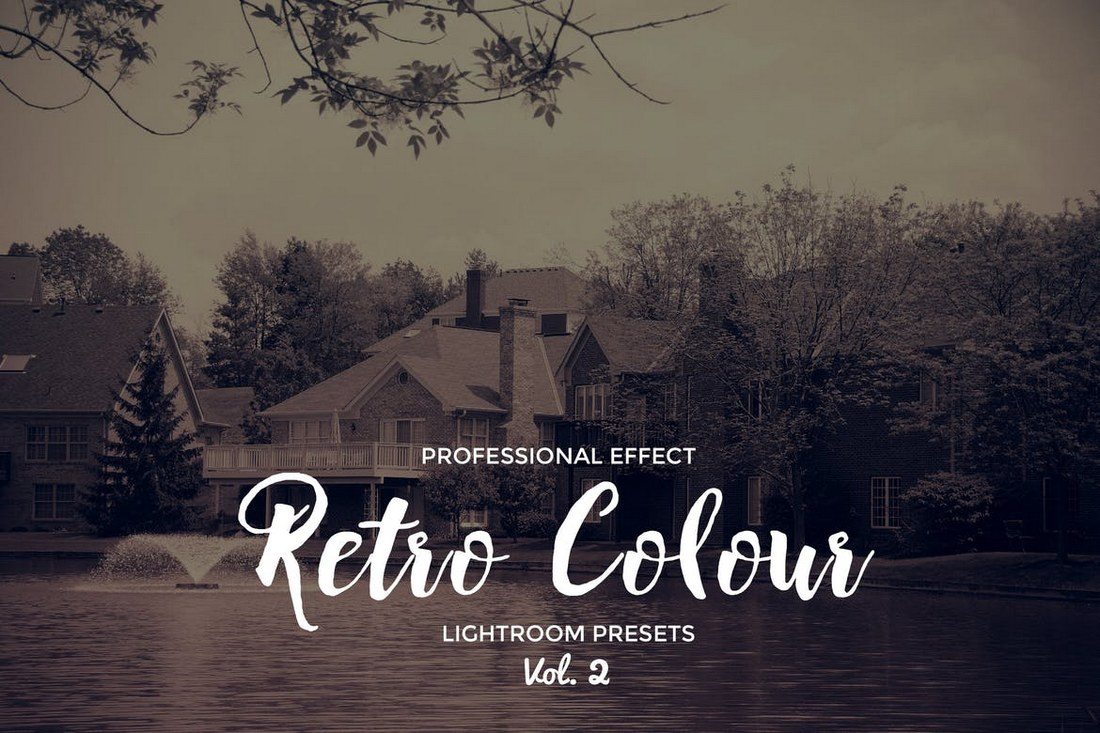
Retro Colour Lightroom Vol. 2

Send your photos back in time using these retro Lightroom effects. This pack comes with 17 presets compatible with Lightroom 4 or better for adding retro and vintage effects to your photos.

Analog Lightroom Presets

Inspired by old-school film photography such as Fujifilm Velvia and Kodak Gold, this pack of Lightroom presets helps you give an analog look to your photos. It comes with 15 presets with adjustable tones. The presets work with Lightroom 4 and above.

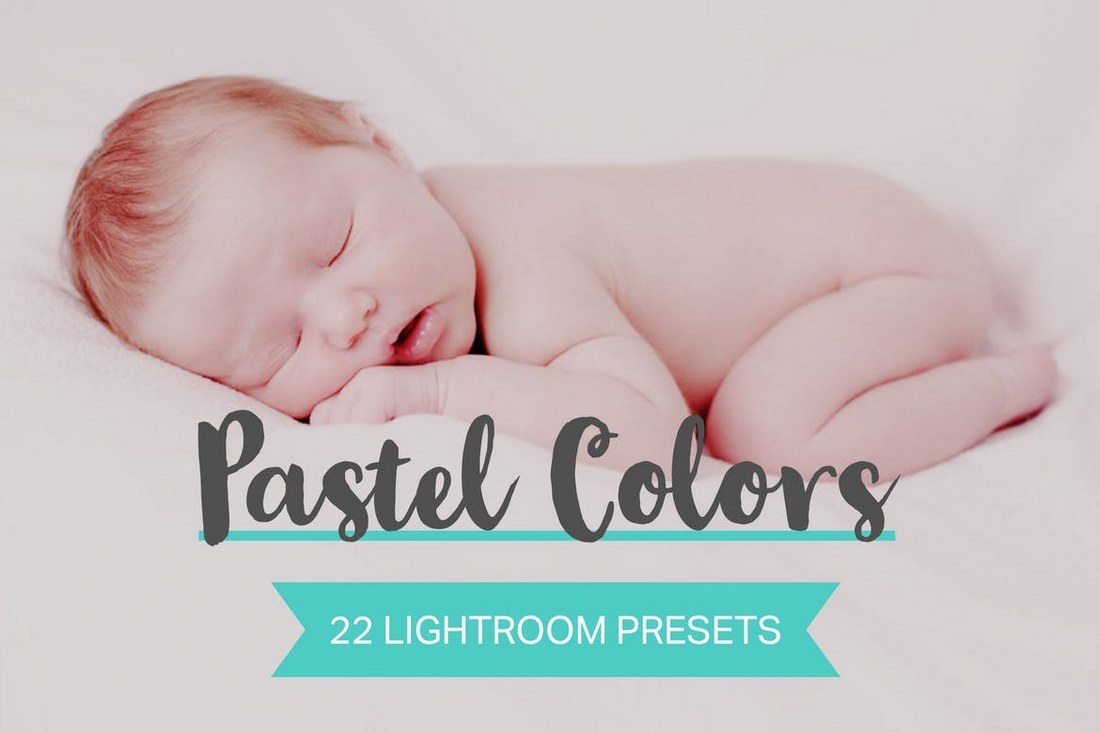
22 Pastel Colors Lightroom Presets

This is a set of color grading Lightroom presets that are perfect for adjusting and improving wedding and baby photography. The presets feature five strengths from subtle to strong for achieving the ideal effect and the tones are adjustable as well.

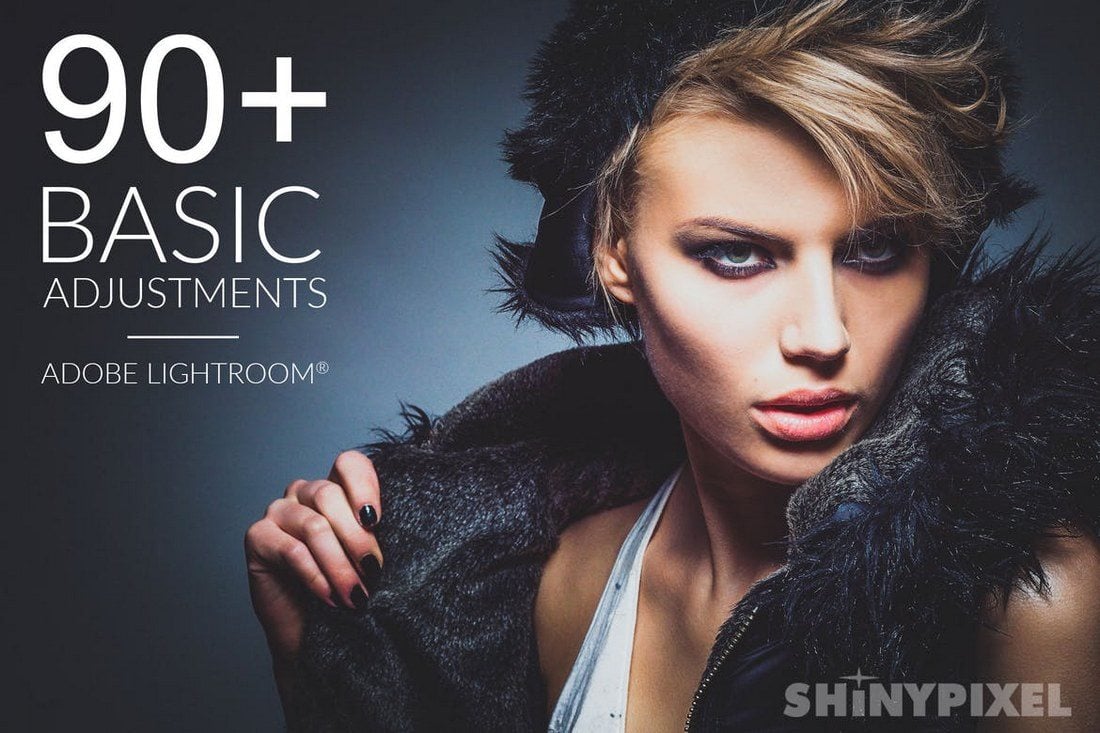
90 Basic Adjustments – Pro Lightroom Presets

A massive bundle of over 90 different Lightroom presets for making basic adjustments to your photos without any effort. The pack includes a set of auto-presets for improving color, contrast, tone, and lets you enhance details with ease.

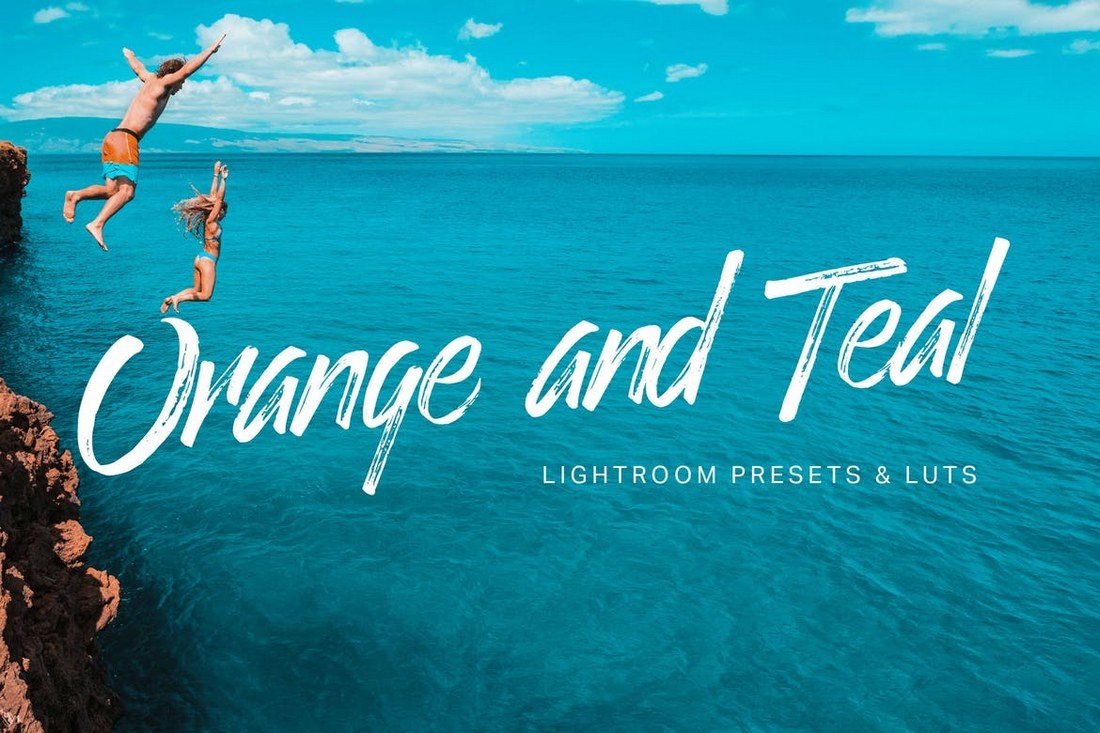
Orange Teal Lightroom Presets and LUTs

This bundle includes 26 fadeable Lightroom presets that gives your photos a professional-level color grading almost instantly. The presets features effects inspired by movies such as Train to Busan as well.

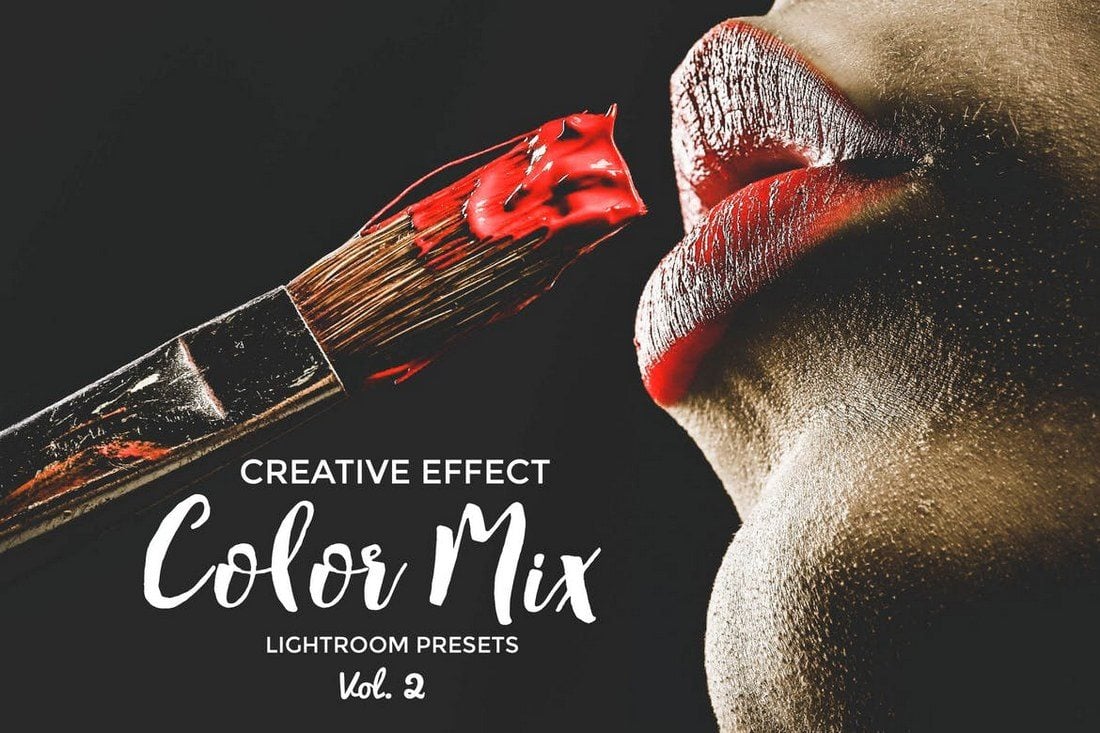
Color Mix Lightroom Presets Vol. 2

Color mix is a pack of premium quality Lightroom presets designed for retouching and enhancing photos. It includes 22 presets that are compatible with Lightroom 4 or better. The presets work with both JPEG and RAW files.

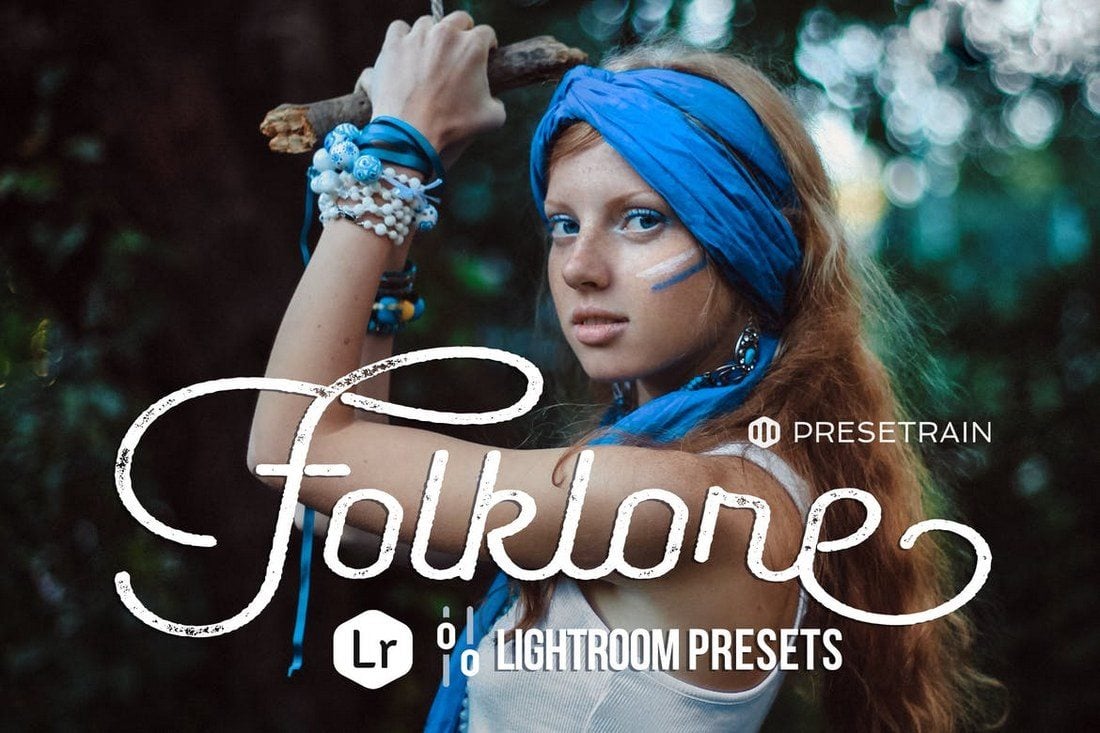
Folklore Lightroom Presets

A unique pack of Lightroom presets that add a stunning moody effect to give a folklore vibe to your photos. The bundle comes with 7 different presets which are suitable for outdoor photography.

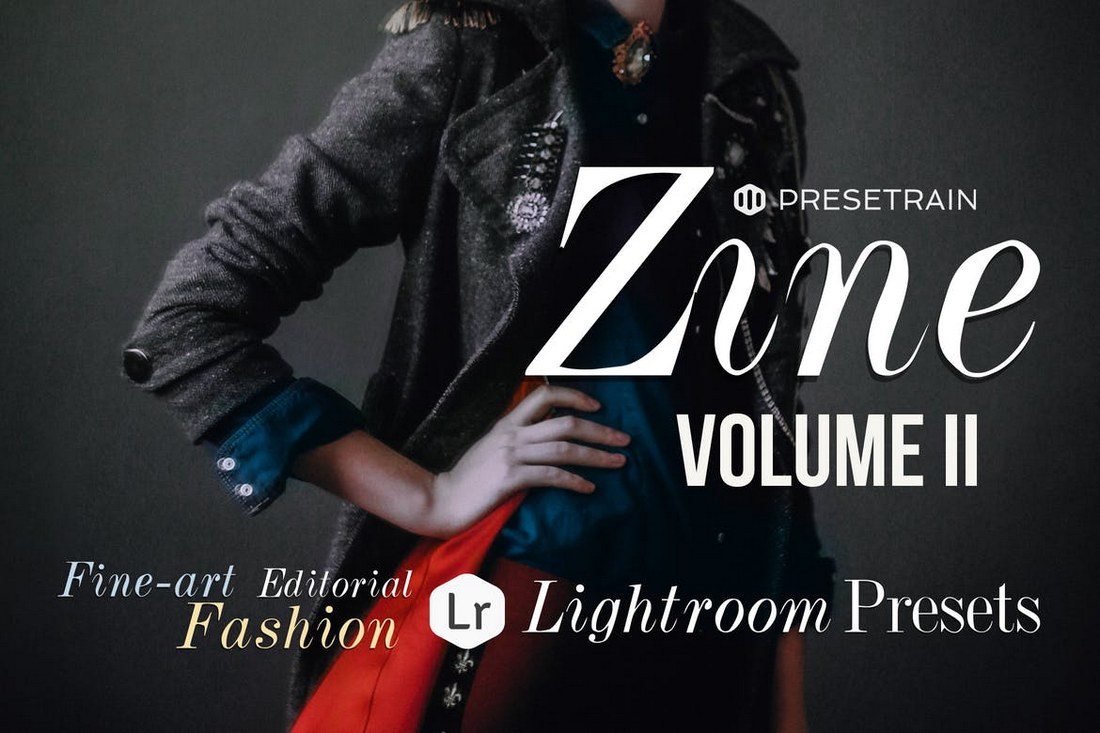
Zine Fashion Lightroom Presets – Vol II

Zine is a set of Lightroom presets designed for fashion and lifestyle photography. It includes 17 unique presets to help you enhance photos instantly and add various styles of effects.

Family & Children Lightroom Presets

There’s no need to hire designers to enhance your family photos and make them look professional. You can use this bundle of 30 Lightroom presets to automatically improve your kids and family photos and add various effects.

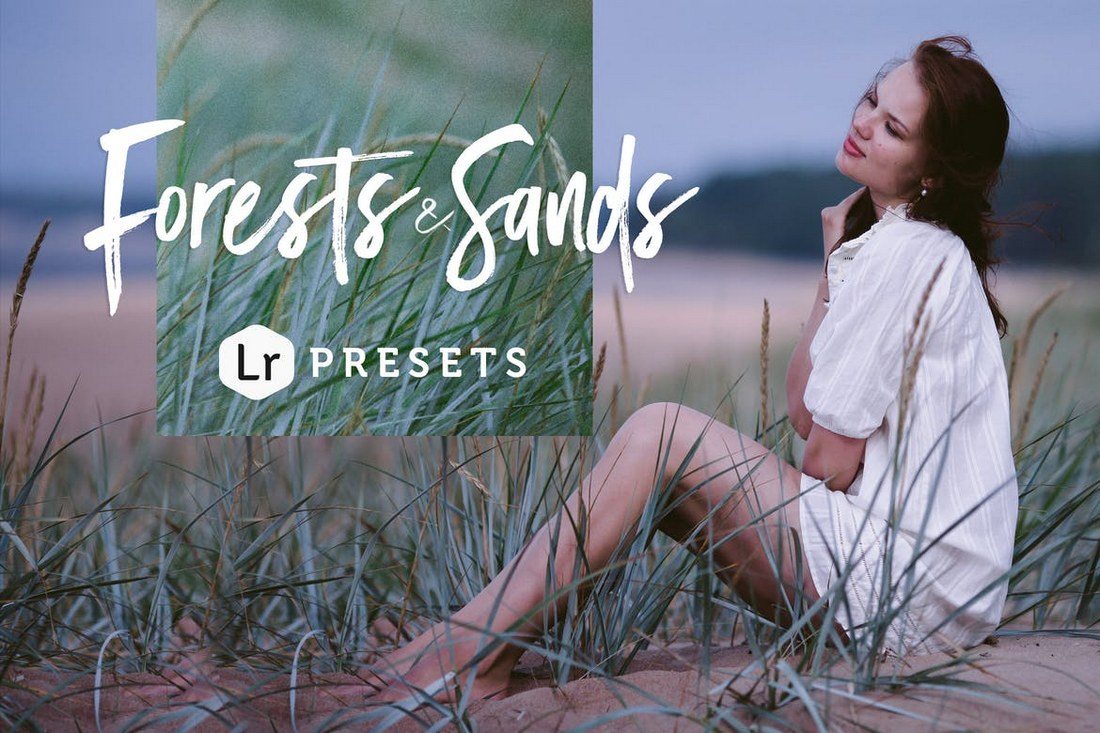
Forests & Sands Lightroom Presets

Forests & Sands is a set of Lightroom presets made for enhancing your outdoor photography. It includes 12 unique presets that gives various effects and each preset comes with several pre-made variations for adjusting lighting and camera settings.

HDR Lightroom Presets Vol. 1

This bundle includes 20 high-quality Lightroom presets for adjusting and improving HDR photography. The presets are fully adjustable and are compatible with Lightroom 4 and above.

Blacktone B&W Lightroom Presets

Looking for a way to achieve the perfect black and white effect? Then look no further. This pack comes with 10 professional presets that allows you to instantly achieve a high-quality B&W effect with just one-click. It’s perfect for fashion and portrait photography.

Retrochrome Lightroom Presets

Retrochrome is a set of Lightroom presets designed for enhancing family and portrait photography. It includes 17 presets: 7 base presets and 10 different variations for achieving different levels of effects and adjustments.

Instant Hipster Lightroom Presets

Give your photos an instant hipster effect using these Lightroom presets. This bundle includes 40 different presets that feature various effects with color grading, adjustable tones, and beginner-friendly settings for adjustments.

Wedding Lightroom Presets Vol. 2

This pack includes 22 professional Lightroom presets for adjusting and improving wedding photography. Retouching many different types of wedding photos will get much easier with these presets.

Interior Lightroom Presets

This bundle features 20 unique Lightroom presets for improving the lighting, contrast, color, and adding effects to your various types of interior photography.

Street Photography Lightroom Presets

Enhance and improve your street and urban photography using this pack of Lightroom presets. It comes with 13 unique presets with various effects and adjustments for giving a professional look to your photos.

10 Cyberpunk Lightroom Presets & LUTs

Make your photos look as if they’re taken from the Blade Runner movie using these cyberpunk Lightroom effects. The bundle comes with 10 unique presets.

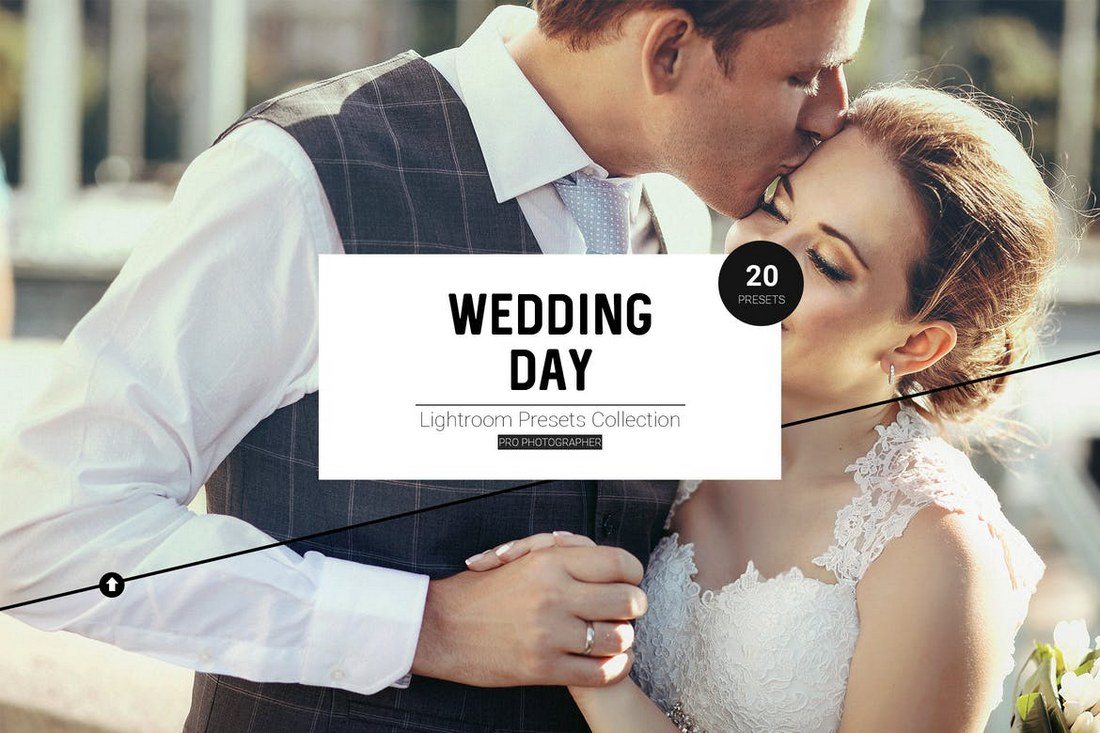
Wedding Day LR Presets

Yet another pack of Lightroom presets made specifically for improving wedding photos taken in various situations, including sunny, summer, and bright lighting. It includes 20 unique presets.

Anniversary Lightroom Presets – Vol I

This is a bundle of creative Lightroom presets designed to enhance the toning of photos. It’s best for improving outdoor, couple, and family photos. It includes 20 total presets with 7 base presets.

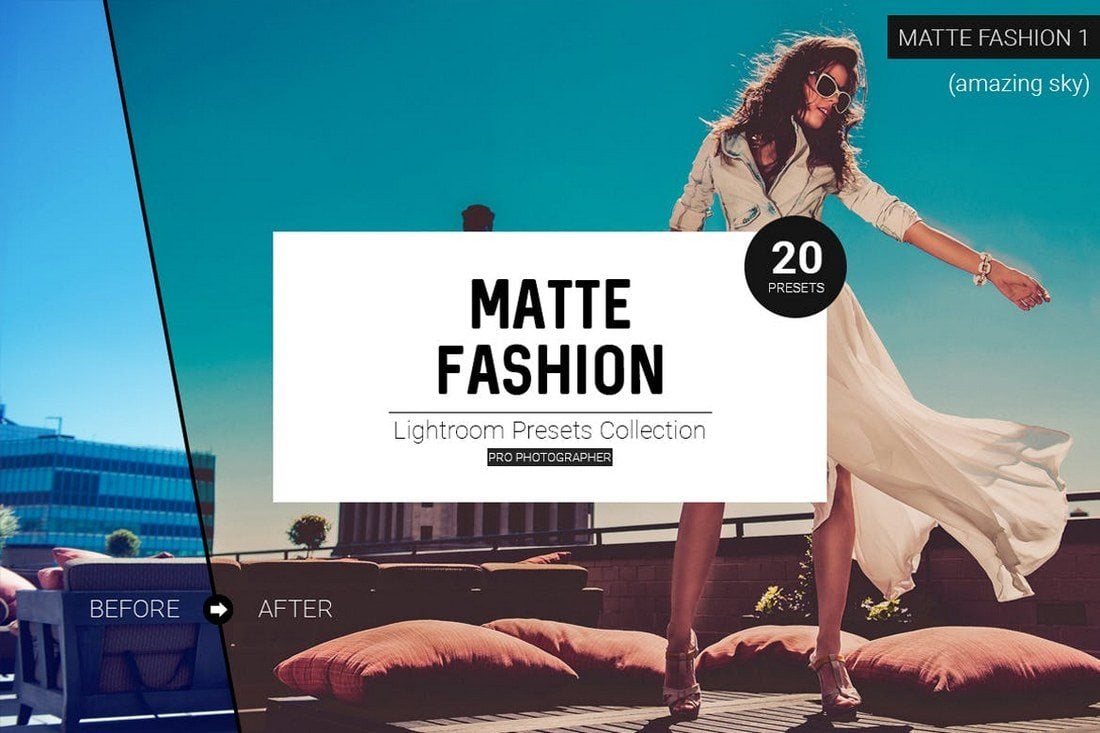
Matte Fashion Lightroom Presets

Improve your fashion photography using this bundle of Lightroom presets. This pack comes with 20 presets for enhancing and adding effects to both outdoor and portrait photos.

Artistic Lightroom Presets vol. 1

A bundle of 27 Lightroom presets for adding truly artistic effects to your photos. It’s perfect for fashion and lifestyle photographers for quickly improving photos with just a single click.

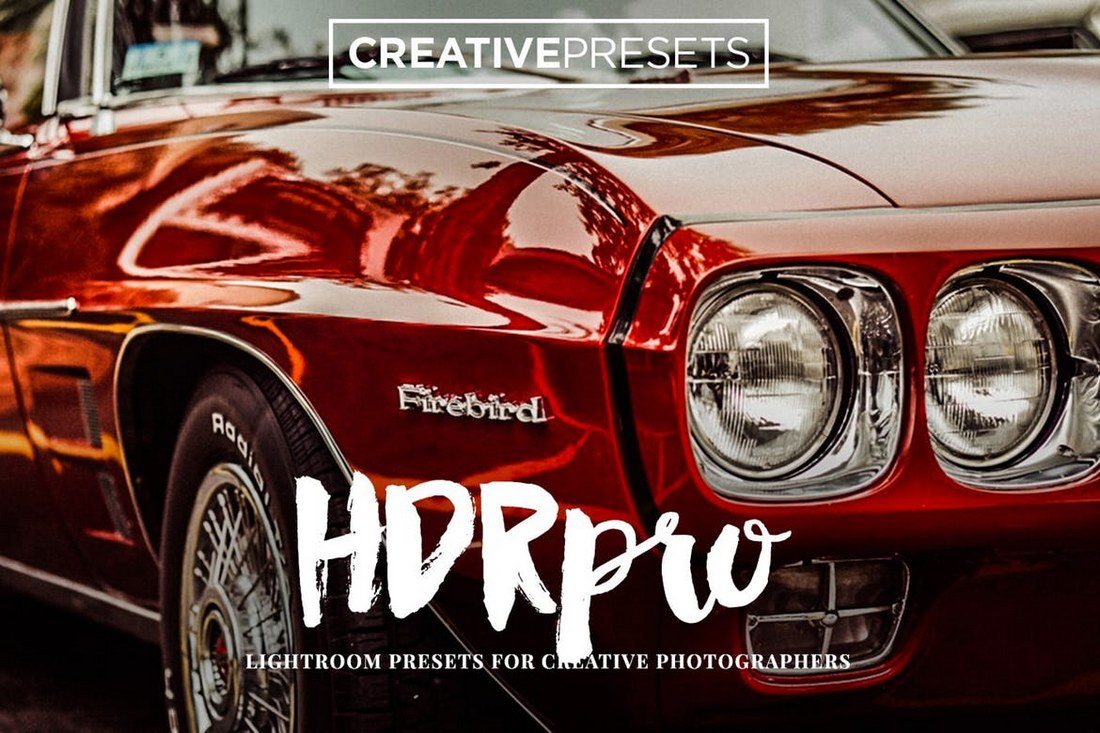
HDR PRO Lightroom Presets

This is a set of 10 Lightroom presets designed specifically to help improve your workflow by allowing you to quickly and easily process your HDR photos.

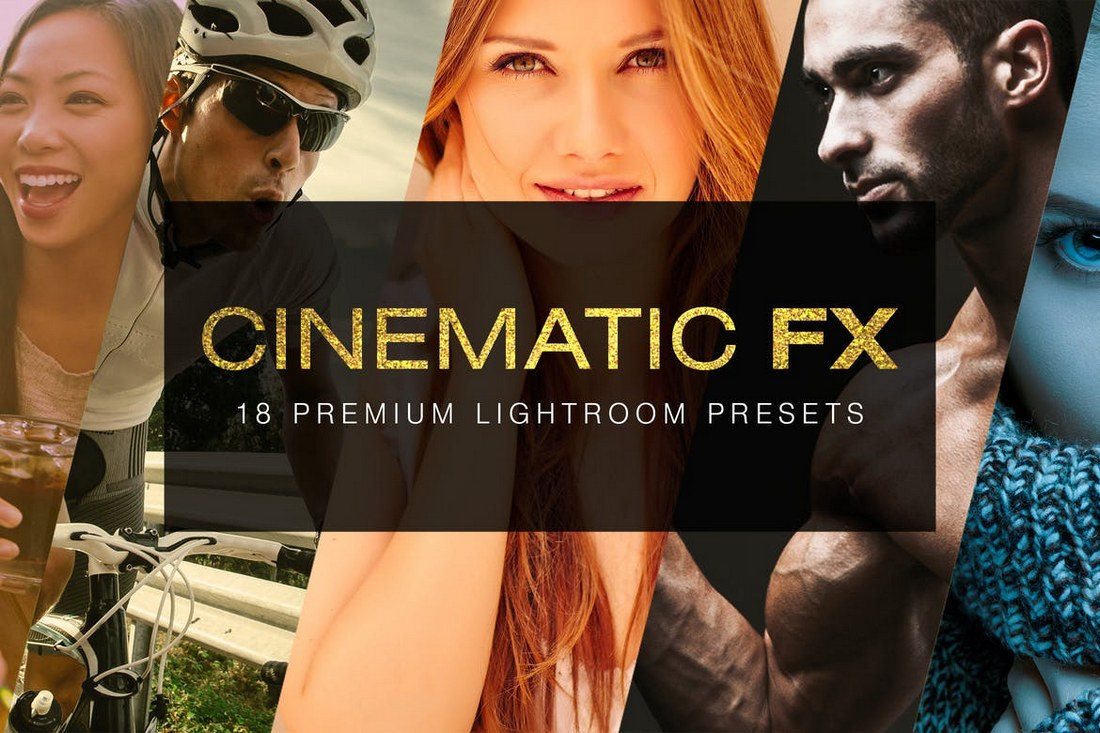
18 Cinematic Lightroom Presets

A bundle of 18 stylish color grading presets for adding various effects and enhancing your photos. These presets are also compatible with videos so you can add them to your videos using Lightroom as well.

Retouch Pro Lightroom Presets

This is a bundle full of professional Lightroom presets made specifically for retouching portraits and other types of photos. The pack includes 15 different Lightroom effects, which are compatible with Lightroom 4 or better.

UltraPOP Lightroom Presets

UltraPop is a pack of creative Lightroom presets that allows you to add an extra bit of color to your boring photos to make them pop. The bundle includes 20 Lightroom effects suitable for different types of photos.

Modern Portrait Lightroom Presets

If you’re a photographer or a designer working with portraits, this collection of Lightroom presets will be indispensable for you. It includes 30 professional Lightroom effects for instantly improving portrait photos.

Burgundy Lightroom Presets

This bundle comes with 14 Lightroom presets that adds a modern retro feel to your photos by adding a warm vintage tone. The effects are most suitable for improving landscape, portrait, and wedding photos.

Fashion Lightroom Presets

This collection of Lightroom presets are ideal for photographers and designers who work with fashion photoshoots. It includes 23 Lightroom presets for optimizing your fashion and beauty photos while also preserving the original photo quality.

Winterchrome Lightroom Presets

Lightroom Presets

If you want your winter pictures to stand out, and make an impact on the audience, you need to add this collection of 8 Lightroom presets to your arsenal. The presets are perfect for holiday, travel, family, and portrait photography. Grab it now!

Folklore Lightroom Presets

Lightroom presets

Wanting your pictures to narrate a story? Look no further than this bundle of 7 Lightroom presets that will add a moody, folk-themed accent to your photos, taking them to a whole new level of perfection. These presets work swimmingly for outdoor portraits.

Boho Wedding Lightroom Preset

Lightroom Presets

If you’re after the perfect set of Lightroom presets to add a relaxed bohemian look to your wedding photography, this collection of filters is a great choice. Each of the 13 filters will add soft, moody, and natural tones to your photographs, and comes with detailed supporting documentation.

K-Pop Mood Lightroom Preset

Lightroom Presets

The K-Pop trend is becoming increasingly popular, so why not channel this fun and modern aesthetic into your photography with this set of 20 unique and colorful Lightroom presets? It includes four different themes – ice cream, motel, vice, and wild west – for you to mix and match.

Santorini Lightroom Presets

Lightroom presets-

Give your photos a beautiful toning with Santorini, a remarkably unique collection of Lightroom presets, perfectly fit for social media bloggers looking to beautify their pictures. Inside the pack, you’ll receive 10 presets suitable for professionals, and amateurs alike.

5 Common Lightroom Preset FAQs

If you’re new to Lightroom, these frequently asked questions will help you understand how to take advantage of the app using Lightroom presets.

1. How to Install & Use Lightroom Presets

Installing a preset in Lightroom CC is quite easy. Simply follow the steps below.

  1. Open the Lightroom CC app and open an image
  2. Open the Develop tab by clicking on the button on the top-right corner
  3. Scroll all the way down to find the Presets button and click to open the presets tab
  4. On the Presets tab, click on the three dots on the top of the panel and select Import Presets option from the menu
  5. Browse your computer to find and select your downloaded preset files and click the Import button to import the presets

Once imported, your new presets will appear in the Lightroom Presets library. Simply click on a preset to apply the effect to your photos. Then you can use the adjustment tools to optimize the effect to your preference.

2. Why Use Lightroom Presets?

When working with photos, you’ll often end up applying the same effects to multiple photos. With presets, you can automate the actions to apply the adjustments to other photos with just a single click.

Lightroom Presets help you save a lot of time and improve your workflow. Presets are also a great way to share your unique filters and effects with others.

3. How to Save & Export Lightroom Presets

If you want to save an adjustment, a filter, or an effect you’ve created with Lightroom to use later, you can easily save it as a preset as well. Here’s how to do it.

  1. First, make all the adjustments you want to save as a preset
  2. Click on the Plus icon (+) on the top-right corner of the Presets tab then select Create Preset
  3. On the Create Preset window, select all the settings and adjustments you want to save. Give your preset a name and click on the Create button to save your preset.

To Export a preset or share it with someone else, simply right-click on the preset you’ve created and select Show in Explorer. Find the .XMP file of your preset and copy it.

4. How to Use Lightroom Mobile Presets

Lightroom also has a very powerful mobile app, which you can use on your phone or tablet to edit photos on-the-go. You can use presets with the mobile app as well. Here’s how it works.

The easiest way to import presets in Lightroom mobile is to import the presets using the Desktop app and sync them with your mobile app using Adobe Cloud.

Or you can install Lightroom presets made specifically for the mobile app.

  1. First, UnZIP or Extract the files in your downloaded ZIP file. You may have to install an additional app to UnZIP files. Lightroom Mobile uses a format called .DNG for presets
  2. Open Lightroom Mobile app and tap on the Add Folder button and select Add Files option
  3. Now browse to your extracted folder and open the Lightroom Preset
  4. Once installed, the preset will appear in your library.

To apply the preset to photos, simply click on the Preset image >> click on the three dots button on the top-right corner >> select Copy Settings. Select all the settings you want to copy and click OK.

Now open the image you want to edit and click on the three dots button and choose Paste Settings.

5. Lightroom Classic vs Lightroom CC: Key Differences

When buying a subscription to the Adobe Lightroom app, you’ll have two options to choose from—Lightroom Classic and Lightroom CC.

Lightroom Classic is the enhanced version of the old Lightroom app. This app is optimized for Desktop users who prefer the classic user interface for faster workflow.

Lightroom CC features a modern user interface and comes with more improved features and Adobe cloud integration and access to the Lightroom Mobile app.

If you’re looking for more, be sure to check out our wedding Lightroom presets and realistic Lightroom presets collections as well.

Unlocking Scalability with Laravel’s Job Queues A Practical Approach

Featured Imgs 23

In modern web applications, scalability is crucial for handling increasing traffic and data efficiently. Laravel’s job queues offer a powerful way to manage tasks that need to be processed asynchronously, helping your application stay responsive and performant. In this blog, we’ll explore how Laravel’s job queues work and how you can implement them to unlock …

The post Unlocking Scalability with Laravel’s Job Queues A Practical Approach first appeared on Lucid Softech.

B2B Marketing KPIs vs. Metrics: 24+ Every Business Should Be Tracking

Featured Imgs 23

Over the last decade, I’ve helped set and track marketing goals for B2B businesses of all kinds — And I’ve come to think of them more as destinations.

→ Free Download: Free Marketing Reporting Templates [Access Now]

They’re points on the map your team wants to reach. And B2B marketing KPIs (key performance indicators)? Well, they’re how you measure how far you’ve gone and just how far you have left.

You can measure trips in miles, hours, or even how many Spotify playlists you’ve gone through. Similarly, there are dozens of KPIs to measure progress toward our marketing goals — but don’t worry; there’s no need to guess and check.

Regardless of industry or audience, there are some KPIs everyone should be tracking, and I’ve compiled them for you here. We’ll define them, why they’re important, and how to track them effectively.

Table of Contents

What are B2B marketing KPIs?

As HubSpot contributor Rebecca Riserbato explains, a key performance indicator (KPI) “measures how your company is performing regarding certain long-term goals or objectives.”

That means B2B marketing KPIs are data points marketers use to monitor and measure the progress of their business-to-business (B2B) marketing initiatives (e.g., website campaigns or email marketing).

It kind of sounds like a metric, doesn’t it? But — plot twist — they’re not the same.

B2B Marketing KPIs vs. B2B Marketing Metrics

Every time I’ve set marketing goals, I’ve needed a refresher on the difference between marketing KPIs and metrics. Many people even use them interchangeably, but this is a little misguided.

KPIs and metrics are similar and work together but have very different responsibilities — like sales and marketing, design and development, or forks and spoons.

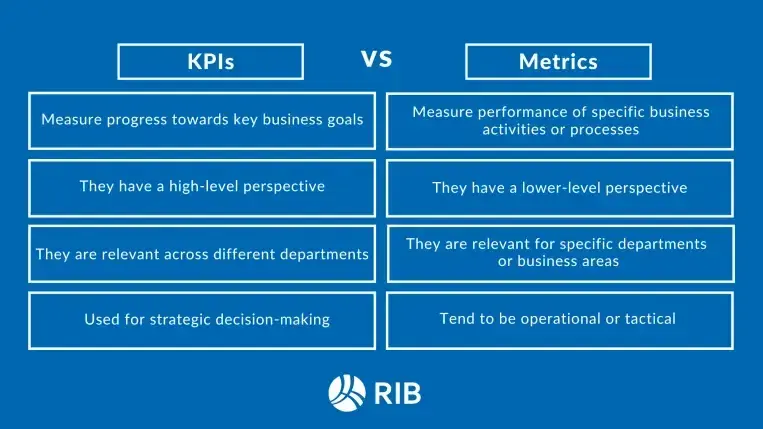
Chart comparing KPIs vs Metrics

Image Source

KPIs are focused on the big picture. They relate directly to your business’s larger long-term goals and are the same across departments.

Metrics are related to business goals, too, but they zero in on specific tactics and initiatives used to accomplish them and tend to change by department.

To use our travel example again, your KPI could be visiting all of Italy in a month. However, your metrics would be tracking individual cities or regions you need to visit to accomplish that.

Thinking of business: say you want to increase your number of new customers by 25% this year. That’s your KPI.

Your marketing metrics would be the click-through rate of the social media ads you run to try to generate new leads or the open rate of the email campaigns you run.

But why do we even need to track any of these things?

Why track B2B marketing KPIs and metrics?

Simply put, B2B marketing KPIs tell you what your team is working toward and where everything it does needs to lead. They give you direction.

They help guide your strategy by giving you something to point to and ask, “Is this going to help get us to that goal?”

Marketing metrics go even further. These measurements can help you:

  • Track progress toward your goals
  • Gather customer/audience insights
  • Evaluate the effectiveness of your work/creative
  • Improve conversion rates
  • Plan more effective future campaigns
  • Prove return on investment (ROI)
  • Incentivize teams
  • Make better business decisions

I’ve always liked to say that marketing is a happy marriage of creativity — and science and metrics are the keys to this.

B2B Marketing KPIs and Metrics to Track

Now that you know why tracking B2B marketing KPIs and metrics is important, which ones should you focus on?

Specifics will depend on your organization’s specific campaigns and company goals, but here are 24 of the most important based on some of the most popular marketing initiatives.

Need help tracking your KPIs? HubSpot’s KPI Software can help you build dashboards, create and send automated reports, and track KPIs to measure your teams' performance and drive improvement over time.

Website Performance KPIs and Metrics

According to our 2024 State of Marketing report, company websites/blogs/SEO have resulted in the biggest ROI for marketers in the past year, which likely comes as no surprise.

For many, your website is the center of all your content marketing and even sales. Website KPIs and metrics help you make sure it's performing to the level you need it to.

1. Website Traffic: This is the volume of users visiting a website.

Why is it important? Your company website is the hub of many modern businesses. Even if it’s not where people are making actual purchases, it’s where they come to learn more about what you do and often even initiate sales conversations.

Understanding traffic helps you gauge interest and potential for sales activity. In terms of specific metrics, you can track:

  • Unique Visits: Total number of unique individuals who click on one or more web pages in a visit.
  • Page Views: Total number of web pages viewed, including individually refreshed pages.
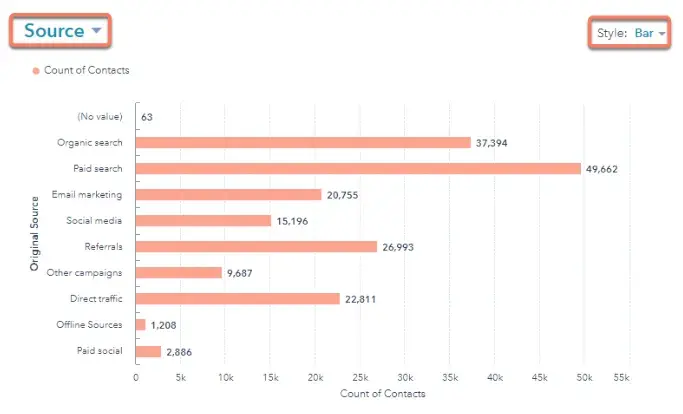
  • Traffic Source: Where your website visitors come from (i.e., email, social media, search engine)

How to calculate and track it? You can track your website traffic through a number of different tools. In my experience, a combination of HubSpot Analytics and Google Analytics is most effective for businesses using HubSpot tools.

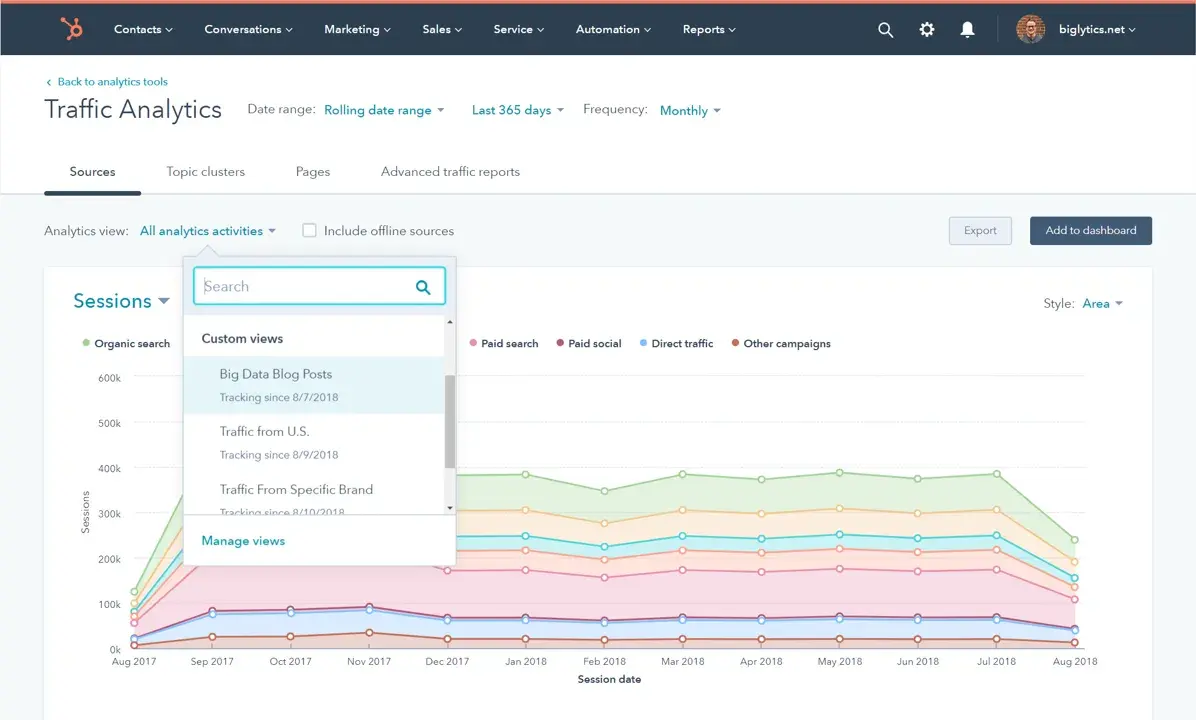
Screenshot of what HubSpot’s traffic analytics can look like

In HubSpot, you can easily view your page views and sessions filtered by time frame or source.

2. Bounce Rate: This is the percentage of website visitors that click on one page and leave.

Why is it important? Bounce rate can help you gauge if your website is delivering what it needs to achieve your goals. If your bounce rate is low, that could mean that people are interested and engaged in your website.

They’re staying and clicking around.

If it’s high, it could mean either your website is not what someone was looking for or didn’t deliver what they wanted, or they immediately found what they needed and could leave.

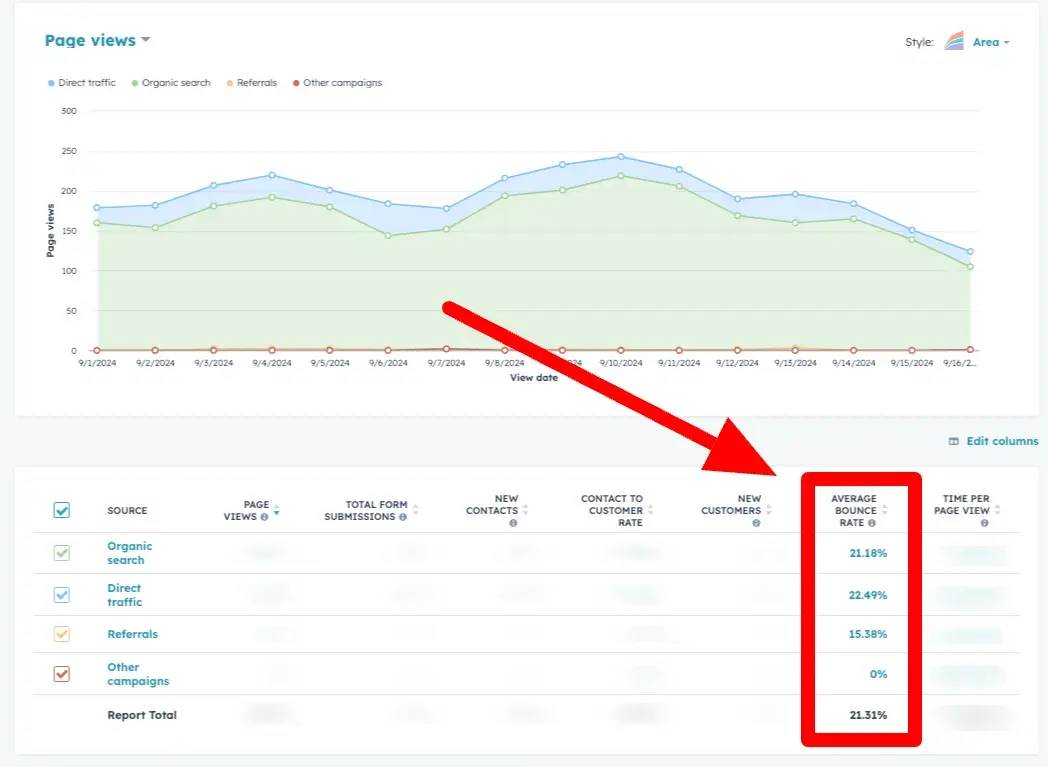
How to calculate and track it? This is another KPI you can track for specific website pages, landing pages, and blogs in HubSpot. Here’s how it can appear in the analytics of a blog article.

Screenshot showing one way to view your bounce rate in HubSpot

3. Conversions: How many visitors took your desired action on your website, like subscribing to your newsletter or making a purchase.

(It’s also the most important marketing metric if you ask me.)

Why is it important? Leads and new contacts are fuel for your marketing and sales funnel. When someone fills out a form on your website, they’ve shown an active interest in what you offer and want to connect with your business.

It’s a crucial first action to put the rest of your marketing and nurturing activities into motion. People can convert on several different things, so this may mean tracking:

  • Form Conversion Rate (or visit to form submission): This is the percentage of website visitors that submit a form. (Formula: Form conversion rate = (total form conversions / total visitors) x 100)
  • Number of Form Submissions: This is how many times forms were submitted on your website.
  • Number of New Contacts: How many new contacts has your website generated.
  • Visit to New Contact: This is what percentage of visits to your website resulted in a new contact.

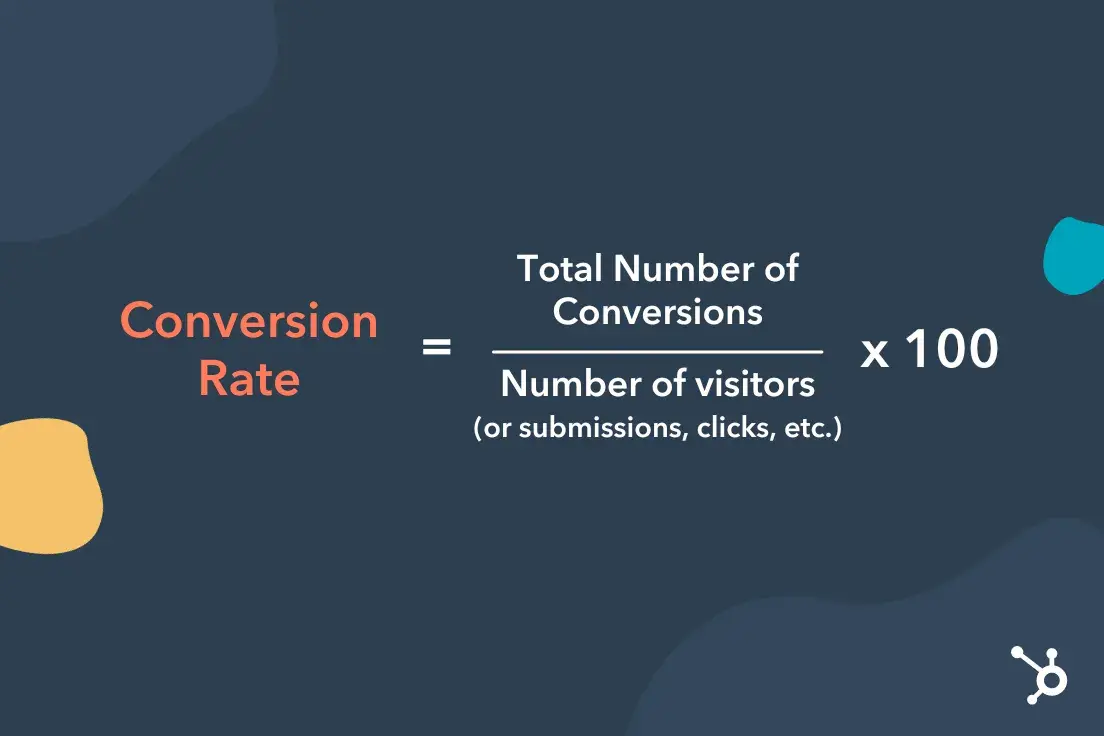
How to calculate and track it? HubSpot or any tool you use to host your forms or landing pages should provide you with calculated conversion rates automatically, but even if they don’t, you can calculate yours with this formula:

Conversion Rate = Total number of conversions /

Number of visitors (or submissions, clicks, etc.) x 100

Graphic showing the formula for conversion rate

Sales and Marketing Pipeline

Once someone fills out a form on your website, they enter your sales and marketing pipeline to be nurtured toward making a purchase.

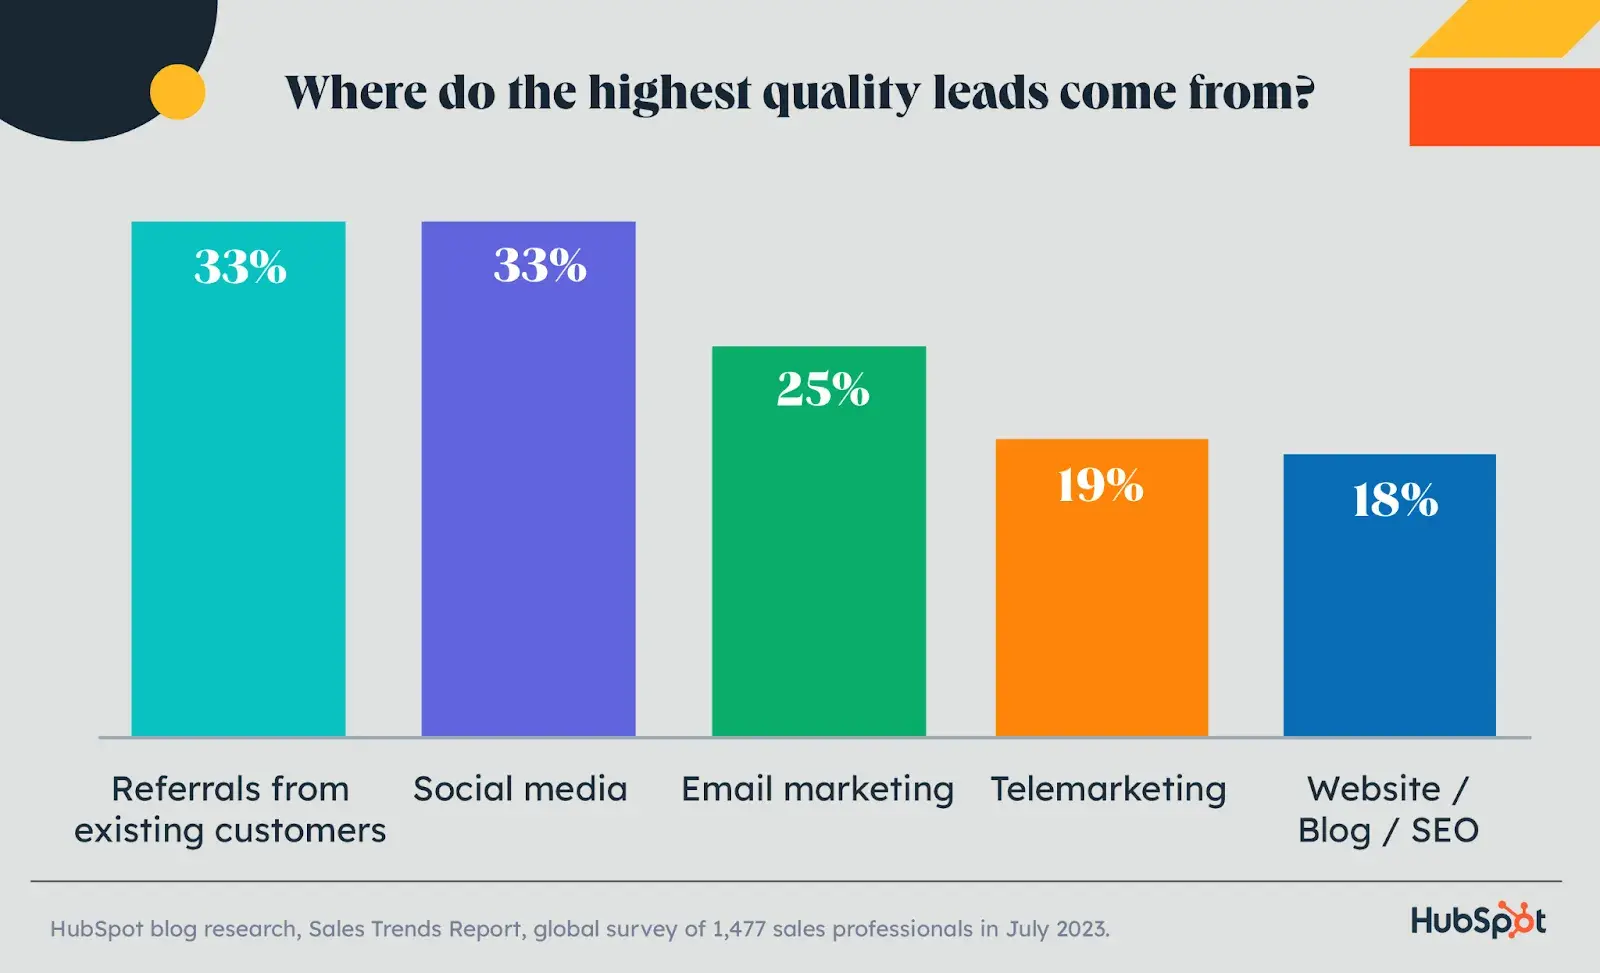
63% of B2B marketers report tracking their marketing/sales funnel as KPIs and metrics, and with their direct correlation to revenue, they should be.

4. Number of Leads (or Leads In): This is the total number of contacts generated by your campaigns that could buy from you.

Why is it important? Similar to your number of new contacts, this tells you how many new people you have to nurture towards a purchase. However, they’re different in that these contacts have the qualities that signal it could turn into a customer.

Think of it this way: If you sell enterprise software, a college student could become a contact after downloading a report on your website for a class project, but they can’t buy from you. That said, they are a contact but not a lead.

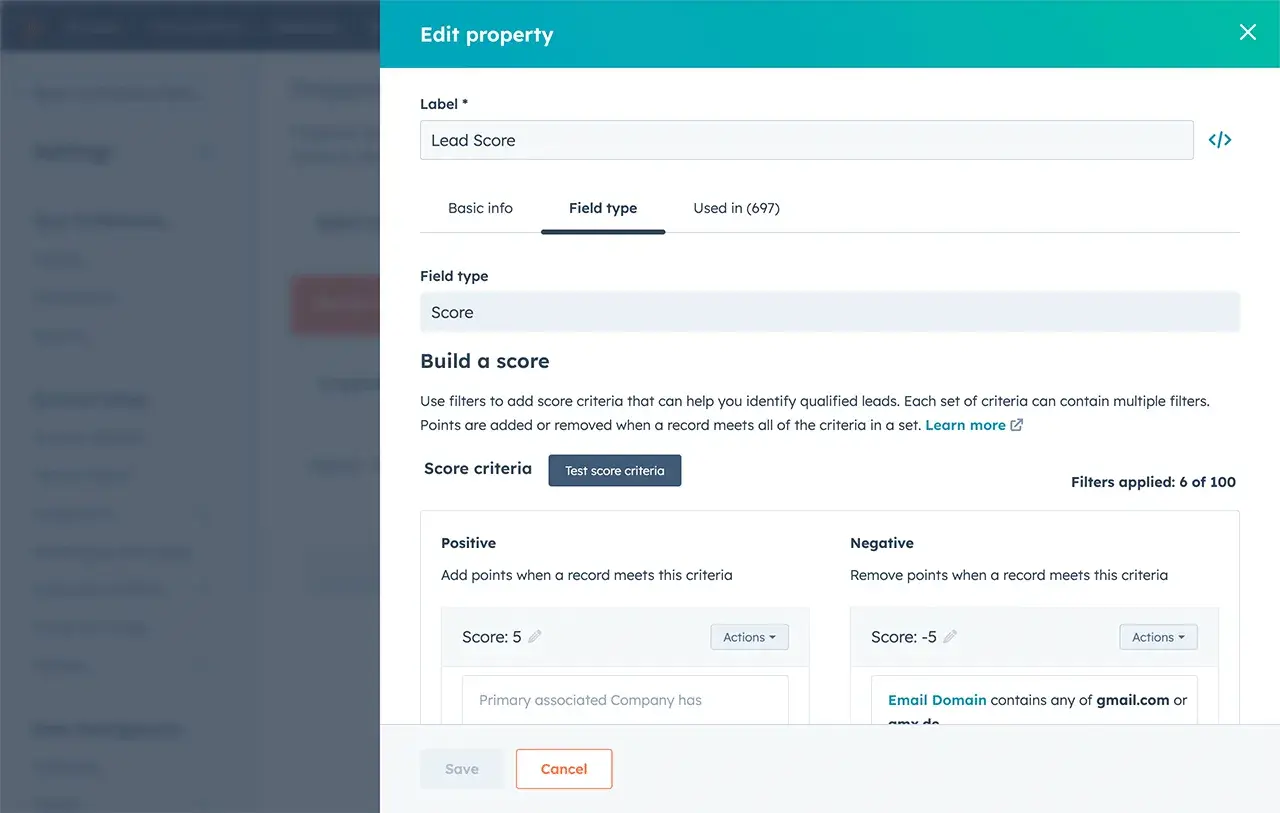
How to calculate and track it? What criteria actually makes someone qualify as a lead is up to your business, but once you have that set, you can use HubSpot Lead Scoring to identify these contacts.

From there, you can create an active list in HubSpot to automatically segment these leads and keep an eye on the size of that list.

5. Cost Per Lead (CPL): This is the total number of dollars it takes to acquire a potential customer.

Why is it important? HubSpot’s Jay Fuchs explains, “Generally speaking, [CPL] is used to gauge the efficacy of individual campaigns — via channels like Google ads, email marketing, or social media — but it can also help you understand whether you're getting the most out of your marketing spend as a whole.”

In other words, this can help you determine if your marketing campaign is cost-effective. If it costs more to bring in a lead than you’ll make off it, that campaign was not worth your time.

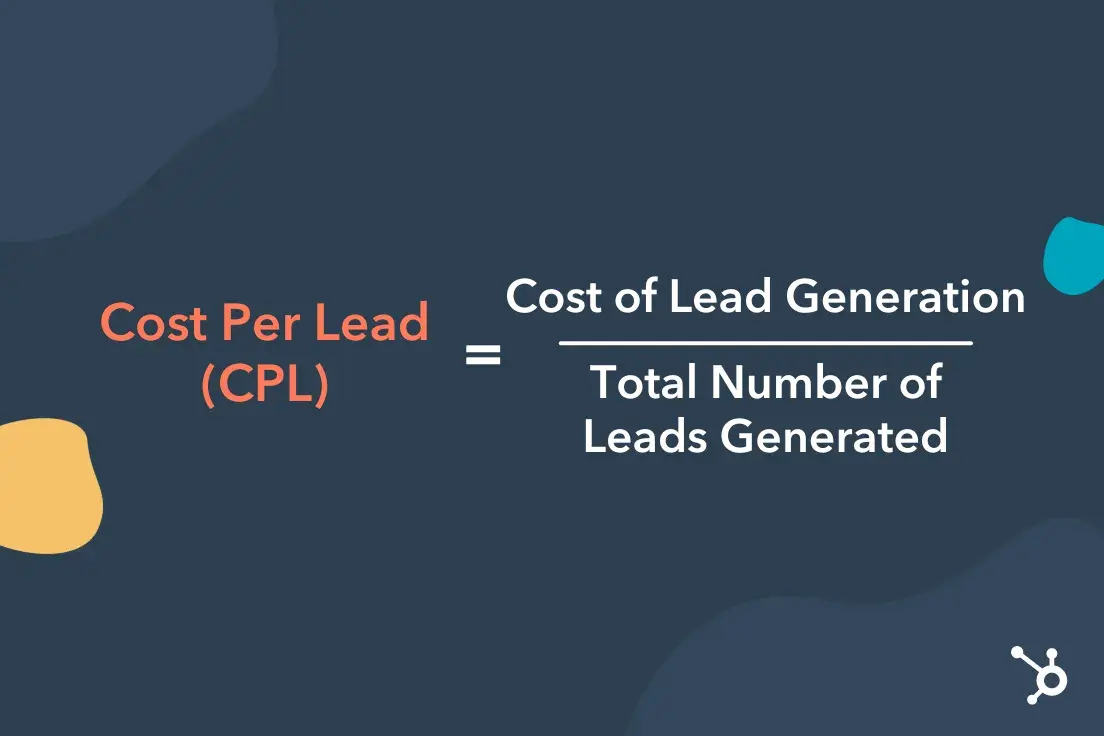
How to calculate and track it? You’ll need to calculate this on your own or through a spreadsheet. Use this formula:

Graphic showing the formula for cost per lead (CPL)

Cost of Lead Generation/Total Number of Leads = Cost per Lead

Fuchs explains this formula in detail in “How to Calculate & Apply Cost per Lead (CPL).”

6. Close Rate (or Lead to Closing Rate): This is the percentage of leads that eventually become customers.

Why is it important? Your close rate can help gauge the quality of the leads you’re bringing in as well as your sales process.

If your close rate is high, things are going well. If not, you may need to re-evaluate your lead criteria or sales behavior.

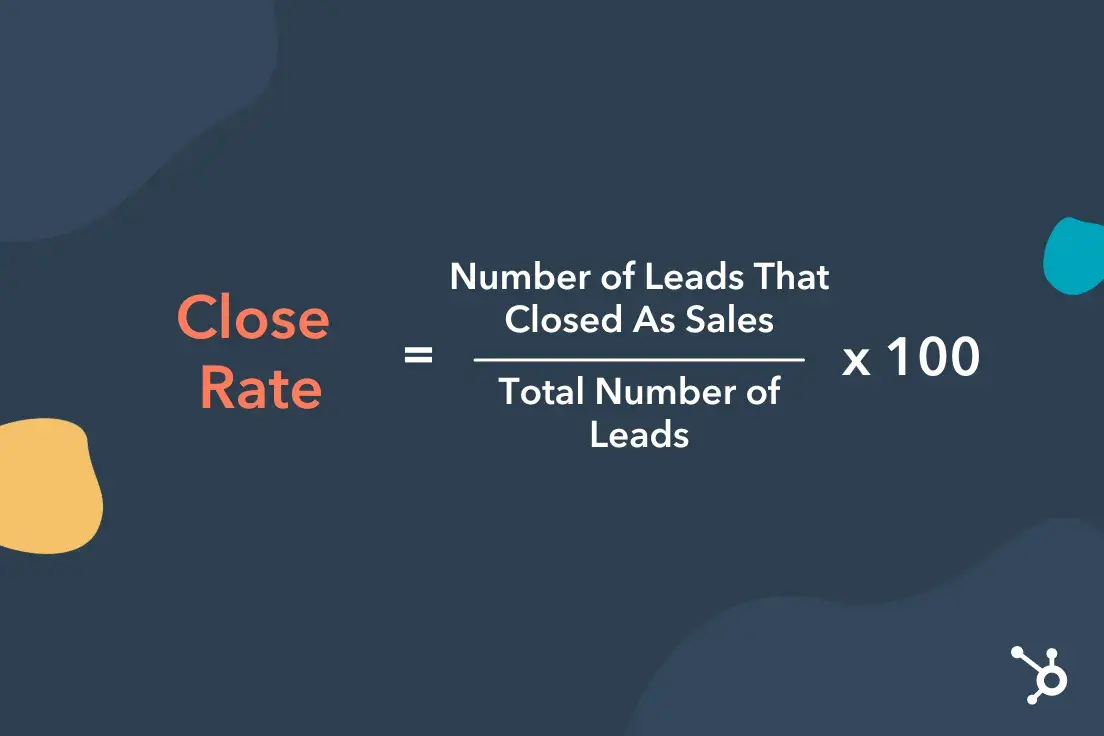
How to calculate and track it? This is another KPI you’ll need to calculate on your own or through a spreadsheet. Use this formula:

Close Rate =

(number of leads that closed as sales / total number of leads) x 100

Graphic showing the formula for close rate

7. Number of MQLs (Marketing Qualified Leads): The number of leads engaged with your company’s marketing and have the potential to become a more serious prospect.

Why is it important? MQLs help your marketing team understand how many leads they're bringing in and if they’re quality leads.

How to calculate and track it? Like number of leads, you can use a combination of HubSpot Lead Scoring, an active list in HubSpot, and workflows to automatically segment these leads and keep an eye on the size of that list. Learn more about MQLs.

8. Number of SQLs (Sales Qualified Leads): Number of prospective customers ready to talk to someone on your sales team.

Why is it important? SQLs have usually expressed enough interest in your product or service to be ready to move into your sales process. Tracking this number lets you know how many people your sales team is currently working with.

It also provides valuable insight into which marketing efforts generate the most sales activity.

How to calculate and track it? Once again, you can use a combination of HubSpot Lead Scoring, an active list in HubSpot, and workflows to automatically segment these SQLs and keep an eye on the size of that list. Learn more about SQLs.

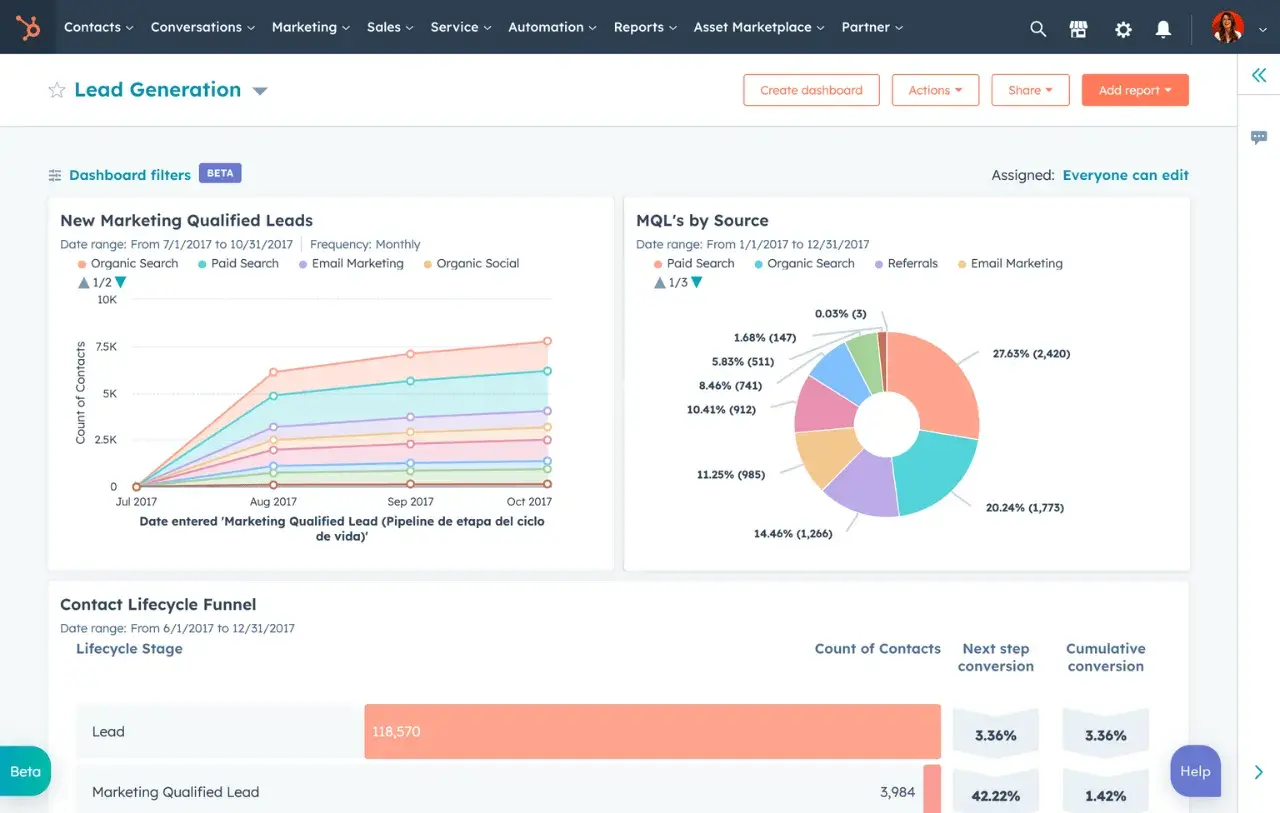
Pro Tip: If your marketing and website are hosted on HubSpot, our Dashboard & Reporting software is a user-friendly, single source of truth for all this data.

Screenshot showing what lead reports can look like in HubSpot

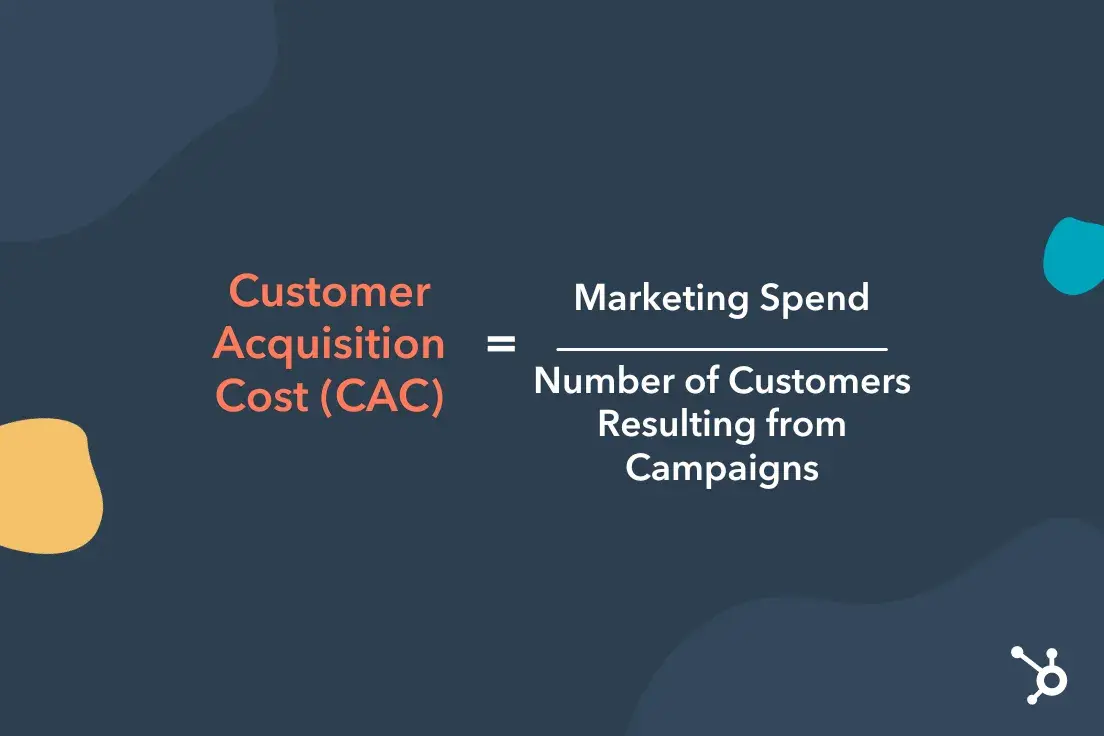
9. Customer Acquisition Cost (CAC): The amount of money it takes to convert a potential lead into a customer.

Why is it important? Like CPL, CAC tells you how cost-efficient your marketing and sales processes are. You don’t want to be spending more on getting customers than you are making from them.

How to calculate and track it? Information from HubSpot can help guide this calculation, but ultimately, this is another you’ll need to calculate it on your own or through a spreadsheet. Use this formula:

CAC = marketing spend/number of new customers resulting from campaign

Graphic showing the formula for customer acquisition cost

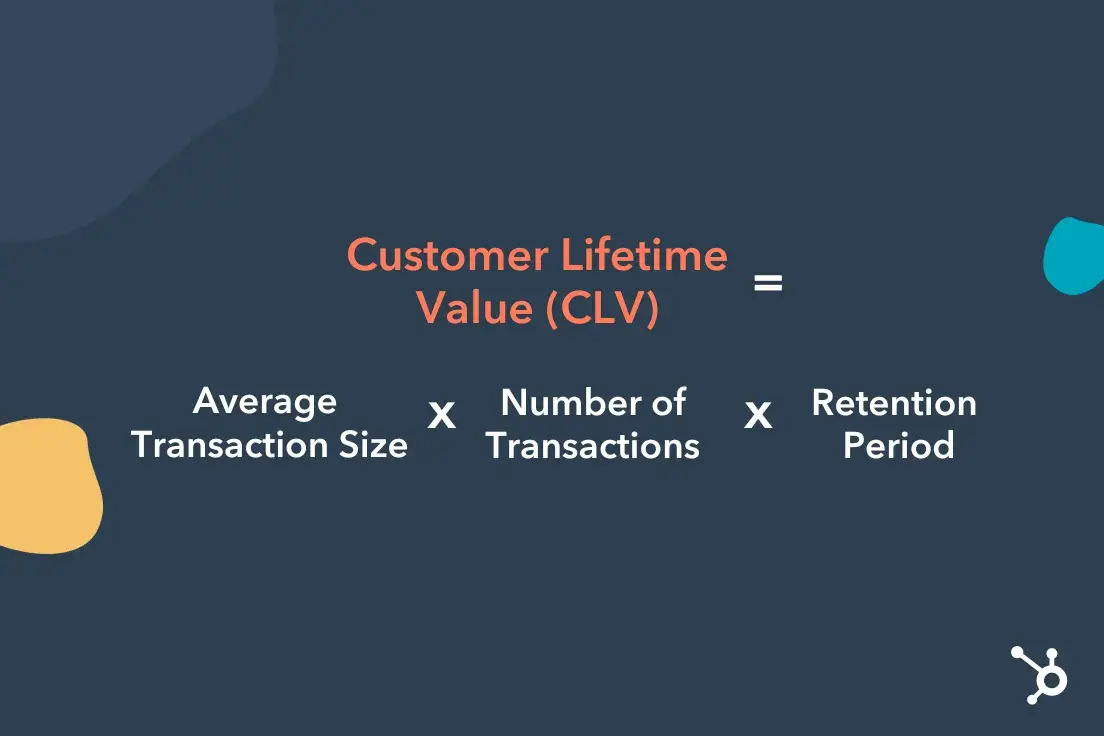
10. Customer lifetime value (CLV): The total amount of revenue a business can expect to make from a single customer.

Why is it important? Knowing how much you’ll make from a customer is helpful when determining how much you can spend trying to close them. In other words, this is a useful metric to compare to CAC. If your CAC is higher than your LTV, you're likely spending too much money acquiring customers and need to revisit your strategy.

The higher the CLV, the more valuable the customer from a financial standpoint.

How to calculate and track it? Calculate this KPI on your own or through a spreadsheet using the formula:

Customer lifetime value =

average transaction size x number of transactions x retention period

Graphic showing the formula for customer lifetime value

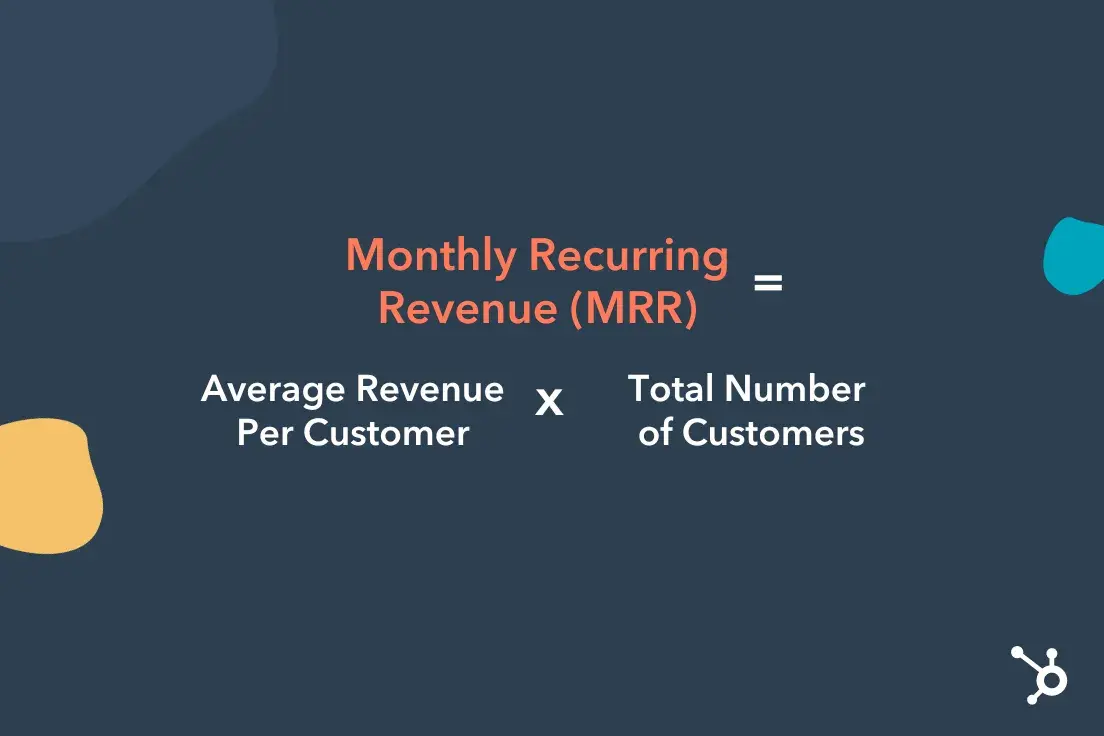
11. Monthly recurring revenue (MRR): This is the amount of revenue a business receives from a customer each month, such as for a subscription-based service or consulting retainer.

Why is it important? This is how much money you are “guaranteed” to have each month from your customers. It allows you to plan budgets and make other financial predictions.

How to calculate and track it? Information from HubSpot can help guide this calculation, but ultimately, this is another you’ll need to calculate it on your own or through a spreadsheet. Use this formula:

Monthly recurring revenue =

average revenue per customer x total number of customers

Graphic showing the formula for monthly recurring revenue

12. Net Promoter Score (NPS): This is a measurement of customer satisfaction using a scale of 1-10 to gauge how likely a customer would recommend your business to a friend. (10 being extremely likely, 1 being unlikely)

Why is it important? NPS gives you a good idea of how happy customers are with their purchase and how likely they are to buy again or stick around. Plus, referrals, recommendations, and other forms of word-of-mouth can lead to quick closes, so you want to make sure your customers want to give them.

How to calculate and track it? Owl Lab’s Sophia Bernazzani Barron recommends calculating NPS using these three steps:

1. Survey your customers and ask them, “On a scale of 0 to 10, how likely are you to recommend us to a friend?”

2. Categorize respondents according to their score: Scores 0-6 are Detractors, 7-8 are Passives, and 9-10 are Promoters.

3. Disregarding the Passives, subtract the percentage of Detractor responses from the percentage of Promoter responses to determine your Net Promoter Score. This score can range from -100 to 100.

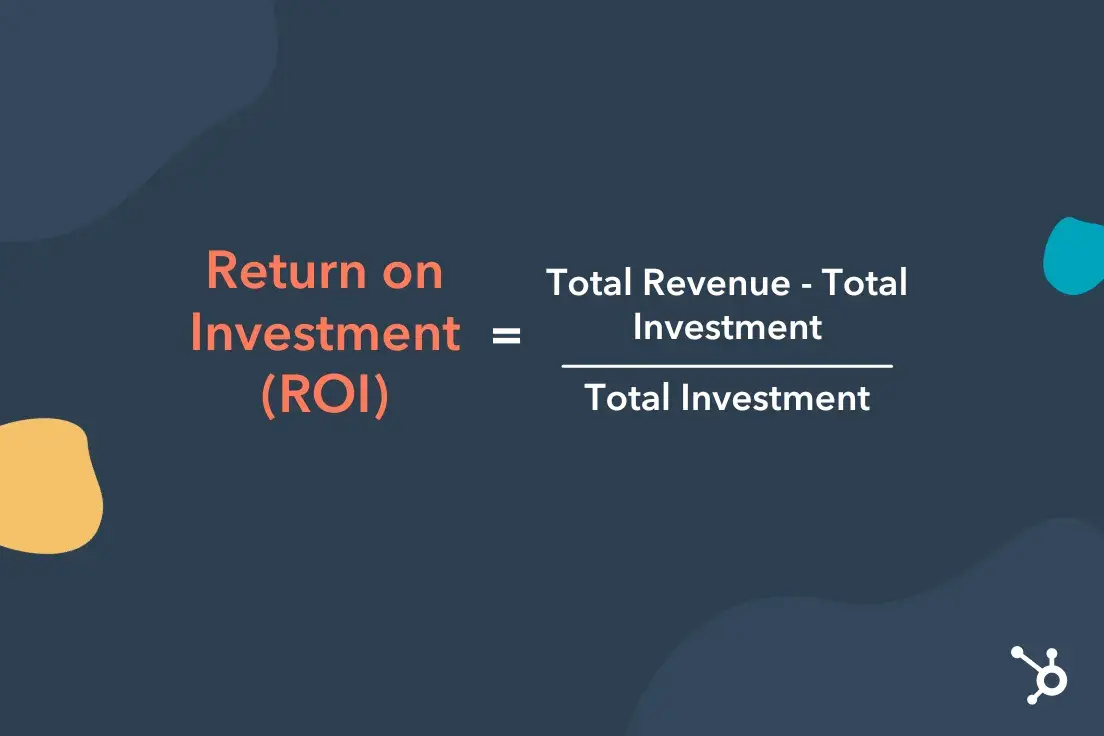
13. Return on Investment (ROI): the amount of money you gain from your marketing efforts compared to their cost.

Why is it important? You never want to spend more than you make. Like CPL and CAC, calculating and tracking your marketing ROI can help you determine how you are performing in that regard.

How to calculate and track it? You can calculate your ROI using this formula:

ROI =

(Total Revenue - Total Investment) / Total Investment

Graphic showing the formula for return on investment

Learn more about calculating marketing ROI.

Email Marketing KPIs and Metrics

14. Number of Email Contacts (or Email List Size): This is how many people in your database have opted into email marketing and communication from you.

Why is it important? Email marketing is not dead. In fact, 77% of marketers have seen an increase in email engagement over the last 12 months, so your email list size does matter. The more email contacts you have, the more people you can reach with targeted campaigns.

Read: Email Marketing: The Ultimate Guide (Expert Tips + Data to Know)

How to calculate and track it? You should be able to see the total number of contacts in your database using any of your email marketing tools, including HubSpot. In HubSpot, navigate to CRM > Contacts and see the total number of records below the header.

But this number may not always be accurate. It also includes contacts whose email addresses you have but perhaps have unsubscribed.

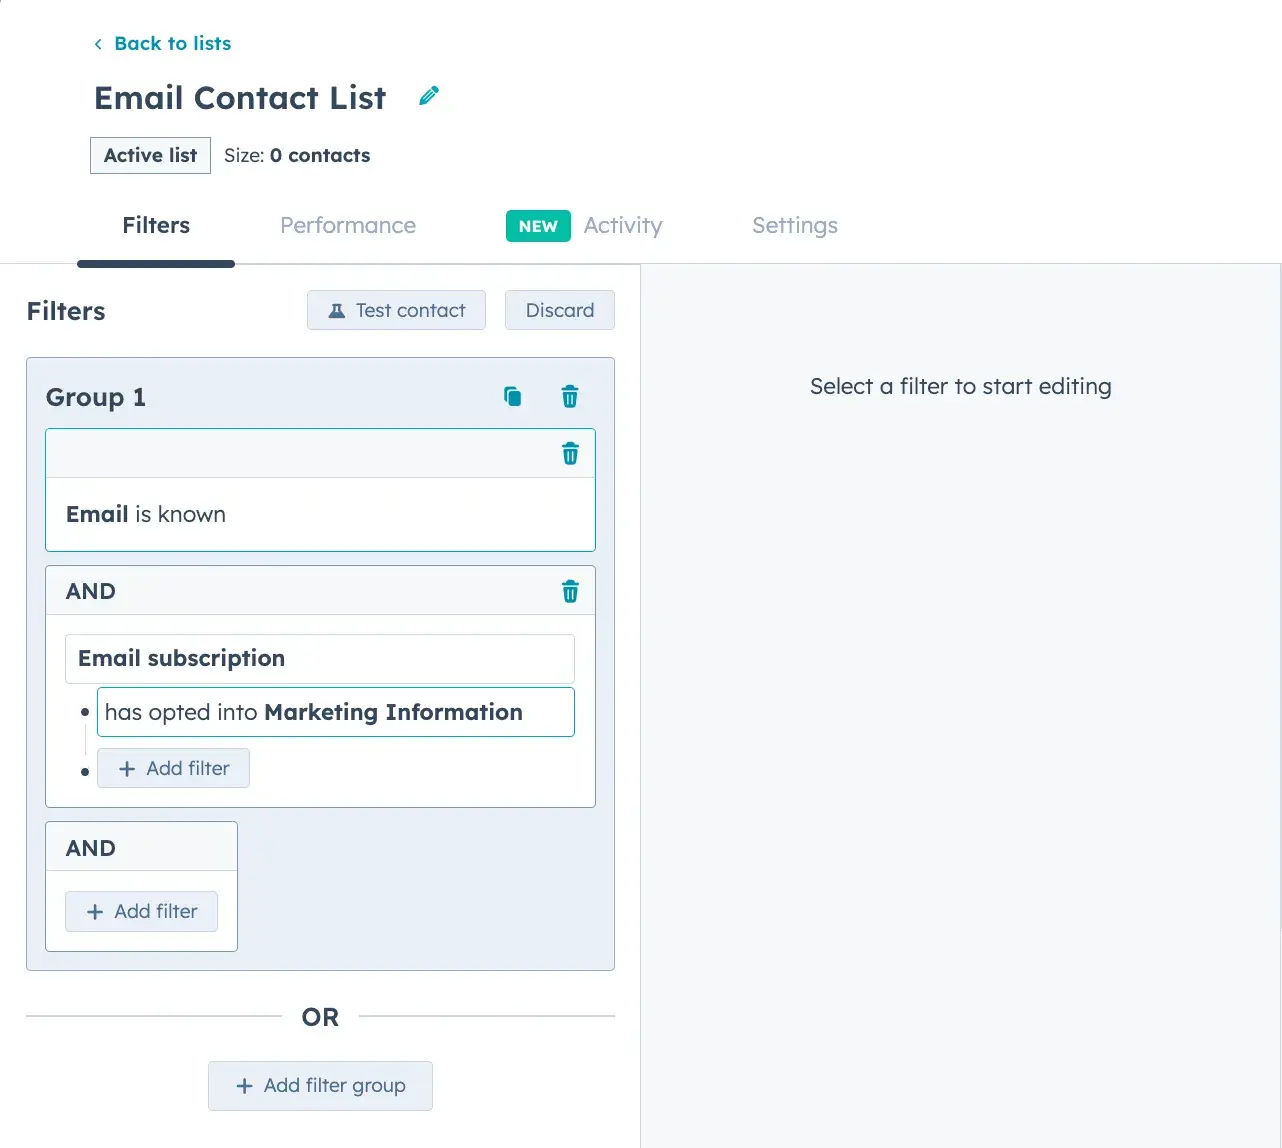
Knowing this, I recommend having an active list in HubSpot, pulling all of the CRM's subscribed and engaged contacts.

Screenshot showing how to build an email contact list

15. Email Open Rate: The percentage of people opening your marketing emails.

Why is it important? There’s no point in sending an email if people aren’t opening and reading it. This metric lets you know how successful you are at this or if you need to adjust your subject line, send time, or sender, among other things.

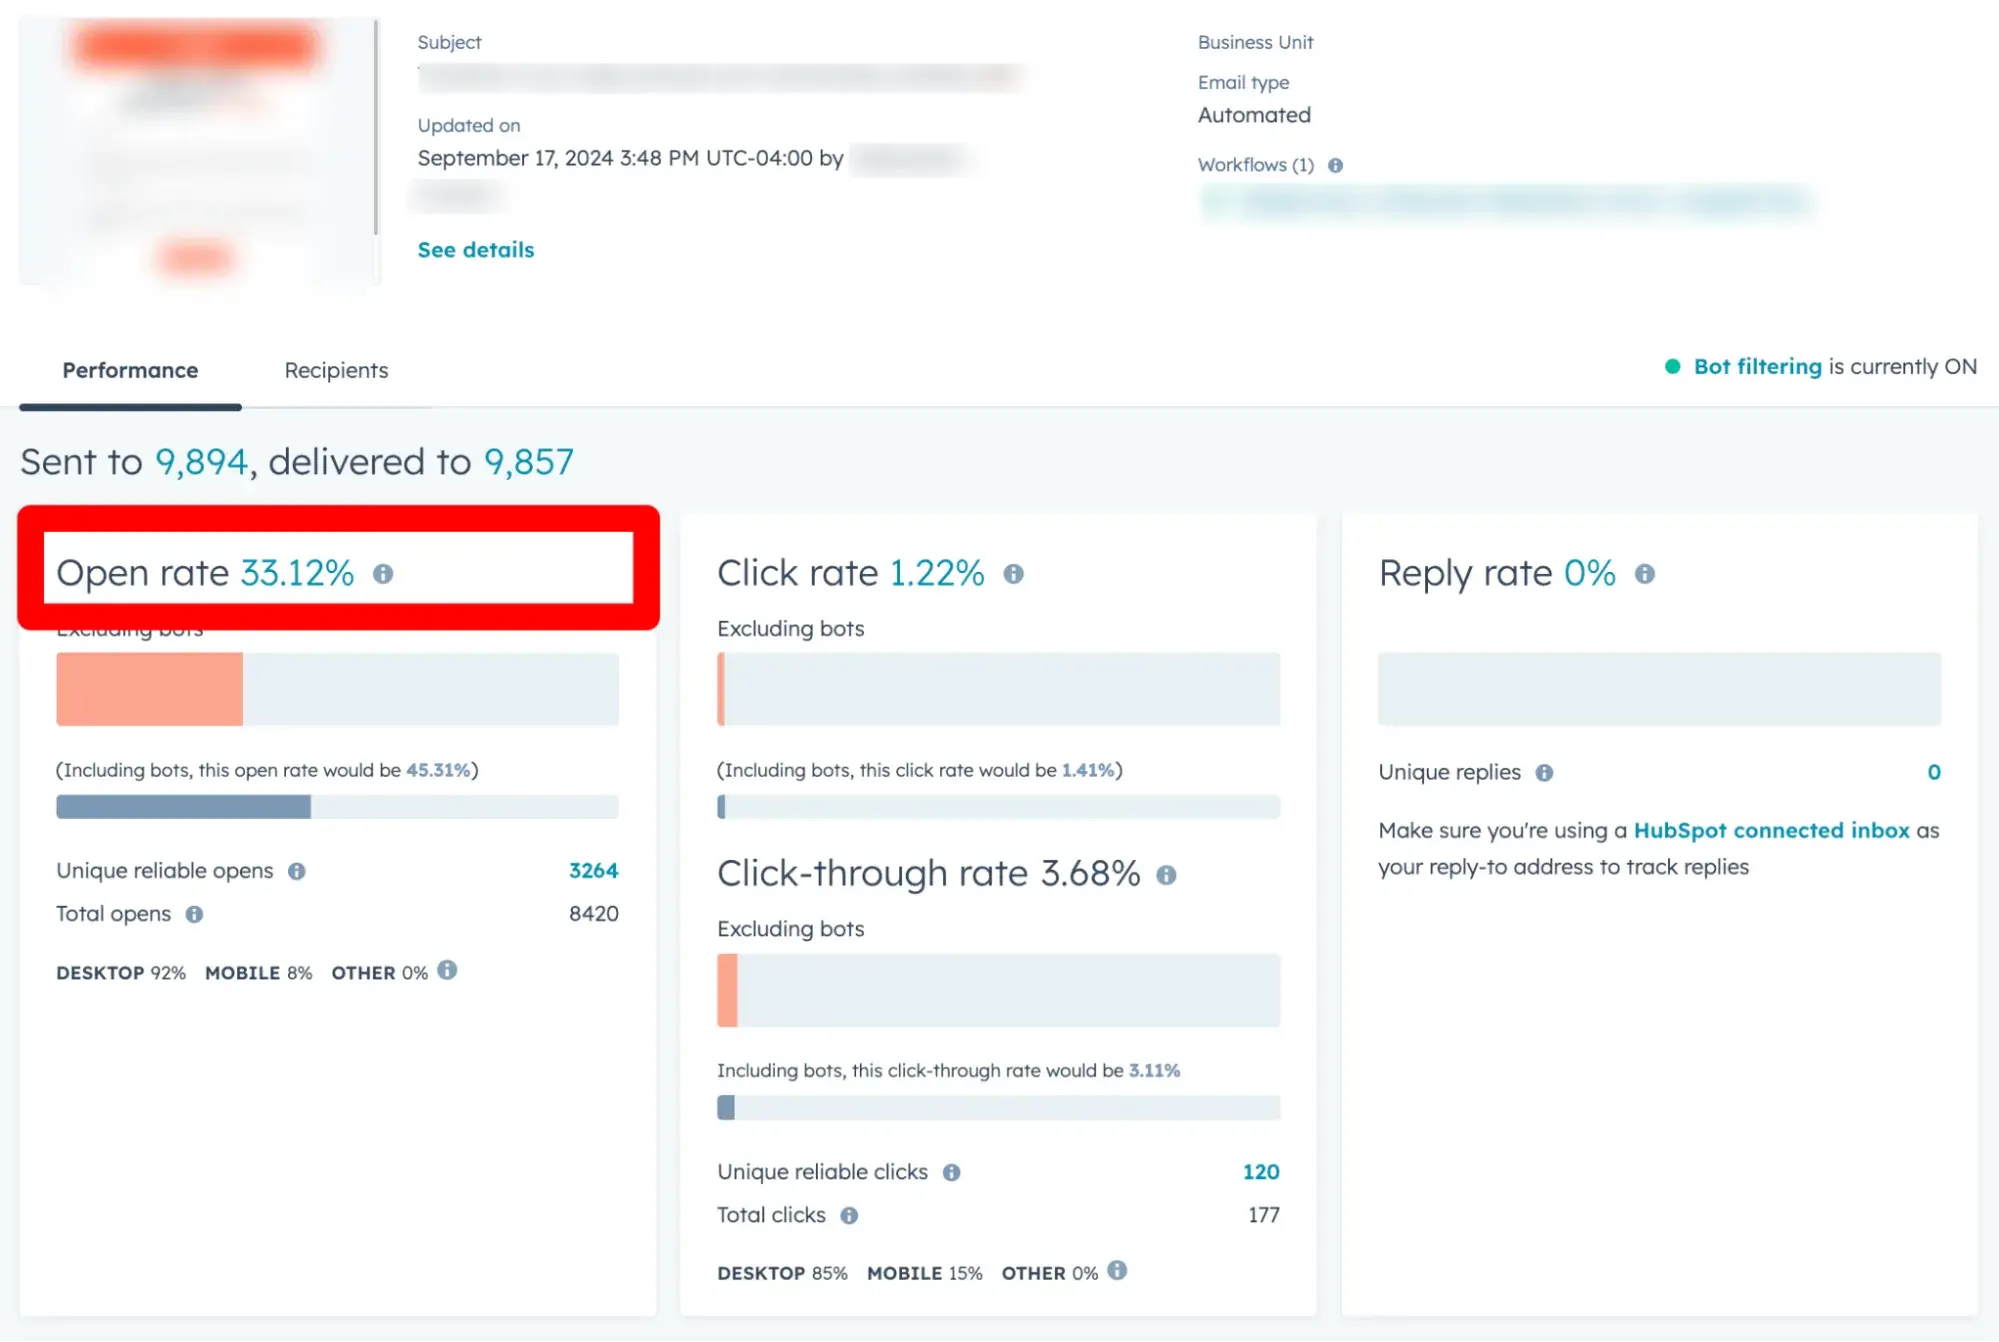
How to calculate and track it? This is another metric that should be easily found in any mainstream email marketing tool.

In HubSpot, you just need to navigate to the email in question, click “actions,” then “view performance,” and you’ll find the open rate called out right below the header.

Screenshot showing how you can view your email open rate in HubSpot

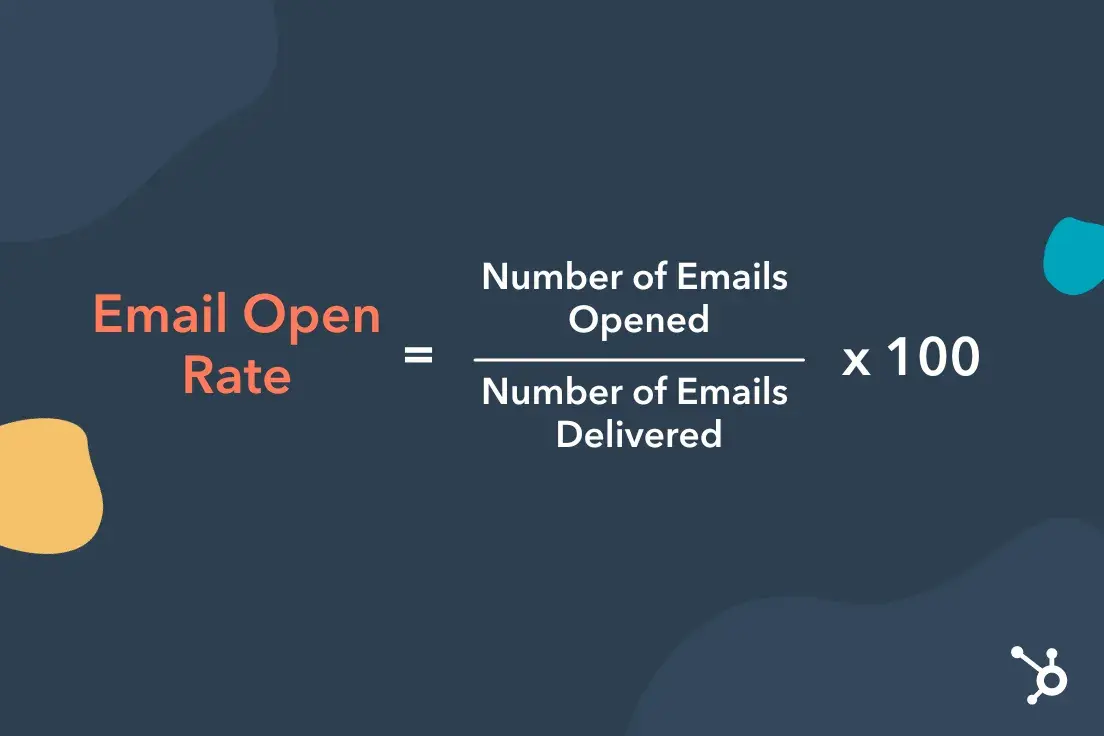
If your tool doesn’t provide this metric or you use a personal email client, you can calculate your open rate using this formula:

Email open rate =

(number of emails opened / total number of emails delivered) x 100

Graphic showing the formula for email open rate

Note: While you can certainly calculate email metrics on your own, it’s next to impossible to know exactly how many people opened your email without a third-party tool.

So, even if you don’t have the budget, I recommend investing in a free email marketing tool to track your metrics more easily.

16. Email click-through rate (CTR): This is how many people click a link in the email you sent out of those who opened it.

Why is it important? An open is one thing, but the click is what you’re really after with email marketing. CTR tells you just how effectively your email copy convinced someone to take action.

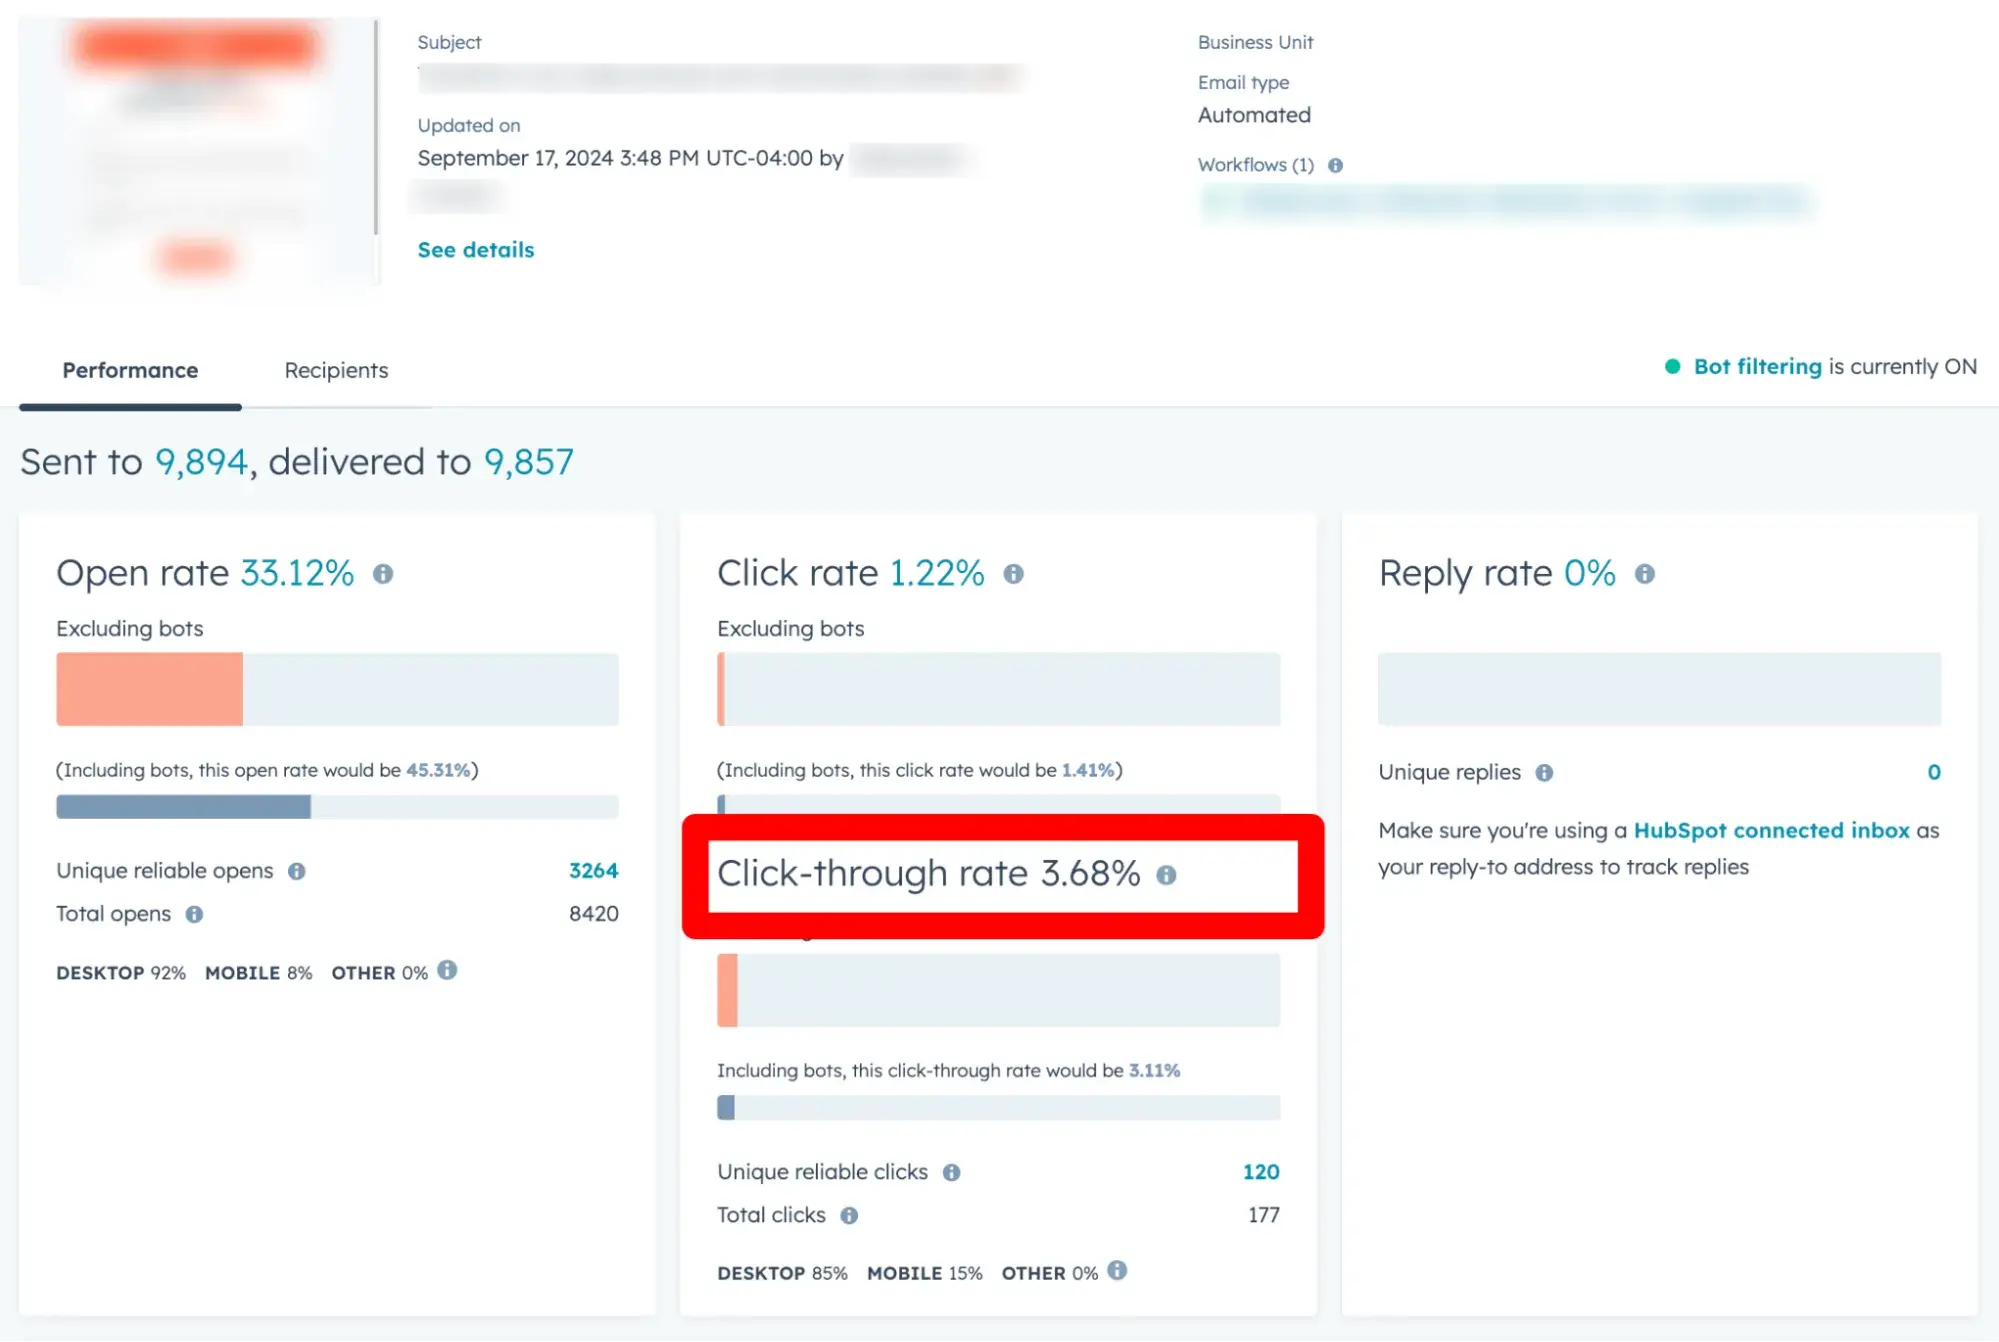
How to calculate and track it? Like open rate, CTR can be found prominently in your email performance page or dashboard like here in HubSpot:

Screenshot showing how you can view your email click-through rate in HubSpot

You can also calculate your CTR using this formula:

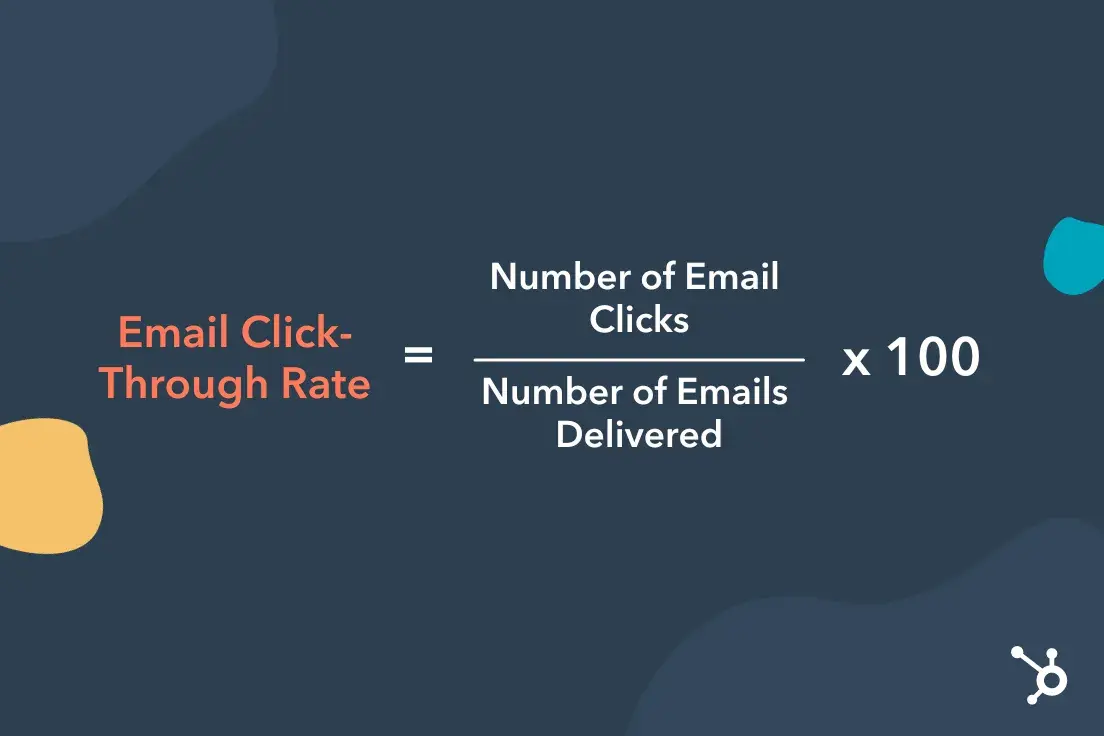
Email clickthrough rate =

(number of email clicks / total number of emails delivered) x 100

Graphic showing the formula for email click-through rate

Like opens, this can be difficult to measure without a formal email marketing tool. If you opt not to use an email marketing tool like HubSpot or MailChimp, use bit.ly or other UTM tracking tools to create trackable URLs.

Social Media KPIs and Metrics

According to our research, social media ties with a company’s website or blog as the top ROI-driving channel for marketers in the past 12 months. So, it’s important to know how you’re performing there.

Organic social media is usually best suited to boosting brand awareness and engaging your audience, while paid social media can generate big results in sales and more.

The KPIs I recommend for both reflect that, but you can dig deeper into social media analytics in our ultimate guide.

17. Social media reach (following): Total number of followers across social media or per platform.

Why is it important? Like an email subscriber, a social media follower “opts in " to stay in contact with your business and hear more about what your brand has to offer.

This number gives you a good estimate of your initial reach on social media before things like engagement and hashtags.

How to calculate and track it? Most social media tools like Buffer, Hootsuite, and SproutSocial have tools to monitor your followings on multiple platforms. HubSpot will track this for Facebook, Instagram, X, and your LinkedIn Company page if connected.

To view yours, navigate to “Marketing,” “Social,” then “Analyze.”

Screenshot showing how you can view your audience growth in HubSpot

18. Social media engagement: This measures how many interactions your posts on social media are getting.

Why is it important? Social media is all about connecting and one of the biggest indicators that your content is successfully connecting with your audience is engagement. Engagement is also often a big factor in social media algorithms.

The more engagement a post gets, the more likely it is to get shared to explore and discovery feeds.

Some common social media engagement metrics include:

  • Likes
  • Comments
  • Shares or Retweets
  • Messages
  • Tags or Mentions
  • Replies
  • Impressions or views
  • Plays

How to calculate and track it? Again, most social media management tools can monitor your followings on multiple platforms, as does HubSpot.

HubSpot shows you clicks, shares, impressions, and interactions (likes, reactions, and comments) of both posts published via its tools and directly on Facebook, Instagram, X, or a LinkedIn Company page.

Screenshot showing how you can view your social media interactions in HubSpot

Paid Ads Performance

If you’re looking for more bottom-of-the-funnel impact from your social media, paid advertising is likely in your strategy. All major platforms including Facebook, Instagram, LinkedIn, TikTok, and YouTube offer advertising options.

Here are some of the metrics you should be tracking to get the highest social media advertising ROI.

19. Impressions: This is how many times your ad gets seen.

Why is it important? Reach is a huge metric when it comes to any type of advertising and impressions is a reflection of that.

If you’re investing with the goal of increasing brand awareness, you’ll especially want to make sure you’re getting a healthy amount of impressions.

How to calculate and track it? This is something your advertising platform will share with you. However, if you use HubSpot to manage your Facebook, LinkedIn, or Google ads, you can see them there as well.

Screenshot showing how you can view your impressions in HubSpot

20. Click rate: The percentage of clicks your ad gets compared to how many times it is seen.

Why is it important? Getting noticed is good, but eliciting action is even better. Your click rate helps identify just how successful you are at that.

Plus, if the goal of your ad is to generate traffic or leads, you need to make sure this number is healthy to make sure you’re getting your money’s worth.

How to calculate and track it? Like impressions, this is something your advertising platform will share with you, but you can also calculate it using this formula:

Click Rate = number of clicks / number of impressions x 100

Graphic showing the formula for click rate

21. Lead rate (or lead conversion rate): The percentage of impressions that turned into leads from your ad.

Why is it important? If the goal of your social media advertising is to generate leads, this should be your number one metric. However, even if it’s not, this can tell you a great deal about how compelling your ad copy or creative is.

If your lead rate is high and that wasn’t your goal, there’s something working well with the ad that you should take note of.

How to calculate and track it? Again, this is something your advertising platform will share with you, but you can also calculate it using this formula:

Lead Conversion Rate = (Number of Leads Generated / Total Number of Impressions or Visitors) x 100

Graphic showing the formula for lead rate

Note: If your goal is leads, you’ll also want to track the number of leads generated from your ads.

22. Cost per impression (CPM): How much you’re spending to generate an impression from your advertising. Impressions are typically billed by the thousand.

Why is it important? This metric tells you how cost-effective your advertising spend is. You should not be spending more on generating impressions than you are making from them.

How to calculate and track it? Again, this is something your advertising platform will share with you, but you can also calculate it using this formula:

CPM = Total cost of campaign / number of impressions x 1000

Graphic showing the formula for cost per impression (CPM)

23. Cost per lead: How much you’re spending to generate a lead from advertising.

Why is it important? This metric tells you how cost-effective your advertising spend is if you’re focused on generating leads.

How to calculate and track it? Again, this is something your specific advertising platform will share with you, but you can also calculate it using this formula:

Cost Per Lead = Total cost of campaign / number of leads

Graphic showing the formula for social media cost per lead

24. Return On Ad Spend (ROAS): The revenue generated from a social media advertising campaign compared to every dollar you spend. It's usually a ratio.

Why is it important? No big revelation here: You want to make sure you’re making more money from your advertising than you are spending.

How to calculate and track it? You can calculate your ROAS using this formula:

ROAS=

Revenue generated from ads / cost of ads (ad spend)

Graphic showing the formula for  return on ad spend (ROAS)

HubSpot will also tell you this for your LinkedIn, Google, and Facebook Ads as “ROI.”

How to Report Your B2B Marketing KPIs and Metrics

Data without meaning is useless.

That’s why once you’ve identified and can successfully track all your metrics, you need a plan for analyzing and reporting findings to your team and other stakeholders.

As Allie Konchar, Partner & Head of Client Operations of digital growth agency Omniscient and former HubSpotter, explains, “Marketing reports uncover meaningful, actionable data that help you draw important conclusions and meet organization-wide goals.”

Marketing reports can be critical to informing future marketing decisions and strategies, so it’s important to learn how to create them successfully. This article by Konchar further details how to build and analyze marketing reports.

We’ve also created a collection of monthly marketing report templates to get you started. These will help you:

  • Track the monthly growth of your visits, leads, and customers.
  • Measure your website's visit-to-lead conversion rate.
  • Accurately track which channels are performing best.
  • Plug your metrics into a PowerPoint or Google Slides deck to present to your boss.

Get yours here for free.

Tracking your way to success with KPIs

Ok, I know — that was a lot. And the truth is, there are likely even more B2B marketing KPIs your team will need to track to truly have a firm grasp on its performance.

But once you’ve got the right tools and templates in place to help you make sense of everything, it’s much easier to scale and adjust your efforts. Use this list and the tips shared to get started and start tracking your way to marketing success.

Lead Scoring 101: How to Use Data to Calculate a Basic Lead Score

Featured Imgs 23

When most people start implementing inbound marketing, they're primarily worried about getting enough new leads in the funnel.

Download Now: Lead Scoring Calculator [Free Template]

But once you have a lot of leads, you need to figure out who‘s really interested in your product and who’s just starting to look around.

That's where lead scoring comes in. In this article, I’ll share lead scoring models for you to consider, important data to look at, and best practices for effective lead scoring.

Table of Contents

What is lead scoring?

Lead scoring is the process of assigning values, often in the form of numerical “points,” to each lead you generate to evaluate the likelihood of them becoming a customer.

You can score your leads based on multiple attributes, including the professional information they‘ve submitted to you and how they’ve engaged with your website and brand across the internet.

This process helps sales and marketing teams prioritize leads, respond to them appropriately, and increase the rate at which those leads become customers.

Learn more about the concept of lead scoring in the video below:

Every company has a different model for assigning points to score their leads, but I’ve found one of the most common ways is to use data from past leads to create a value system.

How? First, you‘ll take a look at your contacts who became customers to see what they have in common. Next, you’ll look at the attributes of your contacts who didn‘t become customers.

Once you’ve looked at the historical data from both sides, you can decide which attributes should be weighted heavily based on how likely they are to indicate someone's a good fit for your product.

Lead scoring sounds easy, right? Depending on your business model and the leads in your database, this can quickly become complicated.

To make this process a little easier on you, I’m going to walk you through the basics of creating a lead score, including what data you should look at, how to find the most important attributes, and the process for actually calculating a basic score.

Why is lead scoring important?

You may be wondering if lead scoring is outdated or if it’s still a relevant sales method. The short answer is lead scoring is as important today as it has been for years.

The methods may have evolved, but the purpose of lead scoring continues to be essential for sales and marketing teams.

For starters, lead scoring allows you to prioritize and focus your efforts on leads that are the most likely to convert to customers.

And when 53% of salespeople say selling got harder in 2023, I think it’s a good idea to turn your energy towards sales that have a higher chance of closing.

Mark Osborne, B2B sales expert and founder of Modern Revenue Strategies, adds that for many businesses, markets are tightening due to uncertainty and higher interest rates, which has resulted in less capital — making every lead even more precious.

“Remember the 80/20 rule: that 80% of your revenues come from just 20% of your clients,” suggests Osborne. “This is even more pronounced when expanded to the percentage of leads that become your best clients.”

Businesses without systems for scoring and prioritizing the best opportunities are likely spreading themselves too thin across all opportunities and won't win the best clients.

Plus, says Osborne, without a lead scoring model in place, you could be losing business to the competition.

“Savvy competitors have learned to swarm on the best opportunities as soon as they identify them,” he says, “giving those prospects the highest level of personalized attention and service to win those crucial deals.”

Lead Scoring Models

Lead scoring models ensure the values you assign to each lead reflect their actual compatibility with your product.

Many lead scores are based on a point range of 0 to 100, but every model you create will support a particular attribute of your core customer.

Here are six different lead scoring models based on the type of data you can collect from the people who engage with your business:

1. Demographic Information

Are you only selling to people of a certain demographic, like parents of young children or CIOs? Ask demographic questions in the forms on your landing pages, and you can use your leads' answers to see how well they fit in with your target audience.

One thing I suggest is to remove outliers from your sales team’s queue by subtracting points for people who fall into a category you don’t sell to.

For example, if you only sell to a certain geographic location, you might give a negative score to any lead who falls outside the proper city, state, zip code, country, and so on.

If some of your form fields are optional (like a phone number, for instance), you might also award extra points to leads who provide that optional information anyway.

2. Company Information

If you‘re a B2B organization, are you more interested in selling to organizations of a certain size, type, or industry? Are you more interested in B2B organizations or B2C organizations?

You can ask questions like these on your landing page forms, too, so you can give points to leads who fit in with your target audience and take points away from leads who aren’t at all what you're looking for.

Osborne also suggests tracking external company data on company information such as new leadership, M&A activity, new investments, or a PR crisis as this knowledge “can be valuable in understanding the prospective company's current context and fit with your value proposition to uncover the potential for long-term, profitable engagements,” he says.

3. Behavioral Data

For Ben Grant, CEO of LearnSales, behavioral data is essential for lead scoring in 2024.

“I'm diving deep into behavioral data such as what content [prospects] are engaging with, how often they visit our site, and even the time they spend on specific pages,” he says. “This gives us a clearer picture of their intent.”

In my experience, how a lead interacts with your website can tell you a lot about how interested they are in buying from you.

Take a look at your leads who eventually become customers: Which offers did they download? How many offers did they download? Which pages — and how many pages — did they visit on your site before becoming a customer?

Both the number and types of forms and pages are important. You might give higher lead scores to leads who visited high-value pages (like pricing pages) or filled out high-value forms (like a demo request).

Similarly, you might give higher scores to leads who had 30 page views on your site, as opposed to three.

What about leads who have changed their behavior over time? If a lead has stopped visiting your website or downloading your offers, they may not be interested anymore.

You might take points away from leads who've stopped engaging with your website after a certain period of time. How long — 10 days, 30 days, 90 days — depends on your typical sales cycle.

Keep in mind that your sales cycle may look different these days compared to years prior. In 2023, 53% of companies experienced longer sales cycles.

4. Email Engagement

If someone opts in to receive emails from your company by filling out an email popup, you may not know how interested that person is in buying from you.

Open and click-through rates, on the other hand, will give you a much better idea of their interest level.

Your sales team will want to know who opened every email in your lead nurturing series or who always clicked through your offer promotion emails. That way, they can focus on the ones who seem most engaged.

You might also give a higher lead score to leads who click through on high-value emails, like demo offers.

5. Social Engagement

How engaged a lead is with your brand on social networks can also give you an idea of how interested they are.

How many times did they click through on your company's tweets and LinkedIn posts? How many times did they comment or share those posts?

In my experience, social media is tied to referrals for generating the highest-quality leads, so it’s not a channel to overlook.

Image Source

If you’re not already collaborating with your marketing team to get this data, start now, recommends Grant.

“Our sales and marketing team are in constant communication, ensuring that the criteria we use for scoring are aligned with real-world results,” he says. “This synergy helps refine our lead scoring models and improve accuracy.”

6. Spam Detection

Last but not least, you should give negative scores to leads who filled out landing page forms in ways that could indicate they're spam. For example, were first name, last name, and/or company name not capitalized?

Did the lead complete any form fields by typing four or more letters in the traditional “QWERTY” keyboard side-by-side?

You might also want to think about which types of email addresses leads are using compared with the email addresses of your customer base. If you're selling to businesses, for example, you might take points away from leads who use a Gmail or Yahoo! email address.

How to Determine What Data to Look At

There's a lot of data to weed through — how do you know which data matters most? Should you find out from your sales team? Should you interview your customers? Should you dive into your analytics and run a few reports?

I recommend a combination of all three. Your sales team, your customers, and your analytics reports will all help you piece together what content is most valuable for converting leads into customers, which will help you attach a number of points to certain offers, emails, and so on.

Talk to your sales team.

Sales reps are the ones on the ground, communicating directly with both leads who turned into customers and those who didn't. They tend to have a pretty good idea of which pieces of marketing material help encourage conversion.

Which blog posts and offers do your sales reps like to send leads? You might find some of them telling you, “Every time I send people this certain piece of collateral, it's easier to close them.” This is valuable information. I recommend you find out what those pieces of collateral are and assign points accordingly.

Talk to your customers.

While your sales team might claim certain content converts customers, you might find that the people who actually went through the sales process have different opinions. That's okay: You want to hear it from both sides.

In fact, according to our 2024 State of Sales Report, building and maintaining a strong rapport with customers is a key focus area for sales professionals.

Conduct a few customer interviews to learn what they think was responsible for their decision to buy from you. I suggest you interview customers who have had both short and long sales cycles so you get diverse perspectives.

Turn to the analytics.

I recommend you also complement all this in-person research with hard data from your marketing analytics.

Run an attribution report to figure out which marketing efforts lead to conversions throughout the funnel. Don‘t only look at the content that converts leads to customers — what about the content people view before they become a lead?

You might award a certain number of points to people who download content that’s historically converted people into leads and a higher number of points to people who download content that's historically converted leads into customers.

Another way to help you piece together valuable pieces of content on your site is to run a contacts report. A contacts report will show you how many contacts — and how much revenue — have been generated as a result of certain, specific marketing activities.

Marketing activities might include certain offer downloads, email campaign click-throughs, and so on. Take note of which activities tend to be first-touch conversions, last-touch conversions, and so on, and assign points accordingly.

 Lead scoring model using a contacts report in HubSpot.

Image Source

Is one lead score enough?

If you have one core customer right now, a single score suffices. But as your company scales, you'll sell to new audiences. You might expand into new product lines, new regions, or new personas.

You might even focus more on up-selling and cross-selling to existing customers rather than pursuing new ones. In my experience, if your contacts aren‘t "one size fits all," your scoring system shouldn’t be either.

With some marketing platforms, you can create multiple lead-scoring systems, giving you the flexibility to qualify different sets of contacts in different ways. Not sure how to set up more than one score? I’ve gathered a few examples to inspire you:

Fit vs. Interest

Let’s say, for instance, your sales team wants to evaluate customers on both fit (e.g., is a contact in the right region? The right industry? The right role?) and interest level (e.g., how engaged have they been with your online content?).

If both of these attributes are a priority, you can create both an engagement score and a fit score so that you can prioritize outreach to contacts whose values are high in both categories.

Multiple Personas

Say you’re a software company that sells two different types of software via different sales teams to different types of buyers.

You could create two different lead scores — one for a buyer’s fit and the other for their interest in each tool. Then, you’d use these respective scores to route leads to the right sales teams.

New Business vs. Up-sell

As you grow, you might start to focus on upselling or cross-selling as much as new business. However, keep in mind that the signals that indicate the quality of new prospects and existing customers often look completely different.

For prospects, you might look at demographics and website engagement, whereas for existing customers, you might look at how many customer support tickets they've submitted, their engagement with an onboarding consultant, and how active they currently are with your products.

If these buying signals look different for different types of sales, consider creating multiple lead scores.

How to Calculate a Basic Lead Score

There are many different ways to calculate a lead score, but I think the simplest way to do it is this:

Featured Resource: Free Lead Scoring Template

free lead scoring template

Download for Free

Manual Lead Scoring

1. Calculate the lead-to-customer conversion rate of all of your leads.

Your lead-to-customer conversion rate is equal to the number of new customers you acquire, divided by the number of leads you generate. Use this conversion rate as your benchmark.

2. Pick and choose different attributes of customers who you believe were higher quality leads.

Customers who requested a free trial at some point, customers in the finance industry, or customers with 10-20 employees could be attributes.

There‘s a certain kind of art to choosing which attributes to include in your model. You’ll choose attributes based on those conversations you had with your sales team, your analytics, and so on — but overall, it's a judgment call.

You could have five different people do the same exercise, and they could come up with five different models. But that's okay as long as your scoring is based on the data we mentioned previously.

3. Calculate the individual close rates of each of those attributes.

Calculating the close rates of each type of action a person takes on your website — or the type of person taking that action — is important because it dictates the actions you'll take in response.

So, figure out how many people become qualified leads (and ultimately customers) based on their actions or who they are in relation to your core customer. You'll use these close rates to actually “score” them in the step below.

4. Compare the close rates of each attribute with your overall close rate and assign point values accordingly.

Look for the attributes with close rates that are significantly higher than your overall close rate. Then, choose which attributes you’ll assign points to, and if so, how many points.

Base the point values of each attribute on the magnitude of their individual close rates.

The actual point values will be a little arbitrary, but try to be as consistent as possible.

For example, if your overall close rate is 1% and your “requested demo” close rate is 20%, then the close rate of the “requested demo” attribute is 20X your overall close rate — so you could, for example, award 20 points to leads with those attributes.

Logistic Regression Lead Scoring

The simple method above for calculating a lead score is a great start. However, the most mathematically sound methods employ a data mining technique, such as logistic regression.

Data mining techniques are more complex and often more intuitive than your actual close rates. Logistic regression involves building a formula in Excel that’ll spit out the probability that a lead will close into a customer.

This is more accurate than the technique I outlined above since it’s a holistic approach that takes into account how all of the customer attributes — like industry, company size, and whether or not someone requested a trial — interact with one another.

If you prefer a less complex lead-scoring method, I think the manual approach above is a great place to start.

Predictive Lead Scoring

Creating a lead score can do great things for your business: improve the lead-handoff process, increase lead conversion rate, improve rep productivity, and more.

But, as you can see from the two methods above, coming up with a scoring system can be a time-consuming task when done manually.

Plus, coming up with scoring criteria isn‘t "set it and forget it." As you get feedback from your team and stress-test your scores, I’ve found you’ll need to tweak your lead-scoring system regularly to ensure it remains accurate.

Wouldn't it be easier if technology could eliminate the manual setup and continuous tweaking, leaving your team more time to build relationships with your customers?

That's where predictive scoring comes in. Predictive lead scoring uses machine learning to parse through thousands of data points in order to identify your best leads, so you don't have to.

Predictive scoring looks at what information your customers have in common, as well as what information the leads that didn't close have in common, and comes up with a formula that sorts your contacts by importance based on their potential to become customers.

This allows you and your sales team to prioritize leads so you're not harassing those who aren't (yet) interested and engaging those who are.

The best part about predictive scoring? As with any application of machine learning, your predictive score gets smarter over time, so your lead follow-up strategy will optimize itself.

Featured Resource: Predictive Lead Scoring Software

lead scoring model, hubspot’s predictive lead scoring software

Download for Free

Lead Scoring Best Practices

We’ve covered a lot so far, so I want to wrap it up with a few best practices I learned from the sales leaders I spoke to.

Here are some lead scoring best practices to follow if you want to improve your sales in 2024.

Leverage AI and machine learning.

In the age of AI, sales professionals would be wise to use one of the numerous AI tools to their selling advantage, especially during the lead scoring process.

Not only can AI tools improve efficiency, but 66% of sales pros say that AI helps them provide a personalized experience and better understand their customers.

 Lead scoring model: AI can help sales pros boost performance throughout the lead generation process.

Image Source

Grant is also taking advantage of AI’s power to personalize data.

“We’re leveraging AI to analyze patterns and predict which leads are most likely to convert,” he says. “Machine learning models can adapt and get more accurate over time, which is a huge step up from traditional lead scoring methods.”

Lead with data.

I think one of the best parts about lead scoring is that it’s an objective method. When the data indicates how interested a prospect is, that’s something you’ll want to lean into.

Data is one of the most important resources sales teams and marketers have at their disposal, and lead scoring has become even more data-driven with the tools available today.

If you want to save time spent on unqualified leads and prioritize sales-ready ones with data-driven decisions, then your sales team should use a lead scoring model that makes it easy to organize and understand your data.

Make real-time adjustments.

If you think lead scoring models are outdated, it could be because the traditional methods didn’t take into account real-time industry or business changes.

“Lead scoring is no longer a set-it-and-forget-it deal,” says Grant. “We’re making real-time adjustments based on the latest data. This agility helps us stay ahead of the curve and respond to changing market conditions.”

There are so many lead generation tools available to help your sales team make real-time decisions and properly qualify inbound leads.

Improve Your Sales With Lead Scoring

Scoring your leads can go a long way in determining which leads are good fits and interested in your offering and which might need more nurturing before being sales-ready.

Check out our lead scoring templates to get started defining your criteria and assigning points!

Editor's note: This post was originally published in January 2019 and has been updated for comprehensiveness.

25+ Best Korean Fonts for Aesthetic Designs

Featured Imgs 23

Korean typography holds a unique aesthetic appeal that can transport your designs to an entirely different cultural dimension. Their unique blend of boldness and simplicity brings a distinct visual appeal that’s perfect for a variety of creative projects.

In this post, we’ve compiled a collection of the most stunning and versatile Korean fonts, each designed to bring a sense of sophistication and cultural richness to your designs. From sleek modern typefaces to more traditional, handwritten styles, these fonts are perfect for making your designs stand out while adding a subtle international flair.

Their clean lines, balanced shapes, and minimalistic style are ideal for creating logos, posters, packaging, or even social media content that requires a unique and stylish touch. Be sure to download them all.

Korean – Modern Korean Font

Korean - Modern Korean Font

This font masterfully combines traditional Korean writing with a modern, sleek design for a visually engaging typeface. Ideal for various design projects, it provides a blend of elegance and cultural depth, ensuring your designs stand out. With a full set of Hangul characters, Latin letters, numbers, punctuation, and specialty characters, its versatility is unmatched.

Waom – Korean Style Font

Waom - Korean Style Font

Waom is an exquisite Korean style font that brings a dash of Asian elegance to your designs. Each letter intricately portrays beauty and delicacy, encapsulating Korea’s cultural richness. Perfect for branding, logos, and events, this unique font adds a timeless charm to your projects.

Kirame – Korean Style Font

Kirame - Korean Style Font

Elevate your designs with the innate beauty of the Kirame font, which effortlessly marries Korean elegance with modern style. Exuding an enchanting Asian charm, every character of Kirame resonates tenderness, making it an ideal choice for branding initiatives, logo typography or any project that seeks to capture the rich allure of Korean culture.

Itaewon – Korean Modern Font

Itaewon is a compelling display typeface inspired by Hangul, the symbol of the lively Itaewon nightlife. Efficient in providing a unique twist to Korean-themed projects such as branding and restaurant menus, it supports uppercase/lowercase variants and multiple languages. Formats available are OTF, TTF, and WOFF.

Seoul – Authentic Korean Font

Seoul - Authentic Korean Font

The Seoul font is an impressive, robust display font that captures the essence of traditional Korean letters. Perfect for a multitude of uses, it can enhance travelogues, poetry, movie titles, food-related content, quotes, brand identities, and more! The Seoul font package includes OTF, TTF, and WOFF versions, along with basic Latin alphabets, numbers, and punctuation.

Namra – Korean Style Display Font

Namra is an appealing typeface inspired by Korean text, perfect for jazzing up your posters. Apart from posters, it’s also ideal for logos, stickers, jerseys, invitation cards, brochures, and more. It comes as one Otf file, though please note it doesn’t include a thumbnail cover.

Korean – Futurstic Helvetica Font

Korean - Futurstic Helvetica Font

This is a stunning and dynamic Korean font that merges elegance and minimalism. Its unique curves at the end of each letter ornament signify it’s ready for both present and future designs. Ideal for branding, invitations, posters, brochures and more, this versatile font ensures clarity while attracting attention. Its blend of serif and sans styles promise distinct, visually appealing results.

Kpop Vibes – Korean Style Font

Kpop Vibes - Korean Style Font

Kpop Vibes is a creative, Korean-style font that mirrors the vibrant culture and growing impact of Korea on the global scene. This sans-serif typeface, in both regular and italic styles, brings together bold, unique graphic design trends. Its versatile features include uppercase, lowercase, numbers, punctuation, and multi-lingual support.

Kinserim – Korean Style Font

Kinserim - Korean Style Font

Kinserim is a captivating Korean font that enriches your branding, logos, and various design pursuits with its enchanting Asian allure. It’s more than just a font—it is a salute to Korean culture, enveloping your projects with the timeless elegance of Eastern charm.  It’s the perfect blend of functionality and aesthetic mastery that supports multilingual content.

Seoul – Modern Korean Font

Seoul - Modern Korean Font

This is a modern Korean font that artfully merges elegance with a contemporary style. Ideal for design projects needing a touch of sophistication, “Seoul” offers a sleek and clean aesthetic with a full set of Korean and Latin characters, numerals and punctuation. Perfect for everything from branding to digital media, it adds a professional and unique touch to any design project.

Hyunso – Creative Korean Font

Hyunso - Creative Korean Font

Hyunso, a creative Korean style display font, draws its inspiration from the title series, All of Us Are Dead. Worthy of your posters and suitable for designing logos, stickers, invitations, jerseys, and brochures, this new offering from IHDSTD is a single Otf file that doesn’t include a thumbnail cover. Embrace Hyunso for a unique, stylish touch to your creative projects.

Annyeong – Cute Korean Font

Annyeong - Cute Korean Font

Annyeong is a vibrant Korean font that embodies the dynamism and allure of Korean design, providing a unique touch of cultural richness to your designs. Its generously sized characters ensure a powerful visual impact while its bold weight brings solidity to your creative projects. Perfect for headlines, logos and more, Annyeong offers multi-lingual support, stylish sets, numerals and punctuations in OTF, TTF and WOFF formats.

Bosan Mirull – Korean Style Font

Bosan Mirull - Korean Style Font

Bosan Mirull is a Korean-style font that beautifully captures the essence of Korea’s rich culture in its design. Ideal for branding projects, logo typography, and special events, it adds a unique Asian flair to your work. This font comes with OTF, TTF, WOFF, WOFF2, CSS, HTML file fonts, all glyphs, variations and multilingual support.

Hello Seoul – Korean Font

Hello Seoul - Korean Font

Hello Seoul is a sleek and modern Korean font, known for its crisp rectangular shapes and sharp corners that symbolize Seoul’s dynamic spirit. This non-heavy display font offers a fresh, structured aesthetic ideal for various design needs like logos, headlines, posters, and branding materials. Features include multilingual support, alternates, and encoded numerals and punctuations.

Konijhipa – Korean Textured Font

Konijhipa - Korean Textured Font

Check out Konijhipa, a beautifully textured, flowing Korean font that’s sure to elevate your next design project. This font’s blend of unique ligatures and modern swirly embedding lends an elegant flair, backed by features like multilingual support, compatibility with both PC and Mac, and simple installation. Available in OTF, TTF, and WOFF formats, Konijhipa is a creative addition to your design toolkit.

Yeongest – Korean Style Font

Yeongest - Korean Style Font

Yeongest is a captivating Korean style font that adds an Asian charm to every project. Each letter shines with elegance, embodying the richness of Korea’s culture. Offering flexibility across numerous formats, from OTF to HTML, Yeongest has all glyphs and variations. With multilingual support and fully accessible PUA Encoded Characters, Yeongest is an excellent choice for branding, logo typography, and special events that aim to embody a timeless beauty.

Busan Garden – Korean Font

Busan Garden - Korean Font

Busan Garden is a Korean font with a bold, immersive style that channels the spirit and aesthetics of Busan. With its sturdy, confident letterforms and sharp angles, it’s a font that commands attention. It’s versatile and supports multiple languages, numerals, and punctuations. Perfect for headlines, logos, and other design projects, Busan Garden isn’t just a font—it’s a journey through the streets of Busan.

Gonggi Notes – Cute Korean Font

Gonggi Notes - Cute Korean Font

Gonggi Notes is a captivating Korean font with modern appeal. Its rich and sturdy lettering delivers a strong presence, while maintaining a delightful roundness for approachable charm. This font brings a touch of Korean culture to your designs, and supports alternate characters, multiple languages and includes various punctuations and numerals. Ideal for headlining, branding, and various print applications, the Gonggi Notes font offers versatility in creative design.
Daebak Mrow – Korean Style Font

Daebak Mrow - Korean Style Font

Embrace the allure of Korean culture with Daebak Mrow, a font styled in the spirit of Asian elegance. With its soft, warm curves, this unique Korean style font greatly enhances the charm of your design projects. Effortless to grasp, Daebak Mrow brings out the calming, mesmerizing, and timeless beauty of Korea in branding, logos, and events.

Chaewon – Korean Style Display Font

Chaewon - Korean Style Display Font

Chaewon is a remarkable Korean font that can add a stylishly ethnic touch to your projects. It’s not just for posters but also works beautifully for logos, stickers, jerseys, invitation cards, brochures, and more. You get 1 OTF file in this package.

Moncbla – Korean Style Font

Moncbla - Korean Style Font

The Moncbla brings a touch of Asian elegance to your designs. This charming, yet modern, font features a distinctively Korean flair, adding beauty and tenderness to each character. Ideal for brand projects and events where a unique Asian aura is desired. The package includes OTF, TTF, WOFF, WOFF2, CSS, HTML file fonts and multiple glyph variations.

Bocan – Korean Calligraphy Font

Bocan - Korean Calligraphy Font

The Bocan is a creative font inspired by Korean movie posters and cover designs, offering a stylish and unique element for your design projects. It serves as a great tool to incorporate a Korean aesthetic into various contexts, including posters, sale signs, advertisements, and social media campaigns. Provided in both regular and outline styles, the Bocan font features a comprehensive character set, including numerals, punctuations, and ligatures, supporting multilingual use.

Free Korean Fonts

Jonyock – Free Korean Style Font

Jonyock - Free Korean Style Font

This free font comes with a stylish Korean-style letter design that will allow you to craft beautiful typography that fits perfectly with various types of design projects. It’s especially great for restaurant and food packaging designs. It’s free to use with personal projects.

Utonaf  – Free Korean Font

Utonaf - Free Korean Font

This free font features a creative square-shaped letter design with Korean-themed letterforms. The font is ideal for fun and casual designs including social media posts, T-shirts, flyers, and more. It’s free for personal use only.

Wefumi – Free Korean Font

Wefumi - Free Korean Font

You can download this font for free to craft attractive titles and headings for your cute and fun designs. The font has a cute Korean-themed letter design that will fit perfectly for packaging and branding designs. It’s free for personal use.

Hangul – Free Korean Style Font

Hangul - Free Korean Style Font

Hangul is a stylish Korean-style font that comes with a modern and futuristic-style letter design. This font is ideal for technology and traditional-themed designs. You can use it freely with personal and commercial projects.

Tenada – Free Korean Font

Tenada - Free Korean Font

Tenada is another creative font with a set of Stencil-style letters. It takes inspiration from Korean-style typography and features stylistic elements that give each letter a unique identity. The font is completely free to use with commercial projects.