Hi Everyone
iam Samantha
iam running a blogging website. i have done my best in seo and in content also
but still not getting the traffic i want anyone can guide?
Thank You.
How Can I Increase More Traffic of My Website?


Tips, Expertise, Articles and Advice from the Pro's for Your Website or Blog to Succeed
Hi Everyone
iam Samantha
iam running a blogging website. i have done my best in seo and in content also
but still not getting the traffic i want anyone can guide?
Thank You.
Retrieval augmented generation (RAG) allows large language models (LLMs) to answer queries related to the data the models have not seen during training. In my previous article, I explained how to develop RAG systems using the Claude 3.5 Sonnet model.
However, RAG systems only answer queries about the data stored in the vector database. For example, you have a RAG system that answers queries related to financial documents in your database. If you ask it to search the internet for some information, it will not be able to do so.
This is where tools and agents come into play. Tools and agents enable LLMs to retrieve information from various external sources such as the internet, Wikipedia, YouTube, or virtually any Python method implemented as a tool in LangChain.
This article will show you how to enhance the functionalities of your RAG systems using tools and agents in the Python LangChain framework.
So, let's begin without an ado.
The following script installs the required libraries, including the Python LangChain framework and its associated modules and the OpenAI client.
!pip install -U langchain
!pip install langchain-core
!pip install langchainhub
!pip install -qU langchain-openai
!pip install pypdf
!pip install faiss-cpu
!pip install --upgrade --quiet  wikipedia
Requirement already satisfied: langchain in c:\us
The script below imports the required libraries into your Python application.
from langchain.tools import WikipediaQueryRun
from langchain_community.utilities import WikipediaAPIWrapper
from langchain.tools.retriever import create_retriever_tool
from langchain.agents import AgentExecutor, create_tool_calling_agent
from langchain_openai import ChatOpenAI, OpenAIEmbeddings
from langchain_community.chat_message_histories import ChatMessageHistory
from langchain_core.runnables.history import RunnableWithMessageHistory
from langchain_core.tools import tool
from langchain import hub
import os

from langchain_community.document_loaders import PyPDFLoader
from langchain.text_splitter import RecursiveCharacterTextSplitter
from langchain_community.vectorstores import FAISS
To enhance RAG using tools and agents in LangChain, follow the following steps.
The benefit of agents over chains is that agents decide at runtime which tool to use to answer user queries.
This article will enhance the RAG model's performance using the Wikipedia tool. We will create a LangChain agent with a RAG tool capable of answering questions from a document containing information about the British parliamentary system. We will incorporate the Wikipedia tool into the agent to enhance its functionality.
If a user asks a question about the British parliament, the agent will call the RAG tool to answer it. In case of any other query, the agent will use the Wikipedia tool to search for answers on Wikipedia.
Let's implement this model step by step.
The following script imports the built-in Wikipedia tool from the LangChain module. To retrieve Wikipedia pages, pass your query to the run() method.
wikipedia_tool = WikipediaQueryRun(api_wrapper=WikipediaAPIWrapper())
response = wikipedia_tool.run("What are large language models?")
print(response)
Output:
To add the above tool to an agent, you must define a function using the @tool decorator. Inside the method, you simply call the run() method as you previously did and return the response.
@tool
def WikipediaSearch(search_term: str):

    """
    Use this tool to search for wikipedia articles.
    If a user asks to search the internet, you can search via this wikipedia tool.
    """


    result = wikipedia_tool.run(search_term)
    return result
Next, we will create a retrieval tool that implements the RAG functionality.
In my article on Retrieval Augmented Generation with Claude 3.5 Sonnet, I explained how to create retriever using LangChain. The process remains the same here.
openai_api_key = os.getenv('OPENAI_API_KEY')

loader = PyPDFLoader("https://web.archive.org/web/20170809122528id_/http://global-settlement.org/pub/The%20English%20Constitution%20-%20by%20Walter%20Bagehot.pdf")
docs = loader.load_and_split()

documents = RecursiveCharacterTextSplitter(
    chunk_size=1000, chunk_overlap=200
).split_documents(docs)

embeddings = OpenAIEmbeddings(openai_api_key = openai_api_key)
vector = FAISS.from_documents(documents, embeddings)

retriever = vector.as_retriever()
You can query the vector retriever using the invoke() method. In the output, you will see the section of documents having the highest semantic similarity with the input.
query = """
"What is the difference between the house of lords and house of commons? How members are elected for both?"
"""
retriever.invoke(query)[:3]
Output:

Next, we will create a retrieval tool that uses the vector retriever you created to answer user queries. You can create a RAG retrieval tool using the create_retriever_tool() function.
BritishParliamentSearch = create_retriever_tool(
    retriever,
    "british_parliament_search",
    "Use this tool tos earch for information about the british parliament, house of lords and house of common and any other related information.",
)
We have created a Wikipedia tool and a retriever (RAG) tool; the next step is adding these tools to an agent.
First, we will create a list containing all our tools. Next, we will define the prompt that we will use to call our agent. I used a built-in prompt from LangSmith, which you can see in the script's output below.
tools = [WikipediaSearch, BritishParliamentSearch]
# Get the prompt to use - you can modify this!
prompt = hub.pull("hwchase17/openai-functions-agent")
prompt.messages
Output:

You can use your prompt if you want.
We also need to define the LLM we will use with the agent. We will use the OpenAI GPT-4o in our script. You can use any other LLM from LangChain.
llm = ChatOpenAI(model="gpt-4o",
                 temperature=0,
                 api_key=openai_api_key,
                )
Next, we will create a tool-calling agent that generates responses using the tools, LLM, and the prompt we just defined.
Finally, to execute an agent, we need to define our agent executor, which returns the agent's response to the user when invoked via the invoke() method.
In the script below, we ask our agent a question about the British parliament.
agent = create_tool_calling_agent(llm, tools, prompt)
agent_executor = AgentExecutor(agent=agent, tools=tools, verbose = True)
response = agent_executor.invoke({"input": "How many members are there in the House of Common?"})
print(response)
Output:

As you can see from the above output, the agent invoked the british_parliament_search tool to generate a response.
Let's ask another question about the President of the United States. Since this information is not available in the document that the RAG tool uses, the agent will call the WikipediaSearch tool to generate the response to this query.
response = agent_executor.invoke({"input": "Who is the current president of United States?"})
Output:
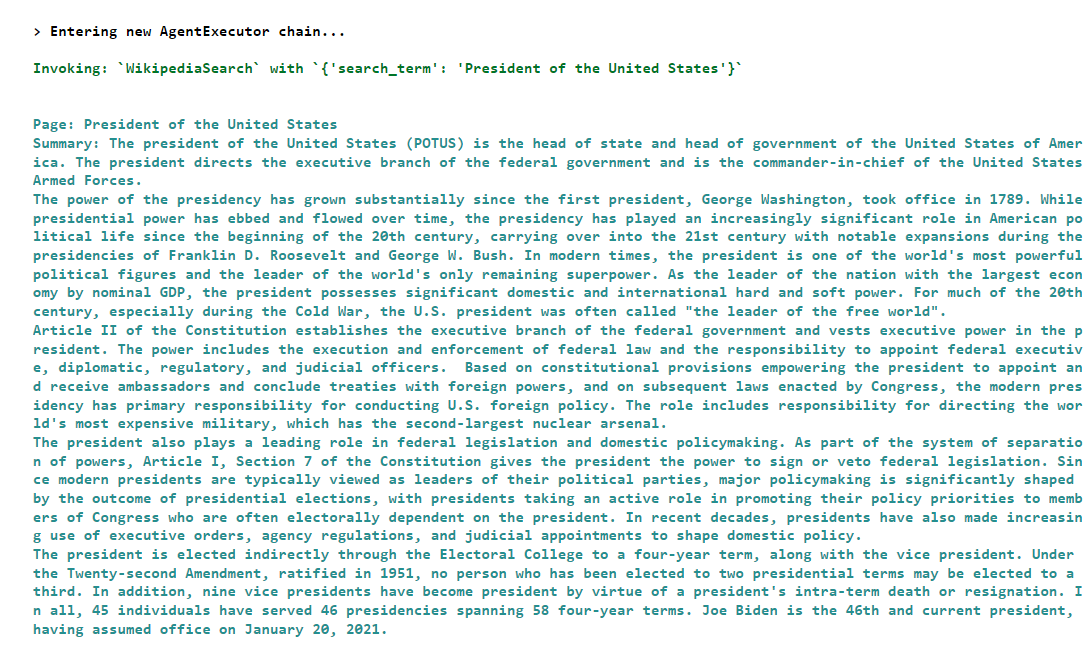
Finally, if you want only to return the response without any additional information, you can use the output key of the response as shown below:
print(response["output"])
Output:
The current President of the United States is Joe Biden. He is the 46th president and assumed office on January 20, 2021.
As a last step, I will show you how to add memory to your agents so that they remember previous conversations with the user.
We will first create an AgentExecutor object as we did previously, but this time, we will set verbose = False since we are not interested in seeing the agent's internal workings.
Next, we will create an object of the ChatMessageHistory() class to save past conversations.
Finally, we will create an object of the RunnableWithMessageHistory() class and pass to it the agent executor and message history objects. We also pass the keys for the user input and chat history.
agent_executor = AgentExecutor(agent=agent, tools=tools, verbose = False)

message_history = ChatMessageHistory()

agent_with_chat_history = RunnableWithMessageHistory(
    agent_executor,
    # This is needed because in most real world scenarios, a session id is needed
    # It isn't really used here because we are using a simple in memory ChatMessageHistory
    lambda session_id: message_history,
    input_messages_key="input",
    history_messages_key="chat_history",
)
Next, we will define a function generate_response() that accepts a user query as a function parameter and invokes the RunnableWithMessageHistory() class object. In this case, you also need to pass the session ID, which points to the past conversation. You can have multiple session IDs if you want multiple conversations.
def generate_response(query):
    response = agent_with_chat_history.invoke(
    {"input": query},
    config={"configurable": {"session_id": "<foo>"}}
    )

    return response
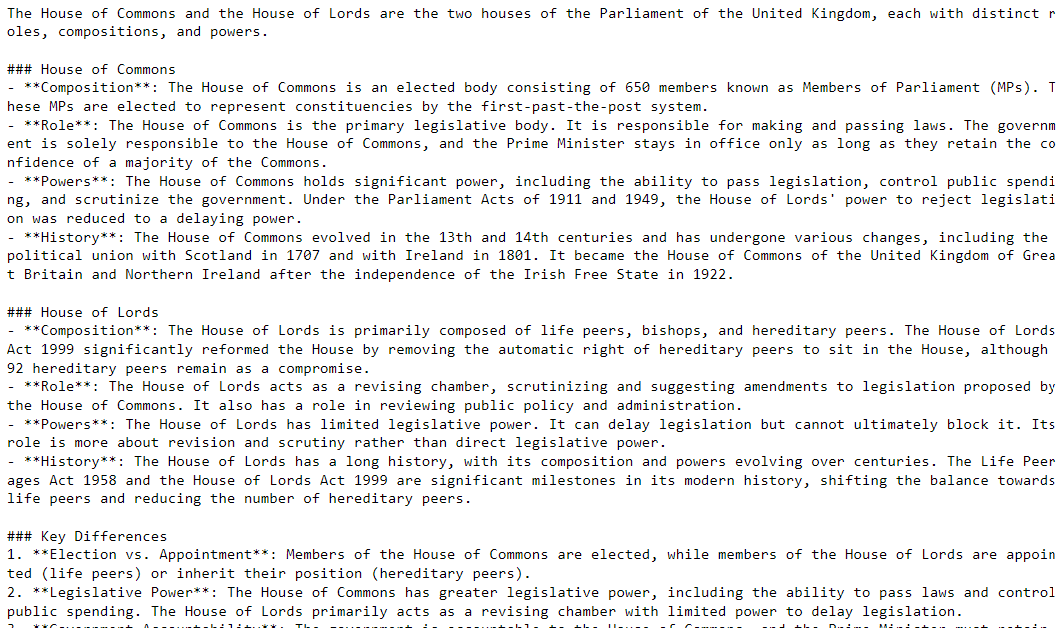
Let's test the generate_response() function by asking a question about the British parliament.
query = "What is the difference between the house of lords and the house of commons?"
response = generate_response(query)
print(response["output"])
Output:
Next, we will ask a question about the US president.
query = "Who is the current President of America?"
response = generate_response(query)
print(response["output"])
Output:
The current President of the United States is Joe Biden. He assumed office on January 20, 2021, and is the 46th president of the United States.
Next, we will only ask And for France but since the agent remembers the past conversation, it will figure out that the user wants to know about the current French President.
query = "And of France?"
response = generate_response(query)
print(response["output"])
Output:
The current President of France is Emmanuel Macron. He has been in office since May 14, 2017, and was re-elected for a second term in 2022.
Retrieval augmented generation allows you to answer questions using documents from a vector database. However, you may need to fetch information from external sources. This is where tools and agents come into play.
In this article, you saw how to enhance the functionalities of your RAG systems using tools and agents in LangChain. I encourage you to incorporate other tools and agents into your RAG systems to build amazing LLM products.
At WP Engine, we’re committed to ensuring your websites are always secure and easy to access. To this end, we use Let’s Encrypt SSL Certificates to safeguard the communication between your site and its visitors, providing peace of mind that your digital presence is well-protected. Let’s Encrypt remains a leader in SSL protection, providing SSL…
The post Understanding Upcoming Changes to Let’s Encrypt’s Chain of Trust appeared first on WP Engine.

View Transitions are one of the most awesome features CSS has shipped in recent times. Its title is self-explanatory: transitions between views are possible with just CSS, even across pages of the same origin! What’s more interesting is its subtext, since there is no need to create complex SPA with routing just to get those eye-catching transitions between pages.
What also makes View Transitions amazing is how quickly it has gone from its first public draft back in October 2022 to shipping in browsers and even in some production contexts like Airbnb — something that doesn’t happen to every feature coming to CSS, so it shows how rightfully hyped it is.
That said, the API is still new, so it’s bound to have some edge cases or bugs being solved as they come. An interesting way to keep up with the latest developments about CSS features like View Transitions is directly from the CSS Telecom Minutes (you can subscribe to them at W3C.org).
View Transitions were the primary focus at the August 21 meeting, which had a long agenda to address. It started with a light bug in Chrome regarding the navigation descriptor, used in every cross-document view transition to opt-in to a view transition.
@view-transition {
  navigation: auto | none;
}
Currently, the specs define navigation as an enum type (a set of predefined types), but Blink takes it as a CSSOMString (any string). While this initially was passed as a bug, it’s interesting to see the conversation it sparked on the GitHub Issue:
Actually I think this is debatable, we don’t currently have at rules that use enums in that way, and usually CSSOM doesn’t try to be fully type-safe in this way. e.g. if we add new navigation types and some browsers don’t support them, this would interpret them as invalid rules rather than rules with empty navigation.
The last statement may not look exciting, but it opens the possibility of new navigation types beyond auto and none, so think about what a different type of view transition could do.
And then onto the CSSWG Minutes:
emilio: Is it useful to differentiate between missing auto or none?
noamr: Yes, very important for forward compat. If one browser adds another type that others don’t have yet, then we want to see that there’s a difference between none or invalid
emilio: But then you get auto behavior?
noamr: No, the unknown value is not read for purpose of nav. It’s a vt role without navigation descriptor and no initial value Similar to having invalid rule
So in future implementations, an invalid navigation descriptor will be ignored, but exactly how is still under debate:
ntim: How is it different from navigation none?
noamr: Auto vs invalid and then auto vs none. None would supersede auto; it has a meaning to not do a nav while invalid is a no-op.
ntim: So none cancels the nav from the prev doc?
noamr: Yes
The none has the intent to cancel any view transitions from a previous document, while an invalid or empty string will be ignored. In the end, it resolved to return an empty string if it’s missing or invalid.
RESOLVED: navigation is a CSSOMString, it returns an empty string when navigation descriptor is missing or invalid
Onto the next item on the agenda. The discussion went into the view-transition-group property and whether it should have an order of precedence. Not to confuse with the pseudo-element of the same name (::view-transition-group) the view-transition-group property was resolved to be added somewhere in the future. As of right now, the tree of pseudo-elements created by view transitions is flattened:
::view-transition
├─ ::view-transition-group(name-1)
│  └─ ::view-transition-image-pair(name-1)
│     ├─ ::view-transition-old(name-1)
│     └─ ::view-transition-new(name-1)
├─ ::view-transition-group(name-2)
│  └─ ::view-transition-image-pair(name-2)
│     ├─ ::view-transition-old(name-2)
│     └─ ::view-transition-new(name-2)
│ /* and so one... */
However, we may want to nest transition groups into each other for more complex transitions, resulting in a tree with ::view-transition-group inside others ::view-transition-group, like the following:
::view-transition
├─ ::view-transition-group(container-a)
│  ├─ ::view-transition-group(name-1)
│  └─ ::view-transition-group(name-2)
└─ ::view-transition-group(container-b)
    ├─ ::view-transition-group(name-1)
    └─ ::view-transition-group(name-2)
So the view-transition-group property was born, or to be precise, it will be at some point in timer. It might look something close to the following syntax if I’m following along correctly:
view-transition-group: normal | <ident> | nearest | contain;normal is contained by the root ::view-transition (current behavior).<ident> will be contained by an element with a matching view-transition-namenearest will be contained by its nearest ancestor with view-transition-name.contain will contain all its descendants without changing the element’s position in the treeThe values seem simple, but they can conflict with each other. Imagine the following nested structure:
A  /* view-transition-name: foo */
└─ B /* view-transition-group: contain */
   └─ C /* view-transition-group: foo */
Here, B wants to contain C, but C explicitly says it wants to be contained by A. So, which wins?
vmpstr: Regarding nesting with view-transition-group, it takes keywords or ident. Contain says that all of the view-transition descendants are nested. Ident says same thing but also element itself will nest on the thing with that ident. Question is what happens if an element has a view-transition-group with a custom ident and also has an ancestor set to contain – where do we nest this? the contain one or the one with the ident? noam and I agree that ident should probably win, seems more specific.
<khush>: +1
The conversations continued if there should be a contain keyword that wins over <ident>
emilio: Agree that this seems desirable. Is there any use case for actually enforcing the containment? Do we need a strong contain? I don’t think so?
astearns: Somewhere along the line of adding a new keyword such as contain-idents?
<fantasai>: “contain-all”
emilio: Yeah, like sth to contain everything but needs a use case
But for now, it was set for <ident> to have more specificity than contain
PROPOSED RESOLUTION: idents take precedence over contain in view-transition-group
astearns: objections or concerns or questions?
<fantasai>: just as they do for
<ident>values. (which also apply containment, but only to ‘normal’ elements)RESOLVED: idents take precedence over contain in view-transition-group
Lastly, the main course of the discussion: whether or not some properties should be captured as styles instead of as a snapshot. Right now, view transitions work by taking a snapshot of the “old” view and transitioning to the “new” page. However, not everything is baked into the snapshot; some relevant properties are saved so they can be animated more carefully.
From the spec:
However, properties like
mix-blend-modewhich define how the element draws when it is embedded can’t be applied to its image. Such properties are applied to the element’s corresponding ::view-transition-group() pseudo-element, which is meant to generate a box equivalent to the element.
In short, some properties that depend on the element’s container are applied to the ::view-transition-group rather than ::view-transition-image-pair(). Since, in the future, we could nest groups inside groups, how we capture those properties has a lot more nuance.
noamr: Biggest issue we want to discuss today, how we capture and display nested components but also applies to non-nested view transition elements derived from the nested conversation. When we nest groups, some CSS properties that were previously not that important to capture are now very important because otherwise it looks broken. Two groups: tree effects like opacity, mask, clip-path, filters, perspective, these apply to entire tree; borders and border-radius because once you have a hierarchy of groups, and you have overflow then the overflow affects the origin where you draw the borders and shadows these also paint after backgrounds
noamr: We see three options.
- Change everything by default and don’t just capture snapshot but add more things that get captured as ?? instead of a flat snapshot (opacity, filter, transform, bg borders). Will change things because these styles are part of the group but have changed things before (but this is different as it changes observable computed style)
- Add new property
view-transition-styleorview-transition-capture-mode. Fan of the first as it reminds me oftransform-style.- To have this new property but give it auto value. If group contains other groups when you get the new mode so users using nesting get the new mode but can have a property to change the behavior If people want the old crossfade behavior they can always do so by regular DOM nesting
Regarding the first option about changing how all view transitions capture properties by default:
bramus: Yes, this would be breaking, but it would break in a good way. Regarding the name of the property, one of the values proposed is cross-fade, which is a value I wouldn’t recommend because authors can change the animation, e.g. to scale-up/ scale-down, etc. I would suggest a different name for the property,
view-transition-capture-mode: flat | layered
Of course, changing how view transitions work is a dilemma to really think about:
noamr: There is some sentiment to 1 but I feel people need to think about this more?
astearns: Could resolve on option 1 and have blink try it out to see how much breakage there is and if its manageable then we’re good and come back to this. Would be resolving one 1 unless it’s not possible. I’d rather not define a new capture mode without a switch
…so the best course of action was to gather more data and decide:
khush: When we prototype we’ll find edge cases. We will take those back to the WG in that case. Want to get this right
noamr: It involves a lot of CSS props. Some of them are captured and not painted, while others are painted. The ones specifically would all be specified
After some more discussion, it was resolved to come back with compat data from browsers, you can read the full minutes at W3C.org. I bet there are a lot of interesting things I missed, so I encourage you to read it.
RESOLVED: Change the capture mode for all view-transitions and specify how each property is affected by this capture mode change
RESOLVED: Describe categorization of properties in the Module Interactions sections of each spec
RESOLVED: Blink will experiment and come back with changes needed if there are compat concerns
CSSWG Minutes Telecon (2024-08-21) originally published on CSS-Tricks, which is part of the DigitalOcean family. You should get the newsletter.

I sure do love little reminders about HTML semantics, particularly semantics that are tougher to commit to memory. Scott has a great one, beginning with this markup:
<p>I am a paragraph.</p>
<span>I am also a paragraph.</span>
<div>You might hate it, but I'm a paragraph too.</div>
<ul>
  <li>Even I am a paragraph.</li>
  <li>Though I'm a list item as well.</li>
</ul>
<p>I might trick you</p>
<address>Guess who? A paragraph!</address>
You may look at that markup and say “Hey! You can’t fool me, only the
<p>elements are “real” paragraphs!You might even call out such elements as
divs orspans being used as “paragraphs” a WCAG failure.But, if you’re thinking those sorts of things, then maybe you’re not aware that those are actually all “paragraphs”.
It’s easy to forget this since many of those non-paragraph elements are not allowed in between paragraph tags and it usually gets all sorted out anyway when HTML is parsed.
The accessibility bits are what I always come to Scott’s writing for:
Those examples I provided at the start of this post? macOS VoiceOver, NVDA and JAWS treat them all as paragraphs ([asterisks] for NVDA, read on…). […] The point being that screen readers are in step with HTML, and understand that “paragraphs” are more than just the
pelement.
Paragraphs originally published on CSS-Tricks, which is part of the DigitalOcean family. You should get the newsletter.
One of the most important early design decisions you will make is what kind of background will carry a project. Should it be a single color, colorless, use trendy elements such as geometric shapes, gradients, or wood grain patterns? Or would a solid background design can help make a project shine?
Staying on trend with background design styles is important as well. A trendy background choice shows that a website design is modern and the content is new. A modern visual framework can even signal a user that you are thinking about their needs and making the most of the tools that will make their experience better.
So how do you do it? Here’s a look at background design trends and styles, with a few great options to try.
Background designs have changed significantly over the years. Back in the day, most backgrounds, especially on websites, were all about chaotic images, vivid colors, and distracting videos.
Today, most backgrounds aim to create a calm and soothing environment to showcase content more efficiently. And the new muted colors trend is one of the most effective styles you can use to create such backgrounds as it allows you to create beautifully soft and calming backgrounds for all kinds of designs.

Creating a muted color background is easy. All you have to do is pick a color that matches your branding design. But to add a bit more style and make it look less bland, you can use a texture that blends well with muted colors, like this gray stone texture pack.
A classic vintage vibe never goes out of style. Many web designers and graphic designers have been using this trend to their advantage as it’s a background style that often highlights elegance and class.
Featuring aged effects, rough textures, and art deco styles, vintage background designs are perfect for creating a bold look for branding designs as well as high-end website designs.
However, when it comes to more playful and creative projects, a retro-inspired background full of neon colors and 80s vibes is the best approach.

Creating a vintage background with a rust and weather effect takes some effort. This bundle of vintage grunge backgrounds will help you save time. Use it to create a gritty background for your digital and print designs.

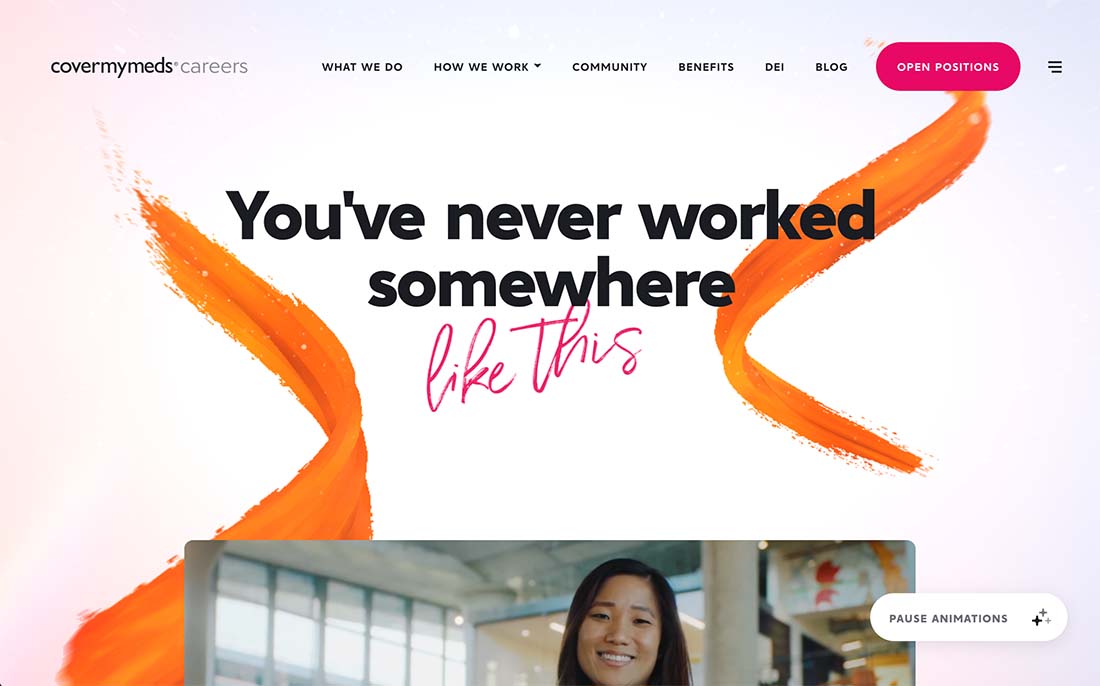
The background of a design plays a key role in creating a more personal look that not only adds a human touch but also evokes emotions in the audience. Adding creative, hand-drawn elements to a background is an effective way to achieve that goal.
Adding subtle brush strokes, playful sketches, illustrations, and icons allows you to make your backgrounds more unique and alter the overall look of the design in a positive way to make them stand out from the crowd.

The best way to recreate this background trend is to craft unique hand-drawn elements on your own. But that could be difficult when you’re working on multiple projects. In such cases, use some items from this 200+ abstract shapes collection.

One of the most mesmerizing background trends in website design is the colorful and creative gradient mesh design. These backgrounds feature interactive designs with gradients that change colors as you move your mouse cursor around.
This background style not only gives your website a vibrant and attractive feel but also makes it much easier to highlight the content above all else. That’s part of why this trend has been quite popular recently and we will likely see more of it throughout this year.

You’ll need some CSS skills to recreate this style of interactive gradient meshes for websites. However, if you’re looking to add a static gradient effect, use some of the vibrant gradient backgrounds in this bundle.

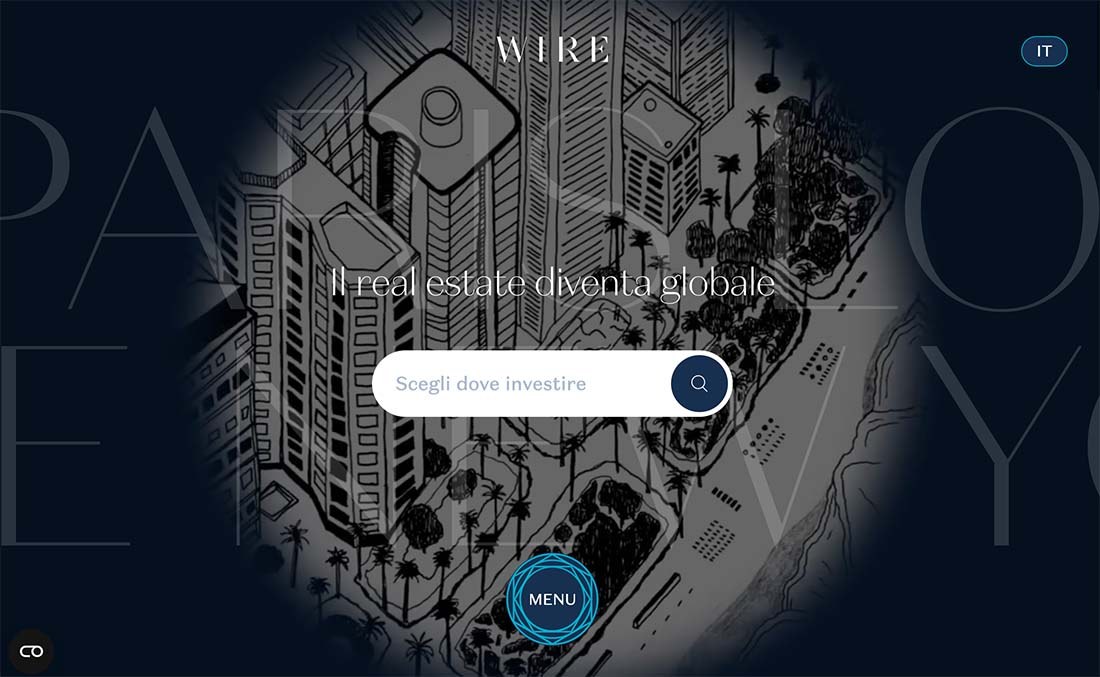
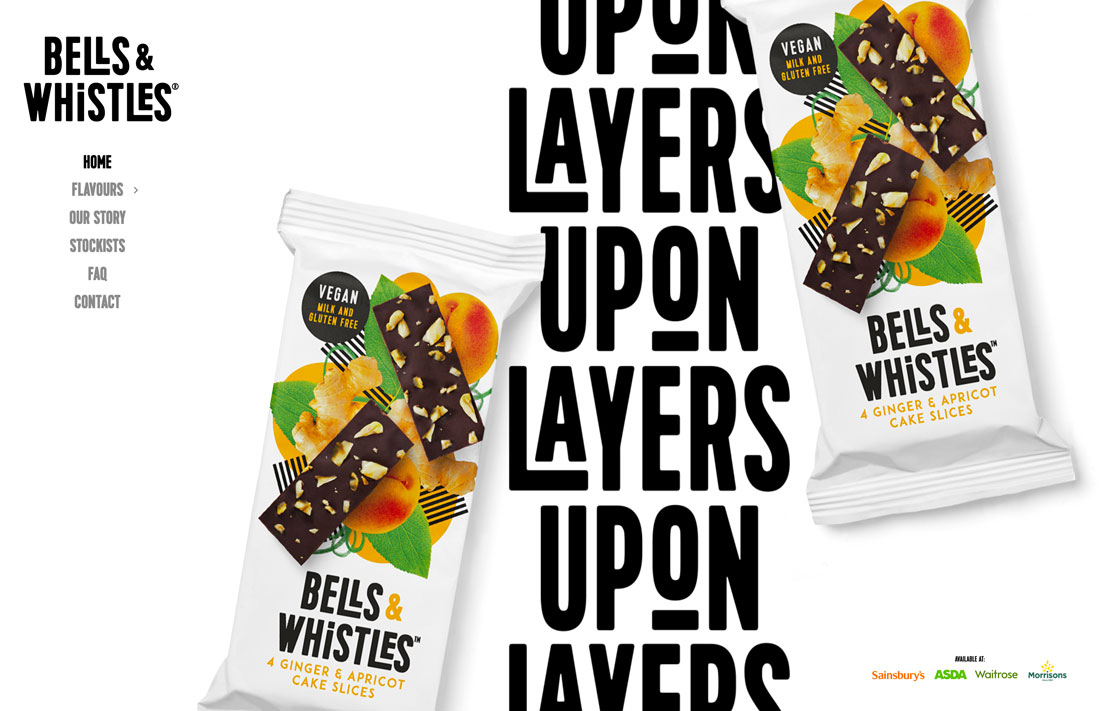
Backgrounds with repeated text and titles are a new trend we’ve been seeing lately. It’s a popular trend used by web designers but it’s also often used in posters, flyers, and even social media designs as well.
Using this trend requires careful thought and planning as it makes things more difficult to create a background that doesn’t steal the attention from the content. To make it less distracting, you can adapt creative methods like using glitch effects, transparent text, and outline fonts.

The repeated typography effect is easy to create but it would take time. The best approach is to use a pattern creator Photoshop plugin like this one. It allows you to easily create patterns from layers.

Adding a subtle glass blur effect to a background may look simple, but it has many benefits. It not only adds depth to the overall design but also makes it much easier to create contrast between the background and the text.
The glass blur background effect works perfectly with both image and gradient color backgrounds. However, it’s much more effective when used with gradient color backgrounds as it helps create a subtle glass-like aesthetic look for websites and graphic designs.

Applying a simple Gaussian blur effect to an image won’t help you recreate this design style. You’ll need a glass blur effect for this one. The easiest way to create this effect is to use a glass blur Photoshop template and apply it directly to your background image.

The split background design trend differs from the popular split website layout trend. This trend involves creating backgrounds that are split into multiple sections.
But it’s not just about adding two images side by side or using two different colors. It’s about creating balance and separating sections more innovatively.
In the above example, the website uses a slider that you can move around to change the divider, which is quite interesting for boosting engagement as well.

The best way to create this effect is to use CSS. But you can also start with a split layout template like this split homepage template for Adobe XD.

One of the best ways to create emotionally engaging and memorable website designs is to use fun illustrations. We see handcrafted illustrations on almost every website these days but most of them are quite random and chaotic. When used properly, the illustrations give a unique personality to each and every design.
The trick is to make the illustrations fun and relatable in a subtle way. Of course, it has to blend with your overall design and theme as well.
Some websites and brands also use illustrations as a way to convey their messages in visual form. And they also use fun characters and mascots to make more memorable designs. But for backgrounds, a big, fun, and creative illustration will do the trick.

You don’t always have to handcraft illustrations. A good illustration pack will give you plenty of options to choose from.

The neon glowing effect is something that always grabs your attention. It often works perfectly for adding a dark and moody vibe to the overall look of the design. The glowing background effect uses a similar approach but without the classic retro neon colors.
The soft, luminous light effect also creates depth and contrast between the content and the background. You’ll see this style used more commonly on technology-themed designs.
This background style works perfectly for product landing pages and for promotional adverts like flyers and posters. It creates a bright and bold look while bringing all the attention to the main content.

The abstract modern backgrounds is a collection of high-resolution backgrounds that includes 15 different styles of images featuring glowing effects.

The grainy texture background style succeeds beautifully when it comes to adding a tactile feel to website designs. It creates a unique handcrafted look to digital designs with its sandy and organic textures.
The main goal of using this background style is to give a more natural, rugged, and raw look to your designs. It’s also perfect for creating a retro and nostalgic look for your digital and print designs, especially for brands that seek to achieve a more grounded aesthetic.

You can use this grainy fabric effect Photoshop template to easily apply a grainy texture effect to your background images.

Three-dimensional anything is a big trend this year. Illustrations with a 3D feel are funky and light for a design that has a certain feel.
The trick to this background style is to pick 3D elements that really work with your content. Illustrations can be a full scene or use 3D icons that create texture or a sort of repeating pattern.
This style emits a certain feel from the get-go. It is lighter and less serious than some other styles, so you want to make sure you are using it with just the right type of content. Otherwise, you could end up with an odd disconnect.
Create your own illustrations or find a UI kit with the elements you need. Add another level of visual interest with a touch of animation, such as the example above.

Emoticon 3D Illustration is a fun option with big faces that you can drop in a background grid or with a more random placement.
A pastel gradient background can be soft or brilliant, but the trend is leaning more toward softer hues and subtle graduation of color.
What’s nice about this type of background is that it adds visual interest with an element of depth. The style can work with any type of content and almost every brand color combination, making it a super practical option if you want to refresh your website design.
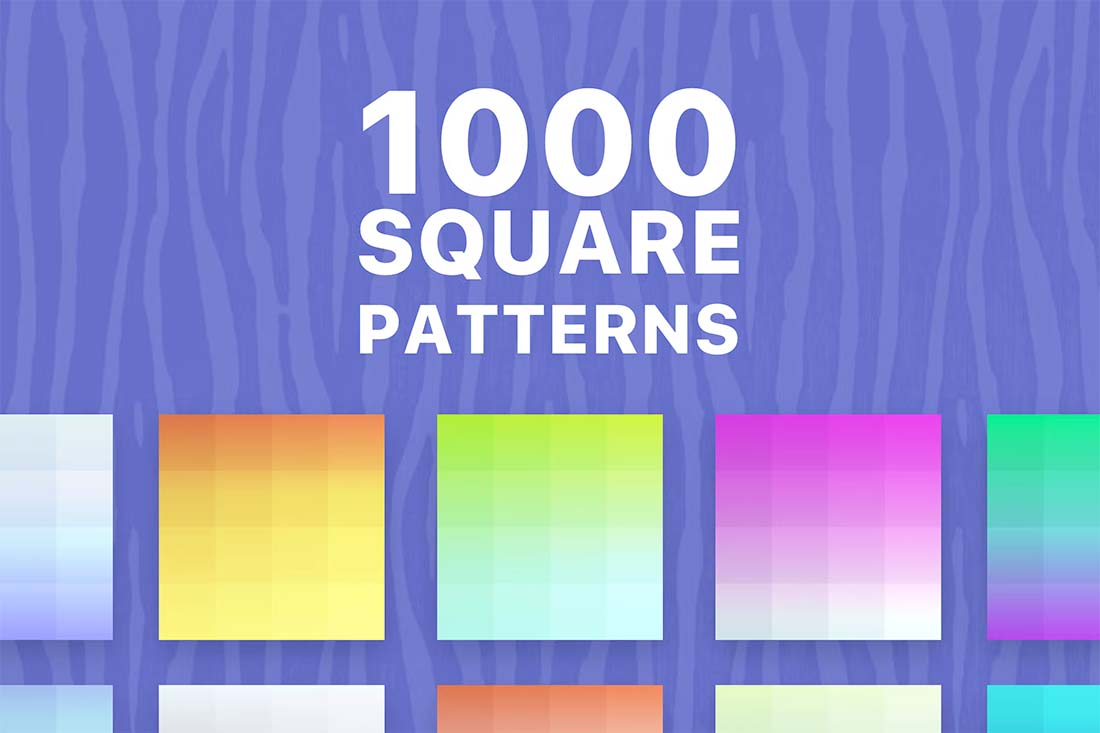
1000 Square Patterns includes plenty of fun repeating elements in a gradient style that can add depth to any website background.
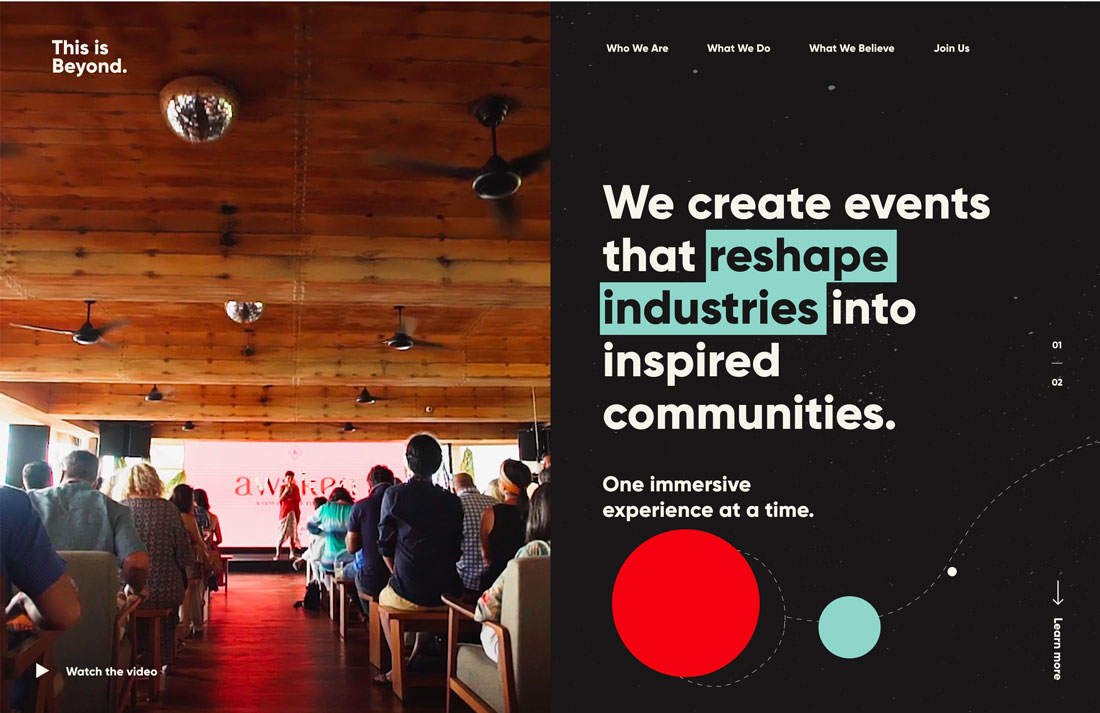
Background video is becoming more common in website design projects. Think of this as b-roll or video that’s more for visual purposes than storytelling.
Motion can help keep attention on a design a little longer or create interest with content that might be lacking visual spunk.
If you click through the example above, it uses two layers of animation – video in the background and moving text in the foreground to create a fun display with a lot of impact. The video background is a stylish contributor to this aesthetic.

Gold Modern Business Video Background has simple motion that can work in any space.

Geometric shapes can be a nice addition as a subtle layer behind other elements in a website design. Elements with thin lines and not a lot of color will create something that’s visually interesting and does not get in the way of the rest of the design.
You can take these effects to another level by using them in similar ways throughout the design and ensuring the shape and style that you use are relevant to the website content as a whole.
Don’t be afraid to use them in multiple ways as well, such as reversed out, with super subtle color, or slight animations. It’s all about creating the right feel for the design with an extra element to engage in the background.

Simple Laine Handdrawn Patterns has thin lines that fit this design trend perfectly. Play around with size and placement to make it work for you.
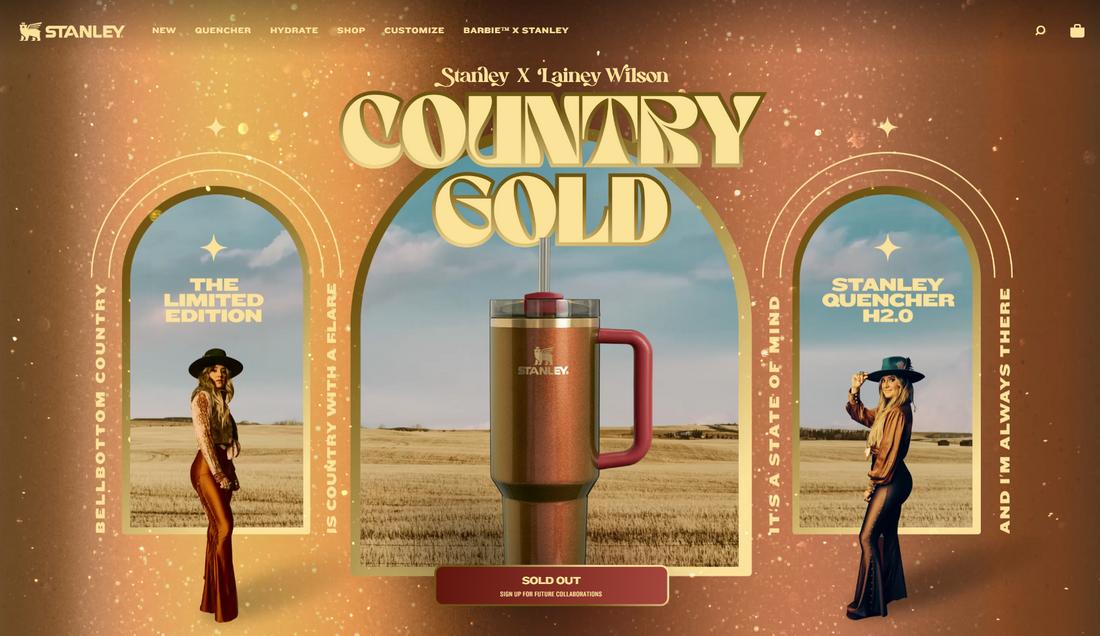
This is a background trend that we didn’t expect – photo backgrounds behind other layers, including text, other images, or videos.
These images tend to be wide-angle, easy-to -understand images that set the stage for the content on the website. They are most valuable when they provide extra information to make everything easier to understand. The challenge is that they can clutter or overwhelm the design if not done well.
Look for images that you can fade easily and content that’s easy to understand at a glance. Generally, the best options pull from the overall website color palette or include a lot of unused space that fades from one part of the background to another.

Beautiful Seascape is an example of a photo background that could work because it just establishes a sense of location and the color could be muted, if necessary. For this design trend, an image that helps create a locational element can be helpful.

Three-dimensional and tactile backgrounds draw users in because they look and feel like something real. Users can almost dive into the design and be part of what they are seeing on the screen, and there’s a strong visual appeal to that.
The modern 3D background trend is more than just shadows and shapes for depth. They also include animation and texture that enhance the realistic vibe.
The key to making a 3D background work is it has to be believable, meaning the effect replicates reality, or it has to be so far-fetched that it is obviously imaginary. There’s a delicate line there that takes practice to do exceptionally well.

Abstract 3D Background mixes depth effects with motion for a groovy background. The elements of motion can add to a 3D background, but you have to be careful so that you don’t end up with a dizzying effect.
Background and foreground elements no longer have to be completely separated on the screen. The merging of background pieces with other parts of the design can create amazing depth, contribute to a three-dimensional effect (as featured above), and help users feel like part of the design.
This background trend is an extension of merging illustration and reality in imagery that we saw trending in 2020 and 2021. Now the trend seems to be more focused on geometric shapes and color with image layers to create this depth effect in a way that’s less cartoonish.
Bright color choices can help propel these designs forward with extra elements of visual interest with shadows or other depth-building techniques.

Background Abstract Landing Page is a good starter to create this effect. To get just the right layering of shapes and elements, start with a background element that contains shapes that you like and then add images to the mix.
Liquid backgrounds are increasingly popular because they are just so visually interesting.
You might find them in one of two ways:
Both concepts are neat to look at and even in a still liquid background, it evokes feelings of motion. The waterlike feel of a liquid animation or background often has a somewhat calming effect as well because of the natural flow on the screen.

Liquid Backgrounds includes high-resolution backgrounds in a few color schemes. Each has an interesting texture and could work at fully saturated color or muted.

Background images never seem to get old and designers are playing with different ways to add contrast to images with overlays and effects that bring the whole scene together.
Overlays are interesting because there are so many different ways to do it, from full-color screens to partial overlays to adding color and other design elements on top of images.
The real key to making a photo overlay background work is using enough color to make foreground elements highly visible without hiding too much of the background image.

Epic Photo Overlays includes some trend overlay options that both darken images and provide a dreamy effect. (This is popular on social media and starting to creep into more web projects as well.)
In stark contrast, the trend above is using thick color transparency over an image or video. While this effect creates a lot of contrast, it almost renders the background image unreadable.
And that’s what the designer is trying to accomplish with this look. It works best in instances where artwork isn’t strong and primarily serves to provide additional texture so that the background isn’t just a solid color block.
Take care with images or videos used behind thick transparency. They shouldn’t be so interesting that people try to understand them. These images should fade into the background with ease.

APPO 3.0 template is designed for presentations but shows what you can do with a thick transparency. Take your color or gradient way up to enhance text elements in the foreground.
Watercolor backgrounds are a new take on illustrations and scenes in website design. This trend includes anything that has a bit of a hand-painted texture to it.
What’s nice about watercolors – and likely what makes them popular – is that the style has a certain softness to it that some harsher background options lack. Watercolor also has an authentic feel that communicates the uniqueness of the content you are about to explore.
Finally, watercolor styles emanate a bit of whimsy. This concept seems to be a design feeling that more projects are trying to replicate right now.

Watercolor Backgrounds with Modern Shapes combines a couple of trends – watercolor texture with geometric shapes. The result is pretty stunning and this set of files can help you set the scene for a variety of projects.

Video has been a go-to background design element for a couple of years, but it’s being reinvented somewhat with this trend: full-screen background video.
Responsive shapes are allowing designers to scale video to fill the landing screen. Like the example above, this trend focuses on the video with minimal effects and elements surrounding it.
The almost cinematic experience draws users in and can be highly engaging with the right video clip. To make the most of this background design trend, look for a video that has a lot of movement and action.
Envato Elements has a solid collection of stock video – more than 500,000 clips – if you need to jumpstart a video background and don’t have anything to work with.
You might not think about text as a background element, but it can be.
Powerful typefaces with big words can carry the background with image elements surrounding them or even encroaching into the space.
This might be one of the trickiest background trends to pull off because you need to maintain a balance between lettering, images, and responsiveness all while maintaining readability.

Boxer Typeface is a funky, slab display typeface that’s almost made for background use thanks to thick lines.
Subtle textures in the background can add depth and dimension to a project.
There are all kinds of texture patterns to try, but the dominant trend seems to be specks (most commonly white) over a solid color.
This style of texture provides a rough element to the background and adds a feeling that the design isn’t overly polished. The best part of this trend might be that it works with practically anything and you can even partner it with other background trends. (The example above uses video and texture.)

Procreate Texture Brushes is a cool add-on packed with subtle sand textures for users of the iPad app.

Who said background images have to be static?
Perfectly placed hover actions add the right amount of movement to otherwise static backgrounds. This technique works with photos, illustrations, and even patterns or textures.
The trick is that it adds an unexpected element of delight to the user experience. Until the hover action presents itself, users don’t even know it is there.
To make the most of this background trend, create a subtle bit of motion. In the example above, the image has a little bounce when activated.

Animative is a collection of image hover effects that you can use on your website.

Another background trend that’s evolving is the use of illustrations. While designers have used illustrations in the background for quite some time, these illustrations are more elaborate with layered scenes and even some animation.
An illustration can be attention-grabbing and memorable. The thing that’s difficult about an illustration is that these background designs can be rather busy, and you’ll have to carefully plan the placement and style of other elements.
The use of the illustration in the example above is almost perfect. With an off-center placement and hints of animation, it complements the text and the rest of the design well.

Creative Flat Design Business Concept has a trending flat design with a color palette and styles that are highly usable. The creator has multiple illustration options available in this style.

Color blocking has been a design trend that transcends disciplines. You’ll find it in fashion, home décor, and website design.
What’s great about this style for design backgrounds is that it can be bright, and with layering, visually interesting. It works with a variety of color palettes – which can be great for brands – and doesn’t create a background that’s overly complex or difficult to achieve.
Use a color-blocked layer with a bright or light background and then add a second “background” in another color. You can see this in the portfolio website example above with a white background and then individual elements in blue boxes.

One of the parts of flat design that have never really gone away is the colors of the style. These colors are coming back around as background colors.
Not only is the style to use bolder hues for the background, but to use them flatly. No gradients, no variation, just a solid color background in a single hue.
These backgrounds often have realistic layers on top and sometimes a border or another background behind them to create depth. (You can see this full effect from the example above with white edging around a beige background with an image on top.)

Circles, polygons, and other geometric elements are a big part of background design in 2021.
The shapes can be reminiscent of childhood or just a fun alternative to all the flat, single-color backgrounds that had been previously trending. For a modern flair on geometry, stick to a monotone color palette and use elements with a lot of contrast to make the most of the background.
These background styles can be somewhat flashy, such as the example above, or include a muted color palette with subtle geometric undertones.

Linear Shadow Backgrounds includes 10 large and small geo (or poly) shapes with fun colors and gradients.

From subtle curves to bold strokes, line patterns are growing in popularity as a background design element.
What makes lines work is that they mean something. The best line patterns help draw the user into the design and lead the eye to other visual elements, such as the custom line pattern in the example above.
Line patterns can be large or tiny, and both can be effective depending on the goals of your project.

Engraved Vector Patterns includes 16 repeat patterns for backgrounds. The kit includes almost any line style you might like with straight lines, blocks and curved lines. (Repeating patterns are nice because you don’t have to worry about “seams” where patterns meet.)

If you are at all like me, then you are one of those designers that truly has a love affair with gradients. (I can’t get enough of them.)
This trend is so flexible with background gradients that are only color, background gradients that overlay an image or video, or even animated background gradients that change color or seem to float across the design.
With so many options, it’s almost certain that you can find a workable solution that works with your color palette and design scheme.

While bubbles and blobs might resemble geometric shapes, they are often different in that many of these elements include some motion and the shapes are rather imperfect.
This trend tends to work in two ways as a background element:

Vintage Bubble Backgrounds has a true-to-life bubble style appeal, with 10 faded bubble images.

Woodgrain backgrounds are popular when it comes to product photography and scene-style designs.
Both work well with this element because the wood grain background provides a natural setting that isn’t flat. It’s interesting, but not overwhelming. It provides an interesting location to help bring focus to the thing sitting in the background.
To make the most of wood grain styles, try to match the coloring of wood to foreground elements and look for planks that are wide or thin based on foreground elements as well. Try to avoid elements that fall into the “cracks” between planks.

Wooden Backgrounds includes 10 different options with color and lighting changes with images that are more than 3,000 pixels wide.

Light-colored – white and gray – backgrounds are a trend that continues to hang on. Mostly derived from the minimalism trend, these backgrounds are simple and easy on the user. They provide ample space and contrast for other elements on the screen.
Most white and gray backgrounds have some element of texture, such as a pale gradient, use of shadows to create separation with foreground elements, or some sort of overall pattern or texture.

Showcase Backgrounds includes 12 background images with a light color scheme with only white a pale gray, making these a perfect fade-into-the-distance design option.
Change up an old design with a new background. Something as simple as changing the look of the design canvas can refresh a project.
Look for something with a touch of trendiness to add a more modern touch to your design. Plus, all of the “one to try” options above are ready to download and use.
The pivot table is one of Microsoft Excel’s most powerful — and intimidating — functions. Pivot tables can help you summarize and make sense of large data sets.
![Download Now: 50+ Excel Hacks [Free Guide]](https://no-cache.hubspot.com/cta/default/53/067360a3-cf50-4923-b737-86af07177c39.png)
However, they also have a reputation for being complicated.
The good news is that learning how to create a pivot table in Excel is much easier than you may believe (trust me!).
I’m going to walk you through the process of creating a pivot table and show you just how simple it is. First, though, let’s take a step back and make sure you understand exactly what a pivot table is and why you might need to use one.
Table of Contents
In other words, pivot tables extract meaning from that seemingly endless jumble of numbers on your screen. More specifically, it lets you group your data in different ways so you can draw helpful conclusions more easily.
The “pivot” part of a pivot table stems from the fact that you can rotate (or pivot) the data in the table to view it from a different perspective.
To be clear, you’re not adding to, subtracting from, or otherwise changing your data when you make a pivot. Instead, you’re simply reorganizing the data so you can reveal useful information.
We know pivot tables can be complex and daunting, especially if it’s your first time creating one. In this video tutorial, you’ll learn how to create a pivot table in six steps and gain confidence in your ability to use this powerful Excel feature.
By immersing yourself, you can become proficient in creating pivot tables in Excel in no time. Pair it with our kit of Excel templates to get started on the right foot.
If you’re still feeling a bit confused about what pivot tables actually do, don’t worry. This is one of those technologies that are much easier to understand once you’ve seen it in action.
Remember, pivot tables aren’t the only tools you can use in Excel. To learn more, take a look at our guide to mastering Excel.
The purpose of pivot tables is to offer user-friendly ways to quickly summarize large amounts of data. They can be used to better understand, display, and analyze numerical data in detail.
With this information, you can help identify and answer unanticipated questions surrounding the data.
Here are five hypothetical scenarios where a pivot table could be helpful.
Let’s say you have a worksheet that contains monthly sales data for three different products — product 1, product 2, and product 3. You want to figure out which of the three has been generating the most revenue.
One way would be to look through the worksheet and manually add the corresponding sales figure to a running total every time product 1 appears.
The same process can then be done for product 2 and product 3 until you have totals for all of them. Piece of cake, right?
Imagine, now, that your monthly sales worksheet has thousands upon thousands of rows. Manually sorting through each necessary piece of data could literally take a lifetime.
With pivot tables, you can automatically aggregate all of the sales figures for product 1, product 2, and product 3 — and calculate their respective sums — in less than a minute.

Pivot tables inherently show the totals of each row or column when created. That’s not the only figure you can automatically produce, however.
Let’s say you entered quarterly sales numbers for three separate products into an Excel sheet and turned this data into a pivot table.
The pivot table automatically gives you three totals at the bottom of each column — having added up each product’s quarterly sales.
But what if you wanted to find the percentage these product sales contributed to all company sales, rather than just those products’ sales totals?
With a pivot table, instead of just the column total, you can configure each column to give you the column’s percentage of all three column totals.
Let’s say three products totaled $200,000 in sales, and the first product made $45,000. You can edit a pivot table to say this product contributed 22.5% of all company sales.
To show product sales as percentages of total sales in a pivot table, simply right-click the cell carrying a sales total and select Show Values As > % of Grand Total.

In this scenario, you’ve just completed a blog redesign and had to update many URLs. Unfortunately, your blog reporting software didn’t handle the change well and split the “view” metrics for single posts between two different URLs.
In your spreadsheet, you now have two separate instances of each individual blog post. To get accurate data, you need to combine the view totals for each of these duplicates.

Instead of having to manually search for and combine all the metrics from the duplicates, you can summarize your data (via pivot table) by blog post title.
Voilà, the view metrics from those duplicate posts will be aggregated automatically.

Pivot tables are helpful for automatically calculating things that you can’t easily find in a basic Excel table. One of those things is counting rows that all have something in common.
For instance, let’s say you have a list of employees in an Excel sheet. Next to the employees’ names are the respective departments they belong to.
You can create a pivot table from this data that shows you each department’s name and the number of employees that belong to those departments.
The pivot table’s automated functions effectively eliminate your task of sorting the Excel sheet by department name and counting each row manually.
Not every dataset you enter into Excel will populate every cell. If you’re waiting for new data to come in, you might have lots of empty cells that look confusing or need further explanation.
That’s where pivot tables come in.

You can easily customize a pivot table to fill empty cells with a default value, such as $0 or TBD (for “to be determined”).
For large data tables, being able to tag these cells quickly is a valuable feature when many people are reviewing the same sheet.
To automatically format the empty cells of your pivot table, right-click your table and click PivotTable Options.
In the window that appears, check the box labeled “For Empty Cells Show” and enter what you’d like displayed when a cell has no other value.

Now that you have a better sense of pivot tables, let’s get into the nitty-gritty of how to actually create one.
On creating a pivot table, Toyin Odobo, a Data Analyst, said:
"Interestingly, MS Excel also provides users with a ‘Recommended Pivot Table Function.’ After analyzing your data, Excel will recommend one or more pivot table layouts that would be helpful to your analysis, which you can select from and make other modifications if necessary."
They continue, "However, this has its limitations in that it may not always recommend the best arrangement for your data. As a data professional, my advice is that you keep this in mind and explore the option of learning how to create a pivot table on your own from scratch."
With this great advice in mind, here are the steps you can use to create your very own pivot table. But if you’re looking for other ways to visualize your data, use Excel graphs and charts.
Every pivot table in Excel starts with a basic Excel table, where all your data is housed. To create this table, I first simply enter the values into a set of rows and columns, like the example below.

Here, I have a list of people, their education level, and their marital status. With a pivot table, I could find out several pieces of information. I could find out how many people with master’s degrees are married, for instance.
At this point, you’ll want to have a goal for your pivot table. What kind of information are you trying to glean by manipulating this data? What would you like to learn? This will help you design your pivot table in the next few steps.
Inserting your pivot table is actually the easiest part. You’ll want to:

Note: If you’re using an earlier version of Excel, “PivotTables” may be under Tables or Data along the top navigation, rather than “Insert.”
A dialog box will come up, confirming the selected data set and giving you the option to import data from an external source (ignore this for now).
It will also ask you where you want to place your pivot table. I recommend using a new worksheet.

You typically won’t have to edit the options unless you want to change your selected table and change the location of your pivot table.
Once you’ve double-checked everything, click OK.
You will then get an empty result like this:

This is where it gets a little confusing and where I used to stop as a beginner because I was so thrown off. We’ll be editing the pivot table fields next so that a table is rendered.
You now have the “skeleton” of your pivot table, and it’s time to flesh it out. After you click OK, you will see a pane for you to edit your pivot table fields.

This can be a bit confusing to look at if this is your first time.
In this pane, you can take any of your existing table fields (for my example, it would be First Name, Last Name, Education, and Marital Status) and turn them into one of four fields:
This turns your chosen field into a filter at the top, by which you can segment data. For instance, below, I’ve chosen to filter my pivot table by Education. It works just like a normal filter or data splicer.

This turns your chosen field into vertical columns in your pivot table. For instance, in the example below, I’ve made the columns Marital Status.

Keep in mind that the field’s values themselves are turned into columns and not the original field title. Here, the columns are “Married” and “Single.” Pretty nifty, right?
This turns your chosen field into horizontal rows in your pivot table. For instance, here’s what it looks like when the Education field is set to be the rows.

This turns your chosen field into the values that populate the table, giving you data to summarize or analyze.
Values can be averaged, summed, counted, and more. For instance, in the below example, the values are a count of the field First Name, telling me which people across which educational levels are either married or single.

Once you have your pivot table, it’s time to answer the question you posed for yourself at the beginning. What information were you trying to learn by manipulating the data?
With the above example, I wanted to know how many people are married or single across educational levels.
I therefore made the columns Marital Status, the rows Education, and the values First Name (I also could’ve used Last Name).
Values can be summed, averaged, or otherwise calculated if they’re numbers, but the First Name field is text. The table automatically set it to Count, which meant it counted the number of first names matching each category. It resulted in the below table:
Here, I’ve learned that across doctoral, lower secondary, master, primary, and upper secondary educational levels, these number of people are married or single:
Now, let’s look at an example of these same principles but for finding the average number of impressions per blog post on the HubSpot blog.
I want to find the average number of impressions per HubSpot blog post. First, I entered my data, which has several columns:
The table also includes CTR and position, but I won't be including that in my pivot table fields.

I want to sort my URLs by Clicks to make the information easier to manage once it becomes a pivot table. This step is optional but can be handy for large data sets.
To sort your data, click the Data tab in the top navigation bar and select Sort. In the window that appears, you can sort your data by any column you want and in any order.
For example, to sort my Excel sheet by “Clicks,” I selected this column title under Column and then selected Largest to Smallest as the order.

Like in the previous tutorial, highlight your data set, click Insert along the top navigation, and click PivotTable.
Alternatively, you can highlight your cells, select Recommended PivotTables to the right of the PivotTable icon, and open a pivot table with pre-set suggestions for how to organize each row and column.

Now, it's time to start building my table.
Rows determine what unique identifier the pivot table will organize your data by.
Since I want to organize a bunch of blogging data by URL, I dragged and dropped the “Top pages” field into the “Rows" area.

Note: Your pivot table may look different depending on which version of Excel you’re working with. However, the general principles remain the same.
Next up, it's time to add some values by dragging a field into the Values area.
While my focus is on impressions, I still want to see clicks. I dragged it into the Values box and left the calculation on Sum.

Then, I dragged Impressions into the values box, but I didn't want to summarize by Sum. Instead, I wanted to see the Average.

I clicked the small i next to Impressions, selected “Average” under Summarize by, then clicked OK.
Once you’ve made your selection, your pivot table will be updated accordingly.
The sum of a particular value will be calculated by default, but you can easily change this to something like average, maximum, or minimum, depending on what you want to calculate.
I didn't need to fine-tune my calculations further, but you always can. On a Mac, click the i next to the value and choose your calculation.
If you’re using a PC, you’ll need to click on the small upside-down triangle next to your value and select Value Field Settings to access the menu.
When you’ve categorized your data to your liking, save your work, and don't forget to analyze the results.
From managing money to keeping tabs on your marketing efforts, pivot tables can help you keep track of important data. The possibilities are endless!
See three pivot table examples below to keep you inspired.

If you’re in HR, running a business, or leading a small team, managing employees’ vacations is essential. This pivot table allows you to seamlessly track this data.
All you need to do is import your employees’ identification data along with the following data:
From there, you can sort your pivot table by any of these categories.

Whether you’re running a project or just managing your own money, pivot tables are an excellent tool for tracking spend.
The simplest budget just requires the following categories:
With this information, I can see my biggest expenses and brainstorm ways to save.

Pivot tables can help your team assess the performance of your marketing campaigns.
In this example, campaign performance is split by region. You can easily see which country had the highest conversions during different campaigns.
This can help you identify tactics that perform well in each region and where advertisements need to be changed.
There are some tasks that are unavoidable in the creation and usage of pivot tables. To assist you with these tasks, I’ll share step-by-step instructions on how to carry them out.
Now that you can create a pivot table, how about we try to create one with multiple columns?
Just follow these steps:

Similarly, drag and drop the fields you want to use for calculations or aggregations to the “Values” area.
For more visual instructions, watch this video:
To copy a pivot table in Excel, follow these steps:
By following these steps, you can easily copy and paste a pivot table from one location to another within the same workbook or even across different workbooks.
This allows you to duplicate or move pivot tables to different worksheets or areas within your Excel file.
For more visual instructions, watch this video:
To sort a pivot table, you can follow these steps:
Alternatively, you can use the sort buttons on the Excel ribbon:

These instructions will allow you to sort the data within a column or row in your pivot table. Please remember that sorting a pivot table rearranges the data within that specific field and does not affect the overall structure of the pivot table.
You can also watch the video below for further instructions.
To delete a pivot table in Excel, you can follow these steps:

Once you complete these steps, the pivot table and its data will be removed from the worksheet. It’s important to note that deleting a pivot table does not delete the original data source or any other data in the workbook.
It simply removes the pivot table visualization from the worksheet.
To group dates in a pivot table in Excel, follow these steps:


Excel will now group the dates in your pivot table based on the chosen grouping option. The pivot table will display the summarized data based on the grouped dates.
Note: The steps may slightly vary depending on your Excel version.
If you don’t see the “Group” option in the context menu, you can also access the Grouping dialog box by going to the “PivotTable Analyze” or “PivotTable Tools” tab on the Excel ribbon, selecting the “Group Field” button, and following the subsequent steps.
By grouping dates in your pivot table, you can easily analyze data by specific time periods, such as months, which can help you get a clearer understanding of trends and patterns in your data.
If you’re trying to add a calculated field in a pivot table in Excel, you can follow these steps:
The pivot table will now display the calculated field as a new column or row, depending on the layout of your pivot table.
The calculated field you created will use the formula you specified to calculate values based on the existing data in the pivot table. Pretty cool, right?
Note: The steps may slightly vary depending on your Excel version. If you don’t see the “Fields, Items & Sets” button, you can right-click on the pivot table and select “Show Field List.” They both do the same thing.
Adding a calculated field to your pivot table helps you perform unique calculations and get new insights from the data in your pivot table.
It allows you to expand your analysis and perform calculations specific to your needs. You can also watch the video below for some visual instructions.
To remove the grand total from a pivot table in Excel, follow these steps:
The grand total row or column will be removed from your pivot table, and only the subtotals for individual rows or columns will be displayed.
Note: The steps may slightly vary depending on your Excel version and the layout of your pivot table. If you don’t see the “Field Settings” or “Options” button in the ribbon, you can right-click on the pivot table, select “PivotTable Options,” and follow the subsequent steps.
By removing the grand total, you can focus on the specific subtotals within your pivot table and exclude the overall summary of all the data. This can be useful when you want to analyze and present the data in a more detailed manner.
For a more visual explanation, watch the video below.
Before creating a pivot table, make sure that your data range is properly selected. Include all the necessary columns and rows, making sure there are no empty cells within the data range.
To avoid potential issues with data interpretation, format your data properly. Ensure consistent formatting for date fields, numeric values, and text fields.
Remove any leading or trailing spaces, and ensure that all values are in the correct data type.
Pro tip: I find it easier to arrange my data in columns, with each column having its own header and one row containing distinct, non-blank labels for every column. Keep an eye out for merged cells or repeated header rows.
If you’re working with complex or nested data, you can use Power Query to turn it into a single header row organized in columns.
While creating a pivot table, use clear and descriptive names for your fields. This will make it easier to understand and analyze the data within the pivot table.
Pro tip: If you‘re focusing on business-related queries, I find that using natural language makes it easier to look them up.
Suppose you’re searching for the number of subscriptions live in 2024. Click the “Analyze Data” option under the “Home” tab. Type “subscriptions live in 2020” in the search bar. Excel will show you the data you are looking for.
Take advantage of the filtering capabilities in pivot tables to focus on specific subsets of data. You can apply filters to individual fields or use slicers to visually interact with your pivot table.
Pro tip: Did you know you can link a specific Slicer to many pivot tables? When you right-click on the slicer, you will see an option called “Report connections” appear.
You can then choose the pivot tables you intend to connect, and then you're done. I found that this same technique can also be used to join several pivot tables together using a timeline.
If you have a large amount of data, consider grouping it to make the analysis simpler. You can group data by dates, numeric ranges, or with your special kind of classification.
This helps to summarize and organize data in a more meaningful way within the pivot table.
Pro tip: Additionally, you can sort the Field List items alphabetically or in Data Source order, which is the order specified in the source table.
I've found that alphabetical order works best when dealing with unknown data sets with numerous fields.
But what if you want to monitor a certain entry and that it should always be at the top of the list? First, choose the desired cell, then click and hold the green cursor border to move it up or down to the desired location.
You'll know where the object will be dropped by a thick green bar. You can also click where you want the entry to appear and type the text to move the entry in a Pivot Table list to change its location.
Excel allows you to customize the layout of your pivot table.
You can drag and drop fields between different areas of the pivot table (e.g., rows, columns, values) to rearrange the layout and present the data in the most useful way for your analysis.
Pro tip: In addition to the standard layout, you can select a layout design from the list by clicking on “Report Layout.”
Infancy: if you want a specific default layout every time you open a pivot table, select “Files” > “Options” > “Data” > “Edit Default Layout.” You can change the layout options there to suit your preferences.
If your data source changes or you add new data, remember to refresh the pivot table to reflect the latest updates.
To refresh a pivot table in Excel and update it with the latest data, follow these steps:
By following these steps, you can easily refresh your pivot table to reflect any changes in the underlying data. This ensures that your pivot table always displays the most up-to-date information.
You can watch the video below for more detailed instructions.
These tips and tricks will help you create and use pivot tables in Excel, allowing you to analyze and summarize your data in a dynamic and efficient manner.
Imagine this. You’re a business analyst. You have a large dataset that needs to be analyzed to identify trends and patterns. You and your team decide to use a pivot table to summarize and analyze the data quickly and efficiently.
As you explored different combinations of fields, you discovered interesting insights and correlations that would have been time-consuming to find manually.
The pivot table helped you to streamline the data analysis process and present the findings to stakeholders in a clear and concise manner, impressing them with your team’s efficiency and ability to retrieve actionable insights. Sounds good right?
You’ve now learned the basics of pivot table creation in Excel. With this understanding, you can figure out what you need from your pivot table and find the solutions you’re looking for. Good luck!
Editor's note: This post was originally published in December 2018 and has been updated for comprehensiveness.
Learning how to create an ebook can be overwhelming. Not only do you have to write the content, but you also need to design and format it into a professional-looking document that people will want to download and read.

To help you get started, I’ve gathered some of my favorite lessons — both from my experience and from the experts.
Don’t worry, it’s not as intimidating as it sounds. I’ll also share some helpful tools and templates you can use to create, publish, and sell your ebook.
In this article:
Statista reports that by 2024, the global ebook market is projected to bring in $14.61 billion in sales. Keeping in line with that prediction, the market will increase at 1.62% per year, with a predicted volume of $15.33 billion by 2027.
So if you’re wondering if now is a great time to try out an ebook for your business, I’m here to convince you.
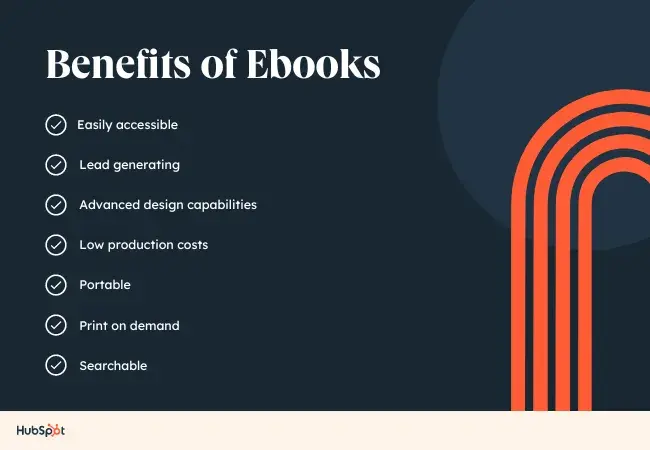
Lead magnets come in many forms, but the ebook still reigns supreme. They give the reader:
Writing ebooks benefits your business, too. Turning a profit, acquiring new customers, generating buzz, and becoming an industry thought leader are just a few advantages of this type of content.
Let's say, however, that you have a fantastic blog full of long-form content. Why in the world would you want to offer your readers an ebook? Is it even worth your time?
Moreover, with lead generation being the top goal for content marketing, ebooks are an essential part of a successful inbound marketing program.
In this post, I’ll walk you through the ins and outs of creating an ebook and will share my process of creating an ebook of my own. And if you’re worried about a lack of design skills, I’ve got you covered there, too.
Ebooks can increase the visibility and credibility of your business while positioning your brand as a thought leader in your industry. However, these ebooks can sometimes be hard to write, even though they offer many benefits.
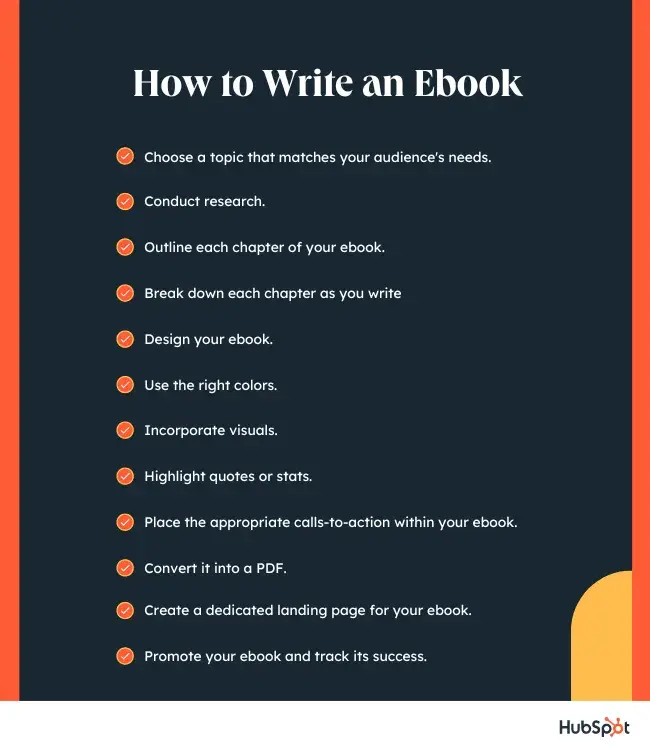
Here are some proven tips I recommend to help you write excellent ebooks.
Remember: The goal of your ebook is to generate leads for your sales team, so pick a topic that will make it easy for a prospect to go from downloading your ebook to having a conversation with your sales team.
This means your ebook should stay consistent with the topics you cover in your other content distribution channels.
Rather, it‘s your opportunity to do a deep dive into a subject you’ve only lightly covered until now, but something your audience wants to learn more about.
For example, in listening to sales and customer calls here at HubSpot, I’ve learned that creating ebooks is a massive obstacle for our audience, who are marketers themselves.
So if I can provide not only this blog post but resources to make ebook creation easier, I’m focusing on the right topic that will naturally lead to a sales conversation.
Here are some sample ebook titles to consider to get your creative juices flowing.
Note: Replace “X” with the appropriate number. You can also use our free Blog Topic Generator tool to develop more ideas. Most blog topics can be comprehensive enough to serve as longer-form ebook topics.
Pro tip: From personal experience, I can tell you that instead of adopting a generic approach, you should delve deeper and focus on a specific audience group to learn about their motivations, preferences, and problems.
Remember, everyone can‘t be your audience, as covering everyone’s pain points in a single book is difficult.
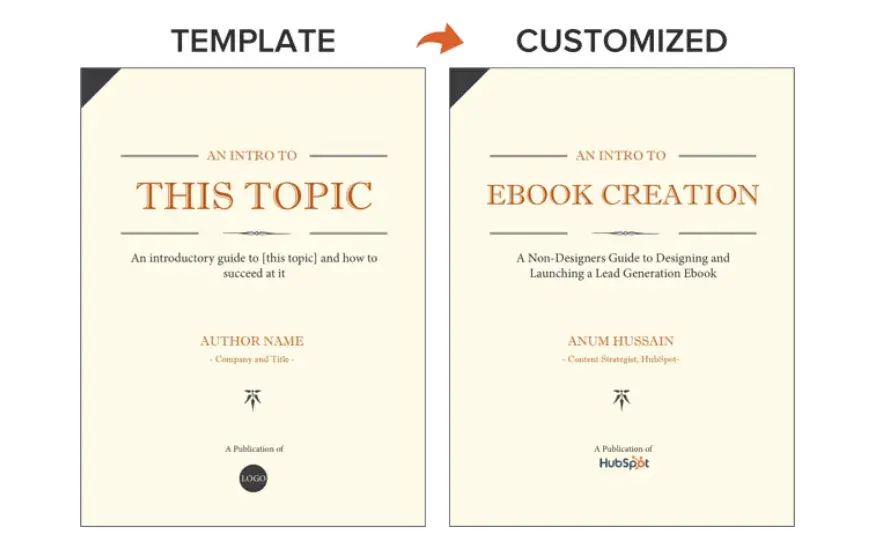
For this blog post, I will use the PowerPoint version of template two from our collection of five free ebook templates. Through each section of this post, I'll provide a side-by-side of the template slide and how I customized it.
Below, you'll see my customized cover with my sales-relevant ebook topic. For help with writing compelling titles for your ebooks, check out the tips in this blog post.
Although you probably have quite a bit of knowledge about your topic already, you still need to figure out what exactly your audience wants to know about and how you can make your ebook stand out from others in the market.
When I’m doing research for my ebook, here’s how I approach it:
Once you’ve gathered all your information, make sure you verify that it is all accurate and up-to-date. Also, be sure to keep your findings organized, so you can easily go back and reference them as you’re writing your ebook.
Pro tip: I‘d also suggest you look at your blog posts related to the topic. This provides invaluable information, such as showing you what questions your target audience asks.
It can be a checkpoint to see if you’re heading in the right direction. If it's something else, either reconsider the focus of your ebook or check to see how you can include it.
The introduction to your ebook should set the stage for the book’s content and draw the reader in.
What will you cover in your ebook? How will the reader benefit from reading it? For tips on how to write an effective introduction, check out this post.
Some ebook creators say that an ebook is simply a series of blog posts stitched together. While I agree you should treat each chapter as an individual blog post, the chapters of your ebook should also flow fluidly from one to the other.
The best way to outline your ebook is by thinking of it as a crash course on the sales-relevant topic you selected. In my example of creating an ebook, I know I need to cover how to:
While my example has a few chapters, keep in mind that your ebook does not need to be lengthy.
Here’s a golden rule to follow regarding ebook length: Write what is needed to educate your audience about your selected topic effectively.
If your ebook requires five pages, great! If it requires 30 pages, so be it. Just don't waste words thinking you need to write a lengthy ebook.
Let’s now move on to the actual copy you’re writing.
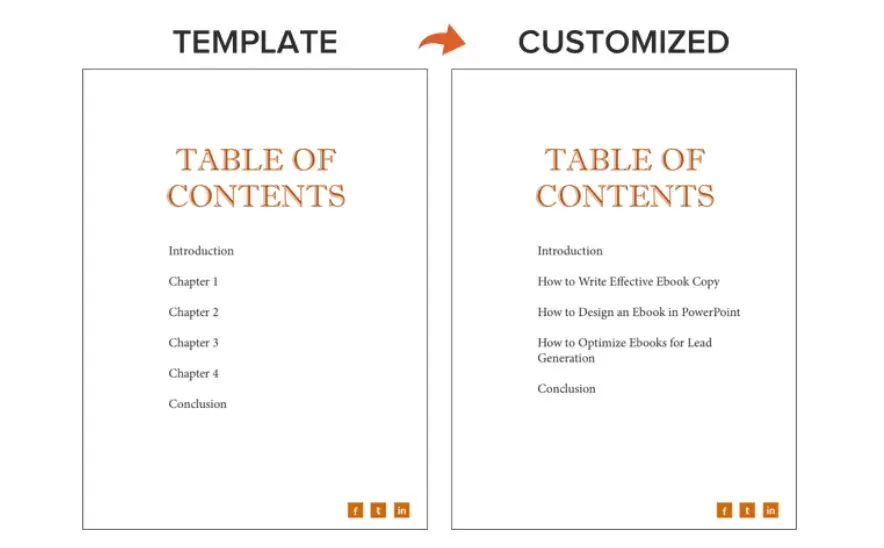
Pro Tip: In my experience, I also found that taking myself on the reader’s journey helped me understand the outline better. So, ask yourself where you want the reader to involve themselves and where they should end up eventually.
Get writing! Here, you can approach each chapter the way you might write a long blog post — by compartmentalizing each chapter into smaller sections or bullet points, as shown in the picture below.
This helps you write simply and clearly, rather than using sophisticated language to convey each point. It's the most effective way to educate readers and help them understand the new material you’re providing.
Be sure to maintain a consistent structure across each chapter, as well.
This helps you establish natural transitions between each chapter so there's a clear progression from one chapter to the next (simply stitching blog posts together can rob you of this quality).
These practices should hold true for all your other marketing efforts, such as email marketing, call-to-action creation, and landing page development. “Clarity trumps persuasion,” as Dr. Flint McGlaughlin of MECLABS often says.
Want to make sure you're keeping your ebook exciting for readers? Here are some key tips I’ve found to be most helpful:
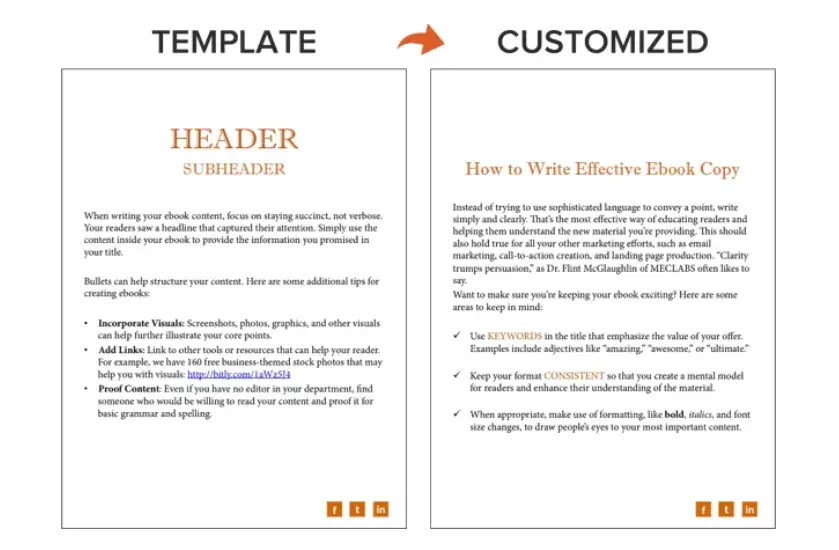
Pro tip: I‘ve also found that the saying "less is more" is handy when you’re in the deep trenches of writing. You don‘t want your readers feeling under or overloaded with information, so I find that a solid balance of content keeps them interested.
Plus, you can ask for a second opinion once you’re done to see if the information is too much to digest.
Our downloadable ebook templates are offered in both PowerPoint and InDesign.
For this example, I'll show you how to do it in PowerPoint since more people have access to that software. (If you need a refresher, here’s a beginner-friendly guide on how to use PowerPoint.)
We only have one “chapter page” in the template (slide three). To create additional chapter pages, or any pages really, simply right-click the slide and choose Duplicate Slide.
This will make a copy of your slide and allow you to drag it to its proper place in your ebook via the sidebar or Slide Sorter section of PowerPoint. You can then customize it for any subsequent chapters.
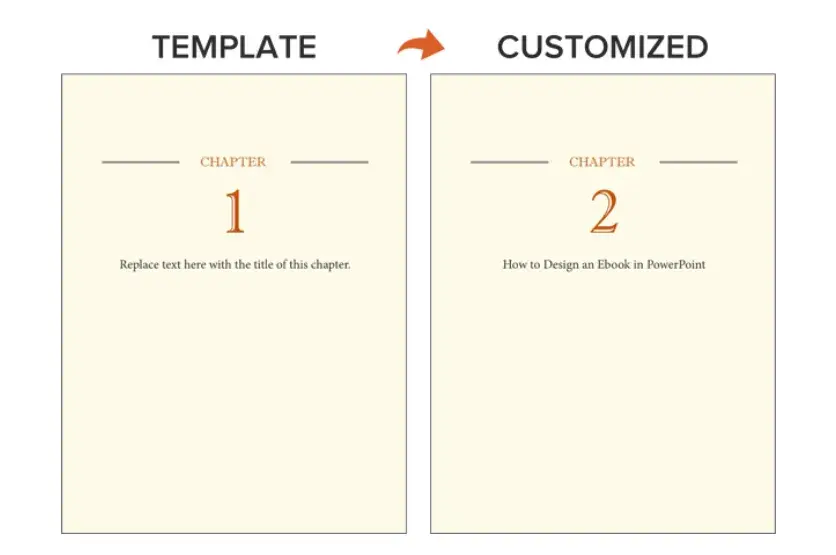
Pro tip: I think it’s good to set up some brand guidelines and stick to them when designing your ebook. If you publish more in the future, your target audience will eventually grasp who you are and what your business is about.
This will ensure that everything you do is consistent and that you’re considered a professional.
Ideally, our free ebook templates would magically match your brand colors. But they probably don’t; this is where you get to truly personalize your work.
However, because ebooks offer more real estate for color than your logo or website, it’s good to consider secondary colors within your brand's color palette. Ebooks are where this color scheme can truly shine.
To learn how to add your brand's colors to PowerPoint, check out this blog post. That way, you can customize the color scheme in our ebook templates to match your brand!
Pro tip: I’ve also found using colors to emphasize a particular word or key points useful. Red can emphasize something, while yellow can highlight something.
Remember, every color has a purpose in designing content assets and can influence how information is displayed.
Images and graphics in ebooks are hard to get right. The key to making them fit well is to think of them as complementary to your writing.
Whether you add them during or after you’ve finished writing your ebook’s copy, your visuals should serve to highlight an important point you’re making or deconstruct the meaning of a concept in an easy-to-understand, visual way.
Images shouldn’t just be there to make the ebook easy on the eyes. Rather, they should be used to enhance the reader’s understanding of the material you’re covering.
If you need help gathering visuals, we have three sets of free stock photos that might help you along the way:
And if you're compiling a data-heavy ebook, you might want to download our free data visualization ebook for tips about designing compelling charts and graphs for your content.
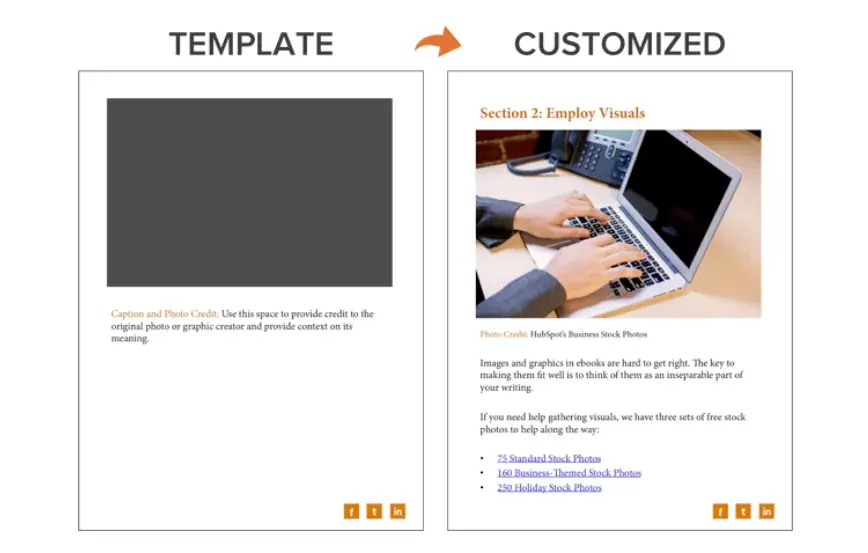
Pro tip: I’d argue one of the most crucial aspects to consider when writing your ebook is thinking about what data/ insight or quote you could present in a visual form.
Think about using images or links to videos, providing them with an all-round experience. So, when writing, jot down where you think images or visuals could be used.
Another way to enhance your ebook is by highlighting quotes or stats within your design. Just be sure the quote or stat you're using genuinely adds value to the content.
Whether you're emphasizing a quote or adding a visual, keep all your content within the same margins.
If your copy is consistently one-inch indented on your page from both the left and right sides, keep your designed elements aligned using that same spacing.
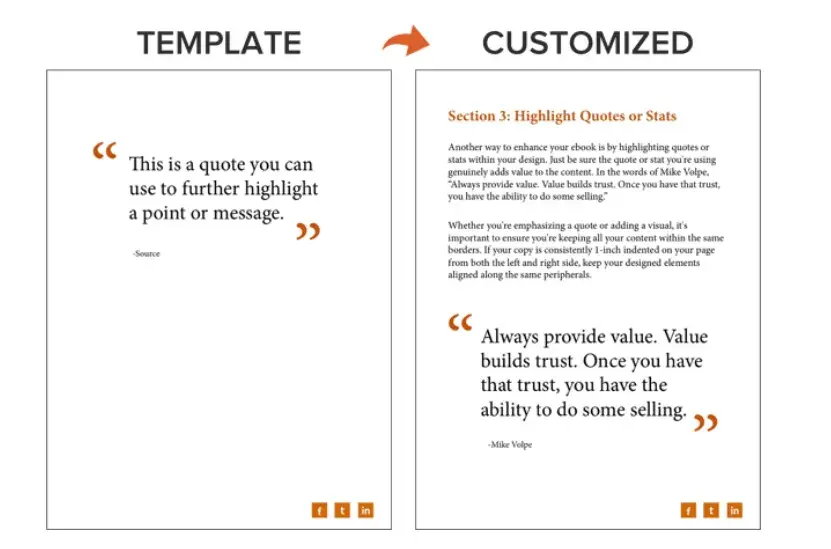
Pro tip: I’m a big fan of large graphics or quotes, but occasionally, a good dose of white space is just as crucial. So, incorporating a lot of text, images, quotes, and statistics is great, but you also want to keep everything balanced.
Now that your content is written and designed, it's time to optimize it for lead generation, reconversion, and promotion.
Think about how you got here — you clicked on a call-to-action (CTA) in an email, on a social media post, or somewhere else.
A CTA is a link or visual object that entices the visitor to click and arrive at a landing page that will get them further engaged with your company.
Since your ebook readers have probably converted into leads to get their hands on your ebook, use the CTAs within your ebook to reconvert your readers and propel them further down your marketing funnel.
For instance, a CTA can lead to another offer, your annual conference's registration page, or even a product page.
Depending on what this next action is, CTAs can be an in-line rectangle or a full-page teasing the next offer (see both images below).
To hyperlink the CTA in your ebook (or any image or text in your ebook) to your destination URL, simply go to Insert >> Hyperlink in PowerPoint.
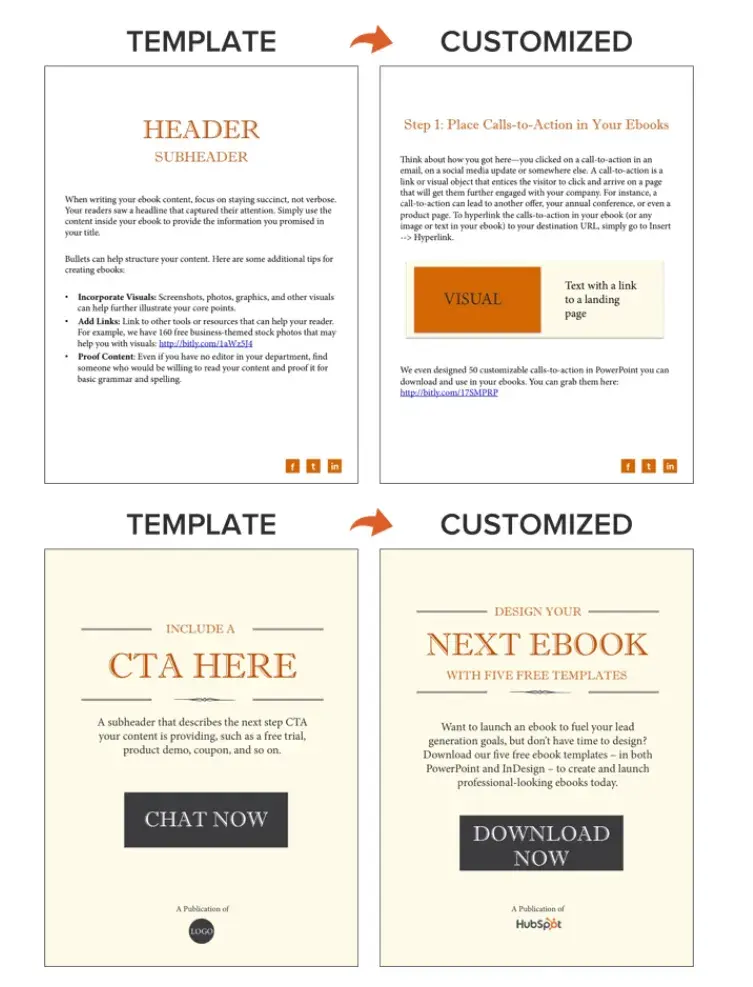
Note: We've even designed 50 customizable calls-to-action in PowerPoint you can download and use in your ebooks. You can grab them here.
Now, we don’t have a dedicated CTA template slide in the PowerPoint ebook templates ... but it’s still simple.
You just have to duplicate the Header/Subheader slide and customize the copy or add images as needed. You can also go to Insert >> New Slide and work from there.
Pro tip: I‘ve found it’s ideal to put CTA links between your ebook‘s chapters — or, better yet, at the end of each one or right after the conclusion. But make sure that you’re subtle with your CTAs, as you wouldn't want to put off your readers.
Once you’ve finished writing your ebook — CTAs and all — it’s time to convert it to the right file type, so it's transferable from you to your recipient.
To convert your ebook to a PDF, click File >> Save As in the ebook template you have open. Then, under File Format, select PDF and select a destination on your computer for this new file.
Why can’t you just attach what you have to a landing page and be done with it? Word documents, PowerPoints, and similar templates are perfect for creating your ebook but not for delivering it.
Because these templates are editable, the contents of your ebook are too easily corrupted, distorted, or even lost when moving from your computer to the hands of your future leads. That’s where PDFs come in.
You've seen these letters at the end of files before. Short for Portable Document Format, the .PDF file type essentially freezes your ebook so it can be displayed clearly on any device. A popular alternative to PDFs is the .EPUB file type.
See a comparison of EPUB to PDF here.
Pro tip: One reason I believe shifting to PDFs is important is because you can also share them as links. This makes it much easier to spread your ebook around, and your readers won’t need to download it if they don’t want to.
Your ebook should be available for download through a landing page on your site.
A landing page is a web page that promotes/describes your offer and provides a form that visitors need to fill out with their contact information to access your ebook.
This is how you can convert your visitors into business leads that your sales team can ultimately follow up with.
For instance, you went through this landing page to access this ebook template.
If you’re still not sure how to get started, download this free ebook to learn more about optimizing your landing pages for conversion.
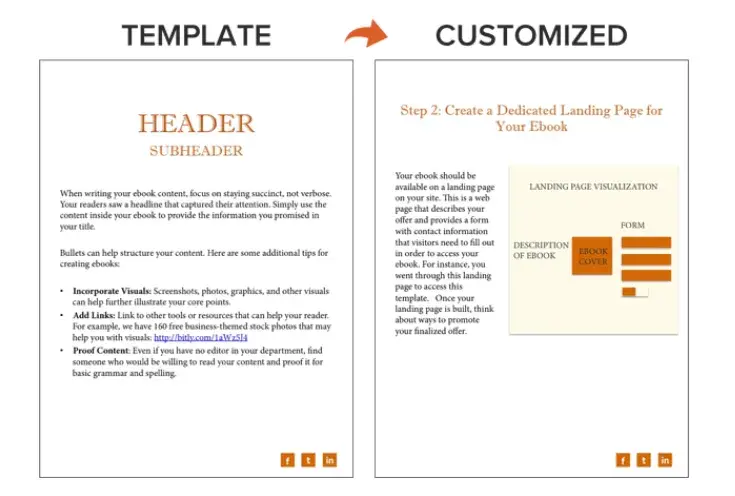
And if you‘re looking for a faster, easier way to create your ebook landing page, check out HubSpot’s free Campaign Assistant tool. Instead of writing and editing for hours, Campaign Assistant can generate your copy with just a few clicks.
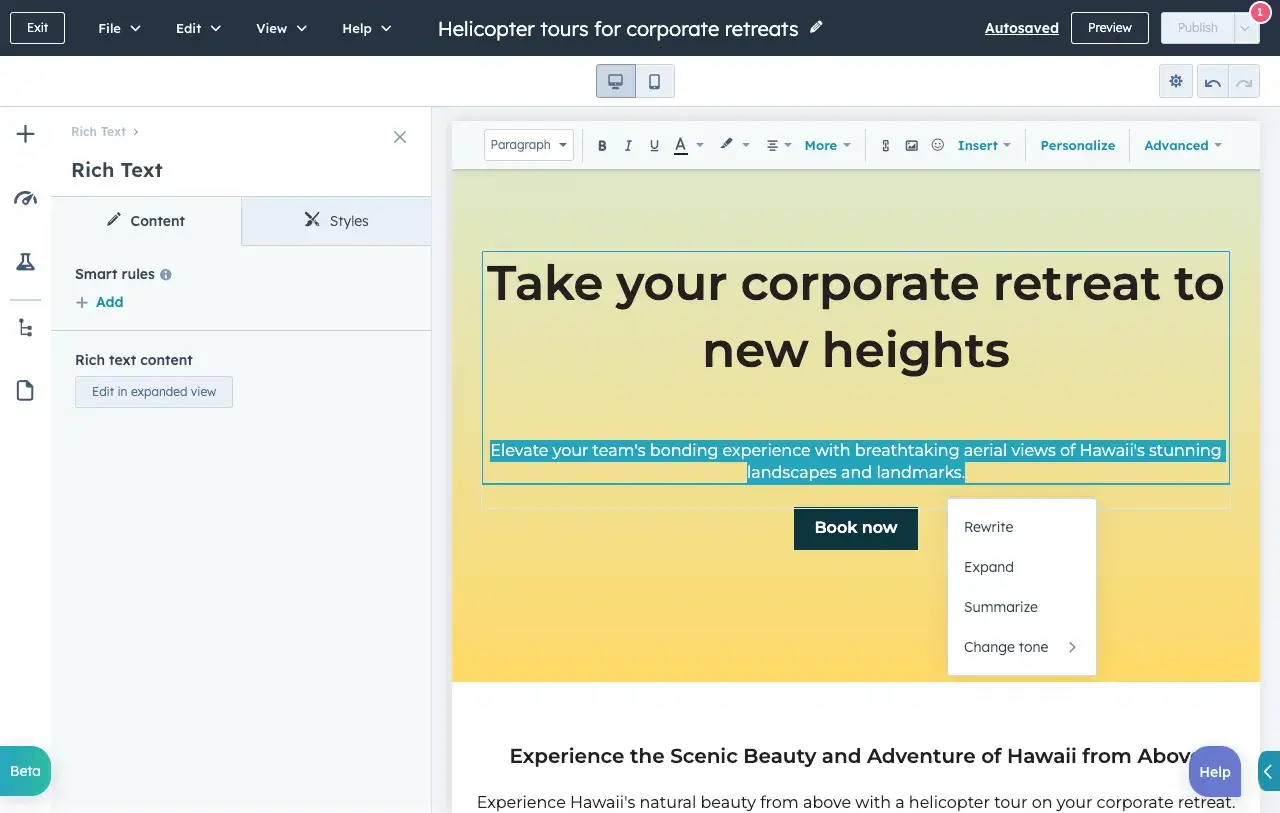
Pro tip: I recommend that you don’t forget about SEO when creating your landing page. It can make or break your conversion rate. Optimize meta tags and include relevant keywords, especially for your ebook.
Once your landing page is all set, you can use that destination URL to promote your ebook across your marketing channels.
However, in 2024, almost 80% of writers said marketing was the hardest aspect of the ebook process. As of this year, authors have dedicated more than thirty-one hours and $617 on marketing per month to promoting their ebooks.
So, I’ve shared five ways you can do this:
Apart from these, you can also use other marketing strategies to promote your ebook. In fact, I could dedicate a whole blog to how you should market your ebook (check that post out here).
After your content is launched and promoted across your marketing channels, you’ll also want marketing analytics to measure your live product's success.
For instance, you should have landing page analytics that give you insight into how many people downloaded your ebook and converted into leads.
You should also have closed-loop analytics that show how many of those people ultimately converted into opportunities and customers for your business.
And with that, we've built an ebook, folks! You can check out the packaged version of the example I built here:
After your content is launched and promoted across your marketing channels, you’ll need to have marketing analytics to measure your ebooks' success.
For instance, have landing page analytics that give you insight into how many people downloaded your ebook or show how many of those downloaders converted into opportunities and customers for your business.

Data Visualization 101: How to Design Charts and Graphs [Free Download]
Pro tip: I suggest that you don‘t wait until you’re done writing your ebook to promote it. To engage your readers, think about posting teasers on Instagram Stories or sending out a survey about your book cover.
You can even tease your audience by offering them some insights from your ebook. Everyone loves taking a look behind the scenes.
Publishing an ebook can be a great way to share your message or content with a wider audience. Here's a step-by-step guide on how to publish an ebook.
Converting your ebook to the appropriate format is necessary to ensure compatibility with your readers and their devices. It allows you to incorporate responsive design elements and preserve the layout of your book.
It provides a consistent reading experience across various devices, ultimately increasing the reach and accessibility of your ebook.
Ebooks can be saved in one of several formats. Depending on your end-user, though, you might find a use for any of the following file types:
PDFs are likely the most well-known file type. The “PDF” extension stands for “Portable Document Format,” and is best for ebooks that are meant to be read on a computer (digital marketers, you’ll want to remember this one).
This file type stands for “Electronic Publication,” and is a more flexible ebook format. By that, I mean EPUB ebooks can “reflow” their text to adapt to various mobile devices and tablets.
This allows the ebook‘s text to move on and off different pages based on the device’s size on which a user is reading the ebook.
They're particularly helpful for viewing on smaller screens, such as smartphones and the Nook from Barnes and Noble.
The MOBI format originated from the Mobipocket Reader software, which was purchased by Amazon in 2005 but was later shut down in 2016.
However, the MOBI file extension remains a popular ebook format compatible across the major e-readers (except the Nook).
While the format has some limitations, such as not supporting audio or video, it supports DRM, which protects copyrighted material from being copied for distribution or viewed illegally.
Newer Kindle formats are based on the original MOBI file types.
This is an ebook file type designed for the Kindle, an e-reader device by Amazon. However, users can also open this file format on smartphones, tablets, and computers through the Kindle app.
ODF stands for OpenDocument Format, a file type meant primarily for OpenOffice, a series of open-source content creation programs similar to Microsoft Office.
IBA is the proprietary ebook format for the Apple iBooks Author app. This format does support video, sound, images, and interactive elements, but it is only used for books written in iBooks. It is not compatible with other e-readers.
When choosing a platform, consider factors like reach, royalty rates, distribution channels, ease of use, and the preferences of your target audience.
It may also be worth exploring regional or specialized platforms depending on your ebook's niche or target market.
Here are some popular options:
KDP is one of the most popular self-publishing platforms.
It allows you to publish and sell your ebook on the Kindle Store, accessible by millions of Kindle e-readers and Kindle apps.
KDP offers various promotional tools and provides global distribution options.
Apple Books (formerly iBooks) is the ebook platform for Apple devices, including iPhones, iPads, and macOS devices. It provides a seamless reading experience and allows you to publish and sell your ebook on the Apple Books store.
Barnes & Noble Press (formerly Nook Press) is the self-publishing platform for Barnes & Noble, one of the largest booksellers in the United States. It allows you to publish and sell your ebook on the Barnes & Noble website and Nook devices.
Kobo Writing Life is an ebook self-publishing platform associated with Kobo e-readers and apps. It offers global distribution and the ability to set pricing, promotions, and earn royalties from sales.
Draft2Digital is a user-friendly ebook distribution platform that helps you publish and distribute your ebook to multiple retailers, such as Amazon, Apple Books, Kobo, Barnes & Noble, and more.
It simplifies the process by handling the conversion, distribution, and payment aspects for you.
Sign up for an account on your chosen platform. Provide the necessary information, such as your name, address, and payment details if required as given in the example below.
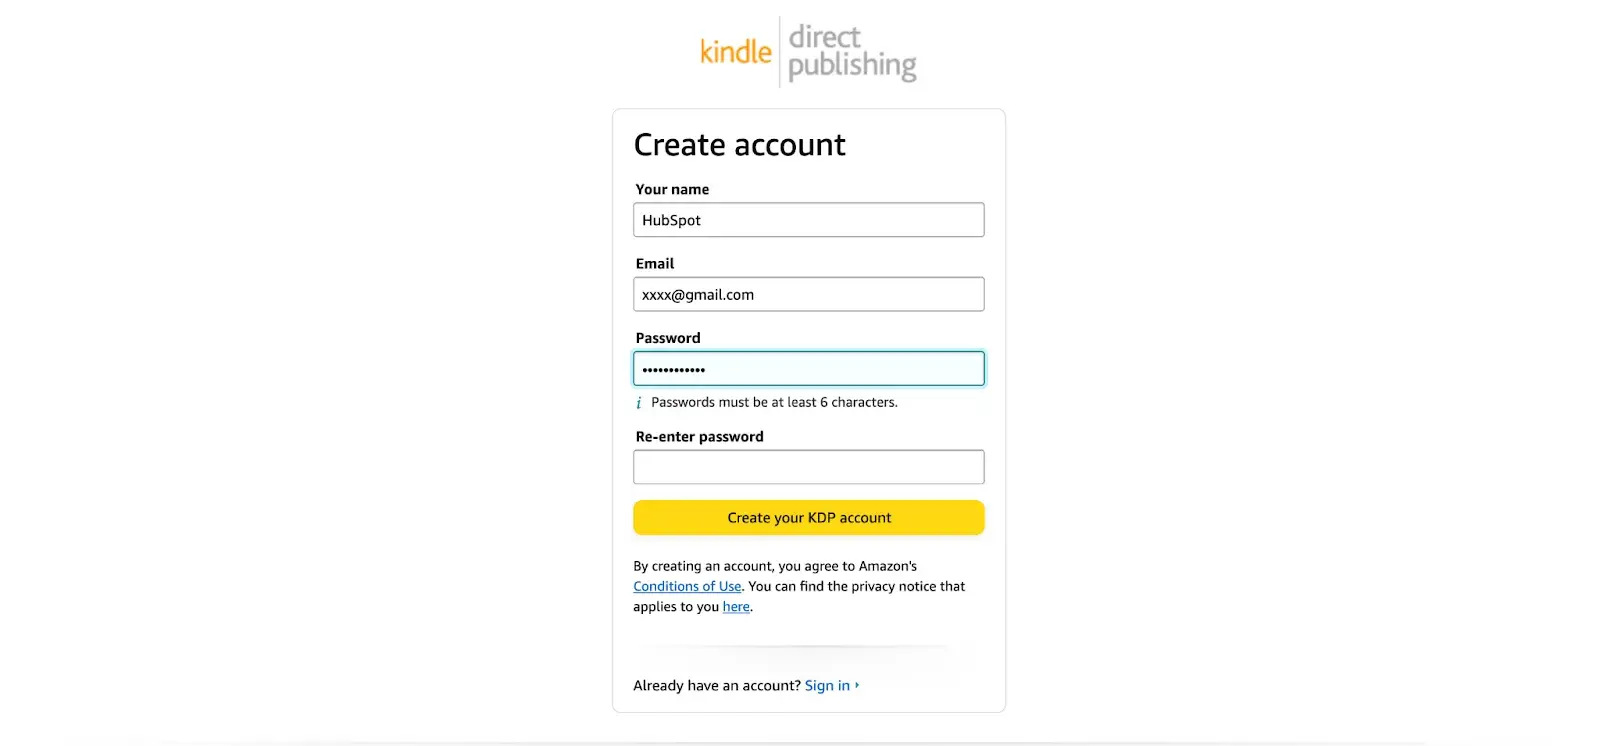
Once your account is created, follow the platform’s instructions to upload your ebook file and cover design. Ensure that the files meet the platform’s formatting and size requirements.
You’ll also need to fill out the book details, including title, author name, description, and categories or genres. These details help readers discover and understand your ebook.
Determine the pricing for your ebook. This determines how much revenue you can generate from each sale. By setting the right price, you can ensure your ebook is competitive in the market while maximizing your earnings.
Once you have your price set, you’ll want to determine your royalty rates, which is the percentage of the ebook's price that you earn as the author or publisher for each sale.
Different ebook publishing platforms offer various royalty structures, and it's important to understand the rates and terms they provide. By setting royalties, you can calculate and predict your earnings from each sale.
You may also want to consider offering your ebook for free.
Although it wouldn’t help generate direct revenue for your company, it can still enhance exposure and attract a larger readership, leading to word-of-mouth promotion and potentially increasing future sales.
Plus, it provides an opportunity to generate leads and build an email list for future engagement.
Before publishing, preview your ebook to ensure it looks as intended and ensure there are no errors or formatting issues. Once you're satisfied, click the publish button to make your ebook available for purchase.
Keep in mind that the steps mentioned above are general guidelines, and the specific uploading process may vary based on the platform you choose to publish your ebook with.
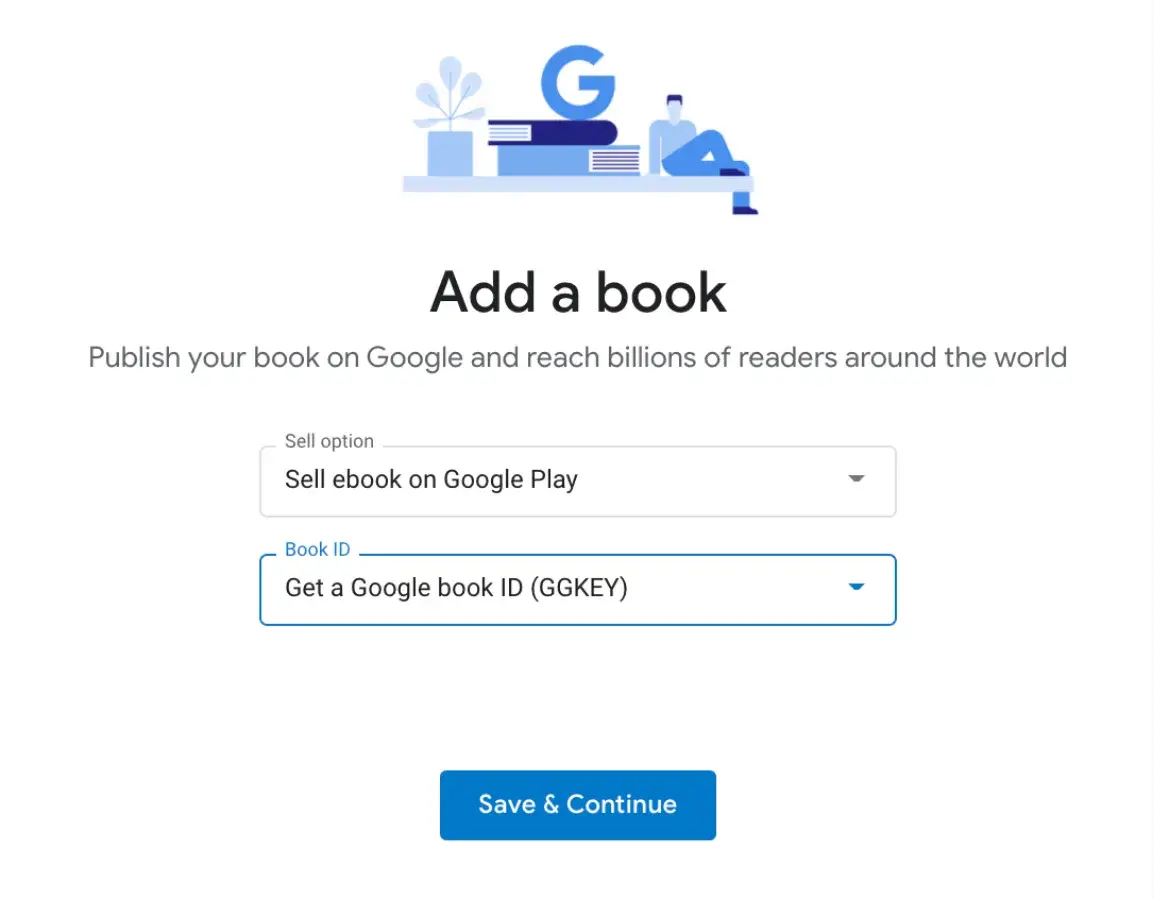
So, what should you write about in your ebook? I’ll answer that question with another question: What do you want your readers to get out of this ebook?
To identify an ebook idea that suits your audience, consider the type of ebook you’re trying to create. Here are a few ideas.
Conducting an experiment or business survey? This is a great way to develop proprietary knowledge and become a thought leader in your industry. But how will you share your findings with the people who care about it?
Create an ebook that describes the experiment, what you intended to find out, the results of the experiment, and what these findings mean for your readers and the market at large.
People love success stories, especially if these people are on the fence about purchasing something from you. If you have a client whose business you're particularly proud to have, why not tell their story in an ebook?
Ebook case studies show your buyers that other people trust you and have benefited from your product or service.
In your ebook, describe what your client's challenge was, how you connected with them, and how you were able to help your client solve their challenge and become successful.
The more complex your product is, the more information your customers will need to use it correctly.
If your product or service has many use cases or it's hard to set up alone, dedicate a brief ebook to showing people how to make the most out of it.
For instance, in the first section of your ebook, you can explain how to launch your product or service. The second section can break down the individual features and purposes your product is best used for.
Are you interested in interviewing a well-known person in your market?
Perhaps you‘ve already sat down with an influencer to pick their brain about the industry’s future. Package this interview into an ebook, making it easy for your customers to read and share your inside scoop.
A “playbook” is a document people can use when taking on a new project or concept that is foreign to them. Think of it like a cheat sheet, full of tips and tricks that help your customers get better at what they do.
When done right, a playbook equips your customers with the information they would need to excel when using your product.
For example, a software vendor for IT professionals might create a “virus protection playbook” that makes support teams better at preventing viruses for their respective companies.
Sometimes, the best ebook for your business is already strewn across a series of blog posts. If you've spent the last month writing articles all on the same subject for your business, imagine how these posts would look stitched together?
Each article can begin a new chapter.
Then, once this ebook is created, you can promote it on a landing page, link to this landing page from each blog post, and generate leads from readers who want to download the entire blog series in one convenient ebook.
Yes, they can be.
Ebooks are high-volume, low-sales-price offers.
This means you’ll need to sell many of them at a relatively low price point to compete in the market and turn a significant profit. Depending on your industry, ebooks can range from free to more than $100.
Before setting a price for your ebook, do some research. Determine who your audience is, what they’re willing to pay, and how many people within your target market might be ready to buy it.
Then, determine the platforms through which you’ll sell your ebook. Amazon? Apple Books? Your website? You can research how much ebooks usually go for on these sites and incorporate this insight into your pricing strategy.
There‘s no set rule for organizing your content into an ebook. It generally mimics the structure of a novel or textbook (depending on what it is you’re writing about). But, you should be sure to adhere to some aspects of an ebook.
Ebooks typically have a system of chapters and supporting images. Like a blog post, they also do well when further segmenting their text with subheaders that break down the discussion into specific sections.
If you're writing about professional sports, for example, and one of your chapters is about Major League Baseball (MLB) in the U.S., you might want to establish subchapters about the various teams belonging to the MLB.
Anything. Well, within reason.
Ebooks are simply a marketer's way of delivering lots of critical information in a form their potential customers are most willing to read.
For example, an environmental company might write an ebook about water conservation. They might also focus an ebook entirely on using their water-saving product or how it helped a customer solve a problem.
Research is a significant part of ebook creation, no matter your ebook's topic. Contrary to short-form content like articles and videos, the content of an ebook is predicated on trust and evidence.
A user who obtains (or requests access to) your ebook wants the full story, not just the bullet points. That includes all the content and testing you went through to produce the ebook.
Nope.
An ebook can‘t be edited once it’s been saved in one of the major file formats, so it's best to ensure you have an editable version saved in a program like Microsoft Word.
But why would you want your ebook to be uneditable? Making ebooks uneditable ensures the content remains unchanged — both the format and the information — as it's shared between multiple users.
You can edit ebooks if they're saved using an editable PDF, a feature that is specific to Adobe Acrobat. If you have the software, learning how to edit PDFs is simple with Acrobat's user-friendly interface.
You can read an ebook on many different devices: iPhone, Android smartphones, a Macbook, PC, and e-readers such as the Nook and Kindle.
The latter two devices are typically used to read novels in digital form. Nook and Kindle owners can store thousands of books (literally) on a single Nook or Kindle.
Ebooks are one of the top converting lead magnets a business can offer to its audience. Creating an ebook is all about delivering high value at a low price point to generate a high sales volume.
Ebooks work well for new businesses looking for brand awareness and established companies securing a spot as an industry thought leader.
So long as you and your team have outlined what success looks like for your ebook launch, you’ll reap the rewards of this stand-alone asset for months — or even years — to come.
So get started on your ebook using the free template available in the offer below.
Editor's note: This post was originally published in November 2018 and has been updated for comprehensiveness.
Hey, marketers. Raise your hand if you’ve been personally victimized by big, lofty marketing goals with little to no resources to execute them.
![Download Now: Free State of Marketing Report [Updated for 2024]](https://no-cache.hubspot.com/cta/default/53/db725f24-564c-483b-a28c-2d6ff9986516.png)
✋🏽*raises both hands* ✋🏽
In an ideal world, we’d have endless budgets and perfect conditions to work with.
Like stable SERPs and simple social media algorithms. Or consumers who laugh at all of our marketing jokes.
While that’s not (always) the case, it’s still possible to set goals that are both ambitious and attainable.
For inspiration, I’ve compiled a list of the highest-priority goals for marketers this year. And as an added bonus, I asked a few marketing pros here at HubSpot to share some of their top tips for goal setting.
Table of Contents
Earlier this year, we surveyed over 1,400 marketers to better understand the current state of marketing. These five goals bubbled to the surface for marketers who implemented winning strategies in 2023.
P.S. You’ll see some familiar faces like increased revenue and reaching new audiences, but the way marketers are thinking about these goals is changing with the times.

Everything we do as marketers ultimately rolls up into the bottom line of the business, so it’s no surprise that this continues to be a top priority.
As Amanda Sellers, manager of EN blog strategy at HubSpot, puts it, “Everything I do as a marketer should ultimately help the organization I work for to grow revenue.”
Here’s how you can make progress toward this goal: 75% of marketers believe personalized experiences drive sales and repeat business. So, building connections and developing relationships across the buyer’s journey is a must.
Sounds pretty standard, but the way we generate awareness and reach today is a lot different than in years past.
It’s wild out here, truly. People are discovering brands from their favorite influencers instead of more traditional methods like paid media. And brands are capitalizing on popular TikTok sounds and trends to appeal to younger audiences.
For example, why is Canva, an online design brand, talking about cucumber salad? Because TikTok user Logan (@logagm) recently went viral for his “sometimes, you need to eat an entire cucumber” recipes.
Here’s how you can make progress toward this goal: Keep a pulse on brand sentiment and visibility in search and on social media. Marketing is becoming more intelligent by the day, so it’s important to understand how people perceive you and learn about your products.
What’s that? Oh, nothing.
Just us marketers asking consumers to like/comment/subscribe … again.
In my opinion, the brands that tap into the latest trends in meaningful ways win the engagement olympics every time.
And sometimes that means not participating in every trend — especially if it’s not a good fit for your brand or your audience.
Either way, I know this is all easier said than done. That’s why keeping up with trends is one of the biggest challenges that marketers are facing this year.
Here’s how you can make progress toward this goal: The majority of marketers agree that website/blog/SEO, social media shopping, and short-form video are the channels with highest ROI right now. Consider focusing your efforts there.
Customers want their buying experiences to be seamless. That’s next to impossible if your marketing and sales teams aren’t on the same page.
Our survey shows that 70% of marketers report having “high quality leads,” but alignment with sales is still one of the biggest challenges they face.
From wasted marketing budgets to lost sales, the consequences of misalignment are huge. I can see why this is a priority for marketing teams this year.
Here’s how you can make progress toward this goal: The key to alignment is centralized data. Establish a single source of truth (read: CRM) that will allow your organization to share data and collaborate more effectively.
This one’s a big yes from me as a blogger. How can we get more views on our content while battling algorithm update (after algorithm update, after … ) in the SERP?
Well, on the HubSpot Blog Team, we knew we had no choice but to evolve.
You have to shift your strategy in order to continue gaining traffic in 2024 (and beyond). That’s a fact.
Here’s how you can make progress toward this goal: Do a regular analysis of how your brand is performing online. For example, you can use tools like AI Search Grader to understand how search AI models view your brand and to identify new traffic-driving plays to lock in on.
As a senior marketer and HubSpot’s Marketing Blog editor, I’d have to say the biggest tip I follow is making sure my goals allow me to meet my audience where they are.
In other words, it’s not all about me. Harsh reality, tbh.
If I’m setting a goal to build my presence on TikTok (because I love TikTok and all of my favorite brands are on TikTok), but most of my audience is on Instagram … What's the point?
Here are some more gems from my fellow marketers.
According to Karla Hesterberg, director of content marketing at HubSpot, you never have to fully start from scratch when setting your marketing goals. That’s because your goals should always reflect the overarching business strategy.
“Your organization has broader goals, and it‘s your job to figure out how to meaningfully connect your work to them,” Hesterberg says. “Use your organization’s broader goals as a starting place.”

She continues, “I start by looking at the biggest things the overall business is trying to solve for. Then, I see where my team‘s work fits into that picture and can have the most impact.
That makes it easier to look at the scope of what we’re working on and determine which things connect back to the business and which things are in the ‘nice to have’ category.”
“For setting team objectives, I like to use our biggest opportunities or headwinds as a starting point and go from there,” says Hesterberg.
“Ideally, everything we‘re working on — from big initiatives to smaller projects — should be connected back to those central things we’re solving for.”
We take those big opportunities and challenges and contextualize them into what we want to accomplish. At HubSpot, that materializes as our OGPs (objectives, goals, and plays).
Here’s an example from Sellers on how she uses OGPs to help guide the EN blog strategy at HubSpot:
“The ideal outcome is that every action or task clearly ladders up. This helps with prioritization, alignment, and so much more.”
Having a framework like this ensures that our priorities are aligned at every level of the organization.
“If you don’t know the ‘why’ behind a project you’re working on, you should pump the brakes and find out,” says Sellers.
Honestly, yeah. The biggest waste of marketing resources is doing things for no reason or with little value add. Stepping back to determine the ‘why’ helps you prioritize the actions and projects that will actually move the needle.

Sellers also notes the importance of data during the goal-setting process.
“Historical data is so important when estimating impact to set goals. If you don’t have historical data, seek out a case study. Either of these options are better than an uninformed guess.”
*mic drop*
This is one of my favorite tips because it tells me it’s okay to think big even when resources seem limited.
Basha Coleman, principal marketing manager at HubSpot, says, “Don‘t assume that something can’t be done. Challenge yourself to work through the obstacles to achieve as close to the ideal solution as possible.”
She continues, “Think about the problem and the ideal solution. Don‘t limit the solution to what’s possible today — think big, idealistic, and as if nothing is impossible. Then, once the solution is identified, figure out what you'd need to start, stop, or continue doing to get to that solution.
Those start, stop, and continue items are the detailed tactics you need to complete to achieve your goals.”
You’ve seen what other marketers’ goals look like this year, and you’ve heard from the pros on how to set your own. Let’s go — it’s time to tackle this thing we call marketing the right way.
Even if you’re brand new to brand voice, you already know exactly what it is. I promise.
Think of a few of your favorite brands, and consider why they’re favs. The product or service probably has a lot to do with it, but that’s only part of the story — a brand’s voice or personality is also a major factor in consumer loyalty.
![Free Kit: How to Build a Brand [Download Now]](https://no-cache.hubspot.com/cta/default/53/814dd420-0d49-40e0-b59c-f01066e186c1.png)
Think about the overall vibe of your favorite brand — is it friendly? Authoritative? Funny? That’s brand voice at work.
A well-defined brand voice can underscore your authority, play up your playfulness, or simply bring the directness and relatability that consumers look for in brands. A poorly defined voice, or one that changes frequently, undermines your brand and alienates customers or clients.
So let’s talk about how to start from scratch by looking at the elements that form a brand’s voice, plus 10 examples to inspire you.
Table of Contents
Your company’s voice should resonate with your audience and build trust with them. In the U.S. market, 90% of consumers say it’s important to trust the brands they buy or use.
Your brand voice shows your customers what to expect from your company’s content, services, and even customer service.
Brand voice is a little bit like a brand ambassador.
You’ll make certain assumptions about an unfamiliar brand if its ambassadors are clad in pink cowboy hats or in black three-piece suits. And you’ll know immediately whether you’re the target audience.
A brand’s voice is usually defined by four or so adjectives that immediately convey whether you’re a pink cowboy hat kind of brand (bubbly, playful, youthful, irreverent) or a black three-piece suit kind of brand (somber, formal, authoritative, exclusive).
Every bit of copy that your brand produces, whether it’s the About Us page on your website or the game on the back of a cereal box, should exude your brand’s distinct voice.
Put some thought into those four(ish) adjectives — we’ll show you how — because your brand voice has to translate across multiple platforms, and potentially even across countries and cultures.
It has an important internal function, too. A well-defined brand voice establishes a cohesive set of guidelines for your writers, marketers, content creators, and even graphic designers.
“Well-defined” is key here — you can throw a bunch of adjectives at the wall and hope something sticks, but without a solid explanation of what “clear, helpful, human, and kind” means, you’re in danger of muddied or inconsistent content.
HubSpot’s style guide, for instance, specifies that “we favor clarity above all. The clever and cute should never be at the expense of the clear.” It also gives multiple examples of what “clear,” “helpful,” “human,” and “kind” actually look like in our copy — a godsend for contractors and new hires.
Once you’ve nailed down your brand’s voice, you’ll find it easier to speak directly to your audience, attract new customers or users, and express your brand’s distinctiveness.
Bring your customers into the conversation so they feel connected to your brand. If a potential customer feels like you‘re talking directly to them, then you’re doing brand voice right.
Your own values, and your company’s mission, are critical as you embark on your brand voice journey.
It’s how HubSpot’s social media team translated the brand voice to LinkedIn — and got 84% more engagement in just six months.
I asked Emily Kearns, HubSpot’s Senior Manager, Social Media, to tell me more.
“So much of what is good about HubSpot is the culture and how we treat each other — just the overall vibe,” she says. “And there was a huge opportunity to take that into the social space.”
HubSpot’s brand voice is clear, helpful, human, and kind, and Kearns says that the social media team used that as its foundation. “Human and authentic — that’s just table stakes,” she says.
But there are different ways to express clarity, helpfulness, humanness, and kindness. Where our official product descriptions might require a little more gravitas, our Instagram account can translate the HubSpot culture into ~vibes~.
Since it began reinterpreting HubSpot’s corporate voice on social media in 2023, our HubSpot social team has earned a 2024 Webby nomination in the category of Social, B2B.
Lauren Naturale, the social media manager at Tides, a nonprofit that advances social justice, agrees that values are foundational to your brand voice. “You cannot take a values-based approach to marketing if your company is not actually living or enacting those values in any meaningful way.”

Naturale was also the first social media manager at Merriam-Webster, where she developed the dictionary’s social media presence from practically nothing — “they would post the word of the day to all the social channels once a day” — into a must-follow.
She says that Merriam-Webster didn’t have the kind of strategy deck that a big corporation would have sunk a lot of money into. What it did have was “very well articulated, shared values around how interesting language was, how important it was, and the fact that it is always changing.”
She sums those values up: “Words and language are not cultural capital. They're not the property of the elite. You can care about words and language and also be interested in the way that language is changing.”
From those values, she built what is now a well-known brand voice (never mind the 456% increase in Twitter audience she ushered in).
Your buyer persona should answer a few vital questions: Who are you trying to reach? What do they need from your brand? What can your brand offer them that no one else can?
Audience research can help you identify other types of content that are reliably appealing to your audience.
Tools like Google Analytics, or even a simple survey of your audience, can help you determine or confirm other sites that your readers frequent.
Ryan Shattuck, a digital media strategist who managed Dictionary.com’s social media for four years, tells me, “Knowing your audience is obvious, but I would take it a step further. Respect your audience.”

Dictionary.com’s buyer persona — or its target users — likely paints a picture of somebody who does the New York Times’ Connections word game as soon as the clock strikes midnight.
“I think it’s safe to assume that the people who follow a dictionary account on Instagram are also people who read books and do crossword puzzles,” as Shattuck puts it.
“And so I can make a joke about the Oxford comma. I can use a meme to share the etymology of a word.”
If your voice doesn't resonate with your audience, keep experimenting.
If you've already been publishing content for a few months or even years, take a look at your top-performing pieces to find out what’s resonating with your audience.
How would you describe your brand voice in that content? It might be assured and authoritative, with deep topical knowledge backed up by original research. It could be playful and irreverent, using memes and pop-culture references to connect with your audience.
Make a list of adjectives that describe your voice in your top-performing pieces, and highlight the common elements. From there, you can start to make strategic decisions about which elements should be replicated across your brand.
It’s also helpful to research the content formats that perform the best in your industry and geographic location. (Pro tip: It’s probably short-form video.)
If you get stuck trying to define your brand voice, try defining what you don’t want it to be.
For instance, perhaps your team brainstorms the following statements:
Our brand voice is not pretentious.
Our brand voice is not too serious.
Our brand voice is not grandiose.
Our brand voice is not unfriendly.
Once you've taken a look at these statements, you can begin forming the antithesis. For example, the above list might yield a brand voice that’s down to earth, funny, informal, and humble.
Forbes' BrandVoice is a media partnership program that helps brands reach and resonate with their audiences through expert consultancy and direct access to Forbes audiences.
Take a look at how Cole Haan worked with Forbes to create content related to style, arts, travel, social impact, and more. Each piece uses a unique voice to target the intended audience for that category.
If you're struggling to create a unique brand voice or you don’t know how to adapt your vision to the different areas of your business, consider using a program like BrandVoice or a third-party content marketing agency. This will help you take your brand’s game to the next level.
Once you‘ve created your brand voice, you’ll want to ensure your entire company can use that voice in all marketing materials.
If your company only uses internal writers, consider creating a training course for new staff so they can learn how to write for your brand. If you work with external guest contributors, you'll want to make public-facing guidelines to ensure all your writing captures the appropriate voice.
Use a table to formalize your process. Write down three to five core characteristics you‘ve determined are important for your brand’s voice and how your writers can use these traits in their writing.
This step is important for translating ideas into action — how can your writers create a “humble, authentic voice” in their writing?
Give some examples or tactical advice to make it easy for your brand voice to come through in all of your content, regardless of byline.
To explore what a template could look like in practice, take a look at the brand voice template below.
Although social media is just one component of a brand’s voice, it’s often the most public and the most prolific. So I asked the social media pros I talked to for this article for their top tips on crafting a brand voice.
Kearns says to ask yourself, “Would a real person say this? Is there something in here that is relatable, and that someone can connect to?”
“It’s not a dictionary sitting at a computer,” Shattuck tells me. “It’s a real person.”

It bears repeating: Don’t just know your audience. Respect them.
You won’t win authenticity points if you’re trying to mimic another brand’s culture. Conversely, if you have a great company culture — channel it and celebrate it in your social accounts.

This doesn’t mean you should meme-ify everything — but it does mean that memes are fair game if you stay on-brand.
Shattuck said that at Dictionary.com, he always asked himself, “Is this post educational? Is it entertaining?” If he couldn’t answer “yes” to both,, he knew the post wouldn’t do well because it wasn’t adding any value.
Before you start crafting your unique voice, turn to role models who have perfected their tone. Here are 10 examples to get you started.
You can see other distinct brand voices in the video below.
A year ago, you’d be more likely to find a product description on HubSpot’s social media than a meme about brat summer.
But then the social team began experimenting with a more Gen Z and millennial tone of voice.
It’s still a work in progress, Kearns tells me, and every month the team takes a close look at what performs well and what doesn’t. “We’re figuring out how we talk about the HubSpot product in a way that is interesting and adds value and is culturally relevant.”
Cultural relevance and timeliness are major considerations for the social team. Kearns says she’s always asking herself how they can connect the HubSpot product to “something hyper relevant, or something that managers are going through right now.”
“If we just talk about our product in a vacuum, even with our fun brand voice layered on top of it, it might fall flat.”
Kearns says that although your brand voice should be identifiable and consistent, “it should have a little bit of flexibility” so you can adapt it to different platforms.
Duo the owl is the face that launched a thousand memes.

The feathery embodiment of the Duolingo brand voice, Duo is “expressive, playful, embracing, and worldly.” That’s according to Duolingo’s brand guide, which also notes that Duo is both “persistent” and “slightly awkward.”
Duolingo’s defined brand voice includes a “brand personality” section that describes who Duolingo would be as a celebrity (Trevor Noah), a vehicle (a Vespa), and a song (Queen’s “Don’t Stop Me Now”).
Duolingo’s Senior Global Social Media Manager, Zaria Parvez, told Contagious in a 2023 interview, “Dream big, but iterate small.”
If you’ve spent any time on the clock app, you’re familiar with Duo’s occasionally unhinged antics — which all started with Parvez asking to take over Duolingo’s then-dormant TikTok account.
A woman-owned and women-focused athleticwear company, Title Nine combines a friendly “aww shucks” vibe with a triumphant fist pump.
Freelance copywriter Robyn Gunn writes on her website that T9 brought her in to write copy that “reinforce[s] the brand's badass, ballsy DNA that differentiates it from ‘softer’ competitors in the category.”
Title Nine’s “Who We Are” page encapsulates this voice perfectly: It’s written in clear, simple language that underscores the brand’s love of the outdoors and its enduring support of women.

This graphic from its online store brings out a more playful side of Title Nine’s brand voice, evident in the bright colors and patterns, the casual typeface that “Trail Shop” uses, and the invitation to “track in some dirt.”

Title Nine doesn’t have a publicly accessible brand guide, but I’d describe its voice as friendly, powerful, playful, and direct.
True story: A customer service rep at Capital One once had to read me a list of recent credit card charges so I could confirm whether they were mine or a fraud.
Poor dude was clearly mortified at having to read “Who Gives a Crap” out loud, saying, “This is the company name, I am just reading this off a list, it is not me saying this.”
So he’s maybe not WGaC’s target audience, which is considerably more relaxed on the topic of toilet paper.
WGaC’s “About Us” page tells a tale of toilet jokes and changing the world. Successfully combining something so ridiculous with a very real and very serious global problem is no easy task, but the ability to walk that line nicely sums up the brand’s voice.

“Making a difference in the world” can be a hard value to channel in a brand voice, since the brand (and the people behind it) have to demonstrably live up to the promise of effecting change.
Who Gives a Crap gives a lot of specific details that indicate that lack of access to a toilet is an issue that the founders genuinely care about. The product descriptions do the same. Take this one for a special poetry edition TP (I am not making this up):

“Create an ode in the commode” is pretty hard to beat for terrible poetry. The product description ends with, “And since we donate 50% of profits, you’re not just building ballads, you’re doing good, too!” — a reminder of the brand’s promise in a goofy, casual tone.
WGaC’s brand voice might be described as cheeky (pun absolutely intended), lighthearted but rooted in a cause that’s deeply serious, informal, and conversational.
Poppi soda blares its voice from the moment you land on its eye-searing bright pink and yellow website. Known for having a Gen Z-friendly voice, DrinkPoppi.com looks more like a neon Instagram feed than a website for flavored sparkling water.
Its “About Us” page brags about “new besties” like Billie Eilish and Post Malone, and even its newsletter sign-up says, “Let’s be friends.”

The creative agency responsible for Poppi’s branding describes “the world of Poppi” as “quirky, nostalgic, and vibrant.” I’d add to that “informal” or “casual.”
Whether you‘re watching a TV ad, driving past a billboard, or scrolling Spotify’s social accounts, you'll see a consistent voice. The brand’s tone is consistently funny, edgy, direct, and concise.
For instance, take a look at this video, which is part of a Spotify advertisement campaign from 2019, “Let the Song Play.”
As you can see, Spotify doesn‘t take itself too seriously. The ad makes fun of people who get so emotionally invested in a song that they won’t resume their plans until the song ends.
You‘ll see a similar brand voice play out on Spotify’s social channels. On its Twitter account, for instance, the brand often posts tweets related to new music in a casual, friendly manner.

If Spotify‘s brand were a person, she would be witty, sarcastic, and up-to-date on today’s pop culture references. You‘ll see that personality play out across all of Spotify’s communication channels.
When exploring Mailchimp's brand voice, turn to the company’s Content Style Guide.
In the Style Guide, Mailchimp writes, “We want to educate people without patronizing or confusing them. Using offbeat humor and a conversational voice, we play with language to bring joy to their work.… We don't take ourselves too seriously.”

Even in the Style Guide, you can hear Mailchimp's brand voice shine through. The company consistently achieves a conversational, direct, playful voice in all its content.
For instance, in this blog post, the brand writes about various “highly unscientific personas”, including the fainting goat. The email service provider describes this persona by saying, "when startled, its muscles stiffen up and it falls right over.”
They then link out to this hilarious video.
As you can see from this example, you can evoke brand voice in subtle yet effective ways. If the blogger had instead written, “If a goat is scared, it becomes nervous. The animal's muscles contract and it faints as a result”, the writer would've evoked a voice more aligned with a scientific journal than Mailchimp.

The About Us page for Rihanna's beauty company reads, "Before she was BadGalRiRi: music, fashion and beauty icon, Robyn Rihanna Fenty was a little girl in Barbados transfixed by her mother’s lipstick.
The first time she experienced makeup for herself, she never looked back. Makeup became her weapon of choice for self-expression."
It‘s clear, even just through this short snippet, that Fenty Beauty’s voice is bold, direct, and poetic. Language like “transfixed by her mother's lipstick” and “her weapon of choice for self-expression” reinforce this voice. However, the tone is also undeniably casual — the way you might talk to your best friend.

You'll see this voice play out across all Fenty social channels, including this YouTube video description:

The first statement, “The blur is REAL!” — along with phrases like “No-makeup makeup look”, and the shortening of the word “combination” — all evoke a sense of friendliness.
The brand voice matches its target audience perfectly: youthful millennials and Gen-Zers who care about makeup as an opportunity for authentic expression.
Clare, an online paint site, has created a mature, spirited, and cheerful brand voice to evoke a breezy, girl-next-door feel to their branded content.
For instance, consider the title of one of their recent blog posts, “6 Stylish Rooms on Instagram That Make a Strong Case For Pink Walls.”
The post uses phrases like “millennial pink”, “pink walls have obvious staying power”, and “designers and DIY enthusiasts alike have embraced the playful shade with open arms.”
The brand’s language is friendly, chic, and professional, relating to its readers while simultaneously demonstrating the brand's home decor expertise.

This voice is clear across channels. Take a look at this Instagram post, for instance.

“When baby's first bedroom is on your grown-up vision board” makes the brand feel like a good-natured older (and more fashionable) sister. The reference to the COO‘s baby boy is another opportunity to make authentic connections with Clare’s followers.
Skittles often posts hilarious social media posts that strip away any promotional, phony language so you're left with something much more real.
Take this tweet, which reads: “Vote Skittles for Best Brand on Twitter so we can keep our jobs!”

The brand voice, which is clever and original, does a good job of making prospects and customers feel like they‘re chatting with a mischievous employee behind-the-scenes. The “I can’t believe they just posted that” factor keeps the content fresh and exciting.
Plus, the brand does a good job making pop culture references, like this Mean Girls reference, to highlight the brand's youthfulness.

Skittles’ use of absurdity and humor plays into their iconic commercials. In one 2022 ad, the company pokes fun at targeted ads.
While two people watch a youtube video, they comment that their ads are so targeted that it feels as if Skittles is listening in on their conversation. Then, a man with a boom mike drops through the floor.
Skittles expertly keeps the same tone across media, showing their brand’s commitment to their voice.

Looking to make a template for your own brand voice? HubSpot is here to help! You can fill out this blank Google Sheet template with your own brand voice characteristics.
Fill out the remaining cells, and send them along to your team.
It‘s important to note, you’ll be prompted to make a Google Drive copy of the template, which isn't possible without a Google account.
And there you have it! You're well on your way toward building a strong, compelling brand voice for your own business.
Logo, color palette, and font are all important aspects of branding. But beyond that, a good brand starts with good content. And good content can’t exist without a strong voice.
Editor's Note: This post was originally published in April 2021 and has been updated for comprehensiveness.
Influencer marketing is one of the most powerful and most effective forms of digital marketing available today.
With a market value of over $21 billion dollars, over 3X the value since 2019, influencer marketing continues to grow as it provides a level playing field for both big and small brands to compete for the user’s attention.
According to a survey by Matter Communications, 81% of people claimed they’ve made purchases based on recommendations from influencers, friends, and family.
Unlike other traditional forms of marketing, influencer marketing evolves with new trends, strategies, and concepts. Each year, you’ll see something new and different that brings better results for your campaigns.
In this post, we take a deep dive into some of these newest influencer marketing trends to see how you can leverage them to get better returns on investment (ROI). These methods might not be as effective next year so it’s better to take advantage of them right now!
It’s no secret that most influencers on social media platforms now utilize some form of AI in their content creation process to make everything look perfect, whether it’s writing better captions, generating AI images, or even enhancing their everyday photos with a little bit of AI editing.
However, real influencers will have to do much more than that to stay relevant as they now have new competition from an entirely new group of influencers that are even more seemingly perfect.

Miquela is just one of many AI influencers currently taking over social media platforms. With more than 2.5 million followers, this AI influencer is not even the biggest account of its kind.
While it’s a new concept, most of these AI influencer accounts are already creating sponsored content and brands do not hesitate to get their products reviewed by an AI personality.
The same trend can be seen across all social media platforms from VTubers on YouTube to AI models on Instagram and TikTok. Facebook is also working on a new AI personality model that allows creators to make AI representations of themselves.
At this rapid rate of advancements in AI, it’s difficult to predict how big of an impact it will have on social media.
60-second videos are still the “king” of social media marketing and TikTok is still in the lead on that front. Especially when it comes to targeting Gen-Z audiences, TikTok is the go-to platform for marketing campaigns.

(Source: Statista)
Even though TikTok ranks at the 5th position in terms of the number of monthly active users, it is the most popular platform among brands for influencer marketing. 66% of brands use TikTok for their influencer marketing campaigns, with only 47% using Instagram, 33% YouTube, and 28% Facebook.
Even though Instagram, YouTube, and Facebook have also implemented their own versions of short-form content formats, TikTok still dominates the Gen-Z market with its trend-making content creation system.
Gone are the days of looking up to celebrities for fashion and lifestyle advice. Now, younger audiences, especially Gen-Zers, turn to smaller influencers for fashion advice.
According to another study by Matter Communications, 60% to 70% of consumers prefer advice from small influencers who are experts in their field while only 17% to 22% listen to popular celebrities.

(Source: TikTok)
In fact, the smaller the follower count the better. Engagement rates were much higher for influencers with 1,000 to 10,000 followers (nano-influencers) than influencers with 10,000 to 50,000 followers (micro-influencers).
The biggest reason for this is authenticity. Smaller influencers put more effort and energy into creating more original content and having closer relationships with their audience.
Going viral on a social media platform is still a shot in the dark. With changing algorithms and audience interests, no one can predict what the next meme or trending hashtag could be. While big brands are still making bets on these global trends, smaller brands and businesses are now slowly turning towards niche trends.

(Source: Google Trends)
Local and niche trends are much easier to target than taking a shot at a trending global hashtag or an event. Small brands have a much higher chance of going viral on a small scale with niche trends, making it easier to even target specific local audiences.
Working with small, local influencers is the key to success in niche trends. Finding micro and nano influencers who specialize in a niche market will make it much easier to target your ideal audience and create trendy content that goes viral.
Influencer marketing is a marathon, not a sprint. You can’t convince your target audience to buy your product over a more established, competing product with just a single TikTok video. It takes long-term campaigns and partnerships to achieve that goal.
This is why many businesses now set aside marketing budgets specifically for content and influencer marketing. According to a HubSpot report, 50% of marketers plan on increasing their content marketing budgets this year.

(Source: YouTube)
As a result, most brands are now establishing long-term partnerships with influencers. Some even go as far as making ambassador-like partnerships that allows influencers to promote products exclusively from a single brand.
It’s an effective way to win over an audience rather than one-time sponsorships from an influencer who promotes products from different brands without consistency.
Leveraging user-generated content (UGC) in social media marketing is nothing new. It’s been an effective strategy for many years. However, a new trend in UGC offers a more effective, multi-layered approach that brings much higher benefits.
It involves partnering with influencers to encourage their audience to create content about a product. Usually, a giveaway or some sort of a prize is necessary for this process, sometimes even asking the audience to involve their friends as a part of the process.
This type of marketing greatly benefits the brand as it generates buzz around the product and the brand on multiple levels.

Livestream shopping plays a huge role in this process as well. Platforms like Whatnot are allowing content creators and influencers to easily create shopping experiences and involve their audiences in the process.
Sending influencers free product samples, also known as influencer seeding, is still an effective strategy used in social media marketing. While it’s not as engaging as sponsored partnerships, this strategy allows much smaller businesses without big marketing budgets to create a presence for their brand.

(Source: TikTok)
A better way to approach this method is to create personalized packages that show the influencers how much you appreciate them and what they are doing. Including several additional free product samples for a giveaway will also get their attention.
As you can see, there are many different opportunities and ways to approach influencer marketing. Big or small, every brand can use these influencer trends to create awareness and reach new audiences. Be on the lookout for the latest trends and leverage them to beat the competition.
Welcome to Press This, a podcast that delivers valuable insights and actionable tips for navigating the ever-evolving world of WordPress. In this episode, host Brian Gardner and Automattic Product Lead Rich Tabor, unpack WordPress’s design potential, highlighting its evolving features and the power it offers website builders. Powered by RedCircle Brian Gardner: Hey everybody, welcome…
The post Press This: WordPress as a Design Tool—Empowering Users to Create appeared first on WP Engine.

Hi All,
I have a dedicated server with a company with poor technical support.
Can anyone suggest a server company?
Thanks,
Jim
Experimentation is central to making evidence-based decisions, and this is where A/B testing has always shined.

But with the advent of AI, we now have tools for AI A/B testing, making experimentation smarter, faster, and infinitely more manageable.
AI A/B testing gets you real-time reports and lets you test multiple hypotheses in a few clicks. To explore the magic that AI brings to A/B testing, I spoke with CRO experts who shared their unique insights.
On top of that, I’ll also take you through the benefits, limitations, and best practices for integrating AI into your A/B testing process.
In this article:

A/B testing is a research method used to analyze landing pages, user interfaces, or other marketing prototypes to determine the best version before full rollout.
You split your audience into two groups or more. One sees the control (A; original version), while the other interacts with the variant (B; modified version). Tracking interactions, analyzing results, and refining content follows.
With AI, you automate much of this heavy lifting. You get clear, actionable insights without the usual headaches because AI takes the guesswork out of the following:

Artificial intelligence can help you sidestep the usual pitfalls of human-led A/B testing. Here’s how AI and traditional methods stack up against each other.

With AI handling everything from setup to analysis, you can ditch the old-school grind for clearer, faster insights. Let’s explore how these efficiencies benefit your A/B testing strategy and set you up for success.
AI streamlines your workflow and generates more accurate insights faster. Here are the top benefits that make AI indispensable for A/B testing.
Humans take days or even weeks to gather and analyze data. Meanwhile, AI processes heaps of variables — think hundreds of web pages or app feature versions — at lightning speed.
Jon MacDonald, CEO of The Good, has reaped the benefits of this well-oiled efficiency:
“Since we build rapid prototypes quite often, using AI has helped us code A/B tests faster and without bugs. We’re able to produce rapid prototypes quickly, increasing our testing volume and rapidly validating hypotheses.”
AI distinguishes subtle correlations within large datasets, helping you prioritize and evaluate the right variants. Thus, you get results faster and make smarter decisions without getting bogged down by lengthy analysis.
Manual error and cognitive biases can skew the results and interpretation of A/B tests. This study on advertising A/B testing demonstrates how AI improves accuracy in these four dimensions:
1. Targeting. Machine learning lets you create detailed audience segments. Some AI tools even allow for real-time, targeted adjustments based on live data.
2. Personalization. Using Recommendation System and Virtual Assistant technology, AI tailors content to individual preferences. Each A/B test variation only shows up for users with similar interests.
3. Content creation. Generative AI and Natural Language Processing (NLP) enhance ad content quality and diversity. You can leverage it to generate consistent, high-quality ad variations.
4. Ad optimization. Deep Learning and Reinforcement Learning adjust advertising strategies dynamically. It optimizes factors like ad placement, timing, and frequency based on live performance data.
AI improves accuracy at every stage of A/B testing. It fine-tunes your test parameters, ensures optimal testing for all variants, and provides deeper insights into user interactions.
AI doesn’t stop at analyzing past data. It also predicts future trends to forecast how users respond to changes and make proactive adjustments.
Advanced tools such as Kameleoon use historical data and predictive analytics to anticipate visitor behavior. Kameleoon achieves this with its Kameleoon Conversion Score (KCS™).
If KCS™ predicts visitors browsing high-end products are more likely to convert with Layout A, it ensures they see this layout. Those who are more interested in budget-friendly options may often encounter Layout B.
Your A/B tests aren’t static with AI. You’re not waiting to tweak your tests for next time. Instead, you’re optimizing and delivering the best possible experience instantaneously.
Intelligent systems track each visitor’s browsing patterns, purchase history, and preferences. AI leverages this data to tailor variations specifically for different user segments, making A/B tests more relevant and accurate.
Ashley Furniture achieved these outcomes with AB Tasty’s AI-powered platform. According to Matt Sparks, the eCommerce Optimization Manager, their UX teams used it to better understand customer experiences, solve problems, and design new functionalities.
AB Tasty helped cut out Ashley Furniture’s redundant checkout procedures. They tested a variation, prompting shoppers to enter their delivery information right after logging in. This tweak increased conversion rates by 15% and cut bounce rates by 4%.
AI-optimized test results drive tangible benefits — no doubt — but they’re not a cure-all. There are inherent limitations to consider, and we’ll go over them in the next section.
AI can’t solve every problem or guarantee 100% perfect results. Recognizing the human-focused aspects it doesn’t cover allows you to be more prudent in your testing and avoid over-reliance.
AI setup involves using advanced algorithms, specialized software, and a skilled technical team. This complexity is challenging for smaller organizations or those without a dedicated data science team.
Start with no-code platforms like Userpilot and VWO if coding isn’t your strong suit. Or, opt for out-of-the-box solutions with multi-channel support like HubSpot if you test across various platforms.
Managing and optimizing A/B tests is much easier with the right tool. So, take the time to assess your needs and select a solution that aligns with your goals.
A 2024 report by Deep Instinct shows that 97% of organizations worry they’ll suffer from AI-generated zero-day attacks.
A zero-day attack exploits a software or hardware vulnerability developers don’t yet know about, leaving no immediate fix.
If such attacks compromise your testing tools, hackers may gain unauthorized access to sensitive data. They may manipulate test results to mislead your strategy or, worse, steal users’ personal information.
Set up real-time monitoring to catch suspicious activities and implement a data breach response plan. Don’t forget to train your team on data security best practices to keep everyone vigilant.
AI has no empathy and intuitive understanding. It can tell you what’s happening, but it can’t always explain why.
Tracy Laranjo, a CRO Strategist quoted in this Convert piece on AI, mentioned that AI doesn't comprehend emotions and context as humans do. She advised:
“The key is to use AI responsibly; I use it to process data more efficiently, automate repetitive tasks, and be a more concise communicator. I embrace it for the doing aspects of my job but never for the thinking aspects.”
Pro tip: Combine A/B testing with other data analysis methods or run multiple tests to gather more insights if need be. However, continue applying sound judgment when interpreting results and making decisions.
Below are seven ways AI can transform your A/B testing efforts.
AI-powered A/B testing platforms can process extensive real-time data insights. They identify complex trends, patterns, and other variables, facilitating more precise tests.
One test design that exemplifies AI real-time analysis is Multi-Armed Bandit (MAB) algorithms. It allocates traffic to better-performing variations up-to-the-minute—think ad placement optimization and content recommendation.
MAB allocates ad impressions in real-time, prioritizing ads that show better performance as user data accumulates. It can also adjust content recommendations based on recent viewer interactions.
Amma, a pregnancy tracker app, used nGrow’s MAB algorithm to reduce user turnover. MAB automated and optimized push notifications in real-time, increasing retention by 12% across iOS and Android users.
The team also gained a better understanding of their user base. They can now better plan for new regions and optimize user engagement.
AI predictions prevent you from having misguided hypotheses and testing ineffective variants.
Alun Lucas, Zuko’s analytics managing director, told me how he does it. He used AI tools like ChatGPT to analyze Zuko’s form analytics data and identify the answers to the following questions:
Predictive analytics identify issues in your data forms or user flows before they become major headaches.
AI lets you break down your audience into different segments based on behavior, demographics, and preferences.
For instance, if you plan to recommend fashion products, you can tailor your A/B tests to different customer segments. Think the patrons, bargain hunters, and eco-conscious shoppers.
Ellie Hughes, consulting head at Eclipse Group, found this approach to be valuable for validating prototypes before implementing them on a larger scale.
She tested different algorithms like personalized search ranking and photo-based recommendations. The outcome? It enhanced her clients’ experience and made it a compelling case for further AI investment.
As Hughes notes, “The value wasn’t in the production of an algorithm as an output. It was about the clever framing of an experiment to prove the monetary value of using AI within experiments.”
A/B testing can scale from only A and B to a full A-Z spectrum of possibilities. In her talk, Ellie Hughes debunked the myth that A/B testing is limited to comparing two versions, saying:
“A/B testing can involve multiple variants and more complex experimental designs, such as multivariate testing [...] to optimize various elements simultaneously.”
Here are some real-world instances where you can implement multivariate testing.
Simultaneous evaluation of multiple variables offers a more nuanced approach to experimentation. It provides richer insights and better overall results than basic A/B testing.
Ever had A/B test results that seemed too good (or bad) to be true?
That happens.
Good thing is, AI tools can monitor test data 24/7 and flag any unexpected deviations from the norm. Whether it is a system glitch or a shift in user behavior, AI tools can help you diagnose these issues.
Valentin Radu, Omniconvert CEO, explained how his team used AI to understand what frustrated his clients’ customers.
They monitored NPS survey responses pre- and post-delivery. The analysis allowed his team to run more effective tests and make targeted improvements.
Radu said, “You can’t come up with strong hypotheses for your A/B tests without blending qualitative data in your insights. So, we are already using NLP to crunch the data and identify the main issues by analyzing customer feedback or survey responses.”
To formulate stronger hypotheses, cross-check quantitative data with qualitative insights. It’ll help ensure the observed anomalies aren’t due to data errors or temporary glitches.
AI A/B testing allows for precise measurement of how different factors (e.g., algorithm changes, user interface elements, or content) impact search engine results.
Ronny Kohavi, a world-leading AI A/B testing expert, has extensively mastered online controlled experiments. His work shows how AI and machine learning have been employed for years to fine-tune search results rankings.
These rankings span major websites like Airbnb, Amazon, Facebook, and Netflix.
He informed me that Airbnb’s relevance team delivered over 6% improvements in booking conversions. That’s after 20 successful product changes out of over 250 A/B test ideas.
Kahavi says that “it's important to notice not only the positive increase to conversion or revenue but also the fact that 230 out of 250 ideas — that is, 92% — failed to deliver on ideas we thought would be useful and implemented them.”
You tested a bold red “Buy Now” button and saw a high conversion rate last year.
Now, you notice its performance slipping. Without continuous optimization, you might not discover that users now respond better to interactive elements like hover effects or animated buttons.
Of course, these are all hypothetical scenarios, but the bottom line is clear: Continuous AI monitoring can keep your A/B tests relevant and effective.
As described in this case study, [24]7.ai continuously refined its customer service strategies through A/B testing. They tested AI-driven chat solution versions to see which improved customer interactions and resolved inquiries better.
The results? A 35% containment rate, an 8.9% bot conversion rate, and over $1.3 million saved from enhanced efficiency.
A/B test results plateau or even decline as user preferences evolve. Adjust your test parameters to keep up with changing trends and drive ongoing improvements.
AI is here. Companies and industry experts who’ve embraced AI-driven A/B testing have found it nothing short of transformative.
To get started with AI-focused A/B testing, I highly recommend checking out HubSpot’s complete A/B testing kit. It offers a comprehensive checklist to help you run the perfect split test, from initial planning to final analysis.
Now, experience the future of testing.
I remember first starting my business. At that time, I knew the basics of marketing and a little about sales.
![Download Now: 10 Competitive Analysis Templates [Free Templates]](https://no-cache.hubspot.com/cta/default/53/b3ec18aa-f4b2-45e9-851f-6d359263e671.png)
What I didn’t know was the depth of my competitive business landscape. The outcome of this knowledge gap wasn’t pretty, as many competitors quickly surpassed me.
Turns out I am not alone — because if you’re reading this post, you want to beat your competition. One tactical way to do this is by creating a competitive matrix.
How?
You run a competitive analysis and document your findings using a competitive analysis template.
A competitive matrix helps to identify competitors and lay out their products, sales, and marketing strategies in a visual format. When I did this, I learned about my market position, how to differentiate myself, and how to improve my processes so they outshined competitors.
Below, I’ll walk you through what a competitive matrix is and then review some templates and examples.
In this article:
Before I dive into the world of competitive matrices, it's important to understand that there are different types you can use.
![competitive matrix template]](https://knowledge.hubspot.com/hubfs/competitive-matrix-2-20240828-2566056.webp)
The competitive advantage matrix is over a decade old, but it’s still relevant today. With this matrix, I can analyze my company’s competitive advantage by assessing based on volume production and differentiation.
This matrix has two axes — vertical and horizontal. The vertical axis evaluates the number of opportunities available for achieving a competitive advantage, while the horizontal axis measures the potential size of the competitive advantage.
Using this information, the competitive advantage matrix is segmented into four quadrants:
Below is how different businesses you know might fit into the four quadrants of the competitive advantage matrix.

Stalemate (Few advantages with small potential)
A small and local retail store that sell everyday products like groceries might be in this category.
Since this store operates in a highly competitive market and sells similar products to others, there is little differentiation and that reduces the competitive advantage.
Growth potential is also limited because of the low profit margin of the business.
Volume (Few advantages with great potential)
Walmart economies of scale and vast distribution network are competitive advantages with huge profit potential. The ability to offer low prices also attracts a high volume of customers.
Fragmented (Many advantages with small potential)
Etsy is a niched online marketplace for handmade, vintage, and unique goods.
Its diverse product range, large number of independent sellers, and thriving community of users give it a competitive edge.
However, this advantage has limited potential since products appeal to specific and smaller customer segments rather than a mass market.
Specialized (Many advantages with great potential)
Apple’s innovative products, user experience, strong brand loyalty, and ecosystem of superior devices and services give it enormous competitive advantages.
These advantages have significant potential, allowing Apple to command premium prices and maintain a strong market share across multiple product categories, from smartphones to laptops and wearables.
See that?
With the competitive advantage matrix, I can quickly determine if I am operating in a saturated market and assess my profit potential.

A SWOT analysis is one of my go-to techniques for assessing how my business compares to competitors. The acronym stands for strengths, weaknesses, opportunities, and threats. I like the SWOT framework because it is simple but incredibly powerful when you dig into it.
SWOT lets me evaluate the internal and external factors that can affect the current and future potential of my business. By identifying these elements, I create a space to capitalize on my strengths, improve my weaknesses, take advantage of opportunities, and eliminate threats.
For example, if my company has an excellent profit record, this is a strength. If my company offers a small variety of products to its customers, this could be a weakness.
But how do I determine what information goes into my SWOT analysis?
Below are some questions I consider.
The following questions help me discover where my company excels. This information will help me attract and draw in new customers as well as maintain existing ones.
It’s difficult for my business or any organization to improve if there’s no system to determine its weaknesses. To remain competitive, I must discover the cracks in my business and find a way around them.
Monitoring my competition is necessary; however, watching for opportunities will give my business a competitive advantage. These opportunities can come from both monitoring my competitors and industry trends.
Threats can come up within a business at any time. These can be internal or external factors that might harm my company and its operations. Identifying these threats will help my business run efficiently.
As shown by these questions, a SWOT analysis matrix can help your company identify elements that are often overlooked.

A competitive profile matrix is a tool that any company can use to compare its strengths and weaknesses to industry competitors. To use this matrix, I’ll need four elements: critical success factor, weight, rating, and score.
Critical success factors are areas that will determine my success. Examples are brand reputation, range of products, and customer retention.
After selecting these factors, I will assign a weight to each one. The weight measures the importance of each factor, ranging from 0.0 (low importance) to 1.0 (high importance). I recommend that you avoid assigning a weight of 0.3 or more, as most industries thrive based on many factors.
This high value can decrease the number of factors you’re able to list in your matrix. When assigning weight, I need to ensure the sum of all weights equals 1.0.
The third step is to rate my company and its competitors from 1 to 4 in each critical success factor where:
The last step is to calculate the score.
First, I’ll multiply the weight of each critical success factor by the rating. After this step, I’ll add each company’s score to get the total score.
This, when compared to my competitors, will show if I’m behind the curve, ahead of the curve, or on par with competitors in my industry.

A sales matrix is a tool for gauging the urgency and viability of sales opportunities. It evaluates potential customers’ interest in my business against their fit for my services.

For instance, when I send out cold emails to potential customers, I am not 100% concerned about the open rate. What I am concerned with is the reply rate. Of course, if anyone on my list doesn’t respond, I follow up.
After getting a response, I want my prospect to fall into any of these categories within the sales matrix.

With this simple matrix, I get enormous benefits, such as:
The best part? I can now use my energy and resources to pursue prospects who are a good fit and interested, making selling easier.
The product feature and benefits matrix evaluates how my offer matches customer needs. It’s weighted by its importance versus its perceived distinction or advantage. When using this matrix, features will fall into the following categories:

If I am building a product, this information tells me what features to keep, what features to get rid of, and where I might save money.
Consider an iPad. Say Apple spends much of the manufacturing budget to produce a high-quality camera, only to find out that most users don’t even use it.
The camera has a high perceived distinction, yet it’s of low importance to iPad users. This information would tell Apple that they overinvested in this feature and could potentially reduce it to save costs in the future.
The price matrix is useful for deciding any business' pricing strategy. Often, this is based on its product innovativeness and the availability of competitors.
This matrix is like the competitive advantage matrix because companies can only price their product based on the edge they have.
In the price matrix, there are four quadrants:
Skimming. Skimming is best for new and innovative products with little to no competition, where customers will pay a premium. Apple uses this strategy when it launches new products like the iPhone at a high price point.
When Apple makes a more recent product, it lowers the price of the previous product to create a demand for its new product.
I found that HubSpot once used this strategy when it had far less competition in the CRM space. However, HubSpot has now slightly shifted to include the Economy model.
Premium. This works for luxury products where unique benefits or exclusivity appealing to customers. An excellent example is Rolex.
Economy. Ideal for price-sensitive customers. This also works for markets with low production costs and little differentiation. Think Walmart.
Penetration. Used to enter a competitive market with the aim of gaining market share quickly. This is popular in the software industry where I operate.
Now, when creating a pricing matrix, I’d recommend you go from:
To improve on it further, check what your competitors did and see if you can do the same or better.
Note: Unlike the other matrices on this list, a price matrix is a customer-facing competitive matrix type. You are creating it for your potential customer. So after deciding on your pricing strategy, go further with pricing tiers.

It’s common to have two or three levels. Once you’ve named them, create a short description. Depending on the industry, you might find it easier to include a few features associated with the category.
Once you do, list the prices. If not, create a call-to-action (CTA) for your potential customer to contact you for a quote.
Remember, as you build your tiers, the price will increase with each one. To stay on par with the perceived value, offer additional features or benefits to justify the cost.
Competitive matrices are great because I can use them to compare any characteristics of my company with those of a competitor.
Sometimes these matrices will be more visual (like a competitive analysis graph), and sometimes it's just an Excel document with the information listed in columns.
The goal of the competitive matrix is to see at a glance the competitive landscape and my position in the marketplace. This will help me see gaps and hone in on my unique value proposition.
A competitive matrix can also be a great way to brainstorm new service ideas or, if you sell a product, get new ideas for tools or features you hadn't considered before.
You might even come out of it with ideas for improving your content marketing strategy. You can use a competitive matrix for a lot of reasons.
Then, after figuring out what to do with the information, document your ideas, develop KPIs, and regularly conduct this analysis to stay current with your strategy.
The internet has democratized access to information. As such, you can easily find information about your competitors if you look at the right places online.
Here are some places I check when researching my competitors:
The process will be different for every business. But generally, I find these online and physical outlets will be helpful for gleaning information about your competitors:
During my time at a B2B content marketing agency, we always presented data to clients. It was always “here is what your competitors are doing” and “here is what we recommend.”
To do this, we always included set elements to present our data so it told a story that stuck:
Now that you know what a competitive matrix is and how to use one, let's review some templates you can use for your own strategy.
Ultimately, a competitive matrix is an industry-analysis tool with many benefits. To make the process even easier, use the following competitive matrix templates.
One type of competitive matrix you can do is a simple comparison of features. You can use this information to plot where your company is compared to competitors.
The features could be something like price or customization potential. Then, you'd place the logos of each company (including yours) on the competitive analysis graph, depending on how well a company executes a certain feature.
The point of this matrix is to visualize who does what better, so you can see what you have to work on and how to differentiate yourself against the competition.

As a content marketer, this is my favorite template. With this, I can compare social media followers, blog strategy, email strategy, SEO, etc.
This will help me decide where I need to focus my content strategy. If you download this template, it also includes a graph and more strategies to analyze.

A basic competitive matrix is the SWOT analysis. Conducting a SWOT analysis will help you identify areas where you could improve.
You should conduct a SWOT analysis for yourself and your competition. Knowing your competition's weaknesses will help your sales reps and help you improve in those areas.

A review tracker matrix will help you see at a glance the reviews you get versus your competitors. It's important not to forget about reviews because they can have a significant impact on a business.
With this template, you can also use a scoring system to normalize the averages.

After reviewing those templates, it's time to see what a competitive matrix looks like in action. Here are some examples below.
This is a public HubSpot competitive matrix comparing the overall pricing of our CRM versus Salesforce. It’s a standard matrix meant to help people see the difference between the CRMs at a glance.

This is a great example of what a feature matrix might look like. SugarSync compares its feature offerings against the competition in an easy-to-understand visualization.

In this example, 360iResearch reports on survey management software. This is a competitor grid showing which companies have the best product satisfaction and business strategy.

Innately, competition feels unpleasant; however, that’s not all it has to be. It can lead to growth, make us look deeper into our business, and improve.
Competitive matrices are great tools to help you uncover how you’re different from your competitors. Three that I really like are the competitive advantage matrix, SWOT (for its simplicity), and the sales matrix.
These — and the other matrices — show areas of improvement and where we can excel. If you’re having trouble evaluating your company’s position in your industry, use this article and the above tools to help.
Editor's note: This post was originally published in January 2021 and has been updated for comprehensiveness.
If you’ve ever read a blog post, you’ve consumed content from a thought leader that is an expert in their industry. And if the post was well written, chances are you came away with helpful knowledge and a positive opinion about the brand.
Anyone can connect with their audience through blogging and enjoy the benefits. If you’ve heard about blogging but don’t know where to start, the time is now.
I’ll cover how you can write and manage an SEO-friendly blog with templates to help you along the way.
Blog posts allow you and your business to publish insights, thoughts, and stories on your website about any topic. They can help you boost brand awareness, credibility, conversions, and revenue.
And most importantly, they can help you drive traffic to your website.
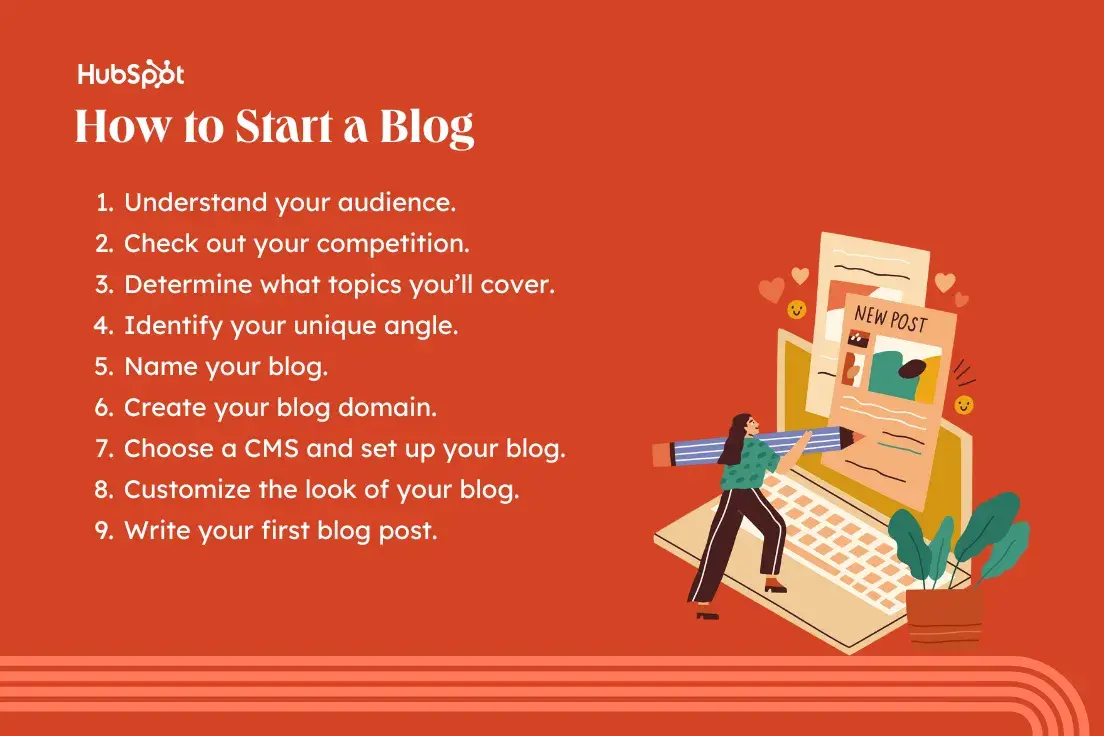
Before you start writing your blog post, make sure you have a clear understanding of your target audience.
To do so, take the following steps:
I’ll share a little more on buyer personas with an example (because they’re that important).
Let’s say your readers are Millennials looking to start a business. You probably don't need to provide them with information about getting started on social media — most of them already have that down.
You might, however, want to give them information about how to adjust their social media approach (e.g., — from casual to more business-savvy). That kind of tweak is what helps you publish content about the topics your audience really wants and needs.
Don't have buyer personas in place for your business? Here are a few resources to help you get started:
What better way to draw inspiration than to look at your well-established competition?
It’s worth taking a look at popular, highly reviewed blogs because their strategy and execution is what got them to grow in credibility.
The purpose of doing this isn’t to copy these elements, but to gain better insight into what readers appreciate in a quality blog.
When you find a competitor’s blog, take the following steps:
Before you write anything, pick a topic you’d like to write about. The topic can be pretty general to start as you find your desired niche in blogging.
Here are some ways to choose topics to cover:
Pro tip: If you need help brainstorming ideas or lack inspiration, you can use HubSpot’s blog topic generator. It can generate title ideas and even outlines based on a brief description of what you want to write about or a specific keyword.
What perspective do you bring that makes you stand out from the crowd? This is key to determining the trajectory of your blog’s future, and there are many avenues to choose in the process.
Here’s how you can find your unique selling proposition in crowded blogging niches:
This is your opportunity to get creative and make a name that gives readers an idea of what to expect from your blog.
Some tips on how to choose your blog name include:
Pro tip: If you help choosing a blog name, try using a blog name generator. And make sure the name you come up with isn’t already taken, as it could lessen your visibility and confuse readers looking for your content.
A domain is a part of the web address nomenclature someone would use to find your website or a page of your website online.
Your blog‘s domain will look like this: www.yourblog.com. The name between the two periods is up to you, as long as this domain name doesn’t yet exist on the internet.
Want to create a subdomain for your blog? If you already own a cooking business at www.yourcompany.com, you might create a blog that looks like this: blog.yourcompany.com. In other words, your blog's subdomain will live in its own section of yourcompany.com.
Some CMS platforms offer subdomains as a free service, where your blog lives on the CMS, rather than your business's website. For example, it might look like this: yourblog.contentmanagementsystem.com.
However, to create a subdomain that belongs to your company website, register the subdomain with a website host.
Most website hosting services charge very little to host an original domain — in fact, website costs can be as inexpensive as $3 per month when you commit to a 36-month term.
Pro tip: You can connect your custom domain to free hosting with HubSpot’s free CMS or in premium editions of Content Hub. This includes access to built-in security features and a content delivery network.
Here are five other popular web hosting services to choose from:
A CMS (content management system) is a software application that allows users to build and maintain a website without having to code it from scratch.
CMS platforms can manage the following:
HubSpot customers host web content via Content Hub. Another popular option is a self-hosted WordPress website on a hosting site such as WP Engine.
Whether you create a domain or a subdomain to start your blog, you'll need to choose a web hosting service after you pick a CMS.
Pro tip: You can get started for free with HubSpot’s free blog maker. Our free CMS offers everything you need to get started– including hosting, a visual editor, and hundreds of free and paid themes to choose from.
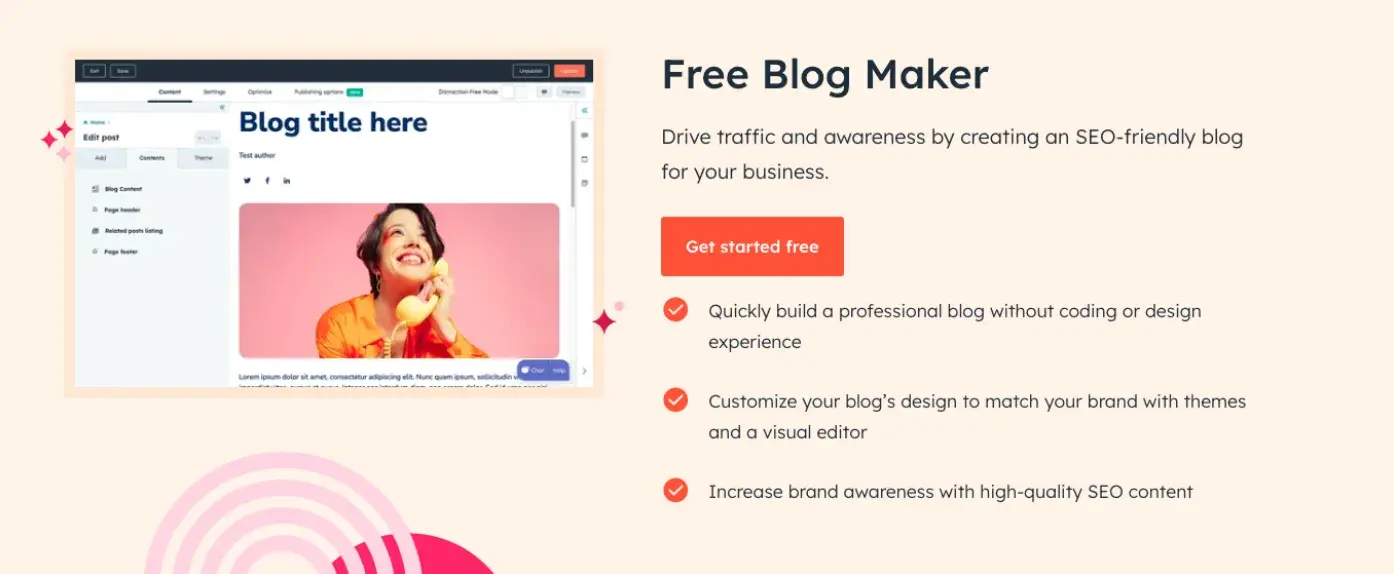
Start using HubSpot's Free Blog Making tool to publish blog posts.
Once you have your domain name set up, customize the appearance of your blog to reflect the theme of the content you plan on creating and your brand.
For example, if you're writing about sustainability and the environment, green might be a color to keep in mind while designing your blog.

If you already manage a website and are writing the first post for that existing website, ensure the article is consistent with the website in appearance and subject matter.
Two ways to do this are by including your:
Once you have your blog set up, the only thing missing is the content.
While the design and layout are fun and functionally necessary, it's the content that will draw your readers in and keep them coming back.
We’ll go into full detail on this later.
Before you write your first blog post, make sure you know the answers to questions like, “Why would someone keep reading this entire blog post?” and “What makes our audience come back for more?”
To start, a good blog post is interesting and educational. Blogs should answer questions and help readers resolve a challenge they're experiencing — and you have to do so in an interesting way.
It‘s not enough just to answer someone’s questions — you also have to provide actionable steps while being engaging.
For example, your introduction should hook the reader and make them want to continue reading your post. Then, use examples to keep your readers interested in what you have to say.
Remember, a good blog post is interesting to read and provides educational content to audience members.
Want to learn how to apply blogging and other forms of content marketing to your business?
Check out HubSpot Academy's free content marketing course.
You’ve got the technical and practical tidbits down — now it’s time to prepare to write your very first blog post.
My advice? Start with “low-hanging fruit.” Write about a highly specific topic that serves a small segment of your target audience.
That seems unintuitive, right? If more people are searching for a term or a topic, shouldn’t that mean more readers for you?
That’s not necessarily true. If you choose a general and highly searched topic that’s been covered by major competitors or more established brands, it’s unlikely that your post will rank on the first page of search engine results pages (SERPs).
Give your newly born blog a chance by choosing a topic that few bloggers have written about.
If you need help, you can also use AI tools, like ChatGPT, for inspiration.
Now, let’s get into the nitty-gritty. Here are my top 20 steps for writing a blog post.
There are several types of blog posts you can create, and they each have different formats to follow.
Six of the most common formats include:
Save time and download six blog post templates for free.
Before you write anything, you gotta pick a topic for your blog post.
The topic can be pretty general to start. If you're a company that sells a CRM for small-to-enterprise businesses, your post might be about the importance of using a single software to keep your marketing, sales, and service teams aligned.
Pro tip: You may not want to jump into a “how-to” article for your first blog post. Why? Your credibility hasn’t been established yet. Before teaching others how to do something, you’ll first want to show that you’re a leader in your field and an authoritative source.
For example, if you‘re a plumber writing your first post, you won’t yet write a post titled “How to Replace the Piping System in your Bathroom.” First, you’d write about modern faucet setups, or tell a particular success story you had rescuing a faucet before it flooded a customer's house.
Here are four other types of blog posts you could start with:
If you're having trouble coming up with topic ideas, a good topic brainstorming session should help. In the post I’ve linked, my colleague walks you through a helpful process for turning one idea into many.
This can be done by:
And if you’re still stuck, take a look at the image below for some first blog post idea examples.

Again, make sure you have a clear understanding of your target audience.
Consider what you know about your buyer personas and their interests while you're coming up with a topic for your blog post.
If you already have a pre-existing portfolio to look back on, it would benefit you to pull from those brainstormed post ideas or previous content strategy.
One thing that’s been helpful for me is specifically looking at content performance data when brainstorming ideas.
In doing this, I’ve discovered which topics tend to resonate with my audience (and which ones don’t) and created content around them.
By focusing on your core blog topics, or clusters, you can establish yourself as a thought leader, gain the trust of your audience, rank better on search engines, and attract new readers.
Find a keyword with low searches in Google (I recommend sticking to about 10 to 150 monthly searches). These topics offer less competition and should therefore allow your new blog post to rank more easily.
To choose a topic, you can either do a traditional brainstorming session or carry out keyword research. I suggest the latter because you can actually see how many people are looking for that topic.
Now, don’t be intimidated by the term “keyword research.” It’s not just for marketers, but for new bloggers, too. And it’s really easy to do.
To jumpstart your keyword research, first begin by identifying the general topic of your blog.
Say you’re a plumber. Your general, high-level topic might be “plumbing” (67K monthly searches).
Next, put this term into a keyword research tool such as:
When you run this term through the tool, a list of related keywords will appear. Scan the list and choose one with a lower search volume. For this example, we’ll use “under sink plumbing” (1.4K monthly searches).
Run that keyword in the keyword research tool again. Look at the related keywords. Find one with a lower search volume. Do that again.
For this example, we’ll settle on “plumbing problems under kitchen sink” (10 monthly searches). That’s the topic for our first post.
TL;DR — Choose a low-volume, low-competition keyword that will ensure your first post ranks.
For more help on keyword research, here are more resources you can use:
You’ve got your topic and primary keyword. Now, you need to check that the user’s search intent would be fulfilled by a blog post.
What does that mean?
If someone is looking for “plumbing problems under a kitchen sink,” they might be looking for a tutorial, a diagram, an article, or a product that can fix the issue.
If they’re looking for the first three, you’re good — that can be covered in a blog post. A product, however, is different, and your blog post won’t rank.
How do you double-check search intent?
Google the term and look at the results. If other articles and blog posts rank for that term, you’re good to go. If you only find product pages or listicles from major publications, then find a new topic to cover in your first post.
Consider the term “under sink plumbing bathroom” (30 monthly searches). It seemed like a perfect fit because it had low monthly searches.
Upon Googling the term, I found product carousels, product pages from Home Depot and Lowes, and guides written by major publications. (You’ll also want to avoid topics that have been covered by major publications, at least for now.)
TL;DR — Before writing your first blog post about a low-volume topic, double-check the user intent by Googling the keyword. Also, don’t forget to take a look at who’s written about that topic so far. If you see a major brand, consider writing about another topic.
It’s time to flesh out your topic by covering related or adjacent topics.
Use the following tools:
You can also use these keyword research tools we mentioned above in step one.
You should also identify opportunities to fill in the gaps of the existing discourse on the topic of your choosing.
You want to meet a need that hasn’t already been met in your topic cluster. Otherwise, you run the risk of writing content for topics that are already over-saturated.
It’s hard to beat saturated search queries when you’re trying to rank against high authority publications — but not impossible if your content is answering the queries the competition hasn’t.
To discover what’s missing within a topic, I conduct a competitive analysis to see what my competitors offer in their content and how I can make my blog post better.
Here are some things to look out for:
If your competitors are lacking in any of these areas, you can use that to your advantage and focus on them when writing your blog post.
Another way to differentiate your blog is by offering original data, quotes, or perspectives. Some of my best performing posts have come from getting a unique quote from an industry expert.
Your blog title should tell readers what to expect, yet it should leave them wanting to know more — confusing, right?
This is why you should brainstorm a few working titles instead of just one. I find it helpful to share these titles with a couple coworkers to get their feedback and see which one is most engaging to them.
Let's take a real post as an example: "How to Choose a Solid Topic for Your Next Blog Post."
Appropriate, right? The topic, in this case, was probably “blogging.” Then the working title may have been something like, “The Process for Selecting a Blog Post Topic.” And the final title ended up being “How to Choose a Solid Topic for Your Next Blog Post.”
See that evolution from topic, to working title, to final title?
Even though the working title may not end up being the final title (more on that in a moment), it still provides enough information so you can focus your blog post on something more specific than a generic, overwhelming topic.
Pro tip: I’ve also enlisted the help of ChatGPT to generate sample blog post titles by inputting a prompt like, “Write a list of blog titles about [topic].” Even if it doesn’t give you exactly what you want, it can still get ideas flowing.
Sometimes, blog posts can have an overwhelming amount of information — for the reader and the writer.
The trick is to organize the info in a way so readers aren‘t intimidated by length or amount of content. This organization can take multiple forms (e.g., sections, lists, tips), but it must be organized.
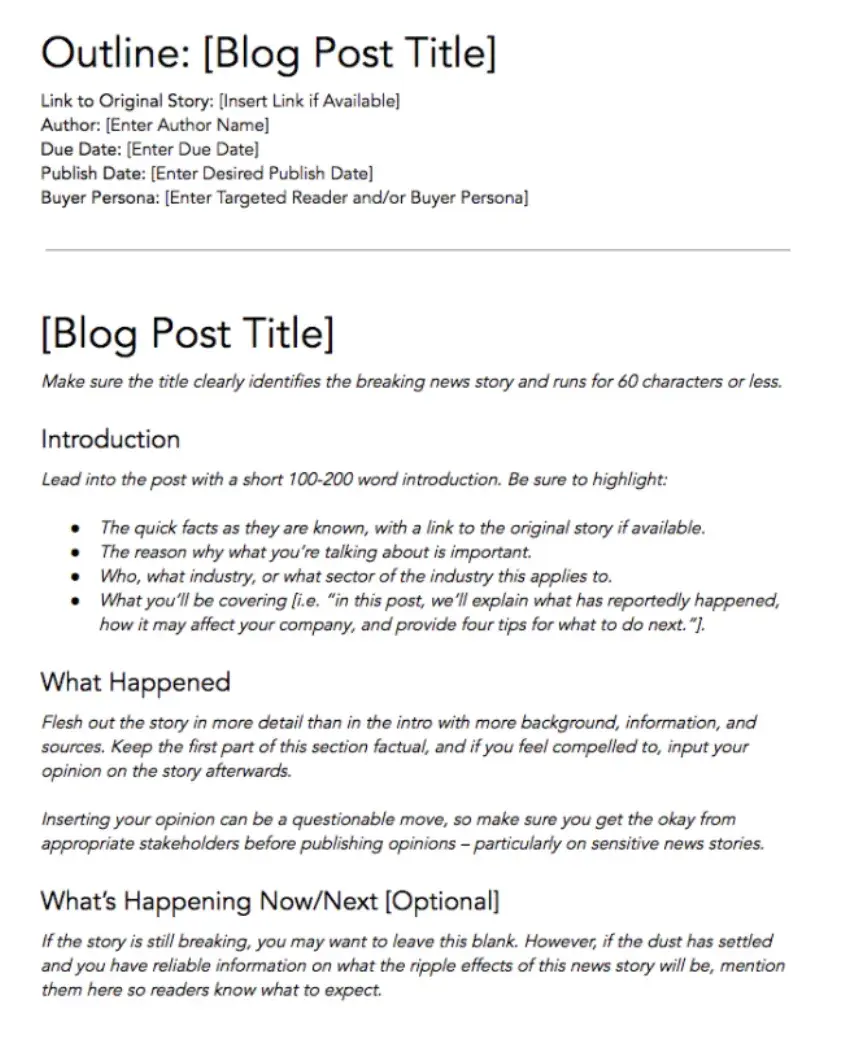
Download These Templates for Free
When outlining, you need to center your main ideas with keyword-rich H2s and H3s. These are going to be your headers and subheaders that readers typically search for, and the information that Google crawls when indexing and ranking content.
I use keyword research tools, like Ahrefs and Semrush, to find the best words for my blog post.
To find the right keywords, I focus on the following elements:
Let's take a look at "How to Use Snapchat: A Detailed Look Into HubSpot’s Snapchat Strategy" as an example.
There‘s a lot of content in the piece, so it’s broken up into a few sections using descriptive headers. The major sections are separated into subsections that go into more detail, making the content easier to read.
Remember, your outline should serve as a guide to make writing your blog post easier, so make sure you include all the important points you want to discuss and organize them in a logical flow.
And to make things even easier, you can download and use our free blog post templates, which are pre-organized for six of the most common blogs. Just fill in the blanks!
We've written more specifically about writing captivating introductions in the post "How to Write an Introduction," but let's review, shall we?
Here‘s an example of an intro I think does a good job of attracting a reader’s attention right away:
“Blink. Blink. Blink. It's the dreaded cursor-on-a-blank-screen experience that all writers — amateur or professional, aspiring or experienced — know and dread. And of all times for it to occur, it seems to plague us the most when trying to write an introduction.”
You‘ve already done the work on the frame, so now’s the time to add the body. The next step — but not the last — is actually writing the content. We can't forget about that, of course.
Now that you have a detailed outline and solid intro, you're ready to fill in the blanks. Use your outline as a guide and expand on all points as needed. Write about what you already know, and if necessary, conduct additional research to gather more information.
Use examples and data to back up your points, while providing proper attribution when incorporating external sources. And when you do, always try to find accurate and compelling data to use in your post.
This is also your opportunity to show personality in your writing. Blog posts don‘t have to be strictly informational, they can be filled with interesting anecdotes and even humor if it serves a purpose in expressing your ideas.
It also factors into creating and maintaining your blog’s brand voice.
Oh, and if you‘re having trouble stringing sentences together, you’re not alone. Finding your “flow” can be challenging for a lot of folks. Luckily, there are a ton of tools you can lean on to help you improve your writing.
Here are a few to get you started:
You can also refer to our complete list of tools for improving your writing skills.
And for even more direction, check out the following resources:
The editing process is an important part of blogging — don't overlook it. I tend to self-edit while I write, but it’s essential to get a second pair of eyes on your post before publishing.
Consider enlisting the help of The Ultimate Editing Checklist and ask a grammar-conscious co-worker to copy-edit your post.
I also really enjoy free grammar checkers, like Grammarly, to help proofread while I’m writing.
Here are some more tips to help you brush up on your self-editing skills:
When you're finished checking for grammar, shift your focus to adding other elements to the blog post than text. There’s much more to making a good blog post than copy, here’s some following elements to add in support of your ideas:
Choose a visually appealing and relevant image for your post. As social networks treat content with images more prominently, visuals are more responsible than ever for the success of your blog content.
![screenshot of HubSpot blog post, Social Media Calendar Template: The 10 Best for Marketers [Free Templates]](https://knowledge.hubspot.com/hubfs/how-to-write-a-blog-post-6-20240828-282471.webp)
For help selecting an image for your post, read "How to Select the Perfect Image for Your Next Blog Post" and pay close attention to the section about copyright law.
No one likes an unattractive blog post. And it‘s not just pictures that make a post visually appealing — it’s the formatting and organization of the post, too.
In a well-formatted and visually-appealing blog post, you'll notice that header and sub-headers are used to break up large blocks of text. And those headers are styled consistently.
Here's an example of what that looks like:
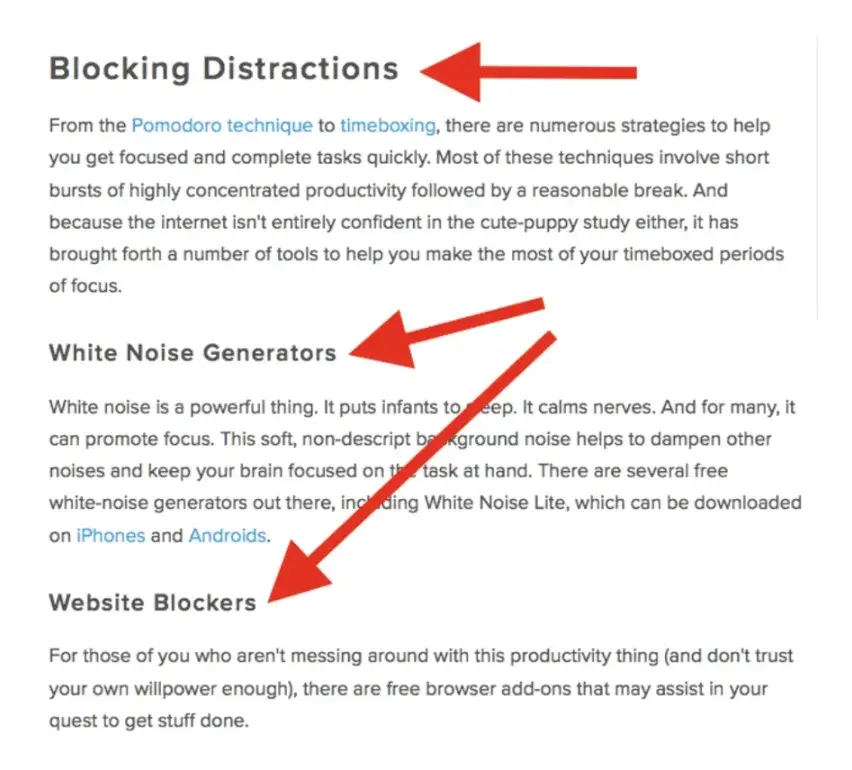
Screenshots should always have a similar, defined border so they don‘t appear as if they’re floating in space. That style should stay consistent from post to post.
Tags are specific, public-facing keywords that describe a post. They also allow readers to browse for more content in the same category on your blog.
Refrain from adding a laundry list of tags to each post. Instead, put some thought into a blog tagging strategy.
Think of tags as “topics” or “categories,” and choose 10-20 tags that represent all the main topics you want to cover on your blog. Then stick to those.
You’ve filled out your blog post with all the optimized content you can, so now’s the time to publish it in your CMS (content management system).
I also use this step as an opportunity to double check my post for any errors that were potentially missed during the proofreading process.
It’s especially important to preview your post before publishing to make sure there aren’t any formatting issues.
You can opt to post your content immediately, save it as a draft, or schedule when you want it to be posted live in case you adhere to a posting schedule.
A conversion path is a process by which an anonymous website visitor becomes a known lead.
It sounds simple enough, but creating an effective conversion path requires a clear understanding of your target audience and their needs.
Having a conversion path is important because when you share your content on the web, you should have an idea of what your audience should do next, or in other words, provide them with a path forward.
The HubSpot Flywheel model is a great example of this as it shows how our organization gains and maintains leads.
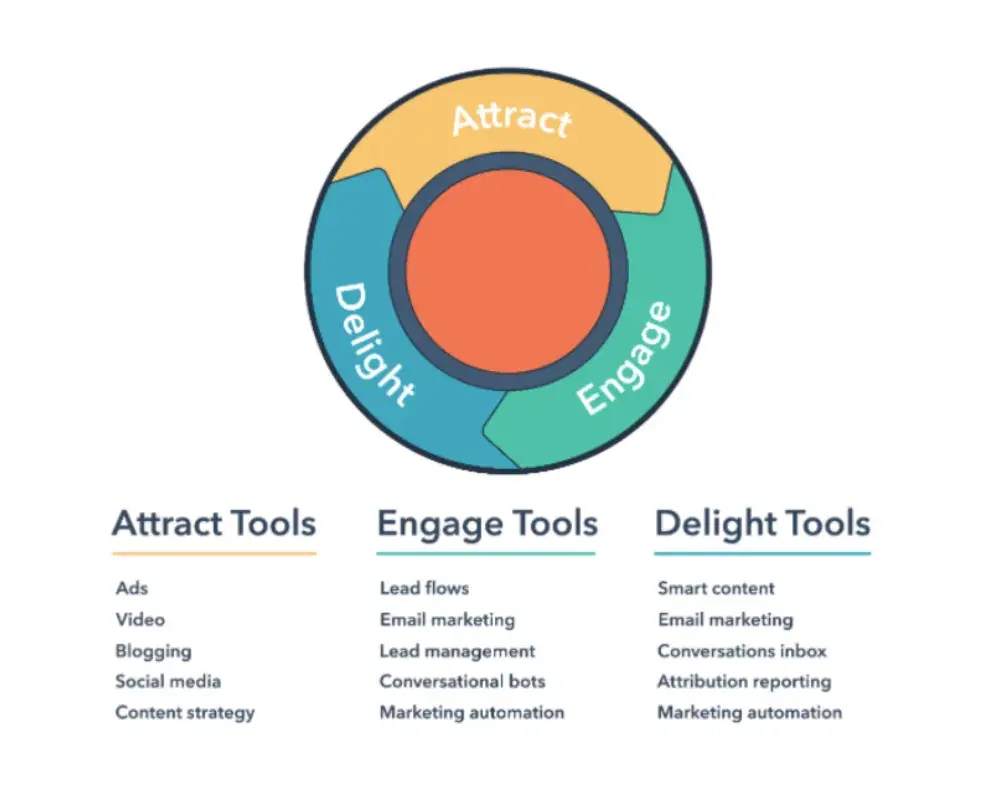
Call to action (CTA) are a part of a webpage, advertisement, or piece of content that encourages the audience to do something. You can add them to your blog post to guide your reader with “next steps” or a conversion path.
Different types of call to actions include asking readers to:
To get a better idea of how to make a CTA that readers want to click, we have a whole list of effective call to action examples for you to check out.
When you’re completing your blog post, you should link relevant content throughout it. An effective way to do this is to link within the same content cluster.
One thing I do to make finding relevant links easier is going to my search browser and typing “site:website.com: keyword.” By doing this, you can find all the posts you have published on that topic.
Keeping relevant content throughout your post can provide your readers with more helpful information, and potentially boost search engine rankings with corresponding longtail keywords.
But we’ll talk more about how to improve your ranking in the next step.
After you finish writing, go back and optimize the on-page elements of your post.
Don‘t obsess over how many keywords to include. If there are opportunities to incorporate keywords you’re targeting, and it won‘t impact reader experience, do it. If you can make your URL shorter and more keyword-friendly, go for it.
But don’t cram keywords or shoot for some arbitrary keyword density — Google's smarter than that.
Here's a little blog SEO reminder about what you should review and optimize:
Share your post across all the marketing channels in your repertoire. The further the reach, the more of a possibility that readers will find it.
Start by building out a promotion strategy. This is your master plan for how you create, post, and engage with your social media content. One quick but effective way to build up your online presence is by simply repurposing your blog posts.
You can turn a blog post into bite-sized snippets of engaging information to share on socials, or into an audio file perfect for audio streaming services.
HubSpot’s content marketing tools let you do just that, as well as handle SEO and even record videos and podcasts.
Having a solid promotional strategy offers your audience from different marketing channels more ways to find your blog posts.
Speaking of channels, here are some you can use to expand your blog post promotion strategy:
As a new blogger, you likely don’t have a social media following yet. Thankfully, you don’t need a huge following before you can create a promotion strategy.
Here are more blog post promotion resources:
Blog promotion and monetization can go hand-in-hand, but monetizing your blog is no small feat. The good news is there are still ways you can monetize your blog even if you’re just starting out.
Here are my top three tips to monetize your blog:
For more, check out these other money makin’ blog posts:
Your post is published for the world to see, make sure you’re keeping an eye on its performance over time so you can see if your blog post strategy is working well enough for your goals.
Keyword research, informative content, and having a promotion strategy in place won’t get you anywhere if you don’t know whether you’re doing it right. Analytics should play a key role in your overall content strategy.
Here are some blog KPIs I like to keep track of:
There are many website traffic analysis tools that you can take advantage of to better understand your audience’s behavior on your blog posts.
For example, you can track a page’s total views and average session duration with HubSpot’s marketing analytics software to gauge whether your target audience found the blog post engaging or informative while monitoring your traffic sources.
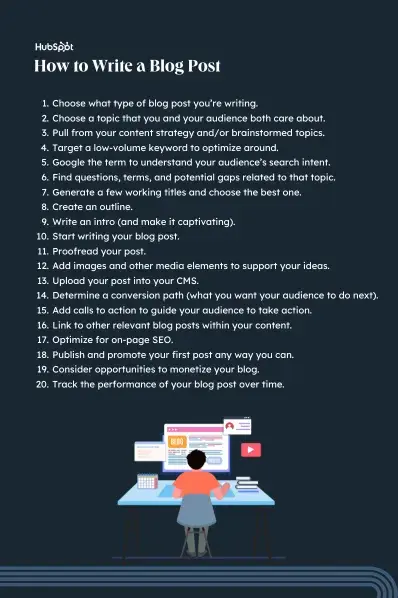
When you begin typing your blog content, it’s important that you divide paragraphs into sections that make it easier for the reader to find what they need.
If you’re just starting out, then focus on the overarching H2s you want to talk about, and you’ll be able to branch off into subheaders and more naturally as you continue.
This is a simple practice that can help your content look more professional with little effort. Centering your images keeps the reader’s attention drawn to the subject — not searching for elsewhere.
Centering also looks better when translating from PC to mobile devices. As formatting transitions to small screens or windows, a centered image will remain the focal point.
So those images you centered earlier, make sure you have descriptive alt text for them, too.
Image alt text allows search engines, like Google, to crawl and rank your blog post better than pages lacking the element. It also leads readers to your blog post if the keywords included are what they searched for in the first place.
Besides SERP features, image alt text is beneficial to readers by providing more accessibility. It allows people to better visualize images when they can’t see them, and with assistive technology, can be auditorily read aloud for people to enjoy.
When you begin working on the body of your blog post, make sure readers can clearly understand what you’re trying to accomplish.
You shouldn’t feel pressure to elongate your post with unnecessary details, and chances are that if you keep it concise, readers will derive more value from your work.
Break up the monotony of your blog post with some multimedia content where seen fit.
Your reader will enjoy visiting a blog page with images, videos, polls, audio or slideshows as opposed to a page of black and white text.
It also makes it more interactive and improves your on-page search engine optimization (SEO).
Now, do you want some real examples of blog posts? See what your first blog post can look like based on the topic you choose and the audience you're targeting.
List-based posts are sometimes called “listicles,” a mix of the words “list” and “article.” These are articles that deliver information in the form of a list.
A listicle uses sub-headers to break down the blog post into individual pieces, helping readers skim and digest your content more easily.
As you can see in the example from our blog, listicles can offer various tips and methods for solving a problem.
Thought leadership posts allow you to share your expertise on a particular subject matter and share firsthand knowledge with your readers.
These pieces — which can be written in the first person, like the post shown above — help you build trust with your audience so people take your blog seriously as you continue to write for it.
Curated collections are a special type of listicle blog post. Rather than sharing tips or methods for doing something, this type of blog post shares a list of real examples that all have something in common in order to prove a larger point.
In the example post above, Listverse shares eight real examples of evolution in action among eight different animals — starting with the peppered moth.

HubSpot Slides is a presentation tool that helps publishers package a lot of information into easily shareable slides.
Think of it like a PowerPoint, but for the web. With this in mind, presentation-style blog posts help you promote your slides so that it can generate a steady stream of visitors.
Unlike blogs, slide decks don't often rank well on search engines, so they need a platform for getting their message out there to the people who are looking for it.
By embedding and summarizing your slides on a blog post, you can share a great deal of information and give it a chance to rank on Google at the same time.
Need some presentation ideas? In the example above, we turned our company's “Culture Code” into a slides presentation that anyone can look through and take lessons from, and then promoted it in a blog post.
“Newsjacking” is a nickname for “hijacking” your blog to break important news related to your industry.
Therefore, the newsjack post is a type of article whose sole purpose is to garner consumers' attention, offer them timeless professional advice, and prove your blog is a trusted resource for learning about the big industry trends.
![infographic blog post example, HubSpot blog, Your Bookmarkable Guide to Social Media Image Sizes in 2021 [Infographic]](https://knowledge.hubspot.com/hubfs/how-to-write-a-blog-post-15-20240828-206733.webp)
The infographic post serves a similar purpose as the SlideShare post — the fourth example, explained above — in that it conveys information for which plain blog copy might not be the best format.
For example, when you're looking to share a lot of statistical information (without boring or confusing your readers), building this data into a well-designed, even engaging infographic can keep your readers engaged with your content.
It also helps readers remember the information long after they leave your website.
For this example, you need not look any further than this very blog post. How-to guides like this one help solve a problem for your readers.
They’re like a cookbook for your industry, walking your audience through a project step by step to improve their literacy on the subject.
The more posts like this you create, the more equipped your readers will be to work with you and invest in the services you offer.
Guest posts are a type of blog post that you can use to include other voices on your blog. For example, if you want to get an outside expert's opinion on a topic, a guest post is perfect for that.
Additionally, these posts give your blog variety in topic and viewpoint. If your customer has a problem you can't solve, a guest post is a great solution.
If you begin accepting guest posts, set up editorial guidelines to ensure they're up to the same standards as your posts.
If you’re feeling stuck as a new writer, don’t give up. It gets easier with practice.
Whether you’re struggling with writer's block or wanting some ways to add depth to your content, here are some quick tips I compiled to help take your blog writing to the next level:
When you’re facing writer’s block, start with what you know. Not only will sharing personal anecdotes help you get ideas flowing, but it can also keep your readers engaged with what you’re saying.
Stories can simplify complex concepts and make your content more relatable. Plus, they add a human touch and help set the tone for the rest of your blog post.
When you back up your ideas with unique, expert quotes or share facts from reliable sources, it shows that your blog post is well-researched and trustworthy.
If you don’t know where to start with finding quotes, think about the people you know and their expertise.
For example, I’m lucky enough to have incredibly knowledgeable coworkers here at HubSpot that I can reach out to if I need a quote.
I’ve also reached out to connections on LinkedIn to see if they can provide a quote or know someone who can. HARO can also be a great resource if you need a quote in a pinch.
There’s nothing that turns readers off more than opening an article and seeing a large wall of text. Think about it: most internet users have a short attention span and tend to skim through content rather than reading every word.
That’s why I recommend breaking up your blog post into smaller chunks to make it more digestible. You can do this by utilizing subheadings (H2s, H3s, H4s, etc.), bullet points, and short paragraphs.
Not only does breaking up your content make your blog post more visually appealing, it also helps readers quickly find the information they’re looking for without getting lost in a sea of text.
Aside from aesthetic appeal, visuals can help convey complex ideas in an easier way and help readers remember the information you share.
I recommend reading through your blog post and putting yourself in your reader’s shoes. Is there anything you wrote about that would be better explained with the support of an image or graphic?
For instance, whenever I write about the pros and cons of something, I like to create a graphic that shows those pros and cons in a side-by-side comparison.
I also look at search engines results when determining what images to add to my post. Does the SERP for the keyword you’re targeting have an image pack?
See if you can add in images and optimize them with alt text to increase the chances of appearing in those results.
Keep it simple.
There’s no reason to write overly complex sentences that confuse your readers. Instead, opt to convey your message in a simple and accessible manner.
At the end of the day, readers just want to find the answers they’re looking for, and writing in a straightforward manner can effectively meet this need.
I like to use the Hemingway App to make sure that my writing doesn’t get too dense.
Although your writing should captivate the reader, you should avoid overwhelming them with fluff. Using active voice can help keep your writing clear, concise, and energetic while still getting your point across.
For example, instead of saying something like “the product was loved by customers,” write “customers loved the product.”
Blogging can help you build brand awareness, become a thought-leader and expert in your industry, attract qualified leads, and boost conversions.
Follow the steps and tips we covered above to begin publishing and enhancing your blog today.
Editor's note: This post was originally published in October 2013 and has been updated for comprehensiveness.
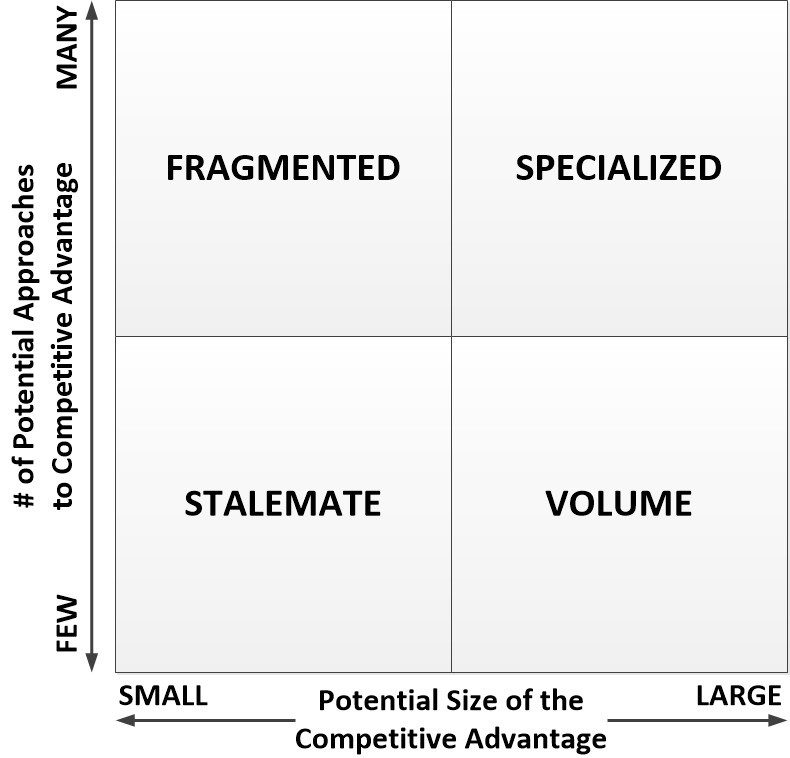