Apple, Google Exposure Notification API Now Generally Available

Apple and Google announced in early April that they were collaborating on an API that would enable cross-platform data transfer, allowing governments around the world to create contact tracing applications that operate seamlessly on both Android and iOS. That API, which was later renamed the Exposure Notification API, is now generally available to public health agencies. 

Molly Burke on the Power of Universal Design

In a 2017 speech titled “Stop trying to fix disability,” YouTube and motivational speaker Molly Burke says, “I live in a world that wasn’t built for me, but what if it was?” Burke was born with a rare, genetic eye disease that caused her to go blind. In this short but moving 8 minute video, she contends that making the world accessible helps everyone. She introduces the concept of universal design to her audience in simple terms:

“Universal design [is] designing and building everything to be accessed, enjoyed, and understood to its fullest extent by everyone, regardless of their size, their age, their ability, or their perceived disability.”

Burke identified Apple as one company that exemplifies universal design.

“Every product they release, I could buy at a store, open up, and use on my own independently, with no extra cost and no assistance needed,” she said. “I ask you to imagine how liberating, how empowering it is to be shown by a company that they view you as belonging to their customers, when so many others tell you the exact opposite.”

In honor of Global Accessibility Awareness Day, I wanted to highlight this video that tells just one person’s story on the powerful impact of technology that is built with everyone in mind. Burke’s speech is a poignant reminder of how designers and builders can extend a sense of belonging to their customers by making their products accessible.

A “new direction” in the struggle against rightward scrolling

You know those times you get a horizontal scrollbar when accidentally placing an element off the right edge of the browser window? It might be a menu that slides in or the like. Sometimes we to overflow-x: hidden; on the body to fix that, but that can sometimes wreck stuff like position: sticky;.

Well, you know how if you place an element off the left edge of a browser window, it doesn’t do that? That’s “data loss” and just how things work around here. It actually has to do with the direction of the page. If you were in a RTL situation, it would be the left edge of the browser window causing the overflow situation and the right edge where it doesn’t.

Emerson Loustau leverages that idea to solve a problem here. I’d be way too nervous messing with direction like this because I just don’t know what the side effects would be. But, hey, at least it doesn’t break position: sticky;.

Direct Link to ArticlePermalink

The post A “new direction” in the struggle against rightward scrolling appeared first on CSS-Tricks.

Flexbox-like “just put elements in a row” with CSS grid

It occurred to me while we were talking about flexbox and gap that one reason we sometimes reach for flexbox is to chuck some boxes in a row and space them out a little.

My brain still reaches for flexbox in that situation, and with gap, it probably will continue to do so. It’s worth noting though that grid can do the same thing in its own special way.

Like this:

.grid {
  display: grid;
  gap: 1rem;
  grid-auto-flow: column;
}

They all look equal width there, but that’s only because there is no content in them. With content, you’ll see the boxes start pushing on each other based on the natural width of that content. If you need to exert some control, you can always set width / min-width / max-width on the elements that fall into those columns — or, set them with grid-template-columns but without setting the actual number of columns, then letting the min-content dictate the width.

.grid {
  display: grid;
  gap: 1rem;
  grid-auto-flow: column;
  grid-template-columns: repeat(auto-fit, minmax(min-content, 1fr));
}

Flexible grids are the coolest.

Another thought… if you only want the whole grid itself to be as wide as the content (i.e. less than 100% or auto, if need be) then be aware that display: inline-grid; is a thing.

The post Flexbox-like “just put elements in a row” with CSS grid appeared first on CSS-Tricks.

PHP and WordPress Version Checks Coming to Themes

PHP and WordPress version checks are coming to the WordPress theme system — finally. The feature was pulled into core WordPress three days ago. It will prevent end-users from installing or activating a theme that is incompatible with their current version of PHP or WordPress. The change is slated to land in WordPress 5.5.

This feature has long been on many theme authors’ wish lists, particularly PHP version checking. Plugins authors gained the ability to support specific PHP versions starting with WordPress 5.2. However, theme authors were left feeling like the second-class citizens they usually are when it comes to the addition of core features, waiting patiently as plugin authors received the new and shiny tools they were looking forward to.

Previously, the code for manually handling version checking within individual themes was more complex than in plugins. Theme authors needed to run compatibility checks after theme switch and block theme previews in the customizer using two different methods, depending on the user’s WordPress version. That is assuming theme authors were covering all their bases.

Users had no real way of knowing whether a theme would work on their site before installing and attempting to activate it. It was a poor user experience, even when a theme gracefully failed for the end-user.

This user experience has also held back some theme authors from transitioning to newer versions of PHP. For years, many were supporting PHP 5.2. Slowly, some of these same authors are now making the move toward newer features up to PHP 5.6, which is now the minimum that WordPress supports. However, not many have made the jump to PHP 7 and newer.

Until now, there has been no mechanism for letting the user know they need to upgrade their PHP to use a particular theme.

Some theme authors may choose to continue supporting older versions of PHP, such as 5.6, for a potentially wider user base. However, developers who want to switch to newer features can now do so with the support of the core platform.

Changes for Users

Twenty Twenty theme page from WordPress.org theme repository.
New WordPress and PHP versions added to Twenty Twenty theme.

Users who are browsing the WordPress theme directory may begin to notice new information available for some themes. Similar to plugins, visitors should see a WordPress Version and PHP Version listed for some themes. For example, the Twenty Twenty theme now lists the following minimum requirements:

  • WordPress Version: 4.7 or higher
  • PHP Version: 5.2.4 or higher

Not all themes will have these numbers listed yet. It will take some time before older themes are updated with the data required to populate these fields.

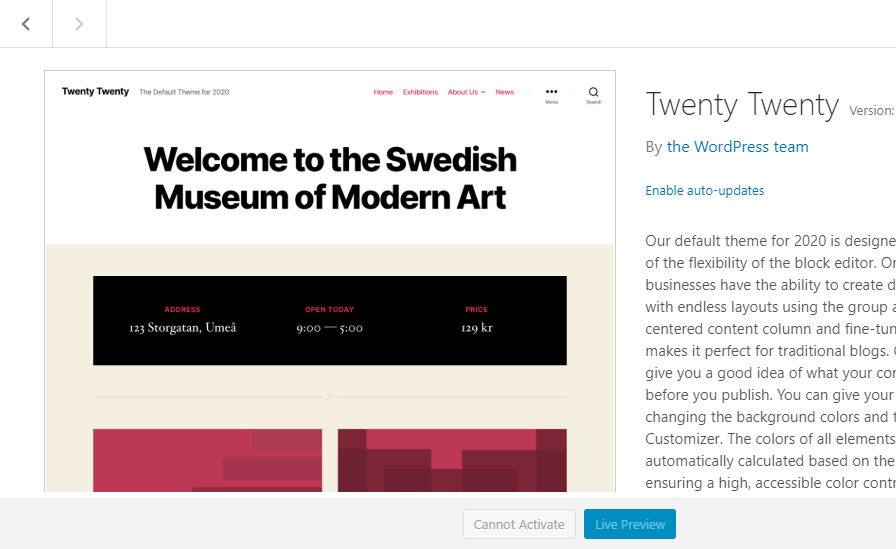
In WordPress 5.5, the admin interface for themes will change. When attempting to install or activate a theme, WordPress will prevent such actions. If a user searches for a theme that has an incompatible WordPress or PHP version, the normal installation button will be replaced with a disabled button that reads “Cannot Install.” If a theme is installed but not activated, the activation link will similarly be replaced with a disabled “Cannot Activate” button. Users will also not be allowed to live preview incompatible themes.

Attempting to activate Twenty Twenty theme without PHP support.
Cannot activate Twenty Twenty theme with incompatible PHP version.

The feature works the same from within the customizer interface as it does via the themes screen in the WordPress admin.

Changes for Theme Authors

The WordPress Themes Team recently announced two new required headers for theme authors to place in their style.css files. The first required field is Tested up to, which is the latest version of WordPress the theme has been tested against. The second is a Requires PHP field, which is the minimum PHP version the theme supports.

It is unclear is why the team decided to require those two fields but not the Requires at least field, which represents the minimum WordPress version needed. Most likely, theme authors will want to place all three headers in their themes.

Theme authors who will still support versions of WordPress earlier than 5.5 will want to continue using their old compatibility checks. However, this is the first step in phasing such code out.

Supermetrics Overhauls its Marketing API

Supermetrics, a marketing data solution provider, has updated the Supermetrics API. Supermetrics has always been about extracting data from marketing and advertising platforms for use in analytical tools. The new API expands on that vision and delivers more user-friendly tools and abilities for custom solutions.

WordCamp Kent Online Features Business and Marketing Tracks, May 30-31

One of the exciting things about WordCamps going virtual is the community gaining access to more events and presentations than ever before, from anywhere in the world. Even in this new online-only format, local camps still retain their unique character as they feature speakers from their respective communities.

WordCamp Kent (Ohio) is one of these upcoming events that has been forced online by the pandemic. Organizers will be broadcasting all sessions on the weekend of May 30-31, and tickets are free for anyone who wants to attend.

The schedule for this particular event runs heavy on the business and marketing side of working with WordPress, with very few talks geared towards developers. If you are a freelancer, run an agency, or have a WordPress product business, you will find WordCamp Kent’s program more tailored to topics that help you improve client services.

The schedule on the first day of the event is divided into two tracks: Freelance/Business and User/Marketing. These sessions will run alongside live Q&A and a Help Desk managed by volunteers in the #wp-help-desk channel in the NEO WordPress Slack workspace. The second day of the event will be also be split into two tracks: Freelance/Business/Developer and WordPress 101/User.

Topics include designing websites for generating leads, improving your business model for freelancers and small businesses, client consultations, content marketing, and customer support.

This Kent, Ohio, WordCamp may not have made it on your radar in the past, but the pandemic has opened up events in some ways. It forces a greater number of camps online and allows attendees to join any event without the travel expenses that would ordinarily be prohibitive. In the past, many people who were not local would simply opt to save their money for the bigger camps. The WordPress community has a greater potential to accelerate their learning opportunities, as more smaller camps gain a global audience online.

Collective #606


Collective Item Image

WebGL guide

Maxime Euzière’s complete, summarized WebGL tutorial, with tiny interactive demos in each chapter.

Check it out


Collective Item Image

DOM diffing with vanilla JS

Previously, Chris Ferdinandi explains how to build reactive, state-based components with vanilla JS and in this article he shows how to add DOM diffing to a component.

Read it


Collective #606 was written by Pedro Botelho and published on Codrops.

How to Make Taxonomy Pages With Gatsby and Sanity.io

In this tutorial, we’ll cover how to make taxonomy pages with Gatsby with structured content from Sanity.io. You will learn how to use Gatsby’s Node creation APIs to add fields to your content types in Gatsby’s GraphQL API. Specifically, we’re going to create category pages for the Sanity’s blog starter.

That being said, there is nothing Sanity-specific about what we’re covering here. You’re able to do this regardless of which content source you may have. We’re just reaching for Sanity.io for the sake of demonstration.

Get up and running with the blog

If you want to follow this tutorial with your own Gatsby project, go ahead and skip to the section for creating a new page template in Gatsby. If not, head over to sanity.io/create and launch the Gatsby blog starter. It will put the code for Sanity Studio and the Gatsby front-end in your GitHub account and set up the deployment for both on Netlify. All the configuration, including example content, will be in place so that you can dive right into learning how to create taxonomy pages.

Once the project is iniated, make sure to clone the new repository on GitHub to local, and install the dependencies:

git clone git@github.com:username/your-repository-name.git
cd your-repository-name
npm i

If you want to run both Sanity Studio (the CMS) and the Gatsby front-end locally, you can do so by running the command npm run dev in a terminal from the project root. You can also cd into the web folder and just run Gatsby with the same command.

You should also install the Sanity CLI and log in to your account from the terminal: npm i -g @sanity/cli && sanity login. This will give you tooling and useful commands to interact with Sanity projects. You can add the --help flag to get more information on its functionality and commands.

We will be doing some customization to the gatsby-node.js file. To see the result of the changes, restart Gatsby’s development server. This is done in most systems by hitting CTRL + C in the terminal and running npm run dev again.

Getting familiar with the content model

Look into the /studio/schemas/documents folder. There are schema files for our main content types: author, category, site settings, and posts. Each of the files exports a JavaScript object that defines the fields and properties of these content types. Inside of post.js is the field definition for categories:

{
  name: 'categories',
  type: 'array',
  title: 'Categories',
  of: [
    {
      type: 'reference',
      to: {
        type: 'category'
      }
    }
  ]
},

This will create an array field with reference objects to category documents. Inside of the blog’s studio it will look like this:

An array field with references to category documents in the blog studio

Adding slugs to the category type

Head over to /studio/schemas/documents/category.js. There is a simple content model for a category that consists of a title and a description. Now that we’re creating dedicated pages for categories, it would be handy to have a slug field as well. We can define that in the schema like this:

// studio/schemas/documents/category.js
export default {
  name: 'category',
  type: 'document',
  title: 'Category',
  fields: [
    {
      name: 'title',
      type: 'string',
      title: 'Title'
    },
    {
      name: 'slug',
      type: 'slug',
      title: 'Slug',
      options: {
        // add a button to generate slug from the title field
        source: 'title'
      }
    },
    {
      name: 'description',
      type: 'text',
      title: 'Description'
    }
  ]
}

Now that we have changed the content model, we need to update the GraphQL schema definition as well. Do this by executing npm run graphql-deploy (alternatively: sanity graphql deploy) in the studio folder. You will get warnings about breaking changes, but since we are only adding a field, you can proceed without worry. If you want the field to accessible in your studio on Netlify, check the changes into git (with git add . && git commit -m"add slug field") and push it to your GitHub repository (git push origin master).

Now we should go through the categories and generate slugs for them. Remember to hit the publish button to make the changes accessible for Gatsby! And if you were running Gatsby’s development server, you’ll need to restart that too.

Quick sidenote on how the Sanity source plugin works

When starting Gatsby in development or building a website, the source plugin will first fetch the GraphQL Schema Definitions from Sanity deployed GraphQL API. The source plugin uses this to tell Gatsby which fields should be available to prevent it from breaking if the content for certain fields happens to disappear. Then it will hit the project’s export endpoint, which streams all the accessible documents to Gatsby’s in-memory datastore.

In order words, the whole site is built with two requests. Running the development server, will also set up a listener that pushes whatever changes come from Sanity to Gatsby in real-time, without doing additional API queries. If we give the source plugin a token with permission to read drafts, we’ll see the changes instantly. This can also be experienced with Gatsby Preview.

Adding a category page template in Gatsby

Now that we have the GraphQL schema definition and some content ready, we can dive into creating category page templates in Gatsby. We need to do two things:

  • Tell Gatsby to create pages for the category nodes (that is Gatsby’s term for “documents”).
  • Give Gatsby a template file to generate the HTML with the page data.

Begin by opening the /web/gatsby-node.js file. Code will already be here that can be used to create the blog post pages. We’ll largely leverage this exact code, but for categories. Let’s take it step-by-step:

Between the createBlogPostPages function and the line that starts with exports.createPages, we can add the following code. I’ve put in comments here to explain what’s going on:

// web/gatsby-node.js

// ...

async function createCategoryPages (graphql, actions) {
  // Get Gatsby‘s method for creating new pages
  const {createPage} = actions
  // Query Gatsby‘s GraphAPI for all the categories that come from Sanity
  // You can query this API on http://localhost:8000/___graphql
  const result = await graphql(`{
    allSanityCategory {
      nodes {
        slug {
          current
        }
        id
      }
    }
  }
  `)
  // If there are any errors in the query, cancel the build and tell us
  if (result.errors) throw result.errors

  // Let‘s gracefully handle if allSanityCatgogy is null
  const categoryNodes = (result.data.allSanityCategory || {}).nodes || []

  categoryNodes
    // Loop through the category nodes, but don't return anything
    .forEach((node) => {
      // Desctructure the id and slug fields for each category
      const {id, slug = {}} = node
      // If there isn't a slug, we want to do nothing
      if (!slug) return

      // Make the URL with the current slug
      const path = `/categories/${slug.current}`

      // Create the page using the URL path and the template file, and pass down the id
      // that we can use to query for the right category in the template file
      createPage({
        path,
        component: require.resolve('./src/templates/category.js'),
        context: {id}
      })
    })
}

Last, this function is needed at the bottom of the file:

// /web/gatsby-node.js

// ...

exports.createPages = async ({graphql, actions}) => {
  await createBlogPostPages(graphql, actions)
  await createCategoryPages(graphql, actions) // <= add the function here
}

Now that we have the machinery to create the category page node in place, we need to add a template for how it actually should look in the browser. We’ll base it on the existing blog post template to get some consistent styling, but keep it fairly simple in the process.

// /web/src/templates/category.js
import React from 'react'
import {graphql} from 'gatsby'
import Container from '../components/container'
import GraphQLErrorList from '../components/graphql-error-list'
import SEO from '../components/seo'
import Layout from '../containers/layout'

export const query = graphql`
  query CategoryTemplateQuery($id: String!) {
    category: sanityCategory(id: {eq: $id}) {
      title
      description
    }
  }
`
const CategoryPostTemplate = props => {
  const {data = {}, errors} = props
  const {title, description} = data.category || {}

  return (
    <Layout>
      <Container>
        {errors && <GraphQLErrorList errors={errors} />}
        {!data.category && <p>No category data</p>}
        <SEO title={title} description={description} />
        <article>
          <h1>Category: {title}</h1>
          <p>{description}</p>
        </article>
      </Container>
    </Layout>
  )
}

export default CategoryPostTemplate

We are using the ID that was passed into the context in gatsby-node.js to query the category content. Then we use it to query the title and description fields that are on the category type. Make sure to restart with npm run dev after saving these changes, and head over to localhost:8000/categories/structured-content in the browser. The page should look something like this:

A barebones category page with a site title, Archive link, page title, dummy content and a copyright in the footer.
A barebones category page

Cool stuff! But it would be even cooler if we actually could see what posts that belong to this category, because, well, that’s kinda the point of having categories in the first place, right? Ideally, we should be able to query for a “pages” field on the category object.

Before we learn how to that, we need to take a step back to understand how Sanity’s references work.

Querying Sanity’s references

Even though we’re only defining the references in one type, Sanity’s datastore will index them “bi-directionally.” That means creating a reference to the “Structured content” category document from a post lets Sanity know that the category has these incoming references and will keep you from deleting it as long as the reference exists (references can be set as “weak” to override this behavior). If we use GROQ, we can query categories and join posts that have them like this (see the query and result in action on groq.dev):

*[_type == "category"]{
  _id,
  _type,
  title,
  "posts": *[_type == "post" && references(^._id)]{
    title,
    slug
  }
}
// alternative: *[_type == "post" && ^._id in categories[]._ref]{

This ouputs a data structure that lets us make a simple category post template:

[
  {
    "_id": "39d2ca7f-4862-4ab2-b902-0bf10f1d4c34",
    "_type": "category",
    "title": "Structured content",
    "posts": [
      {
        "title": "Exploration powered by structured content",
        "slug": {
          "_type": "slug",
          "current": "exploration-powered-by-structured-content"
        }
      },
      {
        "title": "My brand new blog powered by Sanity.io",
        "slug": {
          "_type": "slug",
          "current": "my-brand-new-blog-powered-by-sanity-io"
        }
      }
    ]
  },
  // ... more entries
]

That’s fine for GROQ, what about GraphQL?

Here‘s the kicker: As of yet, this kind of query isn’t possible with Gatsby’s GraphQL API out of the box. But fear not! Gatsby has a powerful API for changing its GraphQL schema that lets us add fields.

Using createResolvers to edit Gatsby’s GraphQL API

Gatsby holds all the content in memory when it builds your site and exposes some APIs that let us tap into how it processes this information. Among these are the Node APIs. It’s probably good to clarify that when we are talking about “node” in Gatsby — not to be confused with Node.js. The creators of Gatsby have borrowed “edges and nodes” from Graph theory where “edges” are the connections between the “nodes” which are the “points” where the actual content is located. Since an edge is a connection between nodes, it can have a “next” and “previous” property.

The edges with next and previous, and the node with fields in GraphQL’s API explorer

The Node APIs are used by plugins first and foremost, but they can be used to customize how our GraphQL API should work as well. One of these APIs is called createResolvers. It’s fairly new and it lets us tap into how a type’s nodes are created so we can make queries that add data to them.

Let’s use it to add the following logic:

  • Check for ones with the SanityCategory type when creating the nodes.
  • If a node matches this type, create a new field called posts and set it to the SanityPost type.
  • Then run a query that filters all posts that has lists a category that matches the current category’s ID.
  • If there are matching IDs, add the content of the post nodes to this field.

Add the following code to the /web/gatsby-node.js file, either below or above the code that’s already in there:

// /web/gatsby-node.js
// Notice the capitalized type names
exports.createResolvers = ({createResolvers}) => {
  const resolvers = {
    SanityCategory: {
      posts: {
        type: ['SanityPost'],
        resolve (source, args, context, info) {
          return context.nodeModel.runQuery({
            type: 'SanityPost',
            query: {
              filter: {
                categories: {
                  elemMatch: {
                    _id: {
                      eq: source._id
                    }
                  }
                }
              }
            }
          })
        }
      }
    }
  }
  createResolvers(resolvers)
}

Now, let’s restart Gatsby’s development server. We should be able to find a new field for posts inside of the sanityCategory and allSanityCategory types.

A GraphQL query for categories with the category title and the titles of the belonging posts

Adding the list of posts to the category template

Now that we have the data we need, we can return to our category page template (/web/src/templates/category.js) and add a list with links to the posts belonging to the category.

// /web/src/templates/category.js
import React from 'react'
import {graphql, Link} from 'gatsby'
import Container from '../components/container'
import GraphQLErrorList from '../components/graphql-error-list'
import SEO from '../components/seo'
import Layout from '../containers/layout'
// Import a function to build the blog URL
import {getBlogUrl} from '../lib/helpers'

// Add “posts” to the GraphQL query
export const query = graphql`
  query CategoryTemplateQuery($id: String!) {
    category: sanityCategory(id: {eq: $id}) {
      title
      description
      posts {
        _id
        title
        publishedAt
        slug {
          current
        }
      }
    }
  }
`
const CategoryPostTemplate = props => {
  const {data = {}, errors} = props
  // Destructure the new posts property from props
  const {title, description, posts} = data.category || {}

  return (
    <Layout>
      <Container>
        {errors && <GraphQLErrorList errors={errors} />}
        {!data.category && <p>No category data</p>}
        <SEO title={title} description={description} />
        <article>
          <h1>Category: {title}</h1>
          <p>{description}</p>
          {/*
            If there are any posts, add the heading,
            with the list of links to the posts
          */}
          {posts && (
            <React.Fragment>
              <h2>Posts</h2>
              <ul>
                { posts.map(post => (
                  <li key={post._id}>
                    <Link to={getBlogUrl(post.publishedAt, post.slug)}>{post.title}</Link>
                  </li>))
                }
              </ul>
            </React.Fragment>)
          }
        </article>
      </Container>
    </Layout>
  )
}

export default CategoryPostTemplate

This code will produce this simple category page with a list of linked posts – just liked we wanted!

The category page with the category title and description, as well as a list of its posts

Go make taxonomy pages!

We just completed the process of creating new page types with custom page templates in Gatsby. We covered one of Gatsby’s Node APIs called createResolver and used it to add a new posts field to the category nodes.

This should give you what you need to make other types of taxonomy pages! Do you have multiple authors on your blog? Well, you can use the same logic to create author pages. The interesting thing with the GraphQL filter is that you can use it to go beyond the explicit relationship made with references. It can also be used to match other fields using regular expressions or string comparisons. It’s fairly flexible!

The post How to Make Taxonomy Pages With Gatsby and Sanity.io appeared first on CSS-Tricks.

Roll Your Own Comments With Gatsby and FaunaDB

If you haven’t used Gatsby before have a read about why it’s fast in every way that matters, and if you haven’t used FaunaDB before you’re in for a treat. If you’re looking to make your static sites full blown Jamstack applications this is the back end solution for you!

This tutorial will only focus on the operations you need to use FaunaDB to power a comment system for a Gatsby blog. The app comes complete with inputs fields that allow users to comment on your posts and an admin area for you to approve or delete comments before they appear on each post. Authentication is provided by Netlify’s Identity widget and it’s all sewn together using Netlify serverless functions and an Apollo/GraphQL API that pushes data up to a FaunaDB database collection.

I chose FaunaDB for the database for a number of reasons. Firstly there’s a very generous free tier! perfect for those small projects that need a back end, there’s native support for GraphQL queries and it has some really powerful indexing features!

…and to quote the creators;

No matter which stack you use, or where you’re deploying your app, FaunaDB gives you effortless, low-latency and reliable access to your data via APIs familiar to you

You can see the finished comments app here.

Get Started

To get started clone the repo at https://github.com/PaulieScanlon/fauna-gatsby-comments

or:

git clone https://github.com/PaulieScanlon/fauna-gatsby-comments.git

Then install all the dependencies:

npm install

Also cd in to functions/apollo-graphql and install the dependencies for the Netlify function:

npm install

This is a separate package and has its own dependencies, you’ll be using this later.

We also need to install the Netlify CLI as you’ll also use this later:

npm install netlify-cli -g

Now lets add three new files that aren’t part of the repo.

At the root of your project create a .env .env.development and .env.production

Add the following to .env:

GATSBY_FAUNA_DB =
GATSBY_FAUNA_COLLECTION =

Add the following to .env.development:

GATSBY_FAUNA_DB =
GATSBY_FAUNA_COLLECTION =
GATSBY_SHOW_SIGN_UP = true
GATSBY_ADMIN_ID =

Add the following to .env.production:

GATSBY_FAUNA_DB =
GATSBY_FAUNA_COLLECTION =
GATSBY_SHOW_SIGN_UP = false
GATSBY_ADMIN_ID =

You’ll come back to these later but in case you’re wondering

  • GATSBY_FAUNA_DB is the FaunaDB secret key for your database
  • GATSBY_FAUNA_COLLECTION is the FaunaDB collection name
  • GATSBY_SHOW_SIGN_UP is used to hide the Sign up button when the site is in production
  • GATSBY_ADMIN_ID is a user id that Netlify Identity will generate for you

If you’re the curious type you can get a taster of the app by running gatsby develop or yarn develop and then navigate to http://localhost:8000 in your browser.

FaunaDB

So Let’s get cracking, but before we write any operations head over to https://fauna.com/ and sign up!

Database and Collection

  • Create a new database by clicking NEW DATABASE
  • Name the database: I’ve called the demo database fauna-gatsby-comments
  • Create a new Collection by clicking NEW COLLECTION
  • Name the collection: I’ve called the demo collection demo-blog-comments

Server Key

Now you’ll need to to set up a server key. Go to SECURITY

  • Create a new key by clicking NEW KEY
  • Select the database you want the key to apply to, fauna-gatsby-comments for example
  • Set the Role as Admin
  • Name the server key: I’ve called the demo key demo-blog-server-key

Environment Variables Pt. 1

Copy the server key and add it to GATSBY_FAUNA_DB in .env.development, .env.production and .env.

You’ll also need to add the name of the collection to GATSBY_FAUNA_COLLECTION in .env.development, .env.production and .env.

Adding these values to .env are just so you can test your development FaunaDB operations, which you’ll do next.

Let’s start by creating a comment so head back to boop.js:

// boop.js
...
// CREATE COMMENT
createComment: async () => {
  const slug = "/posts/some-post"
  const name = "some name"
  const comment = "some comment"
  const results = await client.query(
    q.Create(q.Collection(COLLECTION_NAME), {
      data: {
        isApproved: false,
        slug: slug,
        date: new Date().toString(),
        name: name,
        comment: comment,
      },
    })
  )
  console.log(JSON.stringify(results, null, 2))
  return {
    commentId: results.ref.id,
  }
},
...

The breakdown of this function is as follows;

  • q is the instance of faunadb.query
  • Create is the FaunaDB method to create an entry within a collection
  • Collection is area in the database to store the data. It takes the name of the collection as the first argument and a data object as the second.

The second argument is the shape of the data you need to drive the applications comment system.

For now you’re going to hard-code slugname and comment but in the final app these values are captured by the input form on the posts page and passed in via args

The breakdown for the shape is as follows;

  • isApproved is the status of the comment and by default it’s false until we approve it in the Admin page
  • slug is the path to the post where the comment was written
  • date is the time stamp the comment was written
  • name is the name the user entered in the comments from
  • comment is the comment the user entered in the comments form

When you (or a user) creates a comment you’re not really interested in dealing with the response because as far as the user is concerned all they’ll see is either a success or error message.

After a user has posted a comment it will go in to your Admin queue until you approve it but if you did want to return something you could surface this in the UI by returning something from the createComment function.

Create a comment

If you’ve hard coded a slugname and comment you can now run the following in your CLI

node boop createComment

If everything worked correctly you should see a log in your terminal of the new comment.

{
   "ref": {
     "@ref": {
       "id": "263413122555970050",
       "collection": {
         "@ref": {
           "id": "demo-blog-comments",
           "collection": {
             "@ref": {
               "id": "collections"
             }
           }
         }
       }
     }
   },
   "ts": 1587469179600000,
   "data": {
     "isApproved": false,
     "slug": "/posts/some-post",
     "date": "Tue Apr 21 2020 12:39:39 GMT+0100 (British Summer Time)",
     "name": "some name",
     "comment": "some comment"
   }
 }
 { commentId: '263413122555970050' }

If you head over to COLLECTIONS in FaunaDB you should see your new entry in the collection.

You’ll need to create a few more comments while in development so change the hard-coded values for name and comment and run the following again.

node boop createComment

Do this a few times so you end up with at least three new comments stored in the database, you’ll use these in a moment.

Delete comment by id

Now that you can create comments you’ll also need to be able to delete a comment.

By adding the commentId of one of the comments you created above you can delete it from the database. The commentId is the id in the ref.@ref object

Again you’re not really concerned with the return value here but if you wanted to surface this in the UI you could do so by returning something from the deleteCommentById function.

// boop.js
...
// DELETE COMMENT
deleteCommentById: async () => {
  const commentId = "263413122555970050";
  const results = await client.query(
    q.Delete(q.Ref(q.Collection(COLLECTION_NAME), commentId))
  );
  console.log(JSON.stringify(results, null, 2));
  return {
    commentId: results.ref.id,
  };
},
...

The breakdown of this function is as follows

  • client is the FaunaDB client instance
  • query is a method to get data from FaunaDB
  • q is the instance of faunadb.query
  • Delete is the FaunaDB delete method to delete entries from a collection
  • Ref is the unique FaunaDB ref used to identify the entry
  • Collection is area in the database where the data is stored

If you’ve hard coded a commentId you can now run the following in your CLI:

node boop deleteCommentById

If you head back over to COLLECTIONS in FaunaDB you should see that entry no longer exists in collection

Indexes

Next you’re going to create an INDEX in FaunaDB.

An INDEX allows you to query the database with a specific term and define a specific data shape to return.

When working with GraphQL and / or TypeScript this is really powerful because you can use FaunaDB indexes to return only the data you need and in a predictable shape. This makes data typing responses in GraphQL and / TypeScript a dream… I’ve worked on a number of applications that just return a massive object of useless values which will inevitably cause bugs in your app. blurg!

  • Go to INDEXES and click NEW INDEX
  • Name the index: I’ve called this one get-all-comments
  • Set the source collection to the name of the collection you setup earlier

As mentioned above when you query the database using this index you can tell FaunaDB which parts of the entry you want to return.

You can do this by adding “values” but be careful to enter the values exactly as they appear below because (on the FaunaDB free tier) you can’t amend these after you’ve created them so if there’s a mistake you’ll have to delete the index and start again… bummer!

The values you need to add are as follows:

  • ref
  • data.isApproved
  • data.slug
  • data.date
  • data.name
  • data.comment

After you’ve added all the values you can click SAVE.

Get all comments

// boop.js
...
// GET ALL COMMENTS
getAllComments: async () => {
   const results = await client.query(
     q.Paginate(q.Match(q.Index("get-all-comments")))
   );
   console.log(JSON.stringify(results, null, 2));
   return results.data.map(([ref, isApproved, slug, date, name, comment]) => ({
     commentId: ref.id,
     isApproved,
     slug,
     date,
     name,
     comment,
   }));
 },
...

The breakdown of this function is as follows

  • client is the FaunaDB client instance
  • query is a method to get data from FaunaDB
  • q is the instance of faunadb.query
  • Paginate paginates the responses
  • Match returns matched results
  • Index is the name of the Index you just created

The shape of the returned result here is an array of the same shape you defined in the Index “values”

If you run the following you should see the list of all the comments you created earlier:

node boop getAllComments

Get comments by slug

You’re going to take a similar approach as above but this time create a new Index that allows you to query FaunaDB in a different way. The key difference here is that when you get-comments-by-slug you’ll need to tell FaunaDB about this specific term and you can do this by adding data.slug to the Terms field.

  • Go to INDEX and click NEW INDEX
  • Name the index, I’ve called this one get-comments-by-slug
  • Set the source collection to the name of the collection you setup earlier
  • Add data.slug in the terms field

The values you need to add are as follows:

  • ref
  • data.isApproved
  • data.slug
  • data.date
  • data.name
  • data.comment

After you’ve added all the values you can click SAVE.

// boop.js
...
// GET COMMENT BY SLUG
getCommentsBySlug: async () => {
  const slug = "/posts/some-post";
  const results = await client.query(
    q.Paginate(q.Match(q.Index("get-comments-by-slug"), slug))
  );
  console.log(JSON.stringify(results, null, 2));
  return results.data.map(([ref, isApproved, slug, date, name, comment]) => ({
    commentId: ref.id,
    isApproved,
    slug,
    date,
    name,
    comment,
  }));
},
...

The breakdown of this function is as follows:

  • client is the FaunaDB client instance
  • query is a method to get data from FaunaDB
  • q is the instance of faunadb.query
  • Paginate paginates the responses
  • Match returns matched results
  • Index is the name of the Index you just created

The shape of the returned result here is an array of the same shape you defined in the Index “values” you can create this shape in the same way you did above and be sure to add a value for terms. Again be careful to enter these with care.

If you run the following you should see the list of all the comments you created earlier but for a specific slug:

node boop getCommentsBySlug

Approve comment by id

When you create a comment you manually set the isApproved value to false. This prevents the comment from being shown in the app until you approve it.

You’ll now need to create a function to do this but you’ll need to hard-code a commentId. Use a commentId from one of the comments you created earlier:

// boop.js
...
// APPROVE COMMENT BY ID
approveCommentById: async () => {
  const commentId = '263413122555970050'
  const results = await client.query(
    q.Update(q.Ref(q.Collection(COLLECTION_NAME), commentId), {
      data: {
        isApproved: true,
      },
    })
  );
  console.log(JSON.stringify(results, null, 2));
  return {
    isApproved: results.isApproved,
  };
},
...

The breakdown of this function is as follows:

  • client is the FaunaDB client instance
  • query is a method to get data from FaunaDB
  • q is the instance of faunadb.query
  • Update is the FaundaDB method up update an entry
  • Ref is the unique FaunaDB ref used to identify the entry
  • Collection is area in the database where the data is stored

If you’ve hard coded a commentId you can now run the following in your CLI:

node boop approveCommentById

If you run the getCommentsBySlug again you should now see the isApproved status of the entry you hard-coded the commentId for will have changed to true.

node boop getCommentsBySlug

These are all the operations required to manage the data from the app.

In the repo if you have a look at apollo-graphql.js which can be found in functions/apollo-graphql you’ll see the all of the above operations. As mentioned before the hard-coded values are replaced by args, these are the values passed in from various parts of the app.

Netlify

Assuming you’ve completed the Netlify sign up process or already have an account with Netlify you can now push the demo app to your GitHub account.

To do this you’ll need to have initialize git locally, added a remote and have pushed the demo repo upstream before proceeding.

You should now be able to link the repo up to Netlify’s Continuous Deployment.

If you click the “New site from Git” button on the Netlify dashboard you can authorize access to your GitHub account and select the gatsby-fauna-comments repo to enable Netlify’s Continuous Deployment. You’ll need to have deployed at least once so that we have a pubic URL of your app.

The URL will look something like this https://ecstatic-lewin-b1bd17.netlify.app but feel free to rename it and make a note of the URL as you’ll need it for the Netlify Identity step mentioned shortly.

Environment Variables Pt. 2

In a previous step you added the FaunaDB database secret key and collection name to your .env files(s). You’ll also need to add the same to Netlify’s Environment variables.

  • Navigate to Settings from the Netlify navigation
  • Click on Build and deploy
  • Either select Environment or scroll down until you see Environment variables
  • Click on Edit variables

Proceed to add the following:

GATSBY_SHOW_SIGN_UP = false
GATSBY_FAUNA_DB = you FaunaDB secret key
GATSBY_FAUNA_COLLECTION = you FaunaDB collection name

While you’re here you’ll also need to amend the Sensitive variable policy, select Deploy without restrictions

Netlify Identity Widget

I mentioned before that when a comment is created the isApproved value is set to false, this prevents comments from appearing on blog posts until you (the admin) have approved them. In order to become admin you’ll need to create an identity.

You can achieve this by using the Netlify Identity Widget.

If you’ve completed the Continuous Deployment step above you can navigate to the Identity page from the Netlify navigation.

You wont see any users in here just yet so lets use the app to connect the dots, but before you do that make sure you click Enable Identity

Before you continue I just want to point out you’ll be using netlify dev instead of gatsby develop or yarn develop from now on. This is because you’ll be using some “special” Netlify methods in the app and staring the server using netlify dev is required to spin up various processes you’ll be using.

  • Spin up the app using netlify dev
  • Navigate to http://localhost:8888/admin/
  • Click the Sign Up button in the header

You will also need to point the Netlify Identity widget at your newly deployed app URL. This was the URL I mentioned you’ll need to make a note of earlier, if you’ve not renamed your app it’ll look something like this https://ecstatic-lewin-b1bd17.netlify.app/ There will be a prompt in the pop up window to Set site’s URL.

You can now complete the necessary sign up steps.

After sign up you’ll get an email asking you to confirm you identity and once that’s completed refresh the Identity page in Netlify and you should see yourself as a user.

It’s now login time, but before you do this find Identity.js in src/components and temporarily un-comment the console.log() on line 14. This will log the Netlify Identity user object to the console.

  • Restart your local server
  • Spin up the app again using netlify dev
  • Click the Login button in the header

If this all works you should be able to see a console log for netlifyIdentity.currentUser: find the id key and copy the value.

Set this as the value for GATSBY_ADMIN_ID = in both .env.production and .env.development

You can now safely remove the console.log() on line 14 in Identity.js or just comment it out again.

GATSBY_ADMIN_ID = your Netlify Identity user id

…and finally

  • Restart your local server
  • Spin up the app again using netlify dev

Now you should be able to login as “Admin”… hooray!

Navigate to http://localhost:8888/admin/ and Login.

It’s important to note here you’ll be using localhost:8888 for development now and NOT localhost:8000 which is more common with Gatsby development

Before you test this in the deployed environment make sure you go back to Netlify’s Environment variables and add your Netlify Identity user id to the Environment variables!

  • Navigate to Settings from the Netlify navigation
  • Click on Build and deploy
  • Either select Environment or scroll down until you see Environment variables
  • Click on Edit variables

Proceed to add the following:

GATSBY_ADMIN_ID = your Netlify Identity user id

If you have a play around with the app and enter a few comments on each of the posts then navigate back to Admin page you can choose to either approve or delete the comments.

Naturally only approved comments will be displayed on any given post and deleted ones are gone forever.

If you’ve used this tutorial for your project I’d love to hear from you at @pauliescanlon.


By Paulie Scanlon (@pauliescanlon), Front End React UI Developer / UX Engineer: After all is said and done, structure + order = fun.

Visit Paulie’s Blog at: www.paulie.dev

The post Roll Your Own Comments With Gatsby and FaunaDB appeared first on CSS-Tricks.

How to Deactivate All Plugins When Not Able to Access WP-Admin

Do you need to deactivate all WordPress plugins, but you cannot access the WordPress admin area?

During WordPress troubleshooting, you’ll be often advised to deactivate all plugins and then re-activate them one by one. But what if you cannot access the WordPress admin area to deactivate the plugins?

In this article, we’ll show you how to easily deactivate all WordPress plugins when not able to access the wp-admin area.

Deactivating all WordPress plugins without accessing admin area

Video Tutorial

If you prefer written instructions or want to move at your own pace, then continue reading the instructions below.

Basically, there are two commonly used methods to deactivate plugins without accessing the admin area. We’ll show you both of them and then you can pick one that looks easier.

Method 1. Deactivate All WordPress Plugins Using FTP

In this method, you will need to either use a FTP client, or the file manager option in your WordPress hosting control panel.

If you haven’t used FTP before, then you may want to see our how to use FTP to upload files to WordPress.

First, you need to connect to your website using FTP client, or File Manager in cPanel. Once connected, you need to navigate to the /wp-content/ folder.

Rename plugins folder

Inside the wp-content folder, you will see a folder called plugins. This is where WordPress stores all plugins installed on your website.

You need to right-click on the plugins folder and select Rename. Next, change the name of the plugins folder to anything that you like. In our example, we will call it “plugins.deactivate”.

Plugin folder renamed to deactivate all plugins

Once you do this, all of your plugins will be deactivated.

Basically, WordPress looks for a folder called plugins to load the plugin files. When it does not find the folder, it automatically disables the active plugins in the database.

Usually, this method is used when you are locked out of your admin area. If the issue was with your plugins, then you should be able login to your WordPress admin area.

If you visit the Plugins page inside the WordPress admin area, then you will see notifications for all the plugins that have been deactivated now.

WordPress plugins deactivated

You’ll also notice that all your plugins have disappeared now. Don’t worry they are all safe, and you can easily restore them.

Simply switch back to your FTP client and go to the /wp-content/ folder. From here, you need to rename “plugins.deactivate” folder back to plugins.

Now you can now go back to the Plugins page inside the WordPress admin area and activate one plugin at a time until your site breaks again.

At which point, you will know exactly which plugin caused the issue. You can then delete that plugin from your site using FTP or ask the plugin author for support.

Method 2. Deactivate All Plugins using phpMyAdmin

The FTP method is definitely easier in our opinion, however you can also deactivate all WordPress plugins using phpMyAdmin.

Important: Before you do anything, please make sure that you make a complete database backup. This will come in handy if anything goes wrong.

Next, you will need to login to your web hosting dashboard. In this example, we are showing you a cPanel dashboard. Your hosting account’s dashboard may look different.

You will need to click on phpMyAdmin icon under the ‘Databases’ section.

phpMyAdmin in cPanel

This will launch phpMyAdmin in a new browser window. You will need to select your WordPress database, if it is not already selected. After that, you will be able to see WordPress database tables.

WordPress database tables

As you can see that all tables in the database have wp_ prefix before table name. Your tables may have a different database prefix.

You need to click on the wp_options table. Inside the wp_options table, you will see rows of different options. You will need to find the option ‘active_plugins’ and then click on the ‘Edit’ Link next to it.

Editing active plugins option

On the next screen, you will need to change the option_value field to a:0:{} and then click on Go button to save your changes.

Reset active plugins

That’s all, you have successfully deactivated all WordPress plugins using phpMyAdmin. If it was a plugin stopping you from accessing the WordPress admin area, then you should be able to login now.

We hope that this article helped you deactivate all plugins in WordPress. You may also want to see our list of the best WordPress backup plugins to keep your WordPress data safe, and our expert pick of the best WordPress plugins for all sites.

If you liked this article, then please subscribe to our YouTube Channel for WordPress video tutorials. You can also find us on Twitter and Facebook.

The post How to Deactivate All Plugins When Not Able to Access WP-Admin appeared first on WPBeginner.

Understanding Machines: An Open Standard For JavaScript Functions

Understanding Machines: An Open Standard For JavaScript Functions

Understanding Machines: An Open Standard For JavaScript Functions

Kelvin Omereshone

As developers, we always seek ways to do our job better, whether by following patterns, using well-written libraries and frameworks, or what have you. In this article, I’ll share with you a JavaScript specification for easily consumable functions. This article is intended for JavaScript developers, and you’ll learn how to write JavaScript functions with a universal API that makes it easy for those functions to be consumed. This would be particularly helpful for authoring npm packages (as we will see by the end of this article).

There is no special prerequisite for this article. If you can write a JavaScript function, then you’ll be able to follow along. With all that said, let’s dive in.

What Are Machines?

Machines are self-documenting and predictable JavaScript functions that follow the machine specification, written by Mike McNeil. A machine is characterized by the following:

  • It must have one clear purpose, whether it’s to send an email, issue a JSON Web Token, make a fetch request, etc.
  • It must follow the specification, which makes machines predictable for consumption via npm installations.

As an example, here is a collection of machines that provides simple and consistent APIs for working with Cloudinary. This collection exposes functions (machines) for uploading images, deleting images, and more. That’s all that machines are really: They just expose a simple and consistent API for working with JavaScript and Node.js functions.

Features of Machines

  • Machines are self-documenting. This means you can just look at a machine and knows what it’s doing and what it will run (the parameters). This feature really sold me on them. All machines are self-documenting, making them predictable.
  • Machines are quick to implement, as we will see. Using the machinepack tool for the command-line interface (CLI), we can quickly scaffold a machine and publish it to npm.
  • Machines are easy to debug. This is also because every machine has a standardized API. We can easily debug machines because they are predictable.

Are There Machines Out There?

You might be thinking, “If machines are so good, then why haven’t I heard about them until now?” In fact, they are already widely used. If you’ve used the Node.js MVC framework Sails.js, then you have either written a machine or interfaced with a couple. The author of Sails.js is also the author of the machine specification.

In addition to the Sails.js framework, you could browse available machines on npm by searching for machinepack, or head over to http://node-machine.org/machinepacks, which is machinepack’s registry daemon; it syncs with npm and updates every 10 minutes.

Machines are universal. As a package consumer, you will know what to expect. So, no more trying to guess the API of a particular package you’ve installed. If it’s a machine, then you can expect it to follow the same easy-to-use interface.

Now that we have a handle on what machines are, let’s look into the specification by analyzing a sample machine.

The Machine Specification

    module.exports = {
  friendlyName: 'Do something',
  description: 'Do something with the provided inputs that results in one of the exit scenarios.',
  extendedDescription: 'This optional extended description can be used to communicate caveats, technical notes, or any other sort of additional information which might be helpful for users of this machine.',
  moreInfoUrl: 'https://stripe.com/docs/api#list_cards',
  sideEffects: 'cacheable',
  sync: true,

  inputs: {
    brand: {
      friendlyName: 'Some input',
      description: 'The brand of gummy worms.',
      extendedDescription: 'The provided value will be matched against all known gummy worm brands. The match is case-insensitive, and tolerant of typos within Levenstein edit distance <= 2 (if ambiguous, prefers whichever brand comes first alphabetically).',
      moreInfoUrl: 'http://gummy-worms.org/common-brands?countries=all',
      required: true,
      example: 'haribo',
      whereToGet: {
        url: 'http://gummy-worms.org/how-to-check-your-brand',
        description: 'Look at the giant branding on the front of the package. Copy and paste with your brain.',
        extendedDescription: 'If you don\'t have a package of gummy worms handy, this probably isn\'t the machine for you. Check out the `order()` machine in this pack.'
      }
    }
  },

  exits: {
    success: {
      outputFriendlyName: 'Protein (g)',
      outputDescription: 'The grams of gelatin-based protein in a 1kg serving.',
    },
    unrecognizedFlavors: {
      description: 'Could not recognize one or more of the provided `flavorStrings`.',
      extendedDescription: 'Some **markdown**.',
      moreInfoUrl: 'http://gummyworms.com/flavors',
    }
  },

  fn: function(inputs, exits) {
    // ...
    // your code here
    var result = 'foo';
    // ...
    // ...and when you're done:
    return exits.success(result);
  };
}

The snippet above is taken from the interactive example on the official website. Let’s dissect this machine.

From looking at the snippet above, we can see that a machine is an exported object containing certain standardized properties and a single function. Let’s first see what those properties are and why they are that way.

  • friendlyName
    This is a display name for the machine, and it follows these rules:
    • is sentence-case (like a normal sentence),
    • must not have ending punctuation,
    • must be fewer than 50 characters.
  • description
    This should be a clear one-sentence description in the imperative mood (i.e. the authoritative voice) of what the machine does. An example would be “Issue a JSON Web Token”, rather than “Issues a JSON Web Token”. Its only constraint is:
    • It should be fewer than 80 characters.
  • extendedDescription (optional)
    This property provides optional supplemental information, extending what was already said in the description property. In this field, you may use punctuation and complete sentences.
    • It should be fewer than 2000 characters.
  • moreInfoUrl (optional)
    This field contains a URL in which additional information about the inner workings or functionality of the machine can be found. This is particularly helpful for machines that communicate with third-party APIs such as GitHub and Auth0.
  • sideEffects (optional)
    This is an optional field that you can either omit or set as cacheable or idempotent. If set to cacheable, then .cache() can be used with this machine. Note that only machines that do not have sideEffects should be set to cacheable.
  • sync (optional)
    Machines are asynchronous by default. Setting the sync option to true turns off async for that machine, and you can then use it as a regular function (without async/await, or then()).

inputs

This is the specification or declaration of the values that the machine function expects. Let’s look at the different fields of a machine’s input.

  • brand
    Using the machine snippet above as our guide, the brand field is called the input key. It is normally camel-cased, and it must be an alphanumeric string starting with a lowercase letter.
    • No special characters are allowed in an input key identifier or field.
  • friendlyName
    This is a human-readable display name for the input. It should:
    • be sentence-case,
    • have no ending punctuation,
    • be fewer than 50 characters.
  • description
    This is a short description describing the input’s use.
  • extendedDescription
    Just like the extendedDescription field on the machine itself, this field provides supplemental information about this particular input.
  • moreInfoUrl
    This is an optional URL that provides more information about the input, if needed.
  • required
    By default, every input is optional. What that means is that if, by runtime, no value is provided for an input, then the fn would be undefined. If your inputs are not optional, then it’s best to set this field as true because this would make the machine throw an error.
  • example
    This field is used to determined the expected data type of the input.
  • whereToGet
    This is an optional documentation object that provides additional information on how to locate adequate values for this input. This is particularly useful for things like API keys, tokens, and so on.
  • whereToGet.description
    This is a clear one-sentence description, also in the imperative mood, that describes how to find the right value for this input.
  • extendedDescription
    This provides additional information on where to get a suitable input value for this machine.

exits

This is the specification for all possible exit callbacks that this machine’s fn implementation can trigger. This implies that each exit represents one possible outcome of the machine’s execution.

  • success
    This is the standardized exit key in the machine specification that signifies that everything went well and the machine worked without any errors. Let’s look at the properties it could expose:
    • outputFriendlyName
      This is simply a display name for the exit output.
    • outputDescription
      This short noun phrase describes the output of an exit.

Other exits signify that something went wrong and that the machine encountered an error. The naming convention for such exits should follow the naming convention for the input’s key. Let’s see the fields under such exits:

  • description
    This is a short description describing when the exit would be called.
  • extendedDescription
    This provides additional information about when this exit would be called. It’s optional. You may use full Markdown syntax in this field, and as usual, it should be fewer than 2000 characters.

You Made It!

That was a lot to take in. But don’t worry: When you start authoring machines, these conventions will stick, especially after your first machine, which we will write together shortly. But first…

Machinepacks

When authoring machines, machinepacks are what you publish on npm. They are simply sets of related utilities for performing common, repetitive development tasks with Node.js. So let’s say you have a machinepack that works with arrays; it would be a bundle of machines that works on arrays, like concat(), map(), etc. See the Arrays machinepack in the registry to get a full view.

Machinepacks Naming Convention

All machinepacks must follow the standard of having “machinepack-” as a prefix, followed by the name of the machine. For example, machinepack-array, machinepack-sessionauth.

Our First Machinepack

To better understand machines, we will write and publish a machinepack that is a wrapper for the file-contributors npm package.

Getting Started

We require the following to craft our machinepack:

  1. Machinepack CLI tool
    You can get it by running:
    npm install -g machinepack
    
  2. Yeoman scaffolding tool
    Install it globally by running:
     npm install -g yo
    
  3. Machinepack Yeomen generator
    Install it like so:
    npm install -g generator-machinepack
    

Note: I am assuming that Node.js and npm are already installed on your machine.

Generating Your First Machinepack

Using the CLI tools that we installed above, let’s generate a new machinepack using the machinepack generator. Do this by first going into the directory that you want the generator to generate the files in, and then run the following:

yo machinepack

The command above will start an interactive process of generating a barebones machinepack for you. It will ask you a couple of questions; be sure to say yes to it creating an example machine.

Note: I noticed that the Yeoman generator has some issues when using Node.js 12 or 13. So, I recommend using nvm, and install Node.js 10.x, which is the environment that worked for me.

If everything has gone as planned, then we would have generated the base layer of our machinepack. Let’s take a peek:

DELETE_THIS_FILE.md
machines/
package.json
package.lock.json
README.md
index.js
node_modules/

The above are the files generated for you. Let’s play with our example machine, found inside the machines directory. Because we have the machinepack CLI tool installed, we could run the following:

machinepack ls

This would list the available machines in our machines directory. Currently, there is one, the say-hello machine. Let’s find out what say-hello does by running this:

machinepack exec say-hello

This will prompt you for a name to enter, and it will print the output of the say-hello machine.

As you’ll notice, the CLI tool is leveraging the standardization of machines to get the machine’s description and functionality. Pretty neat!

Let’s Make A Machine

Let’s add our own machine, which will wrap the file-contributors and node-fetch packages (we will also need to install those with npm). So, run this:

npm install file-contributors node-fetch --save

Then, add a new machine by running:

machinepack add

You will be prompted to fill in the friendly name, the description (optional), and the extended description (also optional) for the machine. After that, you will have successfully generated your machine.

Now, let’s flesh out the functionality of this machine. Open the new machine that you generated in your editor. Then, require the file-contributors package, like so:

const fetch = require('node-fetch');
const getFileContributors = require('file-contributors').default;

global.fetch = fetch; // workaround since file-contributors uses windows.fetch() internally

Note: We are using node-fetch package and the global.fetch = fetch workaround because the file-contributors package uses windows.fetch() internally, which is not available in Node.js.

The file-contributors’ getFileContributors requires three parameters to work: owner (the owner of the repository), repo (the repository), and path (the path to the file). So, if you’ve been following along, then you’ll know that these would go in our inputs key. Let’s add these now:

...
 inputs: {
    owner: {
      friendlyName: 'Owner',
      description: 'The owner of the repository',
      required: true,
      example: 'DominusKelvin'
    },
    repo: {
      friendlyName: 'Repository',
      description: 'The Github repository',
      required: true,
      example: 'machinepack-filecontributors'
    },
    path: {
      friendlyName: 'Path',
      description: 'The relative path to the file',
      required: true,
      example: 'README.md'
    }
  },
...

Now, let’s add the exits. Originally, the CLI added a success exit for us. We would modify this and then add another exit in case things don’t go as planned.

exits: {

    success: {
      outputFriendlyName: 'File Contributors',
      outputDescription: 'An array of the contributors on a particular file',
      variableName: 'fileContributors',
      description: 'Done.',
    },

    error: {
      description: 'An error occurred trying to get file contributors'
    }

  },

Finally let’s craft the meat of the machine, which is the fn:

 fn: function(inputs, exits) {
    const contributors = getFileContributors(inputs.owner, inputs.repo, inputs.path)
    .then(contributors => {
      return exits.success(contributors)
    }).catch((error) => {
      return exits.error(error)
    })
  },

And voilà! We have crafted our first machine. Let’s try it out using the CLI by running the following:

machinepack exec get-file-contributors

A prompt would appear asking for owner, repo, and path, successively. If everything has gone as planned, then our machine will exit with success, and we will see an array of the contributors for the repository file we’ve specified.

Usage In Code

I know we won’t be using the CLI for consuming the machinepack in our code base. So, below is a snippet of how we’d consume machines from a machinepack:

    var FileContributors = require('machinepack-filecontributors');

// Fetch metadata about a repository on GitHub.
FileContributors.getFileContributors({
  owner: 'DominusKelvin',
  repo: 'vue-cli-plugin-chakra-ui',
   path: 'README.md' 
}).exec({
  // An unexpected error occurred.
  error: function (){
  },
  // OK.
  success: function (contributors){
    console.log('Got:\n', contributors);
  },
});

Conclusion

Congratulations! You’ve just become familiar with the machine specification, created your own machine, and seen how to consume machines. I’ll be glad to see the machines you create.

Resources

Check out the repository for this article. The npm package we created is also available on npm.

Smashing Editorial (ra, il, al)