Ringtone on Windows Mobile 7 MP3?

How can we use an mp3 song for a ringtone, we used to be able to use it on Windows 6.5, are we unable to find any details about it anywhere on Windows 7 mobile phones and there are no choices in the phone's music side to set it as a ringtone or settings?

Comparing Web Traffic: What Your WordPress Traffic Actually Means

You did it! Your business is now online with a kickass website and a team of experts to help you manage it. The problem is, you don’t understand what your traffic reports are telling you, so how do you know your website is kicking ass?

If you own a restaurant, all you need to do to understand what kind of traffic you’re getting is to stand in the door, smile as people walk in, observe the flow, and take mental notes. Easy!

However, if the same restaurant has a website, trying to make sense of your traffic flow, what it all means, and how you can use this information to improve your results, is not as easy.

To make this whole thing even more challenging, unless you understand the terminology used to describe this traffic, all you can do is stare at traffic reports blankly, or nod dumbly with glazed eyes when experts try to explain to you what is happening on your site.

In this post, we’re going to help you change this. By the time you’re done reading, you will be able to understand what your site’s traffic actually means. Knowing this will help you better analyze what is happening and make more informed decisions on ways to improve your site.

Here’s what we’re going to cover in this post:

  • Who needs to know this (hint: it’s you!)
  • What you need to do to effectively track and measure your site’s traffic.
  • Types of website visitors (Human and Bots).
  • Bot traffic indicators.
  • How to manage bot traffic.
  • How to measure incoming traffic.

Let’s dive in…

Who Needs To Know What Traffic Means?

Given the complexity of running a digital presence, it’s no wonder many businesses choose to outsource things like web hosting, web development, web management, site maintenance, installation, customizations, etc. to a webmaster or a digital agency.

It’s vitally important that webmasters have a full understanding of the traffic the site(s) they’re managing generates. 

It’s also vitally important that business owners and managers understand this too if the business wants to be able to improve its results.

Otherwise, it’s like someone talking to you in a foreign language when English is all you understand.

Being able to pick out basic key metrics like the total number of visitors and your conversion rate are important. However, having a deeper insight into who comprises your traffic and whom you’re converting can significantly increase your bottom line. 

So, understanding what traffic means is not just the webmaster’s responsibility. It’s also something that all business owners and managers in charge of making business and marketing decisions need to understand too.

What You Need To Set Up To Track And Measure Traffic

You can track and measure traffic in WordPress easily by adding a snippet of code to your site’s templates.

With Google Analytics, for example, you can add Google Analytics code to templates manually, or use Google Analytics plugins.

Using plugins is the faster and easier way (unless you want to code your own Google Analytics plugin, which we can also show you how to do).

If you want to skip all the hassle, however, just use a plugin like Beehive Google Analytics Dashboard. Beehive lets you easily add the Google Analytics tracking code to your site in just a few clicks.

Beehive - WordPress Analytics plugin.
Easily add Google Analytics code to your WordPress site with the Beehive Analytics plugin.

Once your site starts to gather traffic data, all you need to do is learn how to interpret it.

Beehive Analytics Dashboard
All your traffic stats on one dashboard…now let’s learn how to make sense of it!

Note: We’ve written a Comprehensive Guide To Google Analytics that will help you understand the metrics and terminology of using Google Analytics to interpret what your traffic means. Go through our guide and read the rest of the article below to massively shortcut the path to Web Traffic wisdom and enlightenment.

Types of Website Visitors

Website traffic refers to anyone and anything that visits your site. 

Yes, anything. 

Bots (computer programs) generate about 38 percent of all internet traffic — that’s a lot of traffic from something that’s not going to buy any of your products or services. 

The rest of the traffic is presumably human, as there are really only two types of website visitors: bots and humans.

Cartoon of Devman staring at two laptops - one with human visitors ready to buy products, the other with spider bots.
Which kind of website traffic would you rather see more of?

Human Visitors

Human visitors are (obviously) your target traffic. Unlike bots, humans can take action (like make buying decisions) and engage with your website in a meaningful, productive way. 

They can write real comments, subscribe to your email list, purchase products, download an ebook, and so on.

As obvious as this may sound, humans are why you have a website in the first place.

So, why are we stating the obvious?

Well, some human traffic is not necessarily going to be useful, such as internal/employee traffic. Yes, your staff and team members are human (we hope), but they are typically not the group you want to track, as they are not potential or existing customers. 

Thankfully, it’s possible to filter out the impact of certain types of human traffic on tools like Google Analytics through IP addresses.

Exclude traffic from IP addresses.
You can filter out unwanted traffic data by excluding IP addresses.

Bot Traffic

Bot traffic refers to anything nonhuman visiting your website. Bots are software applications developed to carry out specific tasks.

In general, you don’t want bot traffic. Bot traffic can inflate your traffic numbers, mask your true conversion rates, and attack your website. 

There are armies of bots that visit your site with malicious intentions. They are programmed to scrape content, launch DDoS attacks, or distribute malware, among other attempts to harm and disrupt your website. 

Frustratingly, bots behave similarly to humans, making it difficult to distinguish them.

If you’re using Google Analytics to monitor website performance, bots can skew your report’s data with inaccurate or meaningless traffic.

That said, not all bots are bad. In fact, Googlebot (Google’s search engine bot that crawls websites) is vital to understanding what content is on your website so it can show up for the proper queries. 

This bot traffic isn’t included in Google Analytics reports. Additionally, good bots respect the indications in your robots.txt file (which provides instructions for bots crawling the page), and generally won’t mess up your data.

Bot Traffic Indicators

So, how do you know if you’re getting malicious bot traffic on your site? 

There are a number of red flags.

In general, you’re looking for sudden changes in website traffic that don’t make sense. If you’ve launched a sale, a sudden spike in traffic seems totally reasonable. 

However, if you haven’t made significant changes or launched a new campaign, significant changes in traffic and behavior could be a sign your site is under attack.

Specifically, you want to watch for these trends:

  • Spikes in traffic from a location without many users fluent in the native language of the site (ie: spikes in traffic from Russia on an Indonesian website).
  • Abnormally high pageviews.
  • An unusual amount of traffic coming from one source/medium. This is particularly worrisome if the location is tagged as (not set).
  • Abnormally high bounce rate. Your bounce rate measures the number of users that visit a single page on the site and then leave before clicking anything on the page.
  • Very high or low average session duration. The average session duration is the length of time users stay on a page. You should have a good idea of how long people usually spend on your site for comparison.
  • Junk conversions. An increase in accounts created with spam email addresses, contact forms with fake details, and so on.

Be aware of these key indicators of malicious bot traffic so you can quickly identify problems and roll out solutions.

You can also take preventative action by installing a plugin like Defender, which can block hackers and bots at every level, stop brute force attacks, SQL injections, cross-site scripting XSS, and other WordPress vulnerabilities with ongoing malware scans, firewall, and two-factor authentication login security.

How to Manage Bot Traffic

Google Analytics has an option to exclude known bots from your site traffic, but it wasn’t built as a bot detection tool. So, you have to take a few additional steps to help weed bot traffic out of your numbers.

The first thing you can do from your Google Analytics report is to go to Admin View > choose the property > choose the view > go to View Settings and check Exclude all hits from known bots and spiders:

Exclude all hits from known bots and spiders.

This ensures all bots on the Interactive Advertising Bureau’s International Spiders & Bots List will be excluded. 

This solution isn’t fool-proof because only bots on the list will be detected. Besides that, the listed bots will still be present in your servers, affecting server load, and website performance.

However, once that box is checked, you can also set up a bot filter on Google Analytics.

Additionally, if you’re having issues with malicious bot traffic, you can get a bot management system. 

This is a software product that blocks undesirable bot traffic while granting useful bots access to your site. 

These bot managers may use JavaScript challenges (which determines whether or not a traditional web browser is being used) or CAPTCHA challenges. 

They may also perform behavioral analysis to identify bots. 

There is a wide selection of quality bot management systems out there, including Cloudflare, DataDome, ShieldSquare, Imperva, and Akamai.

How to Measure Incoming Traffic

As you know by now, not all website traffic is equal. 

In fact, not even all of your human website traffic is equal, which can be due in part to the ways you’re promoting your content, but it requires a closer analysis to really understand which traffic sources are of the highest quality. 

It’s important to look past the number of visitors and start tracking and understanding Key Performance Indicators (KPIs).

Key Performance Indicators to Watch

Some relevant KPIs to keep an eye on are:

  • Average session duration (which helps you understand how long people are engaging with your site)
  • Bounce rate
  • Pageviews
  • Top exit pages (the pages people leave on)
  • Pages per session
  • Page / scroll depth
  • Unique visitors
  • Conversion rate

Google Analytics will gather and sort all your website traffic data into key metrics. However, you can take your interpretation a step further with reports that compare related data points.

If you want to track referral traffic, you can use Urchin Tracking Module (UTM) code. 

Fun fact: UTM codes were introduced by Urchin, an analytics tool that was bought by Google and eventually became Google Analytics.

This is a simple code you can attach to the end of a URL to track a source, medium, and campaign name. 

It tells Google Analytics where a user came from before arriving at your site and what directed them to it.

UTMs have five parameters: source, medium, campaign, content, and term:

  • Medium — channel (ie: social, organic, paid, etc).
  • Source — site within the channel (i.e. social -> Facebook).
  • Campaign — to differentiate campaigns in case you’re running multiple simultaneously.
  • Content — optional, but useful if you have to differentiate multiple links in the same campaign.
  • Term — used to track specific keywords for paid campaigns.

A normal URL without tracking looks something like: www.mywebsite.com

However, if you’re using UTM codes, it changes to something like: www.mywebsite.com/?utm_medium=email

The ? character tells a user’s browser that everything following it is data. The “utm_medium=email” portion is a UTM code referring to the traffic’s medium.

Measuring Traffic with Native Platform Analytics Tools & Third-Party Analytics Tools

If you want a deeper understanding of how to succeed with pay-per-click (PPC) strategies, studying for the Google Ads Academy certification is a great start. 

You should also aim to get familiar with the platform’s native analytics tool: Google Ads Keyword Planner.

Additionally, take the time to become proficient in using platform-specific analytics, such as Twitter Analytics and Facebook Analytics, which measure social traffic. 

Take it a step further by cross-checking your results with a third-party social analytics tool, such as Buffer.

Of course, if you’re going to get serious about measuring and understanding your website traffic, consider adopting an all-in-one SEO tool

For example, Ahrefs is such a tool and measures organic search reach (keyword rankings), links to your website from other websites, and other traffic metrics, like Domain Rating. 

Additionally, it’s possible to get nearly all the same data about your competitors’ traffic.

Finally, installing a plugin like Beehive and using a tool such as Leadfeeder will provide you with additional insights on top of Google Analytics, focusing on the demographics and businesses your website visitors represent, which is vital for B2B companies.

Final Thoughts: How to Understand What Your WordPress Traffic Actually Means

As we’ve just seen, not all website traffic is good traffic. 

It’s important to filter out unwanted bot traffic before you can start to analyze the human element of your website’s visitors. 

Once you have cleaner data, there are a multitude of ways to track and increase your website traffic and strategies you can apply to improve your results.

Here are some of the ways to help you get going and get growing:

WordPress Block Transforms

This has been the year of Gutenberg for us here at CSS-Tricks. In fact, that’s a goal we set at the end of last year. We’re much further along that I thought we’d be, authoring all new content in the block editor¹, enabling the block editor for all content now. That means when we open most old posts, we see all the content in the “Classic” block. It looks like this:

A post written on CSS-Tricks before we were using the block editor.

The entire contents of the post is in a single block, so not exactly making any use of the block editor. It’s still “visual,” like the block editor, but it’s more like the old visual editor using TinyMCE. I never used that as it kinda forcefully mangled HTML in a way I didn’t like.

This is the #1 thing I was worried about

Transforming a Classic block into new blocks is as trivial as selecting the Classic block and selecting the “Convert to Blocks” option.

Select the option and the one block becomes many blocks.

How does the block editor handle block-izing old content, when we tell it to do that from the “Convert to Blocks” option? What if it totally screws up content during the conversion? Will we ever be able to switch?

The answer: it does a pretty darn good job. But… there are still issues. Not “bugs” but situations where we have custom HTML in our old content and it doesn’t know what to do with it — let alone how to convert it into exactly the blocks we wish it would. There is a way!

Basic Block Transforms

That’s where this idea of “Block Transforms” comes in. All (well, most?) native blocks have “to” and “from” transformations. You’re probably already familiar with how it manifests in the UI. Like a paragraph can transform “to” a quote and vice versa. Here’s a super meta screenshot of this very paragraph:

Those transforms aren’t magic; they are very explicitly coded. When you register a block, you specify the transforms. Say you were registering your own custom code block. You’d want to make sure that you could transform it…

  • From and to the default built-in code block, and probably a handful of others that might be useful.
  • Back to the built-in code block.

Which might look like:

registerBlockType("my/code-block", {
  title: __("My Code Block"),
  ...
  transforms: {
    from: [
      {
        type: "block",
        priority: 7,
        blocks: ["core/code", "core/paragraph", "core/preformatted"],
        transform: function (attributes) {
          return createBlock("my/code-block", {
            content: attributes.content,
          });
        },
      },
    ],
    to: [
      {
        type: "block",
        blocks: ["core/code"],
        transform: ({ content }) => createBlock("core/code", { content }),
      },
    ],
   
   ...

Those are transforms to and from other blocks. Fortunately, this is a pretty simple block where we’re just shuffling the content around. More complex blocks might need to pass around more data, but I haven’t had to deal with that yet.

The more magical stuff: Block Transforms from raw code

Here’s the moment of truth for old content:

The “Convert to Blocks” option.

In this situation, blocks are being created not from other blocks, but from raw code. Quite literally, the HTML is being looked at and choices are being made about what blocks to make from chunks of that HTML. This is where it’s amazing the block editor does such a good job with the choices, and also where things can go wrong and it can fail, make wrong block choices, or mangle content.

In our old content, a block of code (a super very important thing) in a post would look like this:

<pre rel="JavaScript"><code class="language-javascript" markup="tt">
  let html = `<div>cool</div>`;
</code></pre>

Sometimes the block conversion would do OK on those, turning it into a native code block. But there were a number of problems:

  1. I don’t want a native code block. I want that to be transformed into our own new code block (blogged about that here).
  2. I need some of the information in those attributes to inform settings on the new block, like what kind of code it is.
  3. The HTML in our old code blocks was not escaped and I need it to not choke on that.

I don’t have all the answers here, as this is an evolving process, but I do have some block transforms in place now that are working pretty well. Here’s what a “raw” transform (as opposed to a “block” transform) looks like:

registerBlockType("my/code-block", {
  title: __("My Code Block"),
  // ...
  transforms: {
    from: [
      {
        type: "block",
        priority: 7,
        // ...
      },
      {
        type: "raw",
        priority: 8,
        isMatch: (node) =>
          node.nodeName === "PRE" &&
          node.children.length === 1 &&
          node.firstChild.nodeName === "CODE",
        transform: function (node) {
          let pre = node;
          let code = node.querySelector("code");

          let codeType = "html";
          if (pre.classList.contains("language-css")) {
            codeType = "css";
          }
          if (pre.getAttribute("rel") === "CSS") {
            codeType = "css";
          }
          if (pre.classList.contains("language-javascript")) {
            codeType = "javascript";
          }
          if (code.classList.contains("language-javascript")) {
            codeType = "javascript";
          }
          // ... other data wrangling...

          return createBlock("csstricks/code-block", {
            content: code.innerHTML,
            codeType: codeType,
          });
        },
      },
    ],
    to: [
      // ... 
    ],
   
   // ...

}

That isMatch function runs on every node in the HTML it finds, so this is the big opportunity to return true from that in the special situations you need to. Note in the code above that I’m specifically looking for HTML that looks like <pre ...><code ...>. When that matches, the transform runs, and I can return a createBlock call that passes in data and content I extract from the node with JavaScript.

Another example: Pasting a URL

“Raw” transforms don’t only happen when you “Convert to Blocks.” They happen when you paste content into the block editor too. You’ve probably experienced this before. Say you have copied some table markup from somewhere and paste it into the block editor -— it will probably paste as a table. A YouTube URL might paste into an embed. This kind of thing is why copy/pasting from Word documents and the like tend to work so well with the block editor.

Say you want some special behavior when a certain type of URL is pasted into the editor. This was the situation I was in with our custom CodePen Embed block. I wanted it so if you pasted a codepen.io URL, it would use this custom block, instead of the default embed.

This is a “from” transform that looks like this:

{
  type: "raw",
  priority: 8, // higher number to beat out default
  isMatch: (node) =>
    node.nodeName === "P" &&
    node.innerText.startsWith("https://codepen.io/"),

  transform: function (node) {
    return createBlock("cp/codepen-gutenberg-embed-block", {
      penURL: node.innerText,
      penID: getPenID(node.innerText), // helper function
    });
  },
}

So…

Is it messy? A little. But it’s as powerful as you need it to be. If you have an old site with lots of bespoke HTML and shortcodes and stuff, then getting into block transforms is the only ticket out.

I’m glad I went to WPBlockTalk and caught K. Adam White’s talk on shortcodes because there was just one slide that clued me into that this was even possible. There is a little bit of documentation on it.

One thing I’d like to figure out is if it’s possible to run these transforms on all old content in the database. Seems a little scary, but also like it might be a good idea in some situations. Once I get my transformations really solid, I could see doing that so any old content ready-to-go in the block editor when opening it up. I just have no idea how to go about it.

I’m glad to be somewhat on top of this though, as I friggin love the block editor right now. It’s a pleasure to write in and build content with it. I like what Justin Tadlock said:

The block system is not going anywhere. WordPress has moved beyond the point where we should consider the block editor as a separate entity. It is an integral part of WordPress and will eventually touch more and more areas outside of the editing screen.

It’s here to stay. Embracing the block editor and bending it to our will is key.

  1. What are we calling it anyway? “Gutenberg” doesn’t seem right anymore. Feels like that will fade away, even though the development of it still happens in the Gutenberg plugin. I think I’ll just call it “the block editor” unless specifically referring to that plugin.

The post WordPress Block Transforms appeared first on CSS-Tricks.

New Iceberg Plugin Brings a Distraction-Free Writing Experience to WordPress

Ever on the hunt for a more beautiful, simplified writing experience inside WordPress, I jumped at the chance to beta test the new Iceberg plugin. Rich Tabor and Jeffrey Caradang, the same team behind CoBlocks, have created a new markdown editor built on top of Gutenberg that provides the best writing experience for WordPress since core’s retired Distraction Free Writing mode.

Iceberg features a minimalist editor with four color themes, the ability to create a custom theme, and a set of typography controls. In switching to Iceberg, there is not much missing much from the default block editor that would be necessary for writing. Users can drag and drop media into Iceberg and the backslash command works to trigger the block inserter. It also includes a Table of Contents, word and character counts, reading time, keyboard shortcuts, and support for emoji.

“Iceberg was brought to fruition out of an experiment to make WordPress look and feel more like my favorite writing applications,” Tabor said. “My personal publishing flow was to write in an external application, paste it all into the block editor, followed by fixing/adjusting/resizing everything–honestly not fun. You see, writing with blocks is just ‘ok’ – and doesn’t feel natural.

“After chatting with others, I realized a lot of folks shared the same sentiment and that such a small number of folks I talked to actually composed articles within WordPress. And although I appreciate how far the block editor has come over the years as a site editor and page builder, I wanted to morph the experience to better support publishing.”

The Iceberg name is a nod towards Guten “berg.” Tabor said he wanted the project to seem more approachable, without being tied to WordPress or emphasizing blocks.

Tabor said he was inspired by dedicated writing applications like Bear, Ulysses, Dropbox Paper, and Google Docs. What he loves most about Iceberg is that its design is centered around the writer’s preferences.

“The editor themes that sit at the core of Iceberg’s design language empower each writer to define their flavor of the editor,” he said. “Every color variable is auto-generated based on the editor theme and applied throughout the interface as necessary.”

Gutenberg was also a strong inspiration for the design principles that guided Tabor in creating Iceberg.

“Gutenberg itself is undergoing quite a transformation with what’s being dubbed as ‘G2’ – a new design system geared towards improved contrast, modern lines and an overall cleaner look,” he said. “I knew I wanted to push Iceberg in that direction, bringing a clean and modern look to the writing environment.”

Under the hood, Iceberg is simply an extension of the block editor that de-emphasizes blocks to better enable writers. Since the plugin manipulates the editor itself, users’ content remains intact even if it is deactivated.

“It’s a clever combination of React components, styles, CSS custom variables and UX that is centered entirely around the art of writing,” Tabor said. “In short, if folks are familiar with Gutenberg development, they’ll find Iceberg similarly structured.”

Tabor said he wants to keep the plugin simple while also exploring where he can push the writing experience further forward. Possible features coming to the roadmap include goal setting, readability analysis, an improved pre-publish checklist, and better post previews/live previewing.

Iceberg Gets Positive Reviews at Launch, Fills a Gap in the Block Editor’s Support for Writers

Iceberg is launching as a commercial product, priced at $39 for a single site or $99 for unlimited sites. The product seems to have filled a gap in the market, covering Gutenberg’s long-standing deficiency in supporting writers. Community feedback during the beta and on Twitter and Product Hunt has so far been overwhelmingly positive.

“Iceberg is like a noise-cancellation for the WordPress editor,” Rajendra Zore said.

Nick Hamze offered feedback in a Twitter thread, saying he was excited to see a product that can “take markdown back from developers.” He views Iceberg as a positive development in the WordPress product space, and urged the community to support these kinds of innovations:

The fun thing about Iceberg is it’s an enhancement of the block editor not a replacement. No editor can be everything to everyone. Iceberg takes all the parts that are great for writers and emphasizes them while moving everything else into the background.

It’s not a criticism of the block editor but a celebration of it. Even if you aren’t a writer I think you should buy a copy. As a community we need to support people who are doing stuff like this. They’re never going to stop making cool stuff but they might stop making it for WP.

After beta testing the plugin I found that it provides the kind of writing experience that I have been missing in the block editor. Iceberg removes the cumbersome feeling of forcing your writing into blocks. More than anything, I want to see something like this land in WordPress core someday.

It’s somewhat bittersweet to see a better writing experience arrive as a commercial plugin, instead of from core improvements. I desperately want WordPress to be home to the best tools for writers, because it is a publishing platform that is so powerful in nearly every other way. This is not to say that core developers cannot adopt something similar. That’s the beauty of open source software – products inspiring new and improved solutions in a never-ending cycle.

Gutenberg designers and engineers have been working for the past two years to bring the writing experience in the editor to a functional place that meets the needs of those who use WordPress primarily for writing. So far the block editor’s Fullscreen mode is incapable of producing the kind of zen writing experience that most writers crave when turning to third-party writing apps.

Iceberg is GPL-licensed and is even available on GitHub for download and collaboration. I asked Tabor what he planned to do if someone proposed that some version of Iceberg be added to core.

“Honestly, I think it would be great if WordPress adopted the same high level of support for writers as Iceberg does,” he said. “Sure it may not be completely ideal economically, but Iceberg is built on an editor built by thousands of hands. If Iceberg is deemed a clever enough solution to be a part of core, then that’s ok. Although I’m positive there’s room to continue experimenting within the realm of empowering writers.”

As WordPress continues to move full steam ahead on the site building aspects of the editor, a truly distraction-free writing experience is not likely to become a high priority anytime soon. Tabor sees this as an opportunity for products that can transform the editor for different types of users who may not be focused on building websites.

“We’re in such a transformative period of WordPress right now,” Tabor said. “The editing experience we’re building with the block editor is much more focused on designing and publishing websites – not writing posts. Consequently, there’s been much more focus on the site building experience, in lieu of the writing experience. That’s not to say I don’t love the direction WordPress is heading–I absolutely do. But rather that I feel there’s room for a tool to improve the writing experience within the block editor.”

Openprise Adds API Factory to its Product Lineup

Openprise today announced the availability of Openprise API Factory, the first and only solution that transforms any automated business process into a custom API with a single click, making it easy to add custom API-based services to enterprise systems without writing a single line of code.

WooCommerce Payments Allows Shop Owners to Manage Payments Without Leaving WordPress Admin

WooCommerce Payments decorative image with a laptop accepting a credit card.

Automattic-owned eCommerce platform WooCommerce launched its new WooCommerce Payments feature today. The company seeks to make it easier for plugin users to manage the entirety of their shop from a single location. For users based in the U.S. with WordPress.com-connected accounts, they can begin managing payments directly from their WordPress admin.

WooCommerce Payments is available as a free download via the WordPress plugin directory. Any costs associated with the plugin are on a per-transaction basis. Fees start at 2.9% + $0.30 per transaction for cards issued in the U.S. An additional 1% fee is tacked on for cards outside the U.S.

Under the hood, payments are handled through Stripe Express. The WooCommerce team developed the front-end so that it would match the look and feel of WooCommerce, making it function like a native part of the plugin. Stripe handles the processing from the backend.

The team began work on the system in 2019 and launched an invitational beta in late February 2020. Since then, it has seen over 1,000 accounts connect to WooCommerce Payments.

“New users have been able to add it to their stores in onboarding,” said Paul Maiorana, General Manager of WooCommerce. “Current customers have heard about it through either our newsletter or virtual community meetups. Through this period, we’ve learned what store owners like about WooCommerce Payments — managing their store and payments in one place; intuitive dashboard views; ‘flow’ and ‘ease.’ We’ve also heard their questions, which are mostly related to features we’ve got planned and are working hard to make available as soon as possible.”

WooCommerce Payments creates an integrated payments dashboard in the WordPress admin. It allows shop owners to manage charges, deposits, refunds, and disputes without leaving their store. By not having to toggle between the store and third-party payment processors, administrators should be able to enjoy a more seamless experience.

The following are some screenshots from a demo install of the WooCommerce Payments plugin:

On the customer end, the experience should also be more convenient for shoppers. Instead of being redirected to a processor like PayPal, customers can make payments directly on the site. This may also help curb cart abandonment, which can often happen when shoppers are redirected.

“Now that we’re announcing general availability in the U.S. and putting focused marketing effort behind it, we’re hoping to draw more store owners to join us on the journey,” said Maiorana.

New account holders will need to wait for seven business days before receiving their first deposit from sales. Afterward, the payments system will bundle daily revenue into a single deposit and automatically transfer it to the users’ bank accounts. This also cuts out the process of logging into an account with a payment processor to manually deposit earnings.

On the Roadmap

Currently, WooCommerce Payments is only available to U.S.-based shops. However, the team expects to begin rolling out support for more countries and local payment methods in 2020.

“We’re launching in the U.S. to start to manage scope, but WooCommerce is a global platform and global support for WooCommerce Payments is a priority for us,” said Maiorana. “Payments is obviously a complex and highly-regulated space. We have a three-year roadmap for WooCommerce Payments that includes feature and geographical expansion. Our legal and business teams are investing the appropriate time and resources to lay a strong foundation for future growth.”

Upcoming releases of the WooCommerce Payments plugin are slated to receive support for subscriptions, saved cards, wallets, and instant deposits.

The WooCommerce team also has no plans of stopping with online sales. It is already taking some steps toward moving into the physical world. “WooCommerce’s mission is to democratize commerce — not only eCommerce — so yes, we’re thinking a lot about how to bring this great payment experience offline to point-of-sale devices too,” said Maiorana.

It would be interesting to see small store owners with physical locations — from a fruit stand to a collectibles shop to a mom-and-pop restaurant — be able to manage payments from a central location, all backed with WooCommerce and the WordPress platform.

The new system does not currently support CBD merchants. WooCommerce has a partnership with Square, and shop owners who are selling CBD-derived products can still use that particular payment processor for the time being. This is likely tied to Stripe’s policies on restricted businesses.

How to Handle GET and POST HTTP Requests in Google Apps Script

With Google Apps Script, you can easily create a Web App that serves HTML, JSON, XML or plain text output using the HTML service. When your publish your Google Script project as a web app, the script gets a public URL (think API) that can be invoked from external applications using either HTTP GET or POST requests with query parameters and request body.

When publishing the script as a web app, make sure to choose “Allow anonymous access” and execute the script as yourself. If you edit the script, create a new version inside the script editor and deploy the latest version.

Here are some examples that demonstrate how you can convert your Google Script into a web API by adding the doGet and doPost methods to your project.

Handling GET Requests

When a script is published as a web app, the doGet callback function handles all GET requests made to the script’s public URL. The Google Script can return plain text content, HTML or JSON data as shown in the examples below:

Return Text Content

const doGet = (event = {}) => {
  const { parameter } = event;
  const { name = 'Anonymous', country = 'Unknown' } = parameter;
  const output = `Hello ${name} from ${country}`;
  return ContentService.createTextOutput(output);
};

Any query parameters added to the Google Script URL, like name and country in our example, become available in the parameter property of the event object of the doGet and doPost methods in Apps Script.

https://script.google.com/macros/s/12345/exec?name=Amit&country=India

If something is not working, you can always log the request object to the StackDrive console logs and easily debug the full request.

console.log(`doGet`, JSON.stringify(event));

Serve JSON Output

The same ContentService can be used to return JSON output by using the setMimeType method with the mime set as ContentService.MimeType.JSON.

const doGet = (event = {}) => {
  const { parameter } = event;
  const { name = 'Anonymous', country = 'Unknown' } = parameter;
  const message = `Hello ${name} from ${country}`;
  const json = { name, country, message };
  return ContentService.createTextOutput(JSON.stringify(json)).setMimeType(
    ContentService.MimeType.JSON
  );
};

When testing HTTP requests in Google Script with utilities like CURL or Postman, ensure that that “Automatically follow redirects Follow HTTP 3xx responses as redirects” setting is turned on since the ContentService serves a 301 redirect from the script.googleusercontent.com domain.

Serving HTML Content

Your Google Apps script project can serve HTML web pages with the HtmlService service. The web pages served with App Script included Google warning header at the top but it can be removed if you embed the Google Script in another web page (like Google Sites) with the IFRAME tag.

const doGet = (event = {}) => {
  const { parameter } = event;
  const { name = 'Anonymous', color = 'Black' } = parameter;
  const html = `<p><b>${name}'s</b> favorite color is <font color="${color}">${color}</font></p>`;
  return HtmlService.createHtmlOutput(html)
    .setTitle('Apps Script Webpage')
    .setXFrameOptionsMode(HtmlService.XFrameOptionsMode.ALLOWALL);
};

You should set the X-Frame-Options header of the webpage to XFrameOptionsMode.ALLOWALL to allow other pages to embed your Google Script HTML page.

Handle POST Requests with Google Scripts

The callback function doPost is invoked when an HTTP POST request is make to your Google Script URL that is published as a web app with anonymous access.

const doPost = (request) => {
  console.log(request);
  return ContentService.crateTextOutput(JSON.stringify(request));
};

The request argument of the doPost method can include:

  1. queryString - The name-value pairs sent in the URL of the request (name=Mike&age=12)

  2. parameter - The query string name-value pairs are also accessible inside the parameter object similar to GET requests (e.paremeter.name or e.parameter.age).

  3. postData - The contents property of the postData object includes the POST body and type property of postData specifies the MIME type of the post body. It can have values like application/x-www-form-urlencoded (key-value pairs separated by the ’&’ character and each key is separated from its encoded value by ’=’), application/json for JSON data or text/plain for text body.

For binary data, like file uploads, the HTTP post request is sent with the multipart/form-data mime type. In the case of application/x-www-form-urlencoded, the queryString is set as part of the POST request body.

const doPost = (request = {}) => {
  const { parameter, postData: { contents, type } = {} } = request;
  const { source } = parameter;

  if (type === 'application/json') {
    const jsonData = JSON.parse(contents);
    return ContentService.createTextOutput(JSON.stringify(jsonData));
  }

  if (type === 'application/x-www-form-urlencoded') {
    const json = {};
    contents
      .split('&')
      .map((input) => input.split('='))
      .forEach(([key, value]) => {
        json[decodeURIComponent(key)] = decodeURIComponent(value);
      });
    return ContentService.createTextOutput(JSON.stringify(json));
  }

  return ContentService.createTextOutput(contents);
};

Testing HTTP Requests with Google Scripts

You can use Postman, RequestBin, CURL or any of your favorite dev tool to send GET and POST requests to your Apps Script service. We’ll use Apps Script itself with the built-in UrlFetchApp service to test the request and response.

Working with HTTP GET Requests

In this example, the GET API coverts the query string to JSON. The test function makeHttpGetRequest compares the supplied query string value with the returned object.

const doGet = (event = {}) => {
  const { parameter } = event;
  const { name, country } = parameter;
  return ContentService.createTextOutput(
    JSON.stringify({ name, country })
  ).setMimeType(ContentService.MimeType.JSON);
};

const makeHttpGetRequest = () => {
  const queryString = '?name=Amit+Agarwal&country=India';
  const apiUrl = ScriptApp.getService().getUrl();
  const url = apiUrl + queryString;

  const options = {
    method: 'GET',
    followRedirects: true,
    muteHttpExceptions: true,
    contentType: 'application/json',
  };

  const response = UrlFetchApp.fetch(url, options);
  if (response.getResponseCode() == 200) {
    const { country } = JSON.parse(response);
    Logger.log('Country', country);
  }
};

Working with HTTP GET Requests

The doPost method returns either the country or the name from the request body depending on the action parameter of the script URL.

const doPost = (request = {}) => {
  const { parameter, postData: { contents, type } = {} } = request;
  const { name, country } = JSON.parse(contents);
  if (parameter.action === 'getCountry') {
    return ContentService.createTextOutput(country);
  } else {
    return ContentService.createTextOutput(name);
  }
};

const makeHttpPostRequest = () => {
  const url = ScriptApp.getService().getUrl() + '?action=getCountrdy';

  const payload = {
    name: 'Amit Agarwal',
    blog: 'www.labnol.org',
    country: 'India',
  };

  const options = {
    method: 'POST',
    followRedirects: true,
    muteHttpExceptions: true,
    payload: JSON.stringify(payload),
  };

  const response = UrlFetchApp.fetch(url, options);
  if (response.getResponseCode() == 200) {
    Logger.log(response.getContentText());
  }
};

POST Request with HTML Forms

The next example uses a simple HTML form that sends a POST request with application/x-www-form-urlencoded mime type.

<!DOCTYPE html>
<html>
  <head>
    <meta charset="utf-8" />
    <meta name="viewport" content="width=device-width" />
  </head>
  <body>
    <form
      action="https://script.google.com/macros/s/#####/exec"
      method="POST"
      target="_blank"
    >
      <input type="text" name="name" />
      <input type="text" name="country" />
      <button type="submit">Submit</button>
    </form>
  </body>
</html>

The POST method returns the POST body of the request.

const doPost = (request = {}) => {
  const { postData: { contents, type } = {} } = request;
  return ContentService.createTextOutput(contents);
};

Using CURL to make HTTP Requests

The POST API returns a parameter from the query string of the URL and the name from the request body.

const doPost = (request = {}) => {
  const { parameter, postData: { contents, type } = {} } = request;
  const data = JSON.parse(contents);
  return ContentService.createTextOutput(parameter.secret + type + data.name);
};

You can use CURL to make a POST request to Google Script. Remember to add the -L flag so that curl follows the redirect from script.google.com to googleusercontent.com.

curl -L \
-H 'Content-Type:application/json' \
-d '{"name": "Amit","country": "India"}' \
"https://script.google.com/macros/s/###/exec?secret=1234"

Also see: AJAX, jQuery and Google Scripts

How to Build a Chrome Extension

I made a Chrome extension this weekend because I found I was doing the same task over and over and wanted to automate it. Plus, I’m a nerd living through a pandemic, so I spend my pent-up energy building things. I’ve made a few Chrome Extensions over the years, hope this post helps you get going, too. Let’s get started!

Create the manifest

The first step is creating a manifest.json file in a project folder. This serves a similar purpose to a package.json, it provides the Chrome Web Store with critical information about the project, including the name, version, the required permissions, and so forth. Here’s an example:

{
 "manifest_version": 2,
 "name": "Sample Name",
 "version": "1.0.0",
 "description": "This is a sample description",
 "short_name": "Short Sample Name",
 "permissions": ["activeTab", "declarativeContent", "storage", "<all_urls>"],
 "content_scripts": [
   {
     "matches": ["<all_urls>"],
     "css": ["background.css"],
     "js": ["background.js"]
   }
 ],
 "browser_action": {
   "default_title": "Does a thing when you do a thing",
   "default_popup": "popup.html",
   "default_icon": {
     "16": "icons/icon16.png",
     "32": "icons/icon32.png"
   }
 }
}

You might notice a few things- first: the names and descriptions can be anything you’d like.

The permissions depend on what the extension needs to do. We have ["activeTab", "declarativeContent", "storage", "<all_urls>"] in this example because this particular extension needs information about the active tab, needs to change the page content, needs to access localStorage, and needs to be active on all sites. If it only needs it to be active on one site at a time, we can remove the last index of that array. 

A list of all of the permissions and what they mean can be found in Chrome’s extension docs.

"content_scripts": [
  {
    "matches": ["<all_urls>"],
    "css": ["background.css"],
    "js": ["background.js"]
  }
],

The content_scripts section sets the sites where the extension should be active. If you want a single site, like Twitter for example, you would say ["https://twitter.com/*"]. The CSS and JavaScript files are everything needed for extensions. For instance, my productive Twitter extension uses these files to override Twitter’s default appearance.

"browser_action": {
  "default_title": "Does a thing when you do a thing",
  "default_popup": "popup.html",
  "default_icon": {
    "16": "icons/icon16.png",
    "32": "icons/icon32.png"
  }
}

There are things in browser_action that are also optional. For example, if the extension doesn’t need a popup for its functionality, then both the default_title and default_popup can be removed. In that case, all that’s needed the icon for the extension. If the extension only works on some sites, then Chrome will grey out the icon when it’s inactive.

Debugging

Once the manifest, CSS and JavaScript files are ready, head over to chrome://extensions/from the browser’s address bar and enable developer mode. That activates the “Load unpacked” button to add the extension files. It’s also possible to toggle whether or not the developer version of the extension is active.

I would highly recommend starting a GitHub repository to version control the files at this point. It’s a good way to save the work.

The extension needs to be reloaded from this interface when it is updated. A little refresh icon will display on the screen. Also, if the extension has any errors during development, it will show an error button with a stack trace and more info here as well.

Popup functionality

If the extension need to make use of a popup that comes off the extension icon, it’s thankfully fairly straightforward. After designating the name of the file with browser_action in the manifest file, a page can be built with whatever HTML and CSS you’ll like to include, including images (I tend to use inline SVG).

We’ll probably want to add some functionality to a popup. That make take some JavaScript, so make sure the JavaScript file is designated in the manifest file and is linked up in your popup file as well, like this: <script src="background.js"></script>

In that file, start by creating functionality and we’ll have access to the popup DOM like this:

document.addEventListener("DOMContentLoaded", () => {
 var button = document.getElementById("submit")

 button.addEventListener("click", (e) => {
   console.log(e)
 })
})

If we create a button in the popup.html file, assign it an ID called submit, and then return a console log, you might notice that nothing is actually logged in the console. That’s because we’re in a different context, meaning we’ll need to right-click on the popup and open up a different set of DevTools.

Showing the "Inspect" option to open DevTools after right-clicking on an element on the page.

We now have access to logging and debugging! Keep in mind, though, that if anything is set in localStorage, then it will only exist in the extension’s DevTools localStorage; not the user’s browser localStorage. (This bit me the first time I tried it!)

Running scripts outside the extension

This is all fine and good, but say we want to run a script that has access to information on the current tab? Here’s a couple of ways we would do this. I would typically call a separate function from inside the DOMContentLoaded event listener:

Example 1: Activate a file

function exampleFunction() {
 chrome.tabs.executeScript(() => {
   chrome.tabs.executeScript({ file: "content.js" })
 })
}

Example 2: Execute just a bit of code

This way is great if there’s only a small bit of code to run. However, it quickly gets tough to work with since it requires passing everything as a string or template literal.

function exampleFunction() {
 chrome.tabs.executeScript({
   code: `console.log(‘hi there’)`
  })
}

Example 3: Activate a file and pass a parameter

Remember, the extension and tab are operating in different contexts. That makes passing parameters between them a not-so-trivial task. What we’ll do here is nest the first two examples to pass a bit of code into the second file. I will store everything I need in a single option, but we’ll have to stringify the object for that to work properly.

function exampleFunction(options) {
 chrome.tabs.executeScript(
   { code: "var options = " + JSON.stringify(options) },
   function() {
     chrome.tabs.executeScript({ file: "content.js" })
   }
 )
}

Icons

Even though the manifest file only defines two icons, we need two more to officially submit the extension to the Chrome Web Store: one that’s 128px square, and one that I call icon128_proper.png, which is also 128px, but has a little padding inside it between the edge of the image and the icon.

Keep in mind that whatever icon is used needs to look good both in light mode and dark mode for the browser. I usually find my icons on the Noun Project.

Submitting to the Chrome Web Store

Now we get to head over to the Chrome Web Store developer console to submit the extension! Click the “New Item” button, the drag and drop the zipped project file into the uploader.

From there, Chrome will ask a few questions about the extension, request information about the permissions requested in the extension and why they’re needed. Fair warning: requesting “activeTab” or “tabs” permissions will require a longer review to make sure the code isn’t doing anything abusive.

That’s it! This should get you all set up and on your way to building a Chrome browser extension! 🎉

The post How to Build a Chrome Extension appeared first on CSS-Tricks.

User agents

Jeremy beating the classic drum:

For web development, start with HTML, then CSS, then JavaScript (and don’t move on to JavaScript too quickly—really get to grips with HTML and CSS first).

And then…

That’s assuming you want to be a good well-rounded web developer. But it might be that you need to get a job as quickly as possible. In that case, my advice would be very different. I would advise you to learn React.

JEREMY! HAS YOUR WEBSITE BEEN STOLEN‽ BLINK TWICE IF YOU NEED HELP.

Just kidding, just kidding. I don’t disagree at all. I’m a fan of React, if you couldn’t tell. But I’ve also been around the block a few times and like to think I have a decent sense of what the right tools for the job are most of the time.

Make sure to read Jeremy’s post to see why it’s called “User agents.” He means it quite literally.

Direct Link to ArticlePermalink

The post User agents appeared first on CSS-Tricks.

Using BugHerd to Track Visual Feedback on Websites

BugHerd is about collecting visual feedback for websites.

If you’re like me, you’re constantly looking at your own websites and you’re constantly critiquing them. I think that’s healthy. Nothing gets better if you look at your own work and consider it perfectly finished. This is where BugHerd shines. With BugHerd, anytime you have one of those little “uh oh this area is a little rough” moments while looking at your site, you can log it to be dealt with.

Let’s take a look at a workflow like that. I’m going to assume you’ve signed up for a BugHerd account (if not grab a free trial here) and either installed the script on your site or have installed the browser extension and are using that.

I’ve done that for this very site. So now I’m looking at a page like our Archives Page, and I spot some stuff that is a little off.

I’ve taken a screenshot and circled the things that I think are visually off:

  1. The “Top Tags” and dropdown arrow are pretty far separated with nothing much connecting them. Maybe dropdowns like that should have a background or border to make that more clear.
  2. There is a weird shadow in the middle of the bottom line.

With BugHerd, I can act upon that stuff immediately. Rather than some janky workflow involving manual screenshots and opening tickets on some other unrelated website, I can do it right from the site itself.

  1. I open the BugHerd sidebar
  2. I click the green + button
  3. Select the element around where I want to give the visual feedback
  4. Enter the details of the bug

Their help video does a great job of showing this.

Here’s me logging one of those bugs I found:

Now, the BugHerd website becomes my dashboard for dealing with visual bugs. This unlocks a continual cycle of polish that that is how great websites get great!

Note the kanban board setup, which is always my prefered way to work on any project. Cards are things that need to be worked on and there are columns for cards that aren’t started, started, and finished. Perhaps your team works another way though? Maybe you have a few more columns you generally kanban with, or you name them in a specific way? That’s totally customizable in BugHerd.

I love that BugHerd itself is customizable, but at a higher level, the entire workflow is customizable and that’s even better.

  • I can set up BugHerd just for myself and use it for visual improvement work on my own projects
  • I can set up BugHerd for just the design team and we can use it among ourselves to track visual issues and get them fixed.
  • I can set up BugHerd for the entire company, so everyone feels empowered to call out visual rough spots.
  • I can set up BugHerd for clients, if I’m a freelancer or agency worker, so that the clients themselves can use it to report visual feedback.
  • I can open up BugHerd wide open so that guests of these websites can use it to report visual problems.

Check out this example of a design team with core members and guests and their preferred workflow setup:

It’s hard to imagine a better dedicated tool than BugHerd for visual feedback.

The post Using BugHerd to Track Visual Feedback on Websites appeared first on CSS-Tricks.

Can Data Visualization Improve The Mobile Web Experience?

Can Data Visualization Improve The Mobile Web Experience?

Can Data Visualization Improve The Mobile Web Experience?

Suzanne Scacca

It can be tough to prioritize the mobile experience when it often feels like a compromise. Don’t include as much text. Remove some of your images. Stay away from features that get in the mobile visitor’s way. It’s kind of like a parent who tells you, “Go out and have a good time, but don’t do X, Y or Z!”

It’s not necessarily that a mobile visitor needs a shorter page, less text or fewer images to more easily consume content on a smartphone. They just need the content you give them to not feel like so much work.

If you look more closely at your pages, you may find that some of the written content can be converted into data visualizations. So, today we’re going to look at some things you can do to start converting more of your content into graphics and enhance mobile visitors’ experiences in the process.

Quantitative Data Tools

Many UX designers are somewhat afraid of data, believing it requires deep knowledge of statistics and math. Although that may be true for advanced data science, it is not true for the basic research data analysis required by most UX designers. Read more →

1. Go Beyond Traditional Data Visualization Formats

When you think about displaying data in a graphical format, what do you envision? Probably graphs and charts like this:

Visual.ly infographic: web designer vs. web developer job statistics
A snapshot of an infographic from Visual.ly that displays web designer vs. web developer job statistics. (Image source: Visual.ly) (Large preview)

This screenshot comes from a Visual.ly infographic comparing web designers and developers. This particular piece of it deals with jobs-related statistical data, so it makes sense that it would be translated into bar graph and line chart formats.

As a writer, I’m a huge fan of this kind of data visualization because having to write out stats can be a major bummer. Like I know there’s a significant difference between the data points, but I can only use bold fonts and bulletpoints so many times before readers start to look for the next new interesting thing to focus on.

When strong data sets are designed rather than written, readers are less likely to skip over and unintentionally miss critical information. But it’s not just data that can be visualized. Take this other segment from the infographic, for example:

 Visual.ly infographic: web designer vs. web developer right vs. left brain
A snapshot of an infographic from Visual.ly that displays web designer vs. web developer right vs. left brain thinking. (Image source: Visual.ly) (Large preview)

This could’ve been written as a paragraph (e.g. “_In general, web designers are right brain thinkers, leveraging intuition, creativity, blah blah blah…_”). It could’ve also been displayed as a table:

Web Designer Web Developer
Brain Hemisphere Right Left
Driven By Intuition Logic
Approach Creativity Linear Thinking
Strength Imagination Technical

While this would’ve perhaps been easier to read than a wall of text, it’s not nearly as interesting as the graphic above.

In order to identify different kinds of data worth turning into graphics, it’s going to require web designers to do some thinking outside the box. I’d recommend you start by acquainting yourself with the different kinds of data visualizations that exist. You can use The Duke University Library for that. It has an entire page that shows how different kinds of information can be translated into graphics, like this example of a scatter plot:

Duke University Library - scatter plot visualization example
The Duke University Library provides an example of a scatter plot visualization. (Image source: Duke University Library) (Large preview)

The Pudding took this basic concept of charting data points over time and turned it into something unique in its “Colorism in High Fashion” article.

This is a graphic that represents the spectrum of skin tones that have been presented on the cover of Vogue:

The Pudding “Colorism in High Fashion” graphic - trends in skin tones
The Pudding depicts trends in the skin tones of Vogue cover models in its article “Colorism in High Fashion”. (Image source: The Pudding) (Large preview)

This is a much more effective and eye-catching way to relay this information than to have a writer say, “Over the magazine’s 200-plus issues, 75% of Vogue’s cover models tend more towards fairer skin tones.”

That said, this graphic on its own isn’t a scatter plot as it only depicts quantity and trends. However, scrolling does eventually turn it into a scatter plot:

The Pudding “Colorism in High Fashion” graphic - skin tones scatter plot graphic
The Pudding uses a scatter plot to display how Vogue cover model skin tones have changed over time. (Image source: The Pudding) (Large preview)

Notice how each of the orbs has been pulled out onto a timeline, representing the faces of the models on the magazine covers. This is not the traditional way to use a scatter plot chart, but, in this case, it works really well. And, again, it does a much more effective job in getting the point across on mobile than a wall of text.

As you look for ways to do this in your own work, hone in on the following elements:

  • Statistical data,
  • Short bulleted lists,
  • Highly complex topics,
  • Step-by-step explainers,
  • Page or topic summaries.

These present the best opportunities for turning essential data or topics into visualizations.

2. Design Your Data Visualizations To Be Filterable

Of course, you don’t want to overdo it. In your mission to preserve your website’s message on mobile, you don’t want to create so many graphics that it compromises page speed or that they start to feel overwhelming.

One solution to data visualization overload is to create a single graphic, but use filters to control which data sets are displayed. Not only does this enable you to deliver a ton of visual information in a smaller amount of space, but it can become a competitive edge, too. Let me show you an example.

The reason why a CDN is useful is because it puts your website geographically closer to your target audience. If the CDN doesn’t have the reach to do that, then it’s not worth the trouble. That’s why, of all the considerations people have to make when finding a provider, they have to look at where their points of presences actually are.

This is how Google Cloud displays this information for its content delivery network:

Google Cloud CDN PoP locations
Google Cloud uses a static map to display its CDN PoP locations to prospective users. (Image source: Google Cloud) (Large preview)

This is a great graphic as it shows where its cache locations are and how broad of an area the network covers. However, this is a static image, so what you see is what you get. Google has to use the rest of the page to list off all the major cities where it has a CDN presence:

Google Cloud CDN caching - list of cities
Google Cloud publishes a list of all its CDN cache locations around the world. (Image source: Google Cloud) (Large preview)

But this is what I’m talking about. This list should be part of the visualization.

Akamai, a competitor to Google Cloud CDN, has designed its media network map this way:

Akamai media delivery network map - media and storage locations
Akamai’s media delivery network map shows all its media and storage point of presences. (Image source: Akamai) (Large preview)

On this map, you can see Akamai’s media delivery network (in orange) and its media and storage locations (in pink).

Prospective users interested in going deeper into the data can use the filters at the top of the page. For instance, this is what the map looks like when someone searches the Asia region:

Akamai media delivery network map - Asia region
Akamai’s media delivery network map with a focus on the Asia region. (Image source: Akamai) (Large preview)

And this is what they see when they choose to view Akamai’s storage network against its competitors:

Akamai media delivery network map - Asia storage vs. competitors
Akamai’s media delivery network map set to view Akamai’s Asian storage network against its competitors. (Image source: Akamai) (Large preview)

Not only does this data visualization design let visitors closely survey the data that’s most relevant to them, but it aids in their decision-making process, too.

This approach is really useful if you want to turn a whole bunch of data into a data visualization without having to overwhelm the page with it. And with this particular model of filtering, you can spare your visitors the trouble of having to pinch to zoom in and out of the graphic. They can customize the view on their own and get to the most relevant bits with ease.

3. Make Your Data Visualizations Interactive

Another thing you can do to pack a ton of information into a single graphic is to make your data visualizations interactive. Not only will this declutter your mobile UI, but it’ll get your visitors to pause and really take time to understand the information they’re being shown.

This is a recent post from Emojipedia. The article shares the results of a study they conducted on emoji usage during the coronavirus. It’s a fantastic read and it’s chock-full of data visualizations like this one:

Emojipedia article - coronavirus emoji trends
An Emojipedia article on coronavirus emoji usage includes data visualizations throughout. (Image source: Emojipedia) (Large preview)

The design is certainly attractive, but it’s not easy to see all the details within the graphic on mobile. This is where interactivity would come in handy.

By making each of the bars in the graph clickable, people could get more information about the emoji, see the percentage increases clearly, and so on.

Something I didn’t show you in the last point is that the Akamai CDN map is interactive:

Interactive Akamai media delivery network map - locations in Osaka, Japan
Akamai’s media delivery network map is interactive. (Image source: Akamai) (Large preview)

This is the exact approach I would suggest for the Emojipedia bar graph. By turning each data point into a clickable element, users don’t have to struggle to gain all the information they need nor do you have to overwhelm them with too much data within a single graphic.

What’s nice about interactivity is that you can apply it to a wide array of data visualizations, too.

Here’s an example of a bubble chart from Information Is Beautiful:

Information Is Beautiful - bubble chart of most serious global data breaches
A graphic from Information Is Beautiful that depicts the most serious data breaches around the world in bubble chart format. (Image source: Information Is Beautiful) (Large preview)

When visitors click on any of the bubbles, more information is revealed about the security breach:

Information Is Beautiful - Zoom security breach and data loss information
A graphic from Information Is Beautiful with information on a major Zoom security breach and data loss. (Image source: Information Is Beautiful) (Large preview)

One of the great things about prioritizing the mobile experience is that it allows us to find creative solutions to designing minimally. And interactions are a really good way to pull that off as the UI remains clear and easy to navigate, but tucked within it are juicy little nuggets waiting to be discovered.

Is Data Visualization The Key To A Better Mobile Experience?

There are a lot of things we can do to improve the mobile user’s experience. If you haven’t considered data visualization part of that strategy, now would be a good time to as it enables you to:

  • Condense the amount of space and time it takes to get your point across,
  • Design your pages to be more visually engaging,
  • Preserve the full integrity of your copy for mobile and desktop visitors.

That, of course, doesn’t mean that you should stop looking for ways to reduce content on mobile. If it’s unnecessary or doesn’t add value, it should go. What remains can then be evaluated for a data visualization makeover.

Smashing Editorial (ra, il)

Beginner’s Guide on How to Add a Link in WordPress

Do you want to add a hyperlink in WordPress? Recently, one of our users asked us how to add a link in WordPress.

There are several different ways to add links in WordPress. You can add links in your posts, pages, navigation menu, sidebar widgets, footer area, and more.

In this comprehensive beginner’s guide, we will show you how to add a link in WordPress posts, pages, widgets, navigation menus, and more.
How to easily add a link in WordPress

Since this is a detailed tutorial, please use the navigation below to quickly jump to the section you need:

Why Are Links Important?

Links are the bloodstream of the internet, which makes them really important.

Basically, most websites on the internet are connected via links, which is why the term ‘web’ or ‘World Wide Web’ was introduced in the first place.

These are the hyperlinked text, buttons, and other elements that you click to go from one page to another or from one website to another.

Imagine visiting a web page with no link for you to click on. You’ll have no option but to click on the back button in your browser.

For individual websites, links tell your users where to click to view more information.

Properly placing links on your website allows you to increase the time users spend on your website. It also helps users discover more content, make a purchase on your online store, or subscribe to your email newsletter.

That being said, let’s take a look at how to easily add links in different areas of your WordPress website.

How to Add Links in WordPress Posts and Pages

WordPress makes it really easy to add links in your blog posts and pages using the block editor.

Simply edit your post or page, or create a new one.

Next, highlight the text that you want to attach the link to. This selected text is called the anchor text for the link. Now click on the ‘Link’ button:

You’ll see a box where you can enter a URL. A URL is a web address. For instance, WPBeginner’s guide on how to start a WordPress blog has the URL https://www.wpbeginner.com/start-a-wordpress-blog.

You can simply copy and paste the URL of the post or page you want to link to, like this:

Creating a link by pasting in a URL using the WordPress block editor

Click the Apply (Enter) button to insert the link into your post.

If you’re linking to content on your own site, then it might be quicker to search for it. Type a word or two from your content title, and WordPress will find it:

Searching for a page to link to using the WordPress block editor

Click on the title of the page or post you want to link to, and the URL will be automatically added for you. Again, you’ll need to click the Apply button to put the link into your post.

If you want to set your link to open in a new tab, then click the arrow on the right. You can then click the toggle and set your link to open in a new tab.

Setting your link to open in a new tab using the WordPress block editor

Note: We recommend that you only use this option for links to third-party websites. This way your users don’t leave your website while visiting it.

Adding Link in Old WordPress Editor

If you are using the older classic editor instead of the block editor, then the process for adding a link is quite similar.

Open up the post that you want to edit, or create a new one. Find the text you want to use as the link’s anchor and highlight it. Then, click the ‘Link’ button which should appear in the first row of toolbar buttons.

Creating a link using the WordPress classic editor

You can then copy and paste the URL you want to link to, or search for it, as in the block editor.

Pasting your URL directly onto the anchor text

Another, even quicker, way to add a link in both the block editor and classic editor is to simply paste the URL onto the anchor text.

First, copy the URL you want to link to. Then, highlight your chosen anchor text in your post.

Next, you can either right-click and select ‘Paste’ or simply press Ctrl+V (Windows) or Command+V (Mac) to paste the URL.

Paste your link directly into your content

WordPress will automatically detect that you’re pasting a URL, not text, and will turn the anchor text into a link.

Take a look at our tips for mastering the WordPress content editor to learn more about using the block editor effectively.

How to Add Links in WordPress Text Widgets

WordPress allows you to add widgets to your site’s non-content areas like sidebar, footer, or other widget areas.

Some of these widgets are automated and do not have many options. For example, the Recent Posts widget will automatically show links to your recent posts. You don’t need to do anything extra.

However, if you want to add some custom text with links in your sidebar, then you can use the Text Widget.

Go to the Appearance » Widgets page and then drag ‘Text’ widget into your sidebar or other widget area.

You can then type in your text and add a link just as you would when adding one to a post or page.
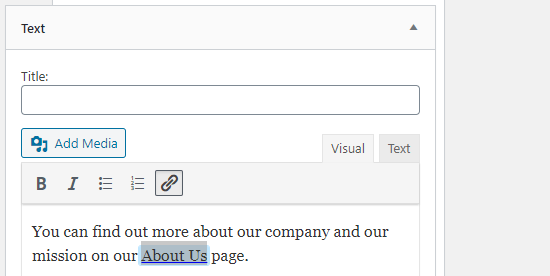
Adding a link in a widget

Make sure you click the ‘Save’ button beneath your widget after making changes.

How to Add Links in WordPress Navigation Menus

Do you want to add links to your site’s navigation menu? WordPress comes with a built-in drag and drop menu editor which allows you to create and manage navigation menus on your WordPress site.

Go to the Appearance » Menus page. If you don’t already have a menu set up, then you can create one by entering a menu name.

Next, select the pages you want to add to your menu on the left-hand side, then click the ‘Add to Menu’ button.

WordPress will automatically link to your selected posts and pages. You can move menu items and up and down to rearrange them.

You can also add any link you want to your menu. It doesn’t have to be a page or post on your site. For instance, you could enter the URL of your Twitter profile and add that to your navigation menu.

To enter a link, just click the arrow next to the ‘Custom Links’ section on the left. You can then type in the URL and the text you want to use for the link.
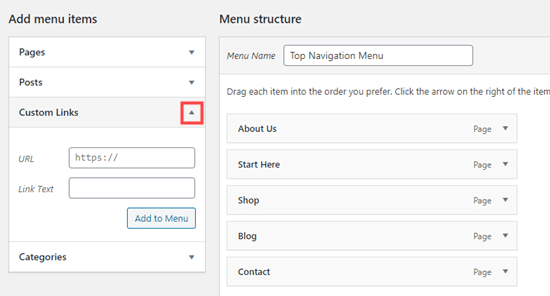
Adding a custom link to your navigation menu

For more help with creating your menu, take a look at our beginner’s guide on how to add navigation menus in WordPress.

How to Add Title and Nofollow in WordPress Links

It’s often useful to give your links a title. This is the text that appears when someone runs their mouse cursor over the link, like this:

A link with a title

Adding a title often makes it clear where the link leads to. It can be helpful or even reassuring for your readers.

However, WordPress does not allow you to add title to the links with the default editor. You can still add it, and we’ll show you how to do that in a bit.

You may also want to add a nofollow tag to external links. This tells search engines not to pass your site’s SEO score to that link because you don’t own or control the content on that website.

WordPress also does not support nofollow by default either.

Method 1. Use AIOSEO plugin in Gutenberg

All in One SEO plugin (AIOSEO) for WordPress automatically adds the title, nofollow, sponsored, and UGC attributes to your links.
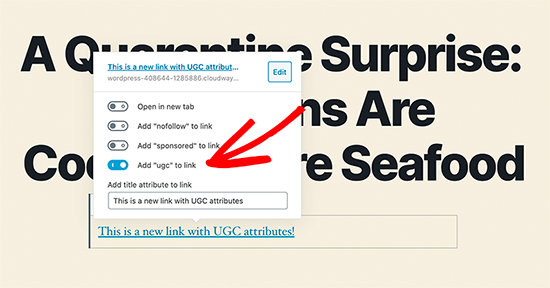
All in One SEO Title and Nofollow

Method 2. Use HTML code in Gutenberg

If you’re using the Gutenberg editor, and don’t want to use AIOSEO, then you’ll need to manually edit the HTML to add title and nofollow attributes to your links.

First, add your link within your paragraph block in the usual way. Next, click on the three vertical dots and select ‘Edit as HTML’ as shown here:
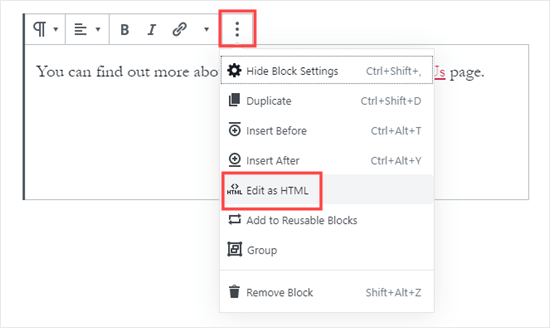
Switching to the HTML view of a block in the WordPress block editor

You’ll now see the HTML code for your block.

Viewing the HTML code for a block in the WordPress editor

You can add a title and/or a nofollow attribute to the link like this:

<p>You can find out more about our company on our <a href="https://www.examplecompany.com/about-us/" title="About Us" rel="nofollow">About Us</a> page.</p>

For the title, you can change “About Us” to be whatever you want. With the nofollow attribute, this should always be rel="nofollow". Don’t forget the double quotation marks around the title and the “nofollow” as your link won’t work correctly without them.

Method 3. Use a Plugin with the Classic Editor

If you’re using the Classic Editor, you can install and activate the the Title and Nofollow for Links plugin.

This plugin will add title, nofollow, and sponsored checkbox options to the insert link popup.

Highlight your anchor text and click the ‘Link’ button, then click the cog:

Locating the cog icon for a link in the classic editor

You’ll then see the additional options:
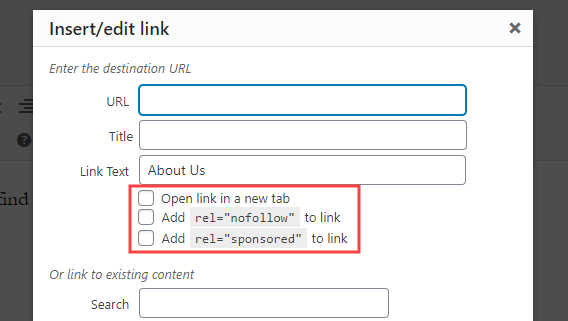
Additional options created by the Title and Nofollow for Links WordPress plugin

For more help, take a look at our guide on how to add title and nofollow to the insert link popup in WordPress for more information on this plugin.

How to Add Link Buttons in WordPress

Do you want to add a button to your WordPress posts or pages? There are many ways you can do this. The easiest is using WordPress’s built-in Button block.

Create a new post or page, or edit an existing one. Then, click the (+) icon to create a new block. Select ‘Button’ from the ‘Layout Elements’ options, or simply search for the Button block.
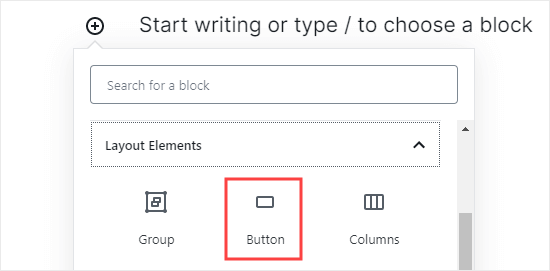
Adding a 'Button' block to your post or page in WordPress

You can type the text for your button by clicking in the colored area. Enter the URL that the button should go to in the ‘Link’ box.
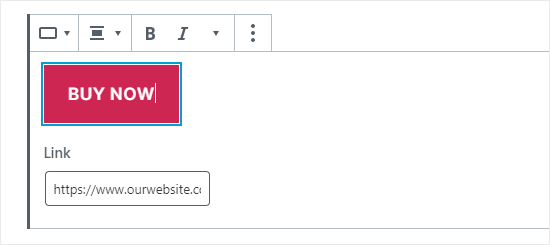
Adding the text and link for your button

To change the button’s alignment, or to make the text bold or italic, just use the controls at the top of the block itself.

You can make more changes to how the button looks in the block options on the right-hand side of your screen. For instance, you might want to change the color or add a wider border.

You can also change the link settings here. You can set your link to open in a new tab, and if you want, you can also add the ‘nofollow’ attribute to the link by typing it in the ‘Link rel’ box.
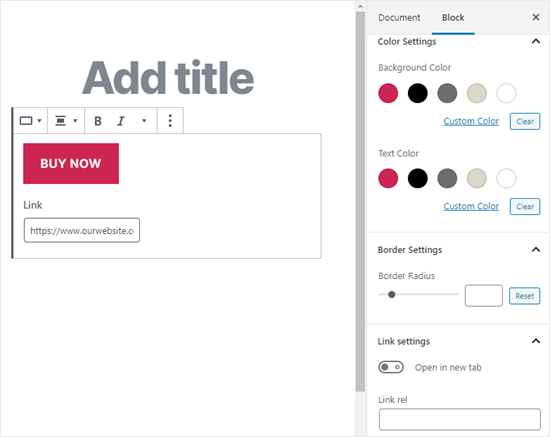
The right hand panel where you can edit your button's design and how the link works

What if you’re still using the old WordPress classic editor? You can install the “Forget About Shortcode Buttons” plugin to easily create buttons while you’re editing a post or page.

Simply install and activate the Forget About Shortcode Buttons plugin. Then, create a new post or edit an existing one.

You’ll see the ‘Insert Button’ icon in the toolbar, on the right hand side:

The Insert Button icon on the right hand side of the classic editor's toolbar

Click on the button, and you’ll see a popup. Here, you can customize your button, choose colors, borders, add text, add an icon, and include the link itself while seeing a live preview.
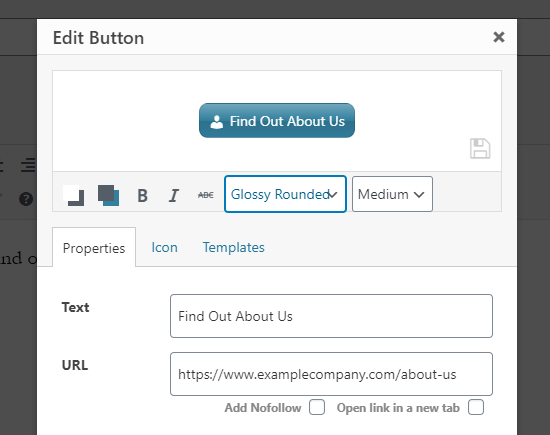
Creating a button for your link and customizing the design

For more information and details take a look at our guide on how to add buttons in WordPress without using shortcodes.

How to Embed Linked Content in WordPress

You can easily embed certain types of content in WordPress by simply inserting its URL in your post. This is sometimes called creating a “content card” in your post.

Just paste the whole URL into its own paragraph block. The whole tweet, including images, likes, timestamp, and more will be embedded like this:
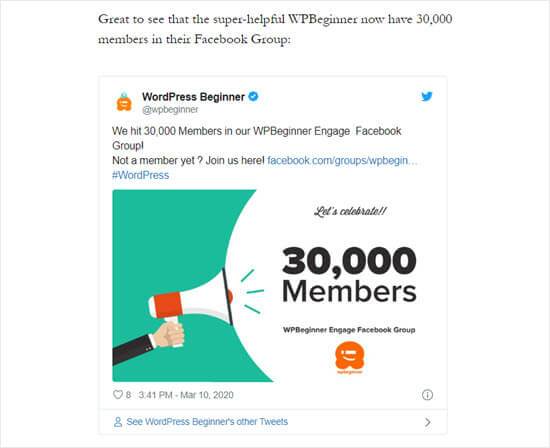
Embedding a tweet by pasting in the link to it in WordPress

The process is the same for YouTube videos. Simply find the video you want to use on YouTube and copy the URL from the top of your browser window:

Get the link to your chosen YouTube video from your browser's address bar

Next, paste the link into your post or page. It’ll automatically embed the video:
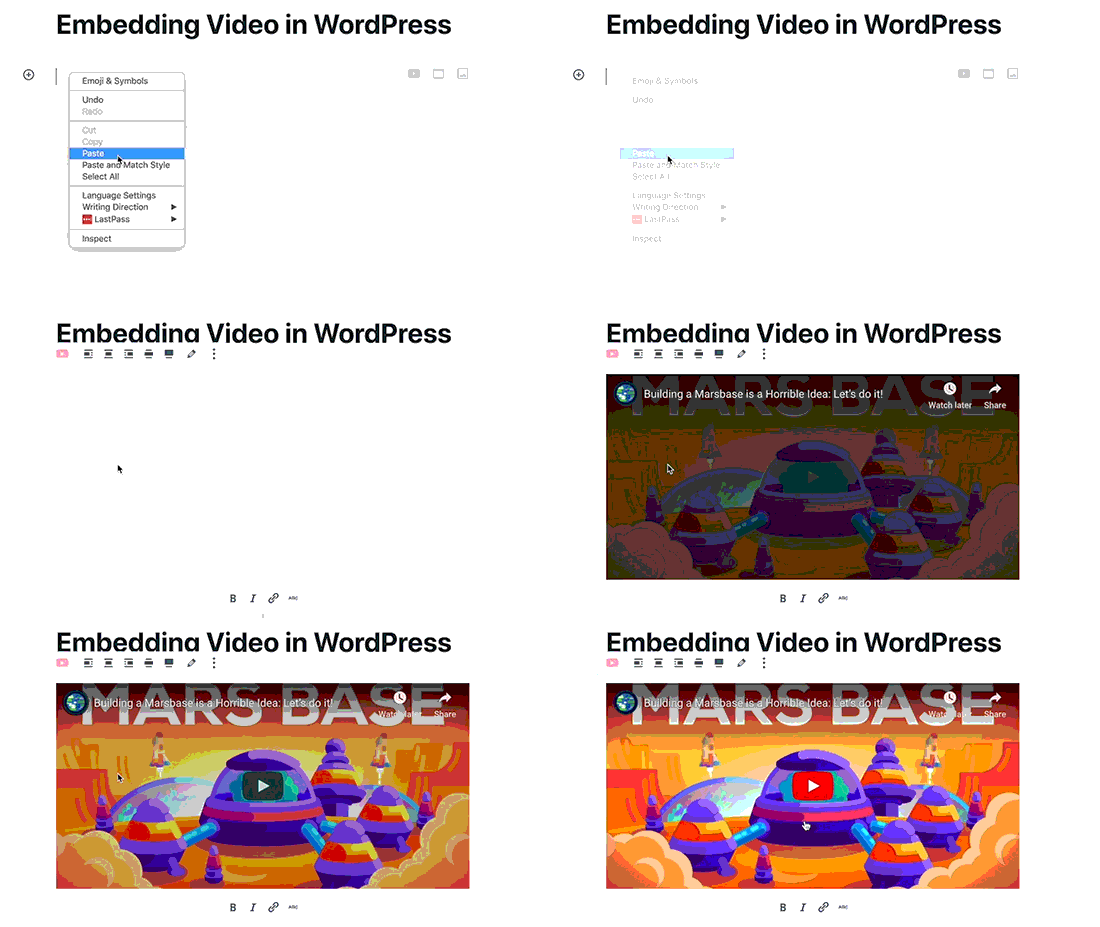
Embedding a YouTube video into your post

As well as being great for Twitter posts and YouTube videos, this method also works for many other types of content. You can find out more from WordPress’s support article on ‘Embeds’.

How to Add Affiliate Links in WordPress

Do you want to increase your site’s revenue by using affiliate links? Affiliate marketing provides a steady income to many blogs and websites.

All you need to do is add special referral links to products and services that you recommend. When your visitors purchase these products after clicking your links, you get a commission.

The problem that most beginners face is that each product or website they want to recommend has a different URL. It’s tricky to keep track of these, especially if you’re recommending lots of products.

The best way to add and manage affiliate links is by using an affiliate management plugin. We recommend using either Pretty Links or Thirsty Affiliates.

Both of these plugins work by creating redirect links such as www.yoursite.com/refer/partnersitename that send people to your special affiliate link.

The plugins will add a new option to your WordPress menu where you can add your affiliate links. Here’s how that looks with ThirstyAffiliates. You simply copy and paste your special affiliate link into the ‘Destination URL’ box.
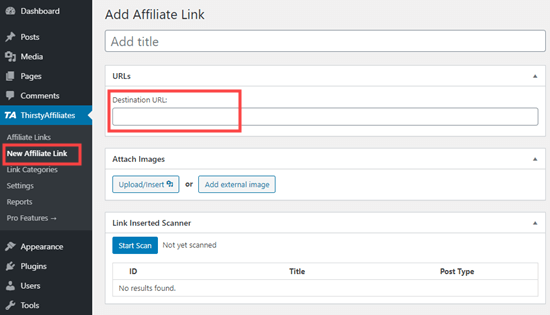
Adding a link in ThirstyAffiliates

You can set specific options for your link on the right hand side, deciding whether to nofollow it, open it in a new window/tab, and more.
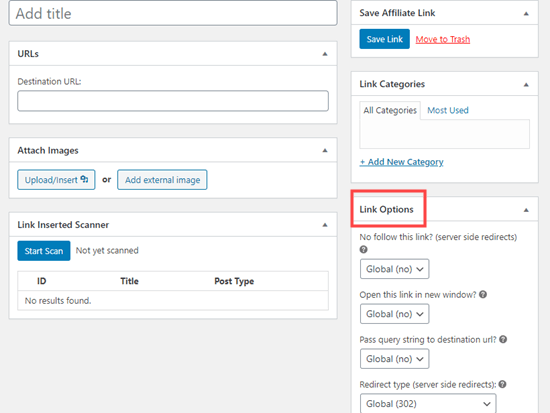
Setting the options for your affiliate link with ThirstyAffiliates

Once you’re done, click ‘Save Link’.

After you’ve set up your affiliate links, you can easily add them into your posts and pages. In a paragraph block, click the down arrow then select the ‘Affiliate Link’ option:
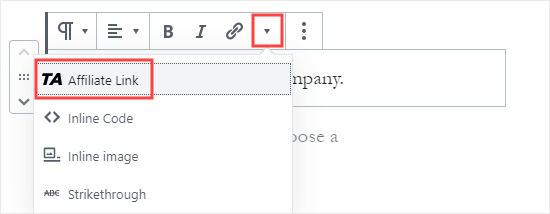
Adding an affiliate link to your post

Next, type in the start of whatever you named that affiliate link. In our example, that’s “Our Affiliate Partner”.

Finding your affiliate link by searching for it

You can then click the name and click ‘Apply’ to add the affiliate link to your post.

If you ever need to change an affiliate link (e.g. if the company you’re linking to moves to a different affiliate program) then that’s really easy to do.

You just change it once in your dashboard, under “ThirstyAffiliates” or “Pretty Links”. The redirect link stays the same as before, but it’ll now redirect to the new affiliate link everywhere it’s used.

For more handy affiliate plugins, check out our post on the best affiliate marketing tools and plugins for WordPress.

How to Manually Add a Link in HTML

Occasionally, you might want to add a link to your site using HTML code. This could happen if you need to use a custom HTML block or widget.

You might also need to directly edit a link in your theme file. Just make sure you always use a child theme so you don’t lose your changes when you update the parent theme.

It’s easy to create a link in HTML. To try it, add a custom HTML block to a post or page. You can find this block under ‘Formatting’ or you can search for it using the search bar.
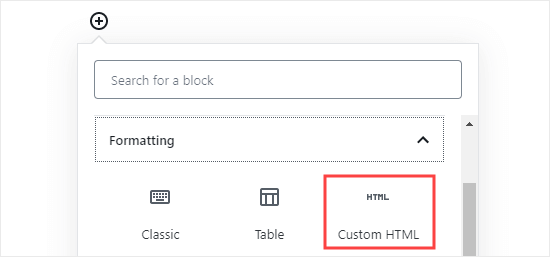
Adding a custom HTML block to your post or page

Next, you’ll see a box where you can write HTML. Copy this code into the box:

<a href="https://www.yourlinkhere.com">Text</a>

It should look like this:

The HTML code to create a link

You can click the ‘Preview’ tab to see how your code will look in your post or page:

Previewing how the HTML will display in the post or page

Now click back to the ‘HTML’ tag. Change the URL to the URL you want to link to. Change the word ‘Text’ to whatever word or words you want to use for your link.

To add a title to your link, you’ll need to include it in the code like this. You can change “This is the title” to anything you want.

<a href="https://www.yourlinkhere.com" title="This is the title">Text</a>

If you want your link to open in a new tab, simply add target="_blank" to the HTML code, like this:

<a href="https://www.yourlinkhere.com" target="_blank">Text</a>

If you want your link to be nofollowed, add rel="nofollow", like this:

<a href="https://www.yourlinkhere.com" rel="nofollow">Text</a>

You can include all of these at once. This is how a link with a title, that opens in a new tab and is nofollowed, would look:

<a href="https://www.yourlinkhere.com" title="This is the title" target="_blank" rel="nofollow">Text</a>

That’s how you create a link in HTML, if you ever need to.

An anchor link is a type of link on the page that brings you to a specific place on that same page. It allows users to jump to the section they’re most interested in.

Take a look at the animated screenshot below:
Anchor link preview

These type of links are really helpful when writing longer tutorials or content, so your users can easily jump to the section they’re most interested in.

We have created a detailed step by step guide on how to easily add anchor links in WordPress.

Want to add social share links or buttons on your site?

These links make it easy for your users to share your content on their favorite social networks. Sometimes social share links or buttons are also accompanied by total share count.
Facebook social share button

We don’t advise users to add these links manually. Instead, you should always use a social share plugin.

We have a step by step guide on how to add social share buttons in WordPress.

We hope this article helped you learn how to add a link in WordPress. You may also want to see our beginner’s guide on how to create a professional business email address, and how to start an email newsletter to grow your audience.

If you liked this article, then please subscribe to our YouTube Channel for WordPress video tutorials. You can also find us on Twitter and Facebook.

The post Beginner’s Guide on How to Add a Link in WordPress appeared first on WPBeginner.

Serverless Is Taking Off: Here’s Why It’s Worth Hopping On

Just a couple of years ago, serverless was a sparsely used technology, recognized mostly for its cost-efficiency. Today, we’re seeing a radical shift in the attitude towards serverless. Developers have begun to realize that serverless not only minimizes operational overhead but can considerably enhance core applications in production. As cloud vendors continue to develop their serverless offerings, serverless is being used in production more than ever before.

In this blog post, we explain what serverless is, dive into some of its major advantages, and point out some factors contributing to its growing popularity.