Do you want to export a navigation menu from one WordPress site and import it into another?
The default WordPress import / export feature allows you to transfer menus as part of the full site transfer, but it does not let you import / export menus by themselves.
In this article, we’ll show you how to easily import / export navigation menus in WordPress, so you can save time.
Understanding WordPress’s Import / Export Features
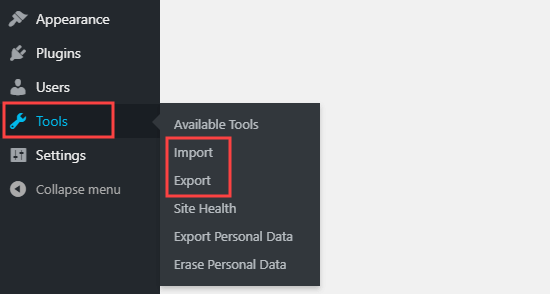
On every WordPress site, you have built-in import and export features. You can find these under Tools » Import and Tools » Export in your WordPress dashboard.
If you go to the Export page, you’ll see the WordPress default options. These let you choose between exporting all content, or exporting only your posts, pages, or media.
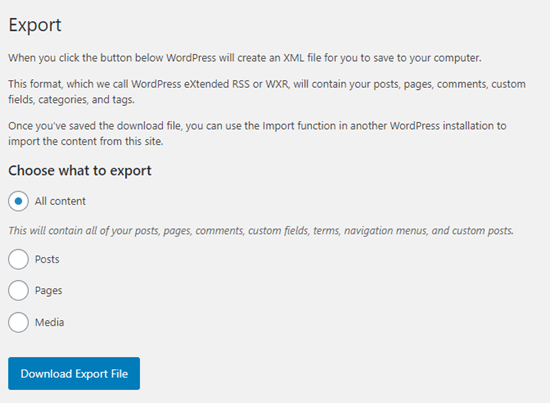
All content includes your navigation menus … plus posts, pages, comments, custom fields, terms, and custom post types.
But in many cases, you don’t want to import everything. For instance, you might just want to replicate your navigation menu and the pages included in it, but not your posts or any other pages.
Luckily, there’s an easy plugin that extends this functionality, so you can only import and export navigation menus in WordPress.
That being said, let’s take a look at how to import and export navigation menus without exporting all the content.
Export and Import Navigation Menus in WordPress
Before going further, make sure you’re happy with the menu you’ll be exporting. You can find your site’s menu under Appearance » Menus.
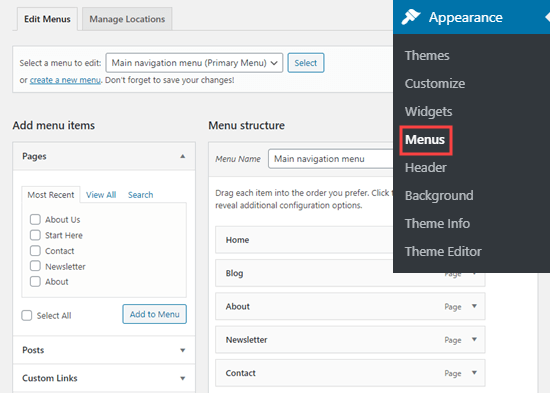
If you need help to create or change your menu, take a look at our tutorial on how to add a navigation menu in WordPress.
Next, you need to install and activate the WPS Menu Exporter plugin. For more details, see our step by step guide on how to install a WordPress plugin.
Upon activation, you need to visit Tools » Export page in your WordPress admin dashboard.
You should now see an additional option to export navigation menu items. This will include your menu itself, plus all the pages that are linked from your menu.
If you have any posts in your menu, those will be included too, along with any comments on them.
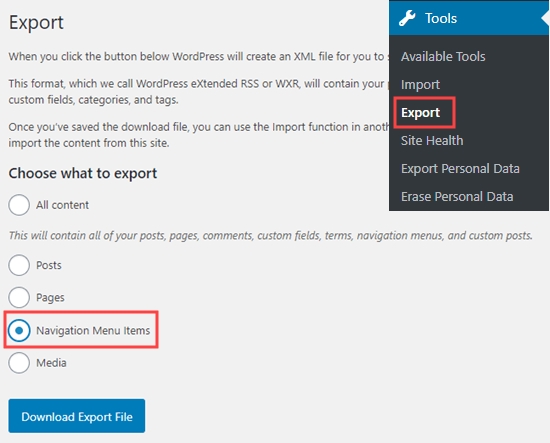
Simply select the Navigation Menu Items radio button and then click the ‘Download Export File’ button.
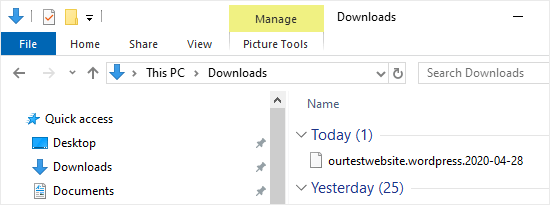
This lets you download your navigation menu and its associated pages to your computer. These are stored in an .xml file with the name site.wordpress.yyyy-mm-dd, where “site” is the name of your website and “yyyy-mm-dd” is the date.
Importing Your WordPress Menu to Your New Site
You can import the .xml file you just downloaded by using WordPress’s standard Import feature. It’s a simple process. You just need to upload your navigation menu file to your new site.
Important: Make sure you don’t have any existing pages with the same name as pages in the menu you’re importing, not even in the trash. Otherwise, the import tool may not be able to import those pages correctly.
First, log in to your WordPress dashboard on the new site where you want to import your menu.
Next, go to Tools » Import. You’ll need to install the WordPress importer. Just click the ‘Install Now’ link beneath ‘WordPress’ at the bottom of the list.
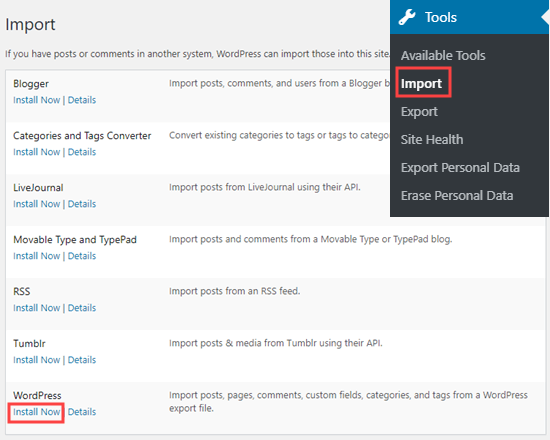
Once you’ve installed the WordPress importer, you should see a ‘Run Importer’ link in place of the ‘Install Now’ link.

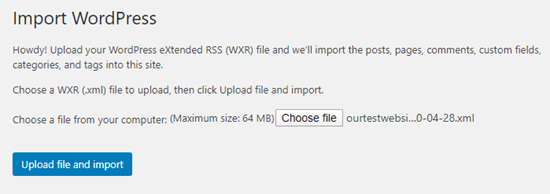
After you click on this link, you’ll see the Import WordPress screen. Here, you’ll need to click the ‘Choose file’ button so you can select the .xml file you downloaded earlier.
Once you’ve selected your file, go ahead and click the ‘Upload file and import’ button.
On the next screen, you’ll be asked to ‘Assign Authors’. The default option is to import the original author of the menu content.
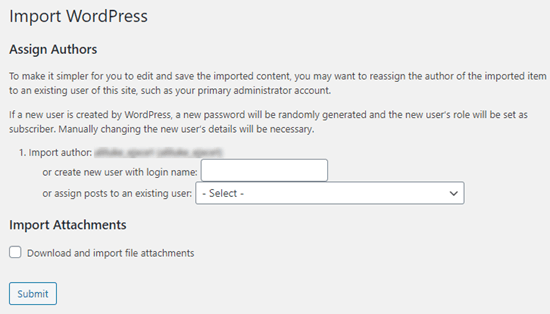
In many cases, it’ll make the most sense to set an existing user as the author of the imported content. You can do that by selecting the user’s name from the dropdown menu.
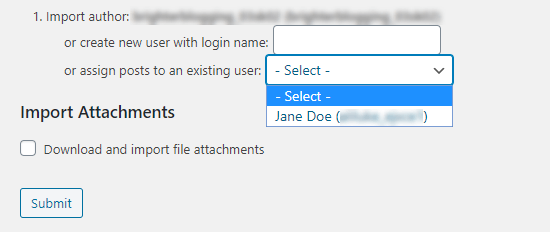
If you plan to re-use the content of the pages themselves, then you’ll also want to check the ‘Download and import file attachments’ box. This means that images will be included in the import.
Once you’re happy with your settings, click the ‘Submit’ button at the bottom of the page.
Upon completion, you should see the following message:

Viewing Your Imported Menu and Pages
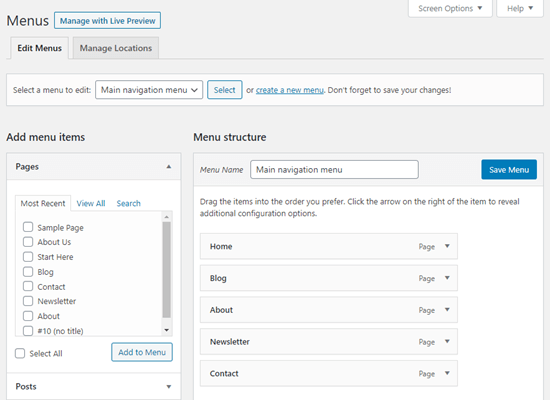
The import has put your menu and the associated pages in place. To take a look at the imported menu, just go to Appearance » Menus. Here, you can make sure that it’s been imported correctly.
You can also click on the Pages tab in your WordPress dashboard to check out the new pages that have been imported along with the menu.
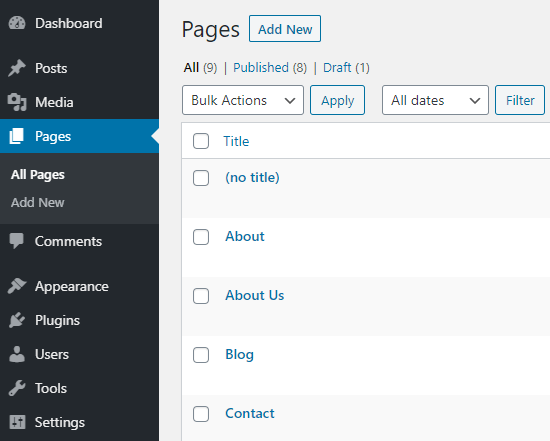
That’s it, you’ve successfully imported your navigation menu and the associated pages. You can edit the menu and the pages however you like.
We hope this article helped you learn how to import and export navigation menus in WordPress. You might also like to take a look at our tutorials on how to style WordPress navigation menus and how to create a dropdown menu in WordPress.
If you liked this article, then please subscribe to our YouTube Channel for WordPress video tutorials. You can also find us on Twitter and Facebook.
The post How to Import and Export Navigation Menus in WordPress appeared first on WPBeginner.

